


Quick Guide
TViX Slim S1 DUO
- Some specifications could change with new firmware versions. Please refer to
the FAQ on our homepage for further information.
- For detailed instructions, please refer to the enclosed TViX-HD CD or the latest pdf file
on the TViX-HD Homepage.
- TViX Slim S1 DUO : DVB-T Dual Tuner with Background Recording.

English
Safety Notice
Do not try to disassemble
or remodel the TViX-HD
unit. Doing so may cause
malfunction or fire.
Place all magnetized devices, such as
speakers, away from the TViX-HD .It
may erase or cause damage to the
data stored in the hard disk.
Do not Place the TViX-HD .
In places that are exposed
to oil, water, dust, humidity,
rain or wind.
Keep your TViX-HD away from
heated areas, such as direct sunlight
exposure, heaters and etc. Place it in a
well ventilated location. Ensure that a
free airflow is maintained around the
appliance.
Do not touch the power
plug with wet hands or use
defective power cables &
electric outlets. It may cause
electric shocks or fire.
Do not drop the TViX-HD from
heights. Doing so may cause
critical damage to the hard drive.
The socket-outlet shall be installed near the equipment and shall be easily accessible.
Unplug the power cable when you are not using the product for a long time.

The TViX-HD is a standalone, multimedia hard disk player that
plays digital videos, digital music, digital still images and DVD
files on TV screens and home entertainment systems. You can
enjoy digital contents in your living room without having to burn
discs or to play it back on a DVD or CD player anymore.
TViX-HD plays back DVD movies with the full functionality of DVD
navigation. You can create your own virtual DVD library by storing your
personal collection of DVDs in .ISO or .IFO format, and watch them exactly
as if they were running from the original DVDs (all the original features
are included: Menu, Chapter, Audio Stream, Subtitle, Fast Forward, Rewind,
Pause, Repeat, Search etc.).
Using the latest multimedia processor, TViX-HD supports the latest
multimedia formats such as MKV, MPEG-4 AVC(H.264), VC-1( MP@HL, AP@
L3), WMV9 & WMV HD as well as MPEG4 3.11,4.0 , 5.0. and H.264, which
is a brand-new and superb compression technology. It can now play more
stunning HD movies with lower storage requirements.
HDMI provides unparalleled qualities to digital videos and audios, while DVI
only serves digital videos. With HDMI you don’t have to deal with multiple
AV cables. It lets you make a connection to digital videos as well as audios,
and enjoy them with just one cable. It can deliver uncompressed digital
video up to 1080P as well as digital audio.
TViX-HD has a DTS hardware decoder to mix DTS sound into 2 channels
for a more dynamic stereo sound quality.
The TViX-HD can be networked with a PC system using either a wired
network or its optional wireless network adapter. You can navigate to a
PC file through TViX-HD’s wired/wireless network and play the file from its
original location without having to copy it into the TViX-HD first. Also, TViXHD’s FTP server and Samba server allow you to transfer files from your
PC. It also allows you to connect to network easily with uPnP support,
and it does not require an IP address. You can immediately playback uPnP
connected files.
With two USB2.0 host ports, you can attach additional external USB hard
drives to further extend the storage capacity. You can also play back files
from a digital cameras, USB flash drives, USB flash card reader or an MP3
player.
Manufactured under license from Dolby Laboratories.
"Dolby" and the double-D symbol are trademarks of Dolby Laboratories.
English
UPnP
H.264
1. Introduction

2. Name of Each Part
2.1Unit Control button
TViX-HD can be controlled by the buttons on the product as well as by the remote
control.
2.2 Cable Connection
You can connect the TViX-HD to an analog TV display or audio amplifier using the
A/V cable.
English
The VFD shown below may differ when you play a file.

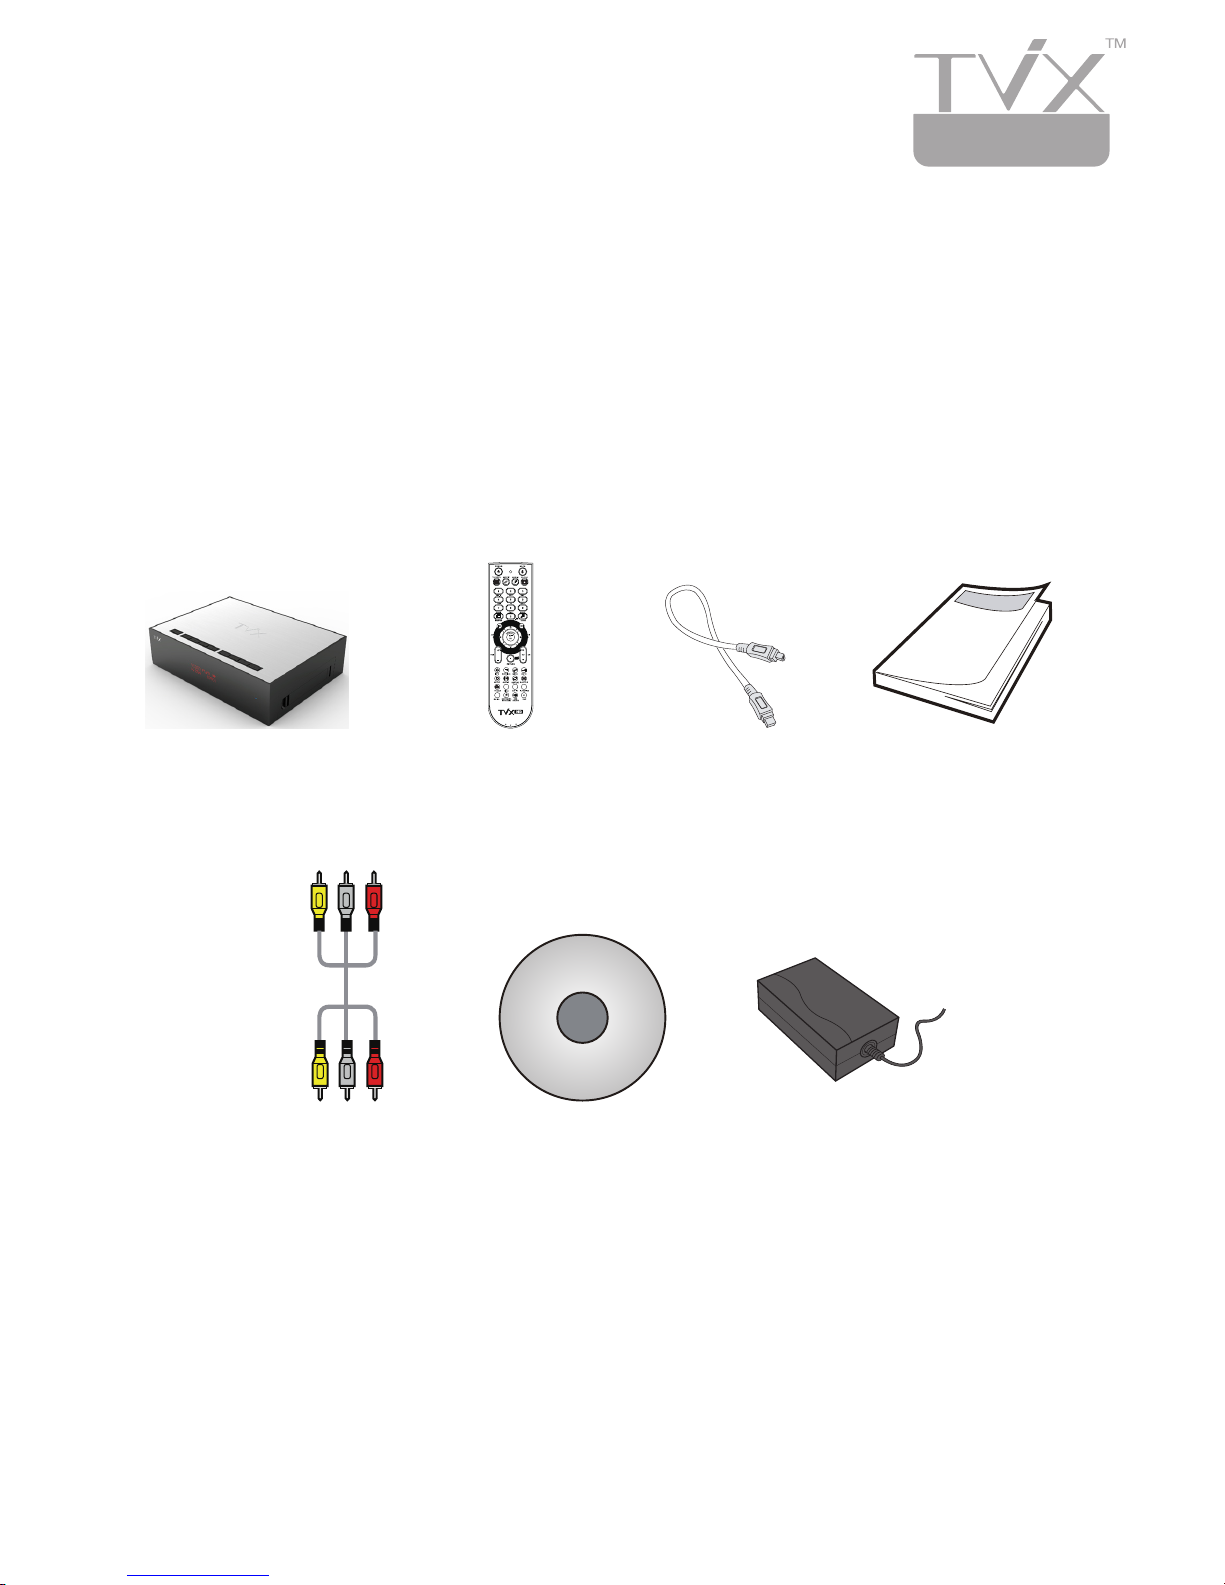
2.3 Package Contents
Thank you for choosing this TViX-HD product.
The TViX-HD package contains the following items. The items described below may
differ from the actual contents.
TViX-HD unit Remote
Controller
USB PC Cable
RCA Cable
Quick Guide
Manual CD Power Adapter
** For detailed instructions, please refer to the TViX-HD CD enclosed or the latest
pdf file on the TViX-HD Homepage.
* TViX-HD automatically formats when you install an unformatted new hard disk.
Do not shut the power down when formatting the hard disk.
English

2.4 HDD Installation/Exchange
** Installing or exchanging your HDD is very easy. Just follow the instructions
below. If you have a pre-installed HDD, you may skip this chapter.
English
① Pull the product Disk Cover located on the side, and separate it from the body. HDD
installation is possible to do without using the screws.
② Before doing HDD installation to product, release the safety-lock button upward.
③ When 3.5” SATA HDD is installed on, make sure HDD’s circuit part downward and
put the HDD into the HDD holder. Before the HDD is fitted on the HDD holder, put
the pin into a tapped hole of the HDD.
①
②
①

English
④ After installation of the HDD, press the safety-lock button back in its place. For the
safety of using HDD, it is recommended tightening a screw between the HDD and
the HDD holder.
⑤ Load the HDD holder into product.
⑥ When replacing the HDD from the HDD holder, please do in reverse order.
3. Installation and Connection
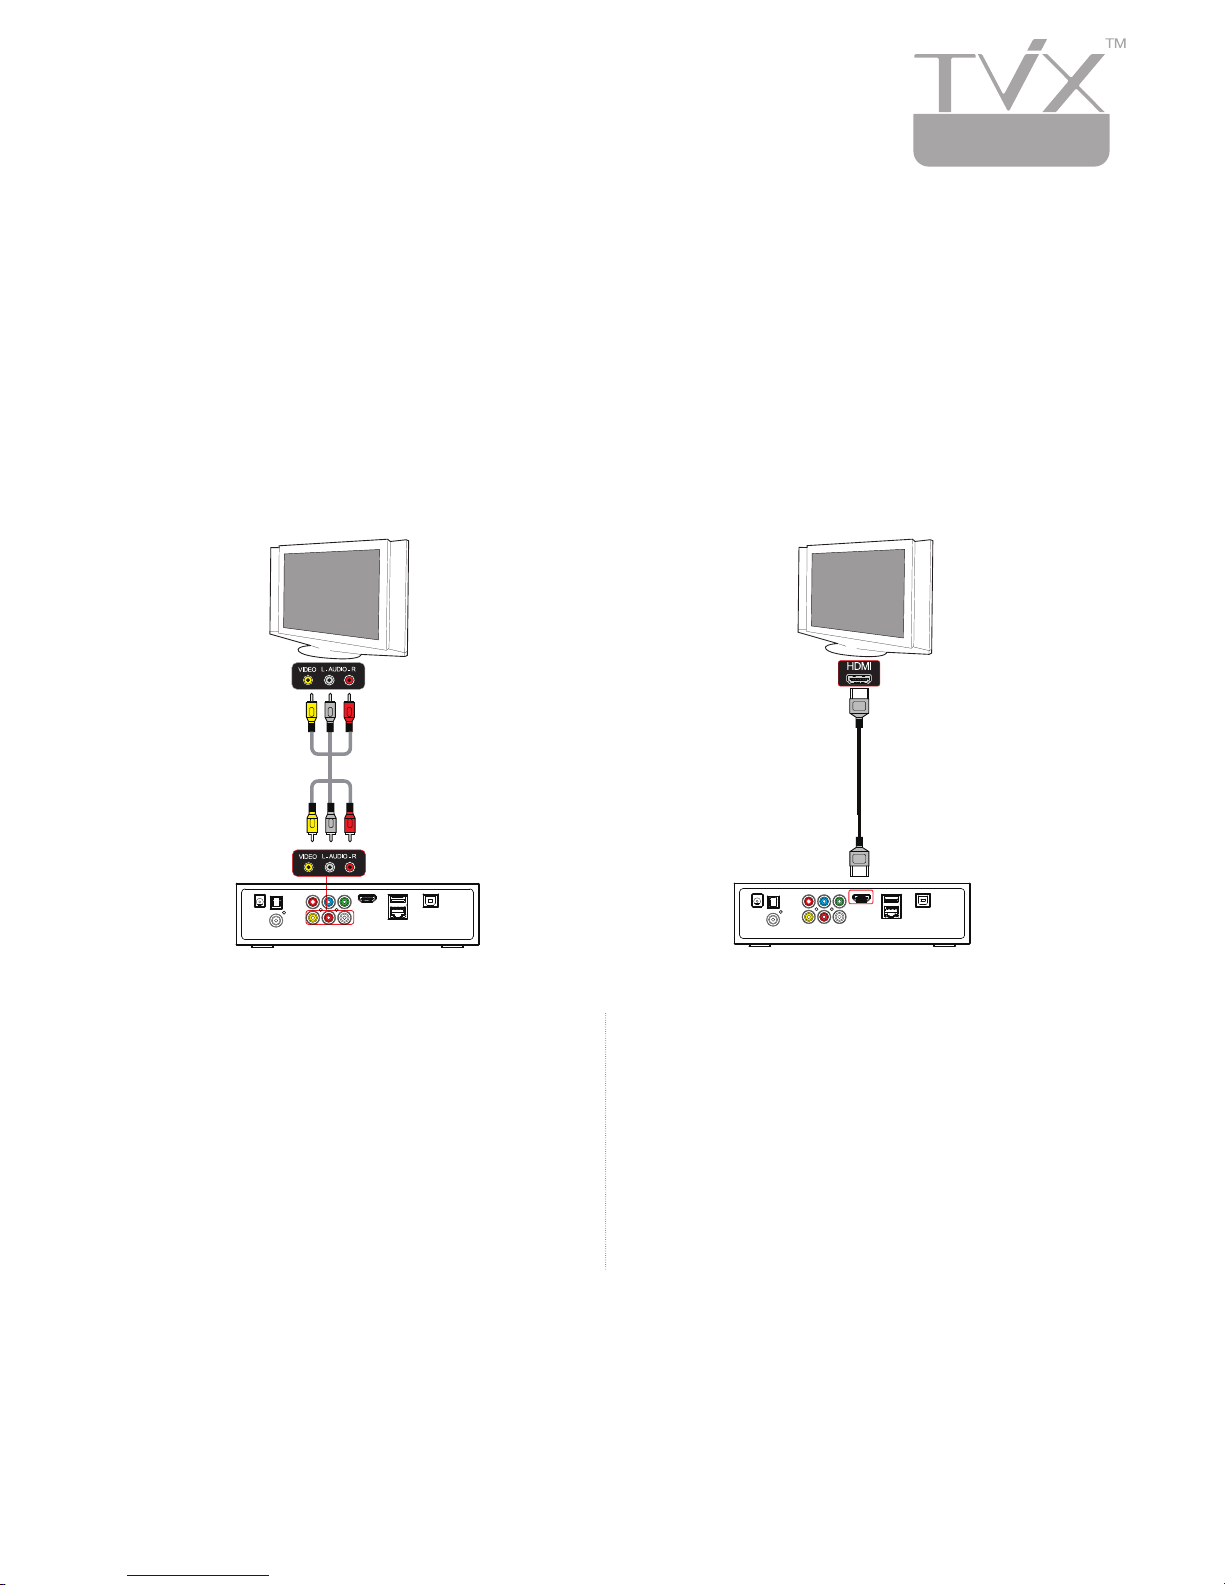
3.1 Connecting the Video
The TViX-HD supports HDMI, Component and Composite video output for connection to a
TV, and each output needs to be selected in the settings menu depending on what cable is
being used.
Connection to Composite Connection to HDMI Output
Connect the TViX-HD output to your TV
using the included Composite (yellow)
video cable.
Select the appropriate video input mode
on your TV until you get the main page
of the TViX-HD
For the Audio, please connect the stereo
cable (red/White cable).
Connect the TViX-HD output to your TV
using an HDMI cable.
TViX-HD plays back high definition
videos (up to 1920x1080P) by using
HDMI cables.
HDMI cable can transmit uncompressed
audio and video signals together at the
same time. No additional cables are
needed.
English
Connection to Component Output :
Connect the product and your TV using the component cables.
Turn on the product and the TV. Select an appropriate video output mode on your TV
until you get the main page of the product. Additional cables required for the audio.

3.2 Connecting the Audio
Connection to 2 CH Normal TV
Connection to 5.1CH Amplifier (Digital)
Connect the two audio cables, the white
one on the left side and the red one
on the right side, to the appropriate
terminals of your TV or Hi - Fi system for
sound output.
If you have a multi-channel decoder/
amplifier with an coaxial/optical input,
you can enjoy 5.1 CH high- quality
sound through the coaxial or optical
cables.
The illustration above shows how to
connect the optical cable with an
included optical jack.(These cables are
not included in the package and must
be purchased separately.)
- After you connect the video cable to your TV, you must press the TV Out button on
your remote repeatedly control until you see the main page of the TViX-HD on the
screen.
-If there is no sound after connecting the coaxial/Optical Cable, you have to change
the audio setup of TViX-HD to Digital on the SETUP menu.
NOTE
English

0
3.3 Connecting the USB(e-SATA) HOST
The TViX-HD also provides two USB-host ports with USB 2.0/e-SATA compliant host/
function processor.
USB-host allows communication between two USB devices. You can connect any
external storage device (e.g. memory stick) or any external hard disk to play files
stored in these external devices. You can even connect your Digital Camera directly to
play digital images and pictures without any other devices.
English
After connecting the client device, press the GOTO button on your remote
control and then navigate to the desired storage unit. You can thereby change the
location from internal hard disk to external USB device and back.
USB Host
e-SATA Host

3.4 Using the remote control
This indicates Remote Buttons.
English
POWER
Toggle Unit Power on / off
MUTE
Stop Audio Output from the Player
HDTV
Switch to DTV mode
MOVIE
Go to Movie folder
MUSIC
Go to Music folder
PHOTO
Go to Photo folder
Numeric Key
Insert number or text
16:9/4:3
Aspect ratio(16:9/4:3 letter box/4:3 Pan&Scan)
ZOOM
Zoom Video / Image Playback
PREV
Previous Chapter / File / Page Up on List
Next
Next Chapter / File / Page Down on List
JUMP/REW
SORT/FF
File Sort or FF playback
OK/TIMESHIFTING
Selection/play/pause/time-shifting on/pause
ARROW
RETURN
Stop Playback/Return to Previous Screen / Folder
VOL + / -
Volume (Increase / Decrease)
CH + / - Switch TV channel/adjust subtitle sync
INFO
Display Media File Information
SUBTITLE
Subtitle ON / OFF, Change Settings
FAVORITE
Switch favorite channel
GOTO
Time-Stamp based Search/TV channel list/Device
SETUP
Enter Setup Menu, Apply/Confirm Setup Settings
AUDIO
Select multi audio
REPEAT
Repeat Media file(s) Playback
SHUFFLE
Switch between Random – Sequential Playback
TV OUT
Toggle Video Output Modes
TITLE
DVD Title Screen
MENU
Display Main Menu Screen/ DVD Menu Screen
FUNCTION
File copy/ folder password/ Sleep Timer
GUIDE
Display DTV EPG Guide
BOOKMARK/SCH
Bookmark / manual recording in TV mode
ADD/DELETE
Add/Remove the recording list/ delete file
REC Instant recording in DTV
Jump to USB Host or network drive
Cursor Navigation Arrow/Rewind / FF playback

3.5 Initial Setting
① Connect the TViX-HD to your TV using A/V cables, and turn on the TViX-HD. You
will see the following screens when you turn the unit on for the first time or when
you select “Load Default Setting”.
② When you see the initial page on your TV screen shown in the picture below, press
the “OK” button on the remote controller.
- In case of HDMI connection: TViX-HD does not show this page but sets to the best
resolution automatically and leads you to the next stage, “Language setting”.
- In case of other connections: TViX-HD changes screen resolutions between NTSC,
PAL, 480P, and 576P about every three seconds until the “OK” button is pressed, so
press the “OK” button when you can see a clear screen
③ Select your language.
④ Now you can see the TViX-HD main page.
English

4. TViX-HD Setup Menu
4.1 SYSTEM Setting
This section is about SYSTEM (Language or Time) settings. Press SETUP button on the
remote control and select SYSTEM.
This screen allows you to adjust the SYSTEM settings of your TViX-HD to your
personal taste. Select menu to exit this SETUP.
Language : Select your
language.
File List Type : Switch between
File list mode and media Library.
Date/Time : Adjust the clock by
using the arrow and numeric
keys. Auto (Via Network) is also
available.
Automatic F/W Update : Now you can upgrade a new firmware if your TViX-HD
is connected to the internet. To upgrade it with our beta version of firmware,
please press 2,3,8,2 of the numeric keys and then press the ‘Function’.
Auto Run : You can make files play automatically when TViX-HD gets loaded. If
you select “random”, they play in a random order.
Set Screen Position : Adjust the UI display position, so that you can see the main
UI display at the right place on your TV.
Check Disk : TViX-HD provides HDD check utility. If you have any problem with
recording or file playback, we recommend running this utility before proceeding.
TViX-HD automatically formats when you connect an unformatted hard disk to
the TViX-HD. Do not shut down the power while the hard disk is being formatted.
Load Default Setting : In order to revert to the Default setting, Select this option.
You will need to configure the video and sound settings again.
English
Date/Time Format : Select
12 Hour or 24 Hour.

4.2 Audio/Video Setting
This section is about A/V (Video or Audio) settings. Press SETUP button on the
remote control and select the A/V.
This screen allows you to adjust the A/V settings of your TViX-HD to your personal
taste. Select menu to exit this SETUP.
Set the audio output setting.
Select the HDMI or the S/PDIF that you want to hear the audio.
If you select the S/PDIF, you can set the detailed audio output with your
Decoder/Amplifier. We recommend you to set the Dolby Digital and DTS to
digital and AAC to analog.
If you don't hear MP3 or AAC audio, please set the S/PDIF setting to CUSTOM.
You don't need set this option when you connect the RCA cable.
English
Dynamic Range Control : This function is for either decreasing high level sounds
or increasing low level sounds.
[ON]: low volume at late night.
[OFF]: full dynamic range of the volume.
Video Aspect Ratio : 4:3 Letter Box / 4:3 Pan & Scan for ordinary TVs / 16:9 for
Wide TVs like HDTV or Plasma TV.
If the ratio of the TV is 4:3, select the 4:3 letter box or 4:3 Pan & Scan.
If the ratio is 16:9, select 16:9.
* The 4:3 Letter box can show the original ratio of the multimedia file in 16:9.
* The 4:3 Pan & Scan will adjust the image of the 16:9 multimedia file to the 4:3
of the TV screen by scaling the image. (Currently, not support this mode)
* 16:9 can adjust any ratio of the multimedia file to the TV screen with the
original image.
Video Auto Switch : the video out switches automatically to 1080P 24Hz
according to the frame rate.
English
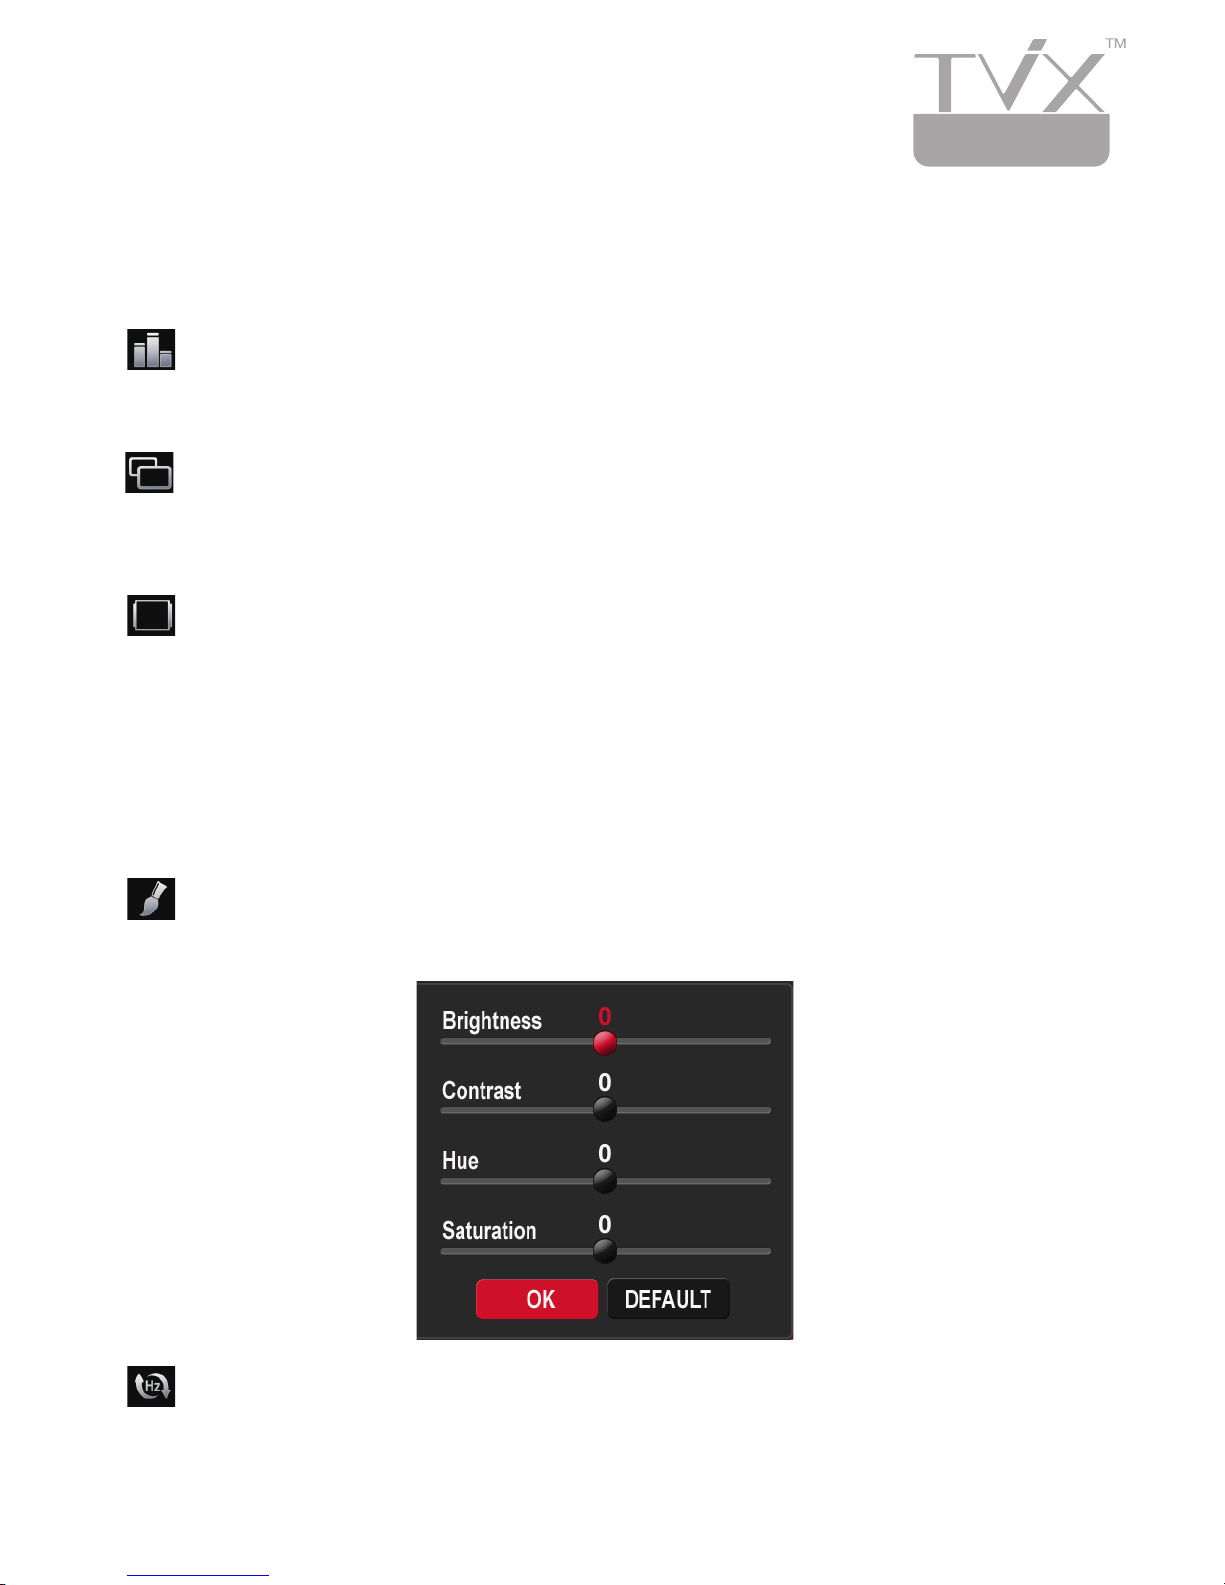
Video Adjust : Set the Brightness - Contrast - Hue - Saturation.
Press OK or STOP button to save and exit current video setting.
Video Output : Select this when you want to connect the video through a
composite or a HDMI cable. With HDMI setting, you can select an output
resolution between NTSC,PAL, 720p 50hz/60hz, 1080i 50hz/60hz and 1080P.
1080i should work on all HD grade TVs.

English
4.3 HDTV Setting
This section is about HDTV settings. Press the SETUP button on the remote control
and select HDTV.
This screen allows you to adjust the HDTV settings of your TViX-HD to your personal
taste. Select menu to exit this SETUP.
Audio Language : select default audio. To change the audio format, press the
AUDIO button on the remote control.
Start Channel Scan : Press ‘Start Channel Scanning’ if you want to scan the
channel.
Country/Location : Select your country or location.
Time Zone : to use the EPG guide with the correct recording time zone, you have
to configure your time zone by using the arrow keys.
Daylight Saving Time : set this option on if you are in the area of DST.
TV Input : Select your input.
CH Key Mode : Select to favorite channels if you want to change the channel
with CH button.
IceTV Configuration : In Australia, you can choose IceTV EPG or normal EPG.
ANT Pass-thru : set to OFF if you don't use antenna pass-thru.

4.4 PVR Setting
This section is about PVR settings. Press the SETUP button on the remote control, and
select PVR.
This screen allows you to adjust the PVR settings of your TVX-HD to your personal
taste. Select menu to exit this SETUP.
TimeShift Duration : Set the maximum time-shifting interval
Auto Timeshift start : Time-shift will be started automatically whenever TV
mode is active.
Schedule Padding Time : Adjust schedule padding time manually.
The TViX PVR can play HDTV broadcasts without a digital TV set-top box, with
excellent and super-clear pictures on HDTV screens. The TViX PVR supports standard
DTV features, such as EPG and Time-shifting.
English

It allows you to connect to network easily with uPnP support, and it does not
require an IP address. You can immediately playback uPnP connected files on
wired/wireless network environment.
With NFS, TViX-HD can play high bit-rate files from a PC flawlessly over a LAN.
We recommend NFS connection over SAMBA. You need to install the
TViX-HD Netshare program (or other NFS server) on the server PC, but the
settings are much easier than in SAMBA mode.
Setup Network Disk: This function searches and helps you find PCs connected to
the network.
SAMBA: If you have a guest account, shared folder names can be listed and can
be selected.
NFS: Connected PCs are listed automatically in NFS of NAS storage or Netshare.
TViX-HD Network Info: You can see the information of TViX-HD’s Network.
FTP Password: to use FTP function, you must use the ID & password displayed on
the Network Menu within SETUP. The FTP ID is tvixftp. you can use capital
letters only for the password.
English
Network Settings : Select Wired network or Wireless network.
4.5 NETWORK Setting
This section is about NETWORK (Network or FTP) settings. Press the SETUP button
on the remote control, and then select NETWORK.
This screen allows you to adjust the NETWORK settings of your TViX-HD to your
personal taste. Select menu to exit this SETUP.

English
4.6 MISC Setting
This section is about MISC (Photo effect and Subtitle) settings. Press the SETUP
button on the remote control, and then select MISC.
This screen allows you to adjust the MISC settings of your TViX-HD to your
personal taste. Select menu to exit this SETUP.
Photo Slide Show : is used when playing background music while watching
picture a slideshows.
Univ. Jukebox Region : Change the region of universal jukebox.
Subtitle Color : Change the color and outline of subtitles.
Fan Speed : Select the Fan Speed. We recommend the Normal setting.
Set Folder Password : In order to password-protect folders, firstly you will
need to setup the Admin Password. Default Admin Password: 0000 (4-zeros).
Perform the SETUP-SYSTEM-Load default settings if Admin Password gets lost
Smart navigation : If there is VIDEO_TS.IFO file in the folder, Clicking on
the DVD folder will automatically playback .VOB content.
Screen Saver : If there is no activity the screen saver will be activated after a
certain time. You can change the Screen Saver time on this menu.
Skip Duration : You can change the Skip duration(up/Down button) of video
playback.
OSD Display : Select the type of OSD display while playing a video.

Digital Video Innovation

Guide rapide
TViX Slim S1 DUO
- Certaines spécifications peuvent être changées selon sa version de firmware (progiciel).
Veuillez vous référez aux questions / réponses (FAQ) de notre page d’accueil pour plus d’
information, http://www.tvix.co.kr
- Pour le détail des instructions, veuillez vous référer au CD TViX-HD joint ou au dernier
fichier (format PDF) de la page d’accueil TViX-HD du site (www.tvix.co.kr).
- TViX Slim S1 DUO : DVB-T Dual Tuner with Background Recording.

Français
Note de sécurité
Ne pas essayez de démonter
ou de modifier le TViX-HD.
Cela peut être la cause de
mauvais fonctionnement ou
d’incendie.
Placez tout élément magnétique
a proximité tel que des hauts
parleurs peut effacer ou causer des
dommages aux données continues
sur le disque dur.
Ne placez pas le TViX-HD
dans un lieu exposé à la
poussière, à l’humidité, à l’
eau, à l’huile, à la pluie et
au vent.
Garder le TViX-HD éloigner de source de
chaleur tel que l’exposition directe au soleil,
appareils de chauffage, etc. Placez le dans un
lieu bien ventilé et veuillez vous assurer que l’
air circule librement autour de l’appareil.
Ne pas brancher le câble
électrique d’alimentation
avec des mains mouillées ou
ne pas utiliser un câble ou
prise défectueux. Cela peut
provoquer une électrocution
ou un incendie.
Ne faites pas tomber le disque dur.
Cela peut causer des dommages
critiques du disque dur.
La prise de courant doit être installé à proximité de l’équipement et facilement accessibles.
Débranchez le câble secteur lorsque vous n’utilisez pas l’appareil pendant une longue
période.

1. Introduction
Le TViX-HD est un lecteur multimédia disque dur qui joue les
fichiers numériques vidéos, musiques, images fixes et DVD
enregistrés sur le disque dur du TViX-HD sur votre écran TV ou
votre installation Home cinéma. Vous pouvez profiter de vos
contenus numériques dans votre salon sans avoir nécessité de
les gravés sur un disque ou d’utilisez un lecteur CD ou DVD.
Le TViX-HD joue des films DVD (préalablement enregistré sur le disque dur)
avec les mêmes fonctionnalités de navigation qu’un DVD. Vous pouvez créer
votre propre librairie virtuelle de DVD en enregistrant votre collection
personnelle de DVD au format .ISO ou .IFO et ensuite regardez les
exactement comme si vous jouiez le DVD original (avec toutes les fonctions
du DVD original: Menu, Chapitre, Audio, sous-titre, avance rapide, retour
rapide, ralenti, pause, suivant, précédent, chercher, etc.).
Avec le dernier processeur, le Disque Dur TViX-HD supporte les formats
multimédias les plus récents MKV, MPEG-4 AVC(H.264), VC-1( MP@HL, AP@
L3), WMV9 & WMV HD) aussi bien que MPEG4 3.11, 4.0 et 5.0.
L’ HDMI offre une qualité incomparable à la vidéo et à l’audio numérique,
tandis que le DVI ne sert que pour la vidéo numérique. Vous ne serez pas
déranger avec plusieurs câbles AV. Par un seul câble il vous permet de vous
connecter clairement et simplement votre écran. Il peut fournir la vidéo
numérique non compressé jusqu'à 1080P ainsi que l'audio numérique.
Le TViX-HD supporte un décodeur DTS matériel pour mixer le son en 2
canaux pour une meilleure qualité de la dynamique du son.
Le port réseau intégré permet l’utilisation du disque dur TViX-HD en réseau.
Le TViX-HD peut être mis en réseau avec un PC en utilisant soit un
réseau filaire ou Wifi (nécessitant un adaptateur wifi USB optionnel).
Vous êtes en mesure de naviguer dans les fichiers d’un PC par le biais du
TViX-HD en filaire / en wifi et de jouer un fichier à partir de son emplacement
d'origine sans avoir à le copier dans le TViX-HD. Aussi, le serveur FTP ou
serveur de fichiers Samba du TViX-HD permet la copie de fichier d'un PC. Il
vous permet également de se connecter au réseau facilement avec le support
UPnP, qui ne nécessite pas d'adresse IP. Vous pouvez immédiatement jouer les
fichiers multimédia des unités UPnP connectées.
Avec les 2 ports USB2.0 host (maître), vous pouvez attacher des unités
disque externe USB additionnelles pour étendre la capacité de stockage.
Vous pouvez également lire les fichiers de votre appareil photo numérique,
de clé USB flash, de lecteur de carte flash USB ou de lecteur MP3.
Manufactured under license from Dolby Laboratories.
"Dolby" and the double-D symbol are trademarks of Dolby Laboratories.
Français
UPnP
H.264

2. Description
2.1 Bouton de contrôle
Le TViX-HD a été conçu pour être contrôlé par ces boutons sans la télécommande.
2.2 Connexion des câbles
Vous pouvez connecter le TViX-HD à un écran TV ou un amplificateur audio (chaîne
HiFi) avec le câble A/V.
Français
2.3 Contenu de Package
Merci d’avoir chosi ce produit.
Le package du TViX-HD contiens les éléments suivants. La description des
éléments suivant peut être différentes de son contenu réel.
Unité TViX-HD Télécommande Câble USB
Câble RCA
Guide rapide
CD Manuel Câbles d’alimentation
** Pour le détail des instructions, veuillez vous référer au CD TViX-HD joint ou au
dernier fichier (format PDF) de la page d’accueil TViX-HD du site (www.tvix.co.kr).
* Nous supportons la fonction de formatage automatique lorsqu’un nouveau disque dur
est installé.
Important! ne pas couper l’alimentation durant le formatage.
Français

2.4 Installation/Echange du disque dur
Français
** L’installation ou l’échange de votre disque dur est très facile. Pour installer le disque
dur, veuillez suivre les instructions décrites ci-dessous. Si vous avez déjà un disque dur
préinstallé, vous pouvez passer ce chapitre.
① Tirez le levier d’accès au disque dur situé sur le coté et séparez le tiroir du corps de l’
appareil. L’installation d’un disque dur est possible sans l’utilisation de vis.
② Avant de procéder à l’installation du disque libérez le bouton de verrouillage vers
le haut.
③ Lors de l’installation du disque dur 3.5” SATA, assurez vous que la carte
électronique du disque dur est bien vers le bas et placez le disque dur dans le tiroir
de disque en commençant par entrer les ergots (1) dans les trous des vis de
fixation du disque dur.

Français
①
②
①
④ Aprés le positionnement du disque dur dans le tirroir, refermez à sa place le
verrouillage de sécurité. Par précaution il est recommandé d’utiliser des vis pour fixer
le disque dur dans le tiroir de disque.
⑤ Insérez le tiroir de disque dans le produit.
⑥ Pour le remplacement du disque dur sur le tiroir, veuillez faire les mêmes opérations
dans l’ordre inverse.

3. Installation et Connexion
3.1 Connexion vidéo
Vous pouvez vous connecter à l’écran soit en HDMI COMPONENT et
vidéo composites comme la figure ci-dessous.
Connexion en composite
Connexion en HDMI
Connectez la sortie du TViX-HD à votre
TV en utilisant le câble vidéo composite
fourni (jaune).
Sélectez l’entrée appropriée sur votre TV
pour obtenir l’écran d’accueil du TViXHD.
Pour l’audio, veuillez connecter le câble
audio stéréo (rouge/blanc)
Connectez le TViX-HD à votre TV en
utilisant le câble HDMI.
Le TViX-HD joue les vidéos HD (jusqu’à
1920x1080P) par le câble HDMI.
Le câble HDMI transmit les signaux
audio et vidéo non compressés. Aucun
câble additionnel n’est nécessaire.
Français
Connexion à une sortie Composante séparée :
Connecter le Disque Dur TViX-HD à la TV avec les cables YUV.
Allumer le Disque Dur TViX-HD et la TV. Sélectionner un canal video approprié sur la
TV (dans le cas présent, le mode YUV).

3.2 Connexion Audio
Connecxion 2 canal stereo à TV normale
Connexion digitale à un amplificateur 5.1
Connectez le câble stéréo, canal gauche
(blanc) et canal droit (rouge), à l’entrée
audio appropriée de votre TV ou de
votre chaîne Hi-Fi.
Si vous avez un amplificateur/décodeur
multi canal ayant une entrée optique,
vous pouvez profiter de la haute qualité
du son en 5.1 avec le câble optique/
coaxiale.
La figure ci-dessus vous montre
comment connectez le câble optique (ce
câble optique n’est pas fourni est doit
être acheté séparément) avec le jack
optique (fourni).
Après avoir connecter le câble vidéo à votre TV, pressez plusieurs fois (tous les 3
secondes) jusqu’à voir la page d’accueil du TViX-HD.
S’il n’y a pas de son après avoir connecté le TViX-HD avec le câble optique/coaxiale,
vous devez configurer en numérique la sortie audio dans le menu de configuration
(SETUP) du TViX-HD.
REMARQUE
Français

0
3.3 Connexion USB HOST/e-SATA (MAITRE)
Le TViX-HD possède également un port USB HOSTe-SATA (MAITRE) conforme à l’USB
2.0 et aux fonctionnalités USB HOST (MAITRE).
L’USB-host permet la communication entre 2 unités USB. Vous pouvez connecter n’
importe quelles unités de stockage USB (clés USB, disque dur externe USB,…) et jouer
les fichiers contenus sur ces unités. Vous pouvez également connecter directement
votre appareil photo numérique pour visualiser les photos numérique ceci sans
nécessité d’un PC.
Français
Après avoir connecté sur l’USB HOST une unité USB, pressez sur la GOTO de la
télécommande, vous pourrais alors changer la location du disque dur interne à l’unité
USB externe.
USB Host
e-SATA Host