

FP8K-DS & FP8K-DS-XLT
Four
Post Parking Lifts
8000 lb Capacity
Installation & Operation Manual
REV A-091713


SPECIFICATIONS FP8K-DS FP 8K-DS-XLT
Lifting capacity 8,000 lbs. 8,000 lbs.
Overall length with ramps 207 1⁄8”222 1⁄2”
Overall width 103
1
⁄2”109 1⁄2”
Overall height 86
1
⁄4”96”
Track length 165 1⁄2”180
1
⁄2”
Lifting height 74 3⁄4” 82 1⁄4”
Width between posts 94
1
⁄2”100
5
⁄16”
Maximum clearance under tracks
70” 77 15⁄16”
Shipping weight 1,640 lbs. 1,700 lbs.
Features:
✦ 8,000 lb. lifting capacity
✦ Carriages completely
enclosed for safety
✦ Redundant ladder lock
safety system with
“auto engage” locking
bar in the event of
cable failure
✦ Extra large slider blocks
for added stability
✦ 10 lock positions
✦ Aircraft quality cables
rated at 14,500 lbs.
✦ 18” wide runways
formed with one-piece
3
⁄16” non-skid
diamond-plate
✦ Easy operation:
Lock release handle
located near power unit
✦ Large 3” diameter
cylinder
✦ Many options
available
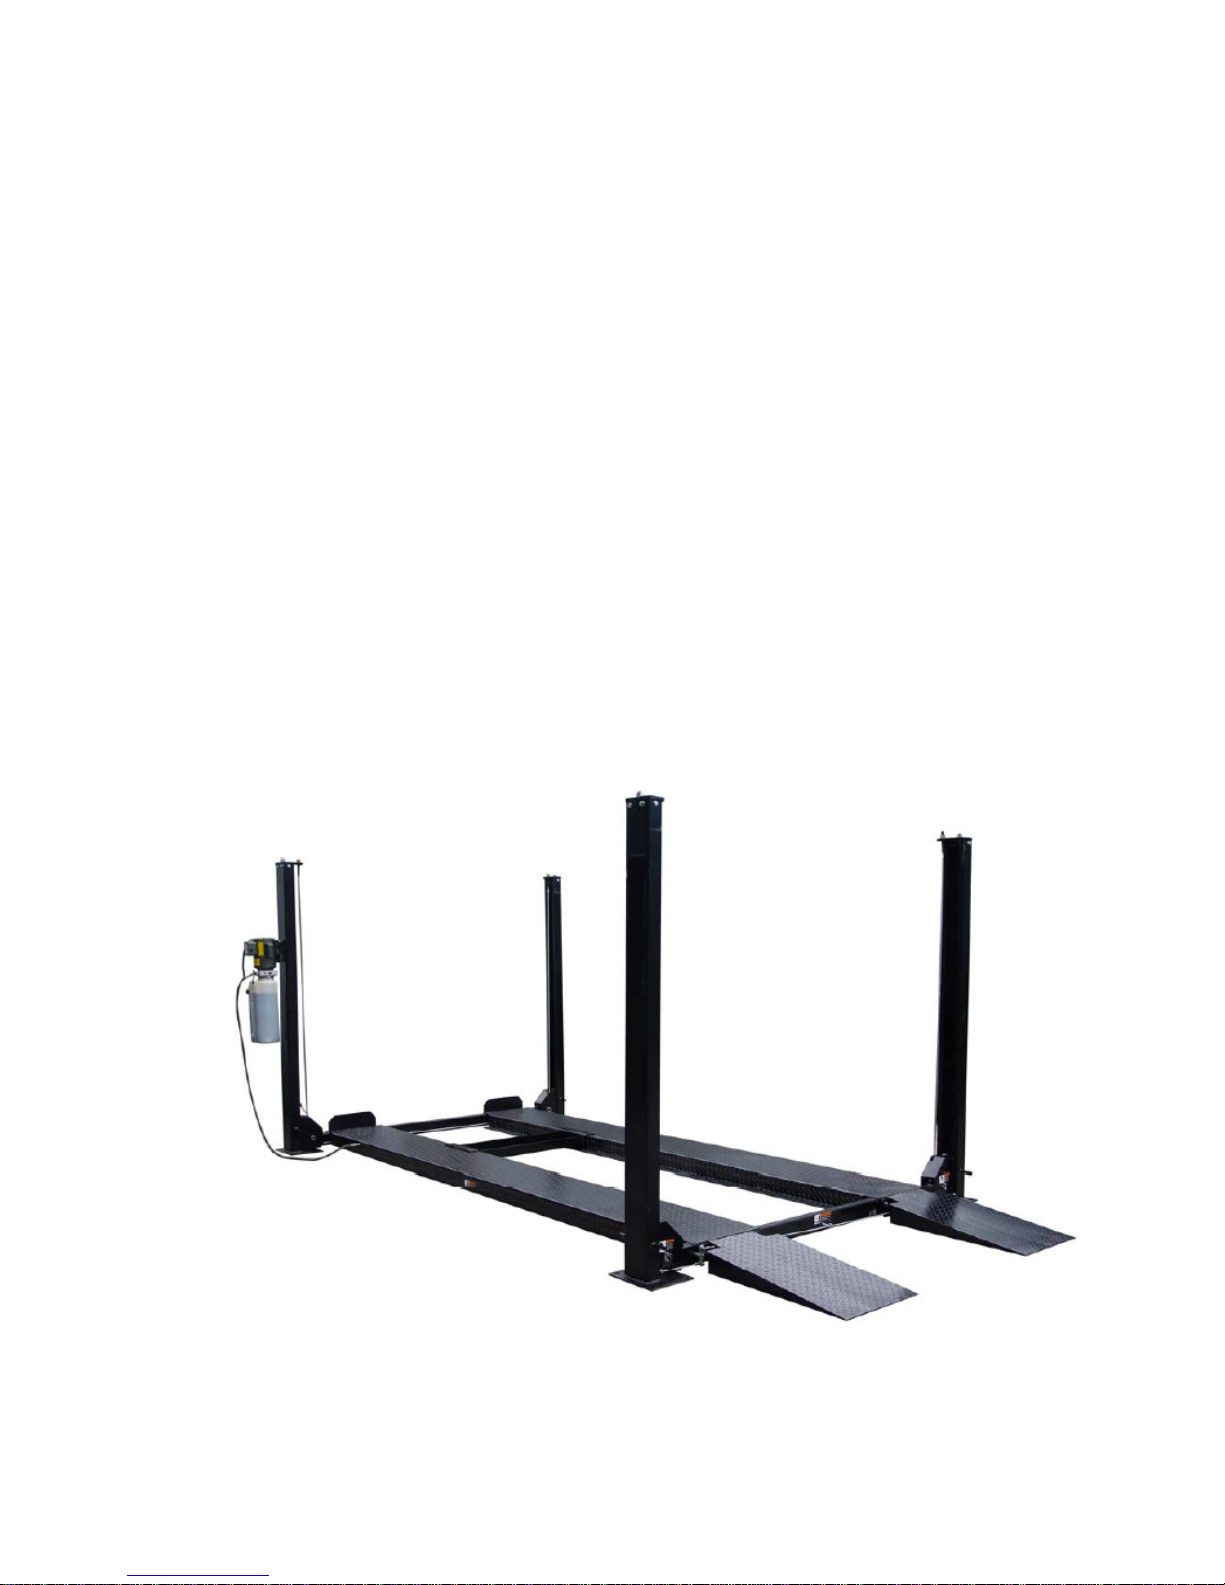
8,000 LB.
DELUXE SERIES
STORAGE /SERVICE LIFTS
Smooth operation and good looks make a great first impression
but it’s the safety features and durability that makes
the“Deluxe Series” the best choice
in storage/service lifts.
FP8K-D S
Deluxe Series
Storage/ Service lift
Cable safety system
Internal ladder locking system
FP8K-DS-XLT
Extra length & under car clearance

TUXEDO DISTRIBUTORS LIMITED WARRANTY
Structural Warranty:
The following parts and structural components carry a five year warranty:
Columns Top Rail Beam Uprights Arms Swivel Pins
Legs Carriages Tracks Overhead Beam Cross Rails
Limited One-Year Warranty:
Tuxedo Distributors, LLC (“Tuxedo”) offers a limited one-year warranty to the original purchaser of
Tuxedo lifts and Wheel Service in the United States and Canada. Tuxedo will replace, without charge, any
part found defective in materials or workmanship under normal use, for a period of one year after purchase.
The purchaser is responsible for all shipping charges. This warranty does not apply to equipment that has
been im p r o p e r l y installe d o r a l t ered or t hat has not been operated or maintained according to specifications.
Other Limitations:
This warranty does not cover:
1. Parts needed for normal maintena
2. Wear
3. Replacement of lift and tire changer cylinders after the first 30 days. A seal
4. On-site labor
Upon receipt, t
signing clear on the shipping receipt. Freight damage is not considered a warranty issue and therefore must
be noted for any potential recovery with the shipping company.
The customer is required to notify Tuxedo of any missing parts within 72 hours. Timely notification must
be received to be covered under warranty.
Tuxedo will replace any defective part under warranty at no charge as soon as such pa r ts becom e a v ai l a bl e
from the manufacturer . No guarantee is given as to the immediate availability of replacement parts.
Tuxedo reserves the right to make improvements and/or de s i g n c h a n ges to its lifts without any obligation
to previously sold, assembled or fabricated equipment.
There is no other express warranty on the Tuxedo lifts and this warranty is exclusive of and in lieu of all
other warranties, expressed or implied, including all warranties of merchantability and fitness for a
particular purpose.
To the fullest extent allowed by law, Tuxedo shall not be liable for loss of use, cost of cover, lost profits,
inconvenience, lost time, commercial loss or other incidental or consequential damages.
parts, including but not limited to cables, slider blocks, chains, rubber pads and pulleys
in
structions will be sent for repairs therea
he customer must visually inspect the equipment for any potential freight damage before
nce
kit and installation
fter.
This Limited Warranty is granted to the original purchaser only and is not transferable or
assignable.
Some states do not allow exclusion or limitation of consequential damages or how long an
implied warranty lasts, so the above limitations and exclusions may not apply. This warranty
gives you specific legal rights and you may have other rights, which m ay vary from st ate to stat e.
1905 N Main St Suite C, Cleburne, TX 76033
Ph 817-558-9337 Fax 817-558-9740

2
PREFACE
Prior to the operation of your lift make sure that you read the
instructions thoroughly. These instructions are found in this
manual.
Please note that your warranty may be voided if you do
not read the manual and understand its content.
REV A-091713

3
IMPORTANT SAFETY INSTRUCTIONS
Read these safety instructions entirely!
Failure to read these instructions may result in injury to user, other people within
t
he area of the lift, or vehicles. The manufacturer is not responsible for any injury
or damage as a result of neglecting to carefully read and follow these instructions.
Always lock the lift in place before going under the vehicle. Never allow anyone to
go under the lift when raising or lowering.
INSPECT your lift daily. Never operate if it malfunctions or if it has broken or
damaged parts. Repairs should be made with original equipment parts.
ATTENTION! LOOK OUT!
Routine check of safety latch system is very important -the discovery of device
failure before
needed could save you from expensive property damage, lost time,
serious personal injury or even death.
z NEVER overload your lift. Manufacturer’s rated capacity is shown on
nameplate affixed to the lift. ALWAYS operate the lift with gross weight
less than the capacity.
z NEVER use the lift to raise one end or one side of the vehicle.
z NEVER raise vehicle with anyone inside. No one should be in the lift area
during operation.
z ALWAYS keep lift area free of obstructions, grease, oil, trash and other debris.
Before lowering the lift, be sure tool trays, stands, etc. are removed from under
the vehicle. Release locking devices before attempting to lower the lift.
z Adequate ventilation should be provided when working on internal
combustion engines.
z Use only manufacturer’s recommended attachments.
z KEEP HANDS and FEET CLEAR. Remove hands and feet from any moving
parts. Keep feet clear of the lift when lowering. Avoid pinch points.
z GUARD AGAINST ELECTRIC SHOCK. This lift must be grounded while in use
to protect the operator from electric shock. Never connect the yellow/green
wire in the power supply cord to a line terminal. This is for ground only.
z DANGER! The power unit used on this lift contains high voltage.
z Disconnect power at the receptacle before performing any electrical repairs.
Secure plug so that it cannot be accidentally plugged in during service.
z WARNING! RISK OF EXPLOSION. This equipment has internal arcing or
sparking parts which should not be exposed to flammable vapors. This
machine should not be located in a recessed area or below floor level.
REV A-091713

4
z MAINTAIN WITH CARE. Keep lift clean for better and safe performance. Follow
instructions in the manual for proper lubrication and maintenance. Keep
control handles and/or buttons dry, clean and free from grease and oil.
z STAY ALERT. Watch what you are doing. Use common sense. Be aware. CHECK
FOR DAMAGED PARTS. Check for alignment of moving parts, breakage of parts
or any condition that may affect its operation. Do not use lift if any component is
broken or damaged
z NEVER remove safety related components from the lift. Do not use lift if safety
related components are damaged or missing.
z ALWAYS wear safety glasses. Every day eyeglasses only have impact
resistant lenses. They are not safety glasses.
READ AND UNDERSTAND ALL SAFETY WARNINGS & PROCEDURES
BEFORE OPERATING LIFT. POST THESE SAFETY TIPS WHERE THEY
WILL BE A CONSTANT REMINDER TO YOUR LIFT OPERATOR. FOR
INFORMATION SPECIFIC TO THE LIFT, ALWAYS REFER TO THE LIFT
MANUFACTURER’S MANUAL.
REV A-091713

5
SIZE DRAWING
Fig. 1
Fig. 2
REV A-091713

6
SPECIFICATION:
Specifications
163016/FP8K-DS 163018/FP8K-XLT
Overall Width 2630mm(103.54”) 2780mm(109.45”)
Inside Columns 2398mm(94.41”) 2548mm(100.32”)
Width of Outside runway 1900mm(74.80”) 2050mm(80.71”)
Width of runway 474mm(18.66”) 474mm(18.66”)
Overall Length 4460mm(175.59”) 4845mm(190.75”)
Lifting Height
Min122~max1900mm
(Min4.8”~Max 74.80”)
Min122~Max2090mm
(Min4.8”~Max82.28”)
Overall Height 2237mm(88.07”) 2390mm(94.09”)
Length of Columns 4000mm(157.48”) 4385mm(172.64”)
Lifting Capacity 8000lbs 8000lbs
Net(Gross) Weight
745(770)kg 795(820)kg
REV A-091713

7
INSTALLATION
Improper installation can cause accelerated wear, resulting in catastrophic failure
which may cause property damage and / or bodily injury. Manufacturer will
assume no liability for loss or damage of any kind, expressed or implied,
resulting from improper installation or use of this product. Read this installation
manual in its entirety before attempting to install or operate the lift.
STEP 1 SELECTING SITE
Before installing your new lift, check the following.
z OVERHEAD OBSTRUCTIONS: The area where the lift will be located should be
free of overhead obstructions such as heaters, building supports, electrical lines etc.
z FLOOR REQUIREMENTS: Visually inspect the site where the lift is to be installed
and check for cracked or defective concrete. This lift must be installed on a solid
level concrete floor with no more than 2 degrees of slope. A level floor is suggested
for proper i
nstallation and level lifting. If a floor is of questionable slope, consider a
survey of the site and/or the possibility of pouring a new level concrete slab. This
lift is designed to be installed on a minimum of 4" thick, 3500psi, steel reinforced
concrete. Do not install this lift on asphalt, wood, or any other surface other than
described. This lift is only as strong as the foundation on which it is installed.
z DO NOT install this lift outdoors unless special consideration has been made to protect
the power unit from weather conditions. The Power unit is not water proof!!!
z DO NOT install lift close to wall. It is necessary to leave adequate clearance for safety
walking. Suggest clearance be 1 meter (3 feet) at min.
Fig.4
REV A-091713

8
STEP 2 UNPACKING
Unpack the lift close to the installation site. Review your packing list and assembly
drawing to verify that you have all the parts. Layout a chalk line on the floor for the
position of columns..
TOOLS recommended
"Rotary Hammer Drill Or Similar (If anchoring )
Medium Crescent Wrench
3/4"
Masonry Bit (If anchoring)
Medium Pipe Wrench
Hammer
Crow Bar
4 Foot Level
Chalk Line
Open-End Wrench Set: 12-28
Medium Flat Screwdriver
Socket And Ratchet Set: 12 -28
Tape Measure
Hex-Key / Allen Wrench Set
Needle Nose Pliers
STEP 3 COLUMN & CROSS
RAIL INSTALLATION
z Put the columns in their respective positions. Main
column (Fig.6)
must be in the front-left position (Fig. 5)
Fig.5 Fig. 6
Main column
REV A-091713

9
z Insert the cross rail into the top of the left and right columns.(Fig. 7) Till it touches the
ground. (Fig. 9-10)
Note: The side with the hole for the safety latch release bar
must be facing out. (Fig. 8)
Fig. 7 (cross rail is facing center)
Fig. 8 Cross rail (side for facing out)
Fig. 9 Fig. 10
REV A-091713

10
z Insert the safety latch ladder into the column and the end of cross rail. (Fig. 11) and
raise the cross rail about one foot to rest on lowest locking position.
Fig. 12
Fig. 11
z Put on the column top cover then bolt it to the
column. Be sure that the hole for the cable
points towards the center (Fig. 12).
Fig. 13
REV A-091713

11
STEP 4 CABLES
z Pull out the piston rod fro
z Line
the cables according to the drawing (Fig. 16-17).
Fig. 14 Fig.15
Fig. 16 Fig.17
STEP 5 Platform installation
z Put
the main platform (the one with cylinder) on the cross rails on the left. (Fig. 18)
z Put the sub platform on the cross rails on the right.(Fig. 19-21)
z Using bolts, fix the platforms on the cross rail temporarily.
Fig. 18 Fig. 19-21
m the cylinder as far as possible.
REV A-091713

12
z Let the cable go through the cross rail end then bolt to top of column. (Fig. 17-20)
Fig. 19 Fig. 20
STEP 6 Safety Latch Linkage Installation
z Install the safety latch linkage rod and other accessories on the front and rear
crossbeam. (Fig 21-22)
Note: the release handle shall be on the front left near the main column.
Fig. 21
Fig. 22
z Connect the front latch and the rear latch by rods and spacer sleeve underneath the
main platform. (Fig. 23)
z Fix the plat forms by bolts and accessories. (Fig. 24)
z Insert the front stop plat in the slots.
Fig. 23 Fig. 24
REV A-091713

13
STEP 7 Motor pump and hydraulic hose
z Mount the motor pump on the main column.
z Connect the hose from pump to the cylinder.(Fig. 25)
z Add hydraulic oil to the pump tank.
Suggestion: using AW-32 or ISO-32 hydraulic oil,
approximately 10L.
z Hook up the power supply to the motor pump.
Attention: Ask a qualified electrician to do the wiring.
For 220V single phase motor pump,
the
capacity of the power supply cable
least must be at 30A. For 110V single
phase motor must be at least 50A.
Fig. 25
STEP 8 TESTING
z Press the UP button on the motor to raise up the platforms.
z With left hand hold down the safety latch handle to open the lock, with right hand
hold down the release handle to lower the platforms.
Note: if the latch handle is hard to hold down, raise the platforms
to release the lock.
z Cyc
le the lift several times UP and DOWN (Stop for 1 minute intervals), if no
leakage or error occurs, the lift is ready.
STEP 9 ACCESSORY MOUNTING
z PPut on the ramp, tool tray and the movable dolly.(Fig. 26-27)
z IIf t
he lift won't move, take away the movable dolly. Then
anchor the lift to the ground.
Fig. 26 Fig. 27
z Put the plastic sheet under the platforms. (Fig. 28)
Fig. 28
REV A-091713

14
Now the parking lift is ready for use.
REV A-091713

15
FP8K-DS/XLT PARTS CODE AND PARTS DRAWING
REV A-091713

16
FP8K-DS/XLT PARTS CODE AND PARTS DRAWING
REV A-091713

17
FP8K-DS/XLT PARTS CODE AND PARTS DRAWING
REV A-091713

18
FP8K-DS/XLT PARTS CODE AND PARTS DRAWING
REV A-091713

19
FP8K-DS/XLT PARTS CODE AND PARTS DRAWING
REV A-091713

20
Parts code for FP8K-DS
ITEM CODE DESCRIPTION QTY NOTE
1 TT7B-100-01-00 Main column weldment 1 weldment
2
TT7B-100-02-00
Sub column weldment 3 weldment
3
TT7B-100-04-00
Top plate weldment 1 2 weldment
4 TT7B-100-03-00 Top plate weldment 2 2 weldment
5
TT7B-100-05-00
Latch ladder weldment 4 weldment
6
GB41
Hex nut
4
M20
7
GB6175
Hex nut
4
M20
8
GB95
Flat washer
24
D20
9
GB95
Flat washer
32
D12
10
GB5781
Hex Bolt
16
M12X35
11
GB93
Spring washer
16
D12
12
GB41
Hex nut
16
M12
13 Anchoring Bolt 16 φ19
14
TT7B-200-09A/B
Cover Plate 2*2
15
GB93
Spring washer
24
D6
16
GB818
cross screw
16
M6X12
17
TT7B-200-10
Bushing 4
18
GB78
Inner-hex bolt
4
M8X12
19
GB95
Flat washer
13
D24
20
TT7B-200-11
Spindle 4
21
TT7B-200-08
Roller 10
22 SF2518 Complex Bushing 10
23
GB93
Spring washer D6
24
GB818
Cross Bolt M6X12
25 SGM-802-08 Orientination plate 8
26
GB5781
Hex Bolt
32
M8X35
27
GB95
Flat washer
36
D8
28
TT7B-200-14
Nylon block 8
29
GB95
Flat washer D20
30
TT7B-200-06
Spindle 4
31 TT7B-200-05 Rod 4
32
TT7B-200-04
Safety block 4
33
TT7B-200-07A/B
Torque spring 2*2
34
GB6170
Hex Nut
8
M12
35
TT7B-200-02
busher 4
36
TT7B-200-03-00A/B
Locking block 2*2 weldment
37
GB93
Spring washer
8
D8
38
GB6170
Hex nut
10
M8
39
TT7B-200-15
Spring 8
REV A-091713

21
Parts code for FP8K-DS
ITEM CODE DESCRIPTION QTY NOTE
40 TT7B-200-12-00 Spindle 4 weldment
41
TT7B-200-13
small roller 4
42
DPF4-3.2-300-07-00
Plate 4 weldment
43 DPF4-3.2-300-06 Baffle plate 4
44
GB5780
Hex Bolt
8
M18X100
45
GB93
Spring washer
8
D18
46
GB6170
Hex Nut
8
M18
47
GB95
Flat washer D20
48
TT7B-300-01-04
Spindle bushing 4 2
49 TT7B-300-01-05 Spindle 4
50
TT7B-300-01-07
Spindle bushing 3 2
51
TT7B-300-02-00
Main runway 1 weldment
52 TT7B-300-01-00 Sub runway 1 weldment
53
TT7B-500-04-00
approach ramp weldment 2 weldment
54
GB91
cotter pin
2
D5X60
55 DPF4-3.2-500-02 pin 1
56 hydraulic cylinder 1
57
DPF4-3.2-500-04
Plate 1
58 DPF4-3.2-500-03 Block plate 1
59
GB889
Nut
1
M24
60
GB95
Flat washer D24
61 DPF4-3.2-600-00 Jack tray 1 weldment
62 Power unit 1
63
GB5781
Hex Bolt
4
M8X25
64
GB95
Flat washer D8
65
GB93
Spring washer D8
66
GB6170
Hex Nut M8
67 TT7B-200-01-00 Crossbeam 2 weldment
68
TT7B-500-02
Connecting pole 2 L=2080
69
TT7B-500-03
Anchoring bolt 2
70 TT7B-500-01 Connecting pole 2 L=215
71 Knob 1
72
DPF4-3.2-400-01-00
Handle 1 weldment
73 DPF4-3.2-400-04 Bushing 2
74
DPF4-3.2-400-03
connection bush 2
75
DPF4-3.2-400-11
Connecting pole 1
76 DPF4-400-02-00 Connecting pole 1 weldment
77
GB889
Nut
8
M6
78
SI6TK
Bearing
8
M6
79 DPF4-3.2-400-09 Spacer 4
REV A-091713

22
Parts code for FP8K-DS
ITEM CODE DESCRIPTION QTY NOTE
80
GB96
Flat washer
4
D6
81
GB5781
Hex Bolt
4
M6X30
82
GB6170
Hex Nut
8
M6
83 TT7B-400-03 Angle fitting 1
84
TT7B-400-04-00
Throttle Valve 1
85
DPF4-3.2-500-10
Hydraulic Hose 1
86 DPF4-3.2-500-07 Angle fitting 1
87
GB95
Flat washer
1
d14
88
DPF4-3.2-500-06
Nut 1
89 DPF4-3.2-500-11 Hydraulic hose 1
90
TPF4-500-05
Tee fitting 1
91
TPF4-500-09
Nut 2
92 TPF4-500-08 washer 2
93
TPF4-500-07
fitting 1
94
TT7B-500-03A
Steel cable A 1 L=8175
95 TT7B-500-03B Steel cable B 1 L=8750
96
TT7B-500-03D
Steel cable D 1 L=2710
97
TT7B-500-04C
Steel cable C 1 L=4130
98
GB95
Flat washer D20
99
DPF4-500-12
Tight Nut
4
100
GB5783
Galvanized Bolt
16
M10X35
101
GB93
Spring washer
16
D10
102
GB6170
Hex Nut
16
M10
103
GB95
Flat washer
16
D10
104 DPF4-3.2-700-01-00 Structure weldment 4 weldment
105
GB91
Cotter Pin
4
D4X50
106
DPF4-3.2-700-02-00
Pin 4 weldment
107 Caster 4 6"
REV A-091713

IMPORTANT
POWER UNIT PRIMING PROCEDURE
THE PROBLEM: Power unit runs fine but will not pump any fluid.
Step 1 – Locate the check valve, the flush plug to the left of the lowering valve.
(See drawing below.)
Step 2 – Using an Allen wrench and shop towel – with shop towel in place to catch
fluid – loosen the check valve plug 2 ½ turns to allow it to leak.
Step 3 – Push the START button for one second, then release for three seconds.
Repeat these steps until unit starts pumping fluid.
Step 4 – Tighten the check valve plug.
YOUR POWER UNIT SHOULD BE PRIMED
 Loading...