

TUV i.Tech Clip D User Manual
www.tuv.com
Test Report No.: 14014459 001 Appendix 4 page 15 of 41
1.6 User Manual
(Cover)
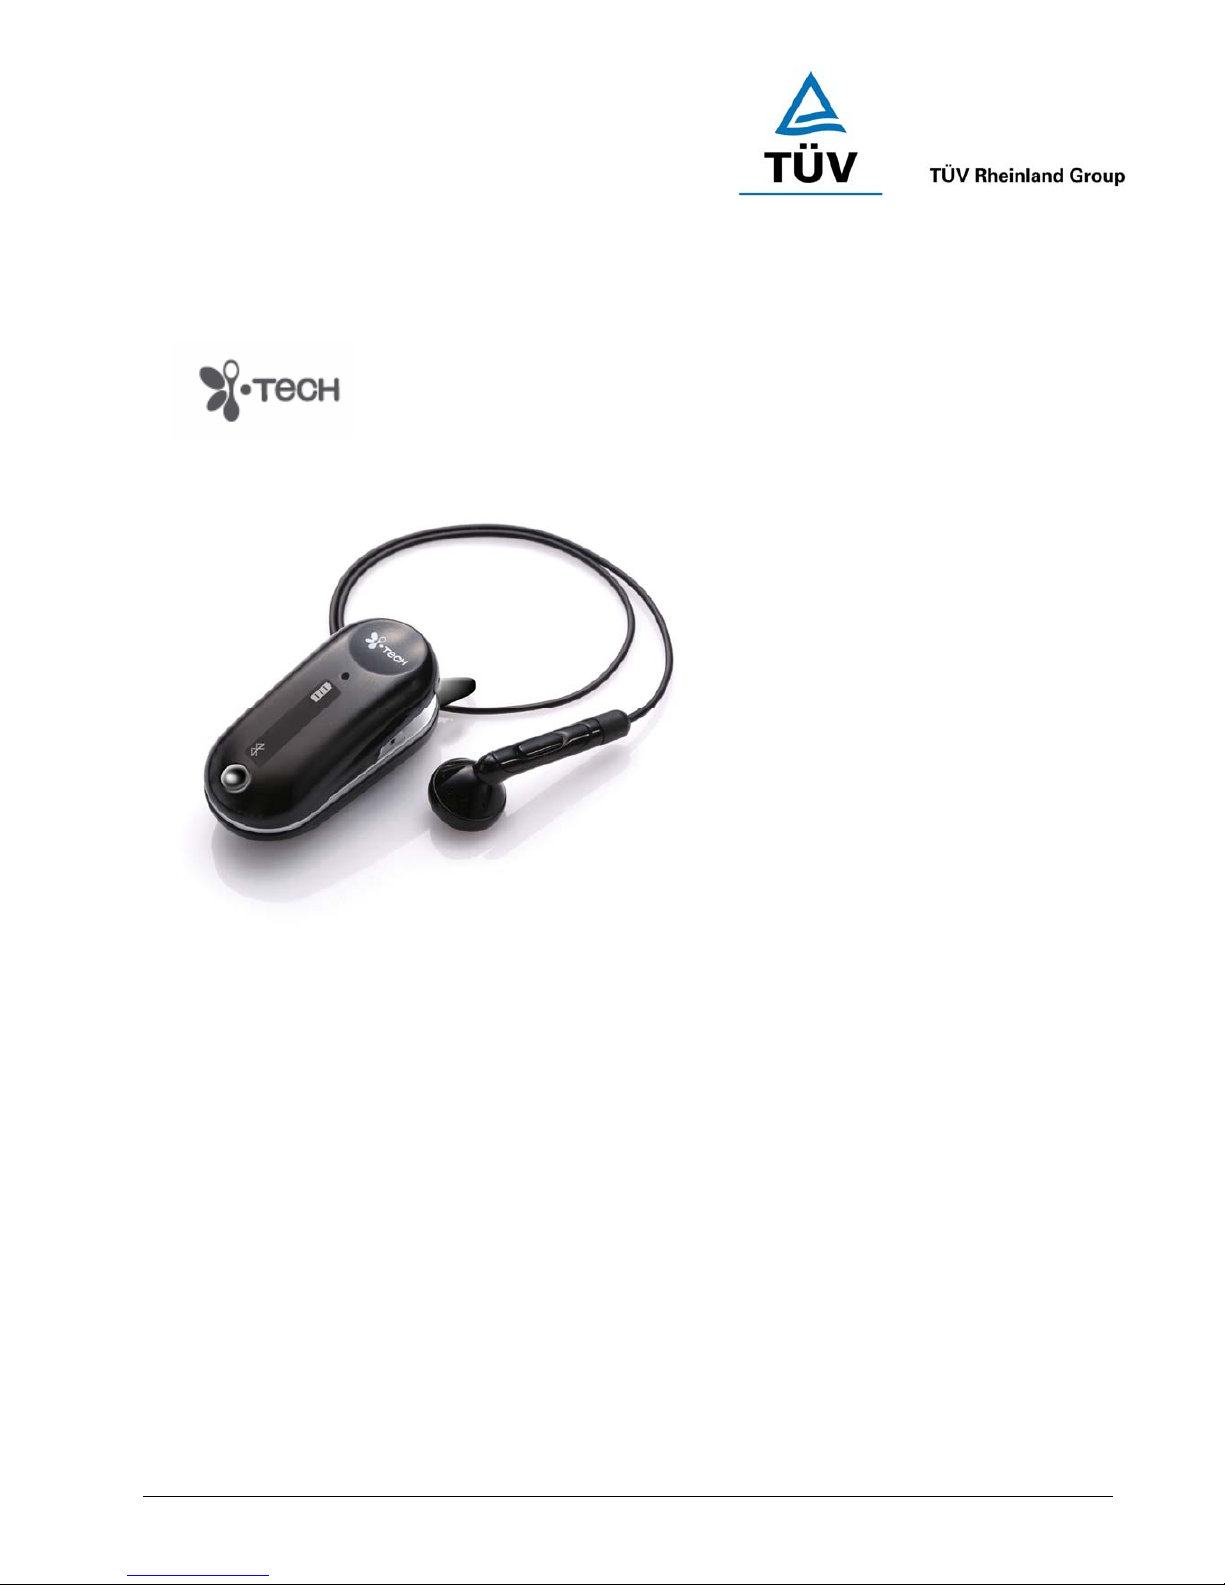
i.Tech Clip D
User Guide
Version 1
14-Aug-2006
Project No. : C51-A06059-XX

www.tuv.com
Test Report No.: 14014459 001 Appendix 4 page 16 of 41
[Inside Cover]
i.Tech Clip D Bluetooth Headset gives you more freedom on the move. Pair with compatible Bluetooth mobile
phones and this headset makes it easier for you to carry on with your tasks whilst making or taking a call.
i.Tech Clip D Bluetooth Headset is compliant with Bluetooth Version 2.0 Class 2 specifications, and is
compatible with the latest mobile phones supporting Bluetooth Headset or Handsfree Profiles.

www.tuv.com
Test Report No.: 14014459 001 Appendix 4 page 17 of 41
(Page 0)
Contents
Title Page
i.Tech Clip D Bluetooth Headset Overview
Display information
Setting Function
1
2
3
Getting Started 4
Charging Your Headset
Normal Charging Time
Talk and Standby Time
Battery Low Indication
5-6
5
5
5
Turning Your Headset On and Off 7
Pairing Your Headset 8
Using Your Clip D Headset
Answering a Call
Ending a Call
Adjusting the Volume
Muting a Built-in Microphone
Dialing from Your Mobile Phone
Voice Dialing from Your Headset
Last Number Redialing from Your Headset
Rejecting a Call (Handsfree Profile ONLY)
Transferring a Call (Handsfree Profile ONLY)
Memory Dial
9-11
9
9
9
9
10
10
10
11
11
11
Resetting or Removing Pairing 12
Care and Maintenance
Headset
Built-in Battery
Charger
13-14
13
14
14
Safety Information 15
Troubleshooting 16
Declaration of Conformity (DoC) 17
Product Specifications 18
www.tuv.com
Test Report No.: 14014459 001 Appendix 4 page 18 of 41
(Page 1)
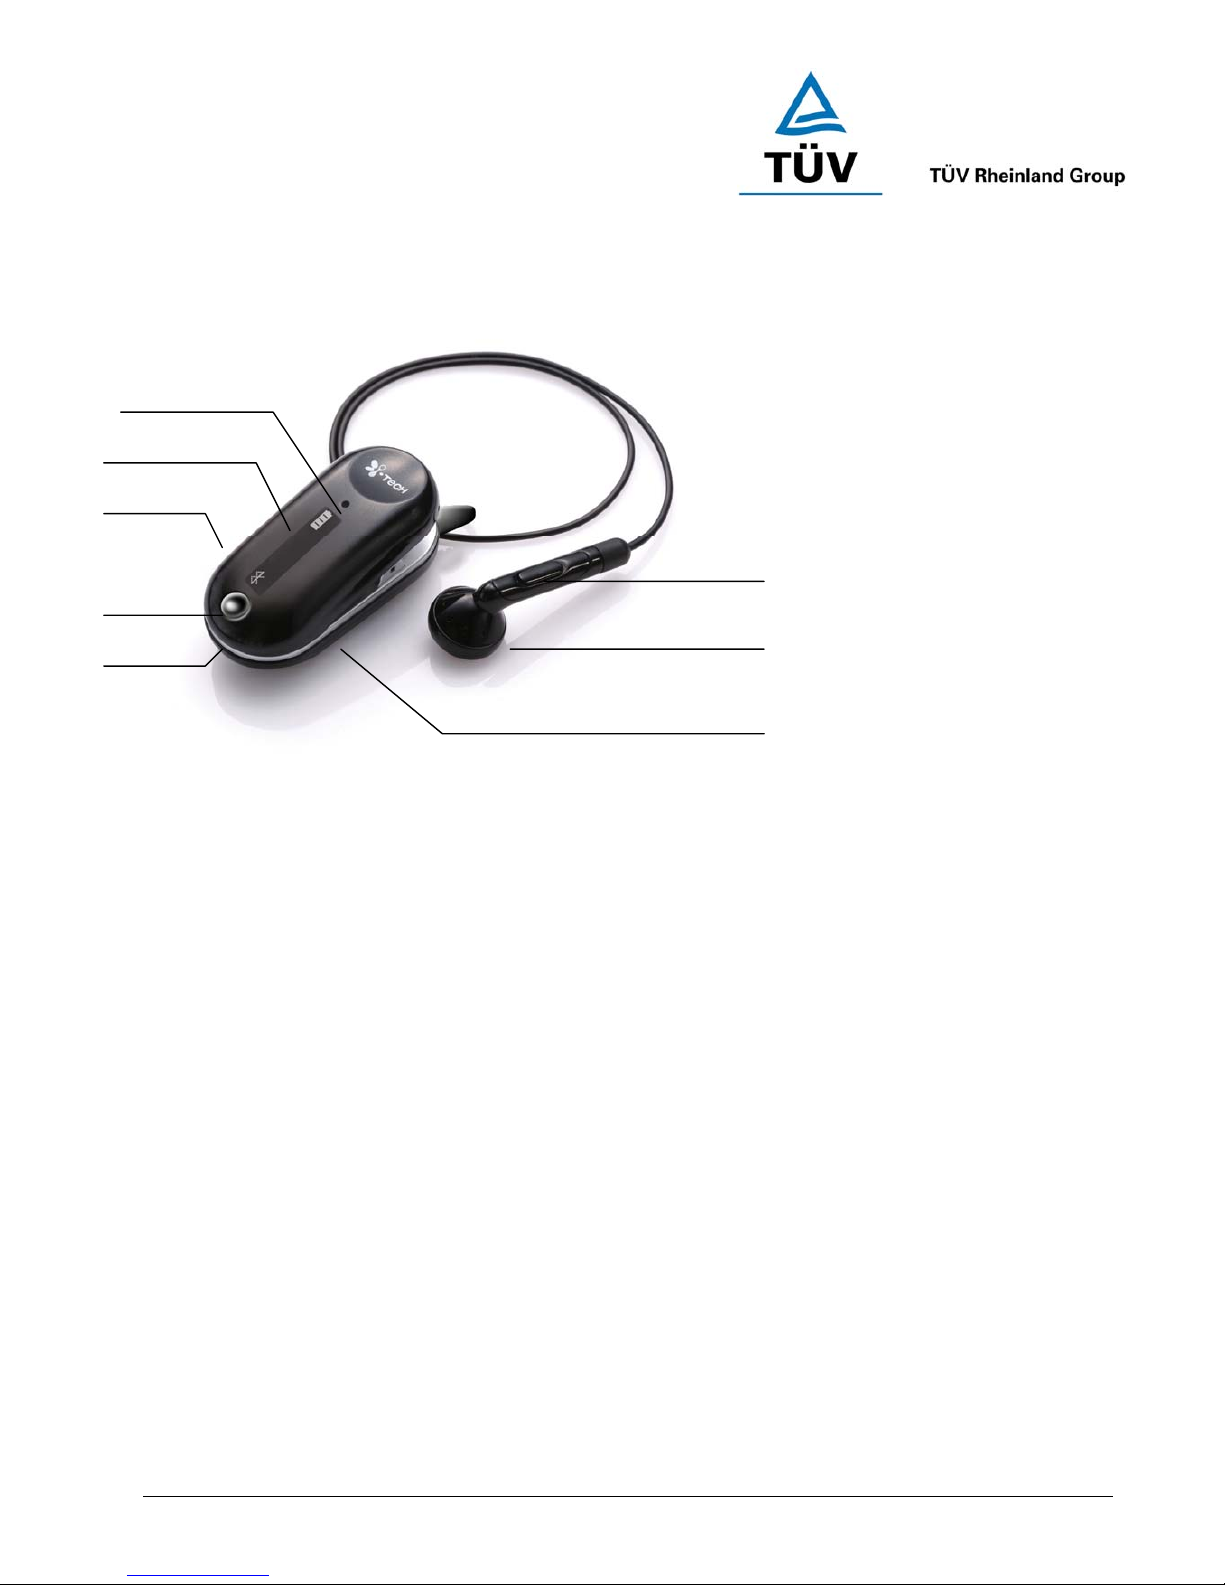
i.Tech Clip D Bluetooth Headset Overview
Figure 1
1. Built-in Buzzer 5. Built-in Microphone
2. Display with backlight 6. Built-in Rechargeable Battery
3. Charging Socket 7. Earpiece
4. Volume / Setting Button 8. Multi-function Button (MFB)
1
2
3
4
5
8
7
6
www.tuv.com
Test Report No.: 14014459 001 Appendix 4 page 19 of 41
(Page 2)
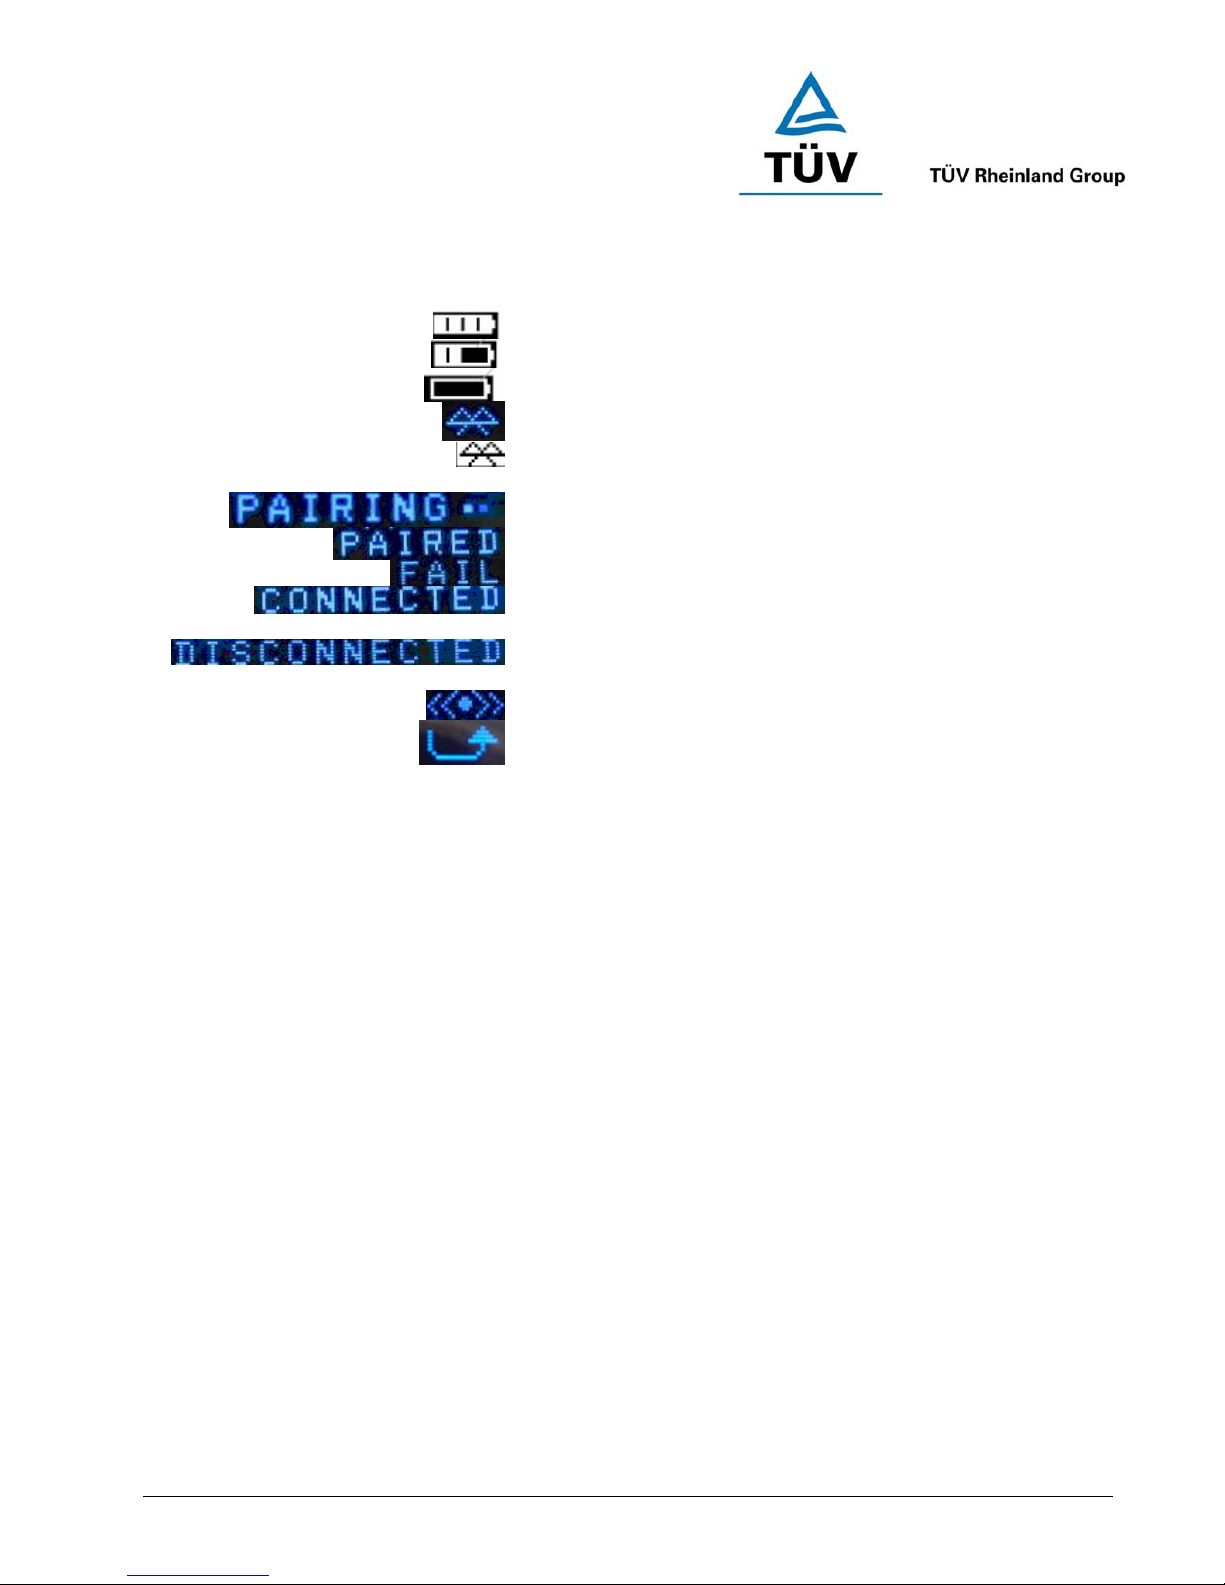
Display Information
Battery Icon (Full Capacity)
Battery Icon (Half Capacity)
Battery Icon (Empty / Low Battery)
Bluetooth Status (Switched on and Paired)
Bluetooth Status (Switched on and Un-
paired)
Bluetooth pairing
Bluetooth Successful Paired
Unsuccessful pairing of Bluetooth
Bluetooth successful connected to
Bluetooth-Ready Phone
Bluetooth disconnected to Bluetooth-
Ready Phone
Buzzer On
Unanswered Call

www.tuv.com
Test Report No.: 14014459 001 Appendix 4 page 20 of 41
(Page 3)
Setting Function
You may set your headset in your profile anytime. To do this, you need to turn off the headset first and then
press and hold the Volume button and MFB button for 2 seconds. You can then select between different
functions by pressing the Volume button. To toggle between the settings, press the MFB once and to confirm the
selection, hold the MFB for 2 seconds. You will be notified of your selection by an "OK" sign on the headset
display.
Setting Options
Adjusting the LCD contrast
Setting buzzer ON/OFF
Clearing call list memory
Clearing paired device(s)
Resetting to default factory settings
Note: After resetting, all previous pairing settings are cleared.
Checking the headset firmware
www.tuv.com
Test Report No.: 14014459 001 Appendix 4 page 21 of 41
(Page 4)
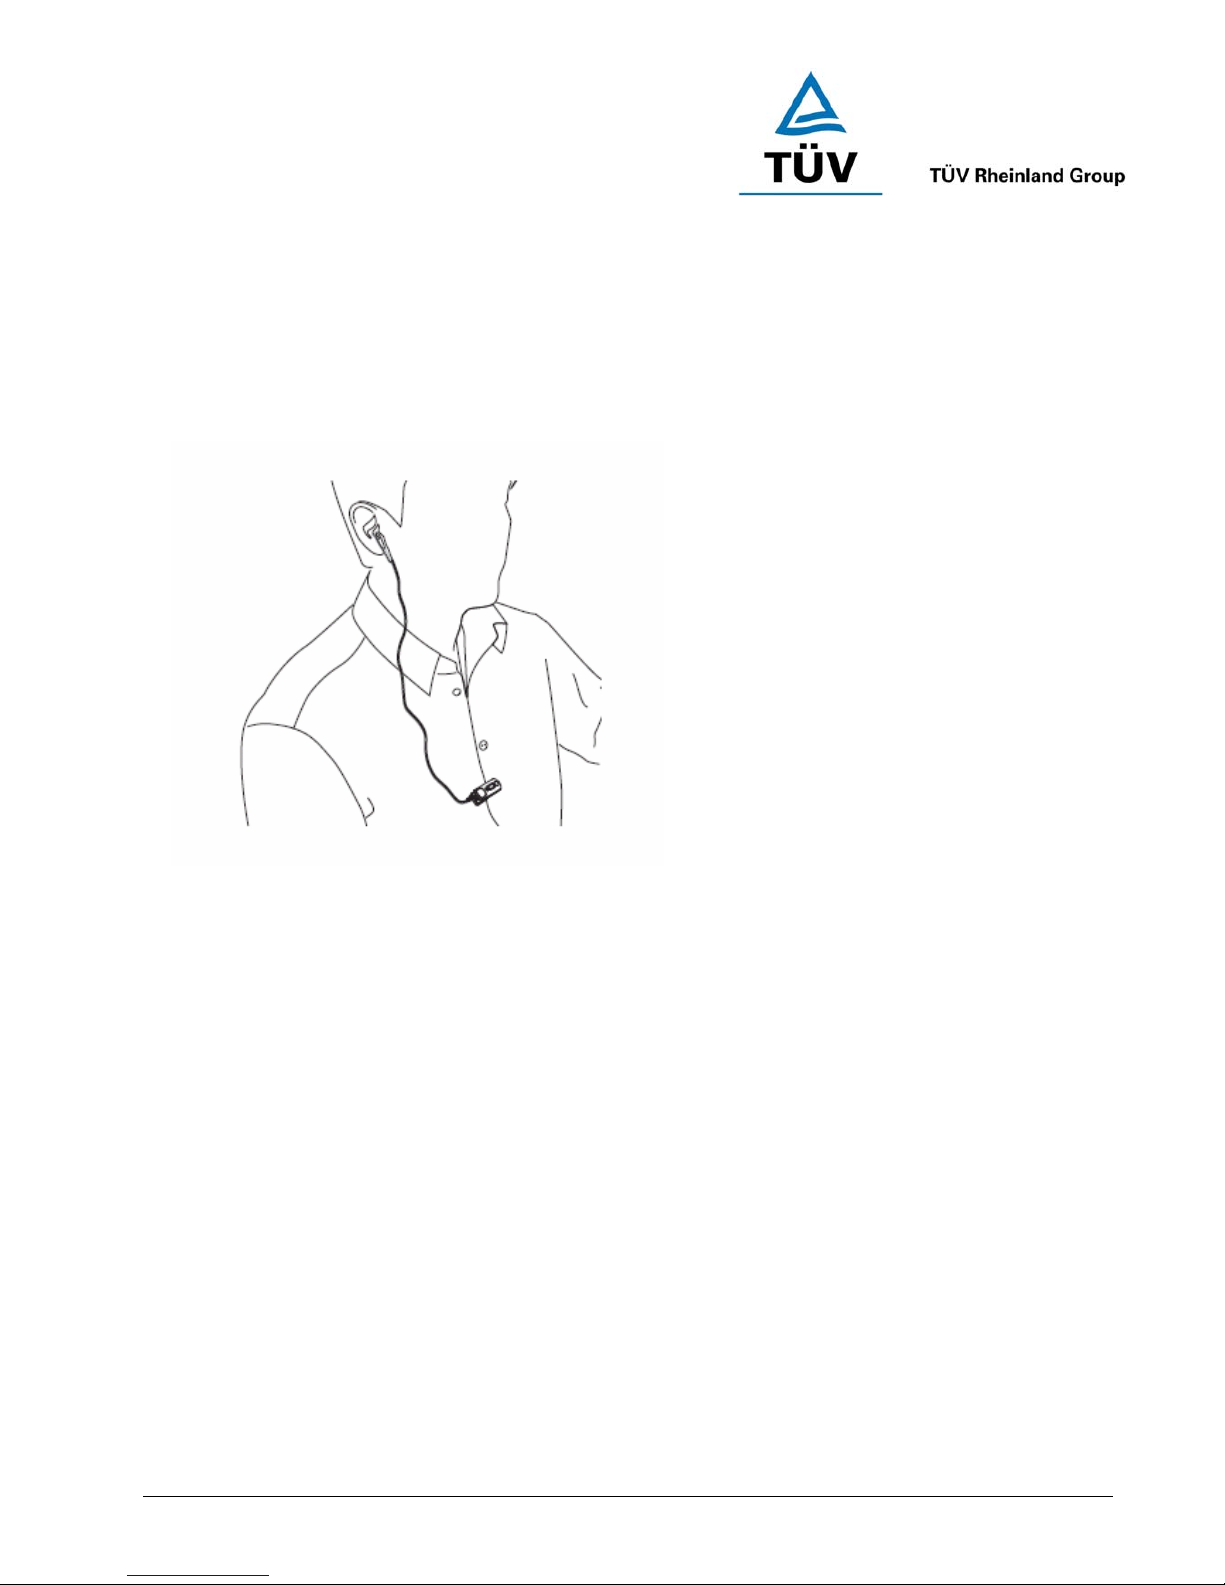
Getting Started
To use your i.Tech Clip D Bluetooth Headset (“the headset”), please follow the steps below:
1. Ensure your headset is fully charged
2. Pair your charged headset with a Bluetooth-enabled mobile phone
Figure 2

www.tuv.com
Test Report No.: 14014459 001 Appendix 4 page 22 of 41
(Page 5)
Charging Your Headset
Figure 3
The headset comes with a built-in rechargeable battery. Prior to using the headset for the first time, it is
recommended to fully charge the battery first.

www.tuv.com
Test Report No.: 14014459 001 Appendix 4 page 23 of 41
(Page 6)
Insert the charger plug into the headset’s charging socket (refer to Figure 3) and plug the mains charger to an
AC wall outlet. The battery icon showed on the headset will be displayed during charging.
IMPORTANT: Charging indication will be delayed for a few seconds if the headset has not been used for
a long time or the battery is drained.
Normal Charging Time
It takes about three hours to fully charge the battery. When the battery is fully charged, the battery icon will stay
on and indicate it is ‘full’. Unplug the mains charger from the AC wall outlet and the charger plug from the
headset. Press and hold the MFB (refer to Figure 1) for two seconds to turn on the headset. Please refer to
“Turning Your Headset On and Off” on the next page for further details.
Talk and Standby Time
A fully charged battery can offer up to 6.5 hours of talk time and up to 150 hours of standby time. When there
are no calls the headset should remain turned on in standby mode.
Battery Low Indication
If the battery becomes low when the headset is on, the battery icon will go empty and the headset will emit a
beep* every minute. Please follow the instructions described above to recharge the battery.
*If you are pairing your headset and your mobile phone in a noisy environment, we advise you to put on the
earphone first so that the beep will be more audible.
 Loading...