

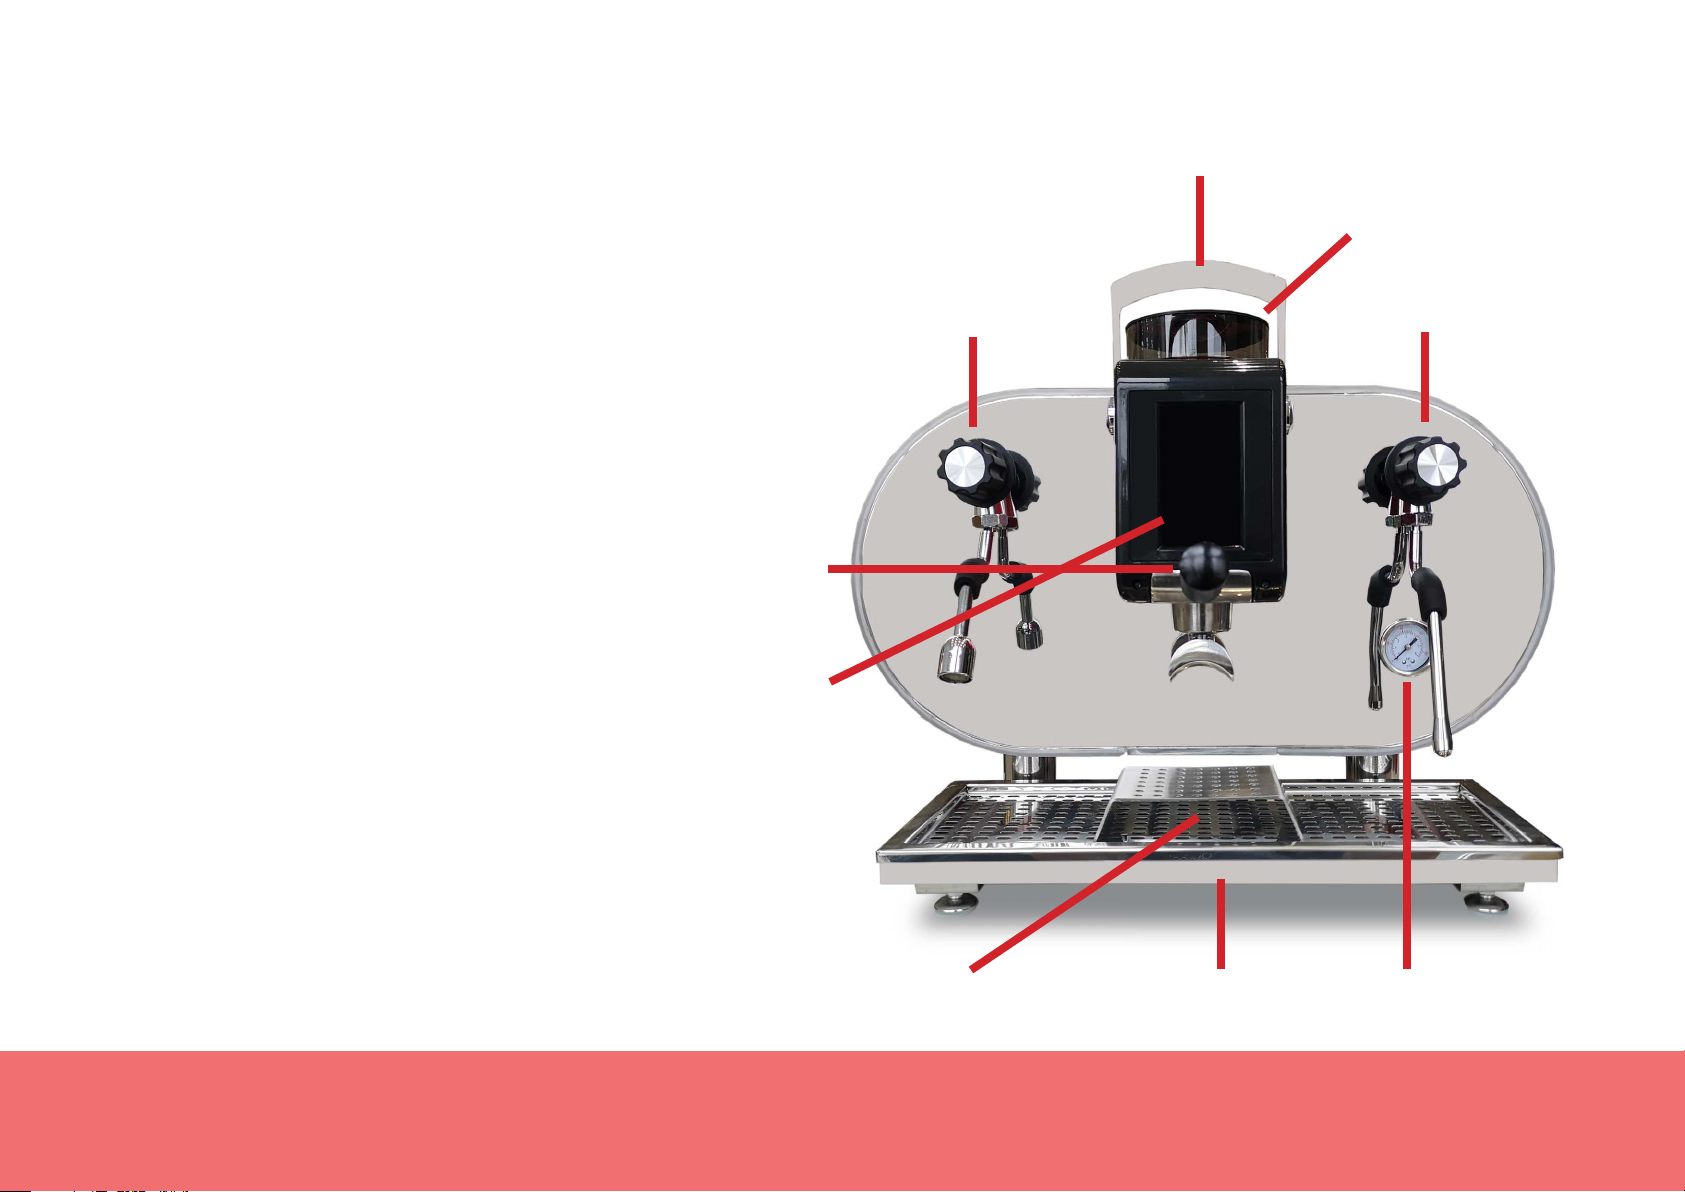
TAMPER LEVER
GRINDER HOPPER
CAFELLO
TUTTO
Quick Start Guide
The Tutto is designed for ease of use making it ideal
for busy locations where staff may not have the time
to focus on preparing coffee. The Tutto grinds, tamps
and brews!
GROUP HANDLE
DISPLAY SCREEN
HOT WATER TAP
STEAM TAP
DRIP TRAY PRESSURE GAUGECUP RAISER
1
INSTALLATION GUIDE
THINGS YOU WILL NEED
◊ 10 amp power supply (Standard wall outlet) to power machine
◊ Connection to Mains Plumbing OR a container of water for water supply
◊ Somewhere for waste water to go (Drainage system OR a container)
◊ 350kpa pressure limiting valve (Only if using Mains Plumbing for water supply)
◊ Water filter (Only if using Mains Plumbing for water supply) and a Filter head
◊ Two spanners for tightening connectors.
1. Start by carefully unpacking the box with your new Tutto inside. Place the Tutto on
a bench or where you wish to install it.
2. Next there is a CLEAR silicon hose with a threaded connector on it coming from
under the machine. If you are choosing to run the machine from a container of
water place this hose into that container.
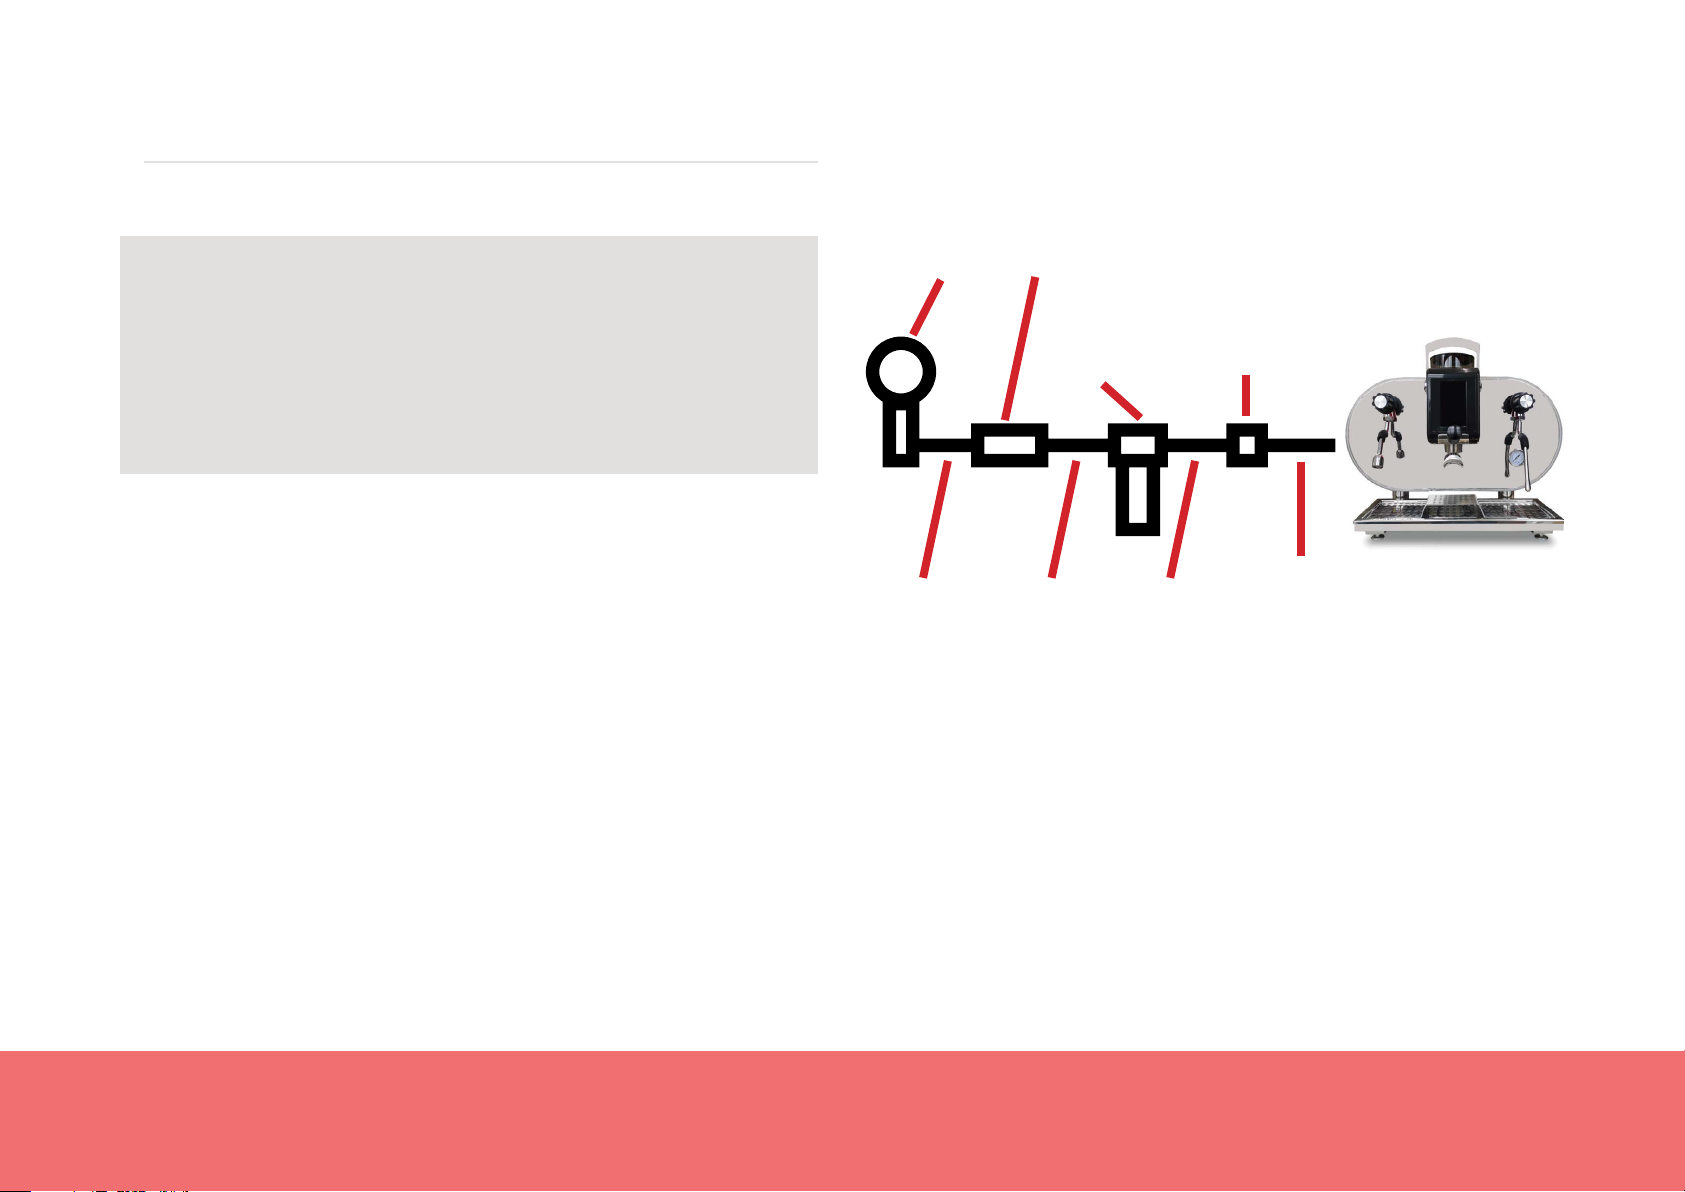
If you are connecting it to mains plumbing you firstly need to detach this hose from
the hose marked INLET PIPE (These two hoses should just pull apart). You can then
put a connector onto this hose and then use a braided hose to connect this to your
water filter head, then another hose to your PLV and another hose into your
plumbing system.
PLUMBING
SYSTEM
PLV
WATER
CONNECTOR
FILTER HEAD
INLET
BRAIDED
HOSE
BRAIDED
HOSE
BRAIDED
HOSE
PIPE
3. There is another RED hose coming from under the machine and this is where
the expansion water from the machine will come through. You can either place
this hose into a drainage pipe or just use a container or bucket (Dont forget to
empty it!)
4. Make sure you have turned the water ON going into the Inlet Pipe. You can
now plug your Tutto into the wall and switch it on. There is a main switch on the
right hand underside of the machine. You can now turn this ON.
Make sure you connect the machine to a valve or a tap so in the case of an
emergency you can switch the water off.
5. Your Tutto should now be on and should automatically start filling with water.
2

USING THE MACHINE
1. Open up the Steam tap and leave it open until steam starts to come from the
steam wand. You can now close the steam tap and watch the pressure gauge
which should rise to between 1.5 and 2 bar. The machine will now be hot and ready
to use.
2. Find the grinder hopper and place it into the grinder on the top part of the Tut-
to. Line the arrow on the hopper up with the arrow on the Tutto. You should now be
able to turn the hopper clockwise and lock it into place.
3. Make sure the Tamper Lever is in the UP position. You can now fill the hopper
with coffee beans. You can adjust how coarse the grind is by rotating the hopper
to the left or right. Only change the grind setting whilst the grinder is in
operation to avoid any coffee getting jammed.
4. Now slide the group handle into the front of the machine. You can now press
the Grind button to grind directly into the group handle. If you navigate to the
DOSAGE menu, you can adjust how long the grinder will run for.
DOSAGE MENU
SETTINGS
5. After you have ground the coffee you can now pull down on the Tamper lever
and leave it in the DOWN position.
6. Place a cup under the spouts of the group handle. You can now press either the
Small Cup or Large Cups buttons to start the coffee brewing. You can set either of
these buttons to your desired cup volume by navigating to the DOSAGE MENU.
7. After brewing has finished you can now use the Steam Wand to texture the milk
to your liking.
8. After you are finished push the lever back up into the UP position. You can now
pull the group handle out and empty the leftover coffee into the knock bin.
BREW
SMALL CUP
START
GRIND
BREW
LARGE CUP
3

SETTINGS MENU DOSAGE MENU
SET BOILER TEMP
SET LANGUAGE VIEW DATA
SET SMALL CUP DOSAGE
SET STAND BY TIME LIGHTS ON / OFF
TURN BOILER OFF
SET SCREENSAVER
SET LARGE CUP DOSAGE
SET GRIND TIME
4

TROUBLE SHOOTING
THE GRINDER. The grinder on your Tutto can sometimes build up with ground coffee which
can stop it from working properly. If the grinder sounds like it is struggling to move, start
by turning the grinder back to setting [1]. Press the grind button and let it run 3 times to
allow any built up coffee grounds to be pushed out.
Now with the grinder running again, turn the grinder back to being finer one step at a time
until you have reached your desired grind setting.
SETTING THE GRINDER. When setting the grind coarseness we find that setting [4] works
the best. This can sometimes change depending on what type of beans you are using.
Set your grind time to be from 6 - 9 seconds. If there is too much coffee in the basket the
tamper may not be engage properly. Do not force the tamper down.
Set the Small Cup Volume to 30 and the Large Cup Volume to 80.
5
 Loading...