

Tuscany Cs812 Owner's Manual

TM
Tuscany
" Value at its Finest"
USE AND CARE MANUAL
For Model CS812LP
Stop! Missing a part? DO NOT RETURN PRODUCT TO STORE
The store where you made the purchase does not stock
parts for this item. If you need parts, whether they are
missing or damaged, please call Customer Service at
Call us between 8:00 AM and 5:00 PM Eastern time, Monday through Friday
or email us at saleshelp@sureheat.com
FOR YOUR SAFETY:
1. Read this Manual before attempting to assemble or operate your grill.
2. Follow saftety instructions.
3. Check for leaks according to the directions in this Manual before operating your grill,
even if purchasing an assembled grill.
4. Keep this Manual for future reference.
5. Contact 1-800-229-5647 should you need assembly assistance or have any questions.
THIS GRILL IS FOR OUTDOOR USE ONLY.
If stored indoors, then detach and leave propane cylinder outside.
1-800-229-5647
General Safety Instructions
IMPORTANT SAFETY INFORMATION
- Read this manual carefully before using your grill to reduce the risk of fire, burn
hazard or other injury.
- Extreme care should be used because of the high temperatures produced by this
appliance. CHILDREN SHOULD NOT BE LEFT UNATTENDED IN AN AREA
WHERE THE GRILL IS BEING OPERATED.
- This appliance must be kept clear from combustible materials, gasoline or other flammable vapors and liquids. Do not allow
ammable materials to come in contact with grate, burner or hot surfaces.
- Use only outdoors and provide good ventilation to avoid carbon monoxide build-up which could result in injury or death.
- Do not repair or replace any part of this appliance unless it is specically recommended in this manual. A qualied service technician
should conduct all other service.
- Follow the installation and servicing instructions provided with this product. Have your grill installed by a qualied service technician.
- Locate the main gas supply valve so that you know how to shut the gas off to your grill.
- If you smell gas, make sure all gas connections are tight before operation. If you continue to smell gas call a qualied technician.
- When lighting a burner, always pay close attention to what you are doing and be certain you are pushing the igniter that lights the
burner you intend on using.
- Always keep your face and body as far away from the grill as possible when lighting to reduce the risk of burn.
- Extinguish all ames and do not smoke while engaging gas and igniting the grill.
- A minimum distance of at least 24" must be maintained from any combustible material on both sides and the back of the grill. Do not
place the grill under any overhead unprotected combustible construction.
RECOGNIZE SAFETY SYMBOLS, WORDS AND LABELS
WARNING
!
▲
DANGER
!
▲
DANGER
▲!
If you smell gas:
1. Shut off gas to the appliance
2. Extinguish any open ame
3. Open lid
4. If odor continues, keep away from the
appliance and immediately call your gas
supplier or your re department.
WARNING indicates a potentially hazardous situation which, if not
avoided, could result in death or serious injury.
NOTE indicates an important piece of information that needs to be
observed to ensure the proper operation of your grill.
WARNING
▲!
1. Do not store or use gasoline or other
ammable liquids or vapors in the vicinity
of this or any other appliance.
2. An LP cylinder not connected for use
shall not be stored in the vicinity of this
or any other appliance.
INSTALLER: Please retain these instructions with the owner so that they may maintain them for
future reference.
2

General Safety Instructions
!
WARNING
▲
Do not use the rotisserie in the rain.
!
WARNING
▲
Electrical Grounding Instructions
This appliance (rotisserie motor) is equipped with
a three-prong (grounding) plug for your protection
against shock hazard and should be plugged
directly into a properly grounded three-prong
receptacle. Do not cut or remove the grounding
prong from this plug.
!
WARNING
▲
Keep any electrical supply cords and the fuel
supply hose away from any heated surfaces.
!
WARNING
▲
NOTE: Do Not operate the main burners and
infrared back burner at the same time. This can
cause warping of the roll top grill hood.
!
WARNING
▲
Do not use the grill in garages, breezeways, sheds
or any enclosed area. Never operate the grill
in enclosed areas as this could lead to a carbon
monoxide buildup, which could result in injury
or death. Place the grill on a level surface. Avoid
moving the grill while it is in operation.
!
WARNING
▲
Always have a qualied service technician perform
difcult conversions or modications.
!
WARNING
▲
The Spare L.P. Gas Tank Barrier must be installed
to prevent storage of spare L.P. Gas Tanks. Failure
to comply with these instructions could result in
a re or explosion that could cause serious bodily
injury, death, or property damage.
FOR YOUR SAFETY
If you smell gas:
1. Shut off gas to the appliance.
2. Extinguish any open ames.
3. Open grill hood.
4. If odor continues, immediately call your
gas supplier and local Fire Dept.
!
WARNING
▲
CALIFORNIA PROPOSITION 65 -WARNING:
The Burning of gas cooking fuels generates some
by products which are on the list of substances
which are known by the State of California to
cause cancer or reproductive harm. California
law requires businesses to warn customers of
potential exposure to such substances. To minimize
exposure to these substances, always operate this
unit according to the use and care manual, provide
good ventilation when cooking with gas.
!
WARNING
▲
This appliance is not intended to be installed in or
on recreational vehicles or boats.
!
WARNING
▲
Never attach an unregulated gas line to the
appliance. Connection to an unregulated gas line
can cause excessive heat or re.
TESTED IN ACCORDANCE WITH ANSI
Z21.58b-2006/CSA 1.6b-2006 STANDARD FOR
OUTDOOR COOKING GAS APPLIANCES.
THIS GRILL IS FOR OUTDOOR USE ONLY.
Installation must conform with local codes, this
unit should be installed in accordance with the
National Fuel Gas Code No. Z223.1/NFPA 54,
National Gas and Propane Installation
Code, CSA B149.1 or Propane Storage and
Handling Code, B149.2
FOR YOUR SAFETY
DO NOT store or use gasoline or other ammable
vapors and liquids in the vicinity of this or any
other appliance.
An LP cylinder not connected for use shall not be
stored in the vicinity of this or any other appliance.
!
WARNING
▲
DO NOT try lighting this appliance without
reading the “ LIGHTING INSTRUCTIONS”
section of this manual.
FOR OUTDOOR USE ONLY
3
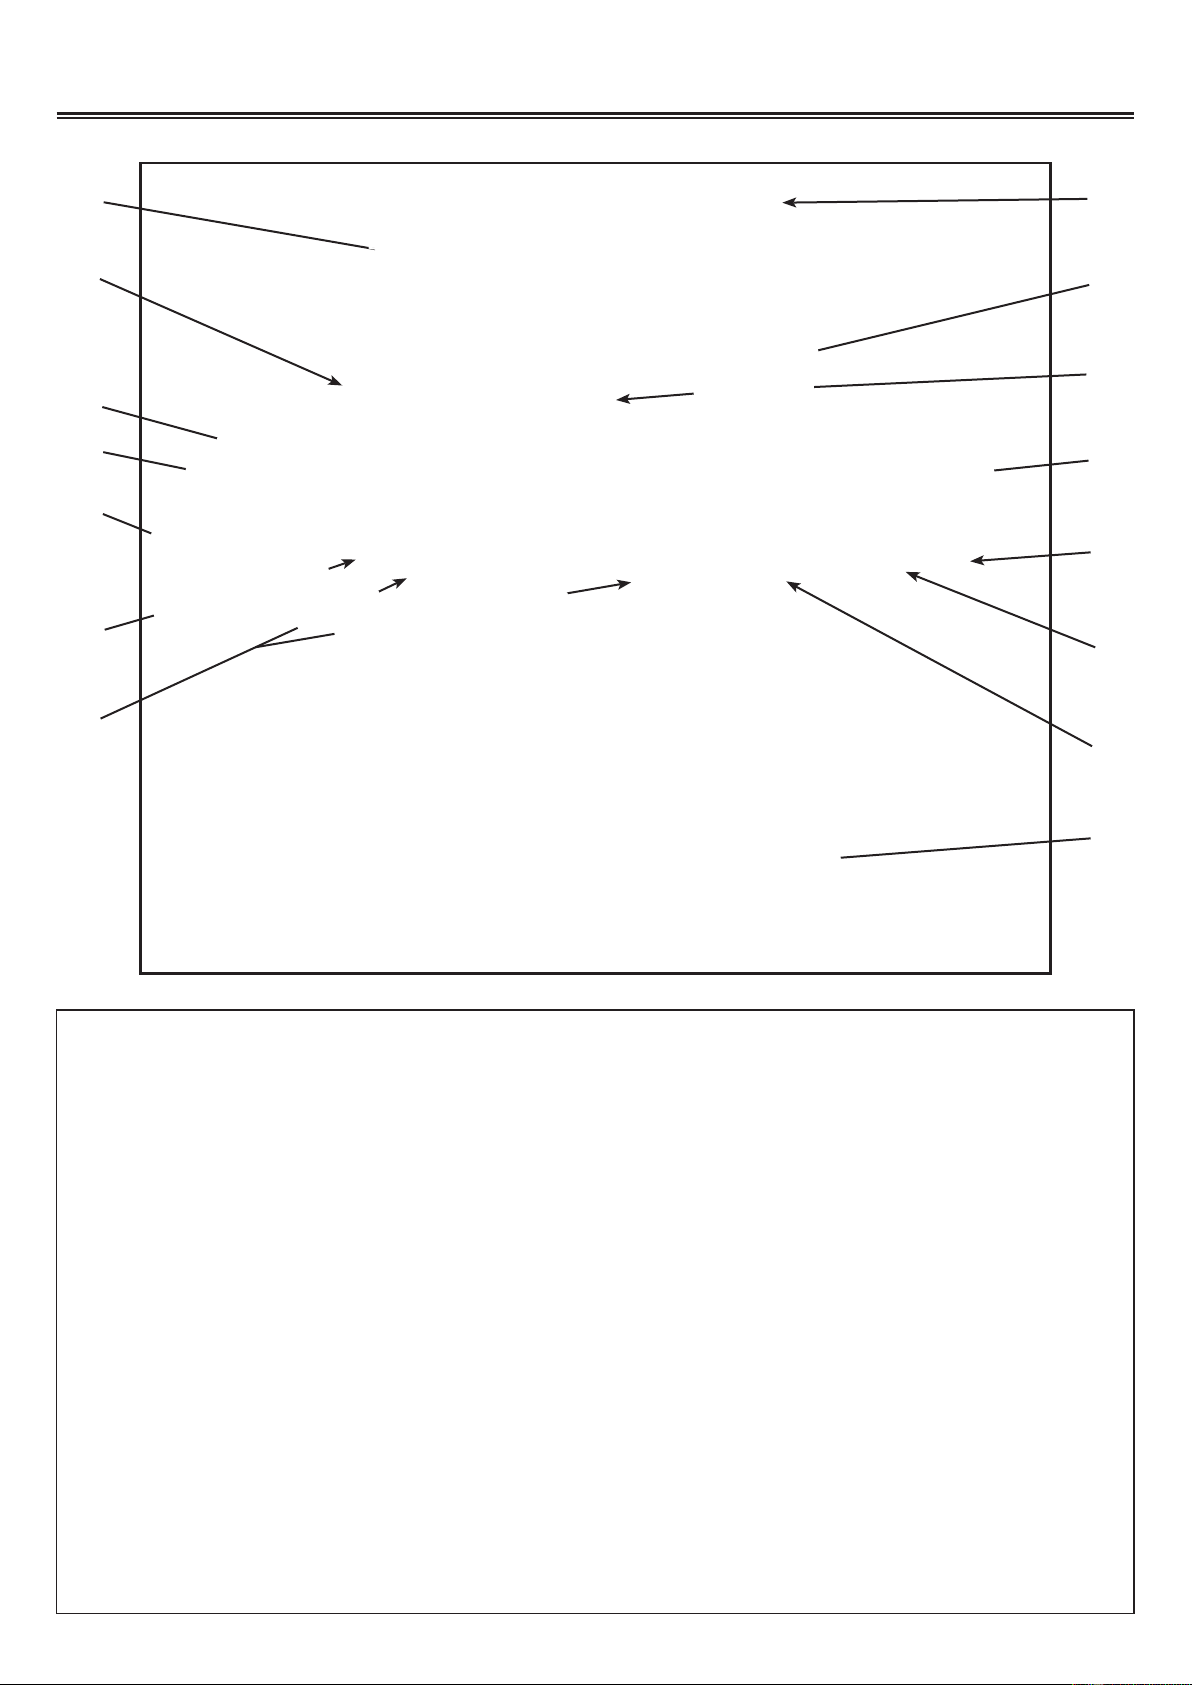
Grill Features
1
2
3
4
5
6
7
8
9
10
11
12
13
14
1. Roll top grill hood
2. Rotisserie kit
3. Grilling/cooking surface
4. Side shelf
5. Towel bar/utensil hanger
6. Control knob: Rear infrared burner
15
9. Bread warming rack
10. Rear Infrared burner
11. Side burner
12. Control Knob: Side burner
13. Electronic igniter: main burners, side
burner, rear infrared burner and searing
burner
7. Control knobs: Main burners
8. Hood Handle
14. Control Knob: Searing burner
15. Cart with doors
4
Getting Started
Self-tapping screw x 1
Phillips pan head screw x 2
Getting Started
1. Please follow the steps in the order that they are presented.
2. Assemble the grill where you plan to use it.
3. You may want to place an old towel or cloth at the assembly site to prevent nuts and bolts from
becoming lost.
4. Have a friend help. An assistant can make the assembly easier by holding the parts in place
while you fasten the nuts and bolts.
5. To be ready to barbecue immediately, have the L.P. gas cylinder filled by an authorized L.P.
dealer or cylinder exchange center.
Unpacking the Grill Parts
1. Remove and set aside all inner boxes and parts from the master carton.
2. Remove and set aside all wrapping paper and additional packaging from the parts.
3. Do not destroy carton or packing until your grill is completely assembled and operating to your
satisfaction.
Tools needed to assemble grill:
Phillips screwdriver
Adjustable wrench
1/2” wrench or socket
1/4” nut driver or socket
TOOLS NOT INCLUDED
WARNING
▲!
Failure to follow all Danger, Warnings,
and For Your Safety notices in this
Grill Guide may result in serious bodily
injury, death, in a fire or an explosion
causing damage to property.
DANGER
▲!
Perform a Gas Leak Test
explained later in this Grill Guide
before operating your grill.
5
Grill Assembly
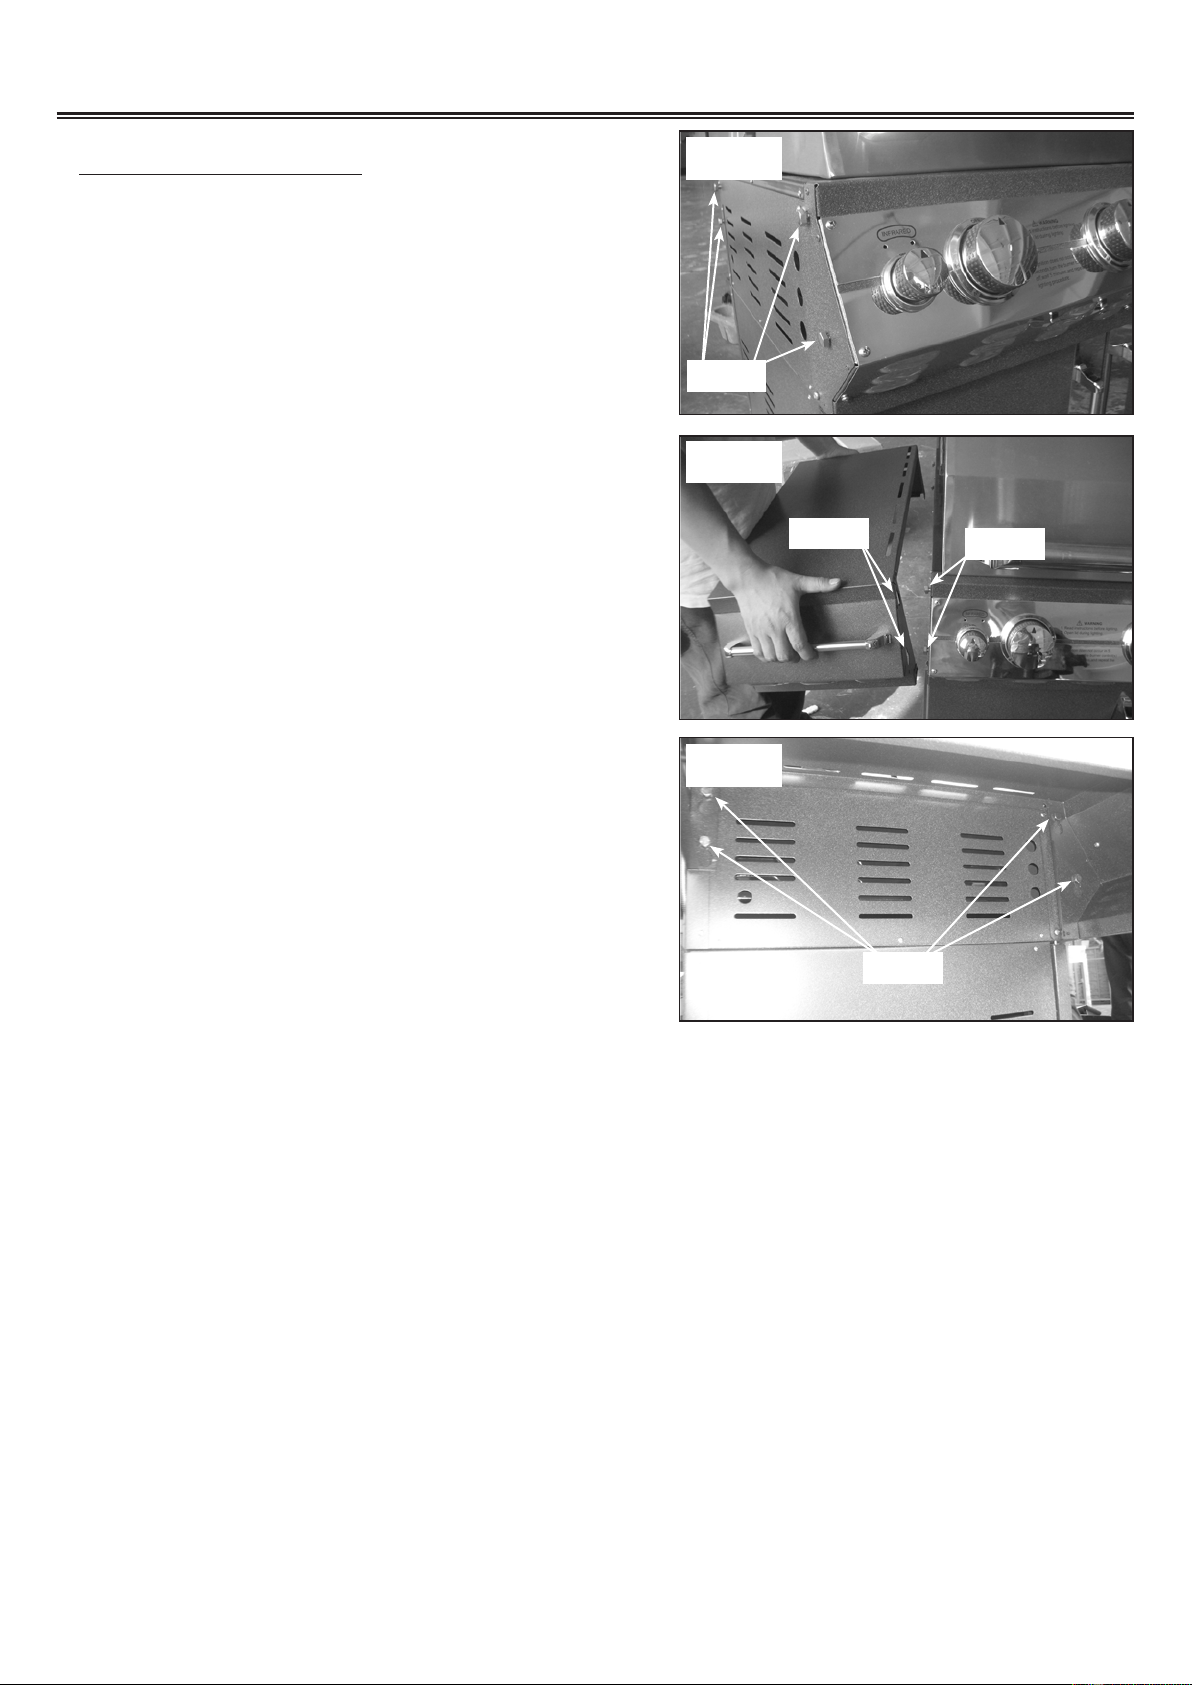
LEFT SHELF ASSEMBLY
1. Loosen the four hex head bolts on the side of the
grill by approximately 1/4". (See Fig. 1)
2. Attach the left shelf by inserting the four bolt heads
into the holes on the left shelf. (See Fig. 2)
Fig. 1
Bolts
Fig. 2
Holes
Bolts
3. Tighten the four bolts to secure the shelf. (See Fig.
3)
Fig. 3
Bolts
6
Grill Assembly
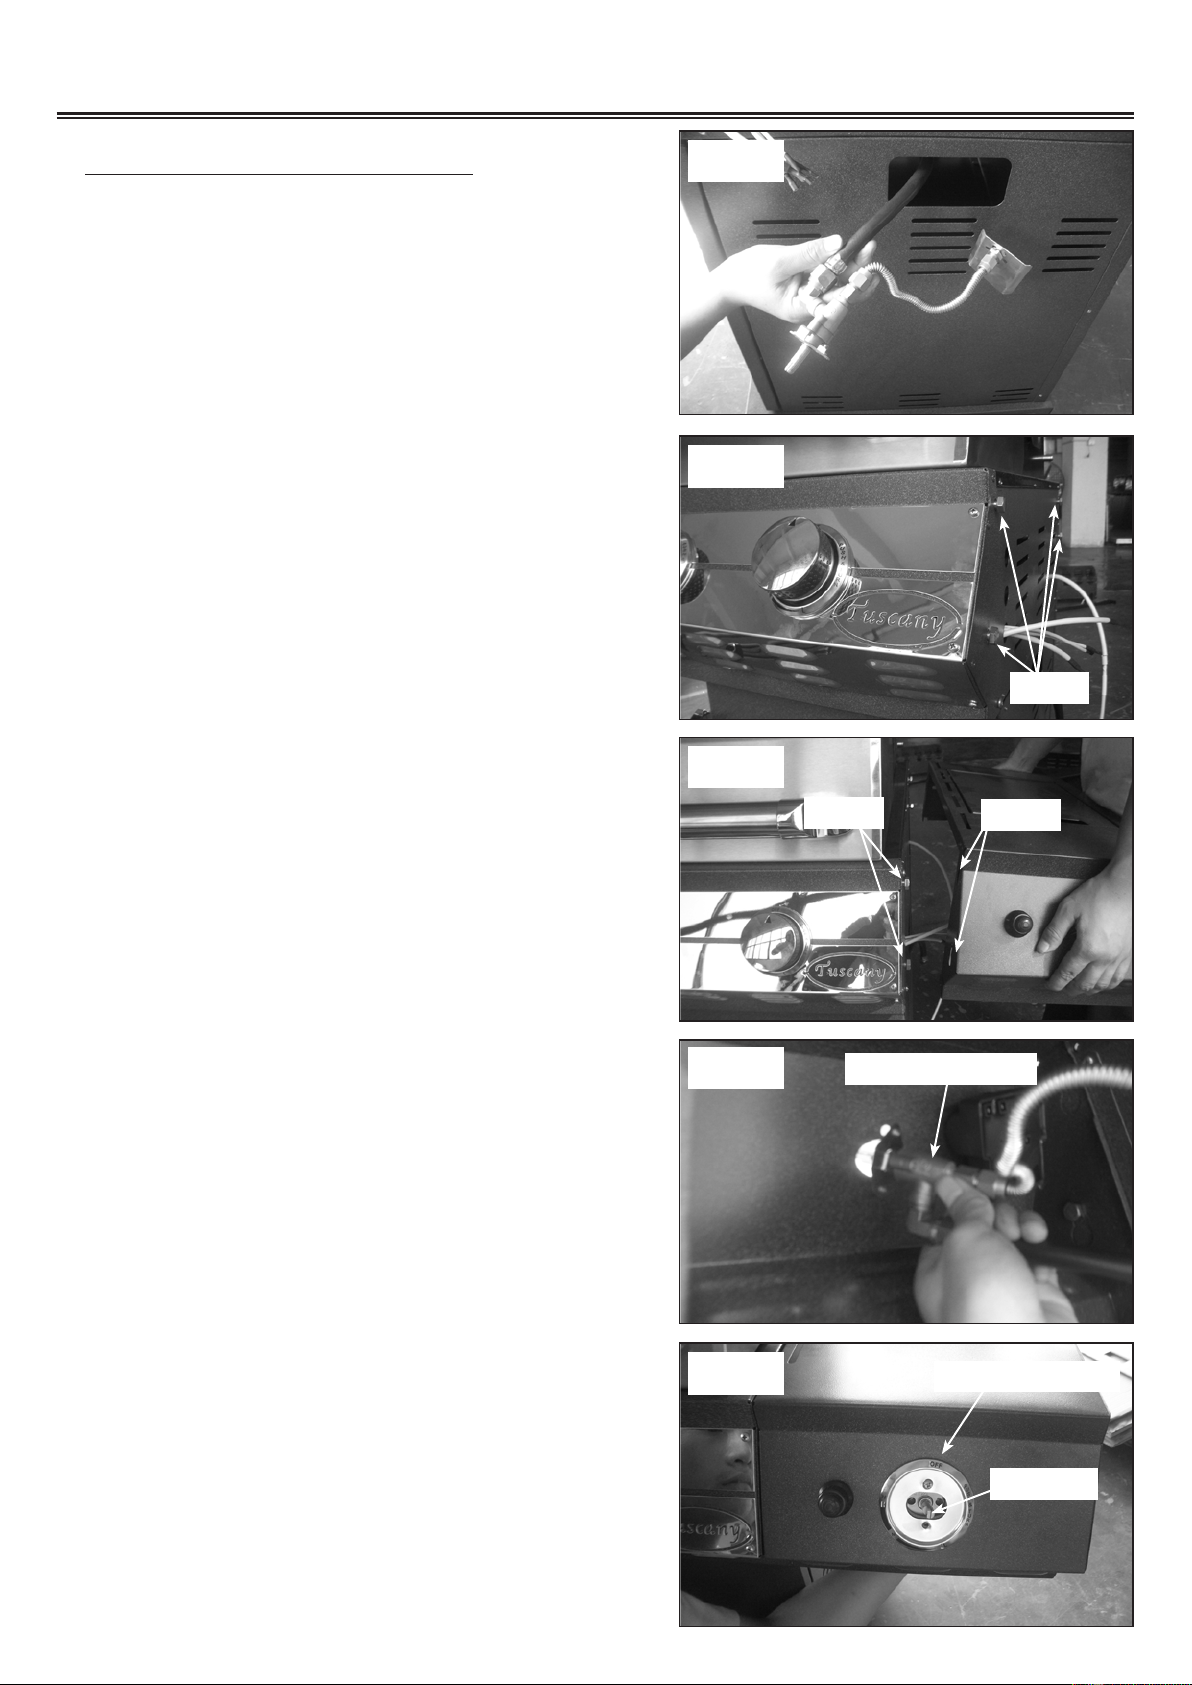
SIDE BURNER PARTS ASSEMBLY
1. Remove side burner valve assembly from
packaging. Feed the valve assembly through the
large cut out in the side of the cart. (See Fig. 4)
2. Loosen the four hex head bolts on the side of the
grill by approximately 1/4". (See Fig. 5)
Fig. 4
Fig. 5
Bolts
3. Attach the side burner by inserting the four bolt
heads into the holes on the side burner. (See Fig. 6)
Tighten the four bolts to secure the side burner (See
Fig. 3 on page 6)
4. Slide the side burner valve stem through the center
hole in the front of the shelf. (See Fig. 7)
Fig. 6
Fig. 7
Bolts
Side burner valve
Holes
5. Insert one valve screw through the bezel and in to
the side burner valve and tighten. Next, install the
second valve screw through the bezel and tighten.
Make sure the bezel is installed with the "OFF"
position facing up. (See Fig. 8)
Install control knob, making sure to line up the at
side of the valve stem with the at side of the knob
stem.
7
Fig. 8
"OFF" on the bezel
vavle stem
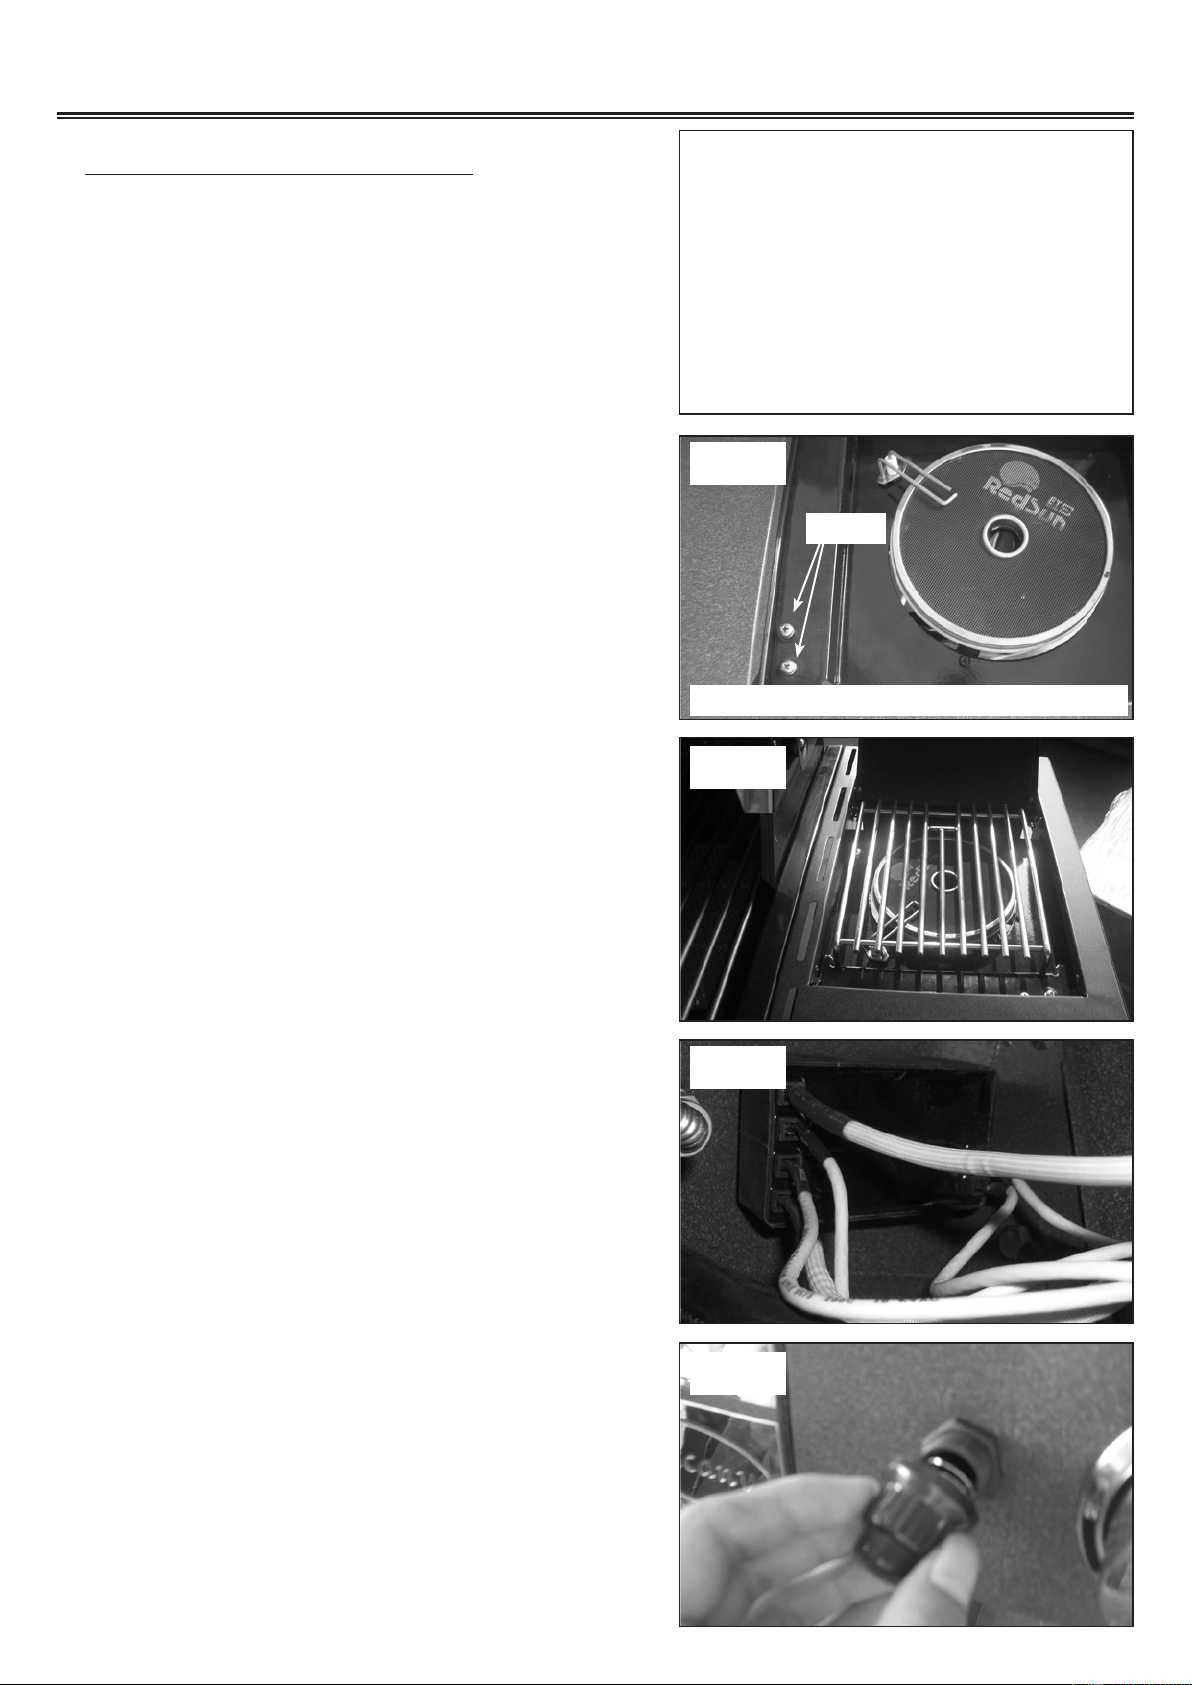
Grill Assembly
SIDE BURNER PARTS ASSEMBLY
6. Remove the two phillips pan head M5 x 10 screws
to from the orifice bracket, then hold the orifice
bracket, make sure the orice goes into the center
hole on the side burner bracket. (See Fig. 9)
7. Use two screws remvoed in step 6 to secure the
orice backet on the side burner tray. (See Fig. 10)
Note: Add lock washer when installing the screws in
position.
Fig. 9
Orice bracket
Side burner bracket
Orice
Fig. 10
Screws
Orice bracket underneath the side burner tay
8. Place the side burner grate in position. (See Fig.
11)
Note: Remove all the tape before using the grill.
9. Attach the igniter wires to the igniter terminals. It
does not matter which wire goes to which terminal
on the igniter module. (See Fig. 12)
Fig. 11
Fig. 12
10.Unscrew the igniter push button from the igniter
module, install the "AA" battery with positive end
facing out. Screw the push button back onto the
igniter. (See Fig. 13)
8
Fig. 13
 Loading...