

Turtle Tough TT Series User Manual

USER MANUAL
TT SERIES INTELLIGENT
THERMAL IMAGING CAMERA
turtletoughsensors.com
Thank you for choosing our product. Please thoroughly go through the user manual
before operaon and keep it well for future reference. All photo’s in the manual
are for reference only and specicaons are subject to the phisycal product.

The product is a handheld thermal infrared imager for temperature measurement.
It is designed with 110592/19200 eecve IR pixels; and is congured with laser,
illuminang lights and visible light of 5 mega-pixel. The product can be connected
to PCs, SD cards, mobile devices (IPHONE or Android devices), HDMI displays
etc., meeng requirements for various applicaons.
IMPORTANT
This is a general manual covering mulple models of thermal imagers from a
common product line, so some funcons and descripons in the manual may not
apply to your thermal imagers.
USER MANUAL
TT SERIES INTELLIGENT

Please always follow the following precauons strictly:
• Keep the device as stable as possible to prevent shaking violently.
• Don’t use the device at operang temperatures not allowed nor place it in an
environment at a storage temperature not allowed.
• Do not align the device with strong thermal emiers, such as the sun,
lasers and spot welders.
• Don’t expose the device in a dusty or moist environment. Prevent water
from splashing onto the device when using it in an environment with water.
Cover the lens when not using the device.
• Place the device and all its accessories into a special packing box when not
using it.
• Do not block any hole on the device.
• Do not knock at, throw or vibrate the device and its accessories so as to
prevent damages.
• Please don’t disassemble the device so as to prevent it from being damaged
possibly and you from losing warranty.
• Don’t use the TF card for other purposes.
• Don’t use the device in an environment exceeding its operang temperature so
as to prevent possible damages.
• Do not apply dissolvable or similar liquid to the device and cables so as to
prevent possible damages.
• The device is powered by a rechargeable Lithium-ion baery so users must
follow the following precauons strictly in order to use it safely:
• Never try to open or dismantle the baery.
• Don’t place the baery in a high temperature environment or nearby a high
temperature object.
• Don’t short-circuit the baery.
• Don’t put the baery in a moist environment or in the water.
• Once the liquid leaked from the baery enters eyes, ush the eyes with clear
water immediately and take corresponding medical cares.
• Please charge the baery as introduced in the manual and follow the charging
steps and precauons. Wrong charging may heat or damage the baery or
even cause injuries.
• Pull out the baery if the device will not be used for a long me.
• Wipe the device as described below:
• Non-opcal surfaces: Use clean and so cloth to wipe non-opcal surfaces of
the thermal imager when necessary.
• Opcal surfaces: Please avoid staining the opcal surface of lens when
using the thermal imager, especially avoid touching the lens with hands since
the sweat on the hands may leave traces on the lens and corrode the opcal
coang on the lens surface. When the opcal lens surface is stained, wipe it
with special lens wiping paper.
PRECAUTIONS

Precauons for use of baeries:
• The baery can be charged repeatedly. However, the baery is a vulnerable
part. If standby me of the device is largely shortened, please replace its
baery with an original one provided by the company.
• If the device operates for a long me especially at high temperatures, its
surface will warm up normally. When it’s hot, please stop charging it and
move it to the shade. Please avoid touching hot surfaces for a long me.
• When charging the device, it’s suggested to use original baeries and
charge cables provided by the company.
• Baery charging me varies with temperatures and its use.
• When the baery level is low, the system will give a low baery level
prompt.
• When the baery level is too low, the system will be turned o
automacally.
• If the device gives no response when the power buon is pressed, the
baery has been run out and the device can be launched only aer being
charged with an original charger for more than 10 minutes.
• When the baery is charged, the side indicator light on the device will
always be red.
• When the baery is fully charged, the side indicator light on the device will
turn green from red, indicang that it’s not necessary to chargethe baery
any more.
PRECAUTIONS
Chapter 1 List of Items.................................................................. 2
Chapter 2 List of Product Components........................................ 4
Chapter 3 A Glance at Functional Areas of the Device................ 8
A Instruction to each functional area............................ 8
B Gallery........................................................................ 9
C Short-cut menu......................................................... 10
Chapter 4 Observation.................................................................. 14
Image mode switch....................................................... 14
Temperature measurement........................................... 15
E-zoom.......................................................................... 16
Chapter 5 Shooting....................................................................... 18
Picture shooting.......................................................... 18
Adding notes.......................................................... 19
Adding shooting notes........................................... 20
Adding text note.................................................... 21
Adding audio note................................................. 21
Contents
PRECAUTIONS
(充电指示灯)
•When the battery is charged, the side indicator light on the device
•When the battery is fully charged, the side indicator light on the
未充满 已充满
Not fully
charged
Fully charged
(Charging indicator light)

Chapter 1 List of items 8
Chapter 2 List of product components 10
Chapter 3 A Glance at Funconal Areas of the Device 13
A Instrucon to each funconal area 14
B Gallery 15
C Short-cut menu 16
Chapter 4 Observaon 17
Image mode switch 18
Temperature measurement 19
E-zoom 20
Chapter 5 Shoong 21
Picture shoong 22
Adding notes 23
Adding shoong notes 24
Adding text note 25
Adding audio note 25
Adding gra note 26
Video recording 27
Real-me analysis 28
Adding/removing the analysis object 28
Resizing the analysis object 29
Palee switching 30
Manual brightness/contrast control 31
Temperature dierence analysis 32
File browsing 33
Picture analysis 34
Picture eding 34
Picture zoom-in/-out 35
PDF creaon & prinng 36
Video replay 37
Isotherm 38
Down isotherm 38
Up isotherm 38
Outside-the-range isotherm 38
Customizable emissivity 39
CONTENTS

Chapter 6
Global Sengs
40
System sengs 41
Central temperature cursor 41
Temperature measurement range 41
Switch of temperature units 41
Switch of distance units 41
Alarm sengs 42
High temperature alarm 42
Low temperature alarm 43
Brightness 43
Scheduled shutdown 43
Scheduled sleep 44
Volume 44
Vibraon feedback 44
Automac lens recognion 45
Disabling automac lens recognion 45
Full Temperature Marker 45
Color of isotherm 45
Local sengs 46
photo seng 46
Report seng 46
Date/Time 46
Languages 47
Watermark sengs 47
Connecon sengs 48
WIFI switch 48
WIFI hotspot conguraon 49
About upgrade 50
TF card upgrade 50
Memory space 50
Formang the TF card 51
Restoring the default sengs 51
CONTENTS

Chapter 7
Connecon with External Device 52
Port Connecon 53
Mini HDMI Interface 53
USB Interface 53
Used along with Applicaon Soware 54
Installing Memory Card and Lens 56
Installing Memory Card 56
Removing Memory Card 57
Installing Oponal Lens 58
Installing High-temperature Lens 59
External Connecon 60
Wireless AP Seng 60
Latest version IOS/Android Acquisions 60
Chapter 8 Troubleshoong Guide
61
CONTENTS

Chapter 1
List of Items
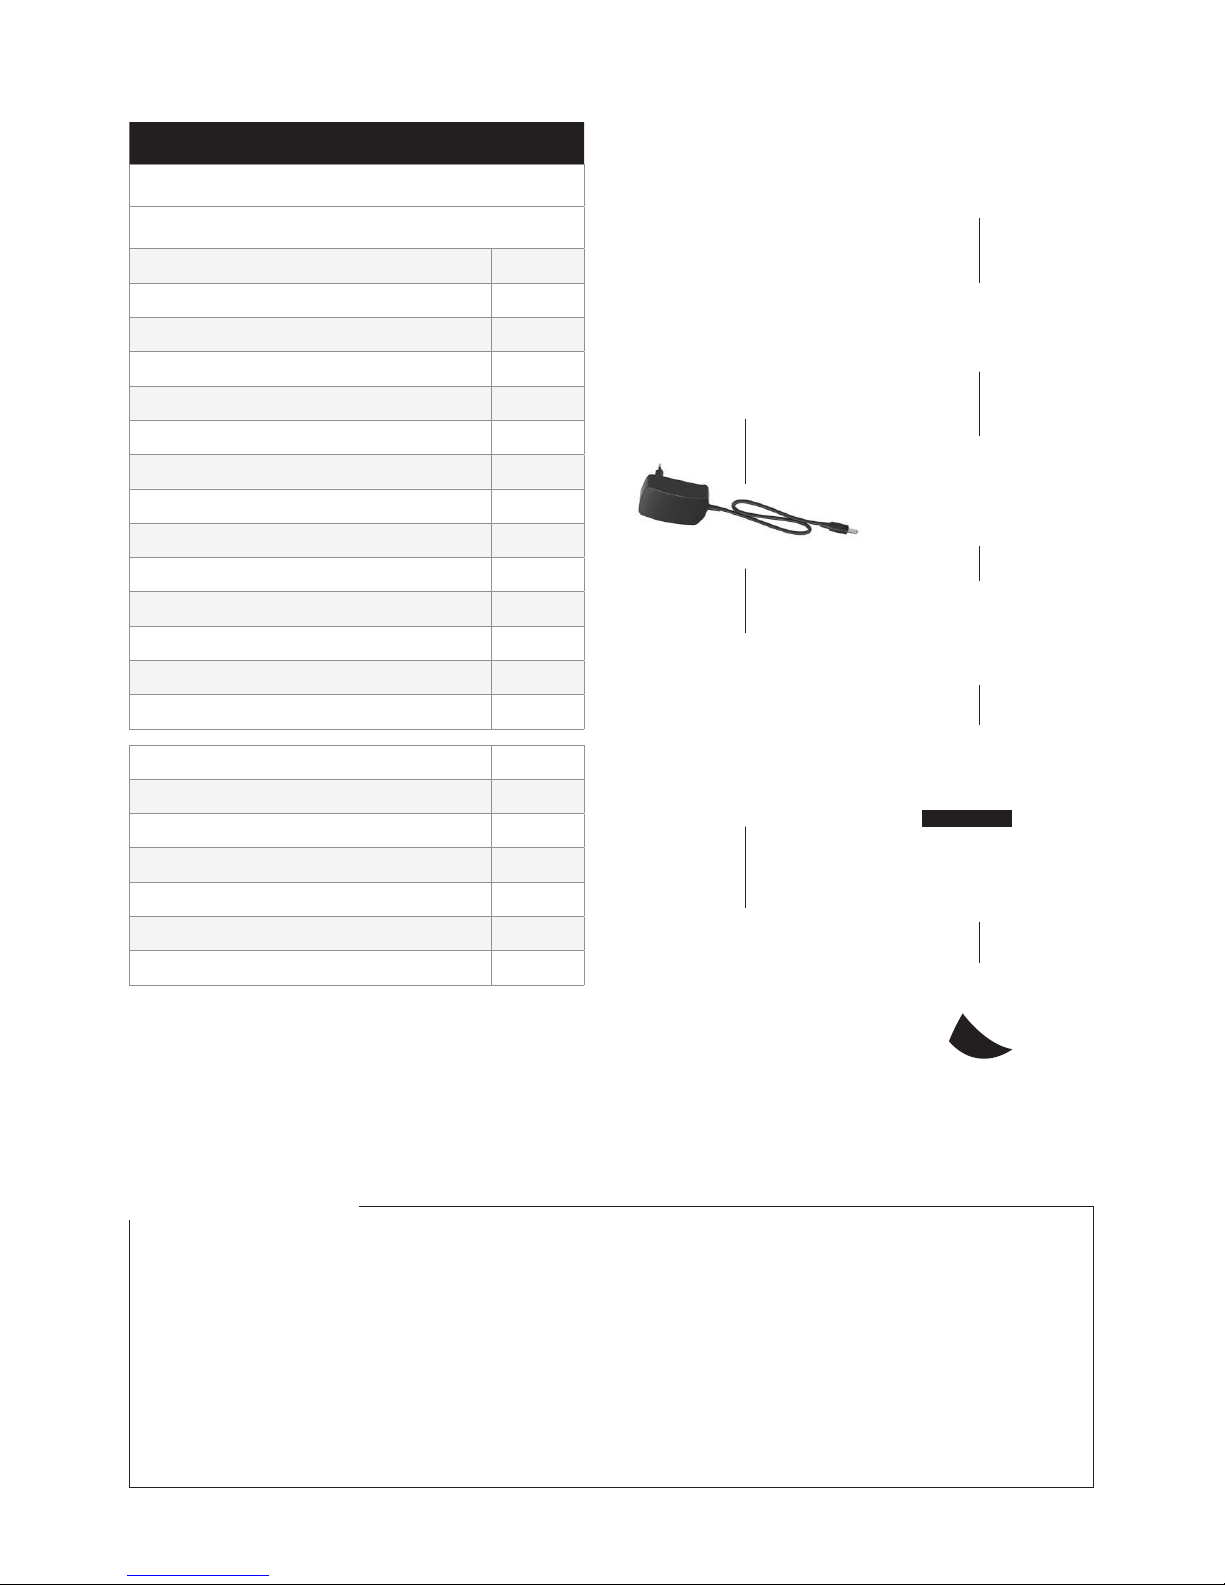
Standard accessories:
Thermal imager
Lithium baery (1)
Adapter (including an adapter plug)
USB cable
Wristband
HDMI connecng line
Quick operaon guide
Specicaon
Compact disk
List of accessories
TF card (16GB)
Oponal items:
Lithium baery
Portable package
Charging dock
Sunshade
Li-ion Battery
HDMI Cable (2m)
USB Cable (2m)
Wrist Strap
CTP Glove Set
TF Card(16G)
User Manual
Quick Start Guide
Accessories List Card
Product CD
Camera Pouch
Charging Dock
Bluetooth Headset
D Series Intelligent Thermographic IR Camera
Copyright
© 2017, Wuhan Guide
Sensmart Tech Co., Ltd.
Li-ion Battery
HDMI Cable (2m)
Wrist Strap
CTP Glove Set
User Manual
Quick Start Guide
Product CD
Camera Pouch
Camera Pouch
HDMI Cable (2m)
USB Cable (2m)
CTP Glove Set
TF Card(16G)
Quick Start Guide
Accessories List Card
Charging Dock
USB Cable (2m)
TF Card(16G)
Li-ion Baery
5 / 8 www.guideir.com
Copyright
© 2017, Wuhan Guide
Sensmart Tech Co., Ltd.
Li-ion Battery
Wrist Strap
User Manual
Product CD
Sunshade
OPTIONAL ACCESORIES
LIST OF ITEMS ACCESORIES
Shipping Content Qty
Infrared camera with lens Infrared
Standard accessories
Li-ion Baery x1
Power Adapter x1
Adapter Plug x1
Wrist Strap x1
USB Cable x1
HDMI Cable x1
Quick Start Guide x1
User Manual x1
Product CD x1
Accessories List Card x1
CTP Gloves Set x1
TF Card (16GB x1
Charging Dock (only for TT384A) x1
Tripod Mount (only for TT384A) x1
Oponal accessories
Li-ion Baery
Camera Pouch
Sunshade
Charging Dock
Tripod Mount
Bluetooth Headset (only for D384A)
Shipping Dimensions: 470mm×360mm×210mm
Infrared camera with lens
Standard accessories
Li-ion Battery ×2
Power Adapter ×1
Adapter Plug ×1
Wrist Strap ×1
USB Cable ×1
HDMI Cable ×1
Quick Start Guide ×1
User Manual ×1
Product CD ×1
Accessories List Card ×1
CTP Gloves Set ×1
TF Card(16GB) ×1
Charging Dock(only for D384A) ×1
Tripod Mount (only for D384A) ×1
Optional accessories
Li-ion Battery
Camera Pouch
Sunshade
Charging Dock
Tripod Mount
Bluetooth Headset (only for D384A)
470mm×360mm×210mm
Power Adapter
Adapter Plugs
Infrared Camera with lens
Adapter Plugs
Adapter Plugs
Product Cd
Power Adapter
HDMI Cable (2m)
USB Cable (2m)
Li-ion Baery
TF Card
User Manual
Li-ion Battery
HDMI Cable (2m)
USB Cable (2m)
Wrist Strap
CTP Glove Set
TF Card(16G)
Li-ion Battery
HDMI Cable (2m)
USB Cable (2m)
Wrist Strap
CTP Glove Set
TF Card(16G)
User Manual
Quick Start Guide
Accessories List Card
Li-ion Battery
HDMI Cable (2m)
USB Cable (2m)
5 / 8 www.guideir.com
Copyright
© 2017, Wuhan Guide
Sensmart Tech Co., Ltd.
Li-ion Battery
Wrist Strap
User Manual
Product CD
Sunshade
USER MANUAL

Chapter 2
List of Product Components

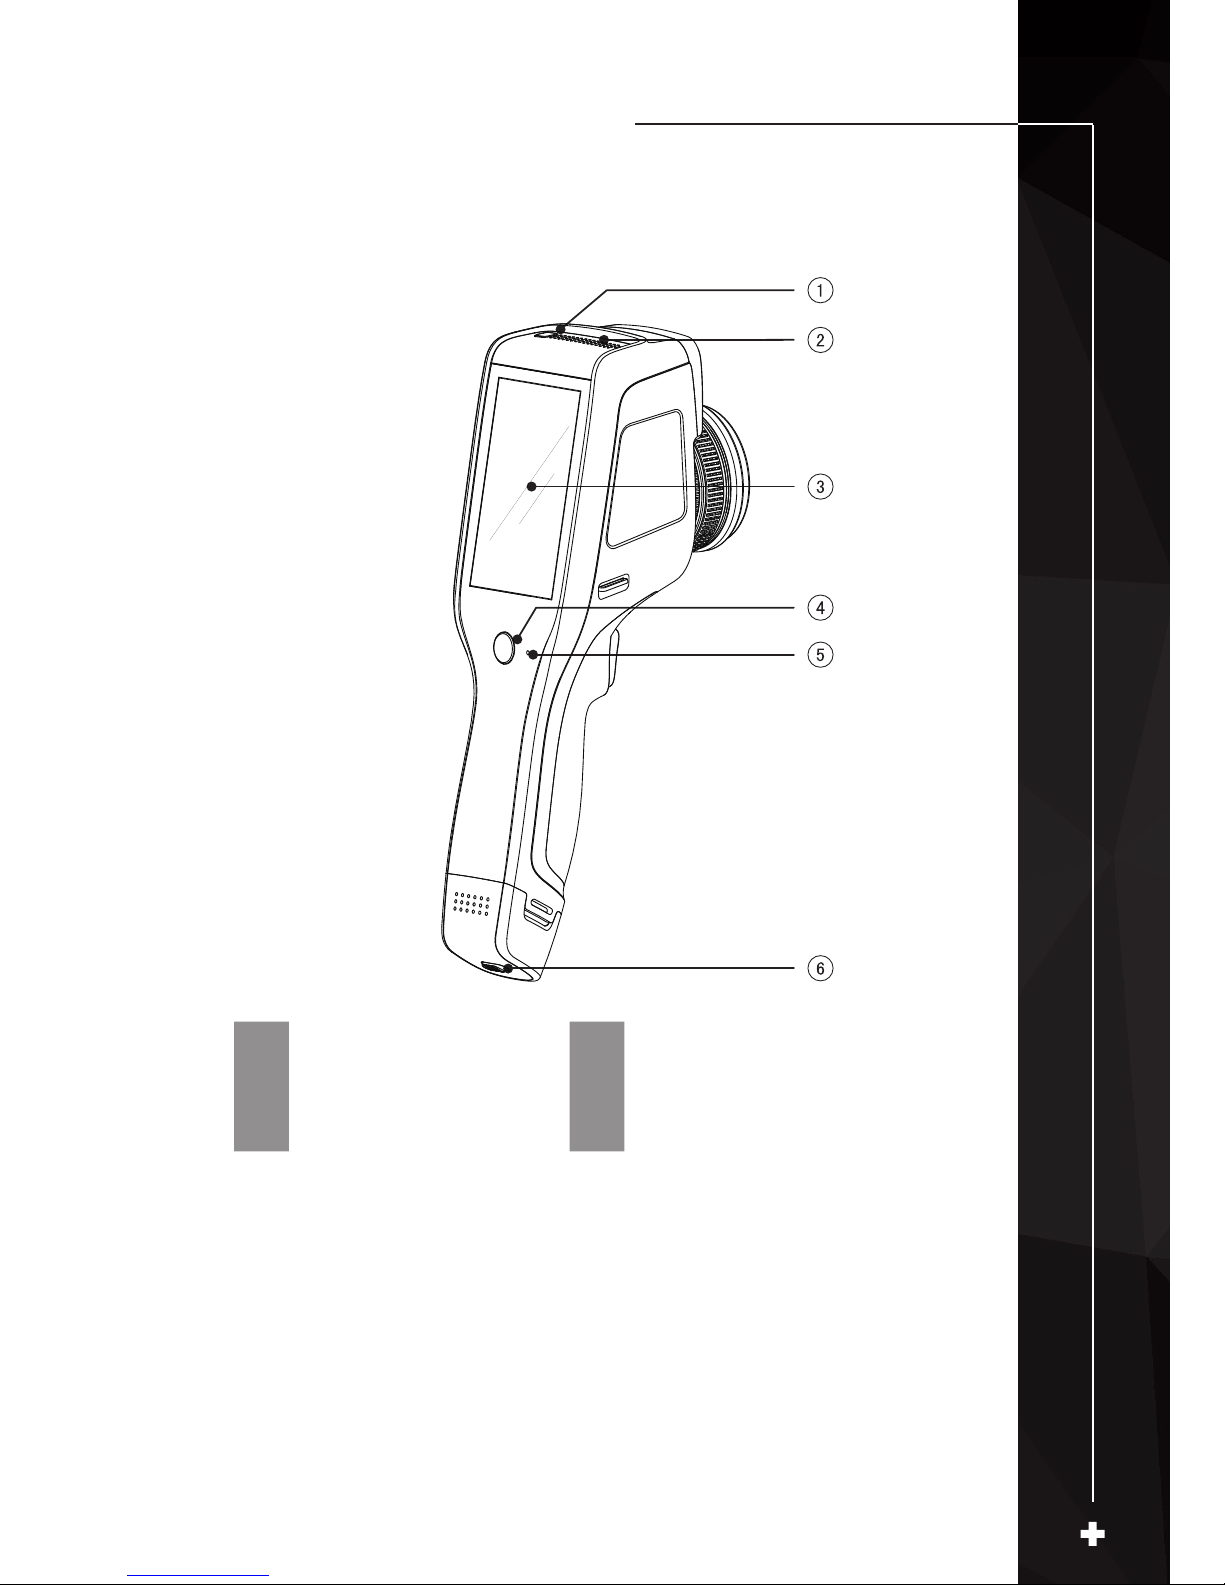
List of Product Components
2
1 Illuminating light 8 Battery release key
2 Laser 9 Micro USB terminal
3 Visible light 10 TF card slot
4 Quick lens release key 11 Micro HDMI output terminal
5 Lens 12 Power supply terminal
6 Wrist belt buckle 13 Indicator light
7 Shooting key
1 Launch button 4 Return key
2 Loudspeaker 5 Microphone
3 LCD display screen 6 Battery lock
List of Product Components List of Product Components
List of Product Components
2
1 Launch button 4 Return key
2 Loudspeaker 5 Microphone
3 LCD display screen 6 Battery lock

Chapter 3
A Glance at the Functional Areas
of the Device
Instrucon to each funconal area
Gallery
Short-cut menu
A Glance at Functional Areas of the Device
3
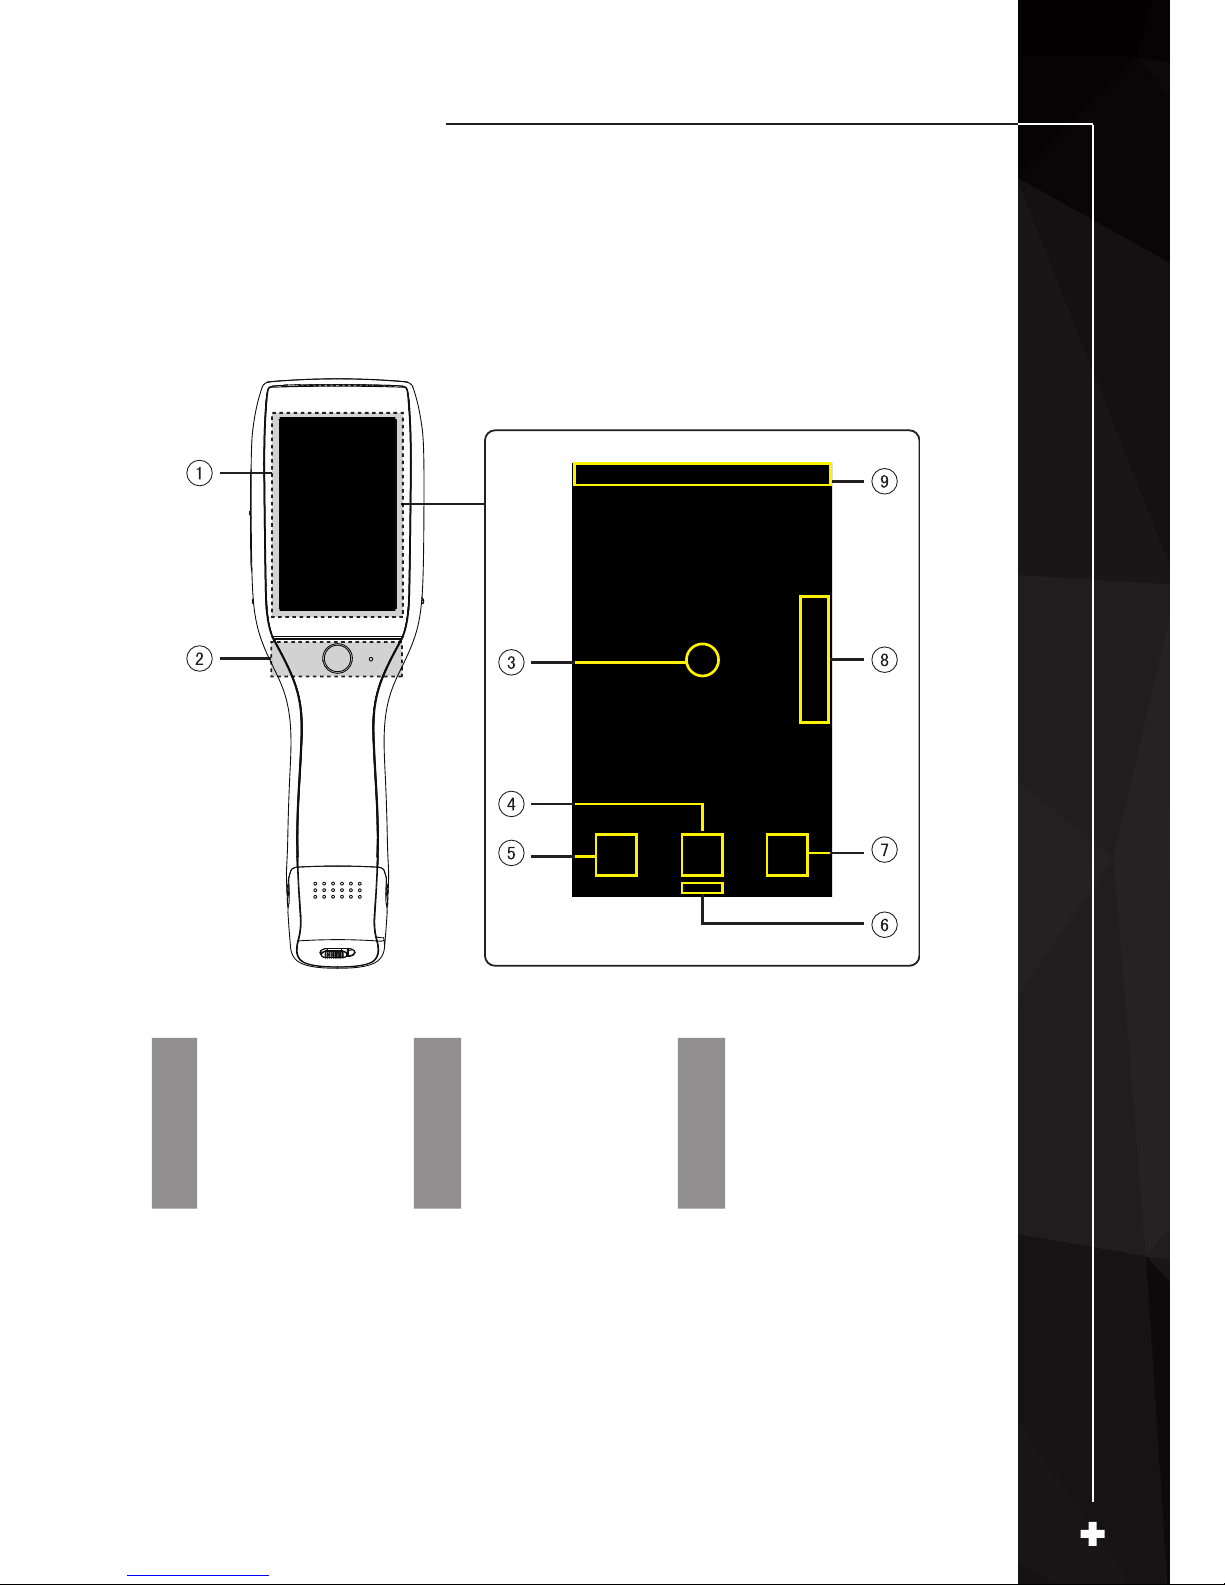
A. Instruction to each functional area: B. Gallery:
1 Display area 4 Gallery 7
Enter real-time
editing
2 Control area 5 System settings 8 Palette
3
Central point
cursor
6
Short-cut menu
button
9
Status identication
area
1. Tap the [Gallery] button in the lower part of the main interface to enter the
picture browsing interface and then double-tap any shot picture to view it.
2. Tap the [Edit] button at the bottom to enter the analysis object editing areas.
When the temperature measurement image is modied, the system will pop
out a dialog box on the interface to prompt “Save modications or not” before
exiting the interface, and then tap [Save] button to save modications.
A. Instruction to each functional area

A Glance at Functional Areas of the Device
3
1. Tap the [Gallery] button in the lower part of the main interface to enter the
picture browsing interface and then double-tap any shot picture to view it.
2. Tap the [Edit] button at the bottom to enter the analysis object editing areas.
When the temperature measurement image is modied, the system will pop
out a dialog box on the interface to prompt “Save modications or not” before
exiting the interface, and then tap [Save] button to save modications.
B. Gallery
1. Tap the [Gallery] buon in the lower part of the main interface to enter the
picture browsing interface and then double-tap any shot picture to view it.
2. Tap the [Edit] buon at the boom to enter the analysis object eding areas.
When the temperature measurement image is modied, the system will pop
out a dialog box on the interface to prompt “Save modicaons or not” before
exing the interface, and then tap [Save] buon to save modicaons.

A Glance at Functional Areas of the Device
3
C. Short-cut menu
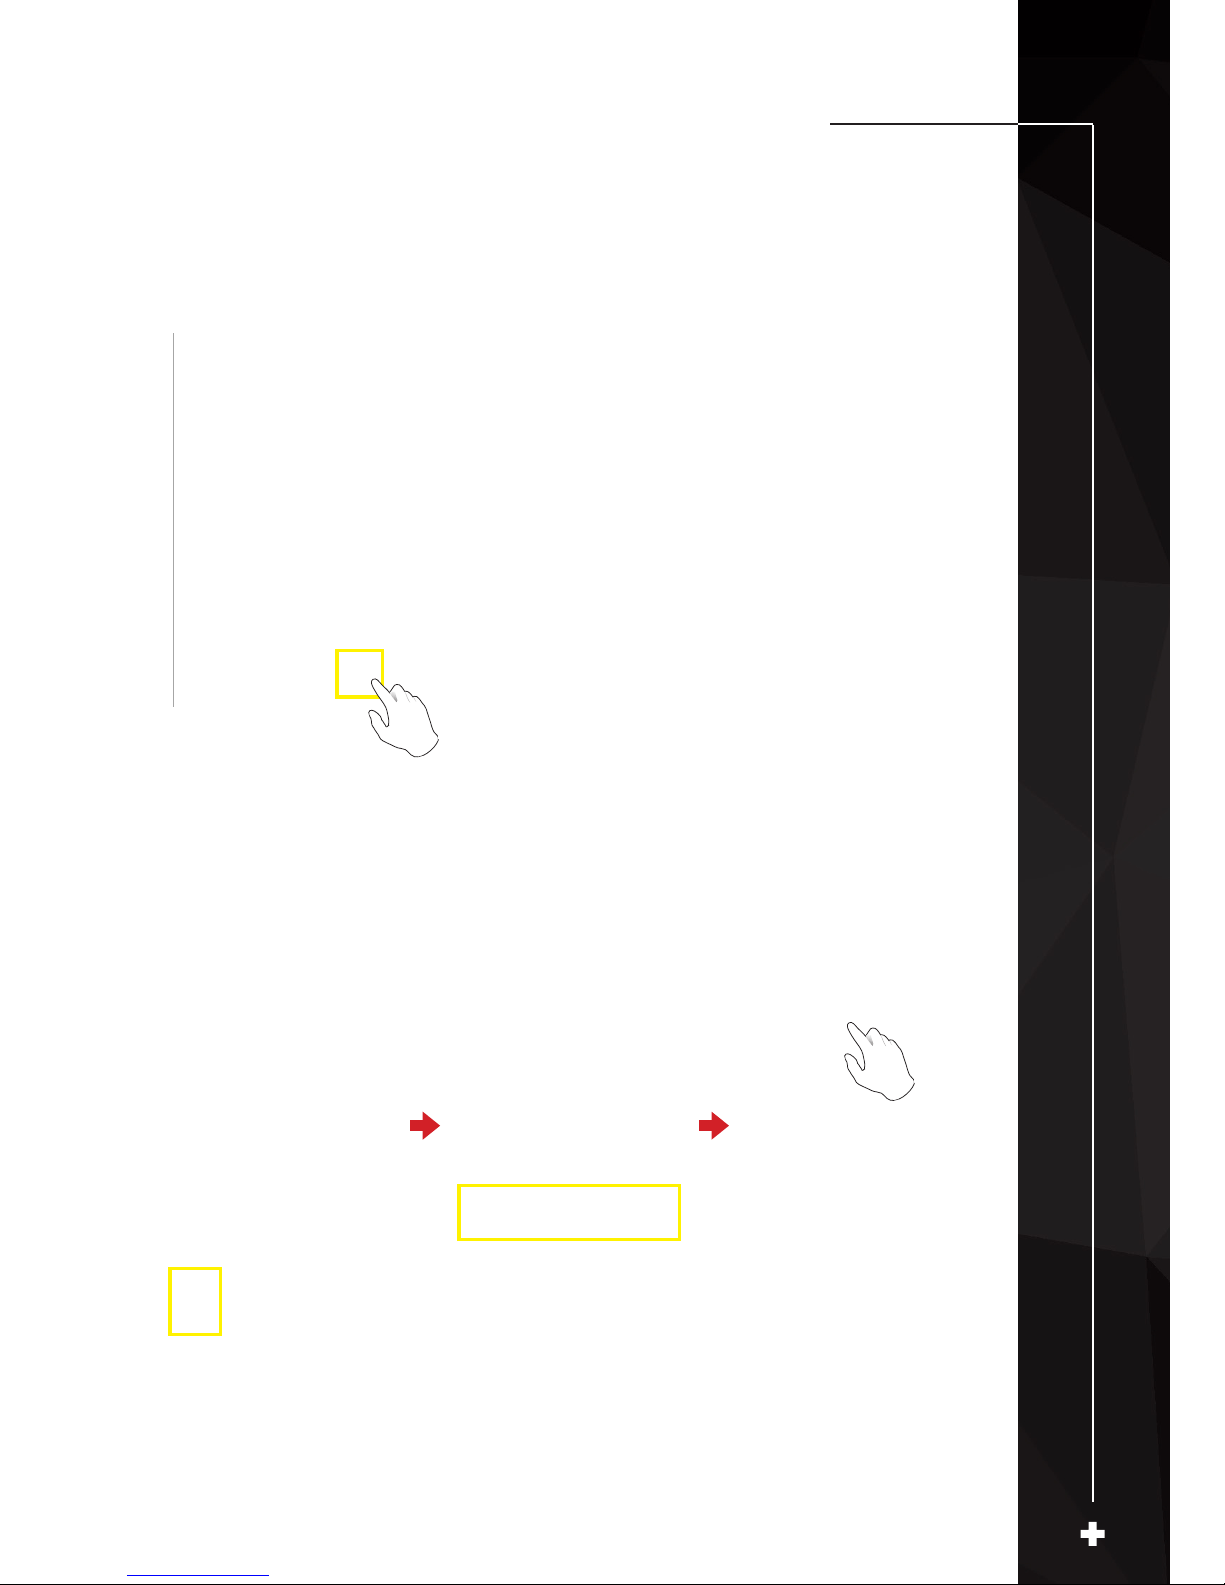
This interface displays some short-cut operaons that can be conducted to
realme images, mainly including IR mode switch, camera, mode switch,
illuminang light switch, laser switch, wireless AP hotspot switch, etc.
How to enter the short-cut menu
(See image 1)
1. In the real-me image, slide the short-cut icon [—] at the boom of the
interface upward, and then the system will pop up a short-cut menu interface.
2. The short-cut menu includes the following contents:
Camera mode: mainly used for control of real-me images and real-me
recording.
IR mode: Mainly used for control of the switch among IR mode, visible light
mode, fusion mode and PIP mode.
Illuminang light: mainly used for control of the start-up and shutdown of
illuminang light module.
Laser: mainly used for control of the start-up and shutdown of laser module.
Hotspot: mainly used for control of startup and shutdown of wireless AP.
Shuer compensaon: double-tap real-me images, and then the system will
conduct automac shuer compensaon and pop up a prompt message.
(See image 1)
E-zoom: 4x.
USB real-me video: Start up and shut down the USB real-me video connecon.
Shutter compensation: double-tap real-time images, and then the system will
conduct automatic shutter compensation and pop up a prompt message.
E-zoom: 4x.
USB real-time video: Start up and shut down the USB real-time video connection.
Shutter compensation: double-tap real-time images, and then the system will
conduct automatic shutter compensation and pop up a prompt message.
E-zoom: 4x.
USB real-time video: Start up and shut down the USB real-time video connection.
Image 1 Image 2

Chapter 4
Observation
Image mode switch
Temperature measurement
E-zoom

Observation
4
Image mode switch
Enter the real-me video, and tap IR mode in the short-cut menu mulple
messo as to conduct mul-mode switch operaons to the current image.
Images can be switched among the following four modes:
A. PIP
C. Visible light
B. Fusion
D. IR
1. In the real-time image, tap the short-cut menu [X] at the most right bottom
of the screen.
2. Tap the materials setting button in the parameters menu, choose the emissivity
of measured object and then double-tap the blank place on the screen to return
the real-time interface.
Observation
4
Temperature measurement
1. In the real-me image, tap the short-cut menu [X] at the most right boom
of the screen.
2. Tap the materials seng buon in the parameters menu, choose the
emissivity of measured object and then double-tap the blank place on the
screen to return the real-me interface.
1. In the real-time image, tap the short-cut menu [X] at the most right bottom
of the screen.
2. Tap the materials setting button in the parameters menu, choose the emissivity
of measured object and then double-tap the blank place on the screen to return
the real-time interface.
 Loading...