

Page 1
campfire™ big table
with trough
Assembly Instructions
Page 2
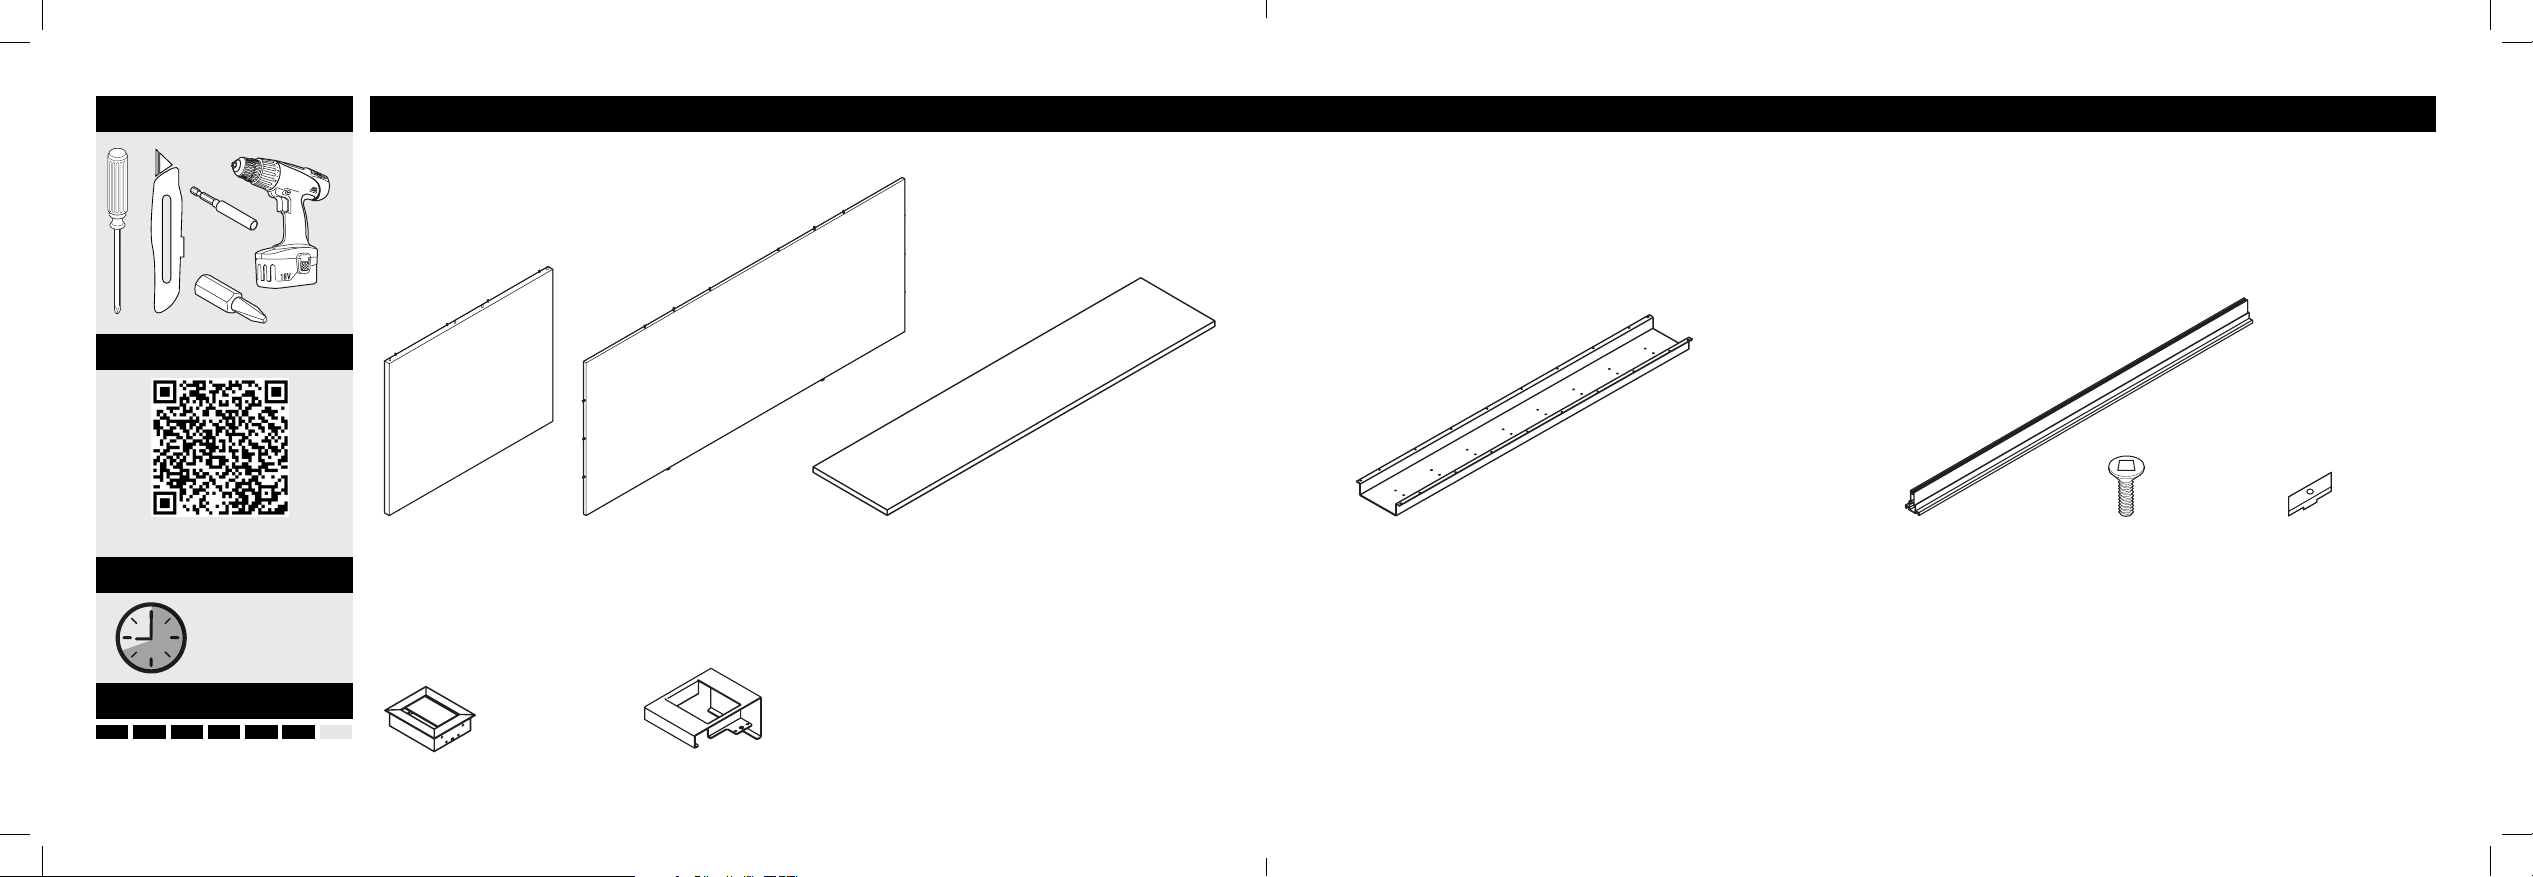
tools needed
time needed
assembly video
Here's what's in the box
For assembly videos go to myturnstone.com/campfire/instructions
BOX #1 BOX #2 BOX #3
myturnstone.com/campfire/instructions
time needed
assemble time:
40 minutes
diculty scale
really
easy
a little
more dicult
leg (2) middle support (1)
BOX #4 BOX #5
electrical (2)
trim plate (2)
half worksurface (2)
trough (1)
rail (1)
X screw (1 6)
size: #10 x 1.075"
T-slot fastener (16)
Page 3
•
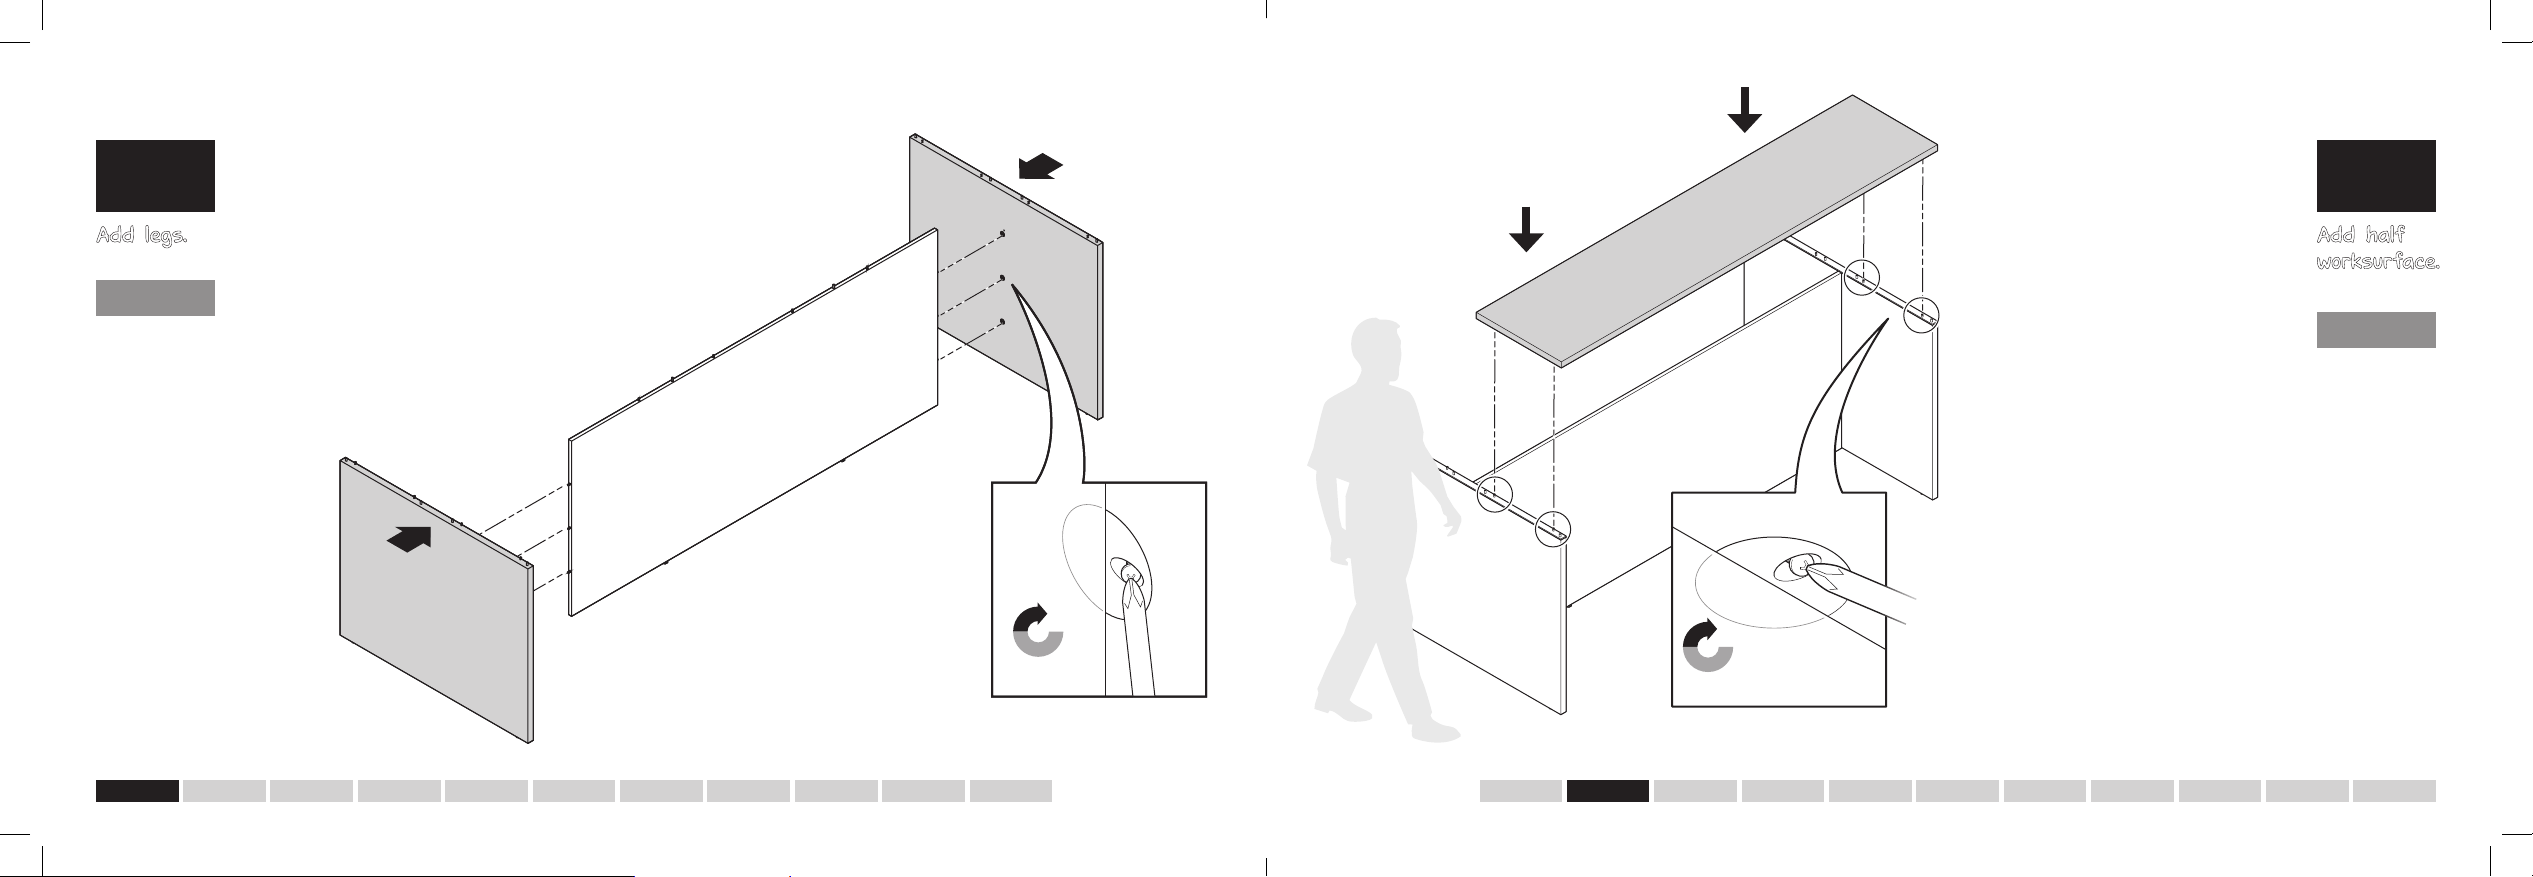
Find the two leg pieces and place upright.
STEP
1
Add legs. Add half
tips
The big table is
appropriately named...
that’s because it is, in
fact, big. Because of
this, we recommend
you install it where you
want it to stay.
The glides on the
bottom of the table
can be raised to allow
power cords to slide
underneath. You will
want to do this before
the table is assembled.
•
This might be an excellent time to call over a friend for help
as you position the large center piece in-between the two end
pieces. Secure one leg, then proceed to attach the second.
The holes will line up with the metal pieces extruding
from the middle piece.
•
Once snapped into place, tighten the cam-locks.
•
Do this on both sides, for a total of six times.
•
Add cam covers.
•
Ask a friend for help to lift the
first half worksurface onto the leg
structure. You’ll notice the edge that
faces outward is slightly rounded
and the inside edge is straight.
•
Carefully line up the holes on the
bottom of the worksurface with the
metal extrusions on the top
of the base.
•
After the worksurface top is in
place, tighten the cam-locks
underneath the table.
STEP
2
worksurface.
tip
tip
Make sure the
cam-locks on the
worksurface are
turned to the left
before you place
the worksurface
onto the leg
structures.
6x
Half turn to the ri ght. Repeat 6 ti mes.
4x
Half turn to the ri ght. Repeat 4 ti mes.
11 22 33 44 55 66 77 88 99 1010 1111
Page 4

STEP
STEP
3
Install T-slot
fasteners.
tip
Use the packaging
to balance the
trough on its side
to easily connect
the fasteners.
Use X screw.
size: #1 0 x 1.071"
T-slot fastener
•
Install the T-slot fasteners loosely into
the center trough by inserting the
screws into the pre-drilled holes and
turning loosely from the bottom.
16x
View from under big table.
•
Place trough underneath the worksurface
and make sure the two rows of fasteners
straddle the center rail.
•
After the trough is in place, look for the
guide holes on the bottom of the
worksurface (second hole in on each
side) to help align the trough. Tighten
from underneath using screw X.
4
Install
trough and
tighten.
Use X screw.
size: #1 0 x 1.071"
1 2 3 4 5 6 7 8 9 10 11 1 2 3 4 5 6 7 8 9 10 11
Page 5

STEP
STEP
5
Install
trough-end
trim plates.
Use X screw.
size: #1 0 x 1.071"
View from under big table.
•
Install the trough-end trim
plates. Be sure the longer
side of the trim plate goes
on the inside and the lip
covers the edge of the leg.
•
After the trim plates are
in place, tighten from
underneath the installed
worksurface using the
X screws.
4x
Half turn to the ri ght. Repeat 4 ti mes.
•
Call over your friend again to help place the
second half worksurface onto the leg structure.
•
Carefully line up the holes on the bottom of the
worksurface with the metal extrusions on the
top of the base.
•
After the worksurface top is in place, tighten the
cam-locks underneath the table.
6
Install
other half
worksurface.
tip
tip
Make sure the
cam-locks on
the worksurface
are turned to the
left (Just like in
step 2).
Use X screw.
size: #1 0 x 1.071"
1 2 3 4 5 6 7 8 9 10 11
1 2 3 4 5 6 7 8 9 10 11
Page 6

STEP
STEP
7
Tighten
trough to
worksurface.
Use X screw.
size: #1 0 x 1.071"
View from under big table.
•
Fasten the trough to the half
worksurface from underneath
using the X screws.
View from under big table.
•
Tighten the trim plates
fromunderneath using
the X screws.
8
Tighten trim
plate.
Use X screw.
size: #1 0 x 1.071"
1 12 23 34 45 56 67 78 89 910 1011 11
Page 7

STEP
STEP
9
Install
electrical.
tip
tip
The outlets pop
open by pressing
on the top. Once
they are installed,
the electrical
outlet will face
the center of the
table.
•
Install both electrical
components into the
trim plates.
•
Feed the plug down to the
outlet. The remaining cord
feeds into the trough.
Link 1 Link 2
•
Snap latches into place
to secure, depress
latches to release.
•
The electrical lines will
rest inside the trough.
10
Connect
electrical
lines.
1 12 23 34 45 56 67 78 89 910 1011 11
Page 8

STEP
11
Install
center rail.
•
Line up T-slot fasteners and set
the center rail on top.
•
The rail will snap into place.
•
Duck under the big table and
tighten the center rail into place
by rotating the T-slot fasteners.
Visit myturnstone.com to see more spots.
End vi ew. End vi ew.
1 2 3 4 5 6 7 8 9 10 11
Page 9

All rights reserved. ©2010 Steelcase Inc. Printed in the U.S.A. on recycled paper. E Data subject to change. Trademarks used herein are the property of Steelcase Inc.
Some products and services may not be available in all countries. Your Turnstone representative can provide you with details.
ad-stock ID 10-0003018. Campfire Big Table with Trough Assembly Instructions: 11/10
engineering document 939500545 rev A.
 Loading...