

Page 1
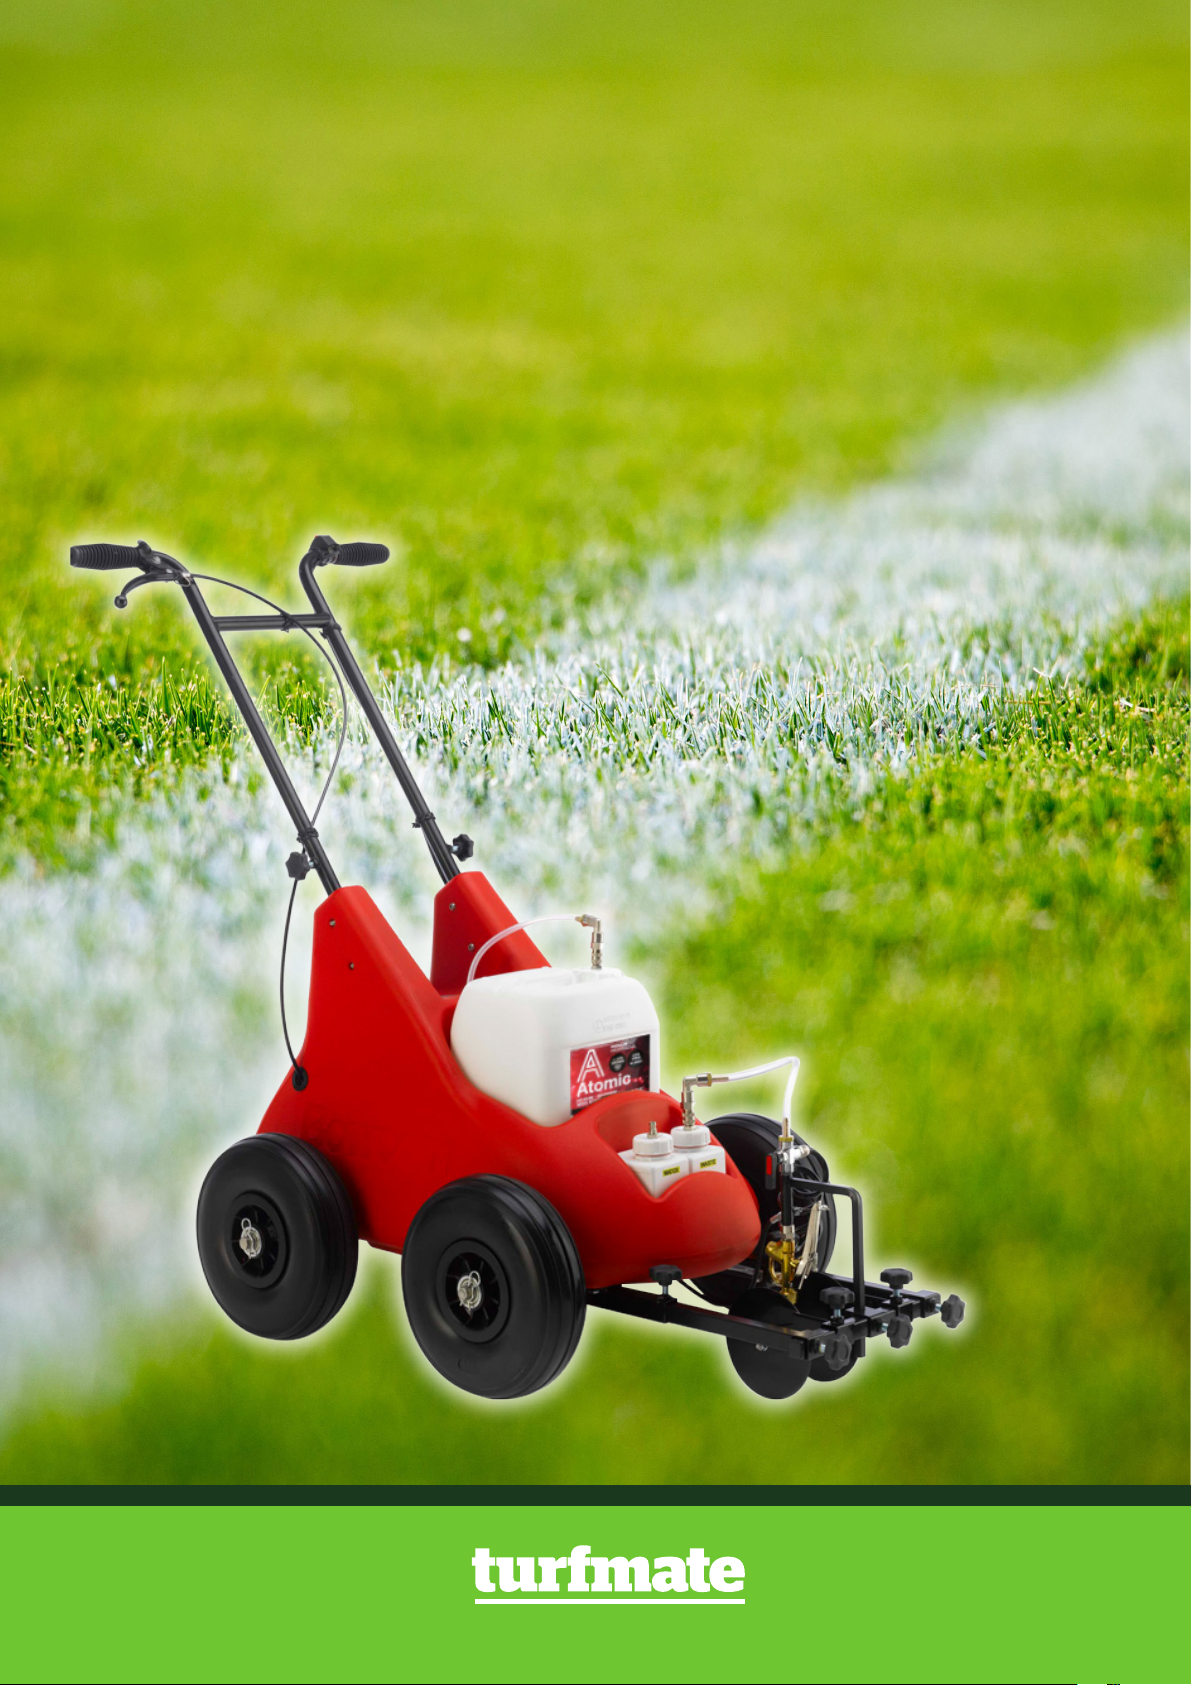
ATOM
LINE MARKER
INSTRUCTION MANUAL
& SPARE PARTS LIST
e sales@turfmate.com.au • w turfmate.com.au • t 1300 184 400
Page 2

ATOM – INSTRUCTIONS FOR USE
• New battery may be partially charged, fully charge before use
• Ensure spray switch connected inside control box
• Ensure handle secure at chosen height
1. Ensure power turned off on both pump isolator switch (on control panel) and spray
switch (on handle bar). Also ensure that the gun spray lever is in the closed position.
2. Place 10L ‘ready-mix’ paint container directly on to the Atom – using only BOWCOM
Atomic or Quantum paint.
3. Replace the paint pail lid, with the holed / clipped lid attached to the Atom.
4. Ensure that the clip / lock hose above the spray gun is attached to the ‘waste’ bottle.
5. Fill cleaning bottle with tap water.
6. Ensure ‘speed-bleed’ direction tap (above spray gun) is in the side-ways position
(lock-off).
7. The machine is now ready to prime.
8. Set the spray limit discs to the required line width. Ensure that the spray gun is set
high enough for the paint spray to hit the spray discs.
9. Turn on the pump isolator switch (located on control panel) – observe the volt meter
reading (12 volts). If too low, place battery on charge.
10. To activate pump, use the spray switch located on the handle bar.
11. To prime the pump: (with the pump activated). Slowly turn the ‘speed-bleed’ knob
to the up-wards position, this will draw through the water & turn to paint in a couple
of seconds, depositing the surplus mix into the ‘waste’ bottle. When paint appears in
‘waste’ bottle, turn the ‘speed-bleed’ knob back to central position ‘lock-off’.
12. Switch off the pump spray switch on handle bars. Turn the ‘speed-bleed’ knob to
downwards position. The ATOM is now ready to paint a line.
13. Re-activate the handle-bar spray switch. Then use the handle-bar spray lever to open
& close the spray gun for instant start / stop technology.
14. NB: When not marking a line for prolonged period, de-activate the pump by turning
off the handle-bar spray switch.
15. Atom Cleaning: Following completion of line-marking, switch off pump. Un-clip the
paint suction tube coupling & place onto the ‘water’ bottle lid.
02
Page 3

16. For full cleaning process: Repeat steps 6 – 12 above. (Paint surplus can be either
sprayed on to grass area or deposited into waste bottle (empty out intermittently).
17. Additional periodic cleaning: From time to time clean the ATOM using tap water
drawn from a 10L empty (clean) paint container. This ensures cleanliness of suction
tube & lter.
18. Nozzle cleaning: Following ATOM cleaning always remove & clean the ‘top-hat’
lter above the nozzle. Ensure clean & clear water is seen spraying from the nozzle.
For additional nozzle cleaning soak overnight using ‘Bowcom Multi-ush solution’,
preferably in an ‘ultra-sonic’ cleaning bath.
19. NB. If using a part-used pail of ‘Atom’ or ‘Quantum’ paint, shake well before use.
20. Battery Charger: Use Battery Charger provided. Place 3-pin plug into 240 volt mains
socket. Plug other end (12 volt) into trailing socket inside the ATOM Control Box
(connector ts only one way). A full charge will take up to 10 hours. Full battery
should operate pump for several days (dependent on use).
Technical Information:
Paint tank capacity ........10L
Water bottle capacity .....0.5L
Weight - Dry, No tank .....22kg
03
Page 4

ATOM – PARTS LIST
Part No. Description
Metal Work
1056XA Handle
1049XA Chassis Tube (left) c/w hose clip xing
1050XA Chassis Tube (right)
1002X Inner chassis extension tube
1004X Gun Holder
1042XA Gun Top
81G Spray Gun
1045XA Spray arm bracket (L or R)
1044XA Spray arm
1043XA Spray disc
Plastics
1047XA Atom Body
1048XA Control box door
Water / waste bottle
1020X Paint tank lid c/w male coupler
Pump & Electrics
272M Pump Complete
987M Pump Diaphragm
509M Battery
510M Battery Charger
992X Battery Gauge
04
Page 5

ATOM – PARTS LIST CONTINUED
Part No. Description
Switches
984XA Pump Isolator Switch
1032XA Spray Switch (inc. cable & bullet connectors)
Filters
991X Paint Hose Filter
166ATM Spray Housing Filter (top-hat)
Spray Gun
278M Spray cable
1017X Speed-bleed tap
85GM Union Nut
ZXS0020 Nozzle (brass /gold)
271M Nozzle (white)
274M Nozzle (blue)
Hoses
986M Clear PVC Hose
987X Spray Coil (standard)
Other Components
1014X Wheel
24 M8 Star Wheel
1027X Control Door Latch (complete)
Atom Spares Kit
1054XA Contains all commonly used parts
05
Page 6

ATOM – CONTROL BOX
Item No. Part No. Description
1 1032XA Spray Switch (inc. cable & bullet connectors)
2 986M Clear Hose
3 1021X Hose Tail
4 1023X Elbow
5 1019X Female Coupler
6 1020X Male Coupler
7 - Holed Lid
8 986M Clear Hose
9 991X Tank Filter
10 - Empty Paint Pail
11 1051XA Pump Mounting Plate
12 984X Pump Diaphragm Drive
13 987M Pump Diaphragm
14 986M Clear Hose
15 985M Quick Release Elbow
16 983X Pump Upper Housing
17 985M Quick Release Elbow
06
Page 7

07
Page 8

ATOM – DASHBOARD & AXLE
Item No. Part No. Description
1 984XA Pump Isolator Switch
2 1041XA Dashboard (inc. Gauge Plate)
3 992X Battery Gauge
4 1046XA Axle
5 1014XB Wheel Bearing
6 1014X Wheel (inc. tyre)
7 - Wheel Washer
8 - R-Clip
9 1052XA Battery Clamp
10 509M Battery
08
Page 9

09
Page 10

ATOM – DASHBOARD & AXLE
Item No. Part No. Description
1 8GB Rubber Handle-Bar Grip
2 7GB Spray Control Lever
3 11 Split-Trunnion (Secures Gun Cable)
4 278M Gun Cable
5 1017X Speed-Bleed Direction Tap
6 1021X Hose Tail
7 986M Clear Hose
8 1022X Spray Hose End
9 987X Spray Hose Coil
10 93 Gun Cable Securing Screw
11 31 Gun Cable Adjuster
12 1042XA Gun Top
13 988X Gun Top Reducer
14 81G Spray Gun
15 166ATM Top Hat Filter (Fine)
16 271M Hollow Cone Nozzle (White)
17 85 Union Nut
18 1049XA Chassis Box Tube (Left Hand)
19 24 M8 Star Wheel
20 1022X Spray Hose End
21 1023X Elbow
22 1055XA Inner Chassis Box Tube
23 986M Clear Hose
24 - Mini-Jubilee Clip
25 1020X Male Coupler
26 1019X Female Coupler
27 1045XA Spray Disc Arm Bracket (Left Hand)
28 1044XA Spray Disc Arm
29 1043XA Spray Disc
30 1004X Gun Holder
31 1045XA Spray Disc Arm Bracket (Right Hand)
32 1001XA Spray Bar
33 1050XA Chassis Box Tube (Right Hand)
34 - Clean Water Bottle
35 - Waste Water Bottle
10
Page 11

11
 Loading...