

Page 1
10
Page 2
2
10
10
Screen
Page 3
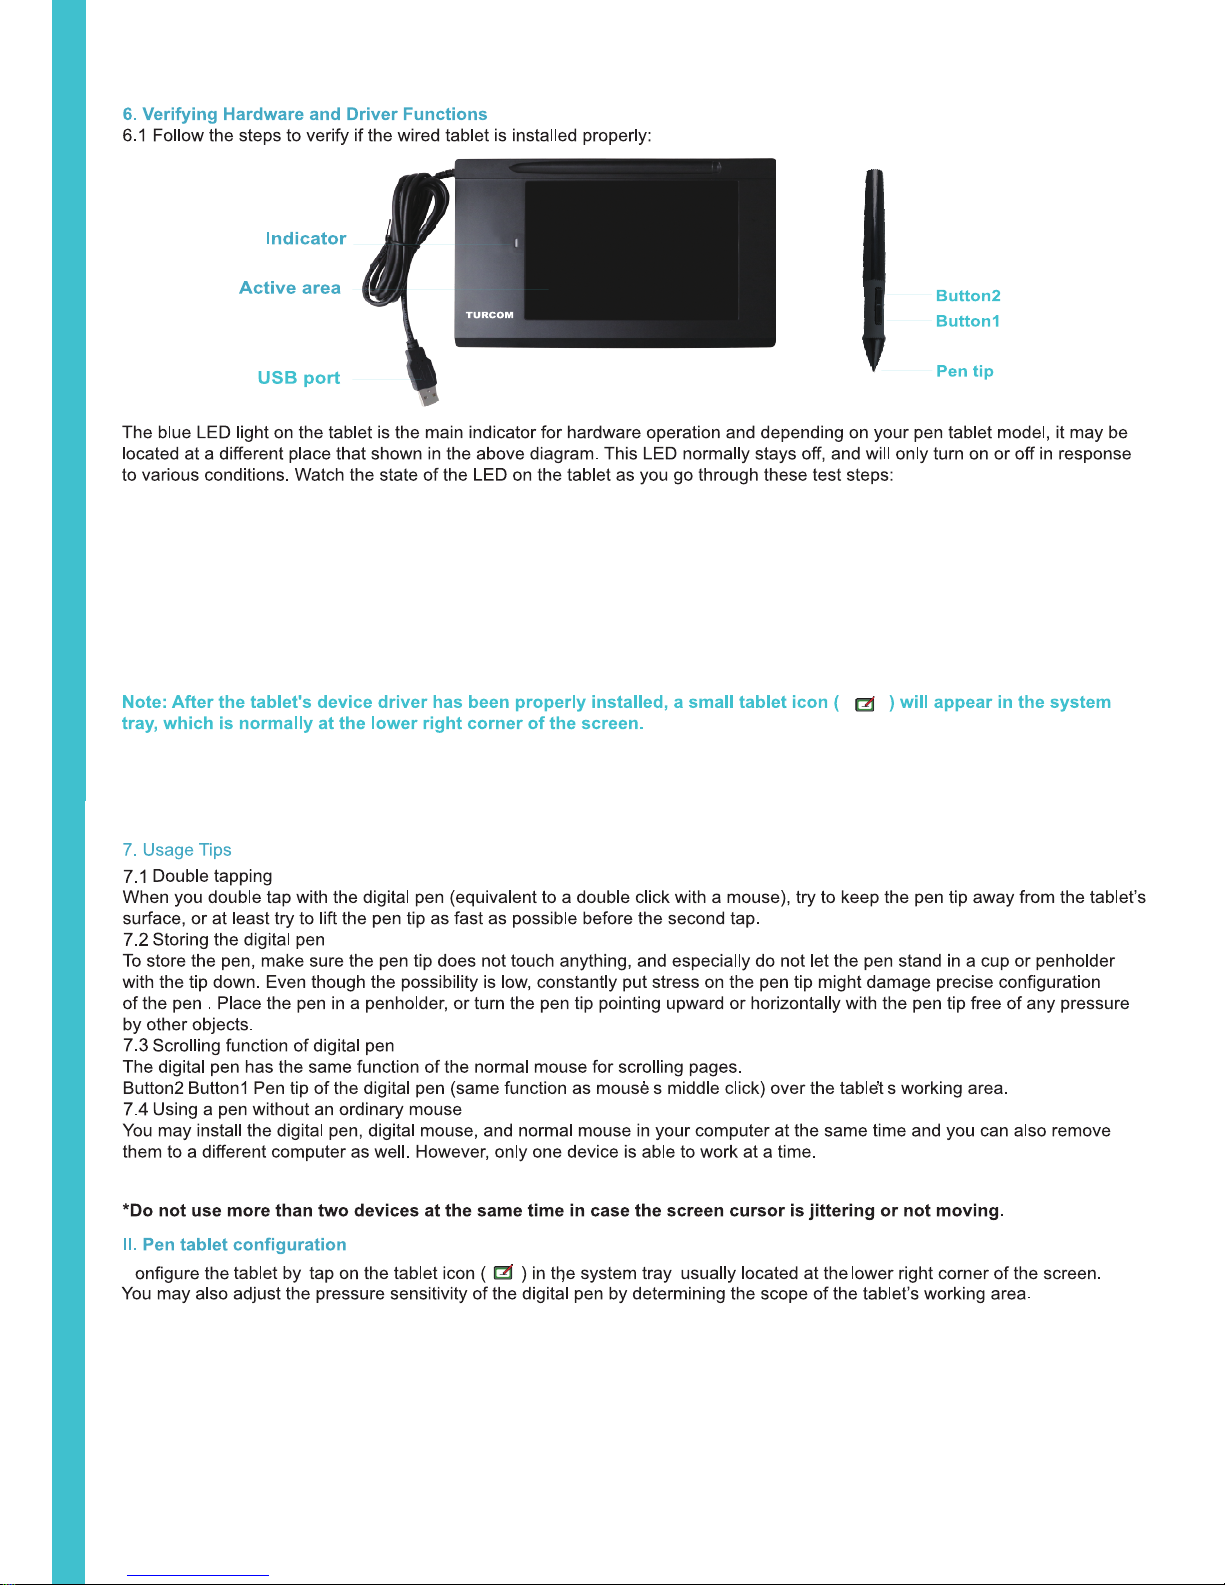
1. Tap on any surface with the tip of the pen, to “wake it up”
if it has gone into standby mode. A built-in power saving function may have forced the pen into
the standby mode if either of them is not used for a period of time.
2. As soon as the pen tablet itself activates, the LED will be light briefly, and will then go and stay off again.
3. When the tablet detects the presence of the digital pen , the LED will be blinked slowly. This
happens either when pen tip is hovering or placing within the working area which above the tablet.
4. When you press a button on the pen barrel, the LED will be lighted up.
5. Hovering and moving the pen in the working area will cause the cursor on the screen to move
accordingly.Changing the wireless stylus pen tip
3
C
Page 4
II.
Driver Interface Introduction
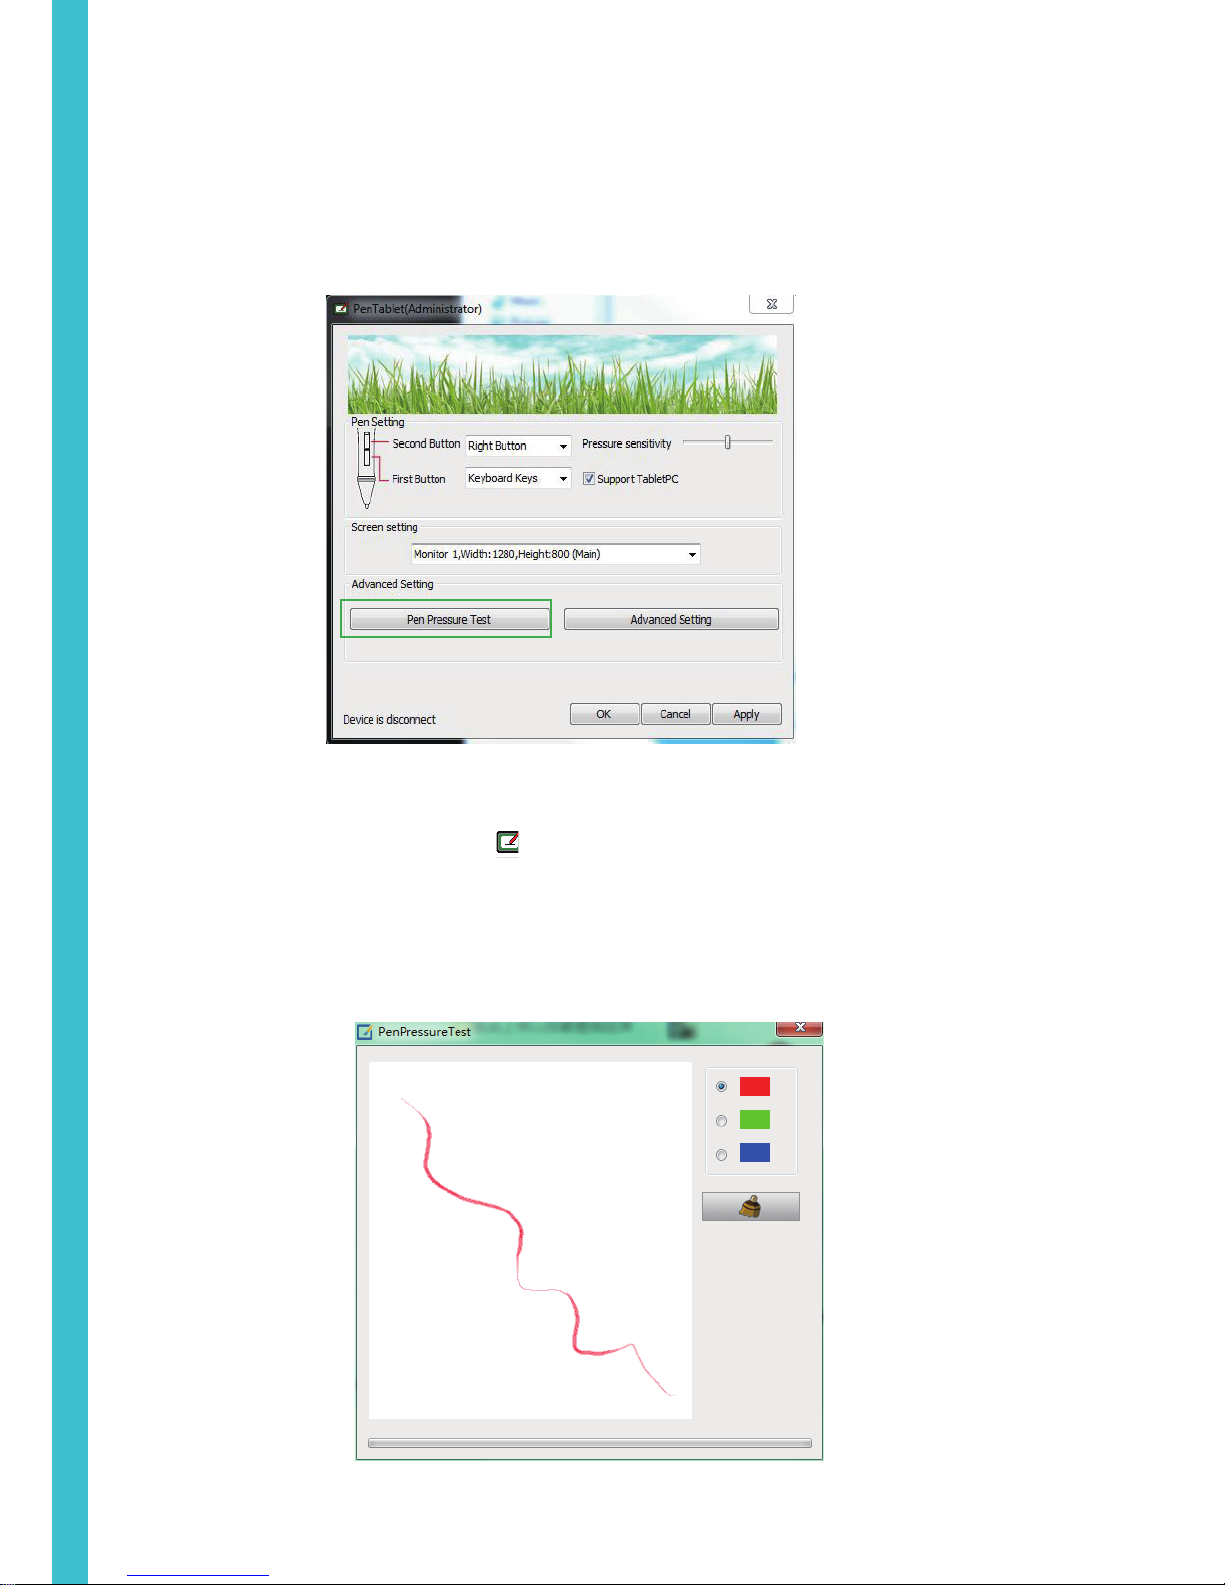
1. Control Interface
When you double click the driver tablet icon ( ) which normally appears in the system tray at the corner of the screen,
you will see the control panel (pictured above). It will display driven-related information.
Controlling the panel by digital graphic tablet can set up functions for the button of the digital pressure-sensitive pen,
regulate the pen’s pressure sensitivity.
1.1 Digital Pen Pressure Sensitivity Test
Click Pen Pressure Test into Pressure Sensitivity Testing
4
Page 5
2. Digital Pen Settings
2.1 Key Functions
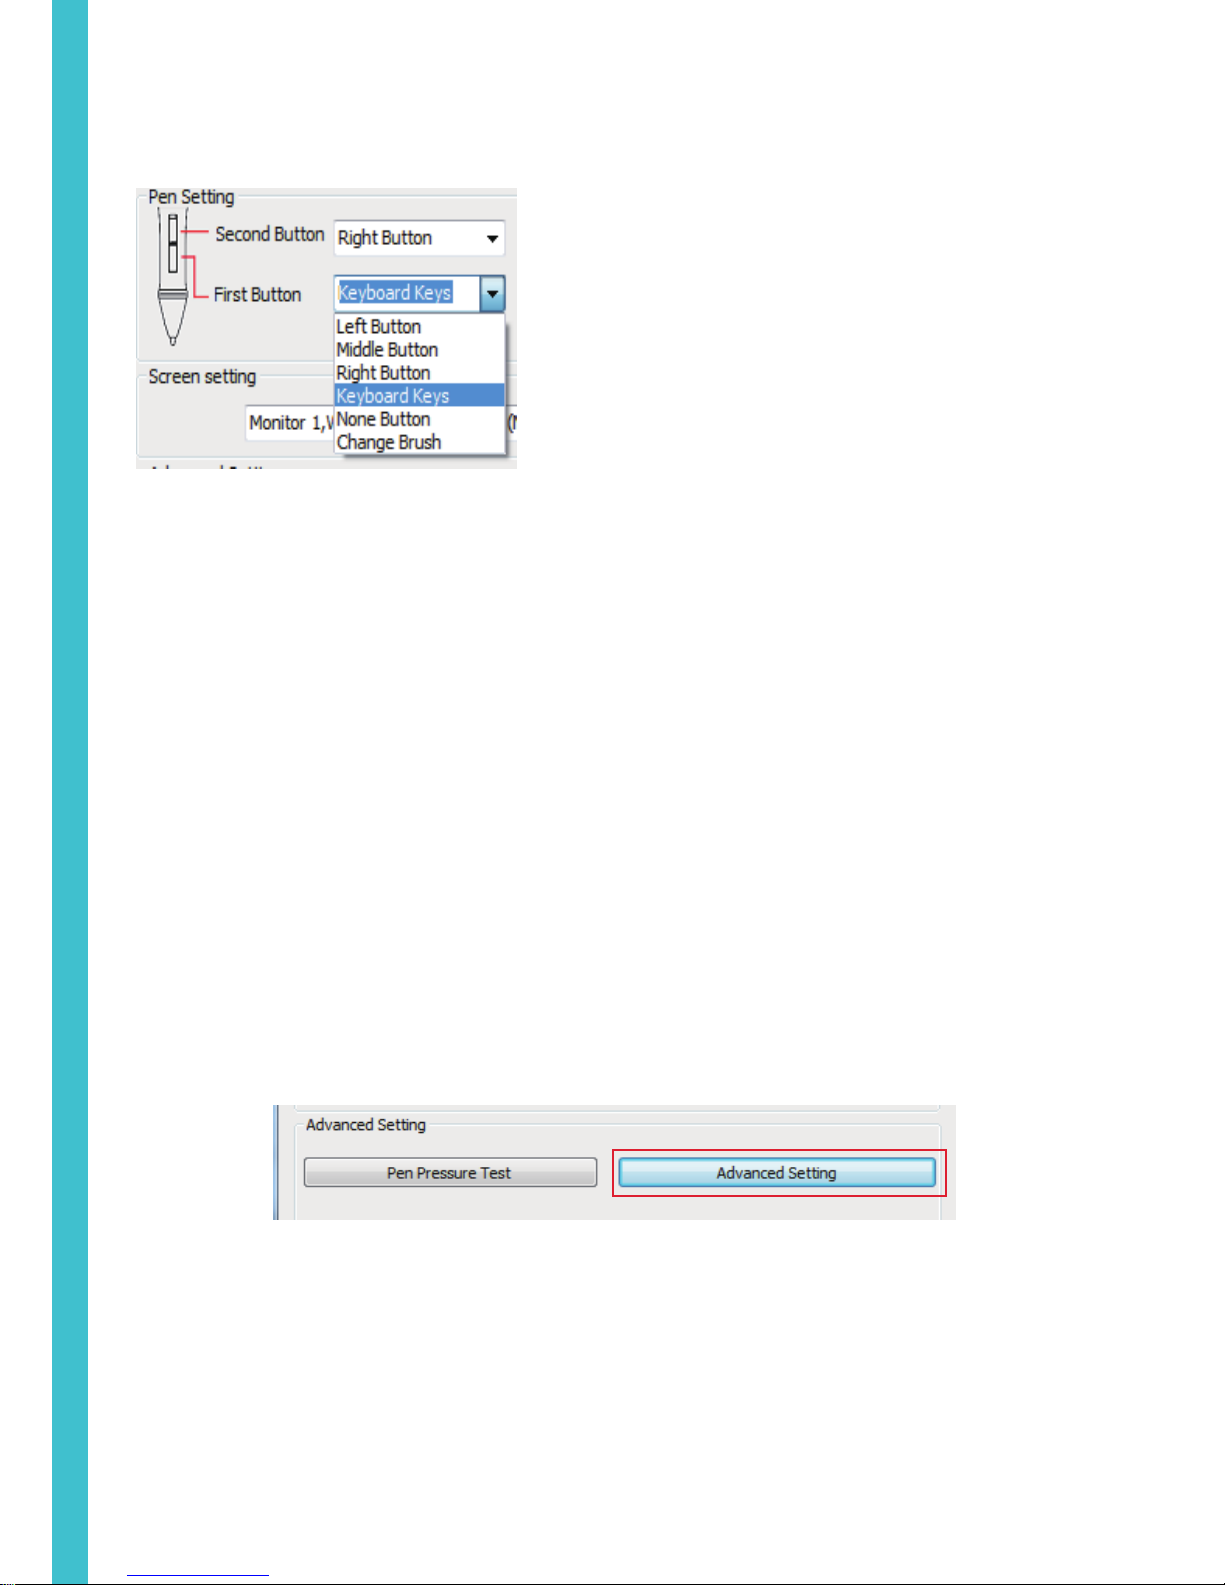
Above menu shows the defining button of the digital pen. Selecting its “left, middle, right,
keyboard keys, None Button,Change Brush” on the corresponding right drop-down menu of the pen function settings
window’s “the first button, the second button” can achieve its functions.
When finished the first button and the second button selecting the keyboard keys, all the other keys can be freely defined.
When this done, you can achieve all the keys functions of the graphic software.
Digital pressure sensitive pen default setting functions: 1.The pen nib is equivalent to the mouse left button function.
2.When the first button is E, you can switch it to eraser in the graphic software(such as photoshop etc.)
3.The second button is equivalent to the mouse right function.
3. Advanced Setting
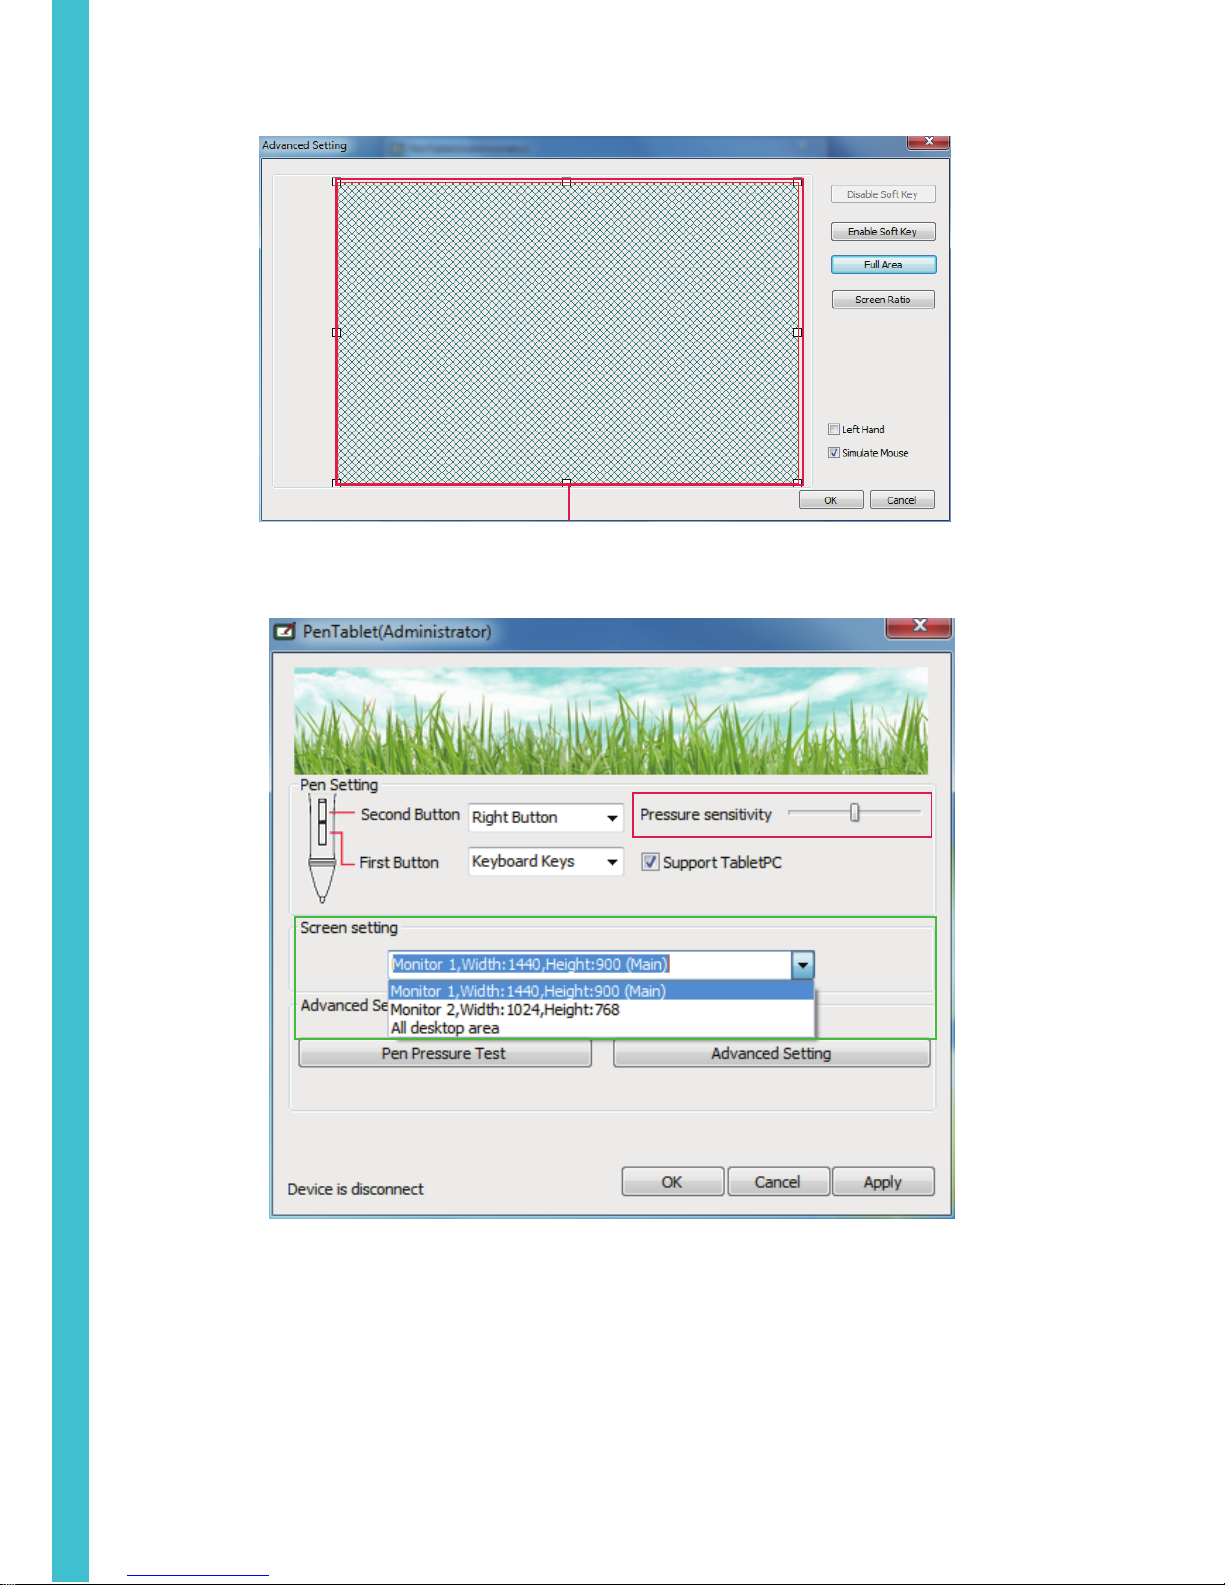
Click work area of the control interface (above the red line area), you can enter into the work area interface.
5
Page 6
6
4. Digital Pen Pressure Sensitivity adjust
Pressure sensitivity: move the slider from left to right, it can be used to adjust the sensitivity of the tip and the severity
of the stroke when drawing, which affects the change of the handwriting. The Back is completely controlled by the
application programming, unrelated to graphic tablets driver programming.
When your computer is connected with two screens and use the extended mode, you can choose the corresponding
work area of the graphic tablet in the setup screen area(green box area).
The work area
Pressure sensitivity of the digital pen can be adjusted in any area of the control panel. The red line of the current pressure
value will display different lengths according to the different pressure of the graphic tablet.
6
Page 7
The green LED light on the tablet is the
main indicator for hardware operation and
depending on your pen tablet model may be
located at a different place that shown in
the above diagram. This LED normally stays
off, and will only turn it on or off in
response to various conditions. Watch the
state of the LED on the tablet as you go
through these test steps:
1. Tap on any surface with the tip of the pen, to “wake it up”
if it has gone into standby mode. A built-in power saving function may have forced the pen into
the standby mode if either of them is not used for a period of time.
2. As soon as the pen tablet itself activates, the LED will be light briefly, and will then go and stay off again.
3. When the tablet detects the presence of the digital pen , the LED will be blinked slowly. This
happens either when pen tip is hovering or placing within the working area which above the tablet.
4. When you press a button on the pen barrel, the LED will be lighted up.
5. Hovering and moving the pen in the working area will cause the cursor on the screen to move
accordingly.Changing the wireless stylus pen tip
C han gin g th e w ire les s s tylu s p en tip
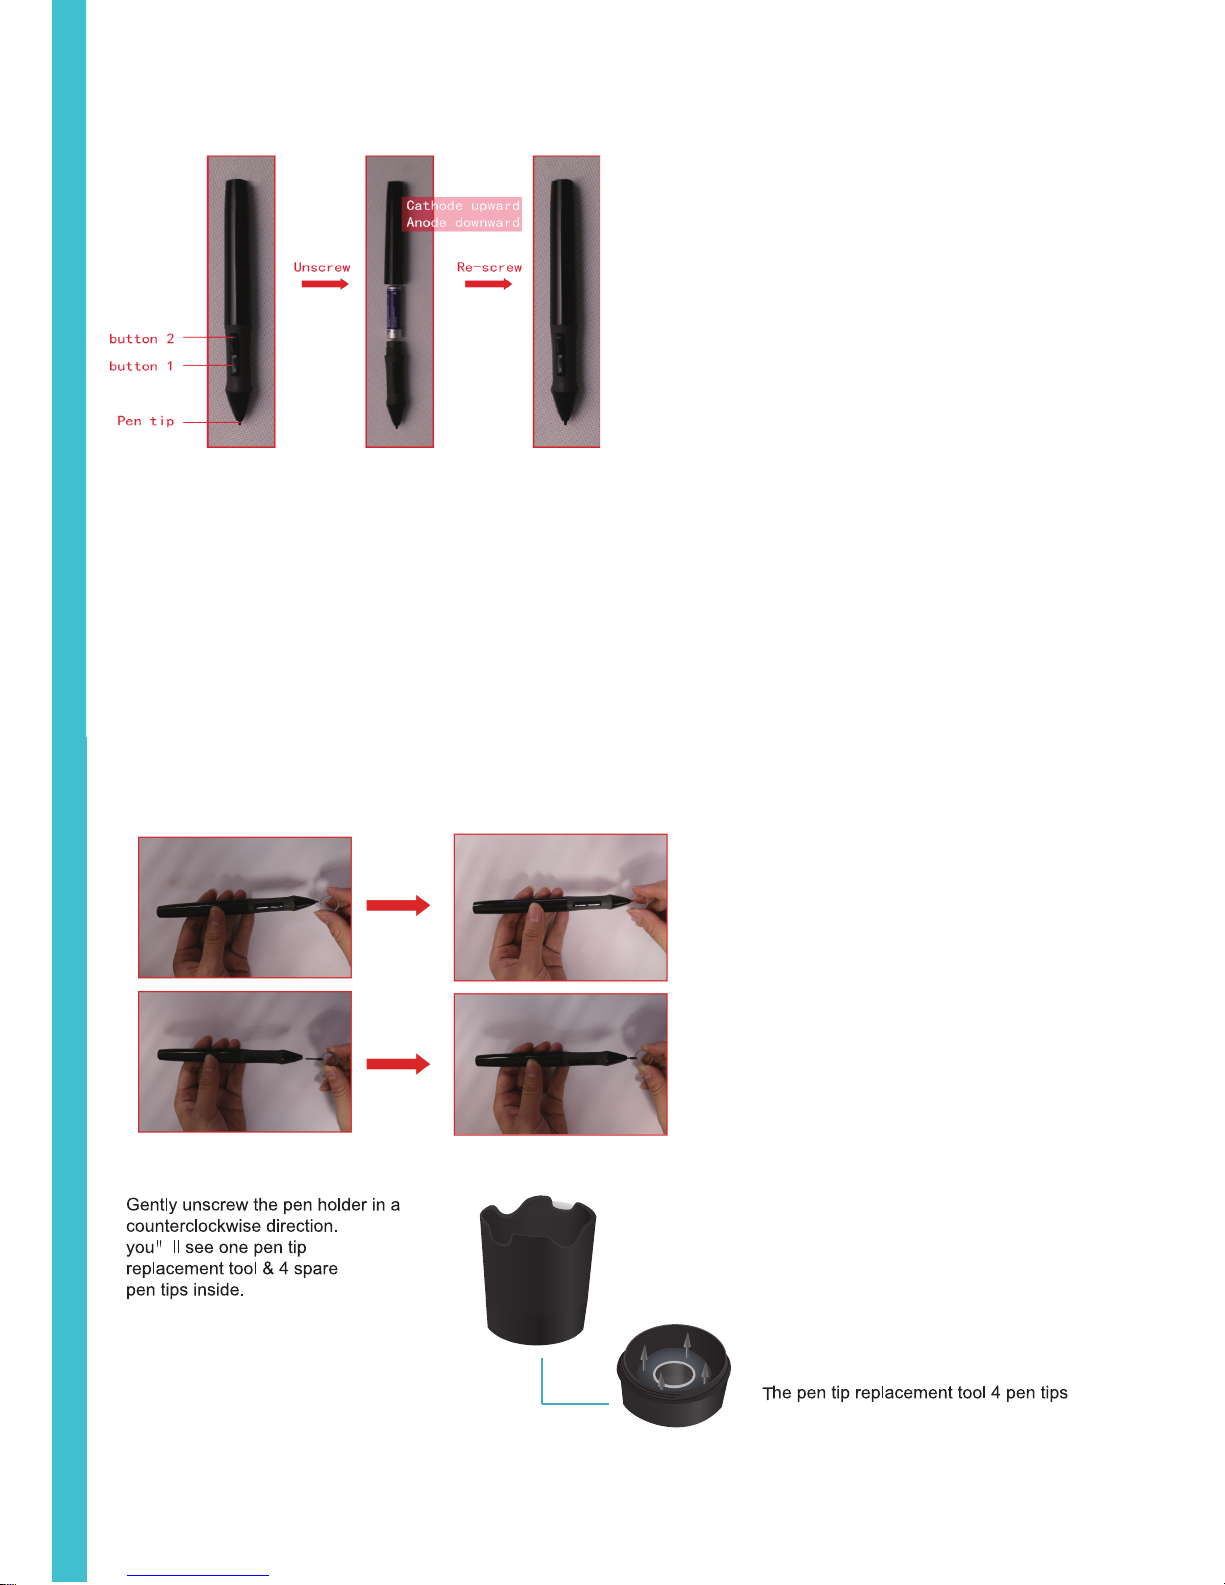
A: Pull out the pen tip from Digital pen
by using a Normal Pen Clip
B: Push the pen tip into the digital pen,
Make sure fit it up to the end properly.
7
Page 8
8
:www.huion-tablet.com
 Loading...