

Tuohy ANDAVI Installation Instructions Manual
ANDAVI
Installation Instructions

Table of Contents
Hardware / Parts List . . . . . . . . . . . . . . . . . . . . . . . . . . . . 1
Typical Connections . . . . . . . . . . . . . . . . . . . . . . . . . . . . 2
Starting Section - Frame . . . . . . . . . . . . . . . . . . . . . . . . . 4
Starting Section - Cabinets . . . . . . . . . . . . . . . . . . . . . . . . . . 5
Next Section - Frame / Cabinets. . . . . . . . . . . . . . . . . . . . . . . . 6
End Cabinets . . . . . . . . . . . . . . . . . . . . . . . . . . . . . . 7
Fixed Height Runoffs . . . . . . . . . . . . . . . . . . . . . . . . . 8
Adjustable Height Runoffs . . . . . . . . . . . . . . . . . . . . . . . . . 9
Electrical . . . . . . . . . . . . . . . . . . . . . . . . . . . . . . . . 10
Lighting . . . . . . . . . . . . . . . . . . . . . . . . . . . . . . . . . . 11
1
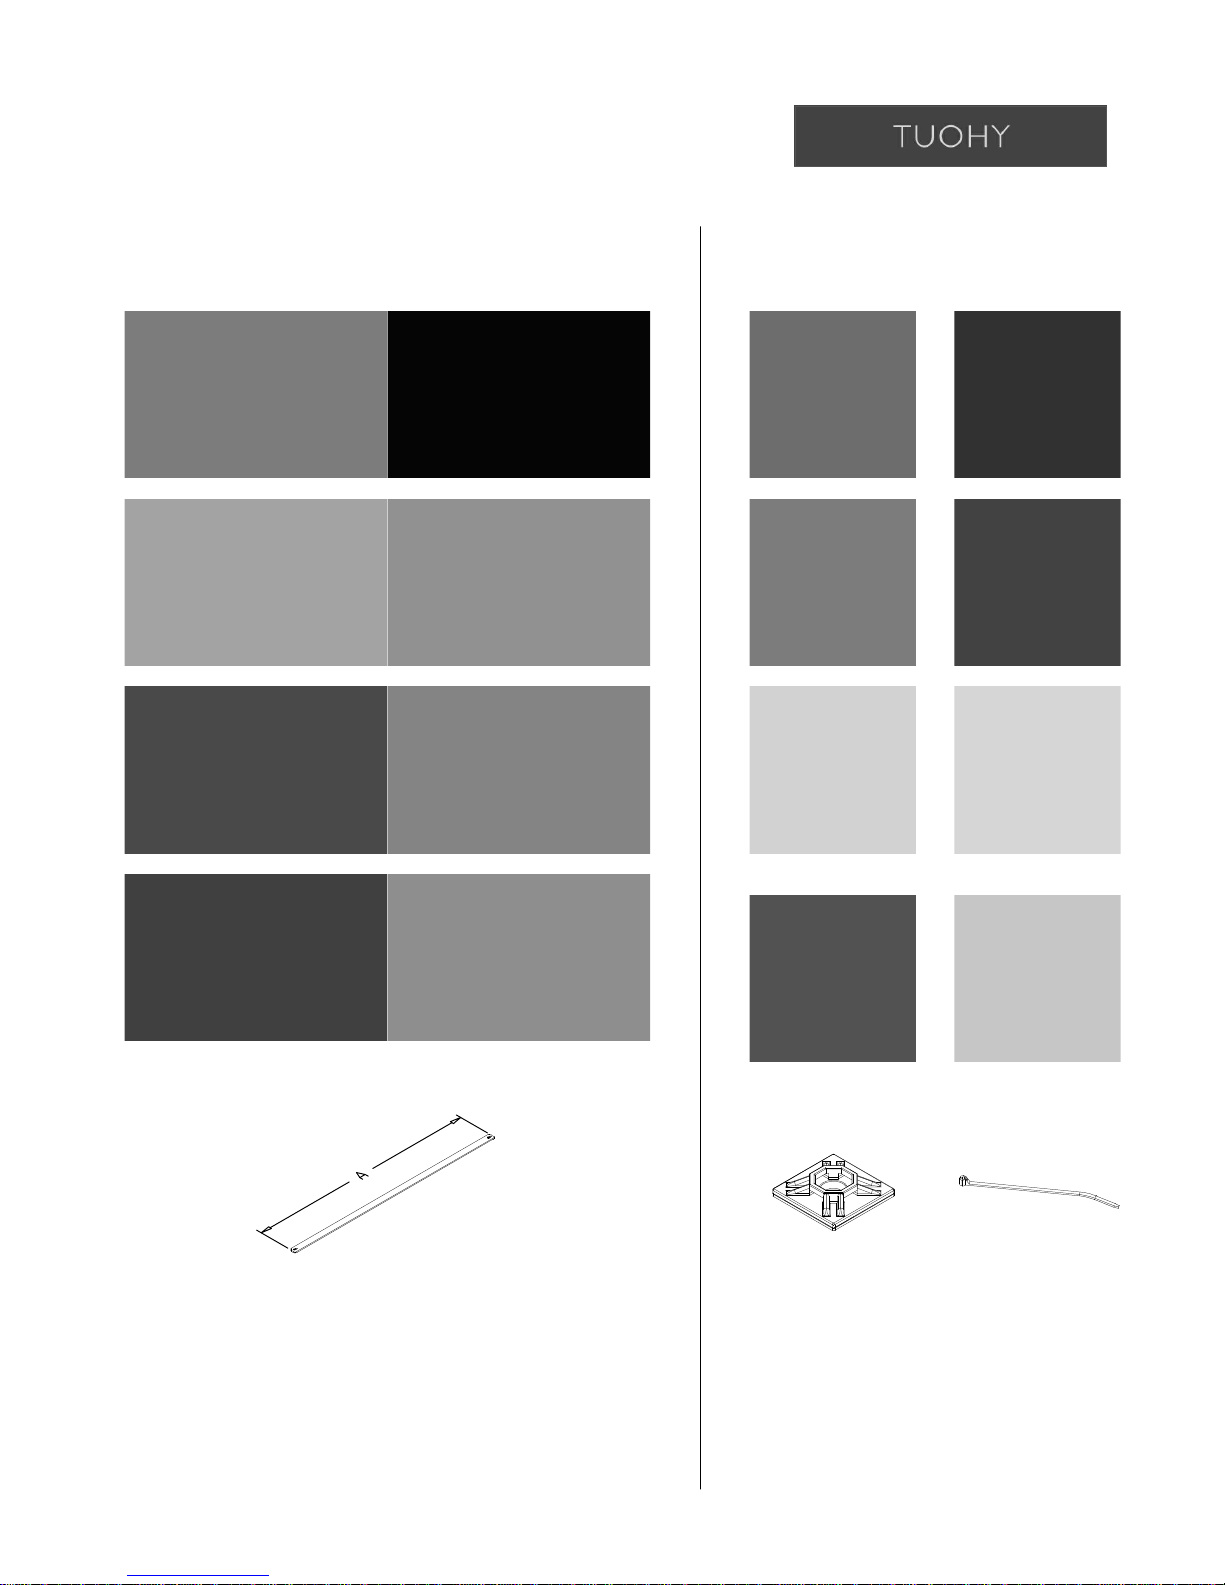
HARDWARE / PARTS LIST:
Cabinet Supports & Mounting Brackets
Single Cabinet Support Double Cabinet Support
Pedestal Bracket
10" Z-Clip Z-Clip Mount Support
#8 x 3/4" Flat Head
1/4-20 x 1/2"
Button Socket Cap Screw
1/4-20 Drop-In
T-Nut
#8-32 X 1/2"
Button Head Screw
Confirmat Screw
Fasteners
#9 X 5/8" Panhead
Cross Strap
A = 14.25" (For use to install 12" cabinets)
A = 20.25" (For use to install 18" cabinets)
A = 26.25" (For use to install 24" cabinets)
A = 32.25" (For use to install 30" cabinets)
A = 38.25" (For use to install 36" cabinets)
Bridge Plate
Runoff Leg
Wire Chase
#10 X 1" Panhead
#9 X 1 1/4" Flat Head
Cable Tie
Mount Block
6" Cable
Zip Tie
2
TYPICAL CONNECTIONS
CABINET SUPPORT
Attach to extrusion using 1/4-20 Drop-In T-Nut
and 1/4-20 x 1/2" Button Socket Cap Screw
DETAIL A
Typical T-Nut Fastener Installation Instructions
These General Instructions Shall
Apply to All Bracket and Plate
Connections that Require T-Nut
Fasteners as Part of the Connection.
- Insert 1/4-20 x 1/2" BSCS Thru Hole
in Plate / Bracket & Thread T-Nut
2-Turns Onto Bolt. Repeat for Rest
of Connection Holes.
- Next, Align T-Nuts so they Match the
Extrusion Being Connected &
Depress Into Channel.
- Should Look Like This Before
Further Tightening Takes Place.
ATTENTION :
- As Initial Tightening of Each BSCS
Begins, T-Nuts Must Pivot in Channel
Engaging the Shoulders of T-Nut
Against the Walls of the Channel.
- Pay Special Attention that Each T-Nut
"Engages" Before Continuing to
Tighten Each Bolt.
CORRECT INCORRECT
Shoulders Did Not Engage
Into Sides of Channel.
Z-CLIP MOUNTING BRACKET
Attach Z-Clip Mounting Bracket using 1/4-20 Drop-In
T-Nut and 1/4-20 x 1/2" Button Socket Cap Screw
DETAIL B
Slide T-Nut into
opening of post
and into place.
Engage T-Nut
and Tighten.
 Loading...