

Page 1
TuneUp Utilities 2006
User Manual
Page 2

TuneUp Utilities 2006 was developed by:
Company: TuneUp Software GmbH
Address: Dolivostr. 9
64293 Darmstadt
Germany
Internet: www.tune-up.com
Support for this software can be obtained at the following addresses:
E-mail: tu2006-uk@tune-up.com
Internet: www.tune-up.com/support/uk
Page 3

Table of Contents
Table of Contents .....................................................5
Preface ......................................................................9
Installation..............................................................11
System Requirements............................................ 11
Starting the Installation......................................... 11
Entering Your User Name and Serial Number........ 12
Selecting the Installation Location......................... 13
Introduction to TuneUp Utilities ............................14
Starting the Software............................................ 14
Structure and Use of the Software ........................ 14
The Five Categories ............................................... 15
Customize and Analyze ..................................... 15
Clean up and Repair .......................................... 15
Optimize and Improve....................................... 16
Administer and Control ..................................... 16
File recovery and Destruction ............................ 16
Table of Contents
Customize and Analyze ..........................................17
TuneUp SystemControl.......................................... 19
Usage ................................................................ 19
Display Æ Animations and Effects..................... 20
Display Æ File Types .......................................... 21
Display Æ Folder Options.................................. 22
Usage Æ Input Options..................................... 23
Usage Æ Start Menu ......................................... 24
TuneUp Utilities 2006 5
Page 4

Table of Contents
Usage Æ Taskbar............................................... 24
Communication Æ Network.............................. 25
Communication Æ Internet Explorer ................. 26
Communication Æ Mozilla Firefox .................... 27
Communication Æ E-Mail and Chat .................. 28
Communication Æ Privacy ................................ 29
Administration Æ User Logon ........................... 30
Administration Æ Drives ................................... 31
Administration Æ Memory and Cache............... 32
Administration Æ Start and Maintenance ......... 32
Administration Æ System.................................. 34
Wizards Æ Correct Problems............................. 34
Wizards Æ Copy Settings .................................. 35
TuneUp StartUp Manager ..................................... 36
Usage................................................................ 36
TuneUp System Information.................................. 38
Usage................................................................ 38
TuneUp Styler........................................................ 40
Usage................................................................ 41
System Elements ............................................... 41
File System ........................................................ 44
Appearance....................................................... 45
Repair................................................................ 46
Boot Screen....................................................... 46
Creating Boot Screens ....................................... 47
Logon Screen .................................................... 49
Visual Style........................................................ 50
Clean up and Repair ...............................................52
TuneUp RegistryCleaner ........................................ 53
Usage................................................................ 53
The Main Window............................................. 54
Clean-up............................................................ 56
TuneUp DiskCleaner .............................................. 58
Usage................................................................ 58
Analysis ............................................................. 59
6 TuneUp Utilities 2006
Page 5

Clean-up............................................................ 61
Optimize and Improve............................................62
TuneUp MemOptimizer......................................... 64
Usage ................................................................ 64
Configuring AutoOptimize ................................ 65
Manual Optimization ........................................ 66
Program Options............................................... 66
TuneUp RegistryDefrag ......................................... 67
Registry Analysis................................................ 67
Defragmenting the Registry .............................. 68
TuneUp System Optimizer..................................... 69
1-Click Maintenance.......................................... 69
The System Advisor ........................................... 70
Optimize Internet Connection ........................... 71
System Optimization ......................................... 72
Administer and Control..........................................74
TuneUp Process Manager...................................... 75
Processes........................................................... 75
Open Files ......................................................... 76
Performance...................................................... 76
Menu Bar Functions .......................................... 77
TuneUp Registry Editor.......................................... 78
Usage ................................................................ 78
TuneUp Uninstall Manager.................................... 80
Usage ................................................................ 80
Table of Contents
File recovery and Destruction.................................81
TuneUp Shredder .................................................. 82
What does TuneUp Shredder do?...................... 82
Usage ................................................................ 82
Deleting Files..................................................... 82
Deleting a Folder............................................... 83
Deleting the Contents of the Recycle Bin........... 83
Selecting the Deletion Method.......................... 83
Shredding a File after deletion .......................... 84
TuneUp Undelete .................................................. 85
TuneUp Utilities 2006 7
Page 6

Table of Contents
Global Modules ......................................................89
Glossary ..................................................................95
Index ..................................................................... 105
Usage................................................................ 85
Enter Search String............................................ 85
Search Results ................................................... 86
Recovering Files................................................. 87
Data Recovery 101 ............................................ 87
Deleting Sensitive Files the Right Way ............... 88
TuneUp RescueCenter ........................................... 90
Undoing Changes.............................................. 90
System Recovery................................................ 92
TuneUp UpdateWizard.......................................... 93
Usage................................................................ 93
Installing Updates ............................................. 94
8 TuneUp Utilities 2006
Page 7

Preface
Preface
1
Windows XP or one of its predecessors are installed on most computers in use
around the world. Windows is an excellent operating system for standard tasks
such as working with applications and managing files. But things aren’t so
simple when a user wants to customize, optimize or streamline the system – ease
of use is quickly forgotten here, and many things cannot be done at all with the
tools that come with the operating system.
But everything is possible. Windows controls the programs that are loaded when
it starts up. Windows specifies which commands can be seen in the Start menu.
Windows also controls how the icons on your desktop look. But how can a user
change these settings?
Nearly everything
can be changed – if
you know where and
how.
Your personal
Windows expert
TuneUp Utilities 2006 9
It’s all easy, says the expert. All of the parameters are hidden in the boot files
and the Windows registry. The registry is the central database for the operating
system and is used by your applications and hardware modules to save their
current configurations. With the help of suitable editors, you can open this
special database and manipulate all of the system’s parameters. The problem is
that only experienced experts know where to find the pertinent parameters
among the myriad cryptic entries in the database. Most users have no idea what
they are looking at when they open the registry.
This is where TuneUp Utilities 2006 comes in. This software helps normal users
and experts alike to better adapt Windows to their needs and tastes. All important
system options are explained clearly and can be enabled or disabled with a click
of your mouse in many different modules. TuneUp Utilities 2006 takes care of
changing the corresponding parameter in the registry or in the boot files.
TuneUp Utilities 2006 is not only about making Windows more attractive. It can
also be used to optimize or clean up the system with a single mouse click,
removing unneeded files from your hard drive and deleting superfluous entries
from your registry. And all configurations are optimized so that Windows runs
noticeably faster than before.
Page 8

Preface
Automatic
adaptation to your
operating system
To make all of this possible, TuneUp Utilities 2006 delves deeply into the
Windows operating system. But Windows itself changes significantly from year
to year. For this reason, our software adapts automatically to all supported
Windows versions. As a user, you normally do not notice this and can simply use
the software and all of its features.
10 TuneUp Utilities 2006
Page 9
Installation
Before you can use TuneUp Utilities 2006 on your computer, you must install it.
This copies the program files to your computer so that you can start and use the
program any time without inserting the CD.
System Requirements
Your system must fulfill certain minimum requirements in order to be able to
properly install and use TuneUp Utilities 2006. These requirements are not
demanding, and should be met by any fairly modern computer.
Installation
2
Minimum system
configuration
Microsoft Windows 98 Microsoft Windows XP
800x600 screen resolution with 256
colors
25 MB free disk space 40 MB free disk space
133 MHz Intel Pentium or AMD K5
processor
CD-ROM or DVD-ROM drive CD-ROM or DVD-ROM drive
Internet access
Recommended system
configuration
1024x786 screen resolution with
16.7 million colors
Intel Pentium II or AMD Athlon
processor
Starting the Installation
Insert the included CD in your CD-ROM drive. The installation should start
automatically as soon as Windows recognizes the CD.
If nothing happens when you insert the CD, the AutoPlay function has been
deactivated for your drive. In this case, open your Explorer and double click the
file Setup.exe in the root CD directory to start the installation.
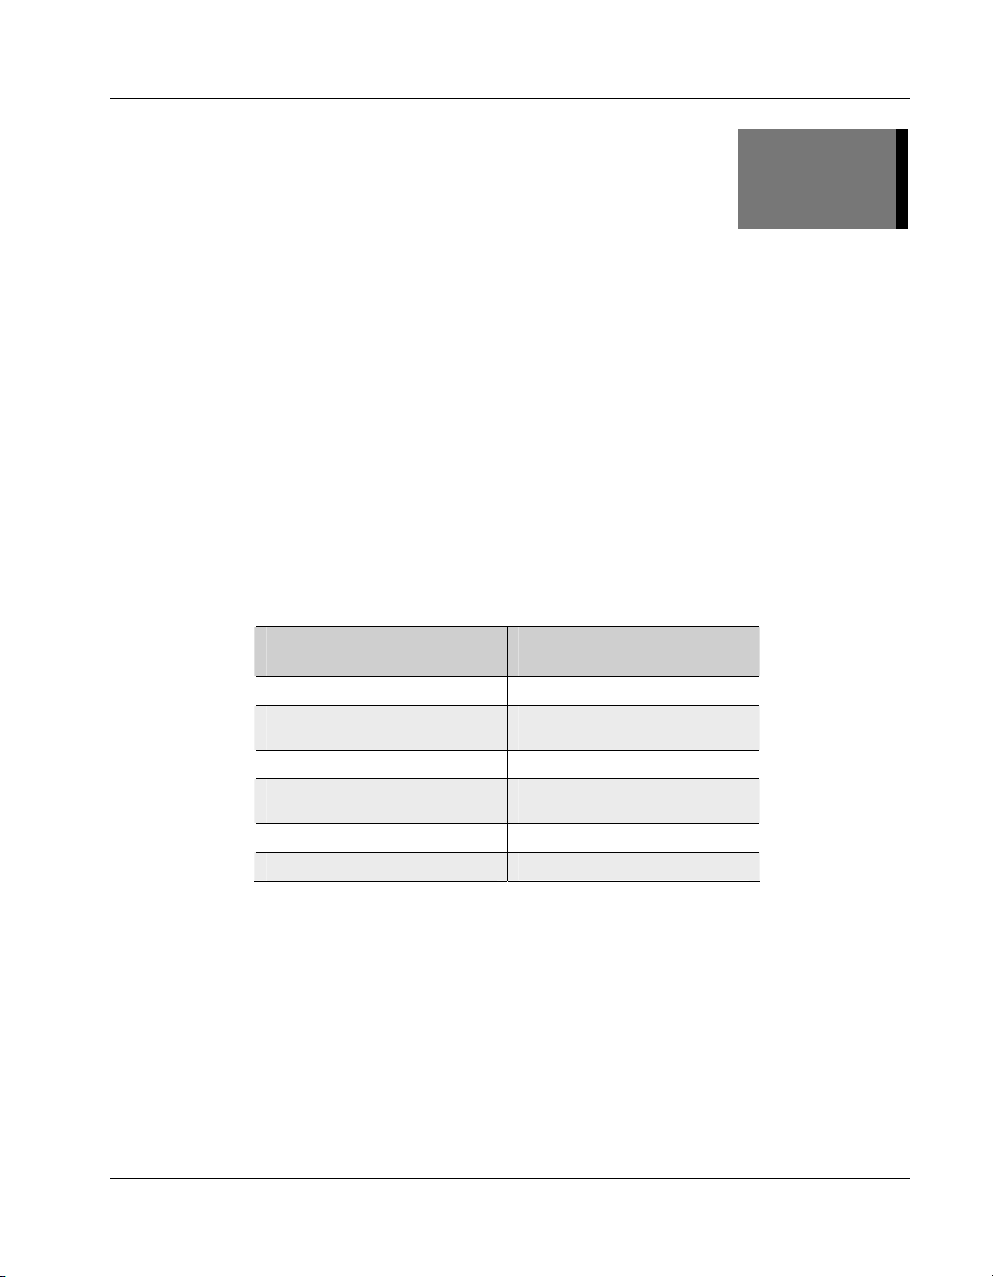
The installation program now displays an introductory screen asking you to close
all other open programs. To do this, press Alt+Tab to switch to any open
TuneUp Utilities 2006 11
Page 10
Installation
Please close all other
programs.
applications and close them by pressing Alt+F4. You must do this to ensure that
no problems occur during installation. This also makes it possible for the
installation program to update system files that may otherwise be locked because
they are in use.
Once you have closed all other programs, click Next to continue.
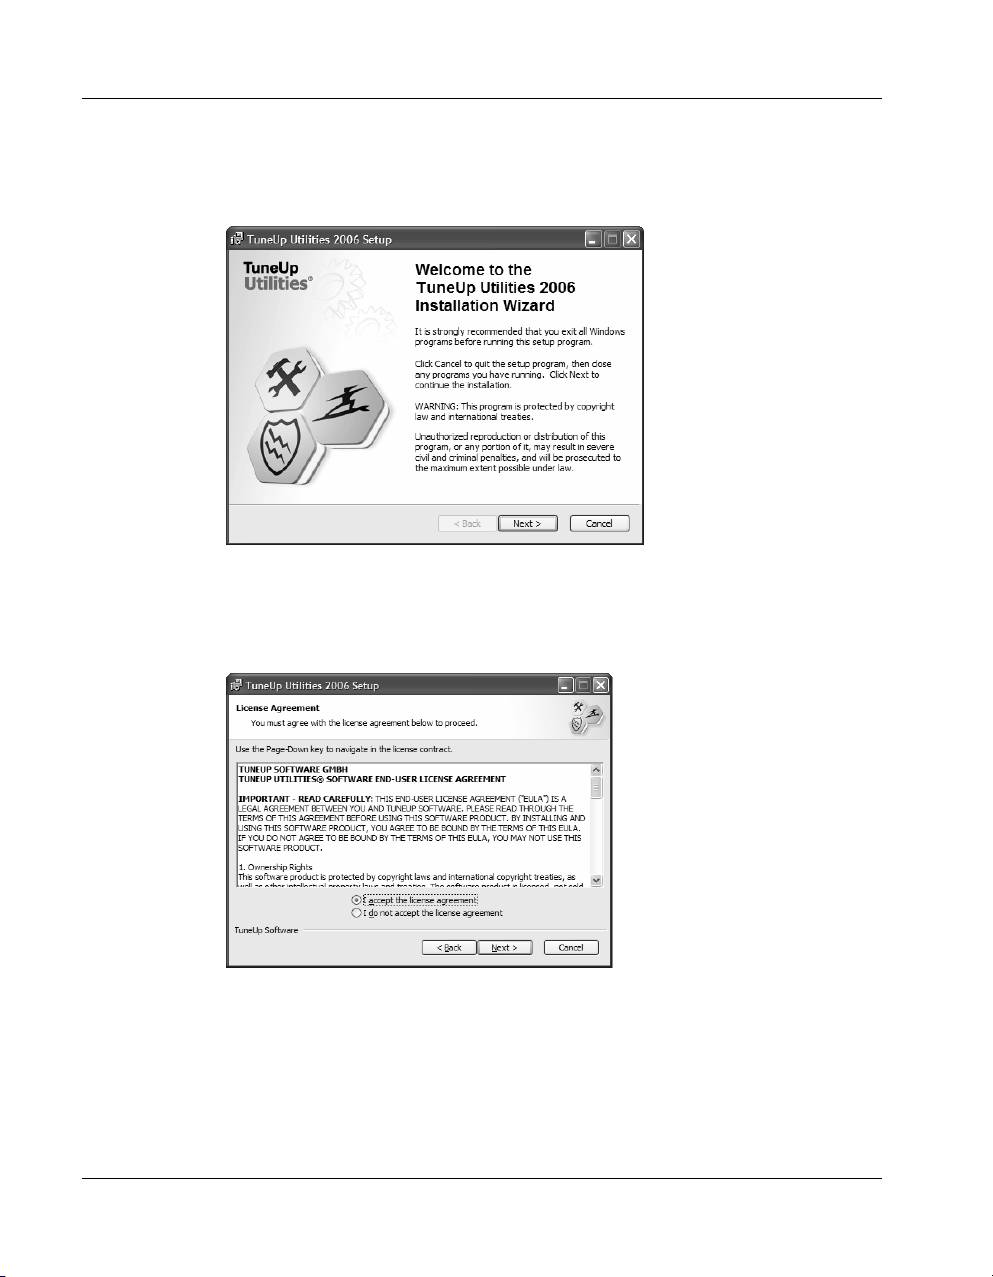
The program now displays the license agreement. Read the entire text to learn
under what conditions you are allowed to use the program. Then select I accept
the license agreement and click Next.
You must accept the
license agreement to
continue.
Entering Your User Name and Serial Number
On the next screen, you must enter your User Information. Here, the installation
program requests your name and the name of your company or organization.
These boxes are normally already filled in with the correct information. If this is
12 TuneUp Utilities 2006
Page 11
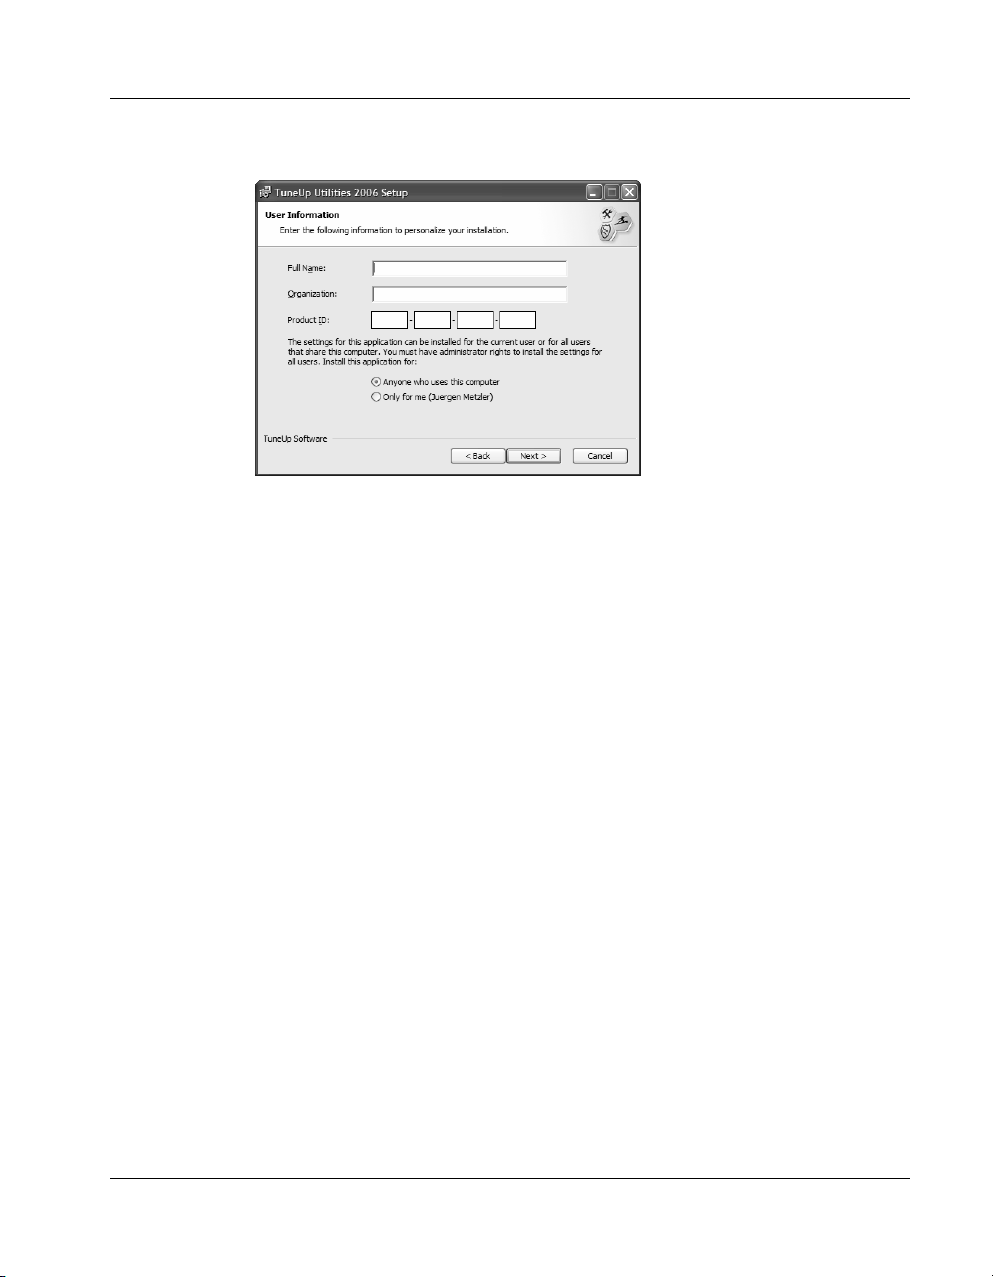
not the case, please enter the correct information. The Serial number can be
found on the front of this manual.
Personalize your
copy of TuneUp
Utilities
If you use Windows XP and 2000, you can specify whether the program should
be available for all users on the computer or only for you in the next step.
After you have entered all necessary information, click Next to continue.
Selecting the Installation Location
You’re almost done. Now, you have to specify the folder on your computer in
which TuneUp Utilities 2006 should be installed. The default location suggested
by the program is C:\Program Files\TuneUp Utilities 2006.
Installation
You can normally use this folder. But if you wish to install the program in a
different folder, click Browse.
Start the installation.
Then click Next to begin copying the files.
A progress bar shows you how far along the installation is. Wait until the
program displays the message “TuneUp Utilities 2006 was installed
successfully”.
Then click Finish to complete the installation.
TuneUp Utilities 2006 13
Page 12

Introduction to TuneUp Utilities
Introduction to
TuneUp Utilities
Starting the Software
There are a number of ways to open the TuneUp Utilities 2006 Start Center. The
most important are explained below.
A new icon is added to your desktop when you install the software. Double click
this yellow icon with the name TuneUp Utilities 2006 to start the program
directly.
You can also start the software through the Windows Start menu. To do this,
open the Start menu and then the folder All Programs. This folder contains a
folder called TuneUp Utilities, which is created when you install the software.
Click the TuneUp Utilities icon in this folder to open the Start Center.
You can also start each of the TuneUp Utilities 2006 modules individually if you
are familiar with the software. To do this, open the subfolder Utilities in the Start
menu folder, which contains icons for each of the modules. Simply click one of
these icons to start the corresponding module.
3
Structure and Use of the Software
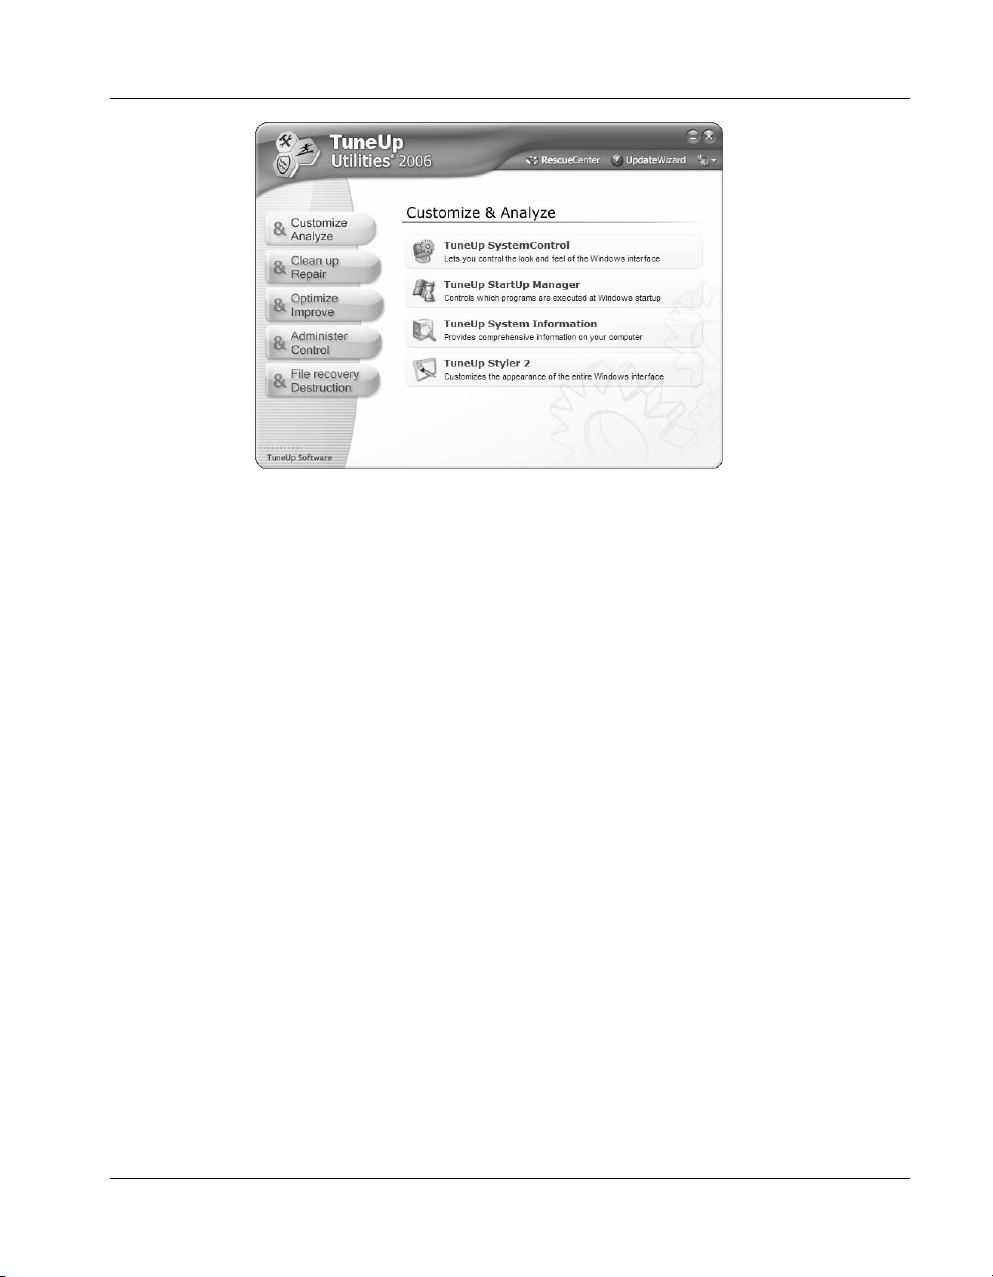
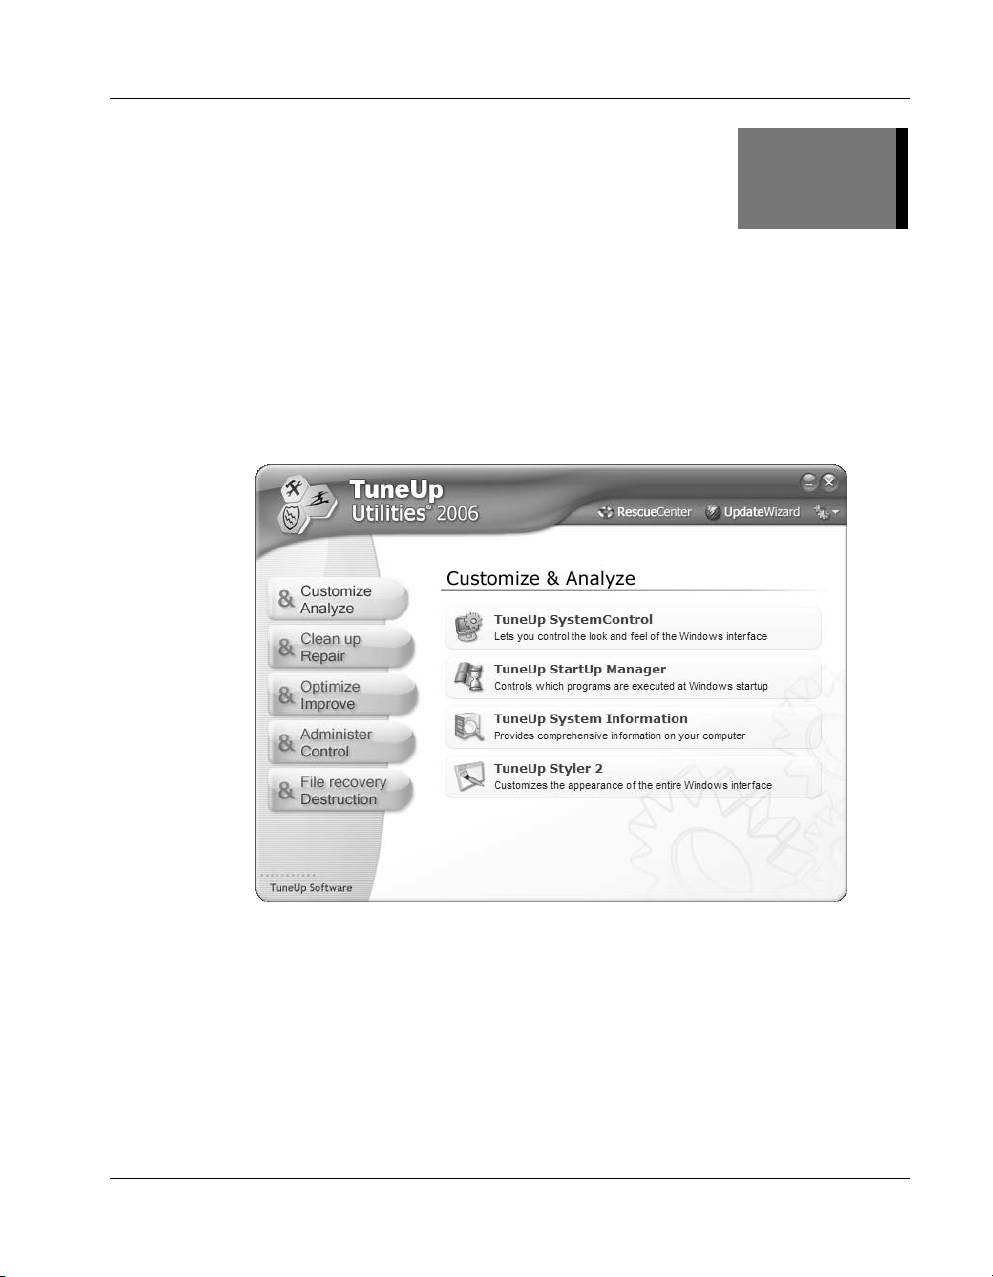
TuneUp Utilities consists of a number of useful modules that can be accessed
through a common graphical Start Center. This center is divided into five
categories to make it easier to select the appropriate modules for what you want
to do.
14 TuneUp Utilities 2006
Page 13
Introduction to TuneUp Utilities
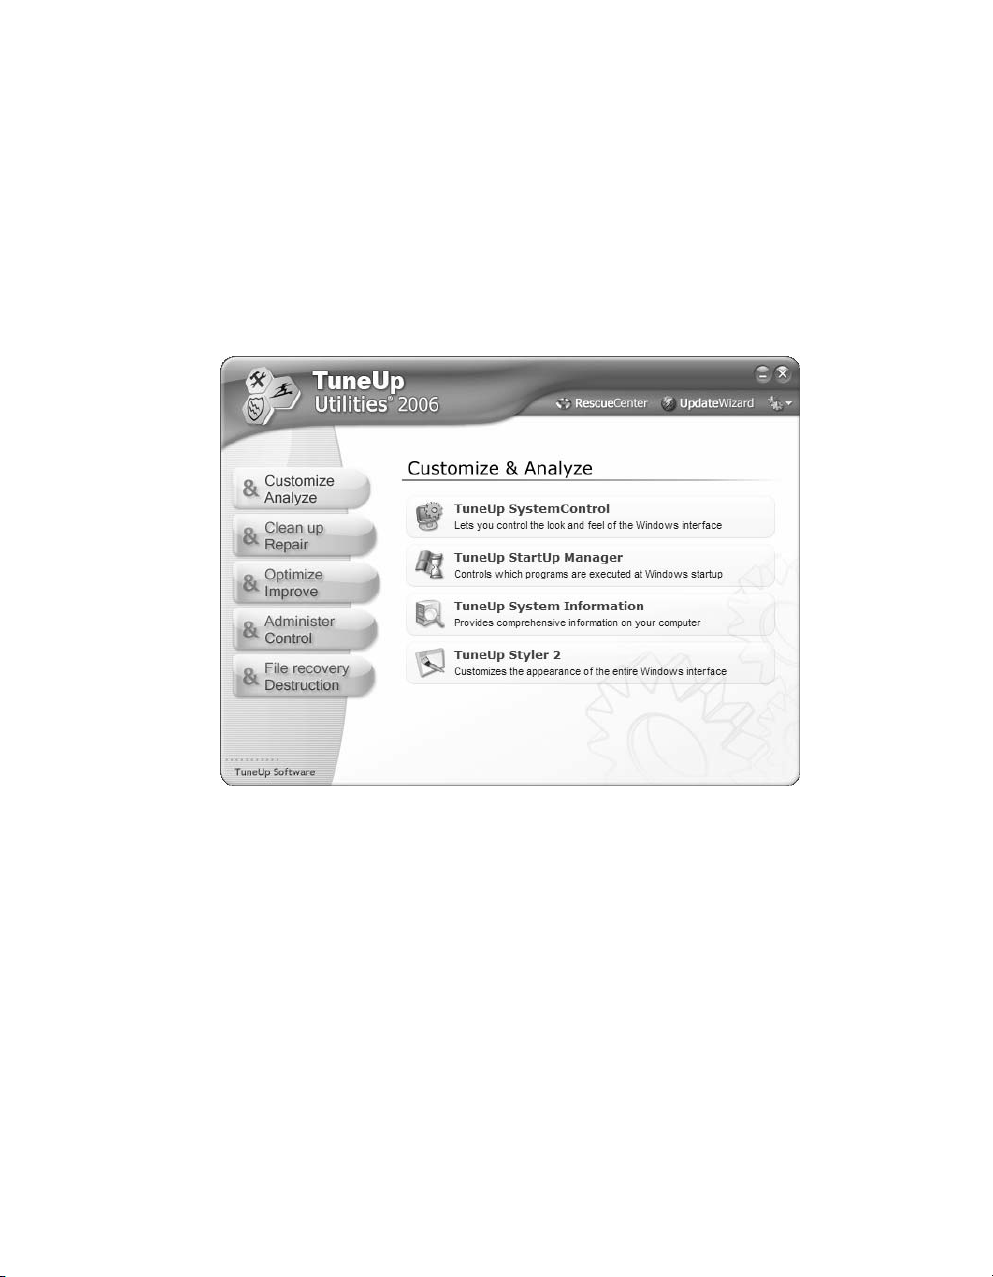
The five TuneUp Utilities 2006 categories can be seen on the left side of the
window. Click one of these names to open the corresponding category.
The modules of the selected category are shown on the right side of the window
in the form of blue buttons. You can start a module by clicking the
corresponding button.
When you have finished working with a module, simply click the red X in the
upper right corner to close it and return to the Start Center. Here, you can either
select another module, or close TuneUp Utilities 2006.
The Five Categories
Customize and Analyze
These modules allow you to delve deeply into Windows and adapt the system to
your needs and wishes. You can, for example, change the appearance of the
interface and manage the programs that are automatically run when Windows
starts. This category also includes a powerful diagnostic module that displays
detailed and useful information on the hardware and software in your system.
Æ Page 17
Clean up and Repair
A large number of unneeded files and system errors gather as you work with
your computer every day. This category provides you with the tools you need to
rid yourself of this unneeded ballast. One module cleans up the Windows
TuneUp Utilities 2006 15
Page 14

Introduction to TuneUp Utilities
registry and corrects errors, while another deletes unneeded files from your hard
drive to free up space. This can noticeably speed up your system.
Æ Page 57
Optimize and Improve
One module analyzes the configuration of your computer to identify settings that
could be slowing it down and corrects them if you wish. Another module repairs
and defragments the Windows registry. A memory manager also works in the
background to optimize memory usage in your system.
Æ Page 62
Administer and Control
Three modules for expert users help you edit the registry, monitor running
processes and safely remove unneeded applications from your system.
Æ Page 74
File recovery and Destruction
Safety and security at your fingertips: Shredder can delete sensitive information
in such a manner that it cannot be recovered. And if you ever accidentally delete
a file, the undelete module is ready to recover files that have even been deleted
from the Recycle Bin.
Æ Page 81
16 TuneUp Utilities 2006
Page 15
Customize and
A
Customize and Analyze
nalyze
You can tweak
Windows to your
heart’s desire here.
4
The modules in the Customize and Analyze category help you adapt the
operating system to your needs.
TuneUp SystemControl is the most extensive module in TuneUp Utilities 2006
and lets you specify exactly how your Windows system should look and work.
You will be surprised at how many options you can configure with TuneUp
SystemControl.
TuneUp Styler takes care of the appearance of Windows. You can use this
module to change the icons on your desktop and in your Start menu, and can also
change the icons for your drives, folders and Favorites. Under Windows XP, you
can even change the appearance of the logon screen and install new visual styles
that change the way the Windows interface looks entirely.
TuneUp Utilities 2006 17
Page 16

Customize and Analyze
TuneUp StartUp Manager lets you finally put a stop to all of the irritating
programs that load themselves automatically when you start Windows, even if
you don’t want them to.
And TuneUp System Information provides you with a clear overview of your
hardware and software so that you know exactly what is installed in your system.
This provides you with all the information you need so that you can, for
example, tell a service technician which graphics card you have in your
computer, the manufacturer of your main board, how much RAM you have
installed, and much more.
18 TuneUp Utilities 2006
Page 17
TuneUp SystemControl
TuneUp SystemControl is a kind of control center that allows you to quickly
and easily adapt your Windows operating environment to your needs and tastes.
Regardless of whether you want to change the visual effects, the desktop, the
way users log on, the security of your system or memory management, TuneUp
SystemControl lets you configure and optimize any setting, down to the
smallest detail.
And the program even protects your privacy if desired by deactivating Internet
functions that automatically contact Microsoft or that collect information on your
surfing habits without asking permission.
All changes are monitored by TuneUp RescueCenter and can be undone at any
time.
Usage
TuneUp SystemControl is a very powerful module. You can use it to easily and
safely configure hundreds of Windows settings.
Extensive but easy to
use: TuneUp
SystemControl
contains over 330
options, structured
and clearly explained
for easy use.
Customize and Analyze
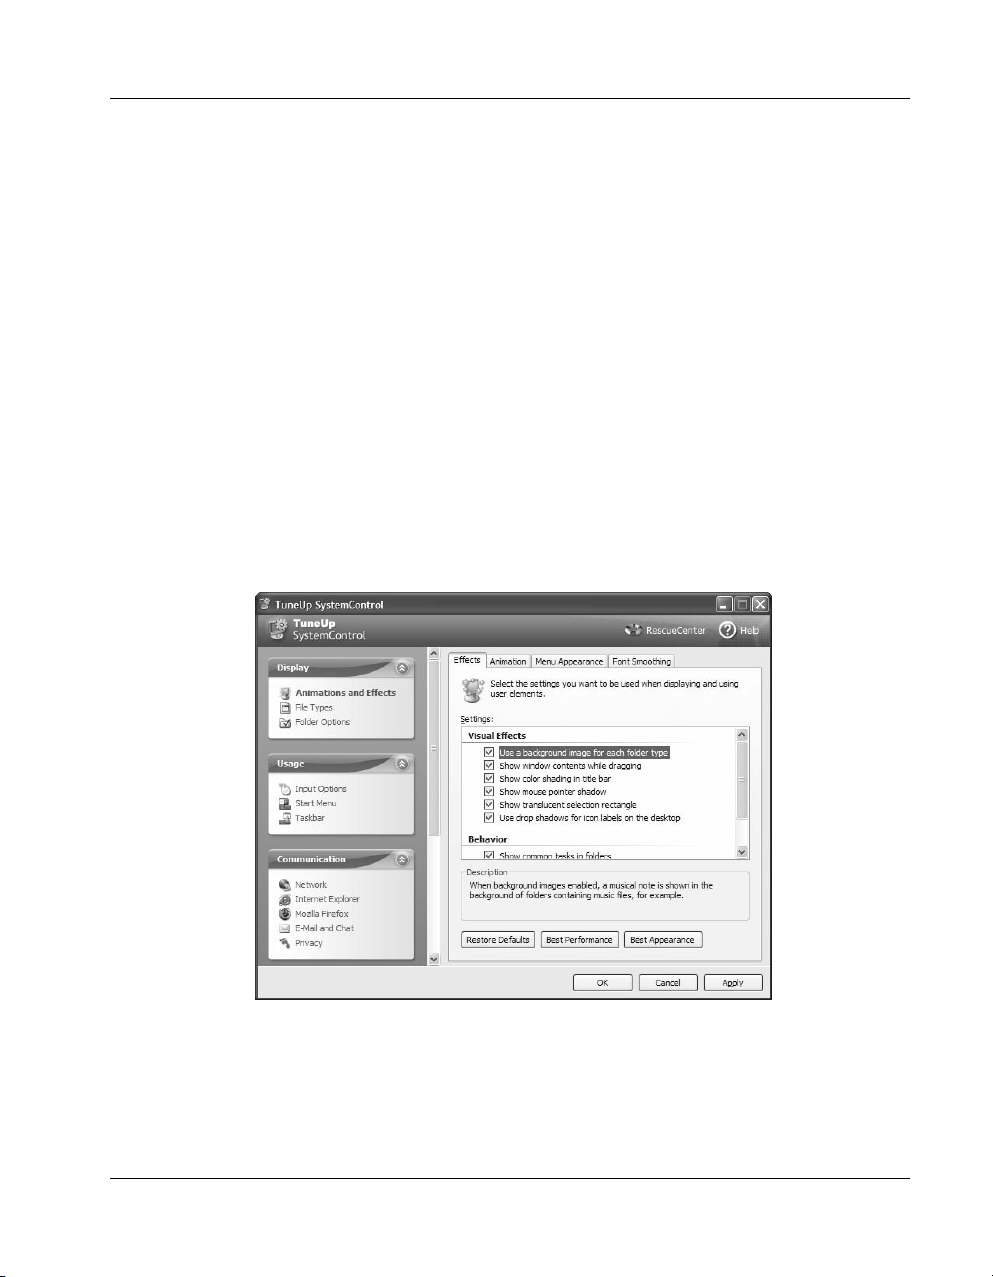
As soon as the program opens, the various categories that you can configure are
shown on the left side of the window. These categories are Display, Usage,
Communication, Administration and Wizards. Each of these categories
contains multiple subcategories.
TuneUp Utilities 2006 19
Page 18
Customize and Analyze
As soon as you click one of the subcategories with your left mouse button, the
available options are shown on the right side of the window. Take a look at all of
the settings that can be configured with the program, you will find many
interesting and useful options.
Note: TuneUp SystemControl adapts to the installed operating system
automatically and only offers the options that are supported by your system.
Don’t be surprised when you see different options under Windows 98 and
Windows XP, for example. If you need help with a particular setting in TuneUp
SystemControl, use the integrated context-sensitive help, which can be accessed
through the context menu for nearly every option.
Tip: Use the context-sensitive help!
Click any option in TuneUp SystemControl with your right mouse
button and select What’s This? to view detailed information for the
selected option.
Display Æ Animations and Effects
Effects
You can configure the appearance and behavior of the system interface elements
here.
Disabling various unneeded effects can lead to a significant increase in speed
depending on your system.
Click Best Appearance to enable the most impressive visual settings. If speed is
more important to you, click Best Performance. Click Restore Defaults to
restore the original Windows settings.
Animations
You can specify which animations should be displayed when you work with
windows and lists here.
Click Best Performance to disable all options that are only eye candy. Click
Restore Defaults to restore the original Windows settings.
Menu Appearance
You can configure the appearance and behavior of context menus and standard
application menus here.
Under Animation, you can specify whether menus should fade out when they
close. You can also select a display effect from a drop-down menu.
Under Effects, you can specify whether Windows should use flat 2D menus or
whether a small 3D shadow should be displayed beneath an open menu.
20 TuneUp Utilities 2006
Page 19

Remove unneeded
entries from the
menu and add your
own!
Customize and Analyze
Font Smoothing
In order to improve the readability of text on your computer, you can select the
font smoothing method that looks best to you under this option.
The smoothing method ClearType is especially interesting. It is designed for
flat screen monitors (TFT and LCD) and makes use of their so-called subpixels
in order to effectively smooth the edges of small fonts. Click ClearType
Settings to adapt these settings to your individual monitor.
Display Æ File Types
Menu Operations
In this tab, you can specify which entries should be shown in the context menus
for drives and folders. This can let you open the command prompt directly under
My Computer by right clicking a folder, for example.
New Menu
You can specify which file types are displayed in the New menu in the context
menu for the desktop, the Explorer and the Save dialog here.
If you wish to remove a file type from the menu, click the check box in front of
the desired file type to remove the check mark. Click Remove to delete the file
type from the list entirely. New file types can be added by clicking Add.
You can also specify whether the New menu is displayed at all in the context
menu for the desktop and free areas of folder windows under Options.
TuneUp Utilities 2006 21
Page 20

Customize and Analyze
Opening Files
Here, you can specify what Windows should do when you open files of an
unknown type. In the box Default application, you can specify that the dialog
"Open With" be shown, or that the file should be opened with a specific
program automatically (such as Notepad). Enter the path of the desired program
in the Open with box.
Advanced
Under New shortcut prefix, you can specify whether the prefix "Shortcut to"
should be added to the names of new shortcuts.
Under Windows Picture and Fax Viewer, you can specify whether pictures
should be shown automatically in Windows Picture and Fax Viewer when you
double click them. If this is the case, you can leave this option selected.
Display Æ Folder Options
View
You can specify how folder Windows and the objects contained in them should
appear here.
Navigation
Here, you can configure the settings for navigating in folder windows and special
sorting settings for numbered files.
Thumbnails
You can configure the settings used for the automatic display of preview images
for folders containing pictures here.
Colors
If you select the folder option “Single-click to open an item” in the Explorer,
files and folders are selected as soon as you position the mouse pointer over
them. You can select the color used to highlight selected files here. You can also
specify the color in which encrypted and compressed files are displayed in the
Explorer here (regardless of whether “Single-click to open an item” is selected or
not).
Advanced
Here, you can specify which special items should be shown on the desktop and
under My Computer. You can also easily hide entire drives and customize the
behavior of the address box in the Explorer, Internet Explorer and the Run
dialog.
22 TuneUp Utilities 2006
Page 21

Do you want to hide
a drive from prying
eyes? No problem, a
click on My
Computer makes it
possible.
Customize and Analyze
Usage Æ Input Options
Mouse Functions
You can configure the functions of your mouse here by swapping the mouse
buttons and changing the behavior of the scroll wheel.
Mouse Sensitivity
You can configure how sensitively your mouse should react to click and drag
actions here. You can change how long the computer will wait between two
mouse clicks and still recognize a double click, for example.
Active Window Tracking
Here, you can activate a little-known Windows function that could entirely
change the way you work with windows, so-called Active Window Tracking.
When you select the Active Window Tracking function, all you have to do to
activate a window is move the mouse pointer over it.
The option in the Foreground section can also be selected if you wish to have
the activated window brought to the front automatically.
Keyboard
You can configure how Windows is controlled with the keyboard here, for
example by configuring the behavior of the Windows key.
TuneUp Utilities 2006 23
Page 22
Customize and Analyze
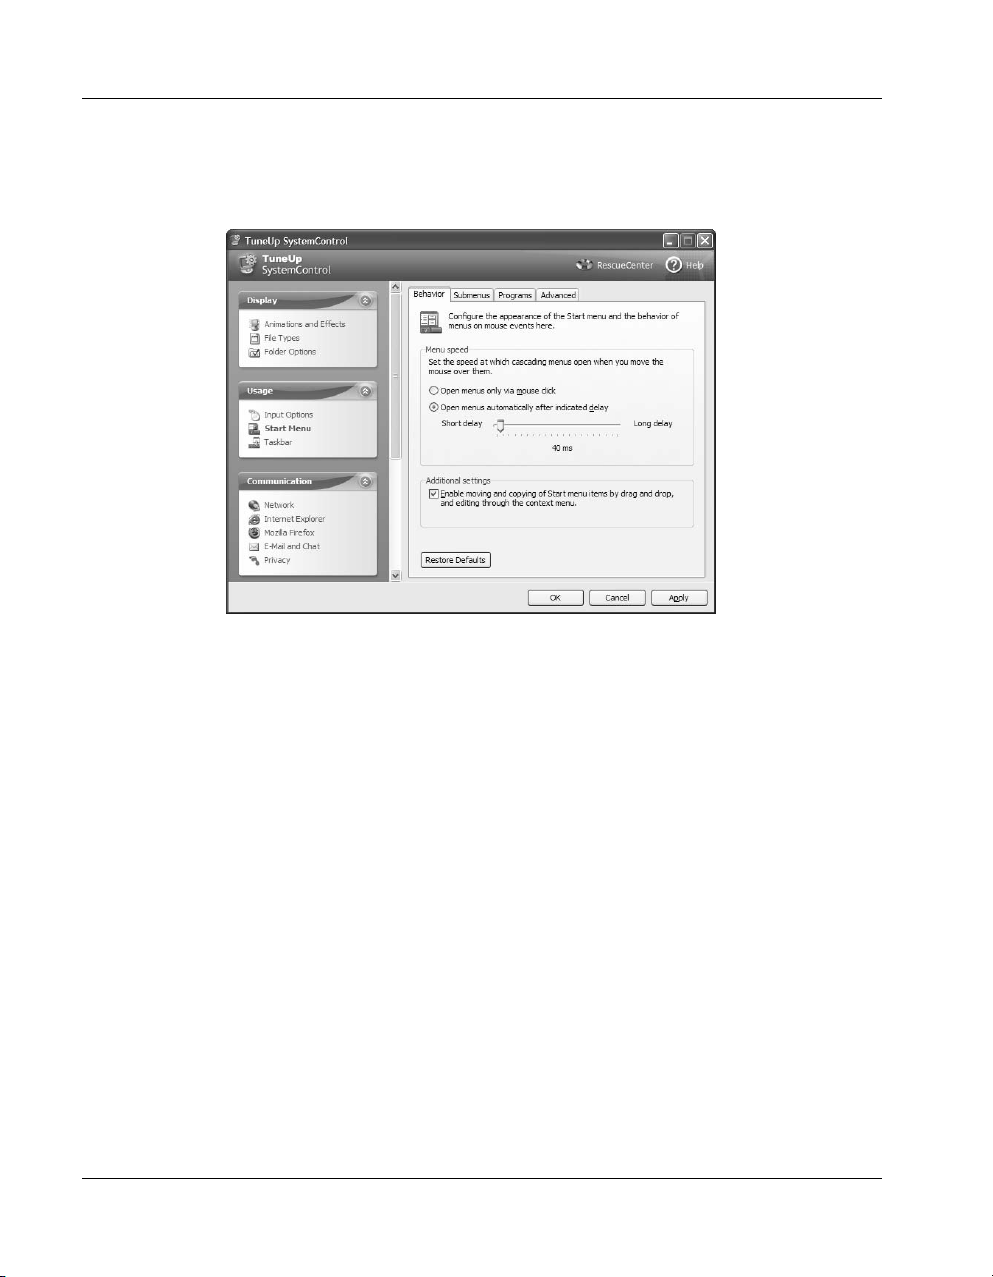
Usage Æ Start Menu
Behavior
You can configure how the Start menu reacts to specific mouse actions here.
You can navigate
through menus
much more quickly if
you reduce the
opening delay here.
Submenus
Here, you can specify how many of your most recently used documents and files
should be shown in the Start menu, among other things.
You can also click Setting in the Special menus section to call up a window in
which you can specify the commands that should be shown in the Windows Start
menu.
Programs
Here, you can configure the Start menu settings that affect programs. One option
is, for example, to customize the list of Frequently Used Programs.
Advanced
You can configure the display of your user name in the Start menu and call up
other TuneUp Utilities modules that are relevant for the Start menu here.
Usage Æ Taskbar
Flashing Buttons
This function prevents other windows from “barging” their way to the front
while you are working on a document in a text editing program. Instead, the
24 TuneUp Utilities 2006
Page 23

You can customize
or deactivate button
flashing here.
Customize and Analyze
button of the program on the taskbar will blink when the program needs your
attention.
Button Appearance
You can specify whether and how windows should be represented by buttons on
the taskbar.
Minimized Windows
Sometimes when a window is minimized, all that can be seen is the title bar that
is moved to the lower edge of the screen, just above the taskbar, automatically.
The behavior of windows that are minimized in this manner can be configured in
accordance with your wishes in this tab.
Advanced
You can customize general display and behavior options for the taskbar and the
notification area here.
Communication Æ Network
My Network Places
Here, you can configure a number of settings that affect the display of shares
under My Network Places. These include preventing your computer from being
shown under My Network Places on other computers.
Advanced
Here, you can deactivate the Windows Universal Plug and Play service for
security reasons. You can also remove the Windows Messenger here.
TuneUp Utilities 2006 25
Page 24

Customize and Analyze
Passwords
Saving your passwords means that you don’t have to enter your password every
time you dial into the Internet, access password protected shares, etc. However,
hackers may be able to access and misuse these passwords. You can deactivate
the automatic saving of passwords here.
Internet Time
You can specify whether and how Windows should synchronize your system
clock with an Internet time server here. You can also add additional time servers
to the list.
Internet
A variety of expert settings for your Internet connection can be configured here.
Communication Æ Internet Explorer
Explorer Bars
Here, you can configure the behavior of the bars in Internet Explorer. For
example, you can specify that the search bar always searches using Google.
View
Here, you can customize Internet Explorer to suit your tastes. You can for
example change the window title bar and specify a toolbar background
picture for the toolbars. You can also customize the behavior of the Image
toolbar here, or turn it off altogether.
Favorites
You can hide unwanted Favorites folders and their contents here. Please note that
the contents of your Favorites folders are not shown here, but only the existing
folders so that they can be hidden or displayed.
Menu
Here, you can customize the File menu of Internet Explorer, and under Settings,
you can add many useful commands to the context menu that is called up when
you click on a web page with your right mouse button.
Security
Make downloading files with Internet Explorer more secure and hide your
browser version from sites you visit.
Performance
You can accelerate the loading of websites here by adapting the number of
simultaneous connections to your connection.
26 TuneUp Utilities 2006
Page 25
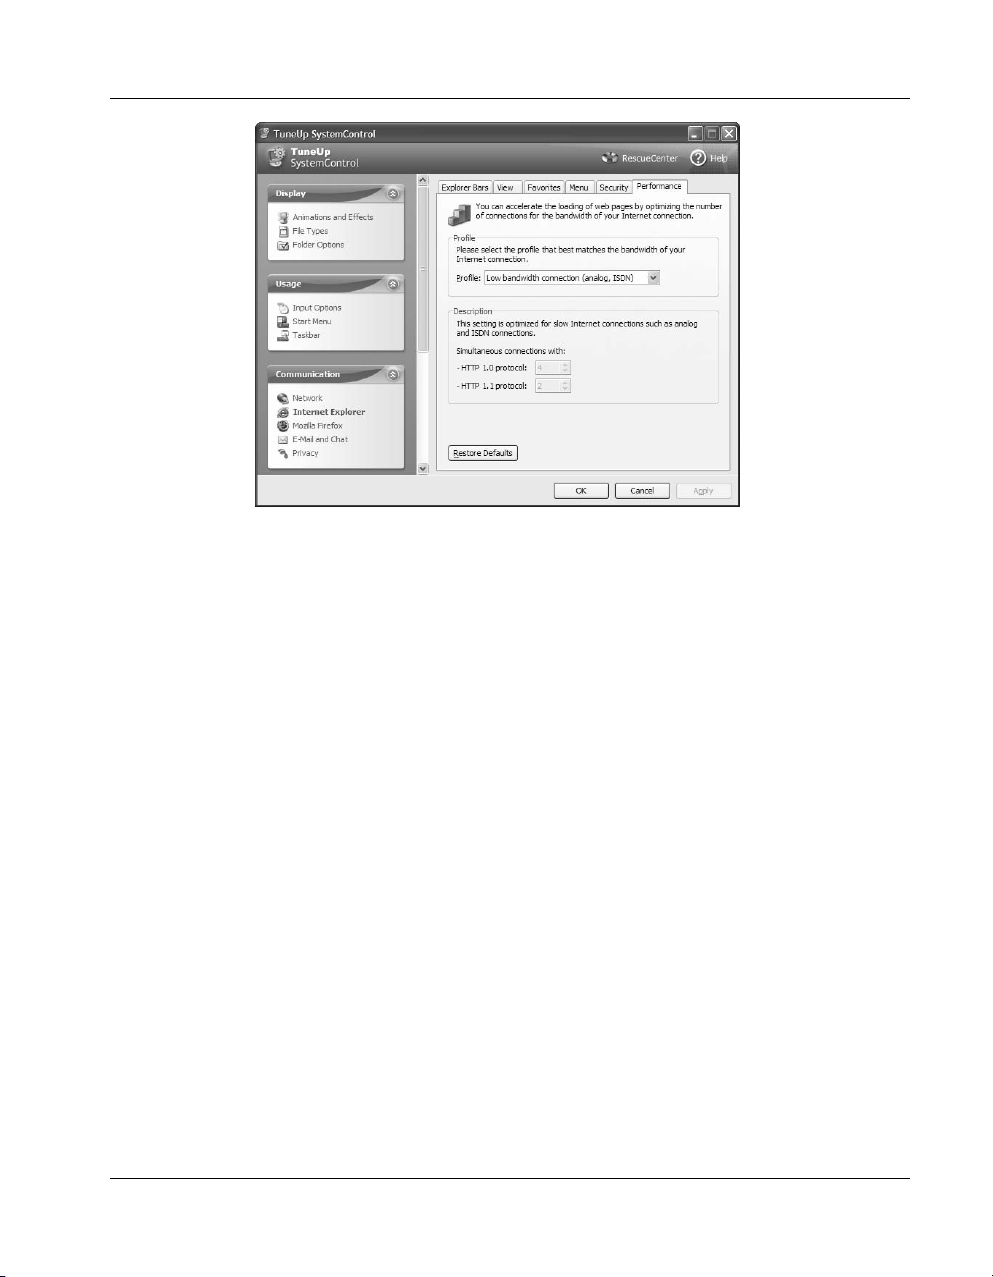
Surf the Internet
faster with this
option!
Customize and Analyze
Communication Æ Mozilla Firefox
General
Text animation: Many web sites try to attract your attention by using as many
visual effects as possible. These often include text effects such as blinking or
horizontally scrolling text (marquees). If these effects are a nuisance to you, you
can disable them by selecting the options Disable blinking text and Disable
scrolling text (marquees).
Error messages: Here, you can specify whether messages about failed attempts
to connect to a web server should be shown in a window (dialog) or as a web site
in the browser window.
Sidebar location: Here, you can specify whether the sidebar should be shown on
the left or right side of the browser window. The sidebar can contain your
bookmarks, history and downloads.
Usage
Autocomplete: When you enable autocomplete for the address bar, Internet
addresses that you have previously visited will be entered automatically in the
address bar when you type the first few characters of the address.
Menu speed: Here, you can specify how long Mozilla waits before it opens a
submenu when the mouse pointer is positioned over the submenu.
TuneUp Utilities 2006 27
Page 26

Customize and Analyze
Popup Windows
Under Opening popup windows, you can specify that the contents of a popup
window must be shown in the current browser window instead of in a new
window.
Under Allowed window manipulation, you can specify what changes a web site
can make to popup windows. Some web sites try to hide the navigation bars in a
popup window so that it looks like a Windows message dialog. You can prevent
this here.
Performance
Here, you can enable the pipelining function of Mozilla Firefox. Pipelining is an
experimental function through which the web browser sends multiple download
requests to a web server over a single connection. This is not supported by all
web servers.
Communication Æ E-Mail and Chat
Outlook Express
If you use Outlook Express, you can change the text that is shown in the title bar
in this panel. You can also specify whether or not the splash screen should be
shown when Outlook Express is started.
You can also configure the security function in Outlook Express that blocks
executable e-mail attachments. If you do not wish to have such attachments
blocked, you can disable this function. Please note, however, that such
attachments may also contain malicious programs, such as a viruses, that are run
when you click them.
Office Outlook
Under Type a question for help box, you can specify whether this box is shown
in the toolbar of all Office applications.
If you want to have an Outlook icon in the notification area instead of a button
on the taskbar when the program is minimized, select Minimize Outlook to
notification area.
E-Mail Attachment Security subwindow
When Office Outlook downloads e-mails that contain attachments, it is best to
have certain attachment file types blocked automatically so that they cannot be
opened. If this is not done, you could easily activate a virus, for example, by
clicking an attachment. In some cases, however, it is sensible to disable the
blocking of individual file types.
28 TuneUp Utilities 2006
Page 27
Cover the tracks you
leave while working
on your computer
and surfing the
Internet here.
Customize and Analyze
Under Blocked file types, you can see a list of all file types that cannot be
opened in Outlook. You can disable the blocking of individual file types, or
disable the blocking of all file types by clicking Block None.
Windows Messenger
Under Run, you can now specify if and at what events Windows Messenger is
loaded automatically. If you want to prevent Windows Messenger from running
entirely, select Do not allow Windows Messenger to run (disable).
If you do not use Windows Messenger at all, you can also remove it from your
system entirely. To do this, use the Remove section.
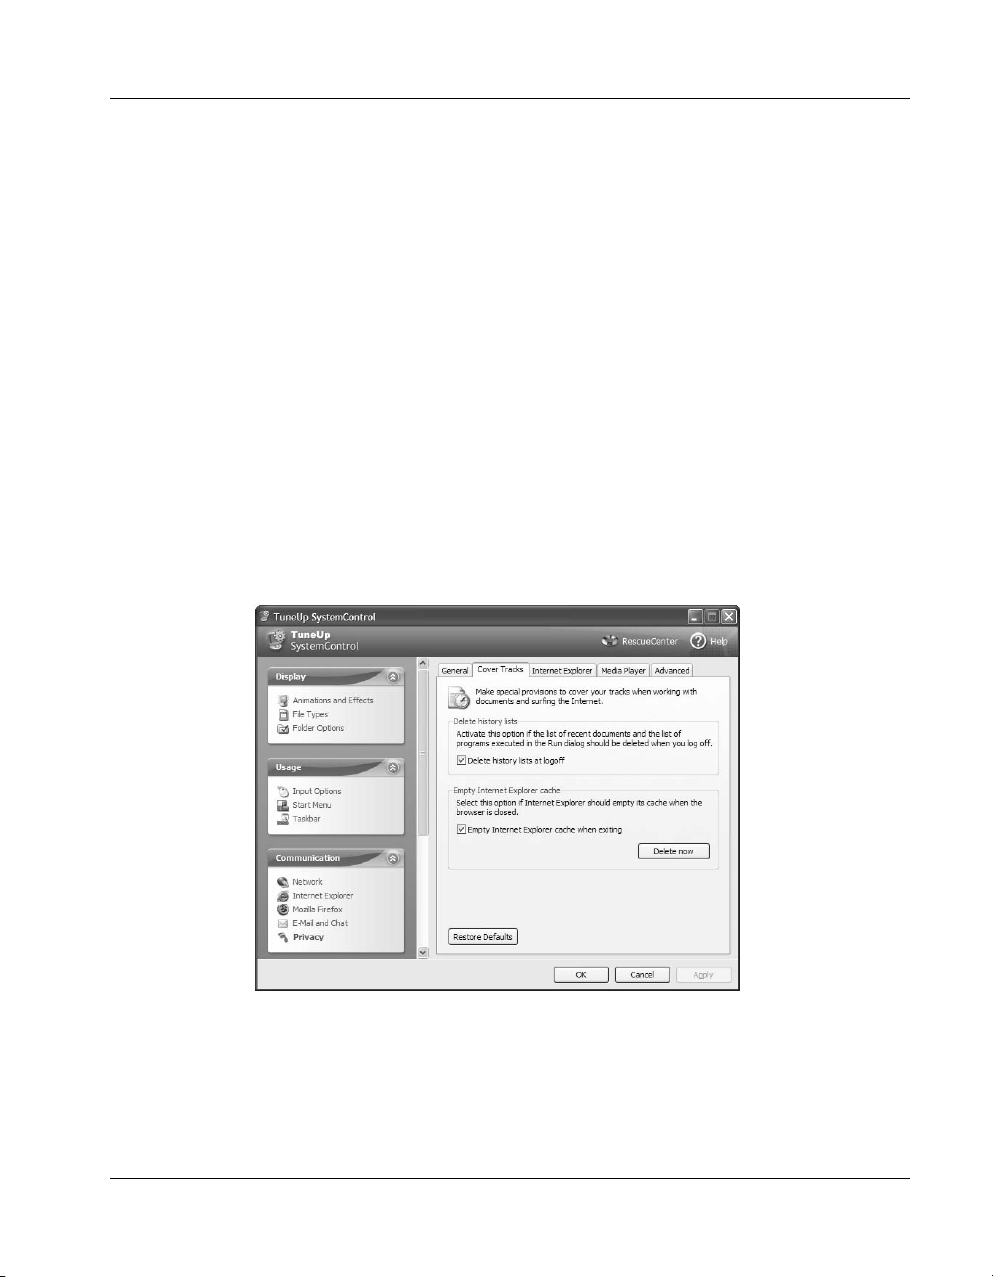
Communication Æ Privacy
General
Here, you can configure settings that affect your privacy and security when
working on the computer.
Cover Tracks
Here, you can configure settings to eliminate the traces of your work with
documents and of the sites you visit on the Internet.
Activate Delete history lists at logoff to have the lists of most recently used
documents and programs emptied when you shut your system down. This
prevents other persons from using these lists to find out what you have done on
the computer.
TuneUp Utilities 2006 29
Page 28

Customize and Analyze
Select Empty Internet Explorer cache when exiting to have the browser cache
deleted as soon as you close the program. You should only select this option
when maximum security is important to you and you do not wish others to be
able to find out which sites you visited on the Internet by viewing the cache.
Internet Explorer
Here, you can configure security settings that affect your privacy when working
with Internet Explorer.
Media Player
You can configure all of the Windows Media Player settings that affect your
privacy here.
Advanced
Here, you can configure Windows XP and Microsoft Office Error Reporting
and go directly to other privacy options.
Prevent your product
ID from being
transmitted to
Microsoft!
Administration Æ User Logon
General
Here, you can switch between the Welcome screen and classic logon prompt, and
can customize both by clicking Customize.
Automatic Logon
In order to save yourself the trouble of logging on to your computer every time
you use your system, you can have yourself logged on automatically.
30 TuneUp Utilities 2006
Page 29

Customize and Analyze
Messages
Here, you can specify whether all users should be shown a message before they
log on.
View
Specify here which screensaver should be shown when no user is logged onto the
system.
Tour
Here, you can activate or deactivate the Windows tour, which offers an
introduction to basic Windows functions and features. When this is activated, it
will be shown each time you log on.
Administration Æ Drives
General
A number of settings that affect your drives can be configured here. You can
enable UDMA66 support to accelerate access to your drives, for example.
Disk Space
Windows displays a warning automatically when too little free space is available
on a drive. If this warning bothers you, clear the check box in front of Show low
disk space warning.
AutoPlay
Under Media change monitoring, you can select or deselect Monitor CD
drives for media change depending on whether you want Windows to
automatically detect when you insert a disc into your CD and DVD drives.
Under AutoPlay, click Advanced to configure the automatic playing settings for
different media types such as music CDs.
Advanced
Under My Computer, click Settings to specify which drives should be shown
under My Computer. You can use this setting to effectively hide drives from
prying eyes.
The button TuneUp Styler opens the TuneUp module that you can use to
customize the icons for individual drives.
If you wish to defragment all of your drives and optimize the locations of all of
your files on your drives so that they can be accessed more quickly, click
Defragment.
TuneUp Utilities 2006 31
Page 30
Customize and Analyze
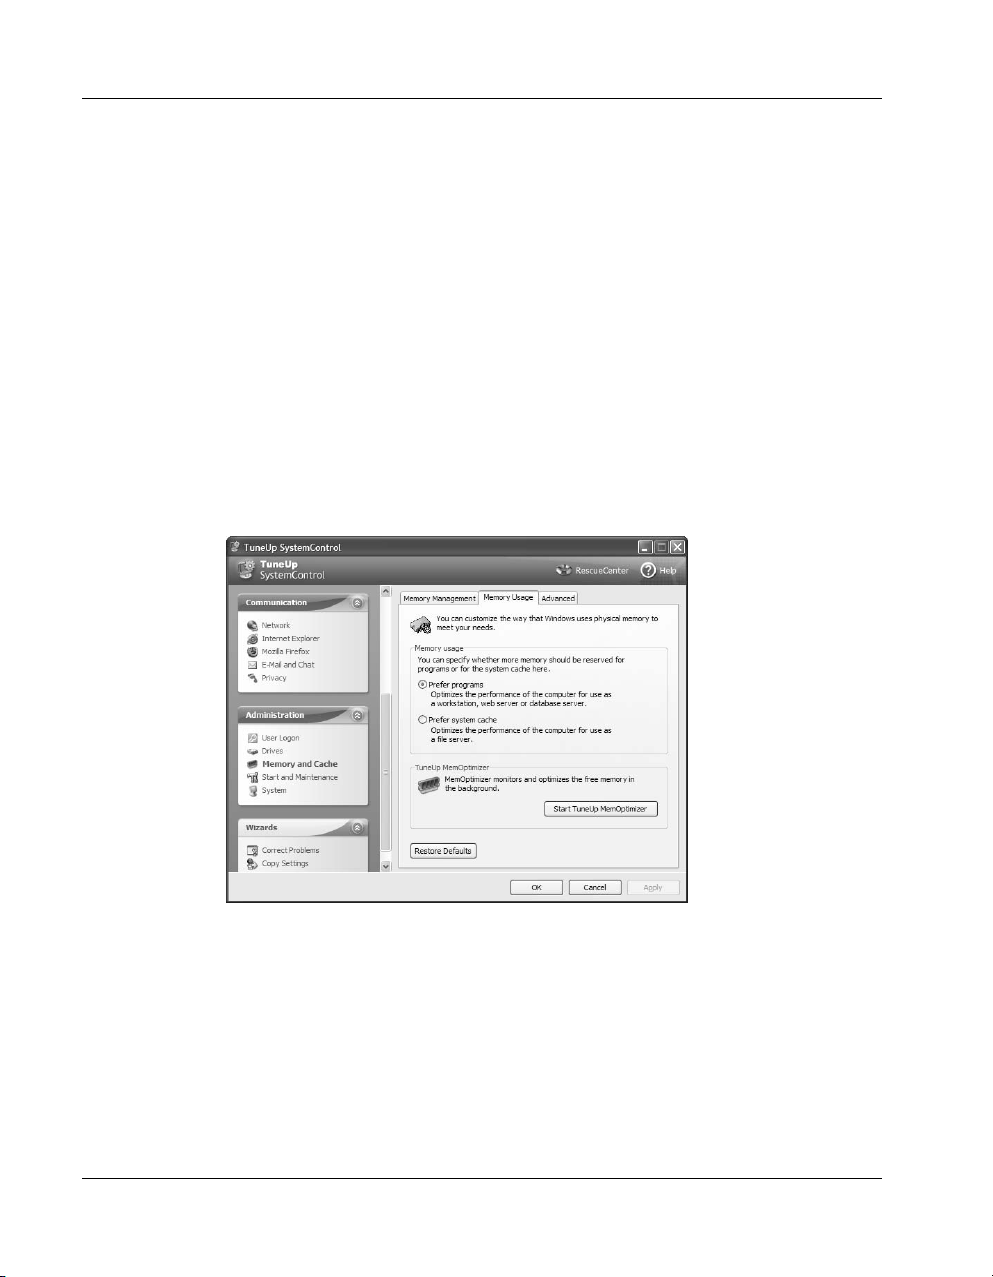
Administration Æ Memory and Cache
Memory Management
Under Virtual memory, you can configure settings for systems with more than
256 MB RAM. On such systems, deactivating the swapping of drivers and the
system core can increase the performance of the system. You can specify
whether the Windows system core and drivers are always kept in the physical
memory or if they can be moved to the paging file if necessary.
Under Paging file, you can configure settings that affect the management of your
physical and virtual memory. If you wish, you can have the entire paging file
overwritten with zeros when you shut your computer down to protect your
privacy. Please note however that enabling this setting will drastically increase
the time your system needs to shut down.
Memory Usage
Here, you can adapt how Windows makes use of your physical memory to meet
your needs.
Do you have 512 MB
RAM or more? Then
try the option
system cache
Prefer
!
Advanced
This tab contains links to other TuneUp Utilities modules that you can use to
optimize your memory usage. All of these modules are described in their own
sections in this manual.
Administration Æ Start and Maintenance
System Start
This tab contains a number of settings that affect how your computer starts.
32 TuneUp Utilities 2006
Page 31

What should
Windows do with
crashed programs?
You decide.
Customize and Analyze
Exit
What should Windows do when individual programs freeze, or when they cannot
be closed?
Under Idle time without feedback, you can specify how long the system will
wait for a program to respond in milliseconds. Once this time has passed without
a reaction, it will be forced to close by the Task Manager or when the computer
is shutting down.
Desktop and Taskbar
You can have the desktop and taskbar run in a separate process here. This
increases the stability of your system in the event that the Explorer crashes.
Errors
Configure various options that affect how Windows deals with errors and faults.
Among other things, you can deactivate Windows XP and Microsoft Office
error reporting here.
Security Center
The new Windows XP Service Pack 2 Security Center regularly checks the
security status of your computer in the background and displays warnings when
potential security problems are identified.
If these warnings are being displayed erroneously on your computer or if you do
not want to have any Security Center warnings displayed, you can disable these
messages here.
TuneUp Utilities 2006 33
Page 32

Customize and Analyze
Administration Æ System
General
Here, you can change the name of the company and name of the person to whom
Windows is registered. You can also specify the user and company name that are
entered automatically when you install programs using the Windows Installer.
Common Dialogs
Here, you can configure the appearance of the common dialogs for opening and
saving files.
Search
Here, you can configure settings that affect the appearance and behavior of the
Windows search function. The Windows Indexing service causes higher disk
activity and can be deactivated here.
Special Folders
Special folders such as My Documents and the Start menu are assigned to
specific directory paths on the hard drive. These paths can be changed here.
Please be sure to follow the warnings displayed by the module.
Command Prompt
You can configure the appearance and behavior of the command prompt here.
Wizards Æ Correct Problems
The Correct Problems wizard can help when Windows no longer does what it
should. This includes problems like incorrect icons, a lost taskbar and many
more.
Select the problems
you wish to correct.
34 TuneUp Utilities 2006
Page 33

The Copy Settings
wizard welcomes
you.
Customize and Analyze
After you start the wizard, a brief introduction is displayed. Click Next to
continue.
The wizard then lists common Windows problems. Select the check boxes in
front of the problems that you are experiencing with your system. Then click
Next to continue.
The wizard shows a list of all problems that you selected. Click Next to begin
repairing your system.
After all problems are successfully corrected, you can close the wizard by
clicking Finish.
Wizards Æ Copy Settings
You can configure many settings with TuneUp SystemControl to change the way
the system looks and acts to suit your tastes and needs. Unfortunately, these
changes are normally only applied to the current user.
The Copy Settings wizard allows you to transfer these settings to other user
accounts, and even to the Windows logon screen.
The wizard starts with a short introduction. Click Next to continue.
The wizard then presents a list of settings that can be copied. Select the desired
settings and click Next again.
You can now specify to where you wish to copy the selected settings. One
possibility is the logon screen (depending on the settings you selected). If more
than one user has been set up on your computer, all users are also shown. Select
where you want to copy the settings to, and then click Next to begin copying.
After copying is completed, you can close the wizard by clicking Finish.
TuneUp Utilities 2006 35
Page 34

Customize and Analyze
TuneUp StartUp Manager
Many applications start automatically together with Windows without asking for
your permission. There is often a good reason for this, for example to provide
you with important functions and services such as your virus scanner, an ISDN
call monitor or a text module administration system.
In addition to these sensible applications, there are often also useless or even
dangerous applications that also start together with your system. Newly installed
programs sometimes add themselves to the Startup folder without asking for
your permission, causing Windows to start more slowly. And what’s worse,
some of these programs even bother you with messages and dialogs.
The limits of the
Startup folder in the
Start menu.
An overview of all
automatic start
commands.
Many users know that programs that are started automatically often simply add a
shortcut to the Startup folder in the Start menu, and that these shortcuts can be
deleted there. But that’s only half of the story. Some start commands are added
directly to the registry, and cannot be found in the Startup folder. TuneUp
StartUp Manager finds every application that launches itself automatically, no
matter where the start command is hidden.
Usage
TuneUp StartUp Manager shows a list of all found startup entries in its main
window.
The navigation bar
on the left side of
the window
The TuneUp StartUp Manager navigation bar is located on the left side of the
window. By default, it contains a list of Tasks that give you access to frequently
used functions. Important information on the currently selected startup entry is
shown beneath this list.
36 TuneUp Utilities 2006
Page 35

Customize and Analyze
You can customize this navigation bar by clicking View > Navigation Bar.
When you select the Categories option, the navigation bar will contain a list of
all locations where startup items can be saved instead of the task list. All is
selected here by default. You can limit the selection of entries shown in the right
panel of the window by clicking a specific node such as Startup folder or
Registry in the list of categories. Then, only the startup items at these locations
will be shown.
How do I find out if
a program that
starts automatically
is necessary?
Deactivating and
deleting entries
Adding a new
startup entry
When you select a startup item in the list, TuneUp StartUp Manager shows
information on the selected entry in the navigation bar on the left side of the
screen or in the information area at the bottom of the screen (depending on the
selected view mode). You can use this information to decide whether or not the
startup entry should be removed.
When you start the program the first time, all startup entries have a check mark
in front of them and are active. Click the check box in front of an entry to clear
it, and the program will no longer be started the next time you start Windows. In
this way, you can find out for certain whether the entry is needed without
removing it from the list entirely. If something doesn’t work properly the next
time you start Windows, all you have to do is select the check box again.
If you are certain that you no longer need an entry, you can remove it from the
list entirely by clicking Delete. But don’t worry, if need be, you can still restore
the entry with TuneUp RescueCenter.
If you wish to add a program to one of the startup folders yourself, click the Add
button. If you are using the category list (folder list) instead of the task pane,
please select the desired destination folder in the list first.
Select the desired application in the dialog or use the Browse button to manually
select an executable file from your drives.
TuneUp Utilities 2006 37
Page 36

Customize and Analyze
TuneUp System Information
TuneUp System Information asks the computer the question of all questions:
what about the hardware? The module takes a deep look inside your computer
and gathers an extensive range of facts and information that can be useful when
you want to upgrade your system, or when a technician asks you if specific
components are installed in your system.
Usage
The information on your computer is broken down into nine sections, each with
its own tab. The first section you see when you start the program is the
Overview, where you can find the most important information on the main
components. Here, the module tells you what processor you have installed in
your computer, how much memory you have, what the graphics card has to offer
and what mouse you are using, and last but not least, all about your drives.
The other tabs contain the following information:
Windows
This section tells you exactly which Windows version is installed on your
computer, when you last started your computer, and what version of Internet
Explorer you are using.
Display
All important information, including the supported display modes and the
abilities of your monitor and graphics card can be found here.
Memory
This section shows the current usage of your memory and tells you which
programs are currently running and how much memory they are using.
Drives
This section provides you with complete hardware information for each drive in
your computer, and shows how much space is used and available on each.
I/O Devices
All important ports, installed printers and audio devices are shown here.
Communication
When a dial-up connection is open, two real-time graphs show how much data is
being sent and received in kilobytes per second.
38 TuneUp Utilities 2006
Page 37

The performance tab
with real-time
graphs.
Customize and Analyze
Note: Please note that this window only displays the data transfer volume for the
dial-up connections in your system. Data traffic over the network is not shown
here.
System Devices
Information is shown here for your processor and BIOS. Click Processor details
to view detailed information on the features of your processor.
Performance
Here, you can view detailed information on your physical memory, the size of
the paging file and the kernel. Three real-time graphs show the current processor
usage, physical memory status and how much of your paging file is currently
being used.
Use the context-sensitive help!
If you are not sure what the information or a function under one of the areas in
TuneUp System Information means, you can use the so-called context-sensitive
help to view a brief description. To do this, click the desired text or button with
your right mouse button and select What’s This? from the context menu.
TuneUp Utilities 2006 39
Page 38

Customize and Analyze
TuneUp Styler
Windows would not be very useful without its graphical user interface. How
important an attractive interface is can be seen on the basis of Windows XP and
how the entire system feels at once fresher and more modern.
But just as in fashion, it’s easy to get tired of the new design, not to mention the
people who have always been bothered by all of the “eye candy” in the interface.
Wouldn’t it be practical to be able to change the appearance of Windows?
Can you change the
appearance of
Windows?
Yes, you can – with
TuneUp Styler!
All functions can be
accessed quickly
from the main
window.
Take the icons for example. These little square pictures are everywhere, in the
Start menu, in file dialogs and of course on the desktop. Is there a way to lend all
of these icons a new look with a few mouse clicks?
And what about the logon screen? Anyone who shares their computer with
others or has a password to protect his user account sees it every day: a mixture
of different blue tones. And there is no way built into Windows to change this.
Or what about the boot screen? The well-known logo that is shown on the
screen while Windows XP starts can't be replaced or changed without additional
tools, either.
Windows also only provides you with a limited number of options for changing
the appearance of all windows and buttons (the so-called visual style): you can
choose between the new Luna interface and the old Windows Classic interface.
In order to help you with all of these changes and to let you adapt how your
Windows interface looks, TuneUp Utilities 2006 has a separate module
dedicated entirely to the appearance of Windows: TuneUp Styler. Start this
module whenever you want to give your system a digital makeover.
40 TuneUp Utilities 2006
Page 39

TuneUp Styler lets
you change the icons
and names of many
elements.
Customize and Analyze
Usage
The TuneUp Styler window is broken down into two sections: a blue navigation
bar on the left and a large area on the right to display the options.
The customization options in TuneUp Styler are divided into seven categories,
each of which can be selected directly in the navigation bar at the left.
System Elements
In this category, you can replace typical Windows icons with icons with a
common theme. You can also change the name of many elements, such as the
Recycle Bin, My Computer and My Network Places.
After clicking System Elements in the navigation bar, all system icons that can
be changed are shown in a hierarchical list on the right side of the window.
The Desktop level is selected by default, under which you can see all special
desktop items. Select one of these items to change it.
How to change an
icon
Click Replace icon to open a dialog in which you can choose a new icon for the
selected item.
The module always shows the icon library in which the current icon for the item
is contained. This is normally the library shell32.dll, which is included with
Windows. If you have an icon library of your own, you can view its contents by
clicking Browse.
TuneUp Utilities 2006 41
Page 40

Customize and Analyze
The file
shell32.dll
which is included
with Windows,
contains a large
number of icons.
,
As soon as you have found the desired icon, select it with your mouse and click
OK to record your change.
Important: All of the changes that you make to system items are not applied
immediately. The program records your changes for the individual items, and
indicates that a change has been saved by adding a small red star next to the
respective entry in the list. Your changes are not applied until you click Apply in
the lower right corner of the window.
Undoing changes
If you have selected a different icon for an item, you can undo this change at any
time as long as you have not yet clicked Apply. To do this, select the
corresponding item in the list and click Discard unsaved changes made to this
item.
If you have already clicked Apply, you can still undo changes to an item by
resetting it to the Windows defaults at any time. To do this, select the desired
entry in the list and click Reset item to Windows defaults. Please note that this
link is only shown when the selected icon is not set to the Windows defaults
already.
Undoing changes for
multiple items
If you should want to undo changes made to multiple items, you can click Reset
category or Reset all categories.
Here, “category” refers to the five levels into which the system items are divided,
namely Desktop, Start menu, Explorer, File Types and Control Panel. The
first link only resets the items in the currently active category, while the second
resets all system items that can be changed with TuneUp Styler without
exception.
After either of the links is clicked, a dialog is shown that asks you if you wish to
reset all items to the Windows defaults, or if you only wish to discard any
42 TuneUp Utilities 2006
Page 41

Practical: icon
packages let you
change all icons at
once.
Customize and Analyze
unsaved changes for these items. The second option is of course only available
when changes have not yet been applied.
Icon Packages
It is rather tedious to change all Windows icons one at a time to change the
appearance of your system. For this reason, TuneUp Styler also allows you to
replace all of the icons in Windows with a new look in one fell swoop. To do
this, click Icon Packages in the lower right corner of the window. Many good
icon packages dedicated to different themes can be found on the Internet.
Managing and Installing Icon Packages
Click Icon Packages to open a new window where you can install and manage
icon packages.
A new window opens in which you can see all available icon packages. Select
the desired package in the list and click Install to have the new icons shown in
the main window.
You can also add new icon packages to the list by clicking Add at the top of the
list. Here, you can either add an icon package from a file on your computer, or
download new icon packages from TuneUp Online, where you can select from a
large number of packages.
Creating Your Own Icon Packages
You also have the ability to prepare your own icon package from your current
icons. You can then save this package to install it again at a later time, or send it
to friends via e-mail. To do this, click Create New Package at the top of the list.
TuneUp Utilities 2006 43
Page 42

Customize and Analyze
After you click this button, a wizard opens that will guide you through the
process of creating an icon package:
Step Description
1.) Information on the
author
2.) Package name
and description
3.) Optimizing the
size of the package
4.) Creating the icon
package
5.) Finish the wizard The icon package has been created successfully
File System
Windows assigns a default icon to each drive, file folder, Start menu folder and
Favorite. Click File System in the navigation bar to change any of these icons.
Here, you can add your name, e-mail address and
Internet address to the icon package.
Enter a descriptive package name here. If you wish,
you can also enter additional information on the
package in the Description box.
Use the options in this step to make sure that your
package is not too large so that it can be sent via email without problems.
The icons are now collected and optimized if
needed, after which they are saved together in an
icon package.
and is added to the list of icon packages when you
click Finish. Click Open folder to go to the icon
packages folder of TuneUp Styler, after which you
can copy the icon package to a different location, or
attach it to an e-mail.
Assign new icons to
your drives!
44 TuneUp Utilities 2006
Page 43

Customize and Analyze
Here, you can assign a cool icon to the drive where all of your games are
installed, and an icon with a serious appearance to the drive where your office
applications are installed, for example.
You can do the same with folders. A few carefully chosen icons can make it
much easier to find your way around drives that contain a great deal of data.
Start menu folders
Internet Explorer
Favorites
Undoing changes
You can also use TuneUp Styler to assign an individual, descriptive icon to each
folder in the Start menu. To do this, open the Start menu node in the tree by
clicking the plus sign in front of it.
Note: This function is only available for Windows 2000 and higher.
You can even assign special icons to your Favorites in Internet Explorer. This
way, you can find your most frequently used Favorites in the long list more
quickly.
Select the desired item in the tree and click Replace icon to select a new icon for
the item. Please note that this cannot be done with the three main nodes My
Computer, Start menu and Favorites. You must open one of these nodes by
clicking the plus sign in front of it and then select a subnode.
A new icon is selected in the same manner as for the System elements. Once you
find the desired icon, select it and click OK to apply the icon.
You can apply the default icons and undo your changes at any time by clicking
Reset item to Windows defaults.
If you would like to undo changes to multiple icons at the same time, you can
use the Restore backup link. This link opens TuneUp RescueCenter and lets
you undo the changes you have made with TuneUp Styler on a specific date.
Appearance
Click Appearance in the navigation bar. Here, you can change a large number of
settings that govern how icons are displayed on the desktop, such as the color
depth, the icon size and the icon spacing. Please note that changing the color
depth and icon size here may affect the display of icons elsewhere as well.
Under Windows XP, you cannot manipulate the maximum color depth of icons,
as this is always 32 bit (the highest value). If you use a different operating
system, you can increase this value here.
The default size for desktop icons is 32 x 32 pixels. You can use the slider to
increase this size up to 64 x 64 pixels if the icons are too small for you, or you
can also make the icons smaller so that you have more space on your desktop.
TuneUp Utilities 2006 45
Page 44

Customize and Analyze
A preview of your
changes can be seen
at all times in the
left pane.
You can even specify how much space should be between the individual icons,
both vertically and horizontally.
How to get rid of the
shortcut arrow
The fix for persistent
problems
The Show shortcut arrow option is very interesting. If you do not wish to have
the small arrow displayed on shortcuts, you can disable it by clearing the check
box in front of this option. Many users are bothered by this arrow.
Repair
It is of course fun to change the Windows icons and to add your personal touch
here and there. But what do you do when your changes are not applied, or when
Windows starts mixing up your icons altogether?
In this case, click Repair in the navigation bar and then click Reload Icons. And
the display errors will disappear.
If reloading the icons doesn’t help, there may be a serious problem in your icon
cache. The icon cache is a file in which Windows stores all of the icons that it
has ever displayed so that they can be shown more quickly in the future. And
when a mistake makes its way into this file, this can corrupt all of the icons.
Fortunately, this problem can be corrected directly in TuneUp Styler. All you
have to do is click Repair Icon Cache. You must restart to complete the repair.
Boot Screen
When you start Windows XP, a full-screen picture with the Windows logo is
shown. The bottom of this picture contains an animated progress bar.
46 TuneUp Utilities 2006
Page 45

Customize and Analyze
You can use TuneUp Styler to replace this boot screen with just a few mouse
clicks, or you can create your own personal boot screen, for example with your
favorite vacation photo.
Click Boot screen in the navigation bar to go to this part of TuneUp Styler.
The module will list all available boot screens. The first time you use the
module, the only screen in the list will be the default Windows boot screen. Add
additional pre-made screens to the list, or create your own.
Downloading premade boot screens
Creating your own
boot screen
Installing a boot
screen
Restoring the default
screen
You can add additional boot screens to the list by clicking Add at the top of the
list. Here, you can import a boot screen from a file on your computer, or you can
download new boot screens from TuneUp Online.
If you want to make your own personal boot screen, click the New Screen button
above the boot screen list. This will open the Create Boot Screen wizard, which
will guide you through the necessary steps.
Select the desired boot screen in the list and then click Install Boot Screen in the
lower right corner of the window. A progress dialog will be shown for the
duration of the installation.
If you no longer want to use your new boot screen, you can naturally restore the
default Windows screen at any time. To do this, click Restore Defaults in the
lower right corner of the window. The default screen is then selected in the list
automatically. Click Install Boot Screen to save your changes.
Creating Boot Screens
Give your imagination free reign and create your own boot screen that you can
install on your computer and share with your friends.
TuneUp Utilities 2006 47
Page 46

Customize and Analyze
To create your own boot screen, go to the Boot screen category and click New
Screen at the top of the list. This will open a wizard that will take you through
the following four steps:
4 Steps to your own Boot Screen
1. Select image
First, select a background image for your new boot screen. To do this, click one
of the available options, for example Search local drives if the desired image is
already on your computer. If you select Capture pictures from camera or Find
pictures with Google, save the desired picture at a location where you can find
it again quickly and then click Search local drives to load the picture.
2. Customize image
3. Customize
progress bar
4. Finish
Once you have selected a background image, you can use the Alignment and
Borders functions to optimize the appearance of your picture. Please note that
the available alignment options will only have an effect when the picture is not
the correct size for a boot screen (640 x 480 pixels). Under Background, you
can specify the color that will be used for the areas that are not covered by your
image. This will also be used for the background of the progress bar (for
technical reasons).
Here, you can specify the Position of the progress bar, your Foreground color
and the Border color as desired. Position the progress bar at a location that does
not interfere with the overall impression of the picture.
Click Save boot screen to assign a name to your creation and to add it to the list
of available boot screens.
Tips for attractive Boot Screens
All boot screens may only have 16 colors under Windows XP for technical
reasons, whereby some of these colors are prescribed by the operating system,
for example black. For this reason, TuneUp Styler must reduce the wealth of
colors in your composition (normally 16.7 million) to a very few when you click
Finish. TuneUp Styler uses a sophisticated algorithm for this to automatically
determine the best 16 colors for your picture. If the picture contains too many
different colors, the results of this conversion may not be satisfactory.
Experience has shown that the most attractive boot screens can be created with
pictures with only a small number of different colors. This means, for
example, that a picture that consists predominantly of different blue shades and
only a few contrasting colors will most likely result in an attractive boot screen.
Set the foreground color of the progress bar to a color that is contained in your
picture. This way, you do not use one of the precious 16 colors in the progress
bar only.
48 TuneUp Utilities 2006
Page 47

Pep up your system
with a custom logon
screen.
Customize and Analyze
You should avoid skin tones in your boot screen if at all possible. Pictures with
skin tones normally cannot be displayed correctly with only 16 colors (ask any
graphical artist). Of course, you may be lucky. The best thing to do is try!
Logon Screen
If you share your computer with other users, or if you use a password to protect
your account, you are familiar with the Windows XP logon screen. Here, you
can see a list of all user accounts. A user can log on by clicking one of these
accounts and entering a password, if one is set for the account.
With TuneUp Styler, you can completely change the appearance of the logon
screen. Click Logon screen in the navigation bar to go to this area.
As soon as it is started, the module lists all available logon screens. When you
use the module for the first time, you will only see the standard Windows screen.
You can add additional logon screens by clicking Add at the top of the list.
Then, you can select an existing logon screen from a file on your computer, or
you can download new screens from TuneUp Online. The module supports all
Logonui.exe screens, the Stardock LogonStudio format (LogonXP) and the
TuneUp Styler (TLS) format.
By the way: Unlike other programs that simply replace the entire file when
installing a Logonui.exe file, your computer cannot be infected by a virus when
you install a logon screen with TuneUp Styler. Here, the entire file is not
replaced, but only the relevant parts such as the pictures and the texts that are
shown on the screen.
TuneUp Utilities 2006 49
Page 48

Customize and Analyze
Select the desired screen in the list and click Install Logon Screen in the lower
right corner of the window.
Using the text from
the logon screen
Try a new logon
screen!
How to restore the
default screen
Most logon screens are in English, but not all. When you install a new logon
screen, the text on the screen may be in a different language. For example,
instead of “Click your user name to log on”, you may see “Klicken Sie auf Ihren
Benutzernamen, um sich anzumelden”.
For this reason, the module asks you if you want to use the text in the new logon
screen, or if you want to use the English text from the standard logon screen.
After you select the desired option, a progress dialog is displayed while the new
screen is installed.
After the new screen is installed, you can test it right away by pressing the
Windows key and L key at the same time.
If you ever decide that you no longer want to use your new logon screen, you can
restore the default Windows screen at any time. To do this, click Restore
Defaults. The default screen is then shown in the list automatically. Click Install
Logon Screen to save the change.
Visual Style
The new visual style of Windows XP makes it possible to lend a new look to all
modern applications. Click Visual Style in the navigation bar to customize your
visual style.
50 TuneUp Utilities 2006
Page 49

Customize and Analyze
When you select a visual style in the list, a preview and additional information
are shown on the right. As soon as you have chosen a visual style, click Apply
Visual Style to activate it. Your screen is grayed out briefly while the style is
applied to your system. As soon as the wait screen is closed, you can view your
interface in all of its new glory.
Downloading visual
styles from TuneUp
Online
Adding a style from
a file
You can download new visual styles at any time from the TuneUp website free
of charge. To do this, click Add and then Download Visual Styles from
TuneUp Online. This will open your Internet browser and go to the TuneUp
website, where you can select from a wide range of different styles. Click on a
style to add it to the list in TuneUp Styler.
You can also use the option Install Visual Style from File if you have other
visual styles on your computer. This way, you can use visual styles that you
received on CD, for example.
For both options for adding new visual styles, it does not matter in which format
the styles are. TuneUp Styler recognizes nearly all standard formats and can
install them without problems.
The following formats are supported:
Type Extension Description
TuneUp Visual
Styles
Microsoft Visual
Styles
Compressed
archives
Self-extracting
archives
.TVS The TuneUp Styler format
.MSSTYLES This Microsoft format often includes
additional files that can be found in
the same folder or in subfolders.
.RAR, .ZIP Archives are searched for all file
types in this list, and decompressed
automatically if such files are found.
.EXE These files are searched to see if
they contain compressed RAR or
ZIP archives, which are then
handled as described under
Compressed archives.
Resetting and
deleting a visual
style
If you should ever want to restore the standard Windows visual style, all you
have to do is click Restore Defaults to select the visual style Luna in the list.
Then click Apply Visual Style to activate your change.
If you wish to remove a visual style from your computer entirely, select it in the
list and click Delete visual style.
TuneUp Utilities 2006 51
Page 50

Clean up and Repair
Clean up and
Repair
Free your system of
unneeded ballast!
5
The modules in the Clean up and Repair category streamline your system by
removing unneeded ballast and correcting problems in your configuration.
Every program you install writes entries in your registry – entries that are often
not completely removed when you remove the program. With time, your registry
becomes bloated and takes up more and more space on your hard drive.
What’s more, Windows constantly has to access the registry. The larger the
registry is, the longer it takes Windows to find the information it needs. Your
system becomes slower, and does not react as quickly as it used to. The module
TuneUp RegistryCleaner makes sure that there are no unneeded entries in your
registry to slow your system down.
The amount of unneeded data on your hard drive also increases with time. This
includes temporary files, but also unneeded backups that are created by different
programs and that are not deleted. TuneUp DiskCleaner helps you find these
files and delete them.
52 TuneUp Utilities 2006
Page 51

TuneUp RegistryCleaner
You can use TuneUp RegistryCleaner to quickly and thoroughly remove the
unneeded data left over when you install and remove programs and when you
work with your computer every day.
Cleaning up your registry database frees your system of unneeded ballast so that
it can work better and more quickly.
After the module analyzes your system for problems, you can individually view
each of the problems found and call up a detailed description. If you wish, you
can also have all problems corrected automatically.
All changes to your system are monitored by TuneUp RescueCenter and can be
undone with a few mouse clicks.
Usage
Once the module is started, a wizard is opened automatically in which you can
choose between two options for scanning the registry.
Decide for a
complete or partial
registry scan here.
Clean up and Repair
The option Complete scan analyzes the entire registry and all system files. If
you select Choose tests, you can specify yourself which categories should be
analyzed by TuneUp RegistryCleaner. It is best to select Complete scan, and
then click Next.
TuneUp RegistryCleaner will now analyze your system. The individual sections
of the registry that will be analyzed can be seen in the program window. A
yellow arrow in front of an entry means that that section is being analyzed.
TuneUp Utilities 2006 53
Page 52

Clean up and Repair
Please wait until the
analysis is finished.
This may take several
minutes.
A green check mark indicates that the analysis has been completed for the
section. A progress bar beneath the list shows the progress of the overall
analysis.
When the analysis is complete, the message “The search for errors has been
completed.” is displayed. Click Show errors to close the wizard and to show the
problems found in the main window.
The Main Window
The main TuneUp RegistryCleaner window is divided into two sections. The left
side of the window contains a list of Categories, and the contents on the right
side of the screen change depending on the category selected on the left.
The analysis has
found a large
number of problems
– correcting them
will bring noticeable
benefits.
54 TuneUp Utilities 2006
Page 53

Clean up and Repair
The category Summary is selected by default. Here, the module shows that the
system scan has been completed and shows how many problems were found in
total. Below this, you can see how many problems were found in each category.
The module can recognize problems in the following areas:
Category Description
ActiveX and COM ActiveX/COM objects were found that are based on
Sounds Some sounds refer to sound files that are no longer
Application paths Some of the application paths in the registry point
Startup Some programs that should be launched
File types Some file types refer to programs that are no
Shared files The registry contains references to files that were
Help files The registry contains entries for help files that are
Fonts References were found to fonts that are no longer
Software Some of the programs listed under Add and
Start menu Some of the shortcuts in the Start menu point to
Shortcuts Some of the shortcuts on your system point to
History lists Some entries in the history list for standard dialogs
libraries that are no longer available on your
system.
on your system.
to directories that no longer exist.
automatically when the system starts are missing.
longer available on your system.
used by multiple applications that no longer exist
on this system.
no longer available on the system.
available on the system.
Remove Programs in the Control Panel do not
have an uninstall program. These entries will not
work.
files that are no longer available on the system,
and/or references in the registry point to folders
that have been removed from the Start menu.
missing targets.
point to files that no longer exist.
As you can see, deleted files can leave behind many “ghosts” in your registry.
TuneUp RegistryCleaner finds these orphaned entries and can delete them.
You can call up detailed information for each of the problems found on your
system by clicking one of the individual categories in the Categories bar.
TuneUp Utilities 2006 55
Page 54

Clean up and Repair
A detailed
description is
available for each
problem, a single
mouse click is all you
need.
The program will then show all programs in the category with a short
description. Select one of the entries in the list to view a more detailed problem
analysis at the bottom of the window. The Details button must be selected in the
toolbar in order for the section with the problem analysis to be visible.
TuneUp RegistryCleaner is designed to correct all problems automatically. This
is why the check box in front of each problem is selected. If you do not wish to
have an individual problem corrected, click the check box to clear it. The module
will then ignore this problem when cleaning up your system.
Clean-up
Click Start Cleaning in the toolbar to have TuneUp RegistryCleaner do its job –
correcting all of the problems that were found.
Here, you can watch
while the module
cleans up your
system.
56 TuneUp Utilities 2006
Page 55

Clean up and Repair
A new wizard is opened that takes you through the process step by step. First, it
indicates how many problems were selected for correction. It also informs you
that all changes can be undone with TuneUp RescueCenter if necessary. Click
Next to clean up your system.
A progress bar indicates how far TuneUp RegistryCleaner is with its work. The
module corrects all problems one after the other and makes sure that unneeded
entries and keys are removed. Please wait until the clean-up is finished.
Once the module is finished, a message is displayed to tell you that all problems
have been corrected.
Chain reactions in
the registry: the
Check Again
All’s well
that ends well.
button
Sometimes, the button Check Again is displayed, and the wizard recommends
that you analyze your system again. This is always the case when the clean-up
may have made additional entries invalid. This is not an error in the module, but
a chain reaction that can occur in the categories ActiveX and COM and File
types.
A simple example: Entry A points to entry B, which in turn points to the missing
file X. In the first scan, TuneUp RegistryCleaner determines that entry B is
invalid because file X cannot be found on the system. Entry B is deleted during
clean-up. This in turn makes entry A invalid, as it points to the now missing
entry B.
TuneUp RegistryCleaner recognizes when this may happen and suggests that
you analyze the system again. In this case, click Check Again, and these two
categories will be analyzed again.
Click Finish to close the wizard. Repeat the clean-up process as often as
necessary until no new problems are found. You can now close the module, with
the confidence that you have removed a great deal of junk from your system.
TuneUp Utilities 2006 57
Page 56

Clean up and Repair
TuneUp DiskCleaner
TuneUp DiskCleaner removes unneeded files from your hard drive and frees up
disk space. All drives are scanned for unneeded files, which are then displayed
according to category.
If you wish, you can individually specify which files should be deleted. If you
are not sure whether you should really delete the files found by the module, you
can also back them up in compressed form with TuneUp RescueCenter before
deleting them.
Usage
Before you can begin working with TuneUp DiskCleaner, you must select all
drives that you want the module to analyze. Click the check box in front of a
drive to add or remove it.
Select the drives you
wish to scan.
The module also displays the total size and the free space for all drives in the list.
This information can help you decide which drives should be cleaned.
Experience has shown that drive C: normally contains the most unneeded data,
usually in the form of temporary files that are no longer used.
Click Next to continue.
Disk analysis
The module now analyzes the selected drives. A progress bar beneath the list
shows the progress of the overall analysis.
When all drives have been analyzed, the program displays the message
“Analysis completed”. You can then click Next to view a list of all found files.
58 TuneUp Utilities 2006
Page 57

You can recover disk
space here.
Clean up and Repair
Analysis
TuneUp DiskCleaner now shows the results of the search.
The right side of the window contains a table that indicates the number of files
found in each category, such as zero-byte files. The number in the Space used
column indicates how much space can be recovered by deleting all files in this
category. Additional information on the selected category is shown on the left.
TuneUp DiskCleaner searches for all types of unneeded data, which can
normally be deleted from your computer without causing problems.
Category Description
Zero-byte files These files contain no data.
Saved lost clusters Repair programs such as Chkdsk scan your drives for
Internet cache All pictures, texts and animations that you view in
Recycle Bin All files in the Recycle Bin can be safely deleted.
Log files Many programs write log files that can be used to
Backups Many files automatically create backups of your files.
lost clusters and save them. These backups are
rarely used.
Internet Explorer while surfing the Internet are saved
in the cache. If you visit a website again, the texts
and images can be loaded from the cache more
quickly than from the Internet. It is nevertheless
advisable to empty your cache from time to time.
analyze their actions. This can be helpful for example
when trying to solve problems. Any log files that you
do not plan on analyzing can be deleted.
These can be deleted if you do not need them.
TuneUp Utilities 2006 59
Page 58

Clean up and Repair
Category Description
Temporary files These are used by different programs to temporarily
Temporary help
files
store data and should normally be deleted by the
program when you are done working. These files can
be deleted in any case.
These files are used to display help files more
quickly.
Don’t take any risks!
Exclude categories
Backup categories
with RescueCenter
Viewing all files that
have been found for
deletion individually
It is important that you are careful when using DiskCleaner so that necessary
files are not deleted. The module finds a number of files that are probably not
needed, but the program can never determine with certainty whether a file is
needed or not. A .sav file can be an unneeded backup copy of a text document, or
a computer game save. And a zero-byte file could be a useless entry in the file
table or part of the copy protection for a program that won’t work when the file
is deleted.
How can you check which files the program deletes and which ones it doesn’t?
First, check whether you can exclude individual categories. To do this, simply
clear the check box in front of the desired category, for example Backups or Log
files.
You also have a second option. Click a category with your mouse. Details on the
selected category are then shown on the left side of the screen. Here, you can
select Backup with RescueCenter to be 100% safe. All deleted files are backed
up automatically by TuneUp RescueCenter in compressed form so that you can
restore them if need be.
When you click Show Details in the information area, TuneUp DiskCleaner
opens a new window that contains information on all of the files in the selected
category.
60 TuneUp Utilities 2006
Page 59

Finished! All
unneeded files have
been deleted.
Clean up and Repair
You can clear the check box in front of any file by clicking it, thereby excluding
it from deletion. You can also click Open file to view the contents of the file to
see if you can delete it safely.
Clean-up
Click Next to begin deleting the selected files. The module then displays how
many files you have selected for deletion and how much space will be recovered.
Click Next again to remove the files from your system. As always, a progress
bar shows the progress of the operation. Please wait until all files are deleted.
When the files have been deleted, click Finish to close the module.
TuneUp Utilities 2006 61
Page 60

Optimize and Improve
Optimize and
Improve
The modules in the Optimize and Improve category speed up your system.
You will find
everything you need
to speed up your
system here.
6
Many of the default Windows settings actually slow the system down.
Experienced users know this and know where they have to tinker to speed things
up.
With the TuneUp Utilities modules in this category, a few mouse clicks suffice
to optimize your system for maximum performance – and you don’t have to
become a Windows guru.
One of the most important modules in this category is TuneUp System
Optimizer. This module analyzes your system for settings that could be slowing
you down, corrects them with a single mouse click and provides you with
62 TuneUp Utilities 2006
Page 61

Optimize and Improve
valuable tips for configuring your hardware and software. Wizards help you
adapt the configuration of your system to your needs in a few steps.
This module also includes the useful 1-Click Maintenance function, which
optimizes your system with a single mouse click after finding any problems.
TuneUp RegistryDefrag optimizes and defragments the Windows registry,
which becomes increasingly larger and slower the longer you work with
Windows.
TuneUp MemOptimizer monitors system memory usage in the background and
optimizes this usage automatically when you are not working.
TuneUp Utilities 2006 63
Page 62

Optimize and Improve
TuneUp MemOptimizer
TuneUp MemOptimizer monitors your system in the background and frees up
memory whenever needed to increase the performance of your computer.
The use of TuneUp MemOptimizer is beneficial on any system with up to
512 MB RAM. If the available physical memory gets too low, TuneUp
MemOptimizer causes the system to swap old data to the paging file to free up
memory for your applications.
SmartOptimize makes sure that this automatic optimization in the background
does not interfere with your work by only optimizing your system when your
processor usage is low.
Usage
The main window of TuneUp MemOptimizer consists of three tabs.
This module shows
how much physical
memory is being
used.
The first tab Overview contains an animated graph that shows the amount of free
physical memory over time. This graph allows you to monitor how Windows
uses your system resources. Free physical memory and Free space in paging
file show exactly how much memory your system is using.
Beneath the graph, you will find a small box that informs you whether
AutoOptimize is activated. This TuneUp MemOptimizer function monitors your
memory and can optimize memory usage automatically when the free physical
memory falls below a specific amount.
64 TuneUp Utilities 2006
Page 63

Configuring
automatic
optimization
Optimize and Improve
Configuring AutoOptimize
Calling up the Settings Dialog
If you wish to change the automatic memory optimization settings for TuneUp
MemOptimizer, go to Overview and click Change settings.
AutoOptimize Settings
This opens the configuration window for the module. Enable AutoOptimize
should be selected so that TuneUp MemOptimizer runs automatically in the
background. If you do not wish to have your memory usage optimized
automatically, you can disable this function here.
Under Physical memory, you can specify the free memory level that triggers
automatic optimization. This can for example be set at 50 MB. Under Increase
free memory to, you can specify how much memory you want to free up.
How SmartOptimize
eases the burden on
your computer
Under Processor usage monitoring, you should select Monitor processor
usage so that the module knows how hard your computer is working. When
Windows Media Player or a game is currently using all of the computer’s
resources, for example, TuneUp MemOptimizer delays optimization
automatically so that the system is not slowed down unnecessarily. When Use
SmartOptimize is selected, TuneUp MemOptimizer recognizes such situations
automatically and only frees up memory when you are not working.
How to cause the
module to optimize
more frequently
If you find the default setting too conservative, you can select Use manual
settings to specify the desired processor load in percent up to which the module
can optimize your memory usage. The higher this limit, the more aggressively
TuneUp MemOptimizer will optimize your system.
TuneUp Utilities 2006 65
Page 64

Optimize and Improve
Click OK to activate your settings. If you wish to restore the module to the
recommended settings, click Recommended.
Manual Optimization
If you do not use AutoOptimize, or if you want to free up memory before you
start a program that requires a lot of memory, you can go to Manual
Optimization.
Under Clear manually, you can use the slider to specify how much memory
should be freed. Click Clear Now to free the specified amount of memory. The
module will then remove unneeded DLLs and other files from physical memory,
which may require a few seconds.
Under Clipboard, the module shows the current amount of memory occupied by
the data in your clipboard. Click Empty Clipboard to free up the memory used
by this data.
Program Options
Under Program Options, you can select Load automatically on Windows
startup so that TuneUp MemOptimizer can ensure optimum performance as
soon as Windows starts.
Hiding TuneUp
MemOptimizer
Select Show icon in the notification area to have an icon that shows your
current memory usage status in the notification area next to the clock. If you do
not select this option, TuneUp MemOptimizer will continue to work in the
background, but will be invisible. To access TuneUp MemOptimizer, you will
have to call up the program through the Start Center or the Start menu.
You can also have your memory usage optimized by pressing a key combination.
The currently configured key combination can be seen in the Key combination
box, and is Ctrl+Alt+O by default. You can change this combination at any time.
66 TuneUp Utilities 2006
Page 65

TuneUp RegistryDefrag
Every new program and every new hardware component enters itself in the
registry, creating keys and values. Over time, the central Windows database gets
larger and larger. The larger the registry becomes, the longer the system needs to
find specific information, and this makes Windows slower.
Optimize and Improve
Swiss cheese bogs
the system down
An introductory
screen is displayed.
When you remove the software or the hardware component, these keys and
values are usually deleted, but the registry doesn’t get any smaller. Why? The
space that was occupied by a deleted key is still in the registry, even if it is no
longer used. Sooner or later, your registry looks like Swiss cheese with lots of
holes. It can be 13 MB in size, but only contain 9 MB of information. This slows
your system down and wastes space, both on your hard drive and in the memory.
TuneUp RegistryDefrag can consolidate your registry and make it considerably
smaller – a trick that can make your system faster again. To do this, the module
analyzes the old registry and then creates an entirely new version that only
contains the correct entries in the proper order. The old registry is then deleted
and is replaced with the new one after a restart.
Registry Analysis
First, TuneUp RegistryDefrag must determine how fragmented your registry is.
Click Next to begin.
Before the analysis starts, you will be informed that all other applications must
be closed. Please follow these instructions and close all other applications before
you continue.
TuneUp Utilities 2006 67
Page 66

Optimize and Improve
What happens
during the Registry
analysis?
What happens when
you restart?
After you confirm this message, TuneUp RegistryDefrag grays the screen and
shows a wait dialog to indicate that you cannot use the computer. During the
analysis, a small clock blinks in the upper left corner of the window to show that
the software is working. Under Windows 2000 and XP, a progress bar is also
shown to inform you of the progress of the analysis. There is no need to worry
even if this bar does not move for several minutes. On heavily used systems, it
can take some time to analyze the entire registry.
Next, the module shows the results of the analysis. If there is potential for
optimization, you will be told by how many percent and kilobytes the size of the
registry can be reduced.
Defragmenting the Registry
If TuneUp RegistryDefrag determines that your registry can be defragmented,
click Finish to begin defragmenting. TuneUp RegistryDefrag must restart your
computer for this.
While the computer is restarting, the new registry is created and the old one
deleted. As soon as Windows restarts, your new registry is already being used.
The program has done its job and does not need to be opened again.
68 TuneUp Utilities 2006
Page 67

TuneUp System Optimizer
TuneUp System Optimizer helps you to find and correct misconfigured settings
and settings that are slowing your system down.
As soon as you start TuneUp System Optimizer, the module displays a welcome
screen that tells you that you have come to the right place if you want to perform
system maintenance. The module also tells you that you can undo your changes
at any time with TuneUp RescueCenter.
The TuneUp System
Optimizer welcome
window
Optimize and Improve
You can now select a task and have it completed with a click of your mouse. The
individual optimization functions can also be accessed by means of the links on
the left side of the window.
1-Click Maintenance
1-Click Maintenance is a function that allows you to quickly and easily clean up
your registry and hard drive. To access this part of TuneUp System Optimizer,
click 1-Click Maintenance under Wizards on the left side of the screen.
1-Click Maintenance does justice to its name. As soon as you start the program,
it scans your registry and your hard drive automatically for unneeded entries and
files. A status window is displayed during the scan to keep you informed of its
progress. And when the scan is finished, all you have to do is click Correct
Problems to rid yourself of the unneeded ballast.
TuneUp Utilities 2006 69
Page 68

Optimize and Improve
1-Click Maintenance
at work.
And the best thing about 1-Click Maintenance is that you can schedule it to run
regularly to keep your system clean. Once you set up a schedule, 1-Click
Maintenance will run once each week, for example, without interrupting your
work.
You can also have a 1-Click Maintenance icon placed on your desktop so that
you can run a complete check on your system at any time quickly and easily.
The System Advisor
The System Advisor analyzes your hardware and software configuration and
provides you with important tips for optimizing your system.
The advisor helps
you to eliminate
weaknesses in your
system.
70 TuneUp Utilities 2006
Page 69

Optimize and Improve
After you click the System Advisor link, the module begins examining your
system in detail immediately.
In a few seconds, the results of the analysis are shown in the window. The
individual problems are broken down into categories such as Display, System
and Security.
A short text describes the problem, for example: “A high screen resolution can
slow the system down”. Select an entry in the list to view a more detailed
description under Details.
System Advisor can do even more than just telling you what is wrong with your
system. If the corresponding setting can be changed directly in Windows, the
Advisor normally offers a link under Details that opens the corresponding
Windows dialog, or that corrects the problem automatically.
Optimize Internet Connection
Whether or not your system is optimally configured also depends on what you
want to do with your computer. If surfing the Internet is important to you, it can
be very helpful to open up some bottlenecks because Windows is not perfectly
optimized for surfing the Internet by default.
Under Wizards, select Internet Optimization. A wizard will then guide you
through the necessary procedure step for step.
You may be able to
optimize your
Internet settings.
In the first screen, you must tell the wizard what kind of Internet connection you
have. Select the connection that best matches yours from the list, for example a
modem, ISDN or DSL connection. Then click Next to go to the next step.
TuneUp Utilities 2006 71
Page 70

Optimize and Improve
The wizard will now analyze your system to determine whether it is optimally
configured. The most important factors here are data transmission performance
and the time required to load web pages. A green message Already optimized
means that your system is already optimally configured for this, and that you
need take no further steps. A red message Not optimal means that your
configuration must be changed.
Click one of the blue headers to view the individual settings that the Internet
optimizer wants to change. Click Next to have your configuration optimized.
The module will now make all the necessary changes and display a message
indicating that your computer has been optimized. Note the message Restart
required. Windows must normally be restarted for all of the changes in the
registry to take effect. Click Finish to close the wizard.
System Optimization
Use this wizard to adapt Windows to your specific needs.
Here, you can adapt
the most important
settings to your
needs.
As soon as the wizard is opened, a message is displayed to tell you that the
program needs some information about your system. Select the options that best
describe how you use your PC from the lists.
Under Visual effects, you can specify whether you prefer maximum
performance and a simpler interface, or if you are willing to sacrifice a certain
amount of performance for a more appealing appearance.
Under Use of the computer, choose the option that best describes your
computer. One option is for example “Computer with network or Internet
connection”. Then click Next to continue.
72 TuneUp Utilities 2006
Page 71

Optimize and Improve
The wizard now analyzes your complete configuration and prepares a list of
optimization suggestions for Visual effects and System configuration.
Click a blue header to view detailed information on the suggested changes. You
can reject individual suggestions by clearing the check box in front of them.
Then click Next to apply the selected changes.
The module now makes all of the selected changes and displays a message when
it has successfully optimized your configuration. Note the message Restart
required. Windows may have to be restarted for all of the changes in the registry
to take effect. Click Finish to close the wizard.
TuneUp Utilities 2006 73
Page 72

Administer and Control
A
dminister and
Control
7
The TuneUp Utilities 2006 category Administer and Control offers three
modules that help you get more control over your operating system.
You can use TuneUp Process Manager to view and, if needed, terminate all
currently running applications and processes. You can also call up an overview
of which files are currently being used by which programs, and how much of
your system memory and processor are being used.
TuneUp Registry Editor takes a look inside the central Windows database and
allows experienced users to quickly and easily find keys and values, and to make
any necessary changes.
TuneUp Uninstall Manager shows you all programs that are currently installed
on your system and lets you remove unneeded programs.
74 TuneUp Utilities 2006
Page 73

TuneUp Process Manager
With TuneUp Process Manager, you have control over the applications that are
running on your system at all times and can monitor your system activity.
You can find out how much memory is being used by any program, view details
on running processes and terminate unwanted processes with a single mouse
click. The module also offers live graphs for processor and memory usage and
provides valuable information on what your computer is doing at any given time.
This information is presented in three different tabs.
Processes
Once the module is started, all currently running programs and processes are
shown in the Processes tab. The names of the processes can be seen in the table
together with their priority and CPU usage. The module also shows how much
memory is being used by each process.
It’s hard to believe
how many processes
are running on a
freshly started
computer.
Administer and Control
If you wish to view more information on an application or a process, you can
select it in the list and then click Show Details. Click Terminate Process to
close a program. This is a somewhat drastic measure, but is sometimes necessary
to close a program that has hung, or if you want to stop an unwanted dialer.
TuneUp Utilities 2006 75
Page 74

Administer and Control
Open Files
The Open Files tab provides an overview of all files and folders that are
currently open on the computer, including information on the file type and
location and which process is currently using the file.
The list of open files
You should not be surprised when some files are shown in the list more than
once. Files and folders can be opened by more than one process at the same time.
It is also normal when files that are obviously “open” cannot be found in the list.
Applications like Microsoft Word and the text editor Notepad only open a file
briefly to read its contents or to save it, but do not keep it open the entire time
you are working on it.
Tip: When you try to delete a file and the computer tells you that it is currently
in use, you can use this module to find out what process is using the file and
terminate it. This will let you delete the file.
Performance
The Performance tab provides detailed information on the current status of your
system.
You can view the current processor usage in percent, and a graph of the
processor usage for the last several seconds. A similar graph shows memory
usage for the last several seconds. You can also view the current usage of the
paging file and the physical memory on kilobytes.
76 TuneUp Utilities 2006
Page 75

Keep an eye on your
system in the
Performance
tab.
Administer and Control
Menu Bar Functions
The menu bar at the top of the TuneUp Process Manager window provides you
with additional functions.
Click File Æ New Application to open the Windows Run dialog, which you can
use to start a new application or open a file.
Click File Æ Exit Windows to shut down or restart the computer so that new
settings can take effect.
If you have selected a process in the list, you can click Edit Æ Set Process
Priority to specify how much processing power Windows should assign to this
process.
Replacing Task Manager
If you click File Æ Replace Task Manager, TuneUp Process Manager
integrates itself into your system so that you can access the module by pressing
Ctrl+Alt+Del, or by right clicking on an empty part of the taskbar and selecting
Task Manager.
If you want to use the Windows Task Manager again, simply select the same
menu item to remove the check mark in front of it.
Note: This function is only available for Windows 2000 and higher.
TuneUp Utilities 2006 77
Page 76

Administer and Control
TuneUp Registry Editor
The Windows registry is nothing more than a large central database. Every
hardware component and program that is installed makes entries in this database.
With time, the registry gets increasingly larger and more chaotic.
The advantages of
TuneUp Registry
Editor
The main window
True experts who are looking for a suitable tool to delve deep into the Windows
system and to adapt their configuration manually should use TuneUp Registry
Editor. It not only offers an extremely fast search function, allows you to create
any number of bookmarks and lets you go to any key via copy and paste, it also
offers the protection of TuneUp RescueCenter, which means that you can undo
your changes at any time.
Usage
The registry is opened as soon as you start the module. The registry database
consists of countless keys that are divided into different categories. The editor
displays the structure of the registry in the form of a tree, with the individual
keys on the left side of the window under Folder.
Double click a key to display its subkeys. When you reach the lowest level of the
hierarchy, the individual values will be displayed on the right half of the
window, where you can edit them.
78 TuneUp Utilities 2006
Page 77

Administer and Control
When you click a value with your right mouse button, a context menu opens with
a number of different commands. Delete removes the entry from the registry.
Rename lets you assign a new name to the key, and Change lets you change the
value of the entry.
When you right click a key, the context menu that is displayed has a much larger
selection of commands. One of the most useful commands here is Search, which
allows you to look for words in the entire registry. Set bookmark lets you place
a virtual bookmark. These bookmarks are shown in the lower third of the
window under Bookmark, and you can go to any of these locations by double
clicking the corresponding bookmark.
TuneUp Utilities 2006 79
Page 78

Administer and Control
TuneUp Uninstall Manager
Every program that you install under Windows adds an uninstall entry to the
system registry. This entry makes sure that the program is removed completely
from your computer when you don’t need it anymore.
TuneUp Utilities 2006 lets you clean up your computer and remove unwanted
programs from your hard drive. All you have to do is open TuneUp Uninstall
Manager.
Usage
When you start the module, it displays an alphabetical list of all programs, games
and tools that have added an uninstall entry to the registry.
Select an entry in the
list to view more
information about
the program.
If you no longer wish to use a program, select it in the list and click Uninstall
software to remove it completely from your computer. This function only works
when there is a green check mark in front of the program.
The uninstall program that starts is different from program to program, but one
thing that they all have in common is that they not only delete the files from the
hard drive, but also all associated desktop icons, Start menu entries and keys in
the registry. Follow the instructions in the program to finish the procedure.
If there is a red X in front of a program instead of a green check mark, this
means that no uninstall program was found for the software. In this case, you can
delete the entry from the registry by clicking Remove entry, as it has no
function.
80 TuneUp Utilities 2006
Page 79

File recovery and
File recovery and Destruction
Destruction
The modules in the File recovery and Destruction category help to protect your
data and your privacy. These two TuneUp Utilities 2006 modules are ready to
help you protect and securely delete your important data at any time.
8
Whenever you want to dispose of sensitive documents in the office, you
normally use a shredder instead of simply throwing them away. The risk that
someone could take the documents out of the trash and make use of them would
be too great.
The module TuneUp Shredder lets you safely remove sensitive data from your
computer. And thanks to the secure deletion method of the US Department of
Defense, you can delete your data so effectively and securely that even the
cleverest of data thieves can’t recover it.
TuneUp Undelete does exactly the opposite. You can use this module to recover
accidentally deleted files and folders, even if they are no longer in the Recycle
Bin. Unless TuneUp Shredder got to them first, of course.
TuneUp Utilities 2006 81
Page 80

File recovery and Destruction
TuneUp Shredder
When you delete a file in Windows, it will probably be moved to the Recycle
Bin. Anybody can get a file back out of the Recycle Bin. For this reason, many
users empty the Recycle Bin regularly, or delete their files without moving them
to the Recycle Bin.
But you should know that Windows does not really destroy a file when it deletes
it, its entire contents are still located on the hard drive. Windows simply marks
the file as “deleted” in the file system, and the disk space occupied by the file
can be used to store other data. But as long as nothing is saved in the area
occupied by the deleted file, this “lost” file can be found and recovered easily
with a program like TuneUp Undelete.
What does TuneUp Shredder do?
TuneUp Shredder makes sure that no data thief can get his hands on your
sensitive data. The tool deletes files permanently, with no chance of recovery.
If you wish, you can even use a deletion method that was developed by the
United States Department of Defense, which overwrites files with certain
number patterns multiple times before deleting them, so that their contents are
securely destroyed.
Usage
What
do you want
to delete?
Once you start the program, a wizard opens that asks you if you wish to delete
individual Files, entire Folders or the contents of the Recycle Bin.
Files: When you select this option, the next window will show an empty list to
which you can add files that you wish to delete.
Folders: When you select this option, you can select the folder that you wish to
have deleted along with its entire contents in the next window.
Recycle Bin: Select this option when you want to shred the contents of your
Recycle Bin. You can review the contents of the Recycle Bin before deletion in
the next window.
Select the desired option and click Next to continue.
Deleting Files
Drag and drop the files you wish to delete from the Explorer into the Files list, or
click Add to select the files in a file browser.
82 TuneUp Utilities 2006
Page 81

Select the files you
want to delete
File recovery and Destruction
When Delete allocated free space is selected, the Shredder will also overwrite
the free space that has been assigned to the selected files.
Click Next to confirm your selection.
Deleting a Folder
Enter the complete path of the folder you wish to delete in the Folder box, or
click Select to select the folder from a tree view.
When Delete allocated free space is selected, the Shredder will also delete the
free space that has been assigned to the files in the selected folder.
Click Next to confirm your selection.
Deleting the Contents of the Recycle Bin
In this step, you can view the contents of your Recycle Bin by clicking Show
Contents. All files and folders in the Recycle Bin will be deleted.
When Delete allocated free space is selected, the Shredder will also delete the
free space that has been assigned to the files in Recycle Bin.
Click Next to confirm your selection.
Selecting the Deletion Method
In this step, you must specify how the selected files or folder should be deleted.
Select one of the two methods under Deletion method.
TuneUp Utilities 2006 83
Page 82

File recovery and Destruction
How securely
you want to delete
your files?
How many times
should the deletion
operation be
repeated?
do
Quick delete: The files will be overwritten with a single character. The files no
longer contain the original text, but endless columns of a single letter.
Secure delete: A method that was developed by the US Department of Defense
(Regulation DoD 5220.22M) is used. The files are overwritten with special data
patterns multiple times before deletion, thereby destroying the original contents
so effectively that even expensive examinations of the magnetic structure of the
disk in a special laboratory cannot recover the data.
Under Repeat the delete operation, specify how many times you wish to have
the selected deletion method repeated. The security of the deletion can be
enhanced further by increasing the number of repetitions, but the time required
will also increase.
Click Next to start deletion. Please wait until the program is completed. If you
do not wish to delete any other files or folders, you can close the wizard by
clicking Finish.
If you wish to delete additional files or folders, click Back.
Shredding a File after deletion
If you have already deleted a file by “normal” means, the only way to reliably
destroy it is by using a special tool that overwrites all free space on your drives.
Tip: When you defragment a drive, any deleted files are normally overwritten in
the process and cannot be recovered afterwards.
84 TuneUp Utilities 2006
Page 83

TuneUp Undelete
It has happened to everyone. You delete a file accidentally, and you can’t find it
in the Recycle Bin. And you don’t have a backup, or the one you have is months
old. This means that it’s time for some serious tools.
With TuneUp Undelete, it is usually possible to recover deleted files and save
your valuable work.
File recovery and Destruction
Usage
When you start TuneUp Undelete, a wizard is opened that takes you through the
recovery process step by step. First, you must select the drives you want to
search for deleted files under Drives to be scanned. The list contains all drives
that are available on your system.
Only select the drive on which the files that you wish to recover were deleted.
Click Next to go to the next step.
Enter Search String
On the next screen, the module allows you to narrow the search to make sure that
you don’t oversee your file in an endless list of deleted files.
You can enter the name of the file in the Search criteria box. You do not have
to enter the complete file name here, a single word is usually enough to narrow
your search. Or if you can only remember the file extension or part of the name,
TuneUp Utilities 2006 85
Page 84

File recovery and Destruction
simply use a wildcard such as *.doc or Picture??.jpg. You can enter multiple
search terms in the box, but you must separate them with a semicolon.
It is practical to enter
one or more words
to search for, but
this is not required.
If you can’t remember the name of the file at all, or if you want to search for all
recoverable files, simply leave the search box empty.
Two additional
options for
narrowing your
search down
There are two additional options that also let you narrow your search further:
Option Description
Don’t show 0-byte files All files that contain no data whatsoever will be
Show only files in good
condition
ignored.
Makes sure that only files with a good chance of
being recovered are shown.
Click Next to begin searching for deleted files.
Search Results
TuneUp Undelete now scans all selected drives one after the other. The progress
of the search is shown in the empty Search results box. The search may take
some time, especially on larger hard drives.
Which files do you
want to restore?
86 TuneUp Utilities 2006
As soon as the search is completed, the module lists all available files that match
your search criteria.
The table shows the file name, the original location, the file type and the
condition of the file.
Page 85

File recovery and Destruction
Don’t worry if the first letter of the file name is missing for the files on FAT
drives, Windows always deletes the first letter when deleting files on drives with
this file system.
Recovering Files
If you find a file that you wish to recover in the list, click it to select it. You can
select more than one file by holding the Ctrl key while clicking. Then click
Restore, and the program will attempt to return the file to the normal Windows
environment.
Once the files have been recovered, try to open them in the corresponding
program. If the file can be opened, the recovery was successful. If not, then part
of the file was already overwritten by another file. And that can often happen
sooner than you think.
Data Recovery 101
Valuable tips for
better results
TuneUp Utilities 2006 87
As deleted files have a rather short life expectancy under Windows, especially on
the system drive where the paging file and many temporary files are located, you
should normally attempt to recover an accidentally deleted file with TuneUp
Undelete right away. The sooner you try, the better the chances that you will be
able to recover the file.
Please do not install software for the recovery of deleted files on your computer
when you have already deleted the file! When you install the software, you may
overwrite the lost file forever. Even if you install the software on a different
drive, temporary installation files may be written over the files you are trying to
recover.
Page 86

File recovery and Destruction
For this reason, data recovery software such as TuneUp Undelete should already
be installed and operational. This way you have all the tools you need should
something go wrong.
Deleting Sensitive Files the Right Way
Make sure that even
Undelete can’t
recover your
sensitive files
Use TuneUp Shredder to permanently delete confidential files. This module
ensures that files that it deletes cannot be recovered with TuneUp Undelete, by
the military or professional data recovery companies.
If you have already deleted a file by “normal” means, the only way to reliably
destroy it is by using a special tool that overwrites all free space on your drives.
Tip: When you defragment a drive, any deleted files are normally overwritten in
the process and cannot be recovered afterwards.
88 TuneUp Utilities 2006
Page 87

Global Modules
Two general TuneUp Utilities modules can be found in the grey area beneath the
title bar of the Start Center, TuneUp RescueCenter and TuneUp UpdateWizard.
TuneUp RescueCenter monitors all of the changes you make to your system
with the other TuneUp Utilities modules and can undo these changes at any time
if you wish.
TuneUp UpdateWizard saves you the trouble of searching for and installing
updates for TuneUp Utilities 2006. A few clicks suffice to make sure that you
have the latest version of this software.
Global Modules
9
TuneUp Utilities 2006 89
Page 88

Global Modules
TuneUp RescueCenter
TuneUp Utilities provides you with a large selection of tools that you can use to
optimize and customize your operating system.
It can happen that you fiddle with a setting or two that you should have better
left alone when trying to improve your system. Or that you delete an entry in
TuneUp Registry Editor that you need after all.
In this case, you will be happy to hear that TuneUp Utilities 2006 is also
equipped with a lifeguard that can undo all of your changes if need be, TuneUp
RescueCenter.
Your first aid kit:
TuneUp
RescueCenter
Open the Start Center. The TuneUp RescueCenter icon can be found in the dark
grey area at the top of the window, directly beneath the blue title bar. Click the
text RescueCenter to start the module.
Undoing Changes
If you wish to undo changes that you made to your system with a TuneUp
Utilities module, make sure that Undo changes is selected under Tasks in the
left side of the window.
TuneUp Utilities opens a chronological list of all backups on the right side of the
window, broken down according to categories. Regardless of whether you
90 TuneUp Utilities 2006
Page 89

These backups can
be restored.
Global Modules
cleaned the registry or your hard drive with TuneUp Utilities, all changes can be
found here.
Next to each entry, you will find the date and time of the action, as well as the
disk space used by the deleted objects or entries. You can also see which
TuneUp Utilities module was used to make the changes and how many changes
were made.
What you can do
with the backups
Select an entry and click Details to view a log of the changes made.
Click Restore to return the system to the configuration it was in before the
backup was made. If more than one backup is available, a dialog will be
displayed in which you can opt to undo all changes made since the selected date.
This can be especially useful when you cannot remember exactly which TuneUp
Utilities module you used to make a change, but know when everything
functioned properly last.
Click Delete to remove a backup from the list permanently, but only if you are
certain that you will not need the backup in the future.
Configuring
RescueCenter
protection
Click Options in the blue bar to open the configuration window for the
RescueCenter. Here, you can specify how long backups should be kept and when
they should be deleted automatically to free up disk space. You can also
deactivate RescueCenter protection for individual TuneUp modules.
Tip: Do not limit the RescueCenter too much only to save disk space. The
protection offered by this module may be the only way to fix problems in some
cases, and is more important than a few extra megabytes on your drive.
TuneUp Utilities 2006 91
Page 90

Global Modules
A large number of
restore points can
normally be found
here.
System Recovery
You can even use TuneUp RescueCenter to undo changes that you did not make
with TuneUp Utilities, but with other programs. This is made possible with the
help of the Windows XP system recovery function.
Windows XP regularly creates system restore points. If your system stops
functioning correctly, you can roll your system back to one of these restore
points at any time. This brings the computer back to the state that it was in when
the restore point was created, undoing any changes made since then.
Go to System Recovery to view all restore points.
If your system stops working as expected, all you have to do is select an entry in
the list (the latest possible when your system worked properly) and click Restore
to activate the backed-up configuration. You must restart your computer for this.
Saving your own
restore points
If you wish to create a restore point of your own so that you can return to a
specific configuration at any time, click Create restore point and enter a
description in the dialog that appears.
92 TuneUp Utilities 2006
Page 91

TuneUp UpdateWizard
TuneUp Utilities are being continually enhanced and improved. New functions
are added to modules, errors are corrected, and some tools need to be continually
adapted to the advances in technology.
Update your product
regularly
Global Modules
TuneUp UpdateWizard automatically checks for a new version of TuneUp
Utilities by contacting the TuneUp server over the Internet. And if an update is
available, these files are very small and can be downloaded quickly.
Run TuneUp UpdateWizard regularly to make sure that you always have the
latest version of TuneUp Utilities. The module can be found in the gray area at
the top of the Start Center. Simply click the text UpdateWizard to open the
module.
Usage
Welcome to TuneUp UpdateWizard. You can use this module to make sure that
you always have the latest version of your TuneUp product. But in order for the
program to do this, you must tell it what kind of Internet connection you have.
Normally, the program detects the correct connection automatically. But if this is
not the case, select a connection from the list.
If your Internet connection cannot be found in the list at all, you have two
possibilities. If you are always online (for example over a network), select
TuneUp Utilities 2006 93
Page 92

Global Modules
Select your
connection.
Permanent connection to the Internet. If you always establish a connection to
the Internet yourself, select Start connection manually.
If you access the Internet over a network, you may have to configure the Proxy
settings in order for the connection to function properly. This is normally not
necessary, as the module uses the same settings as Internet Explorer. That means
that TuneUp UpdateWizard will work if you can surf the Internet with Internet
Explorer.
Click Next to check for updates.
Installing Updates
The module will now establish a connection with the Internet and check if new
updates are available. This may take a few seconds. The wizard shows a list of
all updates that can be downloaded.
Click Next to install the updates in the list. When all updates have been installed,
click Finish to close the wizard.
94 TuneUp Utilities 2006
Page 93

Glossar
y
Glossary
10
Access permissions
The assignment of specific rights to users so that they can access shared data and
resources in the network. Access permissions are managed by the network
software.
Administrator
Designation for the person responsible for managing a network. He has
unlimited access permissions and is responsible for maintaining and managing
all of the hardware and software in the network.
Anti-aliasing
Also called font smoothing. A method employed to reduce pixel stepping in
slanted and curved lines. These “steps” are smoothed out through interpolation,
which is the inclusion of additional colored pixels to create the image of a
smooth line. This can also cause lines to appear wider.
Application
A piece of software designed to fulfill specific tasks and to create documents, for
example word processors and spreadsheet programs.
Benchmark
A measure for comparing performance for hardware, software or for services.
BIOS
Acronym for “Basic Input Output System”.
Bit
Short for “binary digit”, the smallest unit of information in the binary number
system. Corresponds to one storage cell. A bit can either have the value 0 or 1.
Eight bits are equal to one byte. The terms “bit” and “binary digit” were coined
in 1946 at Princeton University by the mathematician John Tukey, one of the
TuneUp Utilities 2006 95
Page 94

Glossary
most important staticians of the 20th century. Tukey had a particular talent for
coining terms, he also created the term “software”.
Byte
A byte is the smallest addressable unit of memory. It consists of eight bits. As a
bit can have one of two values, one byte allows 256 combinations (two to the
power of eight), and can therefore represent 256 different conditions or
characters.
Cache
A fast form of memory that temporarily stores data for rapid access. There are
different kinds of caches:
- Caches that store data from main memory in the immediate vicinity of the
CPU (L1/L2 cache).
- Caches that store data from the hard disk in the main memory (such as
Smartdrive or smartdrv.exe).
- Caches that store data from slow CD-ROM drives on the hard disk.
The hard disk cache stores write and read accesses in the disk hardware.
Depending on the model, a hard disk sold in 2000 has a cache between 128 and
4096 KB; EIDE disks frequently have a 512 KB cache, while SCSI disks often
have a 1024 KB cache. As the algorithms used vary in their effectiveness, a
larger cache does not necessarily make a disk faster. If the data in the cache is
needed again, the cache accelerates operations because the data does not have to
be read from the slower disk again.
ClearType
ClearType, introduced by Bill Gates at Comdex in Las Vegas in autumn 1998, is
designed to dramatically improve the readability of text on all screen types,
including simple screens. ClearType does not only use whole pixels for display,
but also uses invisible subpixels when calculating the display of the screen
contents. This technology can be used on desktop computers and PDAs (personal
digital assistants) or electronic books. Dick Brass, vice president of Technology
Development at Microsoft, claimed that ClearType makes economical screens
look like expensive ones, and makes expensive screens look like paper.
Clipboard
A special area in the main memory that is used by programs and operating
systems like Windows to temporarily store information so that it can be copied
or moved to other documents.
The terms in this glossary have been used with the kind permission from the
online dictionary “ARCHmatic-Glossar und -Lexikon” (www.glossar.de) by
Alfons Oebbeke and adapted by Carsten Scheibe.
96 TuneUp Utilities 2006
Page 95

Glossary
Color depth
The amount of information used to describe the color of a pixel. One bit can only
have one of two states, on or off (1 or 0). Expressed in colors, this is either black
or white. An 8-bit color depth allows 256 colors. At least eight bits per color are
required for high-quality images. In 24-bit color, three color channels are used
(for example red, green and blue), meaning 3 x 8 bits or 256 x 256 x 256, for a
total of 16.7 million colors.
Cookies
A cookie is a small file with text information that must be initiated by the author
of a website and that is then copied to the local computer by the Web server
through the browser in regular intervals.
CPU
Short for “central processing unit”.
Cursor/pointer
A special element on the screen, called the cursor when working in text and the
pointer when working with a mouse. This display element can be moved with the
mouse, the arrow keys or a digitizer and is used to enter text or graphical
information at a specific point or location.
Data medium
A medium for the permanent storage of data. These include diskettes, CD/DVDROMs, hard disks, magnetic tape and other devices.
Defragmenter
A program that changes the location of data elements on a disk so that individual
files are saved at a single location for faster processing.
Desktop
A general designation for the area in Windows that is normally seen first after a
user logs on. Icons can be saved here, and this area also includes the Start menu,
the taskbar and the notification area next to the clock.
Device driver
A special program that controls devices and expansion cards, expanding or
adapting the operating system.
Dialog
A set of associated options that are shown on the screen in the form of a window
or box in which settings can be configured.
TuneUp Utilities 2006 97
Page 96

Glossary
Dial-up network
This Windows function allows computers to create or access networks by means
of modems, ISDN adapters and DSL modems, for example. This function is also
used to access online services.
DLL
Acronym for “dynamic link library”. DLLs are special program routines that are
not loaded from the program library until they are actually needed. This reduces
the amount of main memory occupied by a program.
Drag and drop
This method of interaction in Windows (originally developed by Apple) allows,
for example, part of a text document to be marked with the mouse, after which it
can be pulled into a different window by clicking the selected text with the left
mouse button and releasing the button when the pointer is over the desired
location. The selected text is then inserted at the location of the mouse pointer.
This is called dragging and dropping, and is the easiest way to exchange data
between programs or to move objects within a user interface.
Driver
A program that integrates peripheral devices into the system so that they can
function properly.
FAT
Short for “File Allocation Table”. The operating system stores the exact
locations of all files on a disk in this file.
File allocation table
Called FAT for short, this is a special file that is used by the operating system to
store all information about the exact location of all files on a disk.
File attribute
The attributes that can be assigned to a file depend on the operating system. MSDOS, for example, supports the following attributes: archive, read only, system
and hidden.
File extension
A suffix at the end of a file name, located after the dot. Many programs identify
the file type by means of this extension, for example files with the extension
“.doc” are normally associated with Microsoft Word.
File format
A specification of how texts, images, etc. are stored in a file. Depending on the
file format, images can also be stored with alpha channels. Some formats also
compress image or music contents.
98 TuneUp Utilities 2006
Page 97

Glossary
File name
The complete designation of a file, consisting of the name of the file itself and a
file extension after the dot.
File type association
A logical connection in Windows between a file extension and an application.
This makes it possible for the associated program to start automatically when
opening a file (by double clicking it).
Fragmentation
Normally, all data in a file is saved in consecutive clusters on the disk. But this is
only possible when there is sufficient contiguous free space on the disk. If this is
not the case, individual files are broken up and written to the disk in individual
clusters. Files saved in this manner are called fragmented files. As the disk’s read
head requires more time to seek all of the individual fragments, the loading of
such files takes longer. For this reason, it is sensible to defragment your hard
disk from time to time so that each individual file is saved at a single location.
This is called defragmenting and should be completed at least once per month if
the computer is used on a daily basis.
Frequency / clock rate
The frequency of a processor indicates at how many processing cycles per
second it performs its work. The processor frequency is an important factor in
the overall speed of the computer. The industry has differentiated between
internal and external clock rates since the introduction of the Intel 486DX2.
The internal frequency, also called the CPU frequency, designates the speed at
which commands are executed within the CPU. The more megahertz, the faster
the CPU.
The external frequency is the speed of the front side bus (FSB) and specifies the
speed at which the processor can access the main memory (and the L2 cache, if
present). The speed of the FSB is governed by the motherboard.
Hot key
A special key combination that immediately starts a pre-defined command or
process.
Icon
Icons are pictograms that serve as visual labels in graphical user interfaces and
are used, for example, to open programs.
ISDN
Short for “Integrated Services Digital Network”. ISDN is a digital
telecommunications network that can be used for normal telephone calls, remote
data transmission, faxing and other services such as video conferences. ISDN
TuneUp Utilities 2006 99
Page 98

Glossary
offers significantly higher bandwidth than the standard analog telephone
network. ISDN is an international standard that should be applied to all existing
and future networks. An ISDN line consists of two basic channels, each of which
can transmit 64 kbits, and a control channel operating at 16 kbits.
LAN
Short for “local area network”. Distinct from a WAN (wide area network), which
connects workstations and networks separated by greater geographical distances.
In this sense, “local” refers to a common location, such as a company facility or
a room.
Network
A group of computers connected by various types of cables or radio connections
that share common resources such as data and peripheral devices. A network
often includes a special computer (server) that only manages the common data,
and which is accessed by all other workstations. The two principle kinds of
networks are LANs, which are used within a single location, and WANs, which
are used for example by multiple branches of an organization in different cities
or countries.
Operating system
Operating systems are currently the most important piece of software on a
computer. No computer can run without an operating system. The operating
system processes the data entered by the user, manages the saved files and
controls all connected devices such as printers and hard disks. At the same time,
it serves as the basis for applications such as word and image processing
programs, which could not run without the framework of the operating system.
The development of MS-DOS and Windows allowed Microsoft to assume a
dominant position on the computer market. While DOS is largely limited to
command line operations using a keyboard, Windows allows the user to control a
graphical user interface with the mouse.
Paging file
A (frequently temporary) file that modern operating systems such as Windows
and OS/2 create on the hard disk to temporarily save information that is located
in the main memory but that is not needed at present. A paging file (also called a
swap file) is necessary when all of the data to be processed cannot fit in the main
memory of the computer.
Parallel interface
A port on the computer that supports data transmission over eight channels (and
therefore the simultaneous transmission of eight bits), unlike a serial port.
Parallel ports are also called “Centronics ports”. A parallel port is normally used
to connect a printer to the computer.
100 TuneUp Utilities 2006
Page 99

Glossary
Partition
A defined section of a hard disk that can be accessed and handled as a separate
drive.
Password
An individual string of characters that allows a user to access a computer system
or network.
Path
A path indicates where a file is saved on a drive. For example, the name of a
picture file is “logo.bmp”, and this file is located in the folder “Windows”. This
folder is located on the drive that is labeled with the letter “C”. The path of this
file would be “C:\Windows\logo.bmp”.
Performance
In computers, performance expresses the speed of the system in executing
commands or programs.
Peripherals
This term refers to all devices that are connected to a computer, such as screens,
keyboards, disk drives, printers, etc.
Permanent paging file
A special paging file in Windows that always occupies the same location and
that is stored in a contiguous area on the disk. This results in improved speed in
the management of the system’s virtual memory over a temporary paging file.
Processor cache
Temporary memory that is integrated into the processor itself. Data is stored in
this memory so that the processor does not have to wait until it is fetched from
the slower main memory of the computer. This allows the processor to work
faster.
Prompt
The symbol used by MS-DOS to tell the user that the program is ready for input.
The prompt normally consists of the drive letter and the greater than sign (“>”).
RAM
Short for “random access memory”. This refers to the physical main memory of
a computer.
Random access memory
Fast memory (also called main memory) that can be read from and written to as
needed. The contents of this memory are lost when the power is switched off.
TuneUp Utilities 2006 101
Page 100

Glossary
Refresh rate
This indicates how many times per second the screen picture is recreated. The
higher this rate, the less the screen flickers. As the human eye perceives
relatively slowly, and due to a degree of ghosting, the constant recreation of the
screen picture is no longer perceptible above a certain rate, and is perceived as a
still image. Unlike televisions with their rapid movements and frequent scene
changes (where the flickering is not noticeable), computers most frequently
display still images and require a higher refresh rate. Many occupational safety
and standards agencies require a minimum refresh rate of at least 75 Hz to ensure
a flicker-free picture. In comparison, the refresh rate of a television is only 25
Hz. This value also depends on the sensitivity of the user’s eyes, with some
individuals perceiving no flicker at rates of 70 Hz, while others perceive
flickering at refresh rates up to 85 Hz.
The refresh rate for newer TFT/LCD monitors is normally 60 Hz, as the picture
on these types of monitors is permanently stable.
Registry
Also called the registry database. This is the name of the central Windows
database that contains information on all installed hardware and software.
Windows cannot function without the registry. It should be cleaned up regularly
so that it does not become too large and slow the system down.
Remote data transmission
A collective term for the exchange of data between two computers separated by a
greater distance, for example between an architect in New England and an
engineer in California. Data can be transmitted over the telephone network, over
the Internet or via FTP, among other options. In local networks (LANs), the term
used for this is simply data transmission.
Resolution (graphics card/monitor)
Resolution refers to the number of horizontal and vertical picture elements
(pixels) that make up a monitor image. In general, the higher the resolution, the
more detailed the appearance of the contents of the screen and the greater the
area on the screen (“screen real estate”). In principle, the resolution of a graphics
card depends on the amount of graphics memory, the refresh rate and the color
depth. The higher the resolution, the lower the refresh rate and color depth.
Graphics cards with 2 MB of memory can only display 256 colors at 1280 x
1024 pixels, while 16.7 million colors can be displayed at a resolution of 800 x
600.
Resources
The totality of all peripheral devices, memory and data that can be accessed from
a computer or over a network connection.
102 TuneUp Utilities 2006
 Loading...