

Page 1

No: G-98461704 12/2017
USER MANUAL
Nova 3000 Star
Nova 4000 Star
Seed drill
Starting from serial number AG-52921
All rights
to structural changes reserved
Read the manual before oper ati ng the ma c hine!
Translation
Page 2

2
EC Declaration of Conformity for the Machine
(Machine Directive 2006/42/EC, Annex II A)
Manufacturer: Tume-Agri Oy
Add.: Sudenkorventie 1
FI - 14200 TURENKI
Name and address of person authorized to compile a technical file:
Name: Heimo Valli Address: Sudenkorventie 1, FI-14200 Turenki
Hereby declares that
Seed drills TUME Nova 3000 Star and Nova 4000 Star Serial number __ _________________
• are in compliance with the applicable decrees of the Machine Directive
(2006/42/EC)
and in addition declares, that
• the following standardized European directives and standards have been appli ed:
SFS-EN ISO 12100-1:2003
Place and date: Turenki 3.12.2017
Signature:
Patrik Jungarå
Managing Director
Page 3

3
CONTENT
1. TO THE MACHINE OPERATOR AND THOSE IN CHARGE OF THE MACHINERY ............. 4
2. GENERAL SAFETY PRECAUTIONS .................................................................................... 4
3. MACHINE APPLICATION ..................................................................................................... 5
Using the machine exceptionally for sowing only ................................................................... 6
Using the machine only for fertilizing ..................................................................................... 6
4. GENERAL GUIDANCE FOR SOWING ................................................................................. 6
Sowing depth selection .......................................................................................................... 6
Right time for sowing ............................................................................................................. 7
Choosing the fertilizer ............................................................................................................ 7
General guidelines for direct sowing ...................................................................................... 7
Sowing into a minimally cultivated soil ................................................................................... 8
Sowing in normally tilled soil .................................................................................................. 8
Tire equipment in machines moving on the field .................................................................... 8
6. COMMISSIONING THE MACHINE ....................................................................................... 9
Drive unit installation ........................................................................................................... 10
Connecting the machine to tractor ....................................................................................... 10
Driving instructions .............................................................................................................. 11
7. SUPPLY EQUIPMENT LAND WHEEL ................................................................................ 12
8. FILLING THE CONTAINERS .............................................................................................. 13
Adjustable tank volume ....................................................................................................... 13
Filling method ...................................................................................................................... 14
9. DRAINING OF CONTAINERS ............................................................................................. 14
Draining of fertilizer tank ...................................................................................................... 14
Draining the seed tank ......................................................................................................... 14
10. SEED FEEDING MECHANISM AND CONTROLS ............................................................ 14
Turning the transmission cassette ....................................................................................... 16
Bottom flaps ........................................................................................................................ 16
11. FERTILIZER FEEDING EQUIPMENT A ND ADJ USTMENTS ............................................ 17
Fertiliser feed rate adjustment ............................................................................................. 17
12. SOWING TABLE SAMPLE APPLICATIONS ..................................................................... 18
Adjustment example when sowing grain .............................................................................. 19
Adjustment example of sowing small seeds ........................................................................ 19
Adjustment example, fertilizer side ...................................................................................... 19
13. CALIBRATION .................................................................................................................. 20
Calibration for fertilizer and seeds simultaneously ............................................................... 22
Fertilizer side calibration equipment use .............................................................................. 22
Instruction to improve sowing accuracy ............................................................................... 22
14. FIELD TEST ...................................................................................................................... 23
15. WORKING DEPTH ADJUSTMENT/ CO ULTER WEIGHING ............................................. 23
16. HARROW CONTROL ........................................................................................................ 25
17. DRILL SERVICE ............................................................................................................... 26
Lubrication ........................................................................................................................... 26
Notable tips to operate the machine .................................................................................... 27
Storage ................................................................................................................................ 29
18. TECHNICAL SPECIFICATIONS........................................................................................ 30
19. ACCESSORIES ................................................................................................................ 31
Row markers ....................................................................................................................... 31
Hay seed sowing machine (HS-machine) ............................................................................ 32
Seed dressing ..................................................................................................................... 34
Earthing discs ...................................................................................................................... 36
ANNEX 1 LOADING AND TRANSPORT GUIDE ................................................................ 37
ANNEX 2 LUBRICATION CHART ...................................................................................... 38
Page 4

4
1. TO THE MACHINE OPERATOR AND THOSE IN CHARGE OF THE
MACHINERY
We wish you the best of success with your TUME seed and fertilizer sower. Instruction in this
manual gives the guidance for correct use, adjustments, maintenance and storage of the Tume
Nova Star / Nova Combi Star. Following the guidance of this manual your machine will serve you
impeccably and for a long time to come. It is very important to become acquainted with the
machine operating instructions well before the operating season of the machine. Keep the
manual in a safe place and easily accessible. A place to store the operating instructions is in the
compartment at the right end of the machine. This place is marked with a sticker. Both the
manufacturer, Tume-Agri Oy, as well as the authorized dealer, are happy to assist you with
questions related to the machinery.
Remarks regarding the Operating Instructions
Because this publication is distributed in an international sales network, the machinery shown in
the illustrations (as well as the standard equipment and accessories) can vary in different
countries. In different countries the statutory and otherwise important covers have been opened
or removed in some illustrations, in order to present a clearer view of the object. The equipment
is not allowed to be used without the covers. For your own safety, make sure that all covers are
in good condition or installed in place before commencing operations.
In this manual, the terms "left" and "right" in relation to the machine refer to the machine sides
seen from behind towards the direction of travel.
Tume-Agri Oy continuously develops its products and reserves a right to make changes and
improvements without commitment to carry out the said changes in machinery which is already
sold.
2. GENERAL SAFETY PRECAUTIONS
Anyone using, maintaining or other wise handling the TUME-seed and fertilizer sower, must become
carefully acquainted with this manual befor e starting to work.
Working or staying under an unsupported raised machine is strictly prohibited. Make sure the
machine stays up by closing the lift cylinder safety valves. Put the machine down if you have to
leave it unattended.
Staying on the machine or on the step level when the machine is in motion is prohibited. The driver
must ensure that nobody is near the machine when the machine is in motion.
Work machine lubrication, adjustment or cleaning is not allowed when it is moving. Turn off the
engine and turn on the hand brake during maintenance work.
All covers must be kept mounted in their respective loca tions.
Ensure the correct connection of drive unit, hydraulic lines and electrical wiring to the tractor and
the work machine.
Damaged hydraulic hoses and connector s must be replaced without delay . Tractor hydraulic val ves
and connections must be leak-free and in good condition. Transportation position of the machine
is dependent on these.
Page 5

5
Due to the structure of the machine hydraulics, the hydraulics should be used only when a 12V
supply voltage is connected to the machine. If the power supply is out of order, act with extreme
caution
in the use of hydraulics, because the movements taking place are unlimited!
Optional hydraulic row markers may move very quickly, especially if the hydraulic throttle valve is
open and the tractor hydraulic flow is high. Use extre me caution when try ing out lift and a lowering
of markers for the first time. Make sure that nobody is under a marker or trajectory lifted up with
hydraulics.
Make sure that at least 20 per c ent of the tractor 's weight is left on the front axle of the tractor under
all circumstances. If necessary, use additional weights. Be especially careful if the drill is
connected to an interim processing device and you are raising it with the tractor's lifting gear i.e.
in a case of reversal.
The maximum speed in good conditions is at 30 km/h. Extreme caution and reduced speed must
used on uneven surfaces. Transfers should be preferably made when containers are empty. Load
being transported on the machine is prohibited. In order to keep tires from breaking, avoid driving
over rocks and other obstacles.
Never select a driv ing lane, where the extreme wheels o f the machine are "on empt y". In such
condition the machine can get too much swing. Choosing a wrong driving lane, can cause the
machine to fall.
Always, use caution when moving on top of the machine for cleaning or maintenance work
purposes, or filling the tanks.
When heated, machine painted surfaces can excrete gases harmful to health. Take car e of efficient
ventilation in your workspace for example during welding operations.
Use only manufacturer-approved accessories and equipment. The party carrying out alterations
which does not follow manufacturer's instructions is responsible for the alterations and their
consequences.
The use of respiratory protective devices is recommended, especially when filling the optional seed
dressing. Till Seed Drill d oes not cause an y substantial increa se in the noise lev el at the driver's
cabin. Possible hearing protection required depends on the tractor noise level. When handling
heavy and sharp components (e.g. drawbar and coulter parts) the use of safety boots is
recommended.
Keep your machine up to date also on the required road equipment, in case the machine has to be
transported on public roads. Regulatory changes are often made.
3. MACHINE APPLICATION
Tume Nova Combi –Till Seed Drill is intended for simultaneous seeding an d fertilization. It is w ell
suited for all sowing methods: direct sowing, sowing on minimally cultivated or on normal
cultivated soil.
The machine can also be used only for seeding or fertilization, according to the boundary
conditions stated below. Due to its structure, Nova Combi also intensifies the soil with its support
wheels. Under most circumstances, the support wheels also close the grooves made by the
coulters.
With the additional accessories, the number of features of Nova Combi may be increased, as the
combination machine and accessory may do the drilling and fertilization and, during the same
pass, among other things to modify or even out the arable land, sow grass seeds, cover the sown
Page 6

6
seeds, as well as form tracks in the field.
The use of Nova Combi to other purposes than th e sated is prohibited. The machine is not meant
for example to transport materials with great speed or storing material in the containers of the
machine. The filling station of the machine should be located close to the field which will be sown
and the transport speed, when machine has a load should be in a reasonable relationship to the
container contents and road unevenness. Passenger transport with the machine is completely
prohibited!
Using the machine exceptionally for sowing only
If fertilizers are not being used, it is reasonable to move the partitioning in machine container to
its forward position and maximize the space for seed container.
If desired, for example due to the risk of soil drying out, to ensure that the seed is placed on the
bottom of the deepest opened groove, the seeds can be sown through the fertilizer container.
Calibration must also be done in this case by using the fertilizer side feeding device and
calibration trough. It must also be taken into account that the fertilizer side filters may not pass
through the seeds which will be sown. In this case, the screens must be removed.
In order to achieve the maximum drilling capacity, seeds may also be sown through both
containers simultaneously (note: when sown through separate containers there is a 2 cm
difference in resulting depth). Please note that the calibrations must be then carried out for both
feeders and the sum of results forms a result describing the sowing rate. In the above special
cases, it is worth remembering that the sowing tables shipped with the machine apply.
Using the machine only for fertilizing
Tume Nova Combi can also be used for fertilizer placement only. Fertilizer in this case will be
filled into the fertilizer or seed container or to both. Special instructions related to the mere
fertilizer placement are quite consistent with the instructions of the previous section.
On filling the entire machine with fertilizer, it should be noted that the fertilizer is usually heavier
material than the seeds. Thus, the machine will not be filled completely and must comply with the
maximum total weight stated in technical specifications.
4. GENERAL GUIDANCE FOR SOWING
Sowing depth selection
Nova Combi is equipped with 2-disc coulters, where the right and left discs have different
diameters. The first disc essentially determines the seed sowing depth and the larger disc creates
a somewhat deeper groove for the fertilizers.
When selecting the sowing depth, consideration m ust be given the requirements of seeds and
ground moisture conditions. Find out in good time the suitable depth for sowing the seed and try
to match the sowing date so that in the suitable sowing depth sufficient moisture exists. A suitable
working depth for small seeds, normally alternates between 1-3 cm range and ordinary grains
have a suitable sowing depth of 4-5 cm. Alw ays be cautious no t to sow too deeply. On the other
hand, sowing low may end up with problems as seeds do not necessarily become covered.
It is important, that the smaller disc of Nova Combi 2-disc coulter reaches a mois t part of the soil.
Page 7

7
If the seeding depth is adjusted lower, there is a risk that the seeds fall on dry earth, and do not
germinate.
Right time for sowing
The right time for sowing is based on observing the ground moisture, temperature and prevailing
and predicted weather conditions. Soil type and sown crop type essentially affect the optimal
sowing time, and there are no universal guidelines which could be given.
At the time of sowing, the seed depth should be malleable but still moist. The soil is too wet to be
sown if the soil-texture can be hand-baked into "loafs".
Sowing dates of crops sensitive to frost or cold may have to be moved, regardless of soil moisture
conditions, if the expected or prevailing temperature conditions so require.
If a direct sowing is applied, and the land is not tilled in the fall or spring, it is advisable to prepare
for the spring sowing to start 7-10 days later after the tilled soil conditions. This is due to the
insulating and light back-reflection properties of straws and and other waste materials.
Choosing the fertilizer
Tume Nova Combi places the fertilizers and seeds through the same coulter, in most cases
slightly apart from each other. Fertilizers, when in immediate proximity with the seed, may in
some conditions cause the seed to germinate slower or prevent it altogether. This burn break
down risk is strongest with small seeds (eg, rape, turnip rape) and bark-free grains (e. g. w heat).
The burn breaks down risks are being studied, but as the research is still in progress, it is safest
to use the conventional granular compound fertilizers of well-known manufacturers, in which
granules contain all the nutrients of the fertilizer. Fast soluble nitrogen fertilizers should be
avoided (e.g. urea). Mechanical test results of the fertilizers are not yet available. Fertilizer
dosage must be reasonable. Very high fertilizer dosages should be avoided or alternatively must
choose a divided method, in which part of the fertilizers are passed on the crop.
General guidelines for direct sowing
By using direct sowing and omitting all cultivation tasks, great cost-savings can be generated and
large field areas maintained with only small machinery and people capacity. Especially in
favorable conditions the crop level provided by a direct-sowing method does not usually differ
from the normal. Using the direct sowing method in the spring sow an average crop level may
become somewhat reduced compared to the traditional methods.
Moving over to the direct sowing should be already considered during the preceding year. Arable
land drainage should be in good shape and on the surface there should not be concentrated
tracks present left by the wheels or other irregularities. In the threshing, the stopping of the
combine harvester should be avoided, thus avoiding the formation of straw heaps. The chopper
of the combine should be effective and threshing waste should be spread on the ground as much
into an even layer as possible.
Direct sowing is best suited for autumn sowing, because the autumn is usually high in moisture
and seed germination takes place more easily. In general a dry period occurs during the spring
sowing and also the start of summer is often dry. If the direct sowing taking place in spring time,
the correct time of sowing, soil structure and soil type meanings become emphasized. It is also
essential that the sowing depth is appropriate and that the seeds will be topped by dirt. Seeds
Page 8

8
must in no case remain on the surface! Tume Nova Combi may be provided with earthing disks,
which ensure seed occultation.
In direct sowing special significance is given to the herbicide. Practice has shown that an annual
glyphosate spraying with a reduced dose, either just before sowing or immediately after sowing
before sprouting can keep the couch grass reasonably in check. Over the years, weeds may,
however, become eutrophic, for example in hay growths. These should be fought with the
available chemical products and, if necessary, using plant alternation or fallowing. The light soils
with moisture conditions, which very suitable for direct sowing, are in terms of weeds, the worst.
When direct sowing is used, t he crops should be monitored more carefully than usual, also in
terms of diseases and pests. Control measures should be taken, if necessary when the
thresholds are exceeded
Sowing into a minimally cultivated soil
Tume Nova Combi is also extremely suitable for sowing into a minimally cultivated soil. For
minimal cultivation, machinery leaving an even, suitably fine and compressed track should be
used and where working depth can be adjusted to an adequate accuracy.
Minimum tillage occurring just before sowing should at least be done in the soils with clay
composition and to a somewhat shallower depth than the sowing. This will ensure that the
moisture content at a depth of sowing can be retained.
Considering spring sowings the recommended minimum tillage method is to a tillage in the fall to
a depth of 10-12 cm, and plant residues mix in the surface soil, and do not form an insulating
layer on the surface. This method allows to start the normal sowing early in the spring, which is
important especially in countries where the growth time is short. With Tume Nova Combi a sprin g
sowing straight to the soil is possible, which has r eceiv ed a l ight tillage dur ing the fall. If desired,
during the time of planting a light tillage of the surface can be done by combining to the unit a
Tume Cultipack-interim processing device.
Sowing in normally tilled soil
Seedbed preparation should be carried out at low depth, especially in clay soils lower than the
sowing depth. This is to ensure a better conservation of moisture at a depth of sowing.
In the weighting of coulters a low weighting must be used, especially on light soils.
Equipping the Nova Combi till seed drill Tume CultiPack with interim processing device the
sowing can be done directly to a plowed field, and no other tilling are required.
Tire equipment in machines moving on the field
In fields where direct sowing is carried out, one should pay attention to the preservation and
improvement of the soil structure, so that the water economy works. Additionally, the surface
should be as smooth as possible.
Movement in the field should be done only with tires with a sufficiently low surface pressure and
the axle loads should be as low as possible. Additionally, movement on fields should be avoided,
if the weather conditions are wet.
Page 9

9
6. COMMISSIONING THE MACHINE
Supporting wheels function in the way that the longer cylinders at th e end s of the machine turn a
tube frame with the width of the machine, in which are connected also the extreme wheel pairs.
The intermediate wheel pairs in turn are mounted by means of joints to the tubular body and they
operate with their own drive cylinders. All these cylinders have been connected to the same
hydraulic circuit and thus they all share the same pressure. For this reason the wheel pairs can
adjust to the ground irregularities but the rolling force is still standard throughout the working
width (fig. 1).
Geometry of supporting wheels has been planned in the way,that the machine working position
(with the engine down), the pressure on all wheel pairs is nearly the same. On the other hand
with the engine lifted to its up position, the l oose middle wheel pairs carry some more of the load.
In this way the probability of peripheral wheel pairs becoming damaged is reduced, as those are
the ones which most often are damaged in transit drive.
The front support wheels determine the depth the coulters can sow. The adjustment is coulter
sled-specific, and therefore one-wheel controls two coulters. Adjustment is done with quicklatches which are located in the front edge of the sledge (fig. 2). By adjusting the latch to the
lowest notches, the maximum
sowing depth can be achieved. Respectively, by adjusting the latch i.e. to the upper notches
sowing can be done to soil surface.
When lifting the Tume Nova into a truck (e.g. the machine loading at the factory) a special lifting
device for this express purpose will be deployed. Lifting is done by the driving direction oriented
middle-wall located inside the machine tank. In it are provided 2 lengthy holes, into which the
aforementioned lifting devices will be attached (2 pcs are needed), and to which the lifting chain s
will be connected. Ensure the equal length of the lifting chains: Nova needs to remain in direct
upward position throughout the lift. Open the tarpaulin cover fully for the duration of lift, in order
to protect it from becoming damaged!
Nova can also be loaded onto a truck using a loading bridge, or the use an adequate sloping
ramp transport carriage, where the drive bridge is the width of the machine rear tire set. The
intermediate wheel pairs must not be allowed to drop between the loading ramps. In the
outermost wheel pairs, it is enough that one wheel is on the stage if the machine is transported
in the driving direction.
NOTE: See the end of this manual APPENDIX 1: Loading and transport information.
Also note when reversing the pushers of the back wheels, they are very close to the ground.
Watch out for obstacles! When reversing over a high threshold etc. the above-mentioned
scrapers rise higher, if the machine is slightly lowered. Check that under the coulters will be
enough room so that they will not hit obstacles.
Page 10

10
FIG. 1. Supporting wheels. FIG. 2. Adjusting the working depth.
Drive unit installation
Drive unit is assembled according t o fig. 3 where the mounting of the drive unit to the machine
can also be seen. Note, that drive unit is always mounted to the upper holes of the machine’s
lower brackets. The hydraulic push rod is mounted also to its upper hole.
Hydraulic hoses and electricity wires are connected to the drive unit carefully so that they cannot
be damaged in any driving situation (i.e. driving the tractor into an obstacle). Thread the tubing
through the inside of shaft housing.
FIG. 3. Drive unit.
Adjust the length of the push rod so that the machine is lowered and, in the tractor trailer hitch,
the wheel intermediate roller or intermediate processing device are connected horizontally.
Ensure, that the push rod cylinder is in its lowest position when adjustment is carried out. Focus
of drive unit is done in the field in sowing conditions.
Connecting the machine to tractor
Nova Combi is normally connected to the tractor drawbar. We do not rec ommend conne cting the
machine to the tractor drawbar attached to the arms, because it makes the tractor front end lighter
and reduces maneuverability.
Page 11
11
The hydraulics of Nova Combi are connected to single-phase external cylinders meant for the
outlet of tractor hydraulics. If the machine is equipped with markers, they work with the same
hydraulic valve lift of the machine as lifting and lowering, but in that case the machine must be
connected to the double-phased hydraulics of tractor. It should be noted that, in some tractor
types must be used its own type of hydraulic quick connectors recommended by the
manufacturer. If necessary, please change the tractor parts in question to the right type, to ensure
the proper functioning of of hydraulic system. The hydraulic cylinder of the drive unit will also
need a second 2-function interface.
Seed and fertilizer drill requires a 12 V elect rical c onnection. The wiring diagram is shown on the
next page.
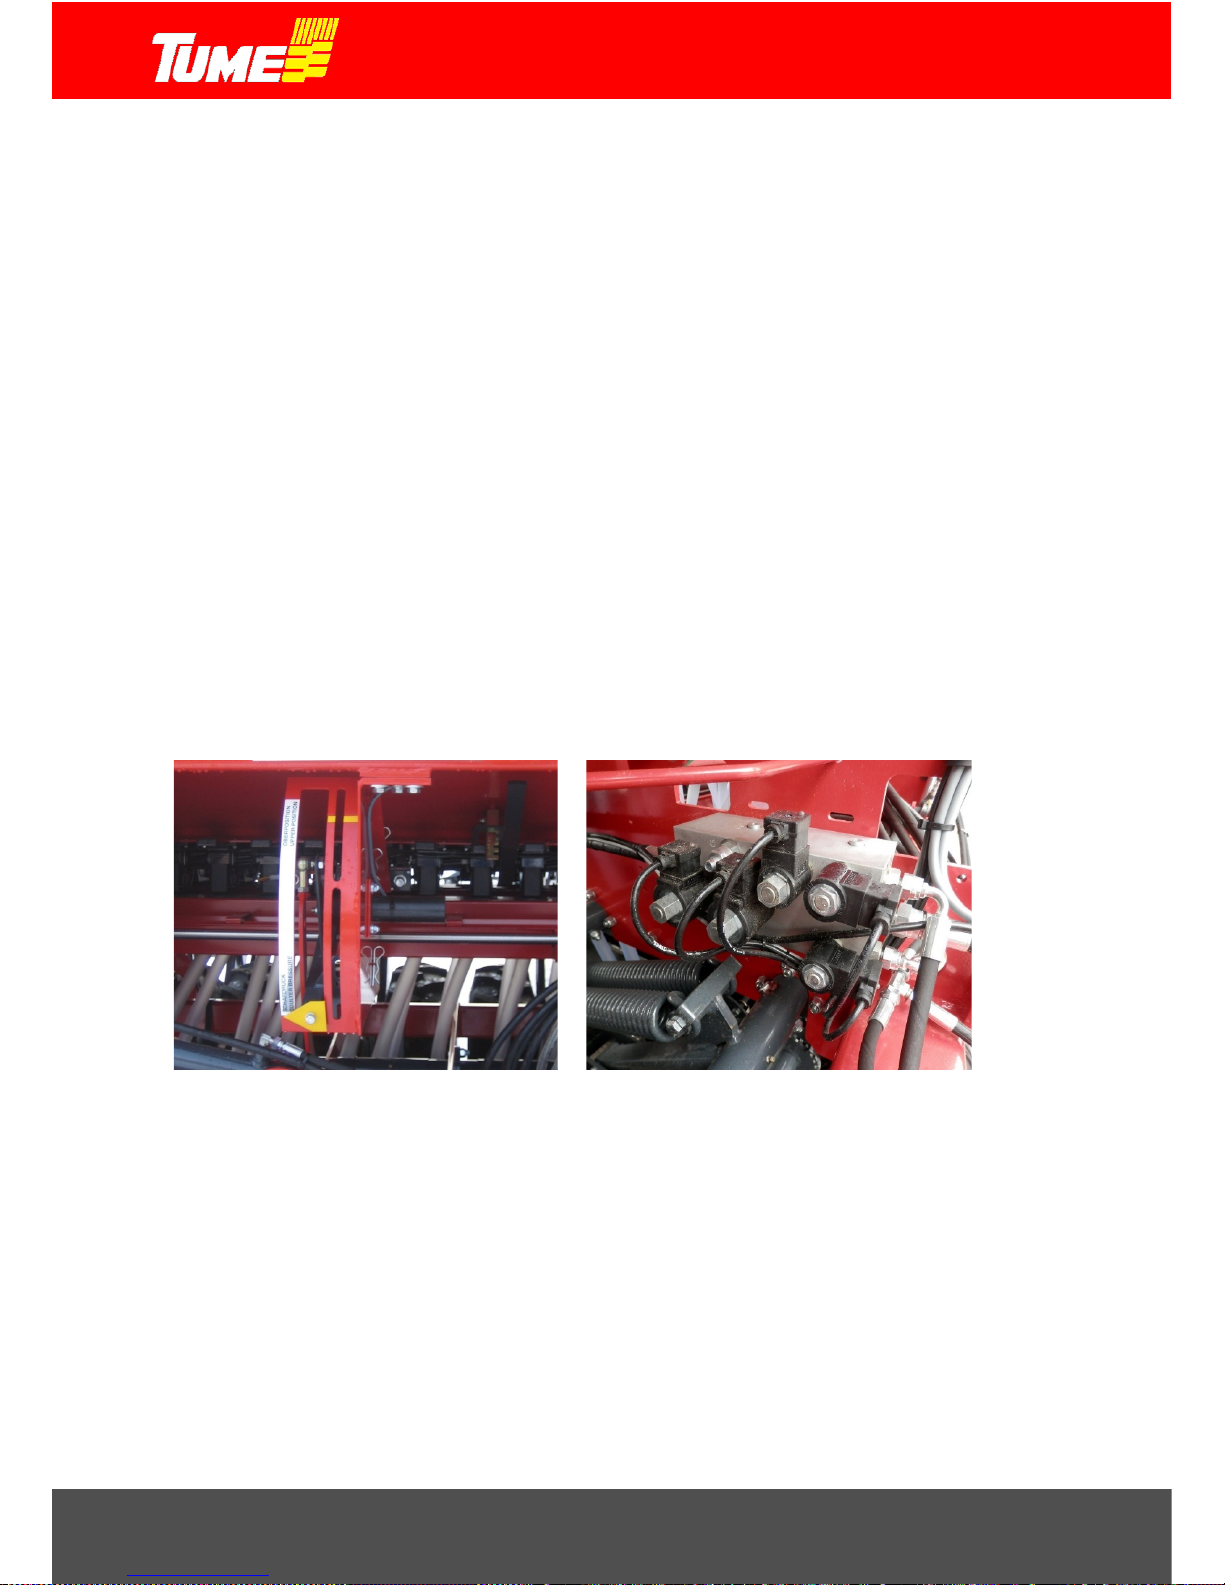
The maximum lifting and lowering height is regulated wi th an electric valve (Fig. 5). The opera tion
is controlled from the tractor cab from the board computer control unit. Refer to the board
computer Agrocont manual about raising / lowering!
NOTE: Always, when moved, the system computer Agrocont must be connected. If the
power system is not connected, it may result in severe tire / coulter damage. This is due
to the fact that, if the electric valves do not limit lifting, the machine can be lifted so that
the rings collide with coulters and become damaged.
IF NO ELECTRICITY IS CONNECTED, CAUTION MUST BE PRACTICED IN ORDER TO
AVOID THE AFOREMENTIONED FROM HAPPENING.
FIG. 4. Control indicator element FIG. 5. Lifting and lowering valves
NOTE: IF THE MACHINE IS LIFTED SO, THAT ELECTRICITY IS NOT CONNECTED, THE YELLOW
POINTING ARROW MUST NOT RISE PAST THE LIMIT MARK.
Driving instructions
Always when lowering the machine, it must be simultaneously moved forward. Otherwise the
coulters may become blocked.
Avoid unnecessary driving in the sown area. Select your driving technique so that there as few
wheel tracks as possible will be left in the sown area.
The machine is in the top position dependent on the tractor hydraulic valve. For this reason, in
the transfer drive one must ensure that the tractor's hydraulic valve cannot accidentally open or
Page 12

12
leak. The end lift cylinder safety valves must always be kept open during the road transport!
The front end of the machine can be lifted with the tractor hydraulic system during sowing, for
example in order to avoid clogging. This is done by the drive cylinder, which is managed by its
own double-phased valve. The aforementioned cylinders should also be used on the road, as a
higher ground clearance is then gained. Instead in sowing the front cylinder is used only when
necessary.
The machine must function on level ground in a horizontal position. If the machine is tilted
forward, the drive unit push rod needs to be adjusted longer. If the machine is tilted back, the
push rod needs to be shortened. Check and if necessary adjust the sowing depths after driving
for a while. Check the adjustment of markers by examining the sowing seam.
NOTE:
Lift and lower the machine only when it moves forward. Never retreat the machine
with coulters on the ground and the transmission connected.
Check from time to time, that there are no blockages in coulters. Also check all the seed and
fertilizer pipe conditions and clean any blockages.
Keep enough seed and fertilizer in the container. Due to the design of the bottom, especially in
the beginning special attention must be paid to this. Do not store fertilizer or seeds for several
days in the containers, especially in the damp weather. Damp fertilizer can cause feeding
problems.
Appropriate driving speed has more significance for the Nova Combi, than for the traditional
sowing machines. A rule of thumb could be to say that in direct sowing a slightly higher sowing
speed is usually recommended compared to the conventional tillage seeding. A suitable driving
speed on modified land is normally about 7-12 km / h. Pea sowing maximum speed is 6-7 km/h.
In transfer drive the maximum speed when empty is 30 km / h.
7. SUPPLY EQUIPMENT LAND WHEEL
Input devices are driven by the ground wheel on the left side of the machine end. The ground
wheel is attached to the container and hence it rises up when the machine is lifted. When the
machine is lifted, the ground wheel is off the ground and the supply runs out. A separate
transmission switch is not thus required in the machine.
NOTE: Do not rotate the ground wheel to reverse direction! Raise the machine fully up
before reversing the tractor.
Feed disconnection and connection time can be adjusted by adjusting the ground wheel either
higher or lower in terms of the container. This is done by adjusting the cable fixing points in the
center of the tube frame of wheels.
It is also possible for the ground wheel to be pushed inwards during transport drive. This gives
the machine the maximum total nominal transport width: 3 or 4 meters. Position options are
shown in Figures 6 and 7.
Page 13

13
Fig. 6: The ground wheel in working position. Fig. 7: The ground wheel in transport position.
8. FILLING THE CONTAINERS
When starting the sowing, it is recommended that the machine is transferred to the field empty.
Fertilizers and seed are brought to the field, for example, with a trailer, and the filling of the till
seed grill is done on the edge of a field. If the machine must be filled far away from the field block
to be sown, the transfer drive with full container loads should be done with caution. The greatest
transfer speed of 30 km/h can be used on steady roads with empty containers. The maximum
speed is with full containers at 15 km / h.
Emptying of the tanks can be monitored:
• By observing the area meter of the machine, it can be established n how large an
area with a container can be sown. This is done using the on-board Agrocont
computer; the previous meter reading of the filling is in the memory.
• An alarm will sound when the containers have a certain amount of fertilizer or seed.
Adjustable tank volume
Fertilizer and seed containers have an adjustable dividing wall, so the relationship between tanks,
can be adjusted. Adjustment can be done by openi ng the locking sc rews of w all support rods and
by turning the dividing partition to a desired position (Fig. 8). Remember to lock the support rods
following the adjustment. Not that the partitioning wall height can also be adjusted.
Fig. 8. Container partitioning wall control rod.
Page 14

14
Filling method
The filling height of the machine is quite large and container volume is large. For this reason, we
recommend that for the filling method is used jumbo bags (NOTE: sufficient lift e quipm ent) , or fo r
example, the filling screw technology.
Jumbo Bags can be treated with a variety of loaders. Do not go under a hanging load. Jumbo
bag may not be put on the till seed drill structures. Do not overload the drill. Find out about the
methods to partially drain a jumbo sack.
9. DRAINING OF CONTAINERS
Draining of fertilizer tank
Fertilizer tank is usually emptied through the coulters. Adjust the output control to its maximum
position; for example, spread the load cover under the machine and lower the fertilizer side
drawer bottom flaps lever all the way down. In this case, the tank empties almost completely.
Guide the remaining fertilizer with a brush, or something similar, to the plen um. Rotate the feede r
with a crank for a few turns, so that the chambers empty out. Finally, swing the bottom flaps with
the lever quickly a few times, so that no fertilizer is left on top of the flaps.
Draining the seed tank
Seed tank is drained the same way as fertilizer tank. Do not mix seeds and fertilizers when
draining the machine.
10. SEED FEEDING MECHANISM AND CONTROLS
Feeder is formed by helical rollers, bottom flaps with springs and adjustable shutters (Fig. 9).
Feed chambers are located in the tank bottom. With this solution is it is po ssible that the sowing
quantity can remain almost the same regardless of drill tilting side or direction of travel. Feeding
equipment is made of corrodible materials. Bottom flaps below the feed rollers are adjustable,
control lever is in the middle of the machine in the back (Fig. 9). For sowing of the small seeds,
the transmission gear ratio can be changed by turning the transmission cartridge.
Page 15

15
FIG. 9. Feeder adjustment with handwheel. FIG.10. Hand wheel for adjustment.
The feed rate adjustment takes place by adjusting the feed roller laterally in relation to the plenum
chamber. Adjustments are made by the hand wheel at the left end of the machine (Fig. 10). The
handwheel is locked with plastic lever, in which is disposed the feed main scale of 0-10, where
the numbers correspond to one hand wheel turn. Adjustment is read from the inner surface of
the handwheel. A handwheel has for each revol ution 10 locking position, mar ked 0-9. This gives
a total of 100 different control positions. With the small seed exchange (cassette position II) can
be respectively gained 100 output control positions of a smaller field.
NOTE: To adjust the feed, the plastic latch must be pressed towards the end w all of the machin e
to the arrow direction and at the same time rotated 90 degrees, resulting in the release of the
handwheel.
Rotating the handwheel counter-clockwise will increase the feed. When the desired amount of
seed sown is known, inside the cover a Sowing Chart will give an indicative output position of the
control.
Please notice the position of the cartridge. Adjustment should be made in such a way that the
adjustable target position is always approached from the larger adjustment position. If the initial
setting position is less than desired, the handwheel is turned anti-clockwise 1/2-1 turns over the
intended adjustment, after which the wheel is rotated back toward the desired control position.
After the adjustment, the lock lever arm is turned into the gap, the wheel and the lever will lock
into place. It should be noted that the adjusting position given by sowing table is indicative and
the actual feed rate varies between different seed lots. It is recommended that the feed rate is
verified by calibration test.
If the feeder accumulates dirt, the feed rollers may become clogged. This can contribute
significantly to the feed rate. We recommend cleaning it from time to time. The rollers can be
cleaned by adjusting the feed rate to zero and then back to the desired adjustment value. In this
case must be kept in mind the above-mentioned adjustment instruction, first turn 1/2-1 above the
desired adjustment value.
Page 16

16
If the machine is equipped with seed dressing, the new calibration must be carried out
approximately one are after sowing. Coating can reduce the feeding amount by up to 20%!
NOTE:
Handwheel must not be forced to zero-position. Simult aneous input shaft
rotating eases the adjustment. The use of sowing table and instructions for performing the
calibration test are discussed below.
NOTE: Maximum speed in sowing peas and beans is 6 – 7 km/h
Turning the transmission cassette
FIG. 11. Transmission cartridge. I = Grain, II = Small seed
When the bigger sprocket of the cartridge is up, it is in a grain position. When the smaller sprocket
is up, it is in a small seed position. Position has been marked on the cartridge shell on the v i sible
side. In Fig. 11 a grain position is shown. Turning is done as follows: Remove the ring pins and
pull the cartridge out of its shafts. Turn the cartridge upside down. A sticker in the cartridge tells
the setting.
Bottom flaps
Feeding accuracy depends on the distance between the bottom flap and feeding roller, for this
reason it is important to have the bottom flaps in a right position, and that they will not be readjusted after the calibration test without repeating the test. The bottom flaps are flexible, in case
some hard foreign item gets between the bottom flap and feeder roller.
Below are indicative values for most seeds. If you are sowing varieties other than those
recommended, compare the seeds based on their size and characteristics to the ones mentioned
below and carry out the calibration test according to respective adjustments.
Page 17

17
FIG. 12. Seed bottom flaps control.
11. FERTILIZER FEEDING EQUIPM ENT AND ADJUST MENTS
The machine has as many chambers feeding fertilizers, as there are chambers sowing seeds.
The feed rate adjustment takes place by adjusting the feed roller laterally in relation to the plenum
chamber. Adjustments are made by the hand wheel at the right end of the machine.
Feed chambers are located in the tank bottom. With this solution it is possible that the sowing
quantity can remain almost the same regardless of drill tilting side or direction of travel. The
feeding rollers are plastic rollers equipped with a helical toothing. Bottom flaps below feeder
rollers are adjustable. The control lever is in the front of the machine in the middle. The whole
fertilizer supply system is made of corrodible material.
Fertilizer tanks can be used to sow all granular fertilizers. The feeder is not suitable for dispensing
powdered fertilizers.
Fertiliser feed rate adjustment
The feed rate is adjusted with the handwheel on the right side of the machine. The handwheel is
locked with a plastic lever, in which is visible the feed main scale.
NOTE: To adjust the feed, the plastic latch must be pressed towards the end w all of the machin e
to the arrow direction and at the same ti me must b e turned 90 de grees, when the handw heel lock
is released.
Rotating the handwheel counter-clockwi se will increase the feed. When the desired amount of
fertilizer sown is known, inside the cover a Sowing Chart will indicate the output position of the
control.
Adjustment should be made in such a way that the adjustable target position is always
approached from the larger adjustment position. If the initial setting position is less than desired,
the handwheel is turned anti-clockwise 1/2-1 turns over the intended adjustment, after which the
wheel is rotated back toward the desired control position.
After the adjustment, the lock lever arm is turned into the gap, the wheel and the lever will lock
into place. It should be noted that the ad justing position given by sow ing table is just an indication
and the actual feed rate varies between different fertilizer lots. It is recommended that t he feed
rate is verified by calibration test.
In the machine an optional electric remote control fertilizer device AgrocontPlus can be fitted.
Bottom flap adjustment positions:
Grain seeds slot2
Pea slot 3
Small seeds slot 1
Beans slot 4
Other seeds: compare the seed size to
previous
Page 18

18
Adjustment in question does not require another separate control unit, this feature will be added
in Agrocont. Then in the fertilizer side there is no hand wheel at all, but the adjustment is carried
out by levers used by the spindle motor.
The normal position of bottom flaps is the slot 2. If the feeder takes in wet fertilizer, the feeder
rollers may become clogged. This may contribute decisively to the feed rate.
The rollers can be cleaned by adjusting the feed rate to zero and then back to the desired
adjustment value. In this case the above-mentioned adjustment instruction must be kept in mind,
first turn 1/2-1 above the desired value and then to the correct value (ie, from higher to a lower).
The sowing table instructions and instructions for performing the calibration test are given bel ow.
The fertilizer feeding device can be switched off by removing the ring pin from the end of fertilizer
feeder shaft at the right end of the machine.
12. SOWING TABLE SAMPLE APPLICATIONS
In the seeding table below three different sowing table usage examples are drawn. It should be
noted that the sowing amount shown in the table is only an indication. The actual sow ing amount
is dependent on the qualities of used seeds, varying significantly between each variety and yearly
qualities. Sowing amount must be verified with a calibration test, as described below.
FIG. 13. Sowing table
Page 19

19
Adjustment example when sowing grain
Case 1. To sow oats 200 kg/ha.
• The correct position of the bottom flaps is stated at the top rig ht of the table, see "grain".
Correct adjustment is position "2"
• Selected descriptor "oats"
• Check the transmission of the machine, which must be "1"
• Starting from the edge of the table in section 200 kg / ha
• Proceed along the horizontal line to the point where this line intersects the describer "oats"
• From the intersect ion po int pr oc eed dir ec tly down to the scale, wher e c a n b e s e en that th e
adjustment must be "5.9"
That is, the hand wheel must be open 5 full turns and 0.9 turns additional. Handwheel lock is locked
to the notch marked with 9.
Adjustment example of sowing small seeds
Case 2. To sow rapeseed 12 kg/ha.
• The correct position of the bottom flaps is stated at the top right of the table as "1".
• Examine the small sowing table.
• Search for a starting point in the small sowing table left side 12 kg / ha.
• Proceed along the horizontal line in question of 12 kg / ha to the right. where this line
intersects the describer "rapeseed".
• Go directly from the inter section to the lower sc ale , an d we can see that the correc t s etting
is "1.0".
• It is noted that in the upper left c orner of sm all sowing table is a m arking "trans mission II" .
That is, in the trans miss ion a sm all seed sett ing mus t be used m eaning the c assette m ust
be turned so that the cassette is as indicated in position "II".
Adjustment example, fertilizer side
Case 3. To sow NPK-fertilizer mix 500 kg/ha.
• It is noted in the sowing table upper right corner, that the correct adjustment of bottom flaps
with correct granular fer tiliz er is "2", in the fertil izer s ide i n the f actory gear wheel Z 17 has
been installed
• Starting from the edge of the big sowing table in part 500 kg / ha
• Proceed along the 500 kg/ha -line horizo ntally to the right into the intersection of this line
and describer "granular f ertilizer Z 17", if the c hain wheel Z 17 in quest ion (a black line in
the table).
• From the intersect ion pr oc e ed d irec tly down, where at the bottom scale it c a n be seen that
the main scale figure place d on the wheel lock lever must be "7.2". Af ter the adjustm ents
the calibrations should be done in order to ensure a correct sowing amount.
NOTE! When attempting to get to an exceptionally large fertilizer level ( over 700 kg/ha ), the double-
chain wheel in the left en d of the m achine must be turned so that Z 22 is in use. Then a
maximum of appr. 900 kg/ha fertilizer can be s o wn . Then in the sowing t abl e t h e r ed line
will be followed!
Page 20

20
13. CALIBRATION
Because the adjustment values in the sowing table are only indicative, before starting the sowing,
a calibration must be carried out. Before starting a calibration the machine will be adjusted
according to the sowing table.
Check:
• Transmission cassette settin g I / II
• Bottom flaps position (seed and fertilizer)
• Seed feed rate from the handwheel
• That the optional drive groove device is not being used
• The amount of fertilizer feed from the handwheel
• The shutters are fully open
• That the tanks contain fertilizer and seeds
Machine is slightly lifted fr om the ground, so that the ground-wheel is loose and can be rotated.
Rotating can be easily arrived at by inserting a rotation piece i n its place as in Fig. 14. The rotation
piece referred to is located in the left end of the machine under a cover.
Machine tubes (both seed and fertilizer) can be easily set to a calibration position at the same
time. This takes place from the front of the machine (fig. 15).
• Lift the lock up
• Push the hose rack back
• Ensure that the hose rack moves evenly and i.e. not another edge first.
Calibration can be done in three ways:
• For the seeds and fertilizer simultaneously, when all of the transmission pins are in
place.
• Separately for the seeds, when a spring ring pin is removed from the end of the
fertilizer shaft. Remember to place the pin back in place after the calibration
• Separately for the fertilizer, when the seed side cassette pin is removed. Remember
to place the pin back in place after the calibration
FIG. 14. Ground-wheel in calibration position.
Page 21

21
FIG. 15. Hose racks in calibration position.
Tume Nova Combi has calibration trays as standard equipment both in seed and fertilizer sides.
You can keep the aforementioned trays in place al so during sowing operations. How ever, always
remember to empty the trays of dust etc. before carrying out a calibration.
When the calibration has been done, pull out the calibration trays and weigh the seeds and
fertilizers placed in them.
NOTE: When you have carried out the calibration tests, remember to pull the hose racks back
to the front. After this the seeds and fertilizers go back in the coulters instead of calibration trays.
FIG. 16. Emptying of the calibration tray.
Page 22

22
Calibration for fertilizer and seeds simultaneously
Turn the crank few times, so that the feeding chambers become properly filled. After this empty
the calibration trays carefully.
Rotate the land wheel the amount of rotations which is mentioned in the sowing t able for the
machinery type in question. The rotation speed must be equivalent to used driving speed.
Weigh the seeds and fertilizer entered in the sowing trays. If the calibration test was carried out
with the rotation amount equivalent to are, the sowin g am ount p er hectare can be arrived at by
multiplying the weighing results by one hundred.
After completing the calibration test the hose rack will be pulled back in sowing position and
handle lock will be locked back to its notch
Place the rotation piece of ground-wheel back in place and close the cover plates.
Fertilizer side calibration equipment use
The test is carried out as previously, with the exception that the seed-side transmission cassette
pin is removed for the duration of calibration test. Place the drainage coil to the calibration trough
under the fertilizer chambers.
Instruction to improve sowing accuracy
Calibration value stated in the sowing table is indicative. Its reliability is affected by, among other
things, ground quality and working depth.
Therefore, in the sowing table an indicative range for calibration results has been given:
Nova Combi 3000: 11 – 12 r/a
Nova Combi 4000: 8.25 – 9 r/a
The accuracy of sowing amount can be increased by carrying out a tensile test in sowing
conditions. Tensile test is carried out by pulling the machine a distance required for on are’s
sowing in the sowing conditions and at the same time counting the ground-wheel rotations. Write
the calibration test value down and use it when carrying out calibrations.
If the value you have measured differs greatly from the value stated in the sowing table value,
repeat the test. In the table below are the distances L for different working widths.
L = 33,3 m, when the working width is 3,0 m
L = 25 m, when the working width is 4,0 m
Also, check the accuracy of area-meter at the time of measurement.
Page 23

23
14. FIELD TEST
A field test is absolutely the most accurate testing format of feeding amount. If the field test is
carried out on the field which is to be sown and on a prepared seedbed, conditions equivalent to
sowing are accurately established. A field test can be done both to seed and fertilizer.
Carrying out the field test:
• Adjust the equipment according to the calibration guidelines
• Measure a drive corresponding to one are sown area, w hich based on machine type
is:
NOVA COMBI 3000 33,3 m
NOVA COMBI 4000 25 m
• Drive outside the test distance, about 10 meters, with the machine in working
position so that each sowing chamber is feeding out the seeds
• Empty the contents of test sowing trays
• Drive a distance in accordance with the table above; the machine lowered to the
sowing position with a normal sowing speed.
• Weigh the seeds in test sowing trays and/or the fertilizers and multiply the weighing
results with 100 to get the resulting seed amount in kg/ha.
• If verifications are needed, carry these out according to the calibration instructions
15. WORKING DEPTH ADJUSTMENT/ CO ULTE R WE IG HING
In Tume Nova Combi the seeds and fertilizers are sown through the same coulters. Fertilizer is
guided to the ground into the larger groove, this is done by the bigger disc, and feed to the upper
groove is done by the smaller disc.
Coulters have been installed in sledges, where the adjusting feeler wheels in the front measure
the coulter working depth. Each feeler wheel determines the working depth of the two coulters in
the sledge. When installing the feeler wheel adjustment hooks into the lowest notches, the
maximum working widths is achieved. In the highest notches can be again sown almost to the
field surface.
Fig 17. Seeding depth adjustment.
The desired coulter emphasis is adjusted by changing the machine container height: When the
machine has been lowered almost to its lowest position, the tension springs creating the coulter
Page 24

24
pressure start to tighten. The lower the lowering of the m achine is adjusted, the greater will be
the coulter pressure created by the tension spring pairs. Maxi mum lower position (that is coulte r
pressure) from the Agrocont board computer. Check the adjustment instruction from the
Agrocontin manual.
FIG. 18. Coulter pressure FIG. 19. Coulter structure
Adjustments
Adjustment must be carried out in the field, in sowing conditions.
Adjust the coulter wheel, e.g. to the middle adjustment notches.
Lower the machine down simultaneously driving forward. Stop the tractor when the machine is
lowered. Do not allow the tractor to jolt backwards, in order to keep the coulters from becoming
blocked.
Check the accurate position of the machine. Machine must be in drivi ng direction and horizontally
aligned. Adjust the drive unit push rod set screw as needed.
NOTE: Shaft cylinder must be in its minimum length when in working position.
If the machine is aligned with the surface of the field and the machine push rod needs no
adjustments, the sowing depth can be verified.
If the sowing depth is not correct, carry out the new adjustments and a new test. Sowing depths
vary somewhat depending on machine filling level, used tractor and soil type.
NOTE: COULTER WEIGHT ADJUSTMENT ALSO EFF ECTSTHE SO WI NG DEPTH
Do not weigh the machine more than necessary. Adjust the maximum weighing with Agrocont,
so that in the hardest part of the field block an adequate coulter weight is found in order to find
the right sowing depth. When the land type changes to a lighter one, lift the machine slightly as
required, that is to reduce the coulter weight adequately. Coulter weight that is too hard, increases
the pull resistance, makes sowing deeper than desired and creates a stress on machine
structures unnecessarily. At the same time the back wheel set closing the groove will have less
gravitational force.
Page 25

25
16. HARROW CONTROL
FIG. 20. Harrow.
Harrow spikes can be adjusted in sideways direction. In addition, the working angle can be
adjusted. Sideways direction will be adjusted in such a way that the spikes travel between the
earth wall left between the supporting wheels and wheel track.
Vertical adjustment will be carried out with side chains. This adjustment, in addition to affecting
the working depth, also affects the moment of escalation; that is in what part of the escalation the
harrow will be off the ground. The lower parts of the chains have been provided with protective
tubes, which at the same time prevent the harrow chains from being adjusted too high up. If the
harrow is adjusted too high, when the machine is lifted in vertical position, the rear foot
step will become damaged.
Whenever the angle adjustment is changed afterwards, the working depth must also be checked.
NOTE After the adjustments, check that when the machine is lifted fully, the harrow will also lift
enough for reversal and transport driving.
Page 26

26
17. DRILL SERVICE
In the more demanding cases we request a return to the dealer. In the following some measures
are presented which in most cases can be carried out on a farm. Please read the service
instructions carefully. According to the guidelines the TUME-Till Seed Drill works flawlessly year
after y ear. In the instructions it is stated that a service failure will void the warranty.
Always turn off the tractor engine before starting the service and turn on the hand break.
DANGER! ALWAYS CLOSE THE SAFETY VALVES OF BOTH CYLINDERS, IF
THE MACHINE NEEDS LIFTING UP DURING MAINTENANCE. DO NOT GO
UNDER A MACHINE WHICH IS ONLY SUPPORTED BY HYDRAULICS!
FIG. 21. Lifting cylinder safety valve closed.
NOTE: Transport drive is not allowed with closed safety valves
In the machine hydraulic circuit there is also pressure when it has been removed from the
tractor.
DANGER! WHEN HEATED, PAINTED SURFACES OF THE MACHINE CAN EXCRETE
GASES HARMFUL TO HEALTH. PROVIDE ADEQUATE VENTILATION IN THE
WORKSPACE, FOR EXAMPLE DURING THE WELDING WORKS.
Lubrication
Transmission roller chains can be lubricated approx. every 50 hours of use or when needed. I.e..
SAE 10 or SAE 20 lubricant can be used for lubrication.
Drive unit push rod set screw must be lubricated with a lubricant and vaseline on a yearly basis.
Coulter disc bearings have been lubricated for life and are thus in no need of maintenance.
Page 27

27
Nipples requiring lubrication by a lubricant press every 50 hours are located in the following
places:
Coulter: -coulter arm upper ends
-supporting front wheel arm closing pin
-working depth notch adjuster
-coulter sledge parallelogram upper ends
Running gear: -frame tube
-cylinder joints
-intermediate wheel joints
Ground-wheel: -reservoir sleeve
Power transmission: -fertilizer shaft drive gear
Lifting cylinder joints
Marker joints
NOTE: See the end of this manual APPENDIX 2: Lubrication chart.
Please check the intervals the tightness of all screw connections every 100 hours of use. On a
new machine the aforementioned check must be carried out twice every 25 hours of use and
after this every 100 hours.
In each end of the machine there are two screws M24 (key 36), with which the coulter sledge
endplay is axially tightened with clamping pieces. These screws have been equipped with
separate rotation-prevention parts, which need to be removed for the duration of tightening. In
addition, the machine is supplied with pass plates (inner diam. 50 mm) which, if the endplay is
big, such that the inner surface of a clamping piece touches the end plate of the machine
(=backlash
used up), then these can be installed behind the clamping pieces as needed
If it is n otic e d in the sowing that some coulter hose does not stay in coulter tube, there is often a
fault in the hose upper part and/or orientation of the curvature. Turn the hose and/or funnel from
the top to different position and check the situation.
Notable tips to operate the machine
Some large and light seed types (i.e. some oats) may experience difficulty in flowing through the
screens. In such case remove the screens from the seed tank. Use extreme caution when filling
the tank, so that no large particles get mixed with the seeds and damage feeders.
Always lift up the back-level stairs when driving the machine: Both in sowing operations and
transport drive
Note, that when the machine is moving forward, two separate issues exist: Forward movement,
which defines the accuracy of sowing amounts means the forward movement of ground-wheel
rotating the feeders of the machine: How many rotations does the ground-wheel in question rotate
Page 28

28
in one are (compare part 13, Instruction to improve sowing accuracy). Instead the forward
movement affecting the accuracy of surface area measurement is defined by the forward
movement of supporting wheels. Determine with a tensile test how much the machine proceeds
in your sowing conditions, when the feeler wheel rotates one turn.
The calibrations of the machine are done in seed and fertilizer sides to the trays below feeder
chambers. Exercise caution when pushing the troughs into place. Hold them in an absolutely
straight line in terms of the machine. If a trough is pushed strongly so that its head is directed
upwards, the trough can hit one of the feeder chambers and damage them.
The air-pressure of feeler wheels (front wheels) is easy to check asunder every second wheel a
relatively sturdy support is placed, when lowering the machine which however is not too wide (for
example log etc.). This lifts up the whole coulter sledge with the tires, and a hand can fit the tire
vent.
NOTE: BE CAREFUL WHEN INSTALLING SUPPORT THAT IT IS WELL SET AND SECURE
UNDER THE TIRE. IF THE SUPPORT FALLS, HAND M AY BECOME JAMMED.
Your seed and fertilizer drill is equipped with an ele ctronic monitoring device, with surface sensors
for seeds and fertilizer. Use caution when taking screens from the tanks. A screen hitting a sensor
can damage it.
Similarly, the installation of the seed dressing tanks and decoupling should be carried out with
caution.
DO NOT SOW IN CONDITIONS WHICH ARE TOO WET THE SOIL CONDENSES TOO MUCH,
AND THE AIRINESS / WATER PERMEABILITY DETERIORATES
WATCH THE SOWING DEPTH. E.G. IF THE FIELD HAS BEEN MODIFIED THE SEED MUST
BE LAID ON UNMODIFIED SOIL. WATCH OUT WHEN MODIFYING DURI NG SPRI NG TIME,
THAT MODIFICATIONS DO NOT GO IN TOO DEEP.
MOST COMMON ERROR IN THE USE OF NOVA COMBI IS THAT COULTERS TOO MUCH
WEIGHT IS PLACED ON COULTERSBECOME TOO MUCH WEIGHED ON. WEIGHING IS
SUFFICIENT WHEN THE WORKING DEPTH IS ACHIEVED, TH AT IS THAT THE COULTER
SLEDGE MOVES ON STEADILY RELYING ON THE FRONT FEELER WHEEL, NOTHING
MORE! TOO MUCH WEIGHT ON THE COULTER INCREASES THE RISK OF MACHINE
BECOMING BLOCKED AND STRAINS THE MACHINE STRUCTURES UNNECE SSARILY
If the machine is twisting to the left, reduce coulter weight and make sure that the machine
is at horizontal level. If the front end of the machine is lower than back, lengthen the
drawbar rigging screw.
Page 29

29
Storage
When the machine is not being used, it must be stored in sheltered place, cleaned up and
maintained. Put the machine down. Do not leave the machine with the tractor hydraulics. Tanks
are emptied of fertilizer and seeds.
The machine is washed inside out with water. Use a pressure washer carefully, (Max. water
temperature is 60 degrees, pressure 100 bars), do not point the pressure directly on the bearings.
Lubricate the machine according to instructions. Parts where the paint has become worn out can
be protected with anti-rust oil.
The faults noted during cleaning will be recorded. Spare parts should be ordered in good time,
well before season, in order to have the repairs done in time.
Page 30

30
18. TECHNICAL SPECIFIC ATIONS
Type
NOVA 3000 Star
NOVA 4000 Star
Working width (m)
3.0
4.0
Tank capacity (l)
-Full
-Seed, min
-Seed, max
-Fertilizer, max
3250
1330
2280
1920
4500
1840
3160
2660
Base machine weight (kg)
-Empty
-Tanks filled with
wheat and fertilizer
3950
6050
5475
8590
Base machine dimensions (cm)
-Height to the tank edge
-Width
-Length without the drive unit
215
300
290
215
400
290
Feeler wheels
-Size
-amount
-Pressure (bar)
7,50 – 16
12
1,5 – 2.0
7,50 – 16
16
1,5 – 2.0
Coulter weighing
-Coulter pressure / coulter (N)
-Weighing adjustment during
driving
400 - 2200
standard
400 - 2200
standard
Number of coulters (units)
24
32
Work depth adjustment wheel
-Size
-amount
-Pressure (bar)
18,5 x 8,50 – 8
12
1,5 – 2.0
18,5 x 8,50 – 8
16
1,5 – 2.0
Hydraulics
-Pressure (bar)
-Connection, without markers
-Connection, with row markers
150
1-phased
2-phased
170
1-phased
2-phased
Shaft cylinder
2-phased
2-phased
Noise level
< 70 dB (A)
< 70 dB (A)
Page 31

31
19. ACCESSORIES
TUME develops its machines and accessories constantly. If accessories are wanted for the older
machines, it is useful to ensure the compatibility by contacting the manufacturer representatives.
I
n TUME-seed and fertilizer sowers only the following original TUME-accessories are allowed to
be used. In the installation of accessories, the factory instructions must be followed without fail.
Faulty installation or use of other than original TUME-accessories may endanger the user safety
or damage the machine. The manufacturer is not responsible for the damages which occur from
the changes that are against the factory instructions.
• Rowmarkers.
• Mixing shafts
• Coulter earthing up set
• Hay seed sowing machine
• Seed dressing
• Front foot step
• Rear-level additional railing
• Ritzi-marker
• Self-retracting tarpaulin
• Hydraulic front harrow
• Packer
• CultiPack intermediate processing device
Row markers
If the machine is equipped with row markers, the seed and fertilizer sower must be connected to
the tractor dual-purpose hydraulic vent. Markers have been connected parallel with the machine
lifting and lowering circuit. The seed and fertilizer sower itsel f works with single-acting hydraulics,
but the marker requires dual-purpose: Arm will not start lowering, unless hydraulically pushed
downwards.
Marker control has been carried out in such a way, that the machine must first be in upward
position before the marker arm raises.
NOTE: Your machine is provided with board computer Agrocont, markers are controlled
with that ( see the use instructions in the related manuals).
The speed of marker movement can be adjusted from the hydraulic unit (Fig. 22). Adjust the
speed to begin with a small flow. This is because the movement of ma rker arms is cal m and doe s
not cause damages or hazards. Adjust the screws for right speed for the actual drilling work at
a time when, for example ,the tractor oil has reached a normal operating temperature. Disc
angle should be so that it moves soil towards the machine.
Marker use and electric connection is presented in the Agrocont manual.
NOTE: If you use markers ( = with at least one of the control unit switches on), remember
to always remove the marker arm lockpins. In road driving, a recommendation is made to place
the lockpins back in their places.
Page 32

32
Fig. 22. Marker speed adjustment.
Hay seed sowing machine (HS-machine)
H
ay seed sowing machine is meant for the sowing of different hay seed varieties and their
mixtures. Seeds are led to the field through hoses. Hoses have been installed in such a way , that
the sowing coulter slightly earths the seeds. I.e. sowing speed affects to how strongly the hay
seeds are earthed.
T
he hay seed sowing machine has been mounted in an integrated way to the seed and fertilizer
sower back wall. The base machine tarpaulin cover thus also covers the hay seed sowing
machine. HS-sowing machine attaches itself partly inside the base machine, and reduces the
seed volume appr. 200 l / Nova Combi 3000 Star and appr. 300 l / Nova Combi 4000 Star.
HS-m
achine feeding equipment consists of helical rollers. The feed rate adjustment takes place
by moving the helical rollers sideways. Adjustment is made with a wheel on the left side of the
sowing machine, which becomes locked in the desired position with a plastic locking device.
When opening the lock button, it must be pressed in the direction of the arrow, it is towards the
end of the machine, when the lock can be turned away from the adjustment wheel.
Do not force the lock!
Main scale on the locking device is divided into notches of 0 - 10, w ith one interval corresponding
to one of the adjustment wheel turns. An adjustment wheel has 10 locking positions for each
revolution, marked 09. This gives a total of 100 different control positions. Full revolutions are
read from the lock scale in the inner surface of the wheel.
T
he feeder has adjustable bottom flaps. The control lever is in the middle of the machine. For
small seeds the adjustment notch 1 is normally used.
T
he closing doors between the bottom of the tank and the feed chamber should be
adjusted in a semi-closed position, if small and easily flowing materials (such as clover)
are sown with the device On the other hand, with lightweight, easily arching grass seeds (e.g.
fescue), the closing doors must be fully opened.
I
ndicative feeding adjustment is done by sowing table. Select from the table vertical axis the
desired feed rate (kg / ha) and follow it on the horizontal line to the right until the line intersects
with the corresponding curve for sowing material. In the corresponding horizontal axis of
Marker speed adjustment
Page 33

33
intersection in Table the requested adjustment value can be read, the numbers on the axis
correspond with the main scale on the adjustment wheel (i.e, on the hand wheel turns). Sowing
table values are only indicative, check the correct feeding amount always with calibration!)
Calibration
The calibration of an HS-machine is carried out with the seed calibration tray provided with the
base machine.
From the HS-machine funnel shelf the locking pins are removed and the funnel shelf is moved
forward. The seed calibration tray is placed in this freed space.
Remove the basic machine's seed and fertilizer feed (remove the pins from feeder shafts).
Adjust the handwheel to the desired sowing setting in accordance with the sowing table. Check
the correct position of bottom flaps (notch).
Pour the seeds into the tank.
Rotate the ground-wheel a few times. This ensures the filling of HS-chambers.
Empty the accumulated seeds on calibration trays back to the HS-machine tank.
Place the calibration tray back under the feeder chambers and rotate the ground-wheel an
amount of turns equivalent to one are. (Nova Combi 3000: 11 – 12 rounds, Nova Combi 4000:
8,25 – 9 rounds in ground-wheel).
Weigh the seed amount, and multiply it with a multiplier: Nova Combi 3000: 100, Nova Combi
4000: 100. The sum received gives the amount of sowing per hectare. For example, if there was
HS -chain
HS -chain
Page 34

34
250 grams of seed in the calibration tr ay, per hectare is then 100 x 0,25 kg = 25 kg. NOTE: The
vibration of the machine while driving can slightly increase the actual and practical sowing amount
compared to the calibration, especially when compared with small amounts of seed. Monitor the
consumption of seeds as the sowing progresses.
Note! Always remember to return the pins back to the feeder shafts before sowing.
HS-machine can be disabled by removing the ring-pin in the end of the feeder shaft and by
moving it to the free hole in the end of the shaft. In this case the chain-wheel rotates freely on the
feeder shaft. HS-machine mixer shaft (accessory) can be disabled as needed by removing the
pin in the end of the mixer shaft use end inside the tank.
Make sure, that when filling the tanks, no hard objects fertilizer dumplings etc. enter the tank an d
could potentially damage the feeder equipment.
Very small grains of sowing material can fit the adjustor sleev e between the sowing chamber and
top of the feed roller. This can lead to tension adjusting the sowing amount with the handwheel.
In this case the device must always be rotated some turns whenever the adjustment control starts
to feel stiff.
Seed dressing
SAFETY PRECAUTIONS WHEN USING THE SEED DRESSING
• All handlers of seed dressing and mordants must read this manual and the manual of the
mordant used. Mordants are toxic.
• In the mordant handling it is mandatory to use personal protective equipment such as
gloves, face protection, respiratory protection and protective clothing. More detailed
instructions are found in the mordant manual i.e. on required respirators.
• Make sure that children or animals do have access to mordant soiled parts.
• If you must wash the seed dressing ( i.e. when changing mordant), make sure the water
used is handled appropriately ( drained, absorbed etc).
• If such seeds are sown, where no seed dressing is desired (e.g. rapeseed) the seed
dressing feed troughs must be removed. Even a small amount of mordant may damage
the type of seeds for which the mordant is not meant (i.e. germination).
• The unused treated seeds are hazardous waste which must be disposed in an appropriate
recycling point.
Page 35

35
Action
Seed dressing is driven with a roller chain from the seed and fertilizer sow er seed side (right side)
from the upper intermediate shaft (shaft, with the seed transmission cassette top) Transmission
power is led to the seed dressing with a mixing shaft through the left end. an eccentric / free
switch combination is in the left, with which the sowing amount adjustment takes place.
If you take the Seed dressing feeding troughs (tanks) out of the machine, pay attention to unload
the parts in right order and right place. This will ensure the correctness of re-installation.
When filling the mordant the seed and fertilizer sower screen must be set aside in order for you
to get the feed through open lids. It is not necessary to remove the screens out of the machine
completely.
Operating Instructions
When using the seed dressing there must always be so much mordant in the containers that its
surface is not above the mixer shaft center line. If there is less mordant in the container, the
feeding amount becomes smaller than the value in the table.
Mordant feed control is done by moving the conrod upper end in the left side of the feed control
lever groove.
The eccentric drive has three M8 threaded holes. The basic supply setting is set wi th these holes.
Compare the required position from the table supplied with the mordant. When you put the screw
to the hole in the center of the axis, seed dressing does not rotate and no mordant is supplied,
but the mixer shaft rotates. If you want also the mixer shaft to s top, remove the pin from the mixe r
shaft use in the right end of the machine. Place the pin in the empty hole for storage found in the
end of the shaft.
NOTE: Seed amounts to sow must be checked with calibration after about half-hectare test run.
Mordant has been found to reduce the seed feeding, barley and oats in particular, because the
flow through the feed apparatus will slow down due to mordant.
After the season it is best to keep the seed dressing unwashed in a warm and dry place. Howev er,
if the device is washed, it must also be carefully dried. Following this the device can be handled
with a thin layer of anti -rust oil. Check that no garbage has been collecting between the feeder
chamber pusher and feeder roller.
Check the transmission bearing and chain tightness’s on a yearly basis. For lubrication, thin
machine oil can be used.
Page 36

36
Earthing discs
The function of earthing discs, which can be acquired as accessories, is to improve the earthing
of seeds. Earthing disc is located in terms of coult ers sli ghtly on the side, behind the coulter, and
it guides the soil to the groove left by the sowing coulter.
The earthing disc unit is coulter sledge specific. Behind each coulter sledge a leaf spring will be
attached, which, in its lower end, has attached two discs, one for each seed coulter.
The earthing unit is attached to the coulter sledge from the loop in fr ont of the leaf spring. T he
lower position limit is placed on the underside of the coulter sledge with an installed screw.
Raising the seed and fertilizer sower up, the earhing di scs can fall downw ard until the leaf springs
coincide with the earthing discs and hit the surface of stop screws.
In the rear end of coulter sledge are 9 holes. These holes are for the adjus tment of earthing unit.
By placing a control pin above the leaf spring of the earthing disc, it is possible to adjust the
weighing force which makes the earthing disc to function. The lower the pin is located, the greater
the force by which the earthing disc operates. If the earthing disc is below the leaf spring, it will
the function as a lower position limit. Earthing will then function only by its own force. When
needed the earthings can be lifted fully up, removed from functioning with this control pin.
The angle of earthing discs is also adjustable. By loosening the nut on the side of axis, the axis
of the disc can be turned and the working angle changes. The nut must be carefully tightened
after the adjustment.
NOTE! EXERCISE CAUTION WHEN LIFTING A MACHINE W ITH EARTHING DISCS!
• If the electric control of the lifting and lowering circuit power is not connected, the machine
can in principle, be lifted as far up as the lifting cylinders permit. In this case, the seed
and fertilizer sower rear wheels touch the earthing discs and as a result there will be
damage to the tires and to the earthing disc units. If you must lift the equipment so, that
the electric power is not connected, stop the lifting movement well before the tires start to
touch the earthing discs.
• Also, when the electric control of lifting is connected, check the upper li mit of lifting. Lifting
must finish well before the wheels are close to the earthing discs. Adjust the lifting upper
limit magnet so that the space between the wheels and earthing discs is at least 10 cm.
Also note that when the machine coulter weighing or sowing depth is changed the settings of
earthing discs also change.
Page 37

37
ANNEX 1 LOADING AND TRANSPORT GUIDE
IF THE LOADING TAKES PLACE BY
LIFTING THE MACHINE, THEN THE LIFT
TAKES PLACE BY THE HOLES IN THE
MIDDLE WALL INSIDE THE MACHINE
TANK WITH RESPECTIVE LOOPS
OR CHAINS.
FOR THE TRANSPORT THERE ARE HOLES
MADE TO THE ENDS OF THE MACHINE.
NOTE THAT COULTERS HAVE SPRINGS AND
THEY CAN MOVE.
LOADING OF THE MACHINE WITH EITHER
TRACTOR OR A TRUCK MUST BE DONE IN
SUCH A W AY THAT UNDER EACH PAIR OF
BACK TIRES THERE MUST BE A
STRUCTURAL SUPPORT OR A RAMP
.
WHEN CARRYING OUT A TEMPORARY
TRANSFER / LOADING IT IS SUFFICIENT
THAT ONLY THE THICKEST OF THE
HYDRAULIC TUBES IS CONNECTED (RED
COLOR CODE
).
WHEN LIFTING THE MACHINE WITH
TRACTOR HYDRAULICS WITHOUT
CONNECTING THE ELECTRICAL SYSTEM,
NOTE, THAT YELLOW POINTER ARROW
WILL NOT RISE PAST THE LIMIT SIGN
Page 38

38
ANNEX 2 LUBRICATION CHART
Page 39

39
Page 40

40
Tume-Agri Oy
P.O.Box 77
14200 TURENKI
FINLAND
Tel. 0207 433 060 TEL. (int.) 358-207 433 060
FAX 03-688 2305 FAX (int.) 358- 3-6882305
www.tumeagri.fi
 Loading...