

Tumbl Trak Porta Trak Owner's Manual
Tumbl Trak™ sales@tumbltrak.co.uk www.tumbltrak.co.uk 44 (0)2971 167 949
1
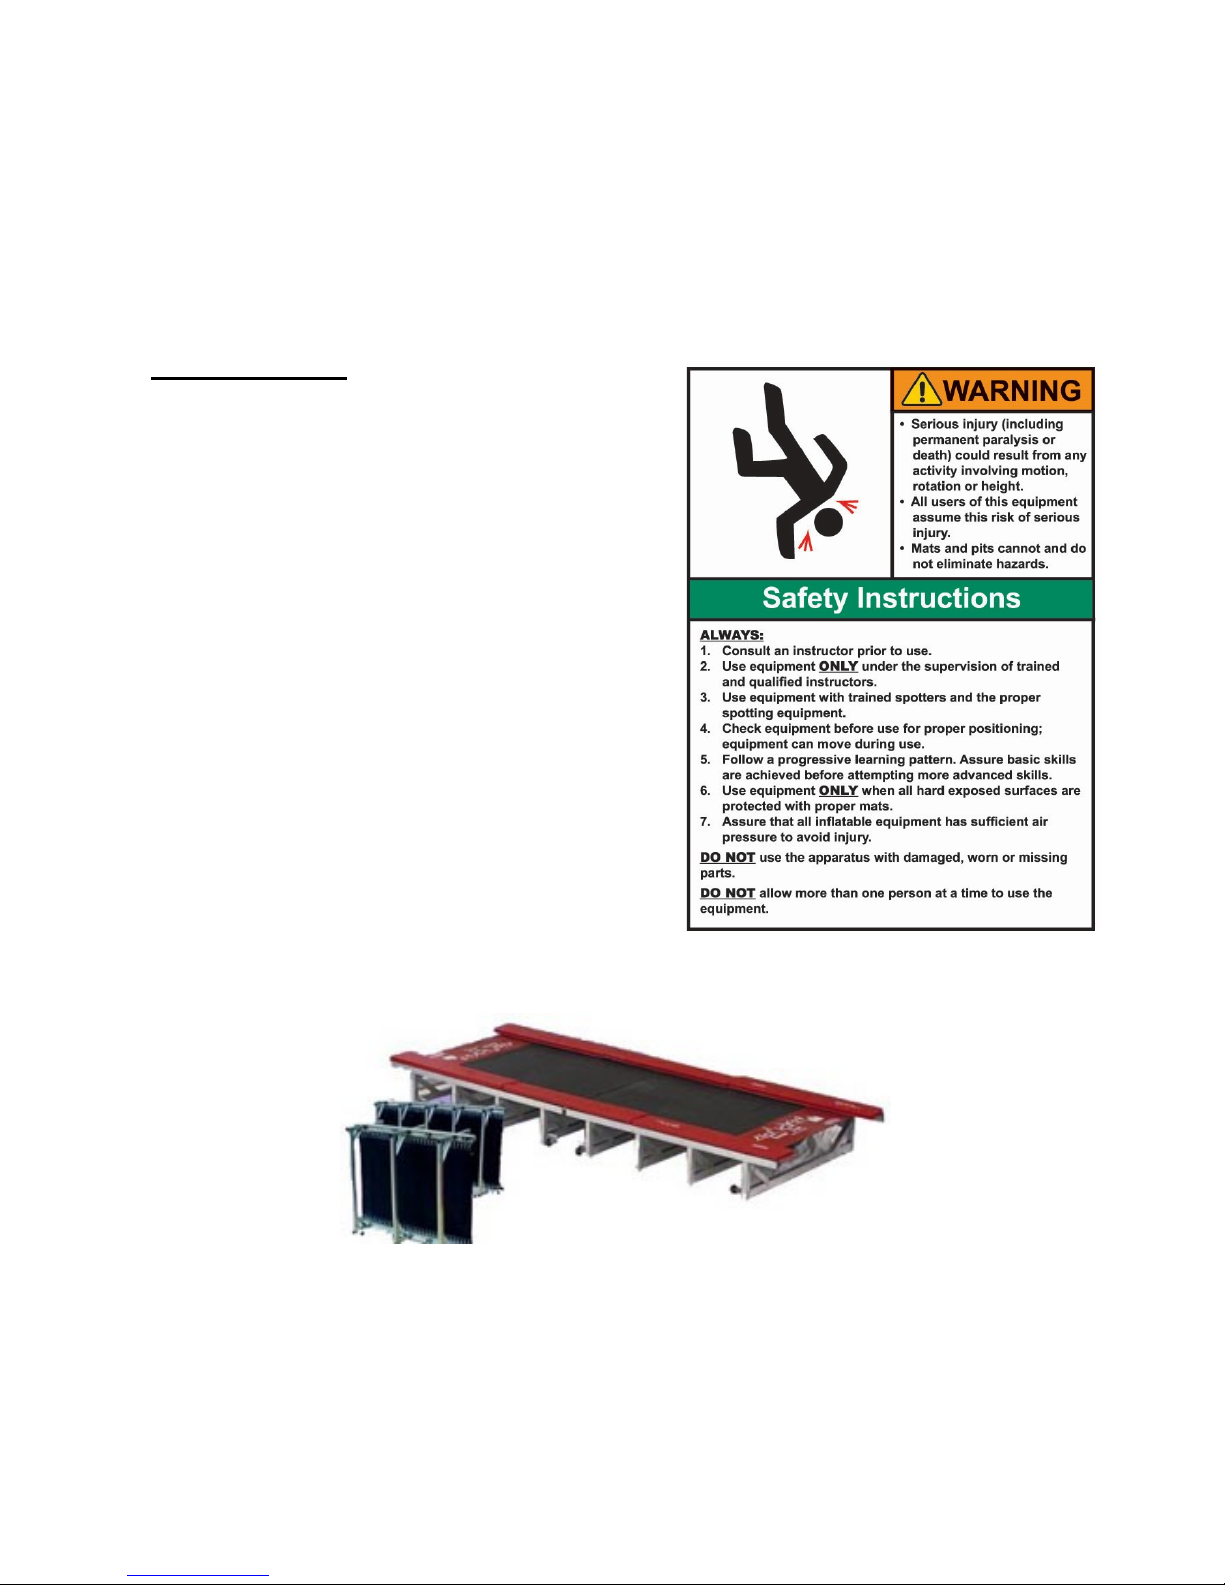
PORTA TRAK OWNERS MANUAL
Please read the instructions thoroughly before setting up the
Porta Trak. Carefully follow how to spring the bed step by step.
Table of Contents:
I. Rail and Frame Parts List
II. Rail and Frame Assembly
III. Springing the Porta Trak Bed
IV. Diagrams
1. Appendix A) Assembly Diagram
V. Porta Trak Checklist and Care
a. After Assembly check list
b. Maintenance Checks for the Porta Trak
c. Tumbling with Porta Trak
d. Safety Suggestions for Use on the Porta Trak
**TOOLS NEEDED FOR ASSEMBLY**
7/32 Hex wrench
Two 9/16 wrench
Congratulations on your acquisition of a Tumbl Trak™ product! The Tumbl Trak™ Line of
Equipment has been designed and developed with the gymnastics coach and athlete in mind. Tumbl
Trak™ is dedicated to helping young athletes train smarter.
Tumbl Trak™ sales@tumbltrak.co.uk www.tumbltrak.co.uk 44 (0)2971 167 949
2
I. Rail and Frame Parts List
15’ Porta Trak
[Qty 2]: 15’ hinged rails
[Qty 4]: Legs w/ Casters
[Qty 4]: Legs w/ no Casters
[Qty 16]: Hex Bolt 3/8-16 x 3-1/4 Grade 5 Plated
[Qty 16]: Hex Nut 3/8-16 Nyloc
* You will need two 9/16 wrenches
20’ Porta Trak
[Qty 2]: 15’ hinged rails
[Qty 6]: Legs w/Casters
[Qty 6]: Legs w/ no Casters
[Qty 2]: 2.5’ extension rail pieces (left)
[Qty 2]: 2.5’ extension rail pieces (right)
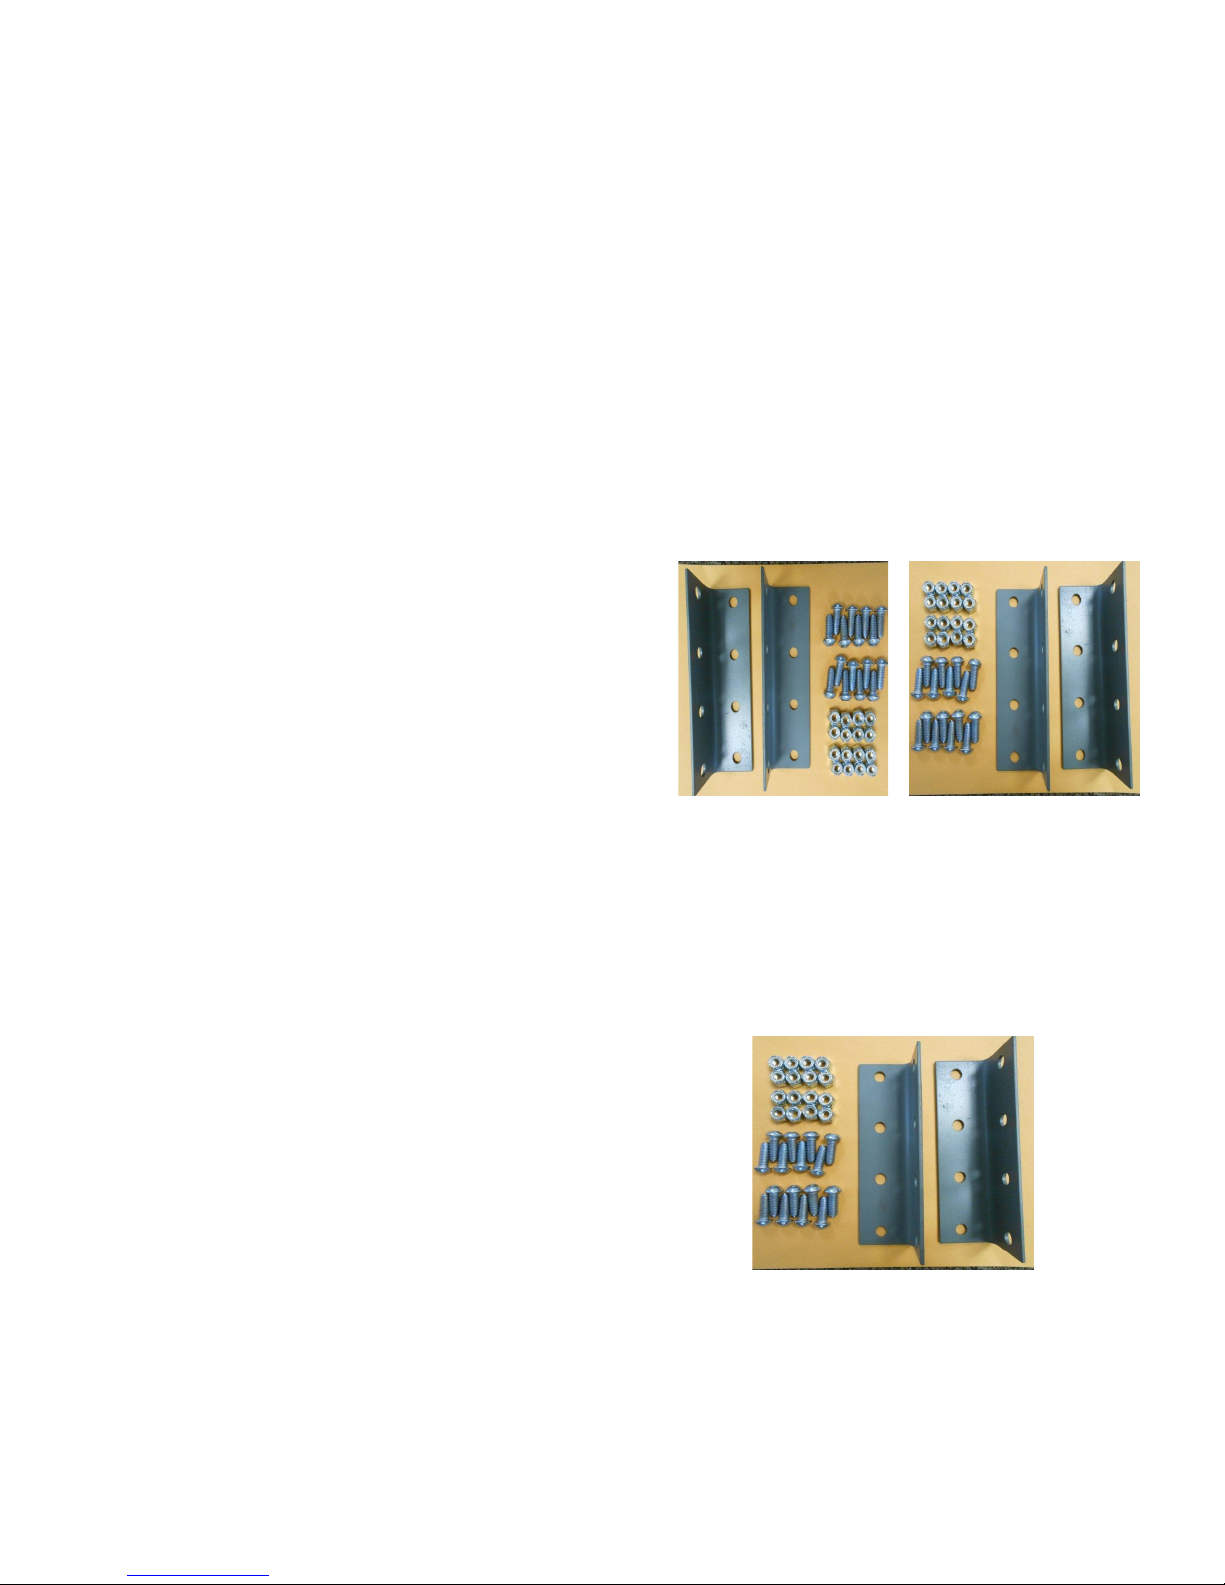
[Qty 4]: Attachment plates w/ 32 ‘3/8 x 1 in.
Allen Head Bolts & Nuts
[Qty 20]: Hex Bolt 3/8-16 x 3-1/4 Grade 5 Plated
[Qty 20]: Hex Nut 3/8-16 Nyloc
*You will need a 7/32 Hex wrench and two 9/16 wrenches
30’ Porta Trak
[Qty 4]: 15’ hinged rails
[Qty 8]: Legs w/ Caster
[Qty 8]: Legs w/ no Casters
[Qty 2]: Attachment plates w/ 16 ‘3/8 x 1 in. Allen Head
Bolts & Nuts
[Qty 16]: Hex Bolt 3/8-16 x 3-1/4 Grade 5 Plated
[Qty 16]: Hex Nut 3/8-16 Nyloc
*You will need a 7/32 Hex wrench and two 9/16 wrenches
Tumbl Trak™ sales@tumbltrak.co.uk www.tumbltrak.co.uk 44 (0)2971 167 949
3
Fig.4
Fig.3
Host
Fig. 2
II. Rail and Frame Assembly
1. Rail Assembly for 20’ and 30’ Units
A. Assemble hinge rails prior attaching to legs.
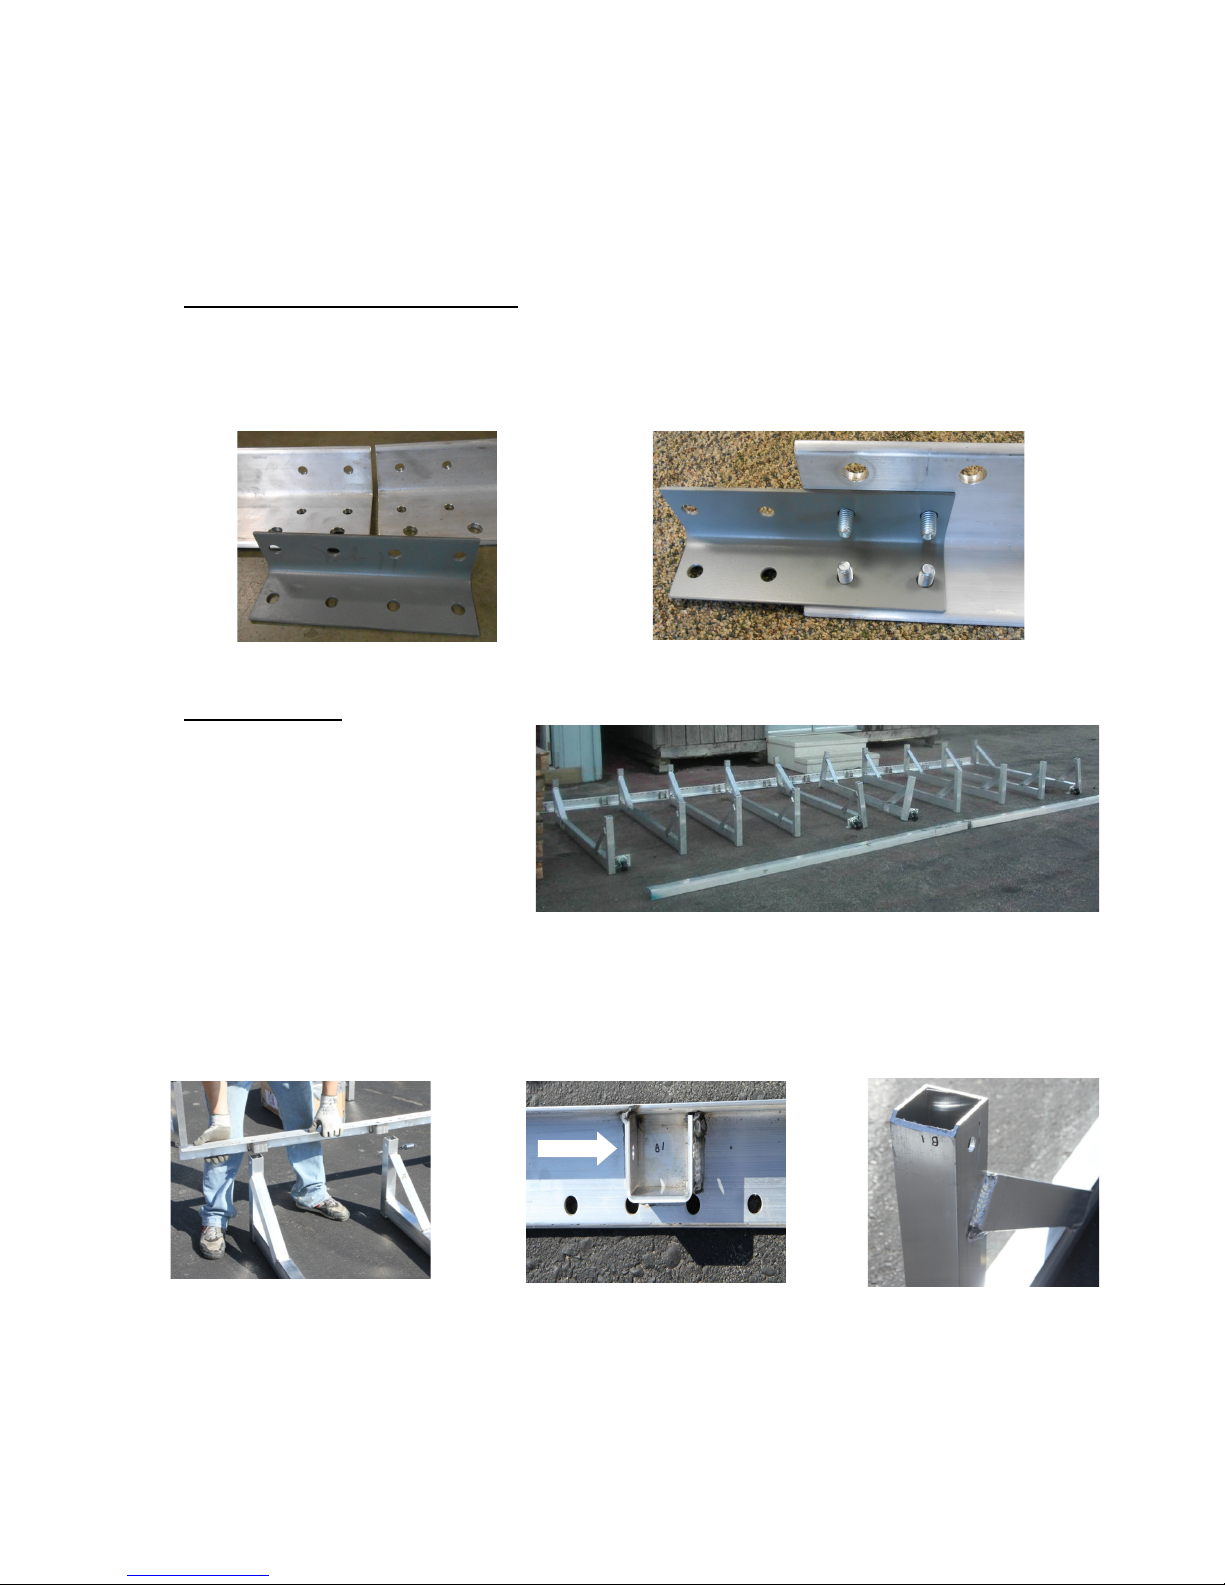
B. Use the attachment plates to fasten the 15’ hinged rail to the 2.5’ extension rail piece (Appendix
A) with the 3/8-16 x 3-1/4 Hex Bolts and Nuts (See Fig. 1). Ensure the threads of the screws are
facing inside the rail (See Fig 2). Secure with Hex Nuts.
*Refer to Appendix A. assembly Diagrams
2. Frame Assembly
A. Lay the 2 assembled Porta Trak
rails parallel to each other
approximately 6 feet apart with
holes facing inward.
B. Stand the legs upright so that the
plastic cap end is on the floor.
The legs will run perpendicular to
the length of the Porta Trak (like
railroad ties). Place legs with casters as indicated in Appendix A (See Fig. 1).
C. Connect the legs to the rails by placing rails onto legs (See Fig. 2). Install the ‘3/8-16 x 1/4 Hex
Bolts provided through the holes indicated in Fig. 3&4 and fasten nuts. The Hex Bolts provided
are meant to be longer than the Porta Trak legs to prevent damage to the aluminum frame
from over tightening.
*Refer to Appendix A. Assembly Diagrams
Fig. 1
Fig. 1
Fig. 2
 Loading...