

TTUUKKTTUUKK
FFAACCTTOORRYY
Keep this booklet with your vehicle
USER MANUAL &
MAINTENANCE GUIDE
E-TUK LIMO-GT
Version number: LGT01
Version release date: August 2017

21
You probably cannot wait to start driving! However, please read this
manual carefully before you get started. This will enable you to be fully
informed about how to fully take advantage of the capabilities of the
vehicle.
Reading and understanding this manual is essential for both your
own safety and the safety of your passengers. It also provides useful
information for troubleshooting any errors that the vehcile may have.
If you take good care of your vehicle, it will always be in the upmost
condition. Keep track of your maintenance in this booklet and follow
the maintenance schedule.
Please check our website www.tuktukfactory.com for an electronic
copy of all versions of this manual including the latest version.
Thank you and enjoy your e-Tuk!
Congratulations on purchasing your new e-Tuk!
- The Tuk Tuk Factory team
Getting
familiar
DrivingBatteryMaintenance
Quick start guide 3
Getting familiar 5
Dashboard & handlebars 5
Controls 7
BDI (Battery Display Indicator) 8
Maximum load 9
Safety 10
Driving conditions 11
Temperatures 11
Ways to extend your range 12
Battery information 13
Battery health 13
Battery specications 15
Watering the battery 15
Charging 19
Charging procedure 19
The charger display 21
Dashboard charging LED 22
Electronics 23
The fuse box 23
12V Battery 25
Tail lights 25
Headlights 26
Fluids 27
Oil 27
Relling the washer reservoir 28
Raincovers and roof canopy 28
Troubleshooting 29
Jacking 29
Changing tires 29
Vibrating front wheel 30
Towing 30
Troubleshooting 31
Handheld programmer 1313 31
It’s not working! 33
It’s still not working! 34
BDI error messages 35
Vehicle information 37
Maintenance schedule 39
Your e-Tuk’s DNA 41
Service & maintenance history 42
Battery analysis tools 47
Battery analysis table 47
Drive logging form 48
Battery logging form 49
CONTENTS
43
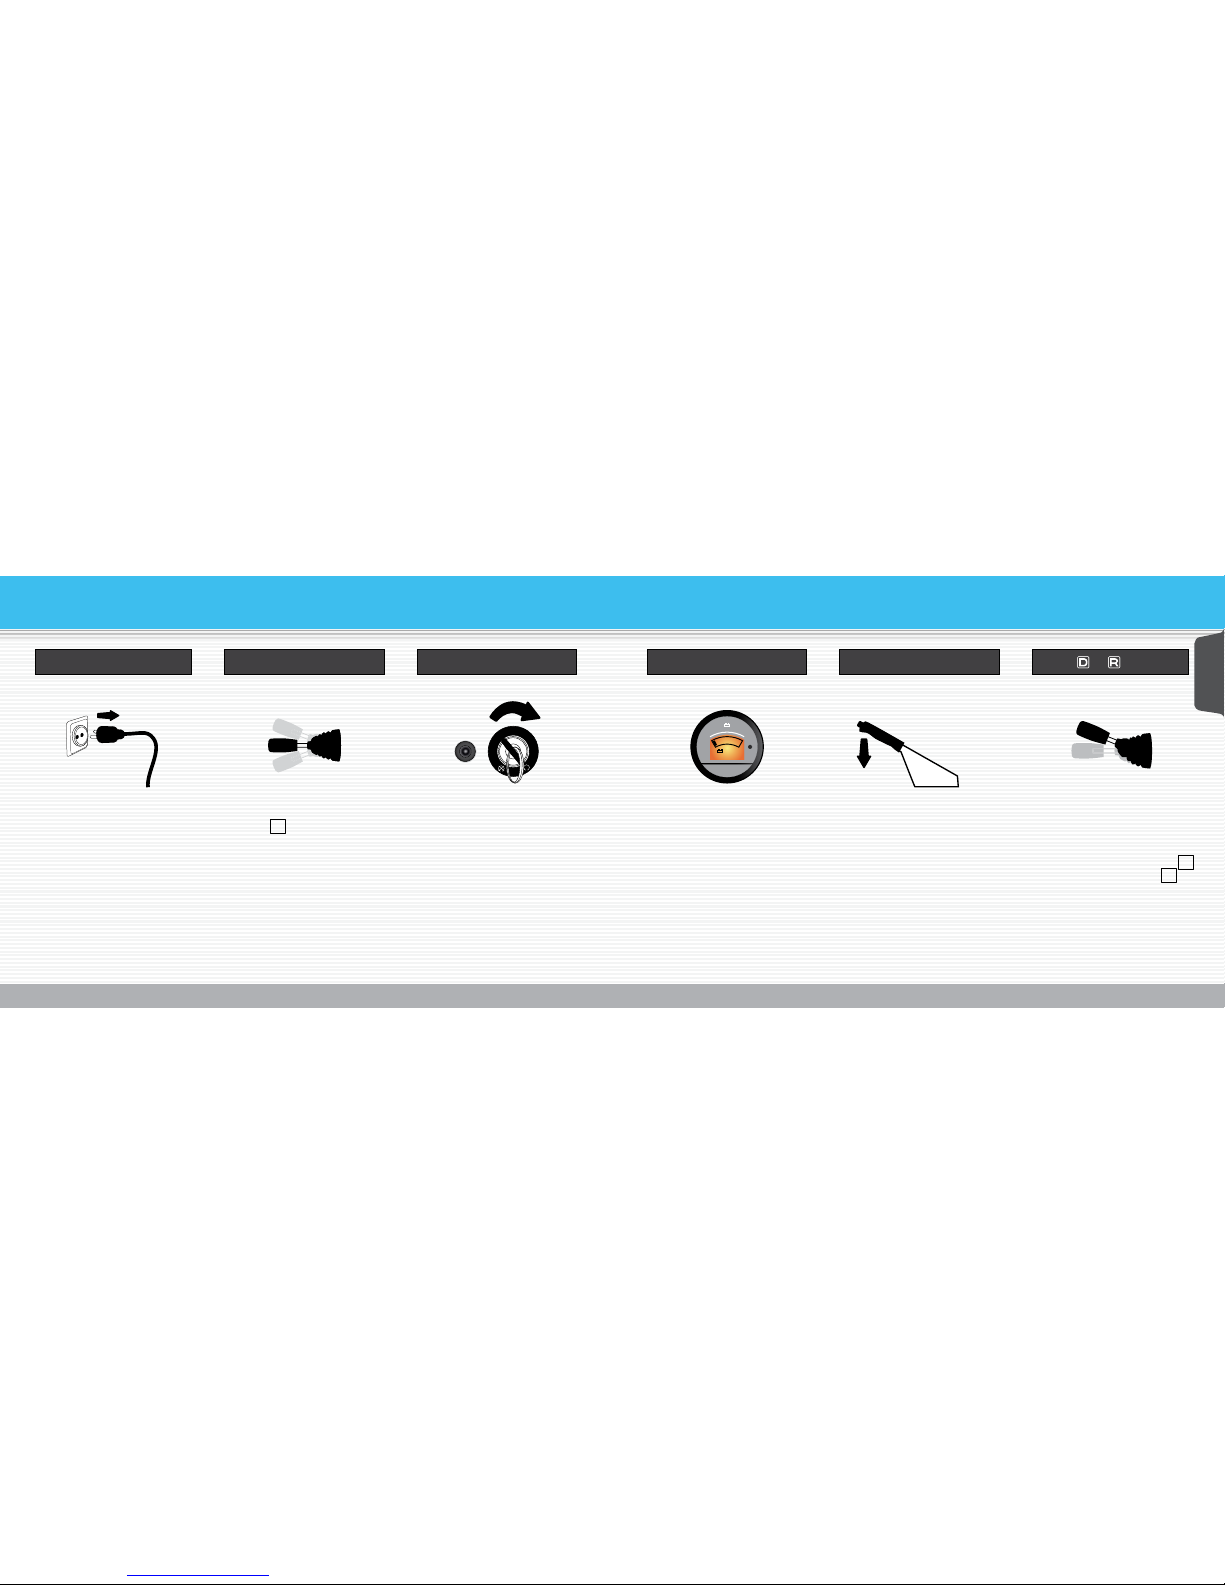
Key Display turns on Parking brakeUnplug Direction switch
Put in of (Drive or Reverse)
Before driving o, make
sure the vehicle is not being
charged, the e-Tuk should
not be able to drive while
you are charging.
Place the charging cable
securely under the rear
seats.
Put the direction switch in
neutral N , and make sure
the throttle is not engaged.
Turn the key clockwise. The display will switch
on and you will hear two
*clicks*, one louder than
the other.
Check the state of charge
and Ub or system voltage. If
it is around 76V your battery
is full.
Make sure the parking brake
is released.
Do not forget to put on your
seatbelt before you start
driving.
Put the direction switch in D
to drive forwards and R to
drive backwards.
Gently twist the throttle
and enjoy your ride!
QUICK START GUIDE
Getting
familiar
L
O
C
K
65
kmph
mph
0
10
20
304050
60
80
70
10
20 30
40
50
0
0020 3
6
0020 3
6
10
20
30
40
50
60
80
90
100
70
10
20
30
40
60
50
kmph
mph
0
0
L
O
1 2 3
4
5
6
7
8
9 10
11
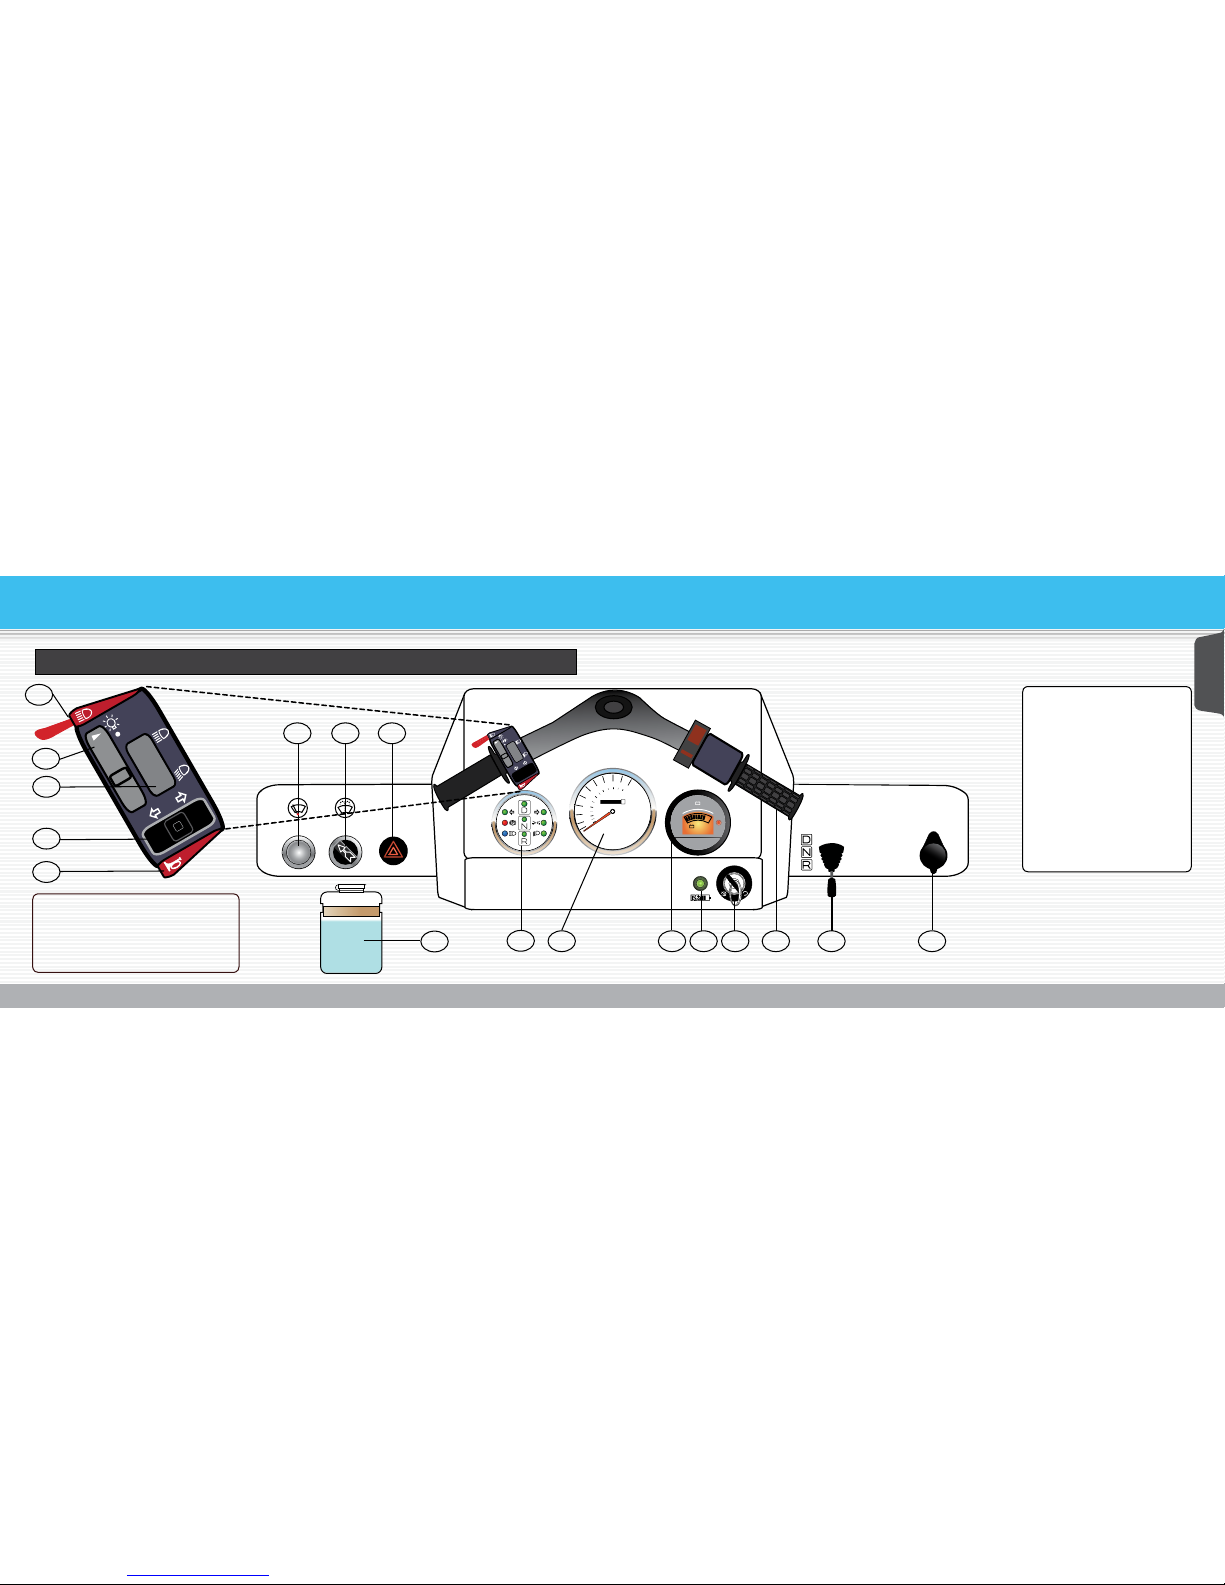
1 Windscreen washer
2 Windscreen wiper
3 Hazard light switch
4 Windscreen washer uid
5 Tell-tales display
6 Speedo- & Odometer
7 Battery Display Indicator
8 Charger LED
9 Key switch
10 Throttle
11 Direction Switch
12 Outlet 12V
A
B
C
D
E
A Direction indicator
B Driving lights on/o
C Driving beam / passing beam
D Directions left / right
E Horn
12
GETTING FAMILIAR
Dashboard & handlebars
Getting
familiar
of
on
L
O
C
K
87
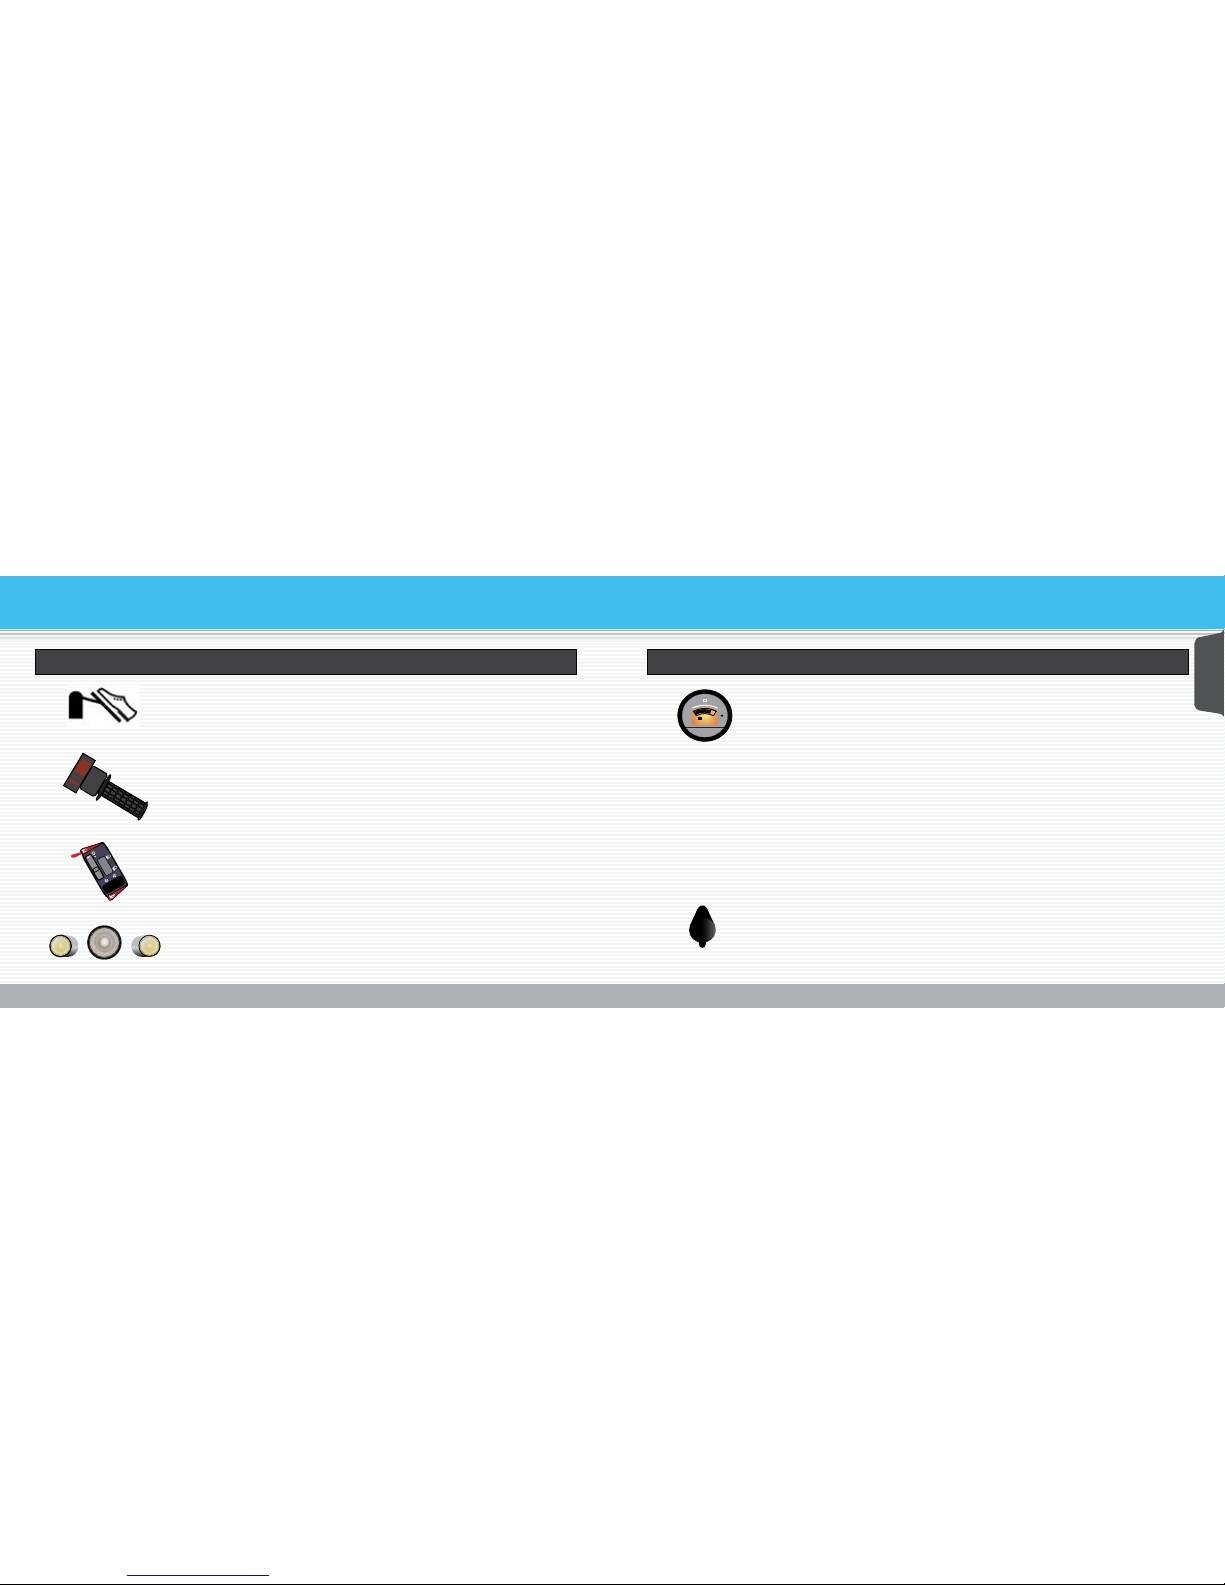
By pressing the brake pedal with your right foot you will engage the
friction brakes. Slowing down and stopping your vehicle can also be
done by braking with the motor alone. You can slow down without even
using the brake pedal. This process also recharges the battery and
therefore extends the driving range.
GETTING FAMILIAR
Turn the throttle to accelerate. By releasing the gas handle the vehicle
will automatically use the motor to slow down and stop. The easier you
are on the throttle and brakes, the further one single battery charge
will take you.
Familiarize yourself with the controls on the steer switch before you
start driving.
Please note that for safety reasons, the position lights are always on.
You’ll notice that the centre headlight cannot be switched on. EUregulation states that you are not allowed to drive on public roads with
three head lights.
This is the Battery Display Indicator (BDI). It shows you the battery level
and up to date driving information. The number of bars on the display
shows the estimated battery level, not an exact calculation.
The display alternates between 4-6 dierent screens. The display button
can be used to scroll through these manually:
The BDI also displays codes in case of an error. To know what these error
codes mean, please refer to the troubleshoot section on page 35.
Ub The amount of volts drawn from the battery
R RPM (Rotations Per Minute) of the electic motor
A Total number of amperes drawn from the battery
H Total driving time of the vehicle in hours
T Temperature of the controller (on some models)
O Total mileage of the vehicle in km (on some models)
There is a 12V outlet on the dashboard that is compatible with any 12V car
appliance (max 10A). Be careful with any wires that might get entangled
in the steering wheel. Please note that the range of your vehicle may be
inuenced by the type of device that is being used. A phone charger will
hardly aect the range, but a heater will be a bigger drain the battery.
There is also a 12V outlet in the back of the vehicle next to the rear bench.
Controls BDI
Getting
familiar
on
o
109
It is a legal requirment that the driver and any passengers use the
seatbelts as provided on the e-Tuk. If you want to use a child seat
check the relevant instructions for the child seat to ensure it can be
secured using a 3-point seat belt.
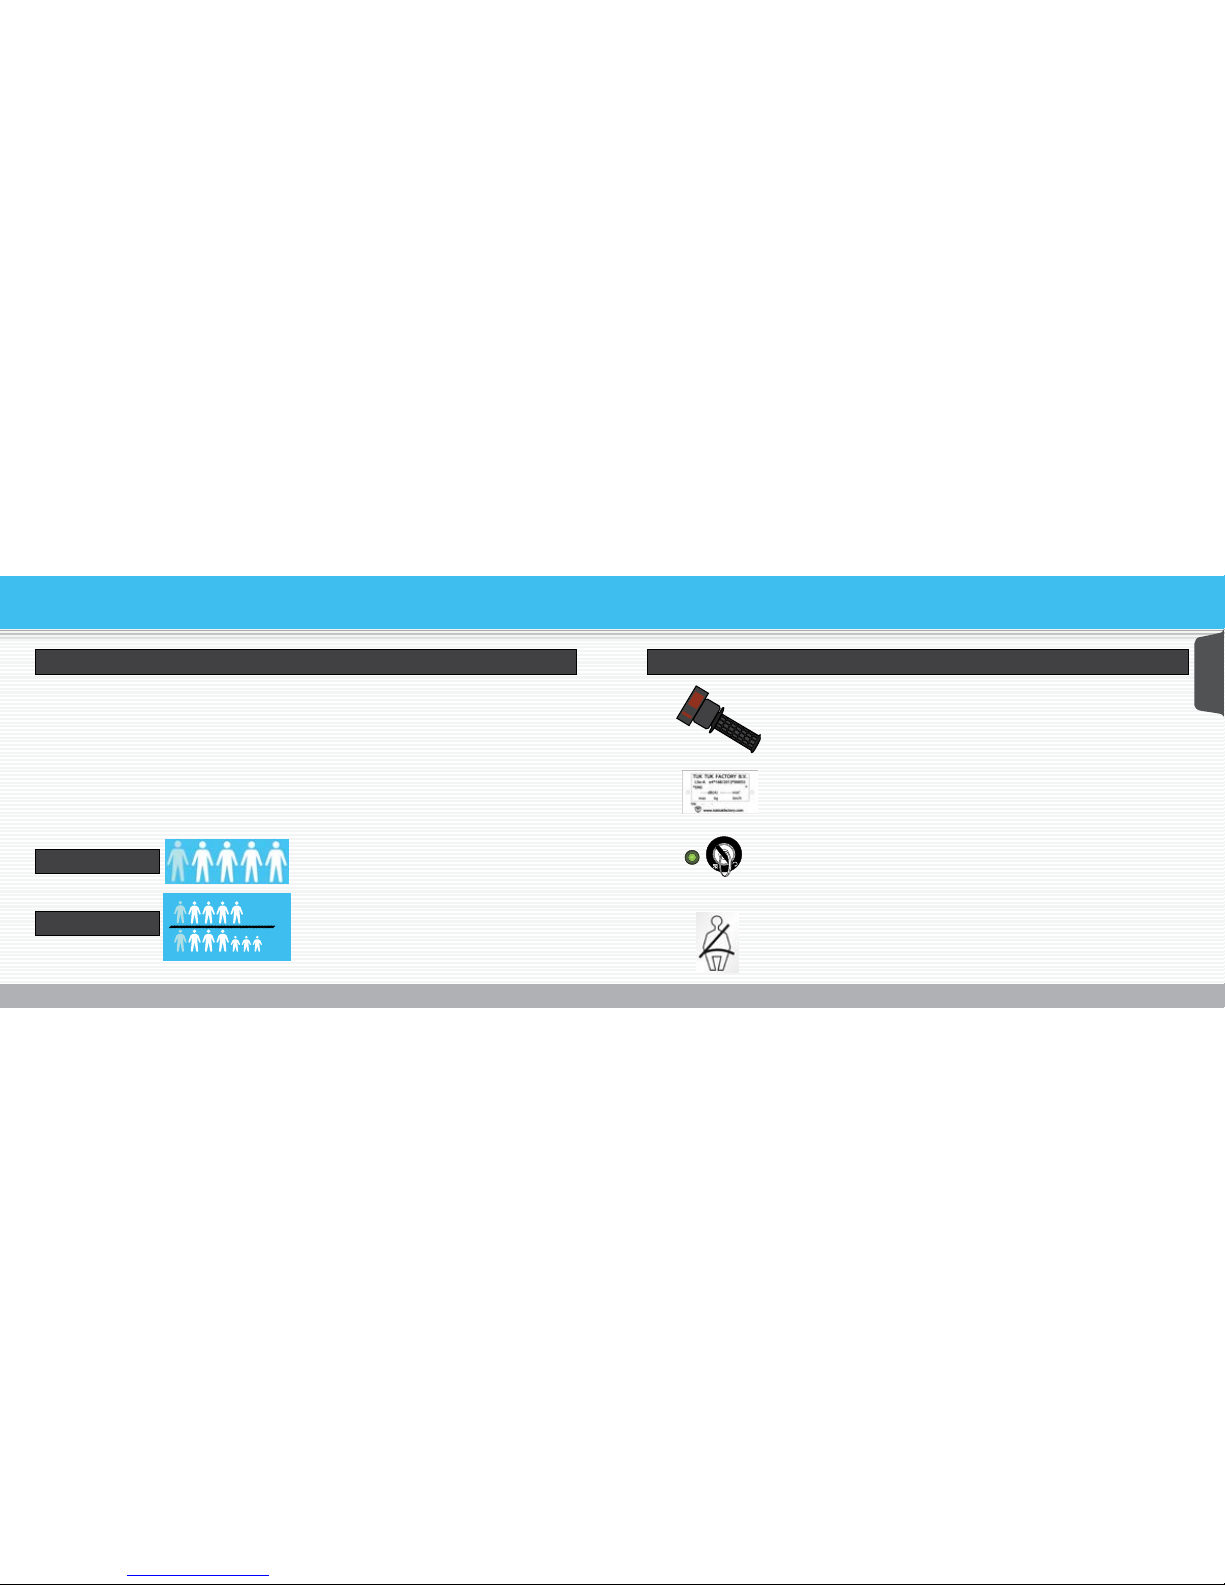
Maximum load
e-Tuk Limo GT
Please do not exceed the indicated load capacity of the e-Tuk. Doing so may cause damage to
the vehicle and could be dangerous to you and your fellow passengers.
Please be aware that your e-Tuk’s driving behaviour and range change when driving around with
more passengers or higher loads.
• Driver plus passenger seats for 4 adults/
children
Please note the emergency switch connected to the throttle (on the
righthand side of handlebar). Pressing the o button will disable the
battery and motor which will make the e-Tuk shut down immediately.
Keep in mind that the pedal brake will need to be used to bring the
vehicle to a stand still if the vehicle is moving.
GETTING FAMILIAR
The Vehicle Identication Number Plate can be found above the
brake pedal. This plate contains the e-Tuk’s serial number and other
manufacturing information. The serial number is the number that is
stamped into the plate. When contacting your service engineer, make
sure you have the serial number ready.
Your e-Tuk is equipped with a steering column lock. To engage the
lock, turn the handlebars all the way to the right, then turn the key all
the way to the left (counter clock wise). Now remove the key and the
handlebars are locked into position.
Safety
Getting
familiar
on
o
L
O
C
K
e-Tuk Limo
• Driver plus passenger seats for 4 adults
• or 3 adults & 3 children
• or 6 children
1211
DRIVING CONDITIONS
Weather conditions may aect the performance and the vehicle’s range.
High temperatures (35+ °C) combined with high payloads may cause
the motor and controller to get very hot. Drive calmly at a steady pace
and give the motor time to cool down every now and then.
Driving uphill drains more energy from the batteries and requires more
power from the motor. As such driving in a hilly area will reduce the
range. Your vehicle will be able to drive up a inclination of 20%.
When the vehicle is stationary on a hill, do not use the throttle to
prevent the vehicle from rolling down the hill as this will cause the
controller to overheat. Instead always use the brake pedal.
When driving from stand still on a hill, apply throttle and release the
foot brake. Your vehicle may roll back slightly before taking o.
Temperatures
Driving on slopes
Cold weather reduces the range of your vehicle. Your vehicle will
drive normally but keep in mind that you may not be able to drive
so many kilometres on a single charge. It is recommended that you
park your vehicle inside, preferably in a warm environment. The ideal
temperature for your battery is 27 °C.
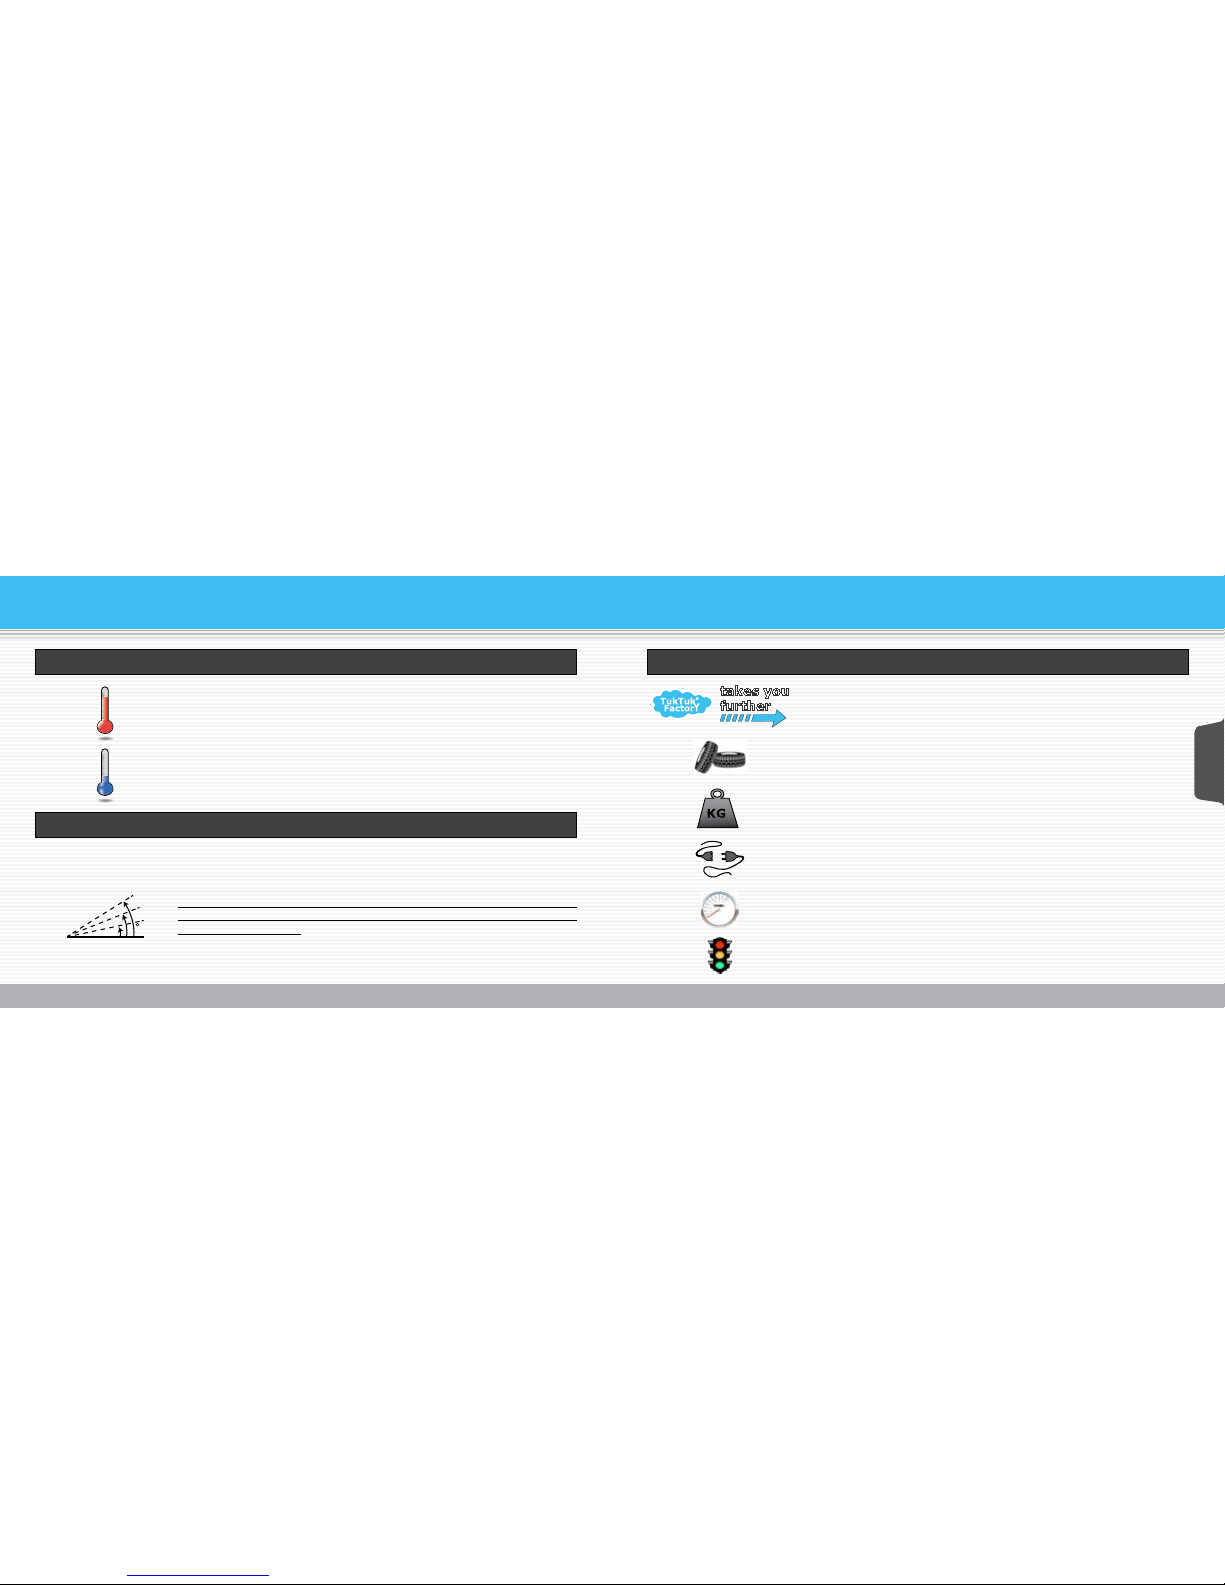
Ways to extend your range
KG
By anticipating trac you can make the ride more comfortable. If you
release the throttle you slow down quite rapidly. You’ll regain energy
and your brakes will last longer.
More weight means more power from the batteries. For maximum
range leave unnecessary belongings at home.
Properly inated tires reduce friction. The recommended tire pressure
is 3bar / 40psi. Check your e-Tuk’s tire pressure at least every month.
Lower your maximum speed and acceleration, the batteries will last
longer if you take it easy on the throttle.
Driving to a place with electricity? Charge on the spot!
The range of the vehicle can be extended by taking breaks in driving.
This allows the batteries to settle and recover some energy.
takes you
further
Driving

1413
BATTERY INFORMATION - LEAD ACID
Your e-Tuk’s battery is one of the most
important components of the vehicle.
To keep your battery in the best condition
you need to take good care of it. Following
some basic maintenance rules keeps your
battery in good shape.
These rules have been set up by the battery
manufacturer*. Not following them will void
battery warranty. Additional information can
be found on the next few pages.
• All battery maintenance, except for
cleaning and watering, should be done
by an authorised service mechanic. This
should be done at least
•
Battery health
Safety
Inspection & Cleaning
Storage
Watering
Charging
• once every year. Always wear protective
clothing, gloves and goggles when
handling batteries
• Keep ames, sparks or metal objects away
from batteries (use insulated tools)
• Neutralize acid spills with baking soda
immediately
• Charge with vent caps or lling system
securely in place
• Provide proper ventilation during charging
• Keep batteries clean and dry
• Check that all vent caps are tight
• Check if all connections are tight (fastening
torque is 11 Nm)
• Use a mixture of baking soda and water
to clean if there is acid residue on the
batteries or corrosion on the terminals
• Add distilled water to cells
• Never add acid to cells this is dangerous
and will alter the chemistry
• Only add water to fully charged batteries.
Let the batteries cool down after charging
before adding water
• Batteries should be charged after every
use to ensure they are never stored in a
discharged condition
• If batteries are stored for extended
periods of time they should be charged
approximately every 6 weeks
• Lead-acid batteries DO NOT have a
memory eect (they do not need to be
fully discharged prior to charging)
• The charging cycle should always be
nished completely to ensure battery life
• If charging cycles have been cut o,
equalization should be done. See
“Equalization” on page 20.
• Batteries should be fully charged prior to
and during storage
• Never store discharged batteries
• Store batteries in a cool, dry place to
minimize self-discharge
• Recharge batteries prior to putting them
back into service to ensure they are fully
charged
• If the plates are exposed in discharged
batteries, add water to a level just above
the lead plates
• Add water to the maximum level indicator
• Do not overll the batteries
* Source: Trojan batteries
Battery
• Terminal protectors or protective spray
can be applied to reduce corrosion
1615
BATTERY INFORMATION - LEAD ACID
Battery specications
Watering the battery
Your e-Tuk has been tted with 12 Lead-Acid Deep Cycle batteries. Each battery produces 6
Volt and around 185Ah. The total battery pack gives your vehicle 72V to power the motor and
electronics. There are various batteries available. They all work the same and should be serviced
in the same manner. However, they cannot be used simultaneously. One broken battery should
be replaced with the same type, brand and health/age.
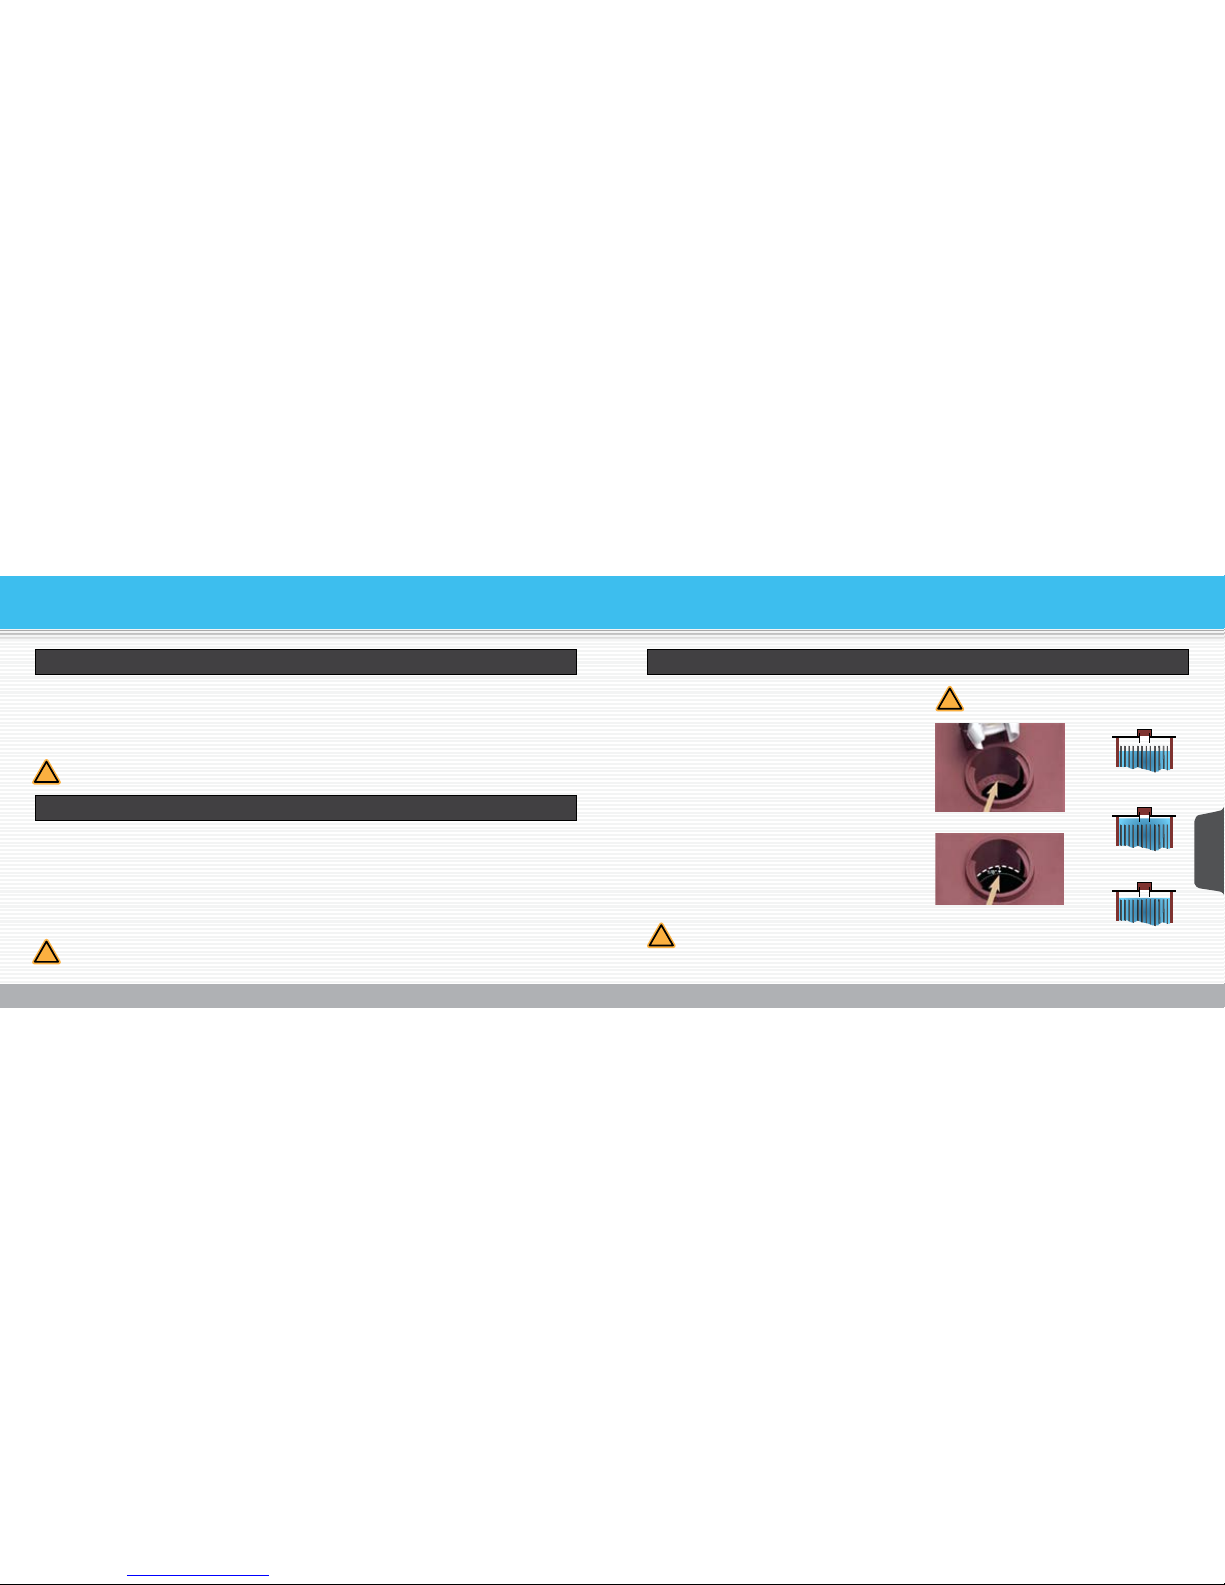
Watering the battery manually
!
!
!
Always use distilled or de-ionized
water to rell the battery.
• Make sure your vehicle is turned o
• Make sure that your batteries are fully
charged and have cooled down
• Remove the rubber mat and oor plate in
the passenger compartment
• For the GT model the front passenger
bench must also be removed.
• Open the vent caps and look inside the
lling wells
• Check the liquid level; the lead plates in
the battery should be submerged.
• If necessary, add water until the liquid
level is 0.3cm below the bottom of the ll
well
• A piece of rubber can be used safely as a
• Only add water to fully charged batteries, except when the battery plates are
above the water.
• Let the batteries cool down after charging before adding water.
Not enough
Too much
Just right!
• Never add acid to a battery.
• Battery uid is hazardous!
Always protect your clothes,
skin and eyes.
Your e-Tuk’s battery needs regular watering. The water is an essential part that makes the
battery work. During heavy use the batteries heat up and the water evaporates. TTF recommends
regular lling (see “Maintenance schedule” on page 39 for more info). Monitoring the amount
of water which is used during the relling process will give you a good indication of your water
use. Watering can be done per battery cell or in one go for the entire pack if you have a battery
lling system.
Battery
• We recommend to replace the entire battery pack if only one battery is broken.
!

1817
• Make sure your vehicle is turned o
• Make sure that your batteries are charged
and have cooled down
• Locate the lling hose
• Fill your water lling tank with de-ionised
or distilled water
• Connect the hose of your water lling tank
to the battery hose
• Place the water lling tank high above
the batteries. The e-Tuk’s roof is a good
location for this. Gravity will pour the
water in the batteries
• You will see the water owing through the
Relling the battery using the water lling system
If your e-Tuk is tted with a water lling
system. This system lets you ll all batteries
at once through a single hose.
Installing a lling system can always be
done after delivery. Feel free to contact your
distributor for more information.
BATTERY INFORMATION
red ow indicator in the tank’s hose
• When the liquid stops owing the batteries
are full
The battery lling system has an
indicator for each single battery
cell. The indicator shows if the
battery is lled and automatically
cuts the water feed.
Full cell Cell needs lling
Battery

2019
CHARGING
Turn o Plug inParking brake
Remove the key from the
key lock.
Apply the parking brake
to make sure your vehicle
does not roll away.
Insert the plug into an electrical socket.
The electrical plug that is needed to charge your e-Tuk can be found underneath the
rear seats. It is connected to the yellow/black charger box.
Wait at least 15 minutes before driving o after charging, your batteries need to cool
down. Driving immediately after charging will damage your batteries and aects range.
Always nish the charging sequence. Cutting o a sequence will damage batteries and
aects range.
If you use an extension cord, make sure it’s fully unwound. Rolled up cords can
generate heat.
Time to charge Equalization
The Delta Q 72V @ 12Amp (5A nominal) is
standard equipment on every e-Tuk. You can
nd it underneath the rear bench. Charging
your e-Tuk from 0 to 100% takes about 14
hours. TTF oers faster chargers which will
Standard charging sequence
!
!
!
Charging your
e-Tuk requires high
current. Make sure
each socket has its
own power ‘group’.
Only connect ONE
QuiQ charger to a
single 15A circuit
or the circuit may
become overloaded.
Is it not charging?
• Check for red lights on the charger
• Check your outlet/plug connection
fuse.
!
!
reduce this charging
time. Please contact
your distributor for
more information.
Whenever your battery’s performance
reduces, or if you were not able to complete
a charging sequence, your battery needs to
be equalized. Additionally, TTF recommends
regular equalization of your battery pack
(see “Maintenance schedule” on page 39
for more info).
• To equalize your battery, simply charge it
until the charger indicates that the battery
is full
• Pull out the charger plug from the wall
socket and put in back in again to start
the equalization process
• Equalization can take up to 6 hours,
depending on the state of your batteries
Battery
L
O
C
K

2221
CHARGING
!
!
!
!
Ampere
meter
Constant: Displays approximate scale of charge
during the rst 80%.
Flashing: High internal charger temperature.
Charging speed is reduced
80% Constant: First 80% charged, the last 20% will go
more slowly
Flashing: Contact your service supplier
100% Constant: Fully charged
Flashing: Charging almost complete, nishing
Charger
turned
on
Constant: AC power good
Flashing: Low AC Voltage, check voltage and ex-
tension cord length
Error Flashing: Charger error. Reset charger , contact
your service provider
The charger display
Green Constant: Fully charged
Flashing: Short: <80% Charge
Long: >80% Charge
Not constant: Contact your
service supplier
Yellow Flashing: Reduced Power Mode: Low
AC Voltage or High internal
charger temperature. Use a
shorter extension cord
Red Flashing: Charging error. Re-plug the
charger plug in the socket or
contact your service supplier
Dashboard charging LED
The e-Tuk’s standard charger is located underneath the rear bench. It has a display on which you
can check the progress of the charging sequence. Cutting o an unnished charging sequence
will lower your battery lifetime. When the green 100% battery charge light turns on, the charging
sequence is complete.
If you do not need detailed charging information, but just want to know if the charging sequence
is nished, you can easily check the charging LED on the dashboard. It is located next to the
key switch.
Battery
L
O
C
K
L
O
C
K
L
O
C
K

2423
The fuse box
The e-Tuk contains
several fuses.
All of the 12V fuses are
located in the fuse box
underneath the driver’s
seat.
To reach the fuse box
you will have to remove
the driver’s seat and the
cover below it.
The illustration shows
the location and function
of the fuses.
ELECTRICS - CLASSICO/LIMO/CARGO/VENDO
When you’re replacing
fuses, only use blade
fuses with amps
according to the schedule
below.
In order to check if a
fuse is broken, carefully
remove it from the fuse
box. If the metal wire
between the 2 poles is
broken, the fuse is blown.
Blown fuse
Ok to use!
Maintenance
taxi sign
unassigned
unassigned
unassigned
front plug
rear plug
radio
coil supply
switched
unswitched
relay relay
DTR
DTR
relay
auto brake limit
relay
12V
main relay
10 Amp
5 Amp
15 Amp
15 Amp
10 Amp
unassigned
5 Amp
5 Amp
10 Amp
15 Amp
unassigned
unassigned
15 Amp
10 Amp
5 Amp
unassigned
unassigned
5 Amp

2625
The tail lights and rear direction indicator
are highly durable LED lights. If they are
not working, please make sure to check
the connections and fuses rst. If the light
is indeed broken, you need to replace the
entire unit.
ELECTRICS - ALL VEHICLES
12V Battery
Tail lights
WARNING
NEVER CONNECT THE
12V BATTERY TO THE CHASSIS (B-)!
When you connect the ground to the frame,
as can be done with regular cars, you
will connect the 72V system. This is very
dangerous and should be avoided!
The 12V battery can be found underneath
the driver’s seat in front of the fuse box. The
minimum voltage it should provide is at least
11V. When measuring the voltage, make
sure the vehicle is switched o. If the battery
voltage is 10V or less then the battery needs
to be replaced.
• Unscrew the two screws inside the dash-
board that holds the headlight in place.
• Slide the black rubber protection cap back
to reveal the white tting
• Rotate the white fitting to remove it fr o m
the metal housing
• Do not touch the bulb with your hands,
wear gloves or use a handkerchief to
unscrew the bulb
• Press and turn the light bulb clockwise to
remove the bulb from its tting
Use a BA20D 12V 35W bulb.
36mm
54mm
17
mm
Headlights
If one of your lights is not working, rst
check if the wiring is properly connected and
that the fuse is not broken. To replace the
light bulb in the headlights, rst remove the
entire headlight assembly:
Maintenance
For Classico/Limo/Cargo/Vendo only:
The ground can be connected to the frame
for GT models as the 72V system is isolated.

2827
Oil
Your e-Tuk uses dierent
types of oil for dierent
parts of the vehicle.
Regularly check the ground
underneath your vehicle for
any traces of uid that may
have leaked. Report any
leakage to your local service
provider immediately.
FLUIDS
Dierential oil Check the state of your dierential oil every
3 years and replace if necessary.
Use about 750ml of 85W90 oil to ll the
dierential.
Brake uid Check the level of brake uid every year.
Unscrew the body panel that covers the
brake pedal. This gives you easy access to
the two reservoirs that hold the brake uid.
Check if the level of uid is between the
indicated levels on the reservoirs. Check for
any visible leaks.
Use DOT 3 or DOT 4 type uid.
Front fork Visually check for any leakage. Replace the
oil in the front fork when you have spotted
leakage or when damping becomes less.
Also make sure you replace the fork seals.
Use 15W type oil.
PULL
PULL DOWN
Relling the washer reservoir
Your windscreen washer can easily be lled with washer uid.
Best way to do it is to slide it down out of its holder. This way
the opening cap is easy to reach and you won’t spill a drop.
Maintenance
Raincovers and canopy
To keep your raincovers and canopy in good condition special maintenance is required:
Depending on use, apply silicon lubricant to the zippers to ensure consistant smooth operation
Whenever raincovers are being reinstalled on the vehicle, make sure to use silicon lubricant for
the rail and raincover seams to allow smooth installation.

3029
Jacking
Changing tires
Do NOT jack up the
vehicle on the diagonal beam near the rear
axle. This will damage the suspension.
To prevent any
damage, only jack
up the vehicle
underneath the rear
supsension.
To change a rear tire, rst jack up your
vehicle. Remove the screw of the plastic
wheel cover. Remove the 4 nuts that hold the
wheel in place. Take o the wheel. Make sure
you put the new wheel in place and secure
the bolts while the vehicle is still jacked up.
Use a thread locking material on all the bolts
before putting the new wheel back in place.
We advice using Loctite Blue 242 Nut & Bolt
Locker.
To change the front tire, jack up the vehicle.
Remove the brake calliper and loosen the bolt
of the front axle. Remove the front axle to
release the front wheel. Pay attention to the
right assembly order of the several spacers
and other parts. Reassembly is the reverse
order of removal.
Only jack up the vehicle
on the allocated jacking points. These are
the cylindrical blocks
underneath the frame.
TROUBLESHOOTING
Towing
In case your vehicle needs to be towed, use
the towing ring at the front of the vehicle.
Start the vehicle and turn on the hazard
lights button located left of the dashboard.
Make sure your hazard lights remain on
whilst being towed.
If the vehicle is being towed at night, make
sure your tail lights are turned on as well.
Maintenance

3231
To facilitate vehicle troubleshooting, TukTuk Factory oers the 1313 handheld. With this
diagnostic device you can easily and quickly detect any errors. Whenever an internet connection
is available, remote assistance can be given by authorised distributors and service mechanics.
The handheld device can be plugged into the communication port which is located underneath
the rear passenger bench on the white box.
TukTuk Factory recommends you to order a handheld whenever your business uses multiple
vehicles, or when a dedicated service station is not readily available.
TROUBLESHOOTING
Maintenance
Handheld programmer 1313

3433
It’s not working!
Check the charger cable.
Whenever it is plugged in the
e-Tuk will not drive.
Do a re-run of the starting
sequence. Check if the direction
switch is in N
Make sure the red emergency
button is not pressed. Rotate
the button clockwise to release.
Check the battery display for the
battery level. Remember that
this is only an estimated level of
the battery's charge
TROUBLESHOOTING
Er 49
Check the battery display
for errors, write them
down and communicate
them to your service
engineer.
Most common errors are
shown on page 35.
It’s still not working!
Lights, horn, display, wiper, washer do not work
X
Display does not function
X X
Vehicle starts moving by itself
X
Vehicle's rear axle makes a lot of noise
X X X
Battery does not charge
X X X X X
Motor stops while driving (bump)
X X X X X X X
Vehicle drives jolty at slow and fast speed
X X X X X
Vehicle does not go up to high speed
X X X X X X
Vehicle turns on & clicks but drives only 2 meters
X X X X X X
Vehicle turns on & clicks but does not drive
X X X X X
Vehicle turns on, but no click and does not drive
X X X X X X X X X
Vehicle does not start, no lights, no click
X X X X
• Key contact not turned correctly
• Key contact faulty connection
• Handle (parking) brake still on
• Emergency button pushed in
• Charger still connected
• Wrong start-up sequence (error 47)
• Battery voltage too low (<58V) (error 23)
• Controller too warm (error 22)
• Main contacter faulty
• Encoder fault
• Motor connector faulty
• Motor fault
• Motor stalled (error 73)
• Motor temperature too high
• Throttle cable fault (error 41,42)
• Display connector faulty
• Rear axle dierential low on oil
• Rear brakes touching / locking
• Front brake touching / locking
• Battery fault: molten poles
• Battery fault: low battery water
• Battery fault: broken cells
• Charger fault: check manual
• Charger not connected correctly
• 12V/relais battery malfunction
• 35 pins connector faulty
Make sure the parking brake is
released. The e-Tuk will not drive
when it is engaged.
Maintenance
L
O
C
K
on
o

3635
BDI error messages
Error What does it mean? What has happened? What do I do?
16 Extreme overheating of the
controller. Vehicle will not
drive.
Heat sink temperature
reached +95°C.
Prevent aggressive
driving. Allow the
controller to cool down.
17 Battery indicates it is almost
empty. Driving speed is
reduced.
Battery is almost empty. Get to a wall socklet
immediately and recharge
the battery.
22 The controller is overheated.
Driving speed is reduced.
Heat sink temperature
reached +85°C.
Drive slowly and do not
accelerate & decelerate
abruptly The controller
will slowly cool down.
23 Battery power is getting low.
Driving speed is reduced.
Battery power is getting
low.
Get to a wall socklet and
recharge soon.
28 The motor is overheated.
Driving speed is reduced.
The motor is overworked.
This could have been caused
by too much weight on the
vehicle or going up too
many steep slopes
Allow the motor to cool
down. Reduce the weight
on the vehicle or take a
less steep route.
TROUBLESHOOTING
29 The motor temperature
sensor is not connected. The
vehicle will not drive.
The motor temperature
sensor has detached.
Check the 2 pin connection
nearby the motor.
36 Encoder error. The encoder has detached. Check the 4 pin connection by
the motor.
37 The motor face is open.
Vehicle shuts down.
There was a short circuit in
the wiring of the motor.
Check the wiring of the motor.
38 The main contactor is welded
shut. Vehicle shuts down.
The main contactor does
not open anymore.
Replace the main contactor.
39 The main contactor did not
close. Vehicle shuts down.
The main contactor did
not close or the tips are
oxidized.
Check the pins on the contactors
or replace main contactor.
44 There is an error in the
throttle.
The throttle is broken or
the wiring is faulty.
Check wiring on the throttle, or
replace the throttle.
47 Vehicle will not drive while
direction switch is in D or R.
You started the vehicle
without putting the
direction switch in neural.
Shut down the vehicle, put the
direction switch in neural (N)
and start it again.
73 Stall detected. The motor is
stalled and the vehicle will
not drive.
Something is blocking the
motor and preventing it
from turning.
Check if something is block-
ing the motor, wheels or drive
train. Check the 4 pin connec-
tion on the motor. The driving
angle might be too steep.
Maintenance

3837
VEHICLE INFORMATION
● Standard
- Not available
* Vendo height may dier
** In a standard e-Tuk city cycle
3+1 Limo Limo GT
Cargo &
Vendo
Cargo &
Vendo XL
Vehicle Driver comfort seat
● ● ● ● ●
Passenger seats 3 6 4 ● Cargo space (ltr)
- - - 2000 3000
Maximum payload (kg) 300 300 294 380 300
Maximum speed (km/h) 45 45 45 45 45
Range** (km) 70-80 60-70 60-70 70-80 60-70
EU vehicle category L5 L5 L5 L5 L5
Battery Deep cycle Lead-Acid ● ● ● ● ●
Capacity (kWh) 15 15 15 15 15
Charging time 0-100%
(hrs)
14 14 14 14 14
Lifetime (years / km)
3/100.000
3/100.000 3/100.000 3/100.000 3/100.000
Charger type Delta Q ● ● ● ● ●
3+1 Limo Limo GT
Cargo &
Vendo
Cargo &
Vendo XL
Drive
train
Motor type AC ● ● ● ● ●
Motor power (kW) 7 7 7 7 7
Reverse speed (km/h) 10 10 10 10 10
Controller Curtis 300A ● ● ● ● ●
Size
and
weight
Size 2980 2980 3980 2980 3980
Width
(mm)
1410 1410 1410 1410 1410
1850 1850 2120 1850 1850
Cargo space - - 850 1850
- - 1400 1400
- - 1200* 1200*
Track (mm) 1255 1255 1260 1255 1255
Wheelbase (mm) 2270 2700 2850 2270 2700
Kerb weight (kg) 700 850 1030 700 850
Tyre size rear wheels
155/80R13 155/80R13 155/80R13 155/80R13 155/80R13
Tyre size front wheel
145/70R12 145/70R12 145/70R12 145/70R12 145/70R12
Maintenance
All valid for Lead Acid T105 Battery option only:

4039
MAINTENANCE SCHEDULE
*The battery manufacturer recommends that batteries are checked once a month. Check the
water level of the batteries monthly. Also, check all the battery pole connections for corrosion.
Only rell batteries one hour after charging them.
**The optimal tire pressure is 3bar / 44 psi.
***Check to see if all the lights (front, rear, direction indicators) work every week.
Proper maintenance is key to
the vehicle's life time.
To ensure good performance
and reach the expected
lifetime of the vehicle,
stick to this maintenance
schedule. Documentaion of
maintenance is required for
warranty claims. We advise
you to use the maintenance
history section in this booklet.
Tyre pressure check**
Clean steer damper
Apply silicone lubricant
on rain cover zippers
Tyre prole check
Lights check***
Water batteries*
Brake pads and shoes
check
Equalize batteries
Clean motor
Flush brake uid
Replace brake discs
Replace brake pads
Read controller history
Update controller
software
Wiring harness check
Dierential oil level
and quality check
Battery terminal
service
Battery range check
Battery cable
replacement
Battery uid specic
gravity measurement
Grease motor spline
Drum brake service
Flush dierential oil
Maintenance done by U U U U U U U U M M M M M M M M M M M M M M M
Weekly or 200km
x x x
Monthly or every 800km
x x x x x x x x
Yearly or every 12.500km
x x x x x x x x x x x x x x x
Every 2 years or 25.000km
x x x x x x x x x x x x x x x x x x x x x x x
U You can do this yourself with some basic technical skills
M This needs to be done by an authorised service and maintenance engineer
Storing the vehicle
Make sure your vehicle is stored indoors in a dry environment. Any water left on the vehicle
should be removed before storing the vehicle. These are the best conditions for keeping the
body and roof cover as good as new.
Maintenance

4241
Classico/Limo/Limo GT/Cargo/CargoXL/Vendo/VendoXL
VIN
Type
TVV No.
Colour
Licence plate nr.
Installed Options
Country
Distributor stamp
YOUR E-TUK’S DNA
In this section we have reserved space for your service and maintenance provider to keep
track of service and repairs on your e-Tuk. Please keep in mind that your vehicle needs regular
maintenance. Regular checks need to be done on your battery. You can nd the maintenance
schedule on page 39.
We advice you to keep all invoices you receive for these repairs. They will give additional insight
in your vehicle’s history.
SERVICE & MAINTENANCE HISTORY
/ /
Date
Comments
km
Next service km/date
Service stamp:
/ /
Date
Comments
km
Next service km/date
Service stamp:
Maintenance

4443
/ /
Date
Comments
km
Next service km/date
Service stamp:
/ /
Date
Comments
km
Next service km/date
Service stamp:
/ /
Date
Comments
km
Next service km/date
Service stamp:
/ /
Date
Comments
km
Next service km/date
Service stamp:
/ /
Date
Comments
km
Next service km/date
Service stamp:
/ /
Date
Comments
km
Next service km/date
Service stamp:
/ /
Date
Comments
km
Next service km/date
Service stamp:
/ /
Date
Comments
km
Next service km/date
Service stamp:
SERVICE & MAINTENANCE HISTORY
Maintenance

4645
/ /
Date
Comments
km
Next service km/date
Service stamp:
/ /
Date
Comments
km
Next service km/date
Service stamp:
/ /
Date
Comments
km
Next service km/date
Service stamp:
/ /
Date
Comments
km
Next service km/date
Service stamp:
/ /
Date
Comments
km
Next service km/date
Service stamp:
/ /
Date
Comments
km
Next service km/date
Service stamp:
/ /
Date
Comments
km
Next service km/date
Service stamp:
/ /
Date
Comments
km
Next service km/date
Service stamp:
SERVICE & MAINTENANCE HISTORY
Maintenance

4847
BATTERY ANALYSIS TOOLS
When your battery performance reduces, your service provider could help you to locate the
problem. In this section you can nd tables that could help you track your battery’s performance.
If you copy these blank pages you can use them more than once.
To be able to quantify the performance it is adviced to perform a eld test, measuring range and
voltages. The drive logging form can be used for this.
Measuring each battery cell can be done to determine which specic cell underperforms. Each
measurement can be lled in the battery logging form. Appropriate values can be found below.
% Charge 6 Volt 72 Volt Gravity
100 6.37 76.44 1.277
90 6.31 75.72 1.256
80 6.25 75.00 1.238
70 6.19 74.28 1.217
60 6.12 73.44 1.195
50 6.05 72.60 1.127
40 5.98 71.76 1.148
30 5.91 70.92 1.124
20 5.83 69.96 1.098
10 5.75 69.00 1.073
Battery analysis table Drive logging form (driving log)
Before drive After drive Charging
Time Voltage Km Time Voltage Km Start time End time

5049
Battery logging form (battery log)
B01
sg1 sg2 sg3
B04
sg1 sg2 sg3
B07
sg1 sg2 sg3
B10
sg1 sg2 sg3
B02
sg1 sg2 sg3
B05
sg1 sg2 sg3
B08
sg1 sg2 sg3
B11
sg1 sg2 sg3
B03
sg1 sg2 sg3
B06
sg1 sg2 sg3
B09
sg1 sg2 sg3
B12
sg1 sg2 sg3
VIN
Date
Time
Total Voltage
BATTERY ANALYSIS TOOLS
Notes

5251
Notes
If you are having issues with your vehicle, please contact your local
service provider. Before you do, please make sure you have read this
manual carefully. If the manual does not give you the answer to your
problem, please contact the following:
Your local service provider:

www.tuktukfactory.com
service@tuktukfactory.com
TTUUKKTT UUKK
FFAACCTTOORRYY
 Loading...