

Page 1

PARTS CHECKLIST
LOCKBOX #307
INSTALLATION INSTRUCTIONS
2007+ Chevy Silverado/GMC Sierra Crew-Cab Under Rear-Seat Lockbox #307
Please read and fill out the enclosed warranty registration card to activate your warranty.
(1) #5 MOUNTING
BRACKET(LEFT)
(1) #6 MOUNTING
BRACKET(RIGHT)
#19.1 (4) 5/16” WING KNOB NUTS #19.2 (4) 5/16” x 3/4” CARRIAGE BOLTS #19.3 (4) 3/8” WASHERS
Tools needed for standard installation
• 18mm Socket and Ratchet
PLEASE READ ALL INSTRUCTIONS THOROUGHLY BEFORE STARTING INSTALLATION.
1. Flip both rear seats up so they are secured in the upright position.
2. Locate and remove the (2) OEM forward/outer rear-seat mounting nuts from the vehicle, you will reuse these.
3. Place the #307 Lockbox in the rear floor area.
4. Remove and unwrap the #5 & #6 Mounting Brackets from inside the Lockbox.
5. Install the #5 & #6 Brackets to the rear of the box as shown(tapered edges of brackets face center of vehicle) using the #19.2
Carriage Bolts, #19.3 Washers, and #19.1 Wing Knob Nuts. (See Figures #1 & #2)
NOTE: Do not tighten #19.1 Nuts as some adjustability is required in the next steps.
6. Place the obround holes of the mounting brackets over the threaded seat mount studs, and replace(but do not tighten) the nuts
removed in Step #2.
7. Adjust the Lockbox’s side to side position so that the gap in the lids aligns with the rear seat split. This may be done by
alternately opening the Lockbox lids and raising and lowering the rear seats, and adjusting to minimize interference.
8. Once the Lockbox is in its final position, the (4) #19.1 Wing Knob Nuts, and (2) OEM Nuts may be tightened.
Call (970)564-1762 for Technical Support
Page 1 of 2 - 5/14/2014 – Rev051414
Page 2
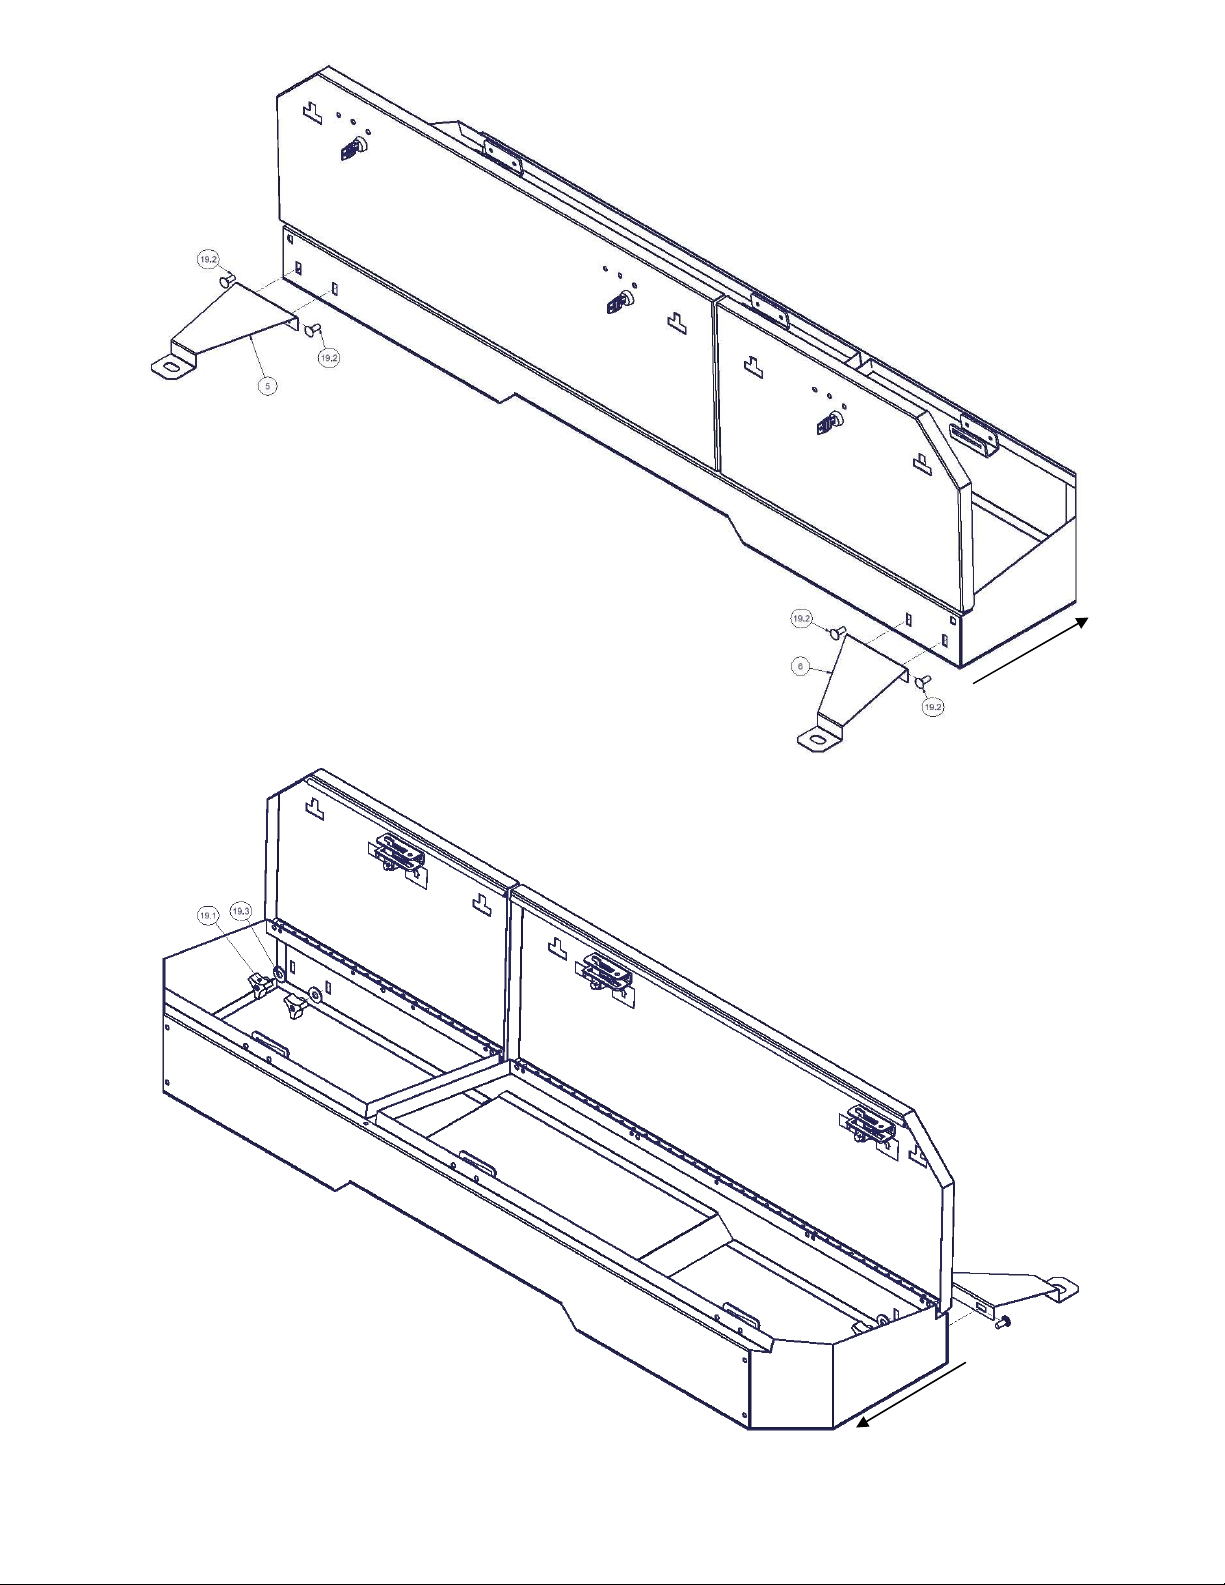
Figure 1
VEHICLE
FRONT
Figure 2
VEHICLE
FRONT
Call (970)564-1762 for Technical Support
Page 2 of 2 - 5/14/2014 – Rev051414
 Loading...