

Page 1
Please read and fill out the enclosed warranty registration card to activate your warranty.
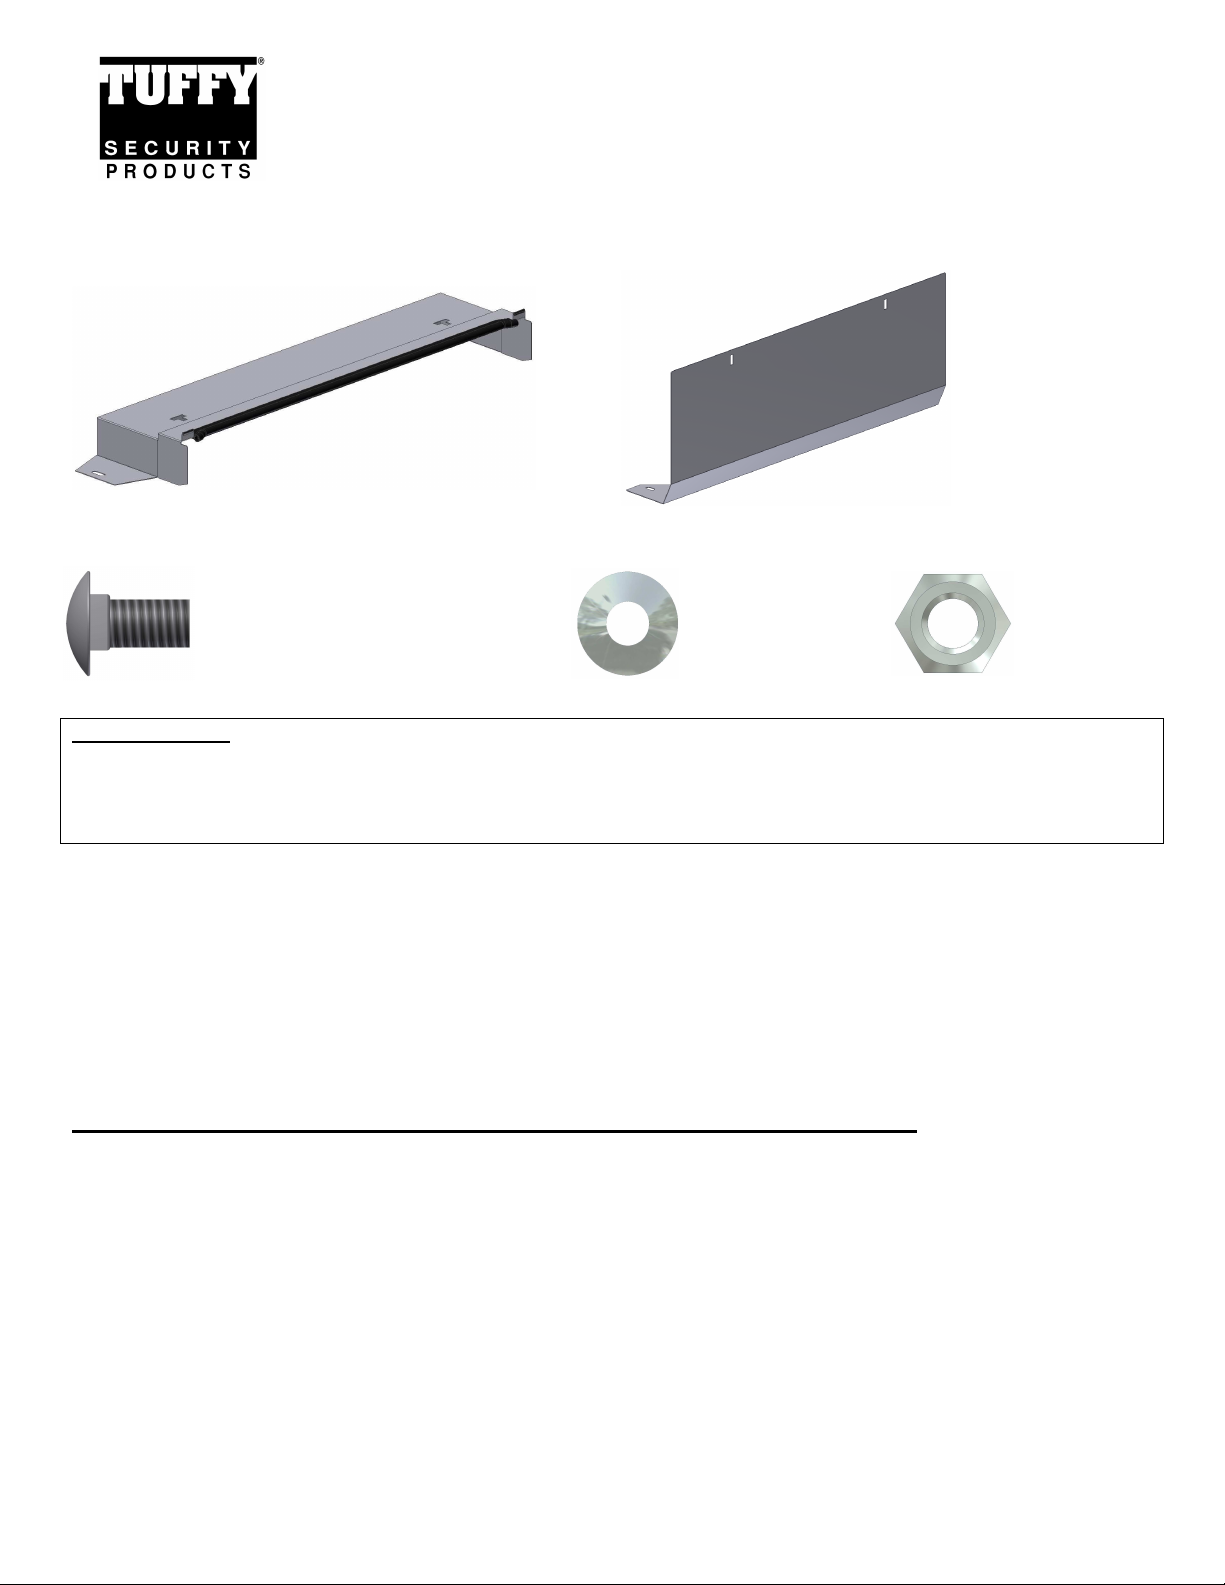
PARTS CHECKLIST
INSTALLATION INSTRUCTIONS
JEEP YJ TAILGATE SECURITY ENCLOSURE #297
Call (970) 564-1762 for Technical Support
#1 Lid (with pre-installed edge trim pieces)
SHIPPING PACKAGE CHECKLIST
#4.1 - (2) 5/16-18 x 3/4” CARRIAGE BOLTS #4.2 - (2) 5/16” WASHERS #4.3 - (2) 5/16-18 NUTS
TOOLS NEEDED
• 1/2” socket
• 9/16” socket
• 5/8” socket
• Socket wrench
#2 Front Panel
ATTENTION:
• THIS ENCLOSURE WAS DESIGNED FOR A STOCK OEM VEHICLE, ANY MODIFICATIONS MADE
MAY AFFECT THE FIT INCLUDING: CARPET REMOVAL/CHANGES, SEATS, ETC.
•
Jeep Wrangler YJ vehicles have Manual Door Locks only! The rear tailgate lock must be locked
manually with key in order for the Tuffy enclosure to function as a secure storage device.
•
For safety do not place any items on top of the enclosure that are not adequately secured to the
vehicle to prevent movement in the event of an accident or abrupt speed changes.
PLEASE READ ALL INSTRUCTIONS THOROUGHLY BEFORE STARTING INSTALLATION.
1. IMPORTANT! Make sure the vehicle is parked on a flat surface, placed in park, and the emergency brake is
activated.
2. Fold and tumble the rear seat forward temporarily to allow plenty of access for installation. The seat can be set
upright again following installation.
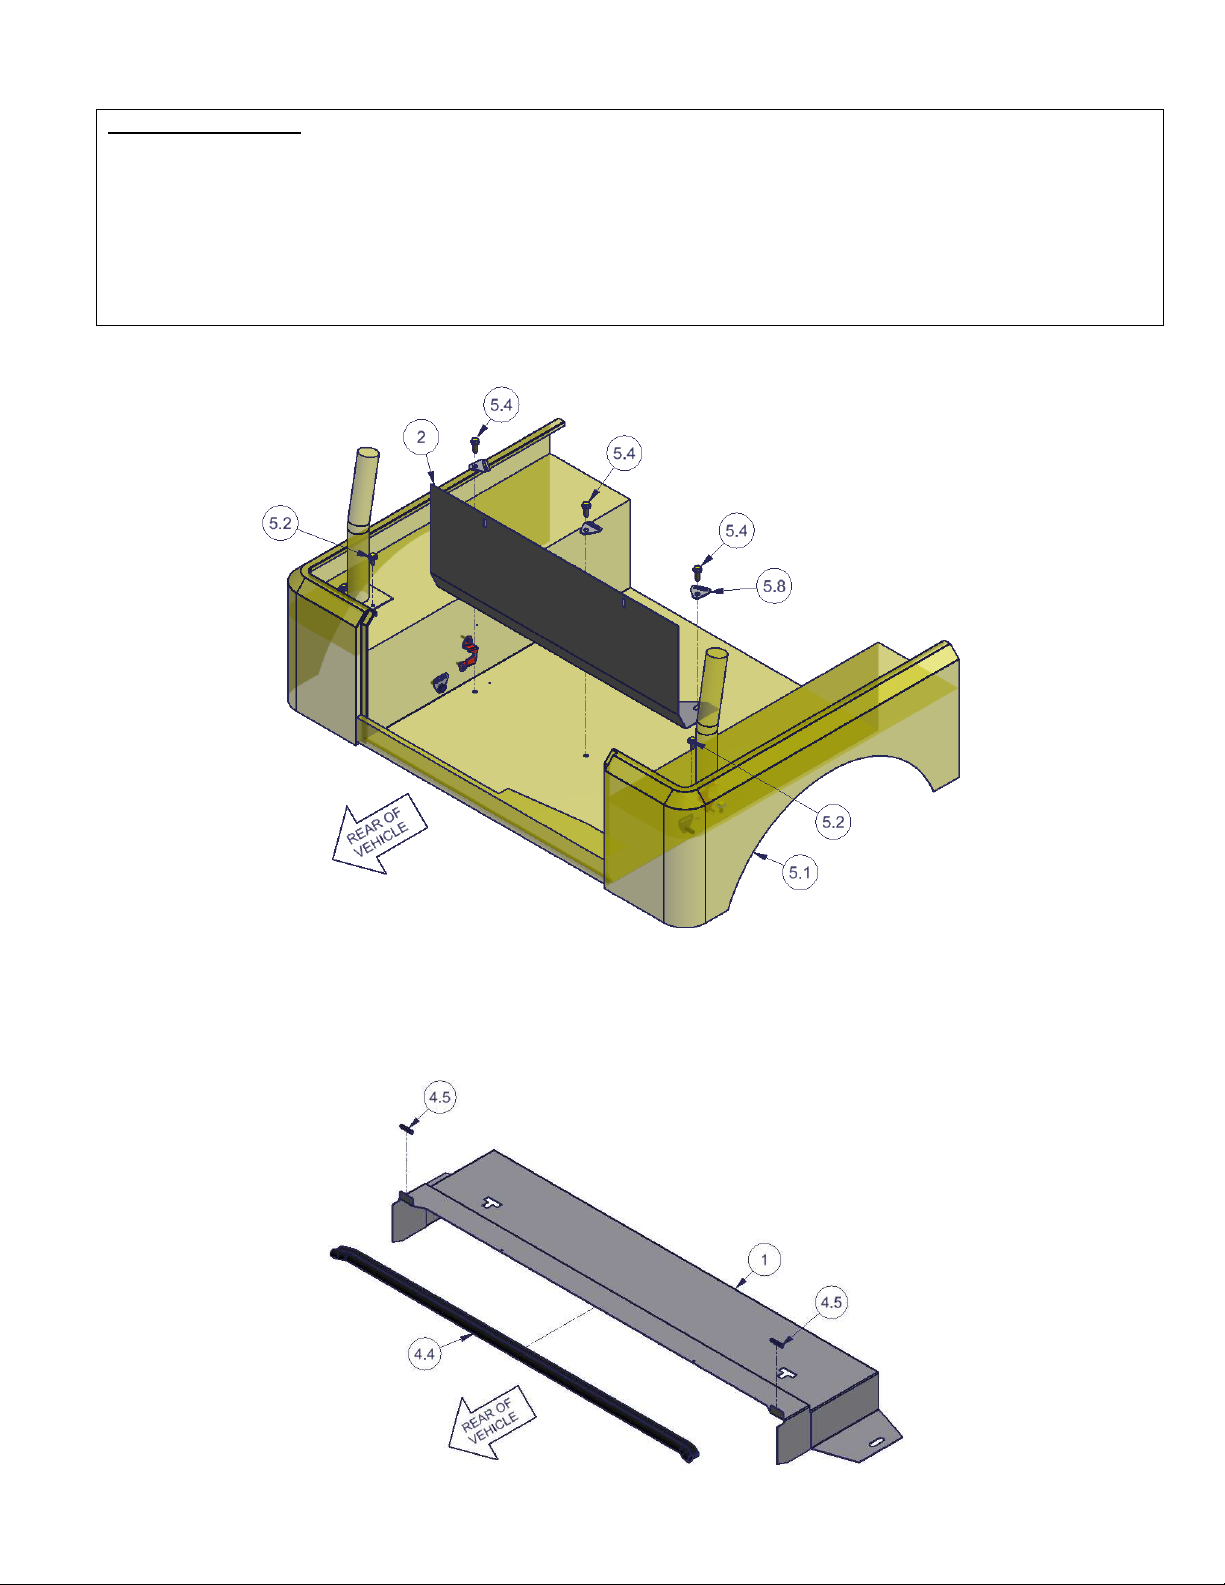
3. Remove the (3) #5.4 OEM seat belt bracket bolts for each of the #5.8 OEM rear seat belt brackets, as illustrated.
Remove the inboard (2) #5.2 OEM roll bar bolts, as illustrated. (Figure 1)
4. Position the #2 Front Panel in the vehicle and align the obround holes in the mounting flange with the (3) rear seat
belt bracket holes, as illustrated. Re-Install the #5.4 bolts and #5.8 seat belt brackets in their original locations. Do
not tighten bolts at this time. (Figure 1)
Page 1 of 3 – 10/23/2012 – Rev 10/23/12
Page 2
INSTALLER NOTES:
***Note: The #2 Front Panel is designed to fit snugly between the carpeted #5.1 cargo area walls. When positioning
the #2 Front Panel into the vehicle, lower the panel evenly to prevent binding as the panel is positioned.
***Note: 1992-1995 YJ vehicles may not feature the outboard two #5.8 floor mounted seat brackets, but should
feature the center seat belt bracket and bolt. If desired, the two outer mounting holes may be drilled and bolted down
with hardware not included.
***Note: On 1992-1995 YJ vehicles featuring roll bar mounted rear seat belt retractors, installers may need to remove
the seat belt retractor along with the plastic cover in order to remove the two inboard #5.2 OEM roll bar bolts.
FIGURE 1
5. The #4.4 Rubber Edge Trim and #4.5 Plastic Edge Trim were installed at the factory, however if any pieces have
become dislodged during shipping, re-install these at this time. Install the #4.4 Long Rubber Edge Trim onto the rear
edge of the #1 Lid. Install the (2) #4.5 Plastic Edge Trim pieces onto the #1 Lid left and right side flanges, as
illustrated. (Figure 2)
FIGURE 2
Page 2 of 3 – 10/23/2012 – Rev 10/23/12
Page 3

6. Install the #1 Lid with trim pieces into the vehicle by positioning the rear edge side tabs under the hardtop mounting lip
at the rear of the vehicle body and tilting the Lid downwards to meet up with the #2 Front Panel. The #1 Lid is
intended to lap over the front of the #2 Front Panel. (Figure 3)
FITMENT AND SEALING NOTES:
***Note: Be sure to fully insert the #1 Lid rear tabs under the hardtop mounting lip before tilting the Lid downwards.
***Note: Be sure to keep the rubber edge trim in position when installing the #1 Lid.
FIGURE 3
7. Install the (2) #4.1 carriage bolts from the front of the installed enclosure. Install the (2) #4.2 washers and (2) #4.3
nuts from inside the enclosure. The two panels have slotted mounting holes to allow for the tailoring of the enclosure
fit and position – it may be necessary to raise or lower the #1 Lid a small amount. Pull the #1 Lid rearward as far as
possible. Re-install the #5.2 OEM roll bar bolts and tighten to factory specifications. Tighten the #4.3 nuts to 15 ft-lbs.
Finally, tighten the #5.4 OEM bolts to factory specifications. (Figure 4)
FIGURE 4
Call (970)564-1762 for Technical Support
Page 3 of 3 – 10/23/2012 – Rev 10/23/12
 Loading...