

Page 1
INSTALLATION INSTRUCTIONS
JEEP 1987-1995 YJ Hood Lock #295
Call (970) 564-1762 for Technical Support
Please read and fill out the enclosed warranty registration card to activate your warranty.
PARTS CHECKLIST
#1 Hood Lock
TOOLS NEEDED
• 7/16” socket and wrench
• 3/8” socket and wrench
ATTENTION:
• THIS HOOD LOCK WAS DESIGNED FOR A STOCK OEM VEHICLE, ANY MODIFICATIONS MADE TO
THE GRILLE, RADIATOR, ETC MAY AFFECT THE FIT.
PLEASE READ ALL INSTRUCTIONS THOROUGHLY BEFORE STARTING INSTALLATION.
1. IMPORTANT! Make sure the vehicle is parked on a flat surface, placed in park, and the emergency brake is
activated.
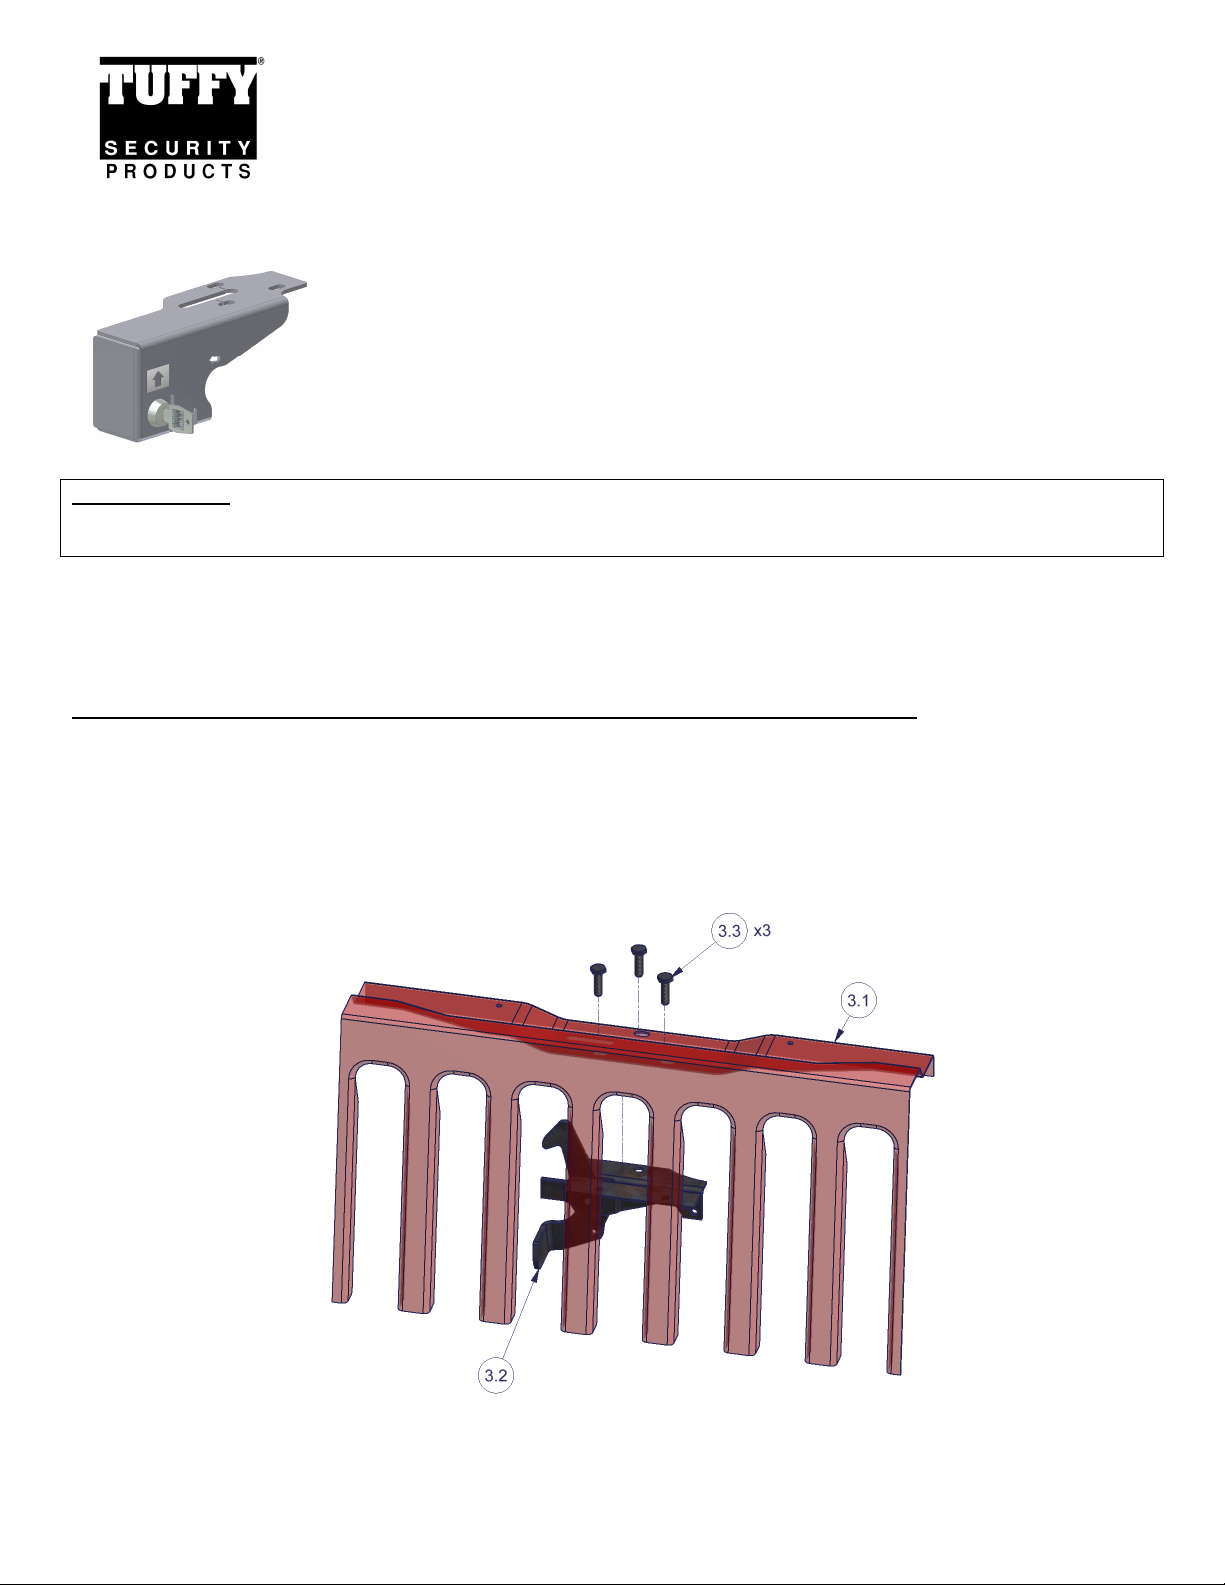
2. Raise the vehicle hood. Remove the (3) #3.3 OEM hood latch bolts. Reaching through the grille, lower the #3.2 OEM
hood latch and temporarily place it at the bottom of the grille. It is not necessary to remove the #3.2 hood latch from
the vehicle. (Figure 1)
FIGURE 1
3. Test various locations for access to install the #1 Hood Lock into the space between the #3.1 grille and the #3.5
radiator. Depending on your vehicle, it may be possible to install the #1 Hood Lock up from the bottom of the vehicle
Page 1 of 3 – 7/26/2012 – Rev 7/26/12
Page 2
between the grille structure and the radiator. However, it may be necessary to remove the two upper radiator
mounting bolts and carefully push the top of the radiator rearward (away from the grille) while simultaneously dropping
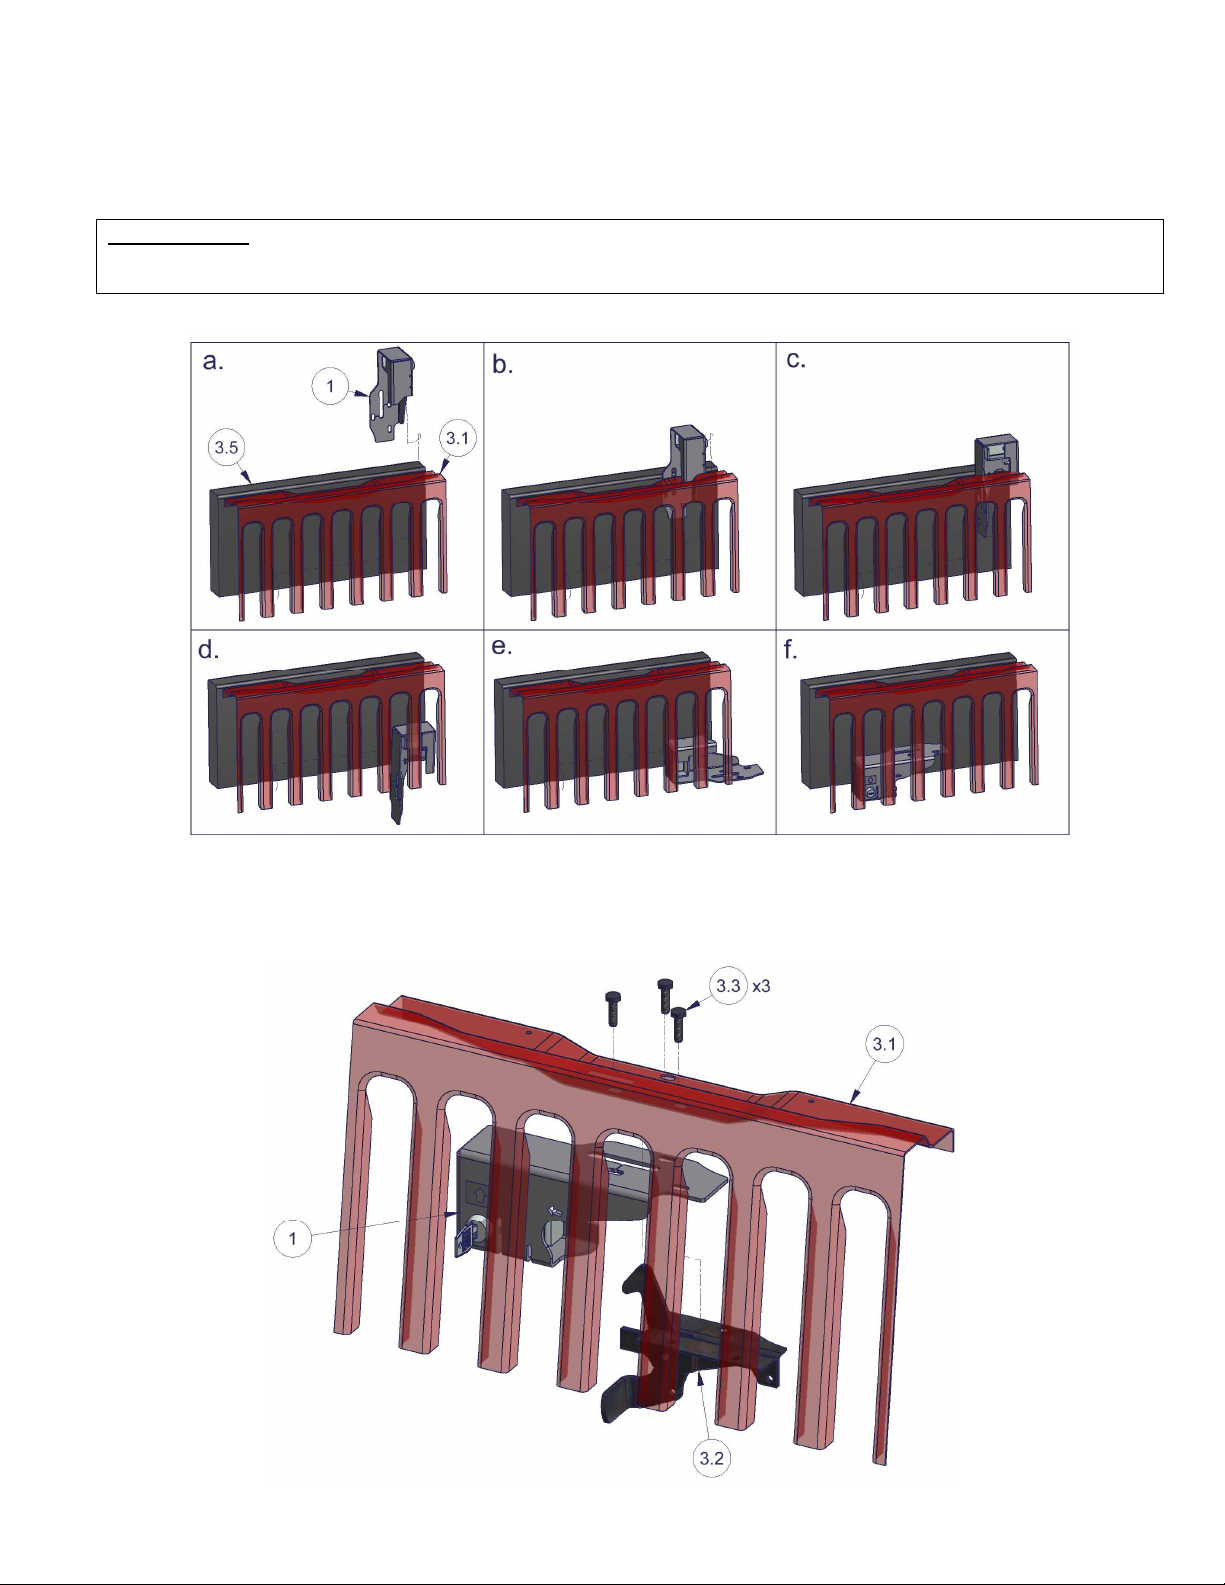
the #1 Hood Lock down between the radiator and the grille. The #1 Hood Lock can be inserted between the #3.1
grille and the #3.5 radiator with the mounting flange first (Figure 2a-2b), then using a twisting motion, turn the #1 Hood
Lock body narrow dimension down between the radiator and grille (Figure 2c). Finally spin the Hood Lock around as
illustrated to get it into position to receive the OEM hood latch. (Figure 2d-2f)
INSTALL TIPS:
**Note: To help keep the #1 Hood Lock from getting scratched when installing, wrap the hood lock in the 2 pieces of
foam wrap that the item was packaged in when shipped.
FIGURE 2
4. Next, raise the #3.2 OEM hood latch up into the #1 Hood Lock. Install the #1 Hood Lock along with the #3.2 hood
latch up to the grille mounting surface and re-install the (3) #3.3 OEM hood latch bolts. Only hand-tighten bolts at this
time. (Figure 3)
FIGURE 3
Page 2 of 3 – 7/26/2012 – Rev 7/26/12
Page 3

5. Make final adjustments for proper Hood Lock function. Move the #3.2 OEM hood latch as far to the left as possible.
While holding the #3.2 hood latch in position, adjust the #1 Hood Lock to the right. Position the #1 Hood Lock as far
right as possible WHILE STILL ALLOWING THE LOCK TO CYCLE FREELY WITHOUT RUBBING THE #3.2 HOOD
LATCH. Tighten the (3) #3.3 OEM hood latch bolts to factory specifications. Finally, test the lock operation to verify
the lock and cam can cycle freely without rubbing. With the lock in the unlocked position (turn key counter clockwise),
close the hood. Lock the hood lock (turn key clockwise). Push the #3.2 hood latch lever to the left until it stops
against the #1 Hood Lock cam and VERIFY THAT THE HOOD CANNOT BE OPENED. If the hood cannot be
opened you have successfully adjusted the Hood Lock for proper function.
FIGURE 4
Call (970)564-1762 for Technical Support
Page 3 of 3 – 7/26/2012 – Rev 7/26/12
 Loading...