

Page 1
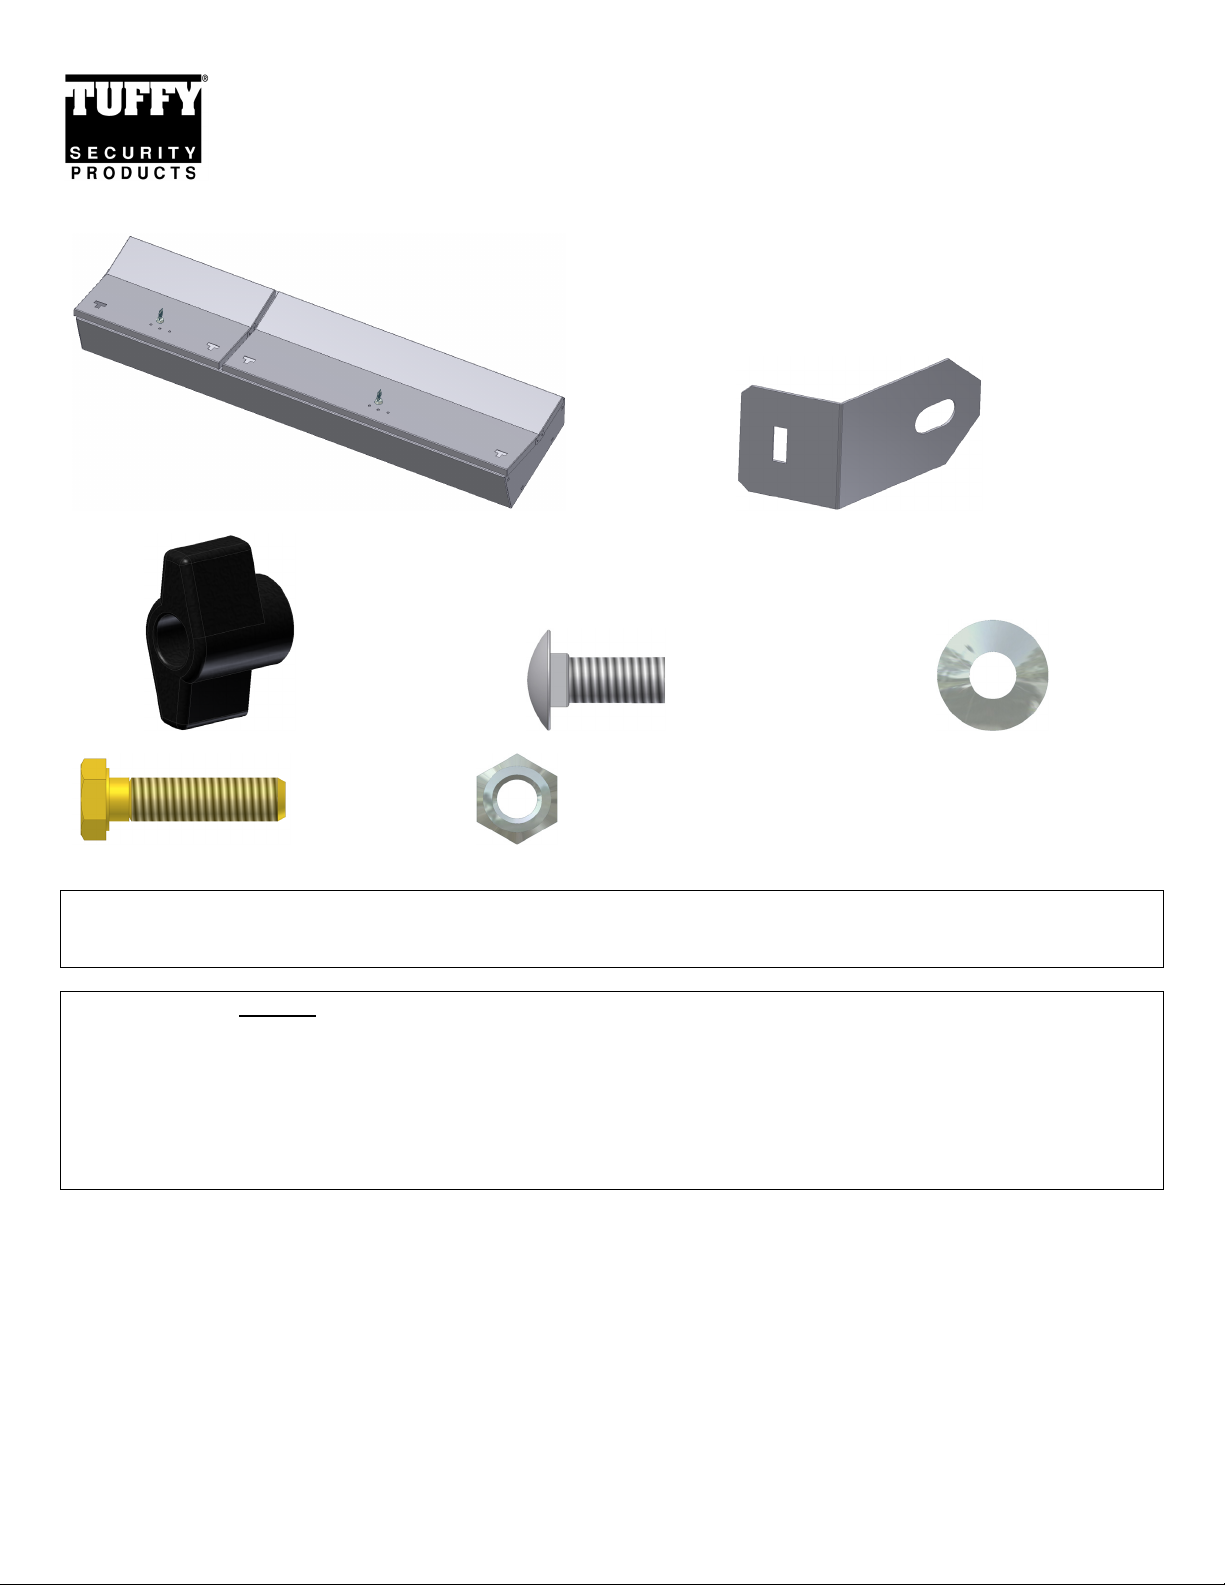
PARTS CHECKLIST
INSTALLATION INSTRUCTIONS
Ford F150 full width under rear seat lockbox (w/o subwoofer) #283
Please read and fill out the enclosed warranty registration card to activate your warranty.
LOCKBOX #283 (2) #8 MOUNTING BRACKETS
#16.2 (2) 5/16 WING KNOB NUTS #16.1 (2) 5/16 x 3/4” CARRIAGE BOLTS #16.3 (4) 5/16 WASHERS
#16.5 (1) 5/16 X 1 ¼ BOLT #16.6 (1) 5/16 NUT
Tools needed for standard installation
18mm Socket and Ratchet
Large flat head screwdriver
Tools needed for optional additional security if desired
Electric drill
3/8” Drill bit
Marker or pencil
Knife
½” Socket and ratchet
½” Wrench
Silicone sealant (Recommended)
Page 1 of 3 - 9/12/2011 – Rev091211
Page 2
PLEASE READ ALL INSTRUCTIONS THOROUGHLY BEFORE STARTING INSTALLATION.
1. Flip both rear seats up so they are secured in the upright position.
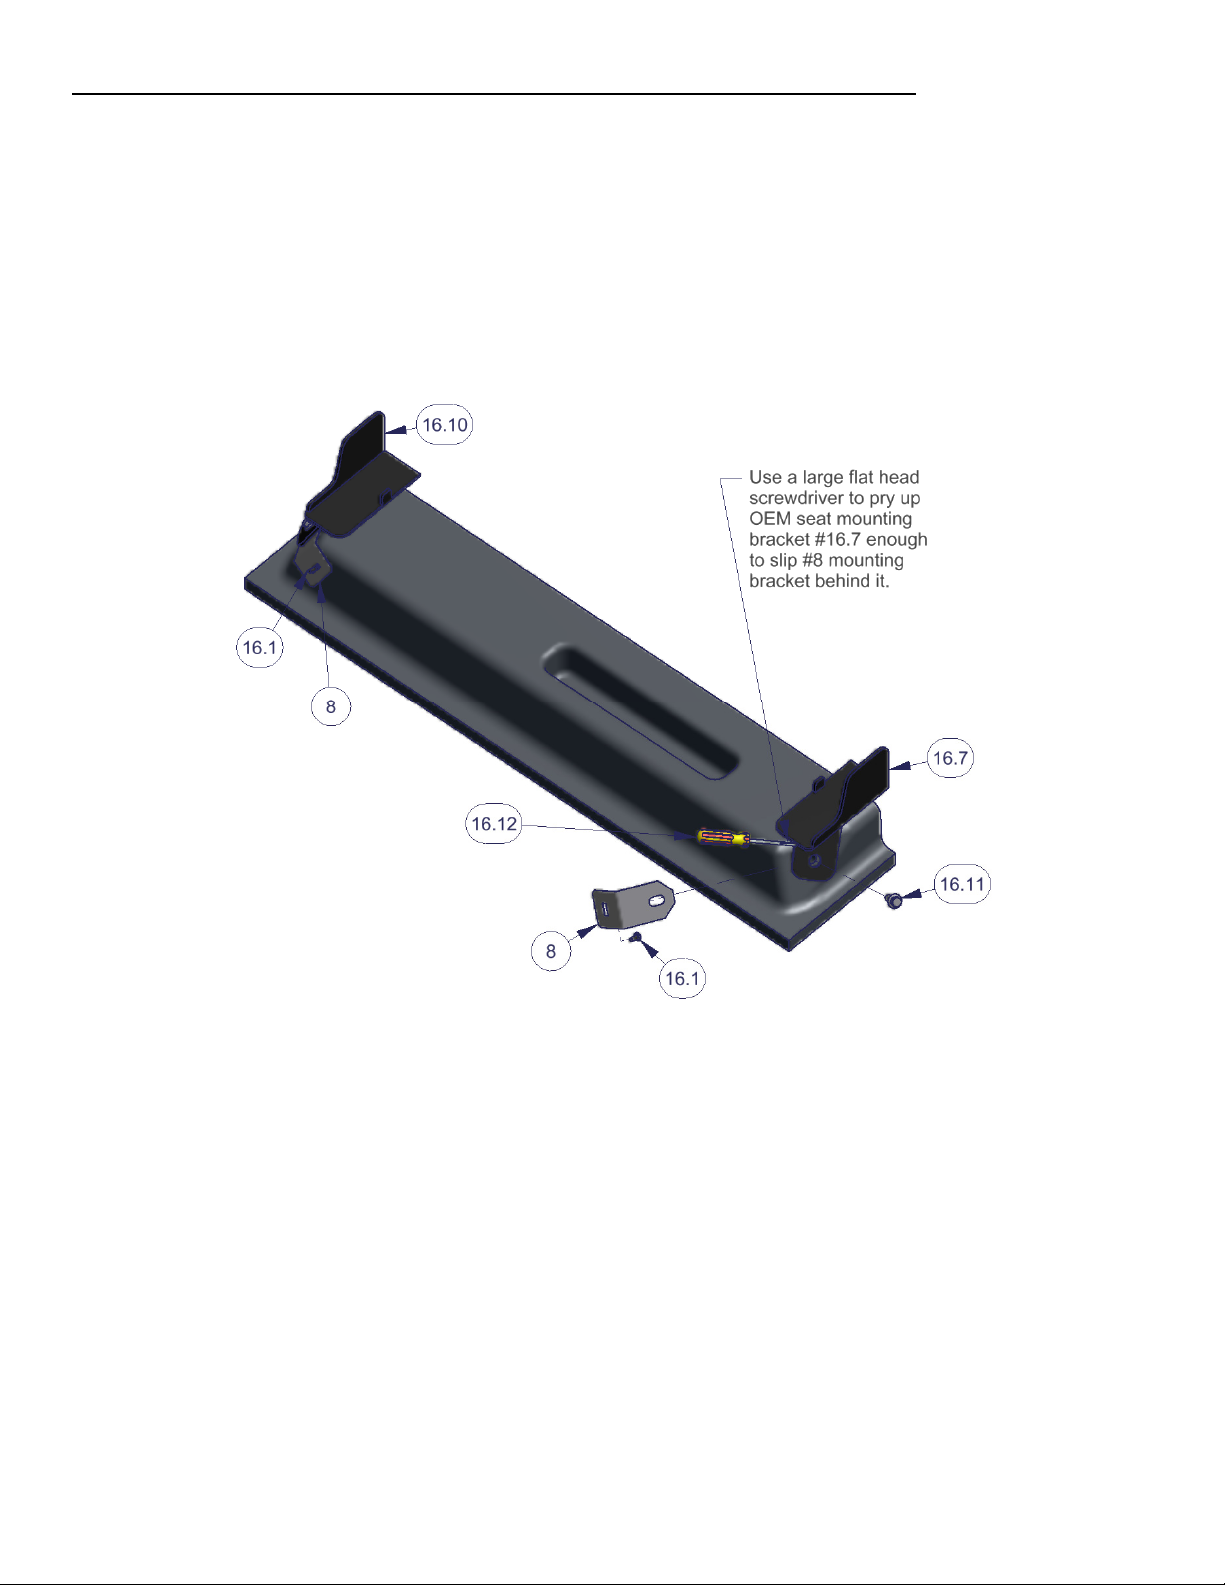
2. Remove the #16.11 OEM original seat mounting bracket bolts from the vehicle, you will reuse these. (See Figure 1)
3. Use a large flat head screwdriver #16.12 to pry the OEM original #16.7 and #16.10 seat mounting brackets up to create a gap
large enough to insert the #8 Tuffy mounting brackets behind them. (See Figure 1)
4. Insert the #16.1 carriage bolts, from the backside, in the rectangle slot on #8 mounting brackets. (See Figure 1)
5. Insert the #8 mounting brackets as deep as possible so the head of #16.1 Carriage bolt is sandwiched snuggly between the vehicle
carpet and the #8 mounting bracket so it can be easily positioned and remain in the desired location within the slot. This will help
when aligning the holes in the lockbox with the bolt. (See Figure 1)
6. Place the lockbox in the vehicle. Check that the #16.1 Carriage bolts are at the same height as the corresponding slots in the
backside of the lockbox then reinstall the #16.11 OEM original seat mounting bracket bolts and tighten. (See Figure 1)
Figure 1
Page 2 of 3 - 9/12/2011 – Rev091211
Page 3

7. Guide the slots on the backside of the lockbox onto the #16.1 Carriage bolts. (See Figure 2)
Important! Align the lockbox left to right so the center of the gap between the two lids match the center of the gap between
the 60/40 split in the OEM seats. Carefully check each lid operation to ensure they do not rub or snag on the seats which may
result in damage to the seat.
8. After aligning the lockbox with the seats, mount it to the vehicle by fastening the #16.3 Washers and #16.2 Wing knob nuts to the
#16.1 Carriage bolts.
9. After tightening all the hardware check the alignment with the seats again and adjust as necessary.
Figure 2
Optional additional security if desired
Note: The quick removal feature will not be usable if this additional security hardware is installed. (Removing the wing knob
nuts that are only accessible when the lockbox is unlocked then removing the lockbox)
10. Using a marker or pencil, mark (1) spot through any of the 3/8” mounting holes in the bottom of the box.
Warning! Make sure that there is nothing under the vehicle that will be damaged by the drill bit when drilling.
11. Remove the box. Cut the carpet at the marked hole. Using a 3/8” drill bit, drill out the marked spot in the floor. (Drilling a
smaller pilot hole is helpful)
12. It is recommended to use silicone sealant in any holes drilled in the vehicle to prevent rusting.
13. Fasten down the box using the hardware provided. (For security, it is best to insert the bolts from underneath the vehicle.)
Call (970)564-1762 for Technical Support
Page 3 of 3 - 9/12/2011 – Rev091211
 Loading...