

Page 1
INSTALLATION INSTRUCTIONS
DIVIDER KIT REF #168, #172, #259
Please read and fill out the enclosed warranty registration card to activate your warranty.
#23.1.1 - Large dividers per drawer #23.1.2 - Small dividers
HARDWARE PACKAGE (Hardware & quantities may vary)
#23.1.3.5 - 10-32x5/8” Screws #23.1.3.3 - 10-32x1/2” Screws #23.1.3.4 - 10-32 Nuts
#23.1.3.1 - 8-32x1/2” Flat head screws #23.1.3.2 - 8-32 Nuts #23.1.3.6 - ¼” x ¾” Self tapping screws
TOOLS AND SUPPLIES NEEDED
• Phillips head screwdriver
• 3/8” & 11/32” Nut driver, socket & ratchet or wrench
INSTALLATION
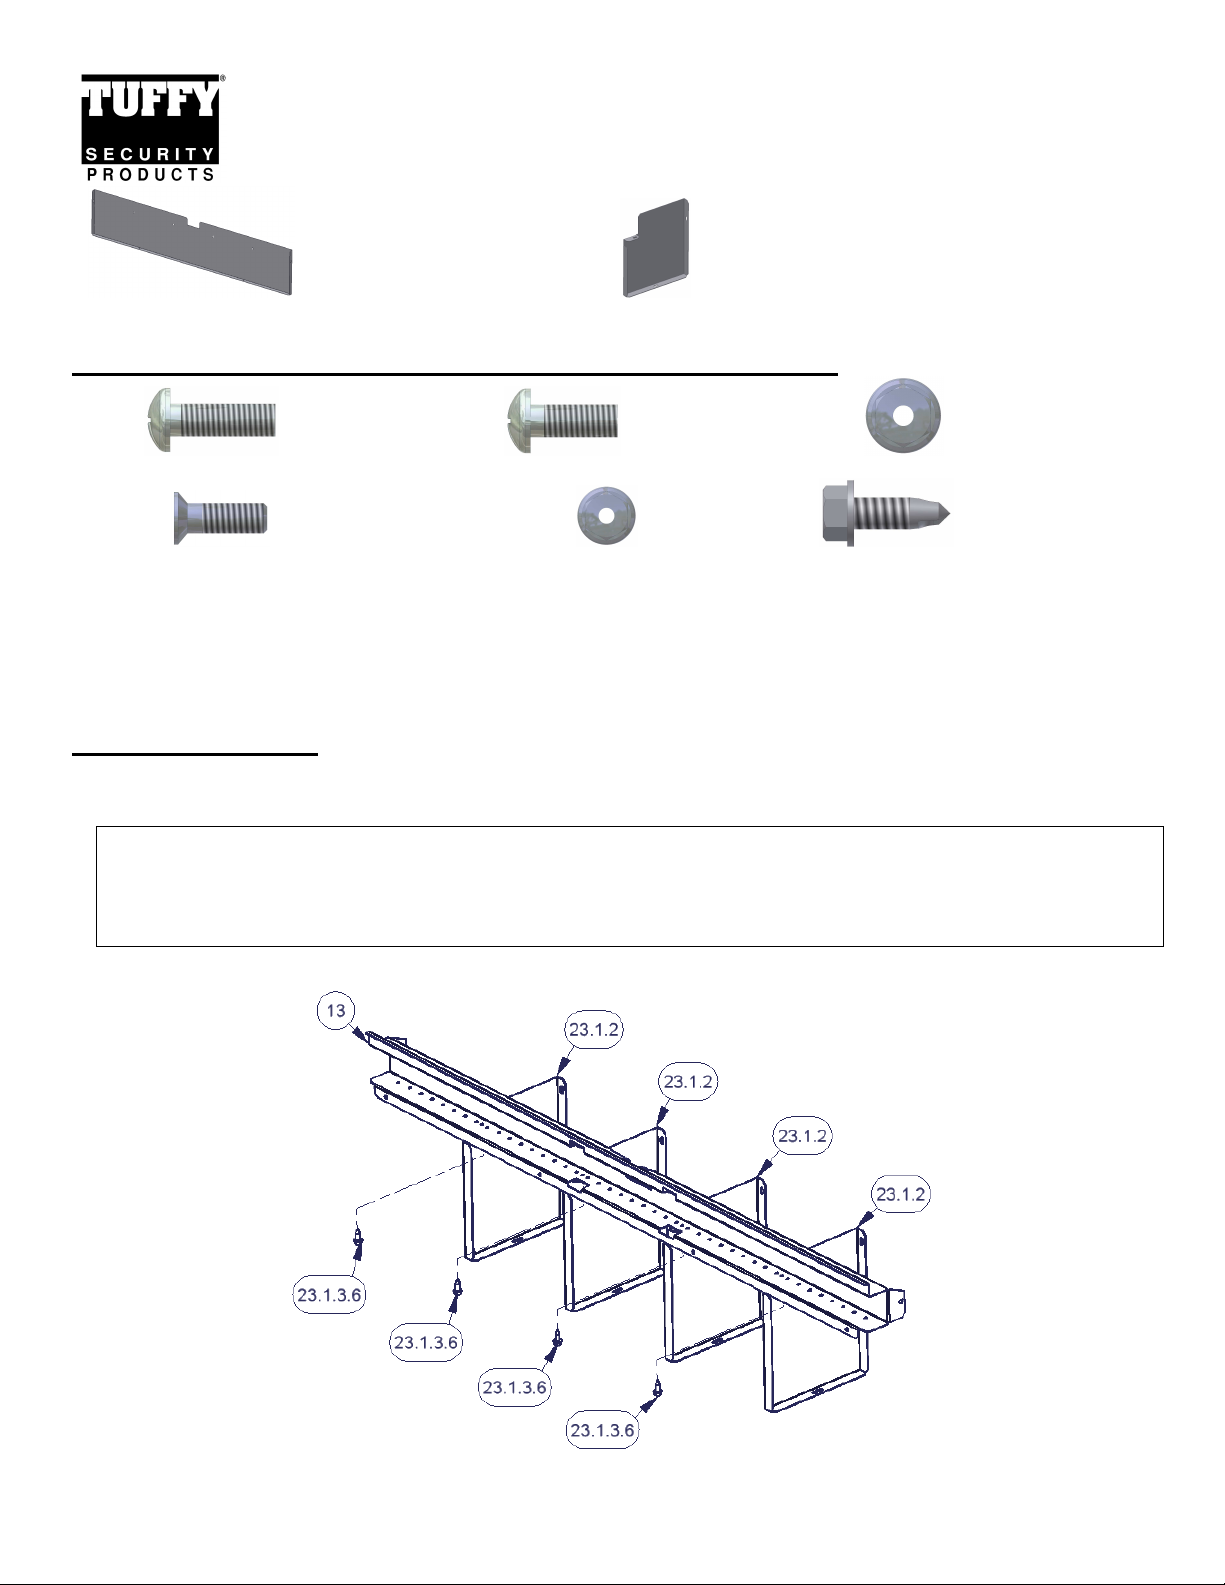
1. Fasten #23.1.2 dividers to the latch cover #13 (Already installed in the drawer) using the illustrated hardware #23.1.3.6 self
tapping screws. Side by side drawers have the dividers split between both drawers. (See Figure 1)
Note: On some drawer models the #23.1.3.6 Self tapping screws cannot be used because the mounting holes in the bottom of the
front latch cover #13 are to large and therefore #23.1.3.5 Screws and #23.1.3.4 Nuts will need to be substituted. In this case the
latch cover #13 will need to be removed from each drawer to install the dividers. To remove the #13 latch cover unfasten the
screws to the latch, the screws and nuts to the drawer face and the screws & nuts on each side. Then fasten the #23.1.2 dividers to
the latch cover #13 using the #23.1.3.5 screws and #23.1.3.4 nuts and refasten the #13 latch cover.
FIGURE 1
2. Fasten the bottom of #23.1.2 dividers to the bottom of the drawer using #23.1.3.5 screws and #23.1.3.4 nuts. (See Figure 2)
Page 1 of 2 - 5/19/2011 – Rev011907
Page 2
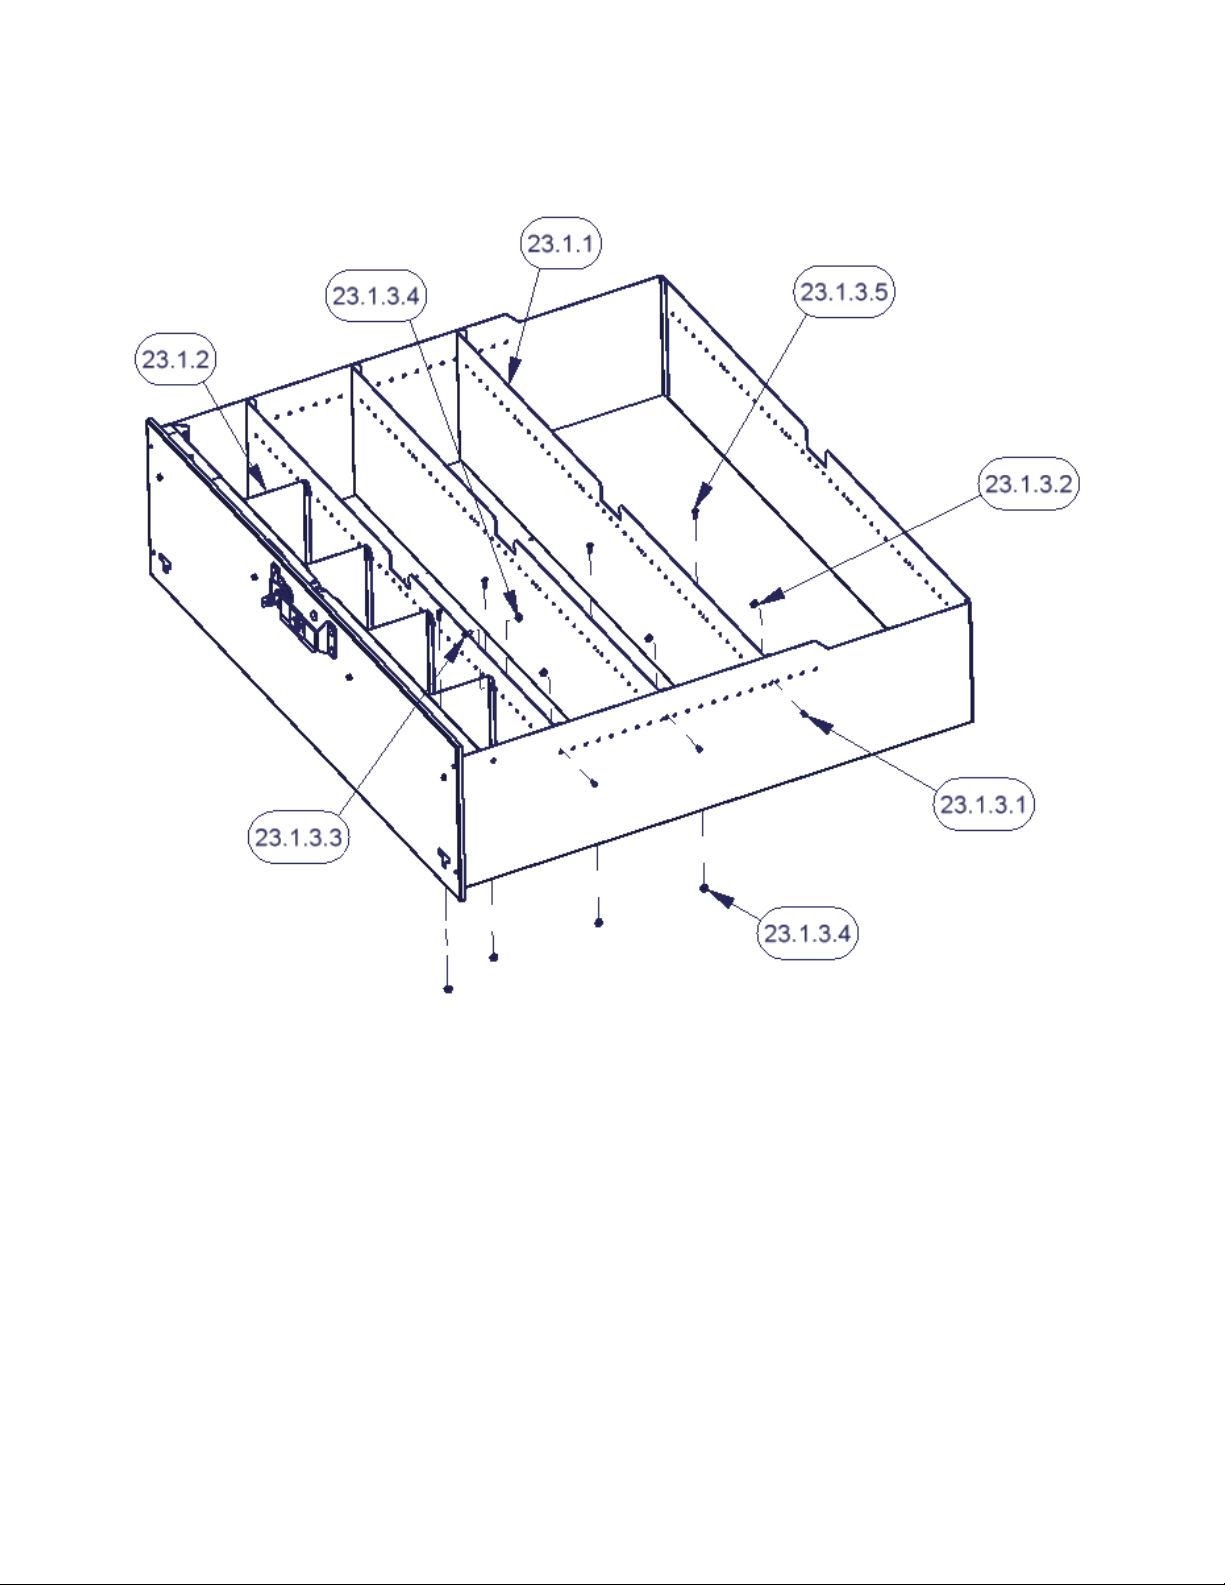
3. Install the #23.1.1 dividers in each drawer using the illustrated hardware. The front divider must be mounted in the first holes but
subsequent dividers can be mounted at 1 inch centers for a variety of configurations. (See Figure 2)
FIGURE 2
Call (970) 564-1762 for Technical Support
Page 2 of 2 - 5/19/2011 – Rev011907
 Loading...