

Page 1
INSTALLATION INSTRUCTIONS
JK Security Door Lockers, Part #164 & #165
Please read and fill out the enclosed warranty registration card to activate your warranty.
PARTS LIST (Part # 164 requires 4 each and Part # 165 requires 2 each of the following items)
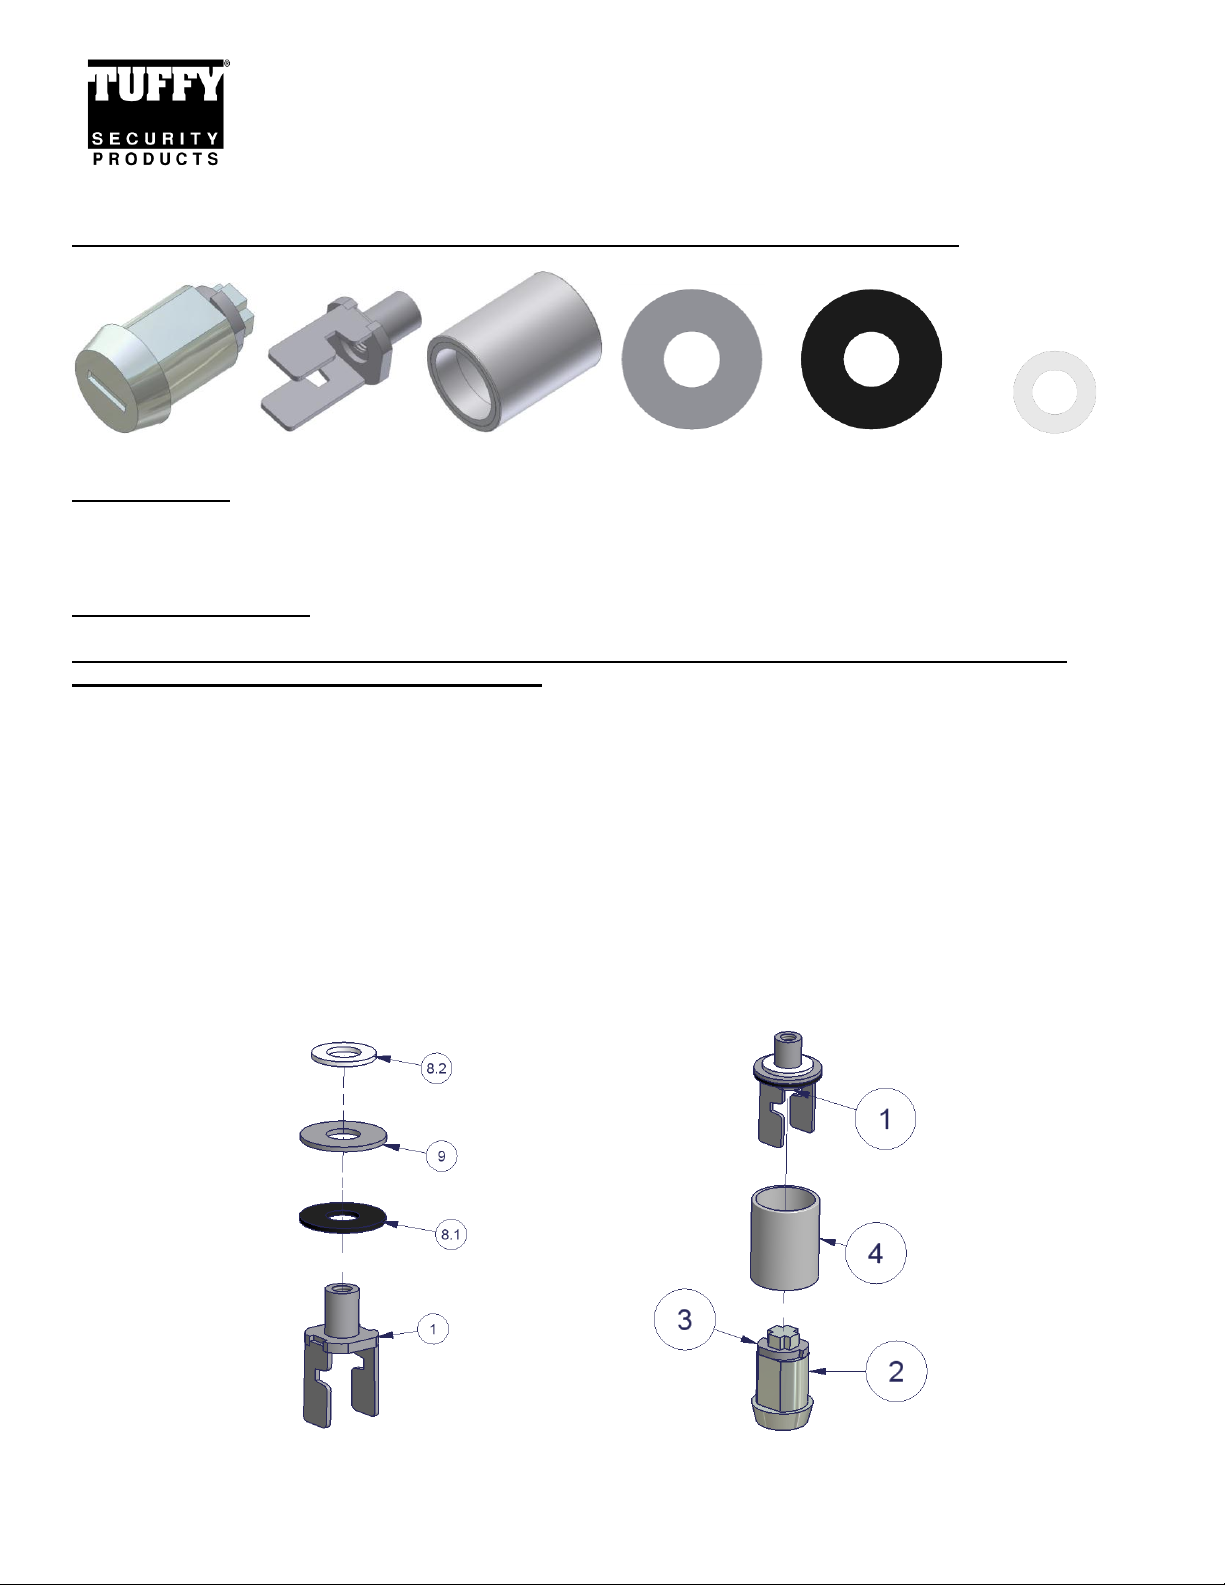
#2 Lock #1 Inside #4 Outside #9 Washer #8.1 Rubber Washer #8.2 Nylon Washer
TOOLS NEEDED
T-50 Torx Wrench
¾” Open end wrench
Loctite (Recommended)
MOUNTING DIRECTIONS
Note: Door lockers can be installed on either the upper or lower hinges (Lower is preferred), please read
complete instructions before starting installation.
1. Remove the bottom fastener from all the door hinges where the door locker will be mounted.
2. Place the #8.1 Rubber washer, #9 Washer, and then the #8.2 Nylon washer on the #1 Inside assembly as illustrated.
Then install this assembly on the door hinge using a ¾” Open end wrench. Warning! Do not overtighten or the
washers can be damaged and/or the threaded stud on the OEM door hinge can break. It is recommended to
use loctite on these threads. Opening the door can make starting the fastener easier. (See Figure 1)
3. Insert the #2 Lock assembly into the #4 Outside assembly. The #2 Lock assembly must be inserted into the correct
end of the #4 Outside assembly which has the interior tube pressed in flush. (See Figure 2)
4. Insert the Lock and Outside assembly on the #1 Inside assembly and lock with the key provided. Note the cam
orientation: When the two flats on the #3 cam are aligned with the two flats on the #2 lock it is unlocked and can only
be installed in one position. Applying pressure on the lock will make it easier while locking, unlocking and removing
and inserting the key. (See Figure 2)
FIGURE 1 FIGURE 2
Call (970) 564-1762 for Technical Support
Page 1 of 1 - 3/13/2013 – Rev122006
 Loading...