

Page 1
Please read and fill out the enclosed warranty registration card to activate your warranty.
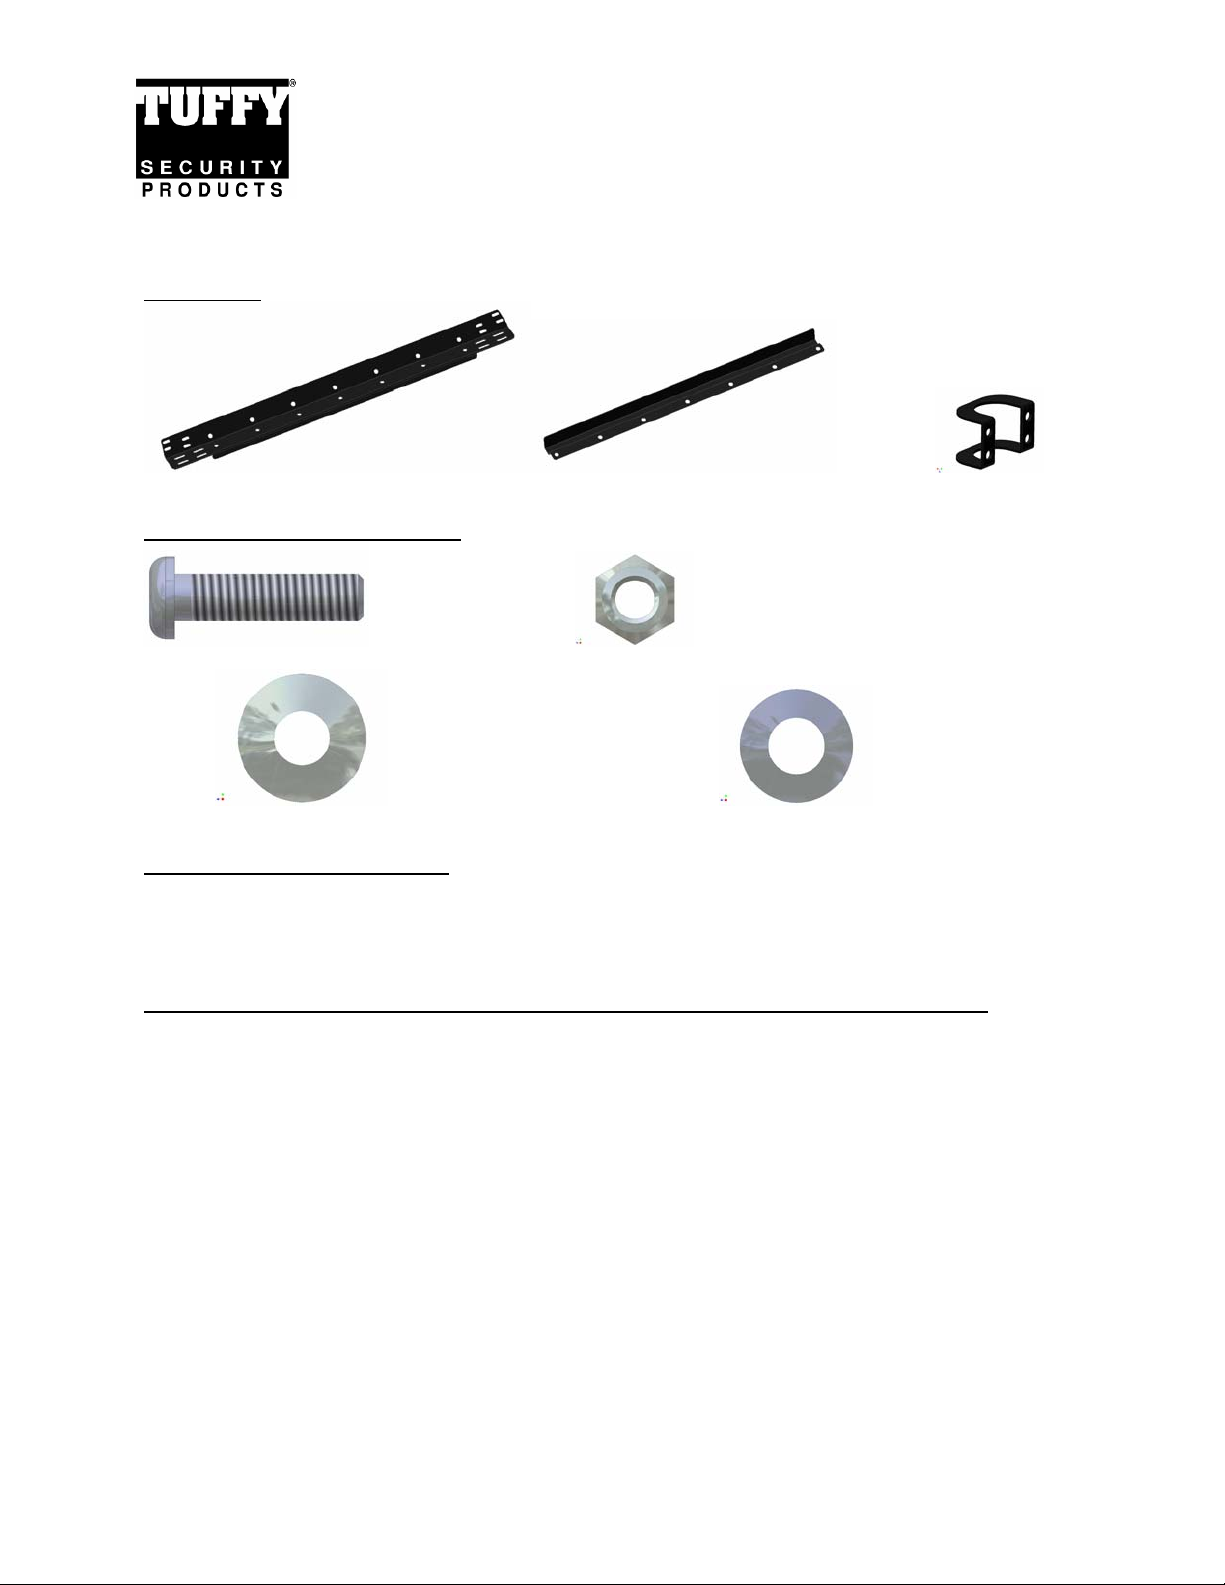
PARTS LIST
INSTALLATION INSTRUCTIONS
TOYOTA FJ CRUISER LIGHT BAR #147
This product will only mount to the OEM FJ Cruiser Factory rack.
It will not fit FJ Cruisers without the OEM factory rack.
This light bar is also designed to mount with Tuffy part#146 Roof Cargo Rack Storage Box
#2 Light mounting bracket #3 Wire Harness tray bracket #1 (2) Clamp brackets
SHIPPING PACKAGE CONTENTS
#4.8 (8) 5/16-18 X 1 ¼” Bolt #4.7 (8) 5/16 Lock-Nut
#4.5 (8) 5/16 USS Washer (Wide OD) #4.6 (8) 5/16 SAE Washer (Narrow OD)
TOOLS & SUPPLIES REQUIRED
½” box end wrench (and/or ratchet and ½” Deep well socket)
3/16 Allen wrench (or ratchet and Allen socket)
Tools and supplies required for routing and connecting wires for lights (Not included)
Lights to be mounted (Not included)
PLEASE READ ALL INSTRUCTIONS THOROUGHLY BEFORE STARTING INSTALLA TION.
Attention: Plan how the wiring for the light system will be routed and where the
switches will be mounted. Some lighting system harnesses may produce too much
heat to be mounted inside the vehicle and will cause a fire hazard. Make sure in
advance that the wire harness is long enough for your planned route and if it is possible
to add any length to it if required. Some lighting system harnesses cannot be
lengthened due to the gauge of the wire. Consult the manual that came with the lighting
system and /or the manufacturer for wiring instructions and safety warnings.
1. There are a variety of ways to route the wiring. Typically the less visible the wiring route the more difficult the
routing. Here are several suggestions and tips for various methods but there are numerous other ways
depending on the installer’s creativity and the lighting system requirements. Some lighting systems may not
be safely or practically mounted in any of these ways so consult the lighting system manual or manufacturer
in advance.
• This very clean method involves drilling but the holes must be sealed properly to avoid leaks.
o Unfasten the liner on the inside of the roof below where the passenger side front OEM rack tubing
is fastened to the roof and pull it back enough so it will not be damaged when drilling the roof
hole.
Page 1 of 3 - 1/28/2008 – Rev122006
Page 2

o Unbolt the passenger side OEM rack tubing and drill a hole in the vehicle roof under the center of
the tubing. Make sure the hole will be large enough for all the wiring, connectors and sealant to
be applied.
o Drill a hole on the inside of the passenger side OEM rack tubing so the wire harness can be
routed directly into the tubing from the light bar and down through the hole drilled in the roof of the
vehicle.
o Install the light bar as instructed below then finish these steps.
o Route the wires through the holes drilled into the vehicle. Tape or use grommets to protect the
wiring where it is routed through the drilled holes to prevent electrical problems.
o Inside the vehicle route the wires behind the windshield frame cover and behind the dash to
where the switches will be mounted and make all the wire connections according the instructions
that came with the lighting system to be mounted. Zip tie any slack behind the dash.
o Completely seal both holes using a silicone sealant or another comparable product/method.
o Reattach the interior covers and roof rack bolts.
• A non-drilling method involves routing the wires through the passenger door then behind the windshield
frame cover and dash to where the switches will be mounted. Things to consider: Large wiring
harnesses may not be easy to conceal on the roof and may create gaps in the seal where they enter the
vehicle therefore creating leaks.
• Another non-drilling method that may be a little cleaner involves routing the wires along the roof rack
tubing (or inside) then through the rear door. It would then need to be routed behind the interior covers
and or carpet to where the switches will be mounted. Things to consider: Some light systems will not
support longer wiring than what comes with them or the entire wiring harness will need to be repla ce d
with a larger gauge wire. Large wiring harnesses may not be easy to conceal on the roof and may create
gaps in the seal where they enter the vehicle therefore creating leaks.
2. Route wiring harness shown as #4.9 (not-included) through any of the 7 holes in the #2 Light mounting
bracket to the lights (not-included). Use grommets, tape or silicone sealant to protect the wires from the metal
edge to prevent electrical problems. (See Figure 1 - The #4.2 & #4.1 lights, #4.9 wire harness, and #4.4
hardware should be included with the lighting system and are only shown for illustration. A wide variety of
lighting systems and light mounting options are available.)
3. Route the wiring harnesses along the backside of #2 Light mounting bracket then place #3 Wire harness tray
bracket over wiring assembly so it is completely concealed. (See Figure 1)
4. Fasten all the lights to any of the 7 mounting spots on the #2 Light mounting bracket and the #3 Wire harness
tray bracket. Try aiming the lights at this point; it may be more difficult to adjust some lighting systems after
the assembly is mounted to the roof rack. (See Figure 1)
5. Place the light bar assembly in the final mounting position. Finish routing, connecting, and sealing the wire
harness at this point. Consult the lighting system manual for instructions. (See Figure 2)
6. Fasten the light bar assembly to the OEM roof rack tubing as illustrated using (2) #1 Clamp brackets, (8) 5/1618 x 1 ¼ button head cap screws #4.8 with (8) 5/16” USS Washers #4.5 (Wide OD), (8) 5/16-18 Nylock nuts
#4.7 with (8) SAE Washers #4.6 (Narrow OD). (See Figure 2)
NOTE: If the light bar assembly is being mounted with the Tuffy part #146 Roof cargo rack storage box
already installed the fairing location may need to be adjusted for the light bar assembly to clear.
NOTE: The light bar assembly can also be mounted on the horizontal portion of the OEM roof rack tubing by
instead fastening through the slotted mounting holes on the horizontal portion of the #2 Light bar bra cket.
(Not illustrated)
Page 2 of 3 - 1/28/2008 – Rev122006
Page 3
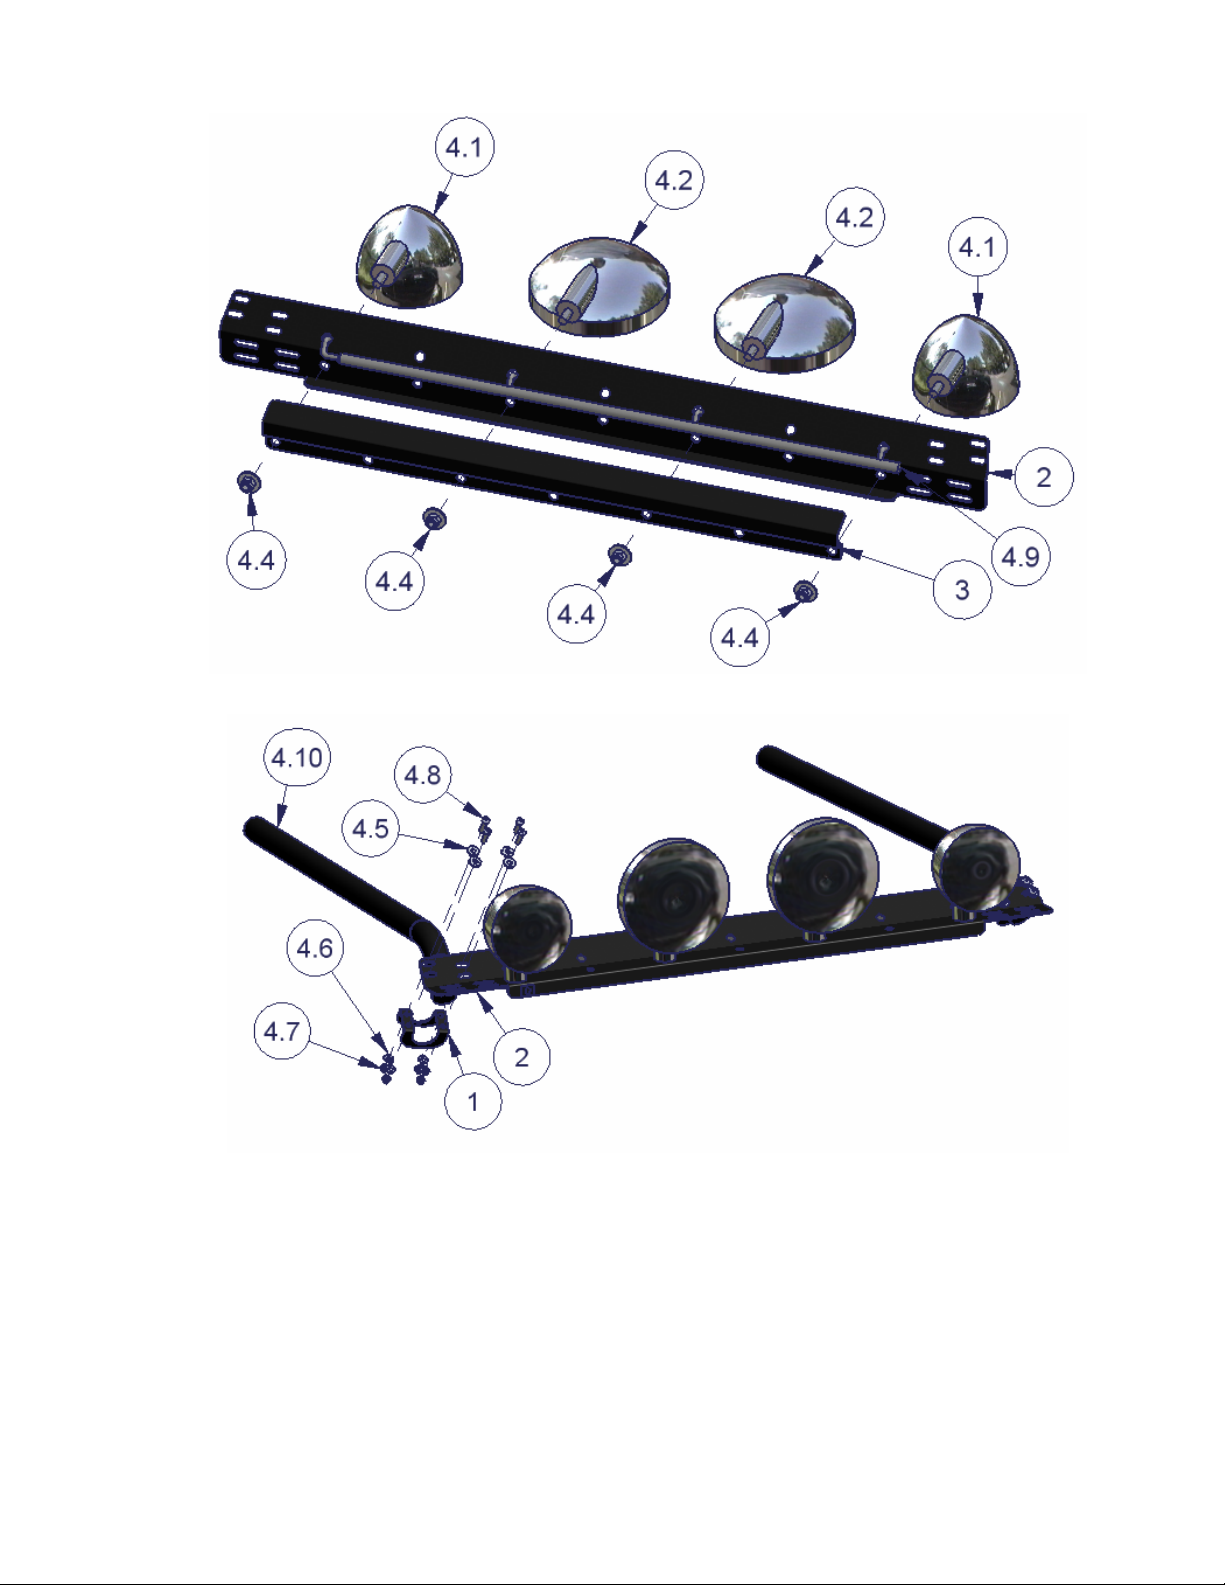
FIGURE 1
FIGURE 2
Call (970) 564-1762 for Technical Support
Page 3 of 3 - 1/28/2008 – Rev122006
 Loading...