

Page 1
INSTALLATION INSTRUCTIONS
#1 Bracket, Hood Lock
#5.3 – ¼-20x1” BOLT
#5.1 - (2) ¼” SAE WASHERS
#5.2 – ¼-20 NYLOCK NUT
JEEP TJ & LJ Hood Lock #137
Please read and fill out the enclosed warranty registration card to activate your warranty.
PARTS CHECKLIST
SHIPPING PACKAGE CHECKLIST
TOOLS NEEDED
7/16” socket and wrench
ATTENTION: THIS HOOD LOCK WAS DESIGNED FOR A STOCK OEM VEHICLE, ANY MODIFICATIONS MADE TO
THE GRILLE, RADIATOR, ETC MAY AFFECT THE FIT.
PLEASE READ ALL INSTRUCTIONS THOROUGHLY BEFORE STARTING INSTALLATION.
1. IMPORTANT! Make sure the vehicle is parked on a flat surface, placed in park, and the emergency brake is
activated.
2. If you purchased a #091 dust cover, install it prior to mounting the hood lock to the vehicle. See instructions
appendix A located at the end for installation).
3. Raise the vehicle hood and prop it open.
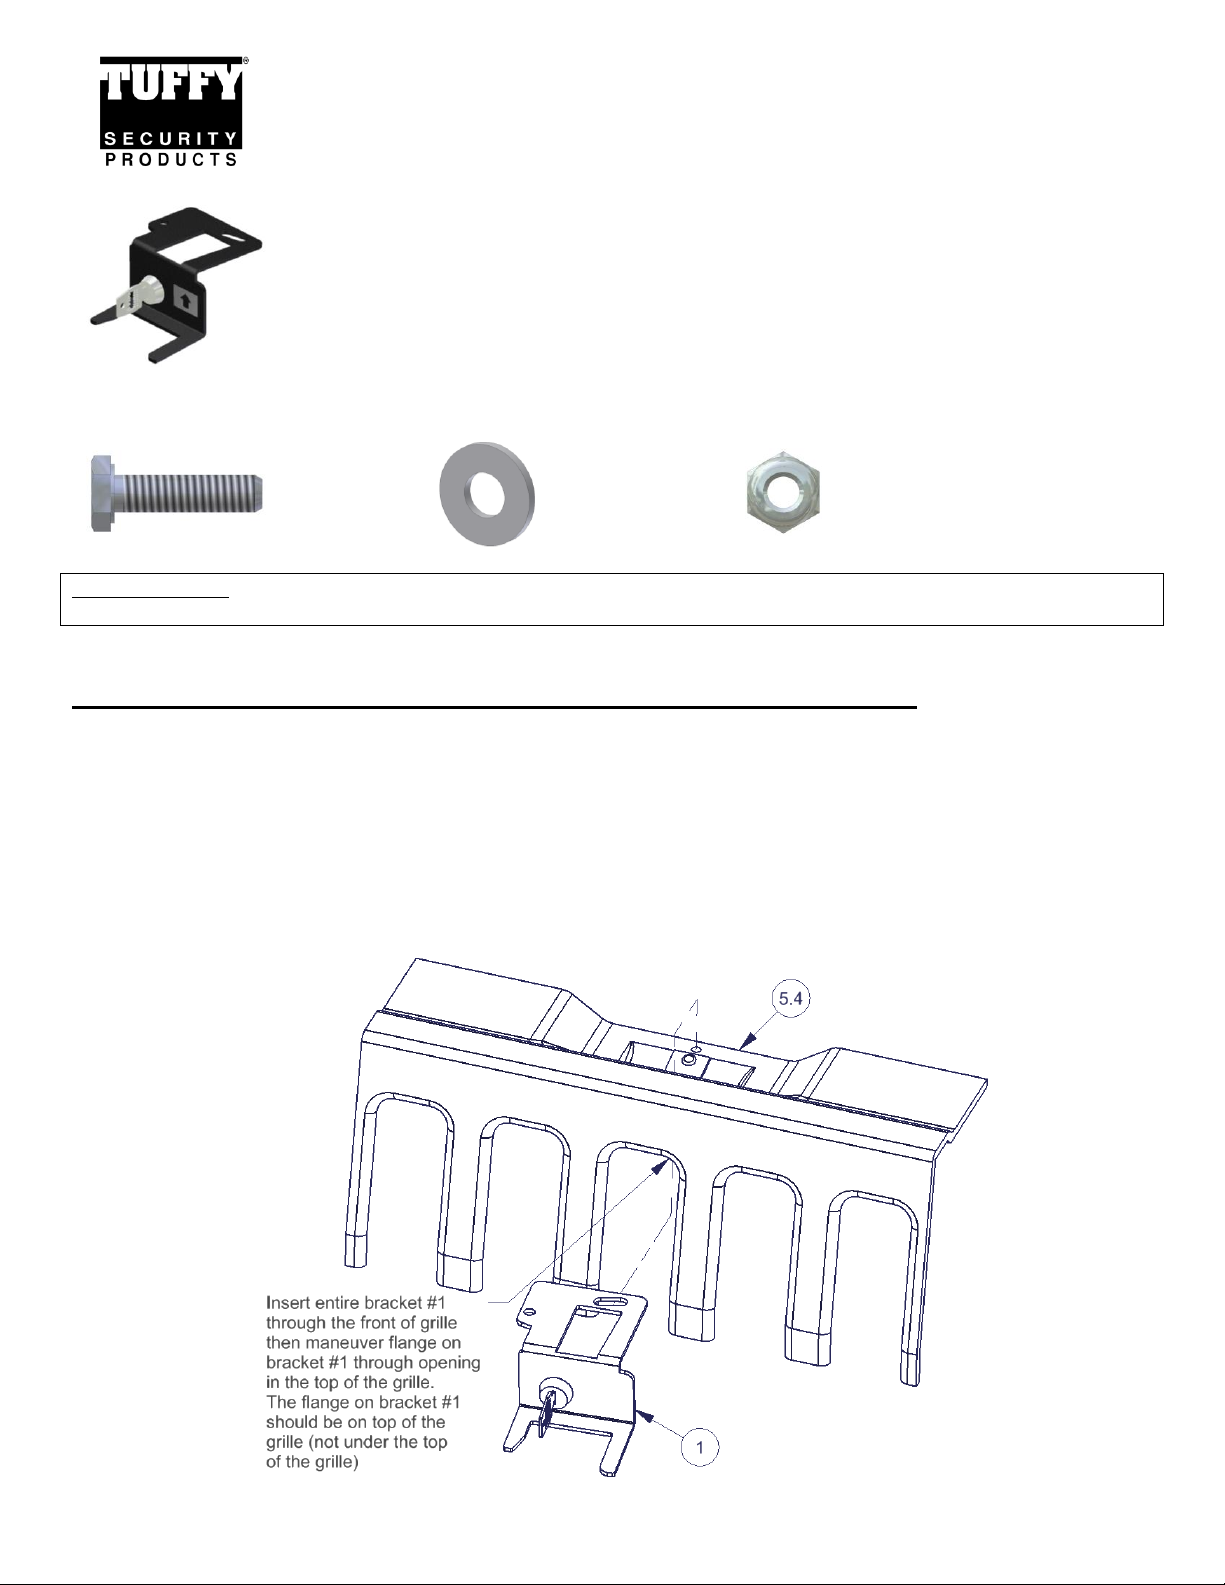
4. Maneuverer the #1 Bracket through the front of the grille #5.4 then insert the flange on the #1 bracket up through the
rectangle slot in the top of the grille #5.4 and line up the holes as illustrated. (See Figure 1 & 2)
FIGURE 1
Page 1 of 2 – Rev 030712
Page 2

5. Fasten the flange on the #1 bracket to the top of the grille as illustrated using the hardware provided. Before
completely tightening the hardware check that the latch in the hood will clear the #1 bracket hood lock assembly when
the hood is closed and that the key can be removed in the locked and unlocked position. Rotate the key clockwise to
the unlocked position and counterclockwise to the locked position to test. Reposition the #1 bracket as needed for
clearance then tighten the hardware. (See Figure 2)
FIGURE 2
Appendix A instructions
Call (970)564-1762 for Technical Support
Page 2 of 2 – Rev 030712
 Loading...