

Page 1
INSTALLATION INSTRUCTIONS
REAR CARGO SECURITY LOCK-BOX #046
Please read and fill out the enclosed warranty registration card to activate your warranty.
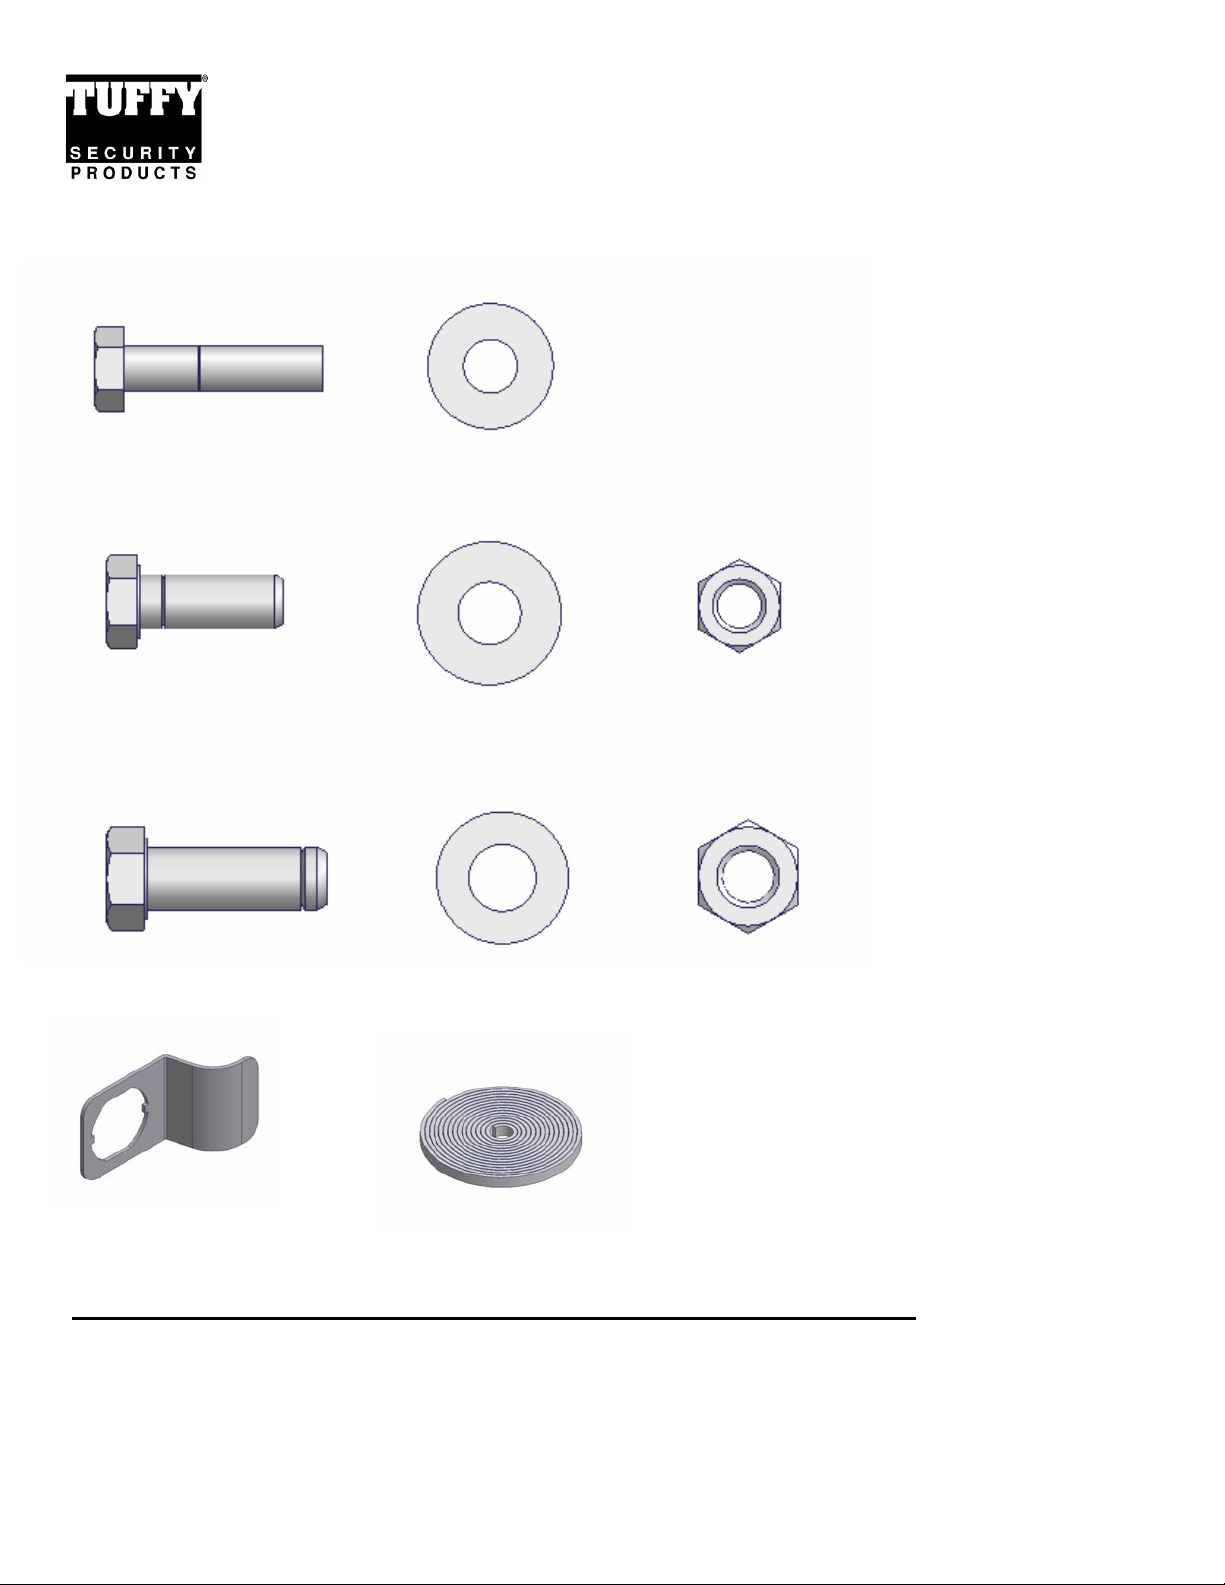
PARTS CHECKLIST
(2) 8MM METRIC BOLTS (2) 5/16 WASHERS
(2) 3/8 X 1 BOLTS (4) 3/8 WASHERS (2) 3/8 NYLOCK NUTS
(2) 7/16 x 1 ¼ BOLTS (4) 7/16 WASHERS (2) 7/16 NYLOCK NUTS
FINGER PULL LEVER RUBBER SEAL
PLEASE READ ALL INSTRUCTIONS THOROUGHLY BEFORE STARTING INSTALLA TION.
ATTENTION!
• In some vehicles as a result of mounting the box on an uneven surface the lid may be offset and will not close
properly after the box is bolted down. To correct this, a spacer (not included) will need to be placed under th e corner
of the box to compensate for the uneven mounting surface.
• It is recommended to use silicone sealant in any drilled holes to prevent any future rusting.
Page 1 of 3 - 1/28/2008 – Rev122006
Page 2

1. Install rubber seal on lid and rear doorframe. (SEE FIGURE 1 AND FIGURE 2)
2. For packaging reasons the cargo box is shipped without the finger pull lever installed on the rear door. The pushbutton will have
to be removed and reinstalled with the finger pull lever. Before removing the pushbutton make sure it is in the unlocked position
and observe the cam location so it can be remounted in the same position. Remove the pushbutton by loosening the large nut on
the backside of it and maneuvering it through the hole. Slide the finger pull lever on the pushbutton. Remount the pushbutton
with the cam in the proper location and tighten the large nut. (SEE FIGURE 3)
3. Skip to the mounting instructions that apply to the vehicle which the cargo box will be mounted in.
CJ-7 (1976-1986) MOUNTING INSTRUCTIONS
1. Take out rear seat by removing seat-mounting bolts on the two front seat brackets and along the back seat mounting
bracket.
2. Place cargo box in Jeep bed.
3. Using the (2) 7/16 x 1 ¼ bolts and washers secure the cargo box down through mounting holes 3 and 5. (SEE
FIGURE 4)
WARNING!
Make sure that there is nothing under the vehicle that will be damaged by the drill bit when drilling.
4. If additional stability is required, mark (2) holes on the floor corresponding with holes 1 and 2. Remove cargo box.
Drill (2) ½” holes corresponding with mounting holes 1 and 2 and secure with (2) 3/8 x 1 bolts, (2) nut s, and (4)
washers. (SEE FIGURE 4)
WRANGLER YJ (1987-1995) MOUNTING INSTRUCTIONS
1. Take out the rear seat by removing the seat-mounting bolts on the two front seat brackets.
2. Remove all of the seat belt hardware including hardware on the side-walls for the seat belt harn esses if applicable.
3. Remove both catches for the fold and tumble seats on the side-walls
4. Place cargo box in the Jeep bed
5. Using the (1) 7/16 x 1 ¼ bolt and washer secure the cargo box down through mounting hole 4. (SEE FIGURE 4)
WARNING!
Make sure that there is nothing under the vehicle that will be damaged by the drill bit when drilling.
6. Mark (2) holes on the floor corresponding with holes 1 and 2. Remove cargo box. Drill (2) ½” holes corresponding
with mounting holes 1 and 2 and secure with (2) 3/8 x 1 bolts, (2) nuts, and (4) washers. (SEE FIGURE 4)
WRANGLER TJ (1997-CURRENT) MOUNTI NG INSTRUCTIONS
1. Take out the rear seat by removing the seat-mounting bolts on the two front seat brackets.
2. Remove all seat belt hardware including the hardware on the side-walls for the seat belt harnesses.
3. Remove both catches for the fold and tumble seats on the side-walls
4. Place cargo box in the Jeep bed
5. Using the (1) 7/16 x 1 ¼ bolt and washer secure the cargo box down through mounting hole 4. (SEE FIGURE 4)
6. Using the (2) 8mm metric bolts and 5/16 washers secure the cargo box down through mounting holes 1 and 2. (SEE
FIGURE 4)
WRANGLER JK (2007 – CURRENT) 2 & 4 DOOR MOUNTING INSTRUCTIONS
7. Take out the rear seat on 2 door model.
8. Remove the factory floor storage cover. Place the cargo box in the Jeep bed. Position the cargo box as far toward
the drivers side as possible and just in front of the jack access opening on the flat portion of the Jeep bed.
9. Mark the (2) spots in the vehicle under holes #8 and 9 using the cargo box as a template for drilling. (SEE FIGURE 2)
WARNING!
Make sure that there is nothing under the vehicle that will be damaged by the drill bit when drilling.
10. Remove the cargo box and drill out the (2) marked spots with a ½” drill bit.
11. Using (2) 3/8” x 1” bolts, (2) 3/8” nuts and (4) 3/8” washers fasten the cargo box down through holes 8 and 9. (SEE
FIGURE 2)
Page 2 of 3 - 1/28/2008 – Rev122006
Page 3

GENERAL MOUNTING INSTRUCTIONS
1. Place cargo box in the bed.
2. Mark any (4) holes for drilling using the box mounting holes 1 through 5 as a template. (Select the holes that will not
interfere with anything under the vehicle and will be easy to access with the wrenches.) (SEE FIGURE 4)
WARNING!
Make sure that there is nothing under the vehicle that will be damaged by the drill bit when drilling.
3. Remove cargo box and drill out the (4) marked holes with a ½” drill bit.
4. Secure the cargo box down using both (2) 7/16 x 1 ¼ bolts, (2) 7/16 nuts, (4) washers and also (2) 3/8 x 1 bolts, (2)
nuts, and (4) washers in any combination.
ATTENTION:
FREQUENT LUBRICATION IS NECESSARY ON THE LOCKING SYSTEM
The pushbutton lock contains an “O” ring seal to protect the interior from dust and water. If this mechanism is not
lubricated regularly it will become difficult to operate and it may not return to its home position preventing the key from
operating the lock. If this happens simply pull up on the pushbutton to manually bring it back to its home position.
Lubricate the pushbutton with a light lubricant such as silicone spray. The pushbutton may have to be periodically
disassembled and cleaned.
Call (970) 564-1762 for Technical Support
Page 3 of 3 - 1/28/2008 – Rev122006
 Loading...