

Page 1
INSTALLATION INSTRUCTIONS
TUFFY CENTER SECURITY CONSOLE #’s 012, 013, 016, 017,
023, 024, 032, 033
Call (970) 564-1762 for Technical Support
Please read and fill out the enclosed warranty registration card to activate your warranty.
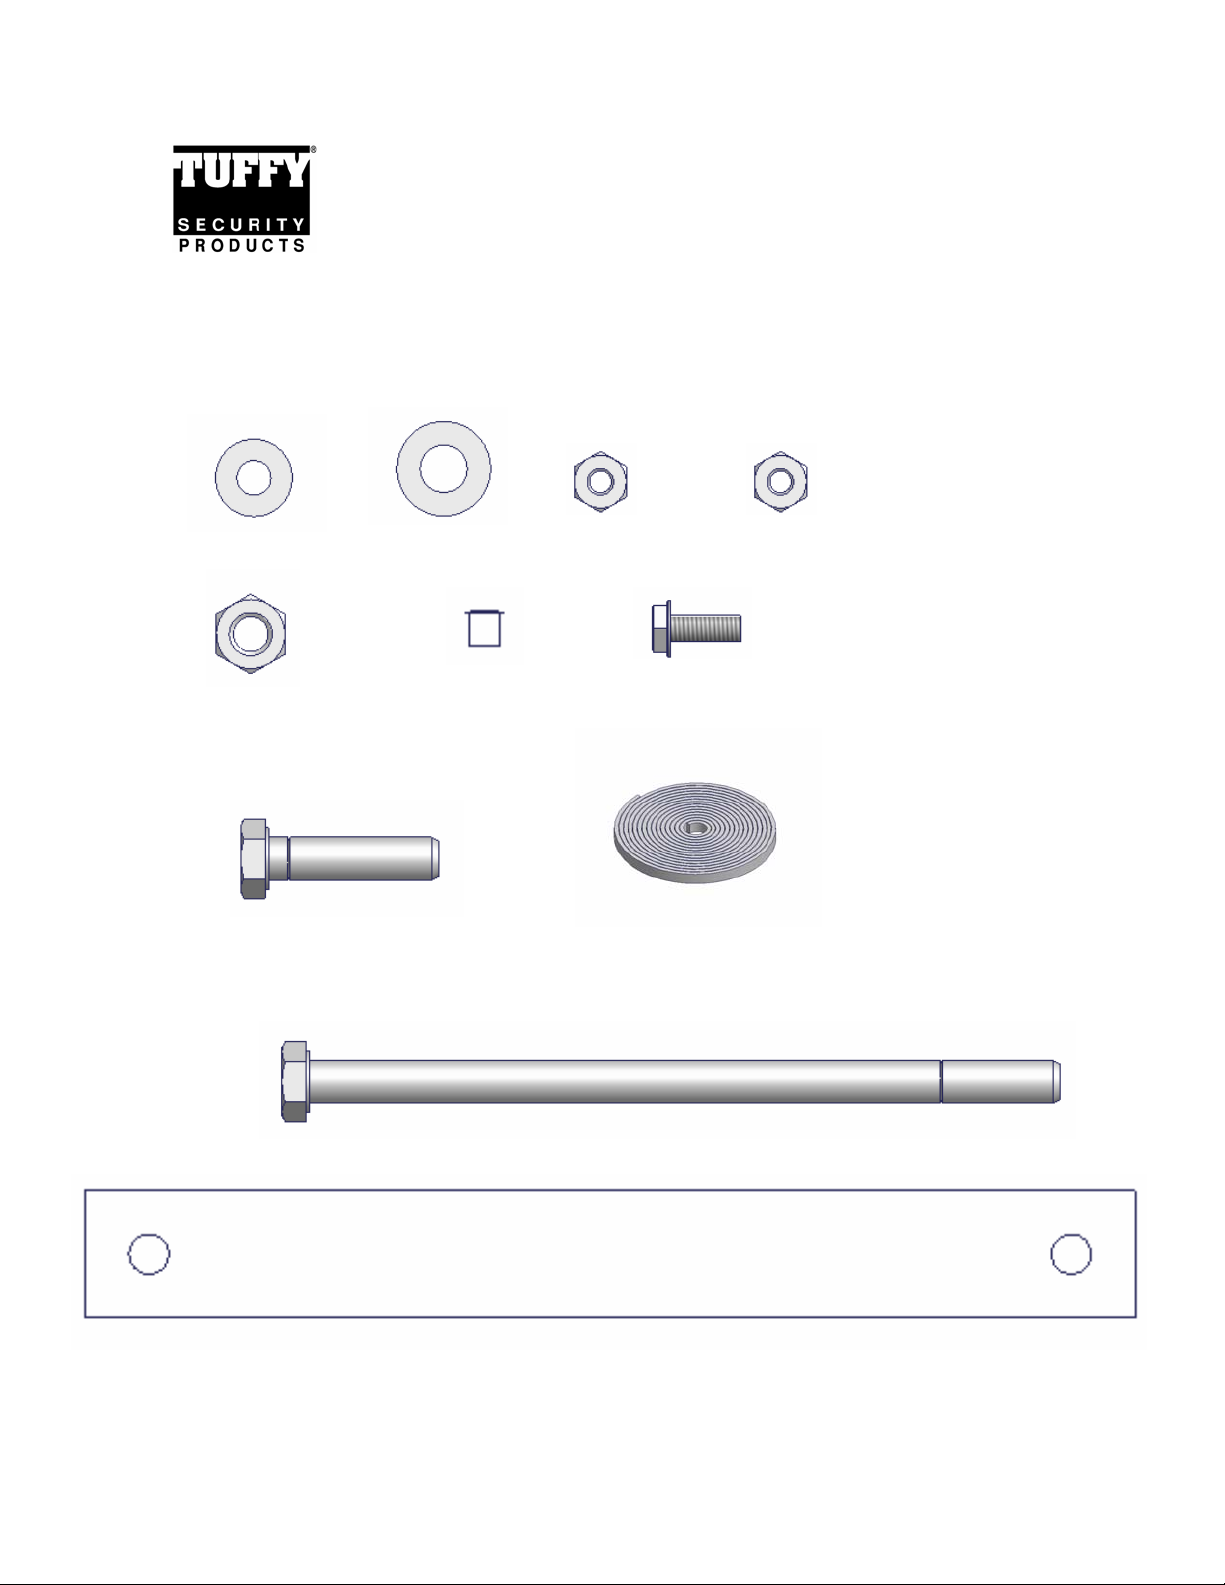
PARTS CHECKLIST
(9)3/16” Washers (6)5/16” Washers (5)10-32 Nuts (4)10-32 Acorn Nuts
(3)5/16” Nuts (2)1/4” Hole Plugs (8)10-32x1/2” Bolts
(1) 5x16x1-3/4” Bolt Rubber Seal
(2) 5/16x5-1/2” Bolts
(2)Seat Belt Straps
Page - 1 - of 3 - 1/28/2008 – Rev122006
Page 2

TOOLS NEEDED
• Electric drill
• 3/8” Drill bit
• Marker or pencil
• Knife
• ½” Socket and ratchet
• ½” Wrench
• 3/8” Wrench
• 5/16” Wrench
• Silicone sealant (Recommended)
PLEASE READ ALL INSTRUCTIONS THOROUGHLY BEFORE STARTING INSTALLA TION.
1. Install the rubber seal around the edge of the lid and check the lock operation (See Figure 1)
2. Attach the mounting bracket to the two ¼” holes on the bottom of the console through Holes #1 & #2
using (2) 10-32x1/2” Bolts, (2) 10-32 Locknuts, and (2) 3/16” Washers. (See Figure 2)
3. Attach the drink holder to either the front or the rear of the console using (2) 10-32x1/2” Bolts, (2)10-
32 Locknuts, and (2) 3/16” Washers. NOTE: If the drink holder will be mounted on the front there are
three different mounting heights to choose from. Additional drink holders may be purchased
separately from your local dealer or directly from Tuffy.
4. Place the console between the seats and mark the floor directly under the (3) 3/8” mounting Holes #3,
#4, & #5 in the bottom of the console. (Check to make sure that the shift lever will not interfere with
the lid operation.)
WARNING!
Make sure that there is nothing under the vehicle that will be damaged by the drill bit when drilling.
5. Remove the console, cut holes in the carpet where the marks are and drill a 3/8” hole in each spot. Use
touch up paint or silicone sealant in any drilled holes to prevent rusting.
IF YOU HAVE A DELUXE STEREO CONSOLE TUFFY PART NUMBERS 013, 017, 024, 033.
ATTENTION: Refer to your stereo owner’s manual for instructions on how to mount and wire your
stereo, the following are only general steps.
NOTE: If a stereo is to be mounted in the console an antenna extension wire will be required and is
available at most stereo equipment stores.
6. Run all required stereo and speaker wires to the console mounting location. Tuffy recommends
running wires in a protective wire loom and using rubber grommets when passing through any drilled
holes.
7. Fasten the stereo support strap included with your stereo to the back of the stereo . (If you do not have a
stereo support strap, some plumber strap may be substituted.)
8. Insert the stereo into the mounting bracket and fasten the other end of the stereo support strap to the
10-32 stud on the inside of the console using a 10-32 locknut and a #10 washer. See Figure 3.
9. Connect all wires to the stereo according to your stereo owner’s manual.
Page - 2 - of 3 - 1/28/2008 – Rev122006
Page 3

10. Fasten down the rear of the console through Holes #4 & #5 using (2) 5/16”x 5-1/2” Bolts, (2) 5/16”
Locknuts, and (4) 5/16” Washers. Fasten down the front of the cons ol e th ro u gh Hol e #3 usi n g (1 )
5/16” x 1-3/4” Bolts, (1) 5/16” Locknut, and (2) 5/16” Washers.
11. Using (4)10-32x1/2” Bolts, (4) 3/16” Washers, and (4) 10-32 Nuts attach the seat belt support straps by
placing the seat belt between the support strap and the console. (See Figure 4) Make sure to put the
washer on the outside of the strap.
12. If you mounted your drink holder to the front of your console, insert the (2) ¼” hole plugs into the two
holes on the back of the console.
13. Lock it up!
ATTENTION:
FREQUENT LUBRICATION IS NECESSARY ON THE LOCKING SYSTEM
The pushbutton lock contains an “O” ring seal to protect the interior from dust and water. If this
mechanism is not lubricated regularly it will become difficult to operate and it may not return to its
home position preventing the key from operating the lock. If this happens simply pull up on the
pushbutton to manually bring it back to its home position. Lubricate the pushbutton with a light
lubricant such as silicone spray. The pushbutton may have to be periodically disassembled and
cleaned.
Page - 3 - of 3 - 1/28/2008 – Rev122006
 Loading...