

Tuff Birds
Super Tough Wings & Planes
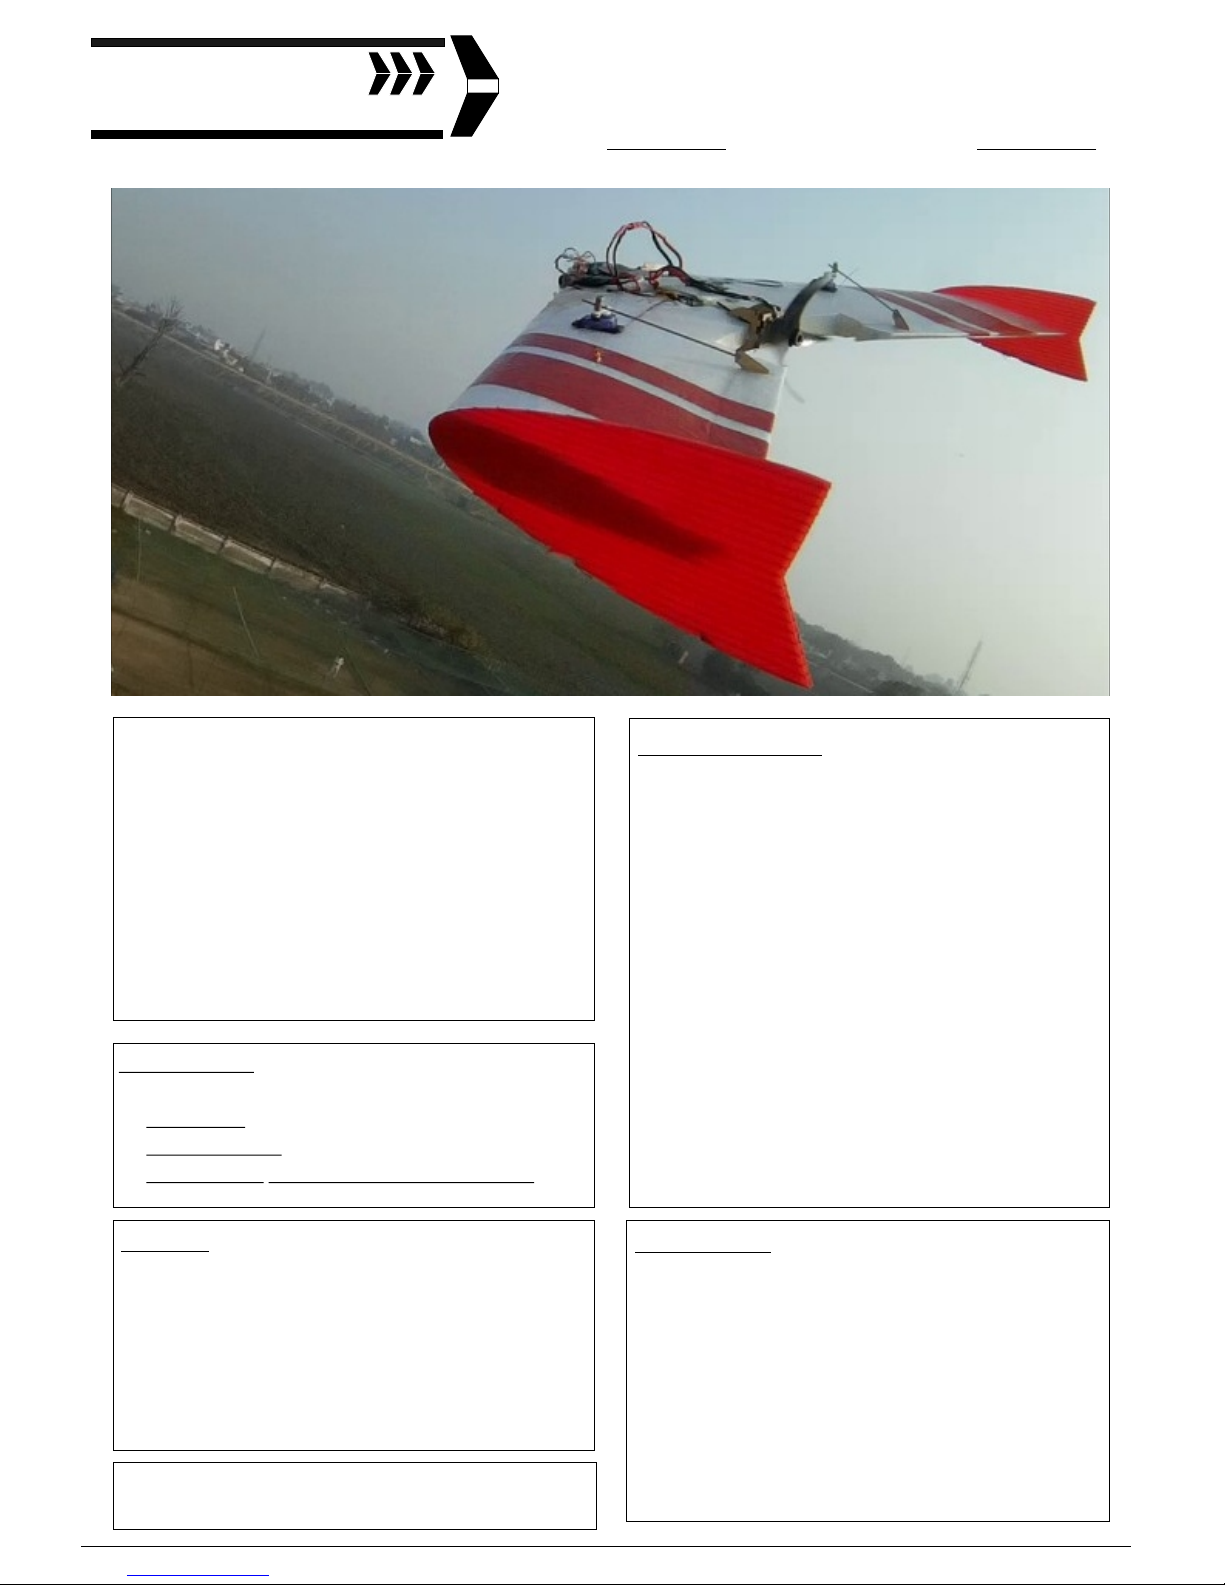
Micro BEE
Specifications:
Ÿ WingSpan: 600MM
Ÿ All-Up-Weight: ~ 200gms
Ÿ CG Location: 130MM back from Nose Tip.
What's Included:
Ÿ 2 EPP Wing Panels in Wing Beds
( Left + Right )
Ÿ Laser Cut Aircraft grade Plywood sheet
(Motor Mount, Control Horns & Battery Tray )
Ÿ Corrugated Plastic 3MM Winglets ( 2Nos )
Ÿ 1ft x 6ft 1.7Mil Lamination Film.
~120mm Pushrods
Linkage Connectors
Ÿ 5x250 mm Carbon Fiber Strip
Ÿ Velcro
Ÿ Paper Knife
Ÿ Elevon Throw Gauge
Ÿ Instructional Manual
Ÿ 2 Nos
Ÿ 2 Nos
Requires:
Ÿ 4-6 Channel Programmable Radio (Tx-Rx)
Ÿ 1000-1400mah 2S Lipo
Ÿ 6Amp-12Amp Brushless ESC
Ÿ 2 Nos 5gms-9gms Servo
Ÿ Micro Brushless Motor (12-20gms)
Ÿ 5-6inch Propellor
Building Tools:
Ÿ Hot Glue Gun and Glue Sticks
Ÿ Cyanoacrylate Glue ( FeviKwik etc )
Ÿ Screwdrivers & Allen Key
Ÿ Paper Tape & Clear Packing Tape
Ÿ An Iron ( If Laminating )
Ÿ Soldering Iron and Solder Wire
Ÿ Ruler , Pen and a Flat Working Table
Congratulations on your purchase of the
TuffBirds MicroBee EPP 600MM Flying Wing.
We hope these build instructions will help you
complete the build easily. Though the build
itself doesn't take much time, just be sure to
double check everything before cutting and
glueing.
Before flying, do the preflight checks
thoroughly, and we hope you will have a great
time flying the Micro Bee.
1
Ver 1.0 12 May 2018
600MM Flying Wing
goo.gl/Vrqb9b
Build
Video
:
BUILD INSTRUCTIONS
Tuff Birds
Super Tough Wings & Planes
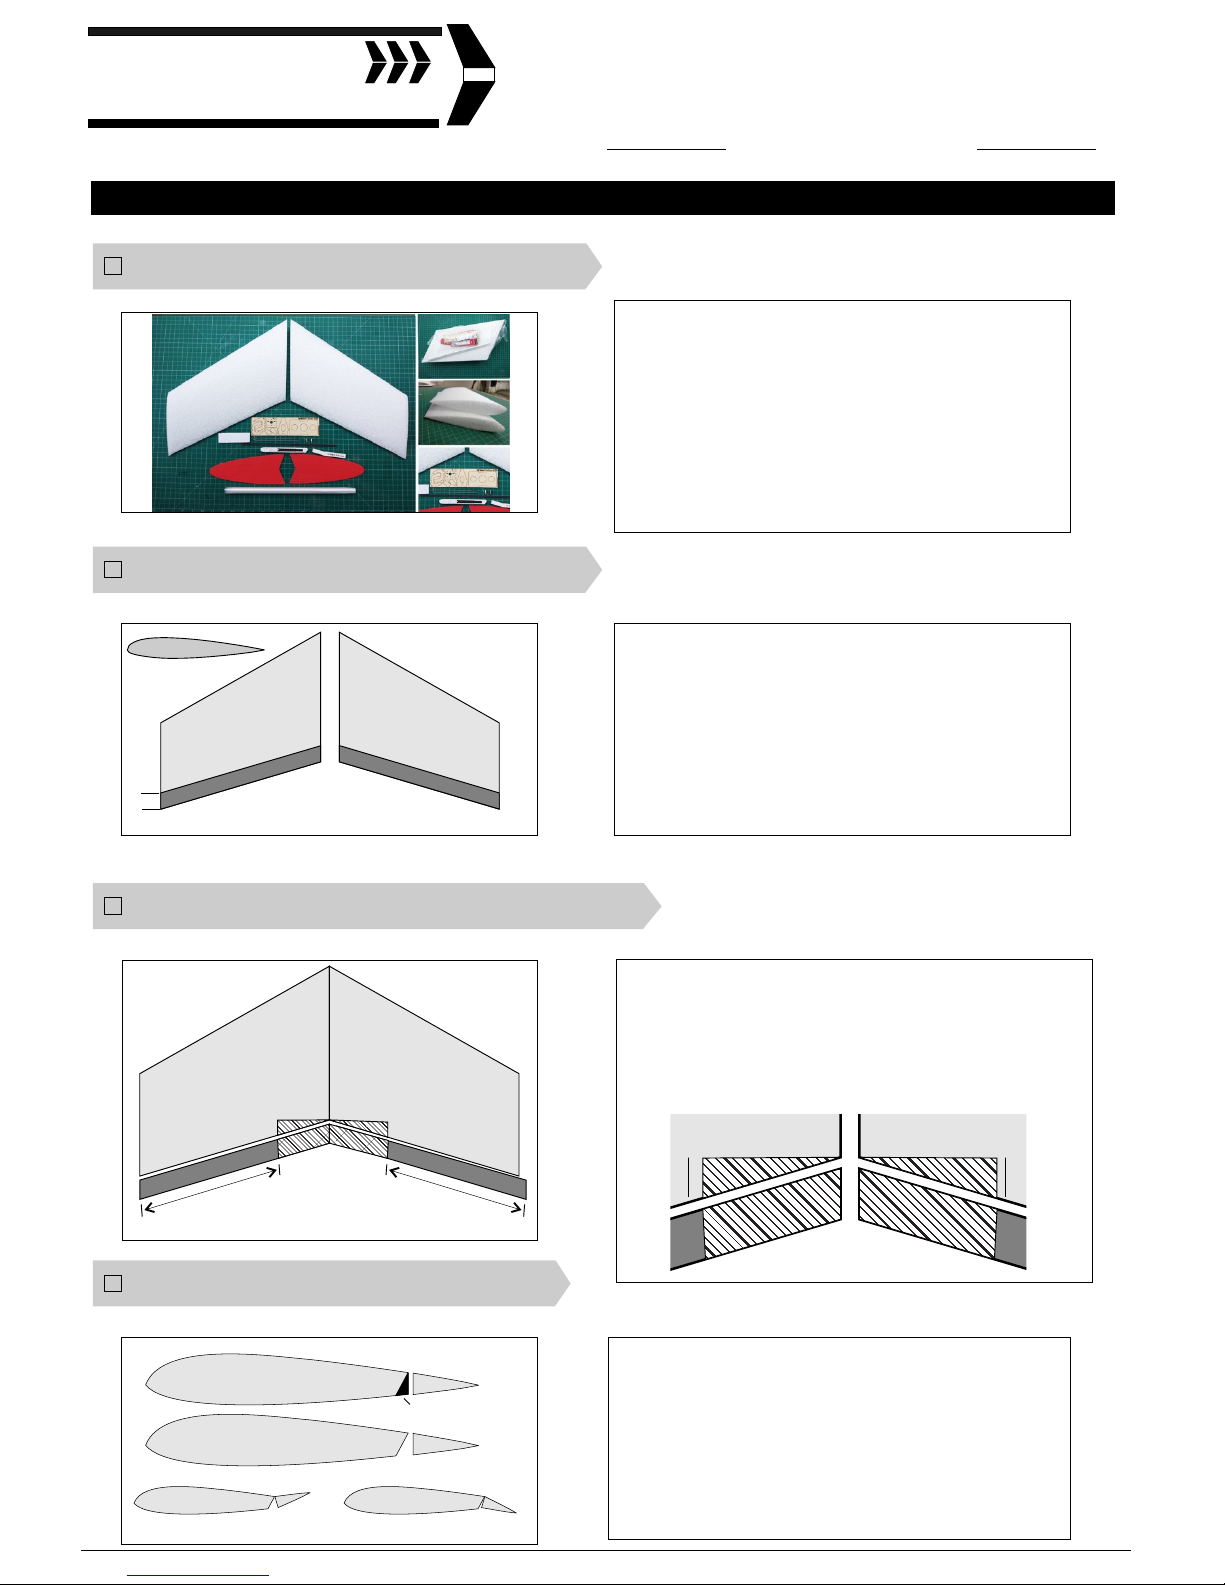
From the Wing Panels, cut the Elevons as
shown. Both elevons need to be same size. It
helps if you cut one Elevon, and use that as a
template to cut the second. The width of the
Elevons is 30MM.
Unpack and lay out everything from the kit.
Identify all the parts . Note and mark the Left and
Right Wing panels. In case you find anything
missing, stop and contact us before proceeding
with the build. The Left and Right Wing Panels
can be identified by the Airfoils. The slightly
flatter side is towards the bottom.
1. Layout and Identify the parts.
2. Cut the Elevons.
30MM
ELEVON
ELEVON
Next, we need to cut out some space for the
prop. Trim the inboard part of the Elevons so that
240MM of elevons is left. Make sure that both
sides are symmetrical. Next on both panels cut
and remove the area as shown.
3. Trim Elevons & cut space for prop
240MM
240MM
The wing panels need to be beveled to allow for
the Down movement of Elevons. Cut the bevel as
illustrated across the length of the panel with a
sharp knife. Try to cut the entire bevel with a
single pass of the knife.
4. Bevel the Wing
Area to be cut-off
Elevon Movement UP Elevon Movement DOWN
2
Micro BEE
600MM Flying Wing
20MM
20MM
Top
Bottom
Ver 1.0 12 May 2018

BUILD INSTRUCTIONS
Tuff Birds
Super Tough Wings & Planes
Test fit the panels, and use a bead of CA to glue
the panels together. Make sure they are aligned.
Leave aside to dry. When completely set, add a
bead hot glue and wipe it off to secure the entire
joint.
Use the Battery tray as a guide to make space for
the cut out of the battery area.
Cut only as deep as required for the battery. Leave
at least 10MM of foam at the bottom of the wing.
The Battery bay is usually required to be cut as far
forward as possible. The battery location may
need to be adjusted later to get the plane
balanced properly.
5. Cut Battery Location
6. Join Wing Panels
7. Install Spars
If Laminating , then laminate the elevons in at
least 2-3 layers to add rigidity. Laminate the
bottom wing first and then the top side. Hinge
using Laminate or Clear packing tape.
If not laminating, then use our EPP Hot Glue
Hinge method to install the elevons.
8. Laminate Panels OR Hot Glue Hinge
The 5MM Spar has to be installed on the panels
Use the knife to make a shallow cut, and use the
end of the spar to make enough space for a tight
fit Use CA to glue the spar. The Main Spar can be
glued 130Mm from the tip of the nose. This is
the CG location.
5MM Spar
130MM
3
Micro BEE
600MM Flying Wing
Ver 1.0 12 May 2018

BUILD INSTRUCTIONS
Tuff Birds
Super Tough Wings & Planes
Use CA or Hot Glue to install the Winglets at the
Wing Tips. Align the Winglets so they are flush
from the leading edge and as centered on the
tips as possible.
Servos need to be installed as far forward as
possible. Ensure that the linkage is perpendicular
to the elevon hinge line. Install the control horn so
that the hole is on top of the hinge line.
9. Install Servos & Linkages
11. Install Winglets
10. Assemble Motor Mount
This is the most cruicial step . CG of this wing
should be 130MM from the nose tip. Adjust the
placement of battery to get the CG to this
position. Flying wings are very sensitive to CG,
and if the CG is off by more than 5MM the plane
will not fly properly.
12. Check CG
Assemble the Motor mount using the 4 parts as
shown. The small arrows marked need to be
facing towards the top. Use CA to Glue the parts
together. Install the motor mount on the wing,
keeping it as centered as possible.
130 MM
4
Micro BEE
600MM Flying Wing
90°
90°
Ver 1.0 12 May 2018

BUILD INSTRUCTIONS
Tuff Birds
Super Tough Wings & Planes
13 Wiring Diagram
Motor
ESC
BATTERY
RX
Servo 2
Servo 1
PROP
LEFT
RIGHT
Left Elevon Moves Up | Right Elevon Moves Down
Plane will Roll/Turn Right
LEFT
RIGHT
Left Elevon Moves Down | Right Elevon Moves Up
LEFT AILERON
RIGHT AILERON
Down Elevator
LEFT
RIGHT
Both Elevons Move down
Plane will Nose Down / Dive
Plane will Nose UP / Climb
UP Elevator
LEFT
RIGHT
Both Elevons Move UP
CH 1
CH 2
CH 3
FPV Gear
14 Elevon Mixing
Use the supplied throw gauge to set the throws
of Elevons. Start with the recommendation and
then you may adjust later to suit your flying
style.
Check all linkages to be tight, and slop-free.
Double check the CG balance point.
15 Final Checks
Elevon Throws
Throw Gaug
e
Elevon at Neutral
5
Micro BEE
600MM Flying Wing
Plane will Roll/Turn Left
Ver 1.0 12 May 2018

Common Problems:
1. CG too far back. Flying wings will not fly tail heavy. A good sign you are tail heavy is you can’t control the
plane or the plane won’t stay trimmed. When you try to loop the plane will roll over. Add weight to the nose
to see if the problems resolve. It is not uncommon to need an extra oz or two of lead depending on how light
you build.
2. Too much movement in the elevons so the plane stalls on launch as you pull up on the elevator. This is a
very common problem!!!! May be combined or confused with tail heavy airplane symptoms.
3.Loose servos in the foam, linkages and push rods that flex, and poor leverage with push rods not installed
per plans, elevons are too soft and twisting.
BUILD INSTRUCTIONS
Tuff Birds
Super Tough Wings & Planes
6
Micro BEE
600MM Flying Wing
Essential Preflight Checks:
1. Check CG. #1 Check. DO NOT FLY If you don't get this
right.
2. Check Elevon Mixing
3. Check Neutral Trim
4. Check throws.
5. Check Prop direction and thrust
6. Check for any slop in Elevon/linkage Connectors
First Flight Checks:
1. Fly in a open ground with no obstacles.
2. For the first flights have someone experienced do the
checks and trim out the model
3. Launch the model with about 50% power and INTO the
wind.
4. Remember - Safety first. Fly Safely and responsibly.
Have fun and Enjoy. But fly responsibly. Find out a large open field, free from trees, buildings, obstructions
and people. Ensure you comply with local regulation laws.
Before flying your model, it is recommended you have an experienced flier from your region test fly the
model and trim it out for you . In case you have no such help, do not despair.
We suggest you go and do some computer simulation practice ( Realflight G4.5 , Phoenix etc ) afterwards this
airplane should be easy enough for you to fly.
Follow all of the Preflight checks mentioned below. Double check the control surfaces. They should all be
neutral and check again for control reversing. Check for wind direction. The airplane is always launched and
landed against the wind. So move to a location in your field from where you have a clear area ahead against
the wind to launch.
Always keep the model within sight and within the confines of your flying field.
The TuffBirds MicroBee has been Designed, prototyped, tested and manufactured in India by Vortex-RC. All
Contents are copyright , and no part may be copied, or duplicated in any form without the written permission
from Team Vortex-RC.
Visit us at and www.Vortex-RC.com www.TuffBirds.in
Ver 1.0 12 May 2018
 Loading...