

Tucker GTR3, GTR5, GTR4, GTR SERIES, GTR6 Assembly, Installation And Operating Instructions
...
ASSEMBLY, INSTALLATION AND OPERATING
INSTRUCTIONS
FOR GTR SERIES BARBECUES ON
CABINET TROLLEYS
MODELS:
GTR3, GTR4, GTR5, GTR6.
GTR3 SS, GTR4 SS, GTR5 SS, GTR6 SS.
GTR3 S, GTR4 S, GTR5 S, GTR6 S.
IMPORTANT – PLEASE READ ALL INSTRUCTIONS
BEFORE YOU ASSEMBLE, INSTALL OR
OPERATE THIS APPLIANCE.
2
GENERAL WARNINGS
BARBECUE ASSEMBLY INSTRUCTIONS
INSTALLATION INSTRUCTIONS & WARNINGS
SPECIFICATIONS
DIMENSIONS
GAS INSTALLATION AND LEAK TEST PROCEDURE
OPERATING INSTRUCTIONS
COOKING HINTS
TROUBLESHOOTING
SERVICE & MAINTENANCE
WARRANTY
3
4
10
12
13
16
19
20
21
23
24
CONTENTS

3
IMPORTANT SAFETY
INSTRUCTIONS
• Tucker GTR Barbecues are approved for
outdoor use only.
• Remove all plastic protection lm from
stainless steel components before assembly.
• Keep this manual for future reference.
• Read all instructions carefully before
assembly and usage of barbecue.
• Clean your barbecue regularly; check the
grease trays for excess grease build up as
damage by grease or fat re is not covered
by warranty.
• Always turn off the gas supply when you
nish barbecuing.
• A canvas cover for this barbecue will extend
its life and ensure trouble free operation.
• Attend an operating barbecue at all times.
• Do not use this appliance indoors or in any
enclosed area.
• Do not spray aerosols in the vicinity of this
appliance while it is in operation.
• Do not place articles on or against this
appliance.
WARNING FOR
YOUR SAFETY
If you smell gas:
1. Shut off gas supply to appliance.
2. Extinguish any open ame.
3. Open lid or hood.
4. If odour continues, immediately call your
gas supplier or your Fire Department.
• Do not use or store ammable materials in or
near this appliance.
• Always leak test /check hose connections
after lling cylinders.
• Check cylinder condition for rust and that
the date stamp is current as every gas
cylinder in Australia must be pressure tested
every ten years.
• Never disconnect the barbecue whilst it is
running.
• Do not modify this appliance in any way.
• Do not allow children to operate the
barbecue.
• If a grease/fat re should arise, turn off the
gas supply immediately until extinguished.
• Always open the Lid or Roasting Hood before
lighting.
HAZARDOUS FIRE OR EXPLOSION MAY
RESULT IF INSTRUCTIONS ARE IGNORED.
It is the consumer’s responsibility to see that the
barbecue is properly assembled, installed and
taken care of. Failure to follow the instructions in
this manual could result in serious bodily injury
and /or property damage.
4
BARBECUE ASSEMBLY
INSTRUCTIONS
• Remove the pallet and any plastic lm
protecting or covering any parts of the
Barbecue and Cabinet Trolley before
assembly.
• Cut away any packaging or cable ties that
may be holding components in place.
• Check you have all the correct components
as listed below.
Tools required for assembly – 17mm,10mm
spanner and a Phillips head screwdriver.
1. If you have chosen a Roasting Hood you
will need to unhinge and remove the Doors
completely from either side of the Cabinet
to allow the removal of the Roasting Hood.
NOTE: The Roasting Hoods are packaged inside
the Cabinet Trolley for transport, they cannot be
removed unless the Doors of the Cabinet Trolley
are removed rst.
• Barbecue body
• Large Flare Guards
• Small Flare Guards
• Plate and grill
• Grease tray
• Hose and regulator
• Cabinet Trolley
• Control Valve adjustment screwdriver
• Check that you have the correct gas type
Barbecue i.e. L.P.GAS (red sticker) NAT GAS
(black sticker). The Gas Type Label is located
on the righthand side of the Barbecue Body.
• GTR BBQs can be installed with either a Flat
Hinged weather cover/ Lid or a Roasting
Hood.
• Make sure to read any separate instructions
on Assembly, Installation and Operation of
the Roasting Hood and / or Wok Burner if
they are to be tted to the BBQ.
• If you have a Flat Hinged Weather Cover/
Lid, attach the Lid onto the back of the BBQ
with the Phillips head bolts provided.
BARBECUE PARTS LIST
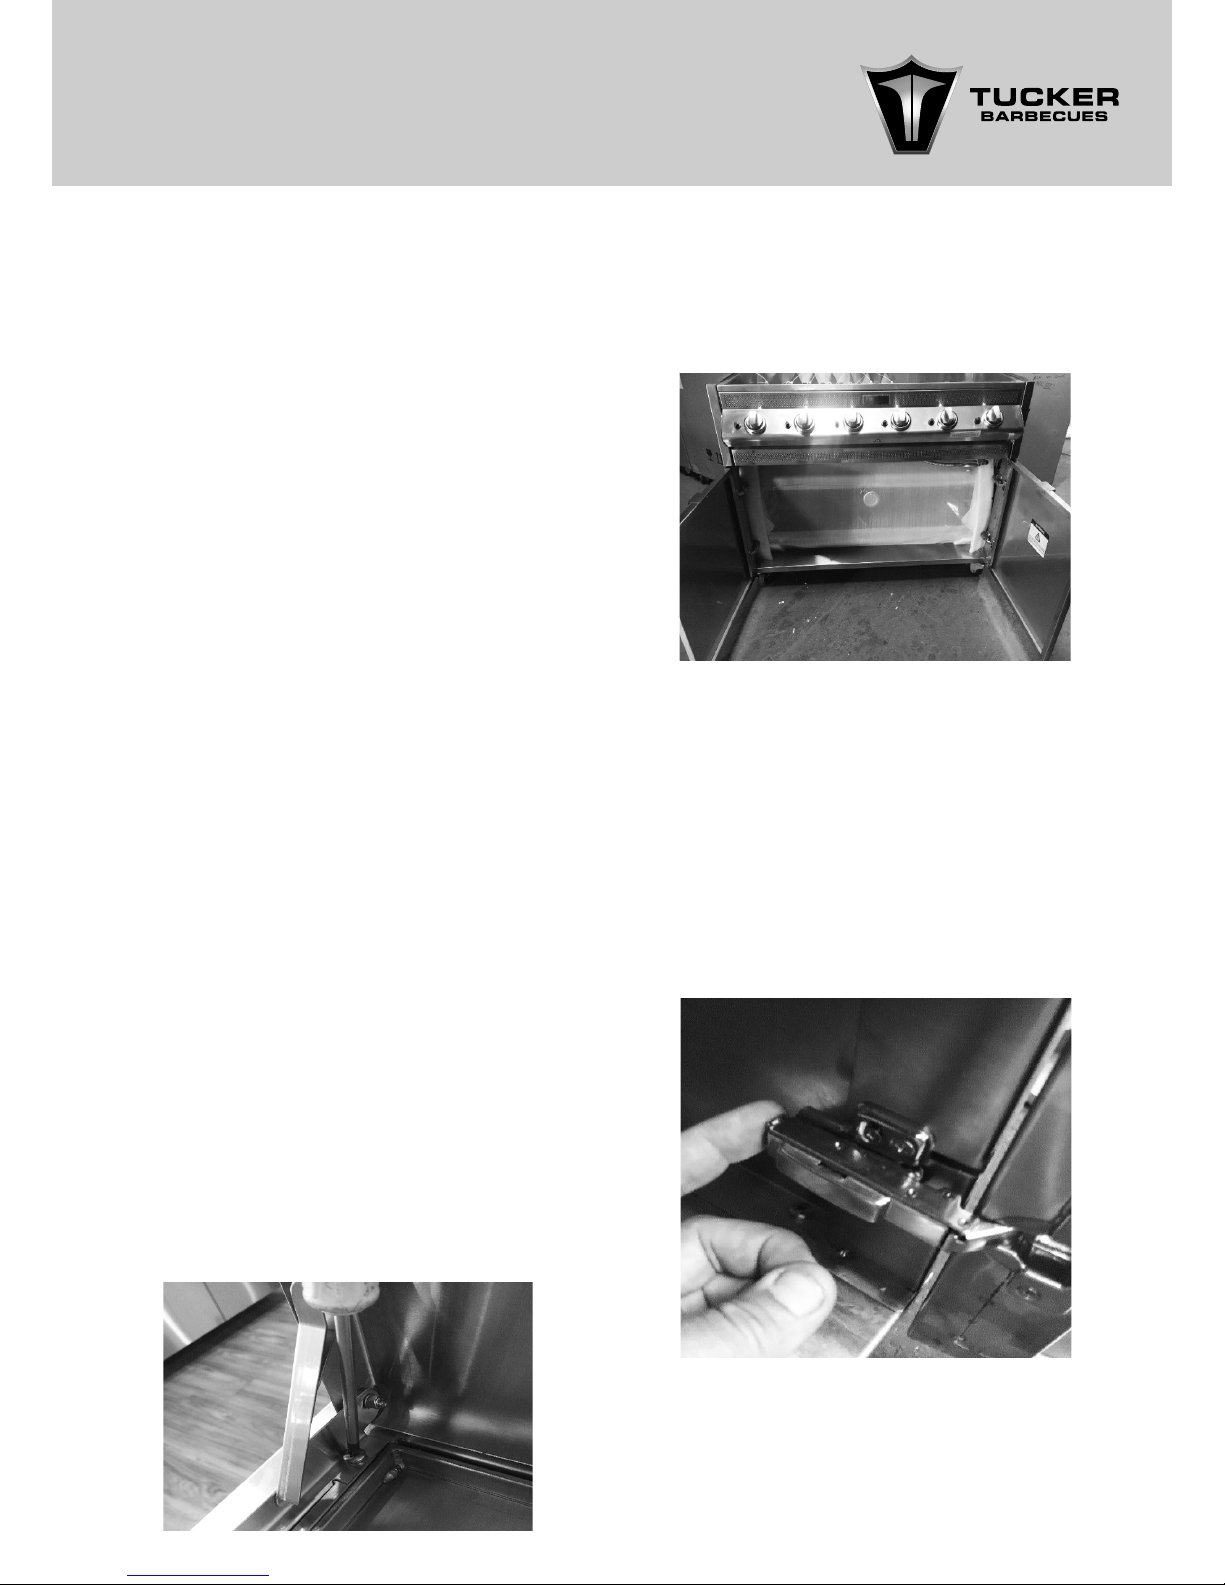
2. To remove the Cabinet Trolley Doors simply
push in the spring catches on the back of
each Hinge. This will allow the release of
the hinge from the Hinge Plates that are
attached to the side walls of the Cabinet
Trolley.
5
NOTE: Sometimes the Hinges may require a
slight jiggle as they can get stuck.
NOTE: We suggest to do any adjustment of
the Doors after the BBQ is assembled and in
position.
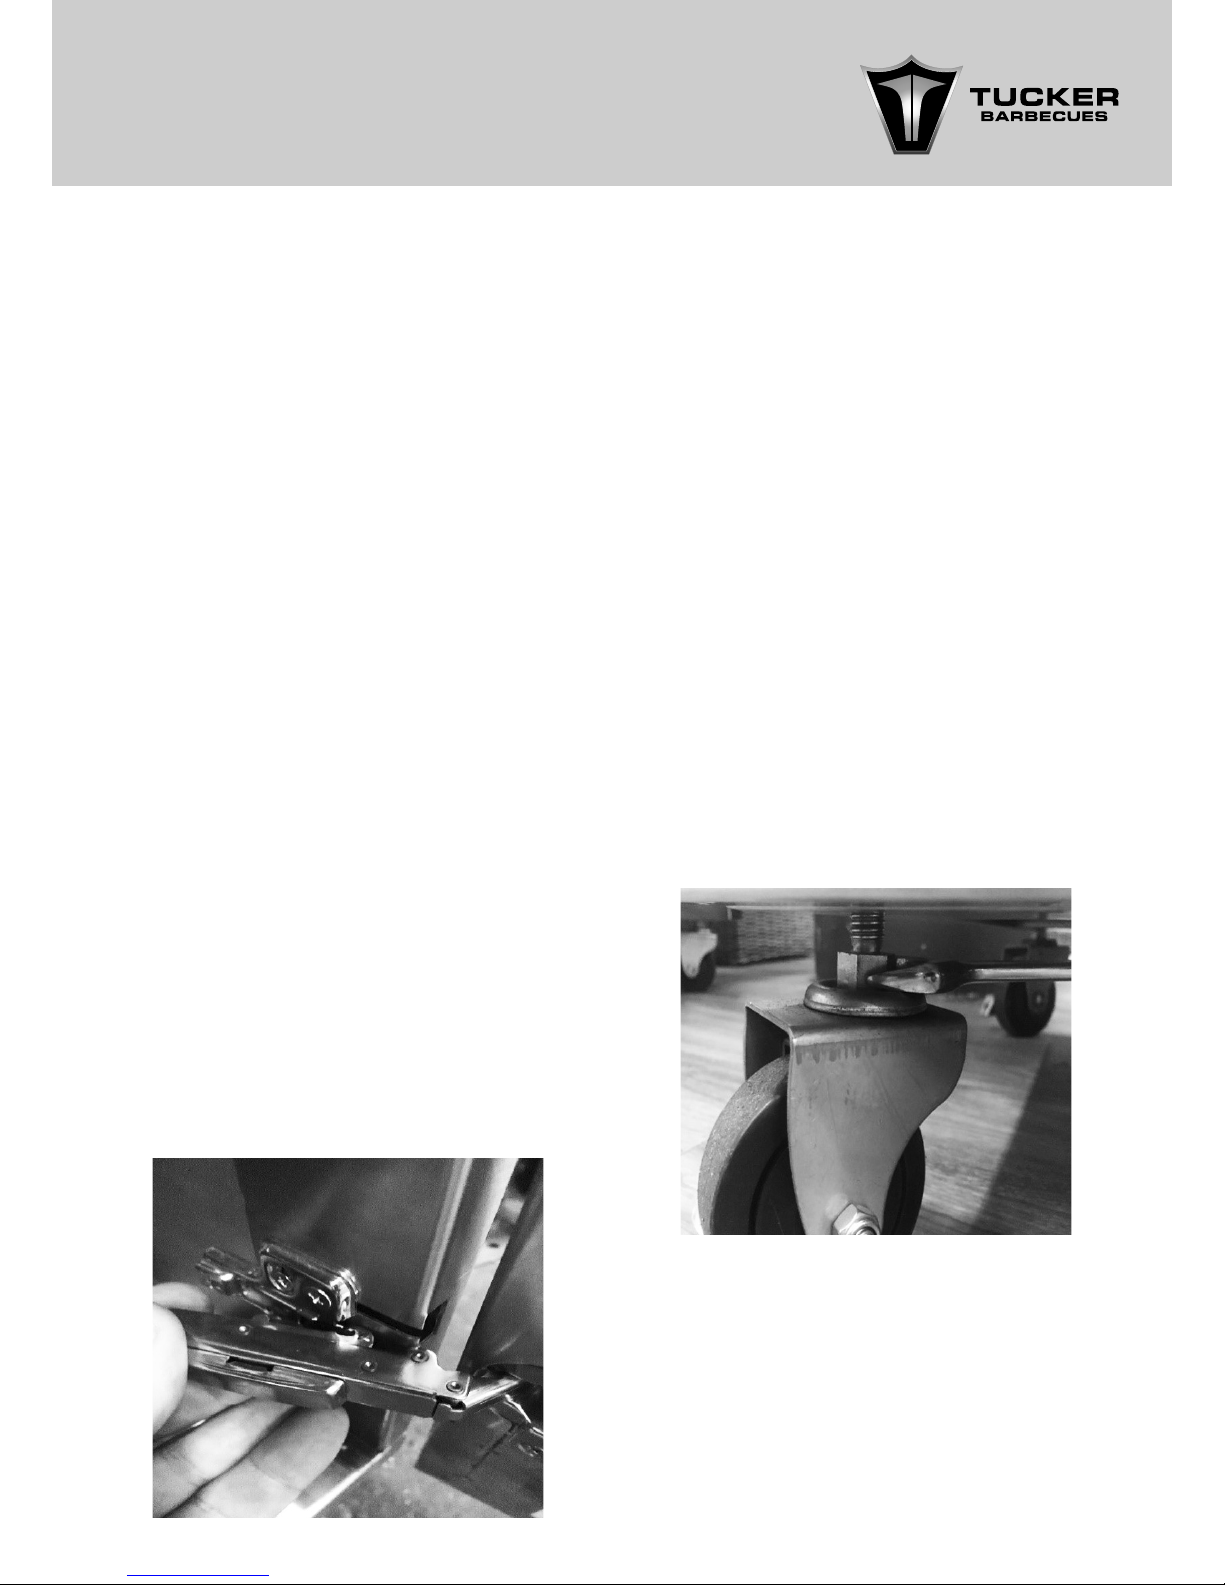
The Castor wheels on the base of the Cabinet
Trolley are also adjustable in height and are to
be used as the primary adjustment for levelling
the cabinet Trolley.
NOTE: Be very careful not to scratch the
Roasting Hood when removing it from within the
Cabinet.
NOTE: Be very careful with the Doors. Do not lay
them down where they might get scratched or
damaged while you are removing the Roasting
Hood.
6. To re-attach the Doors back onto the
Cabinet Trolley, simply line up the top
and bottom Hinges on the Doors with the
Hinge Plates tted to the Side Panels of the
Cabinet Trolley. Then simply side them back
into place making sure to latch the Tongue
of the Hinge underneath the Hinge Plate.
You will feel it click into place when it is
attached.
3. As you push in each catch on the back of
the Hinge, just lift the Door away from the
Cabinet to remove it.
4. Now that the Doors are removed, remove
any packaging away from the insides of the
Cabinet Trolley and the ends of the Roasting
Hood. This will allow the Roasting Hood to be
removed from inside of the Cabinet Trolley a
lot easier.
5. Once you have got the Roasting Hood out
of the Cabinet Trolley place it aside and
re-attach the Doors to the Cabinet Trolley.
7. The Door Hinges are adjustable, they can be
adjusted in and out, sideways left and right
as well as up and down, offering you the
ability to ne tune the position of the Doors
once they are tted.
8. It is best to leave the levelling of the Cabinet
Trolley until the very end of the assembly and
installation process to avoid doing it more
than once.
9. To adjust the level of the Cabinet Trolley, use
a 17mm spanner to screw the nut on top of
each of the Castor wheels. You will notice as
you turn the nuts that the Door heights start
to change, when the Doors are level the
Cabinet Trolley should be level as well.
6
13. Now position the side shelf in between the
two shelf brackets and using the bolt, spacer
and nut, attach the shelf onto the brackets.
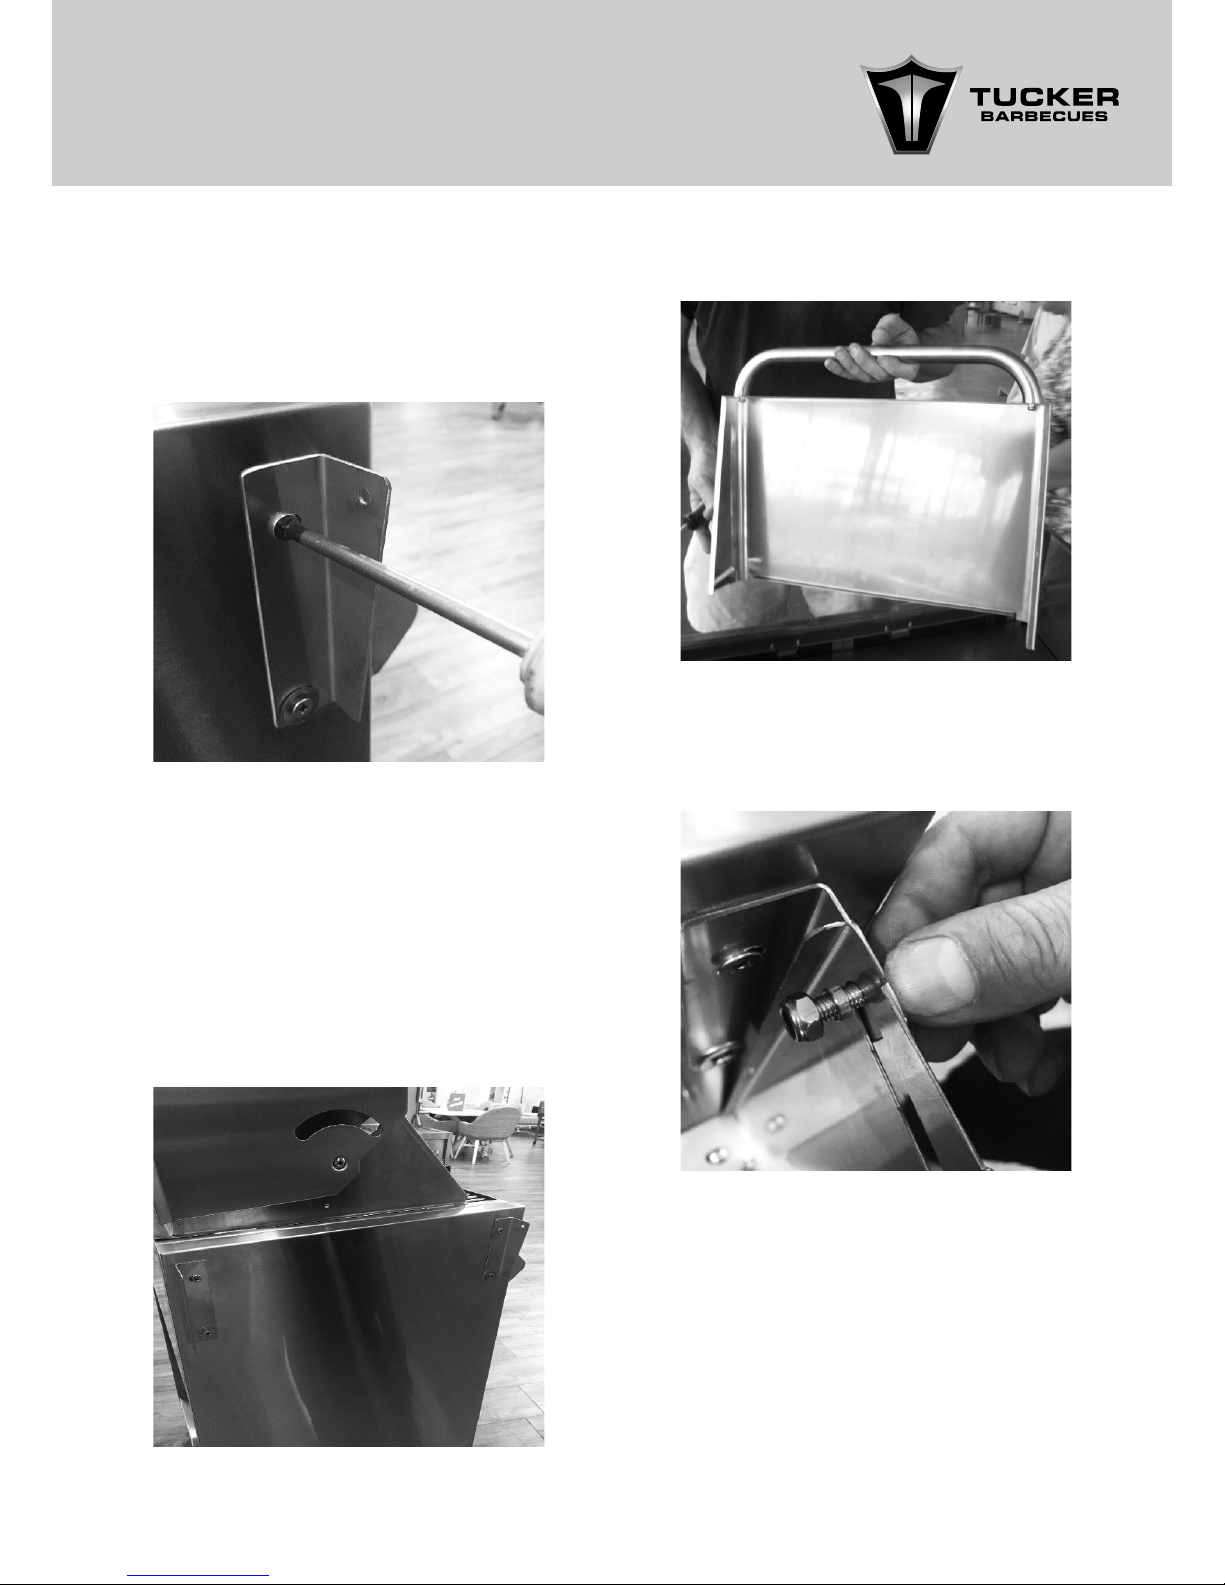
10. If you have chosen the optional Side Shelves
for the Cabinet Trolley you will need to rst
t the two shelf brackets supplied with the
shelves onto each side of the BBQ with the
bolts provided.
11. The shelf brackets should mirror each other
on the front and at the back of the BBQ as
per the photo below. The bolts need to be
carefully lined up as they screw into nuts
welded inside the sides of the BBQ Body.
12. Bolt the handles to the end of the side shelf.
NOTE: The holes in the brackets are oversized
and may require a washer to be tted to avoid
the head of the nuts from pulling through the
holes in the brackets.
NOTE: Push the bolt through the hole in the shelf
bracket rst and then through the slot in the
side of the shelf. Now slide the spacer over the
bolt and into the slot in the shelf and tighten the
nut. The spacer allows you to tighten the nut up
rmly yet still allowing the shelf to fold up and
down.
7
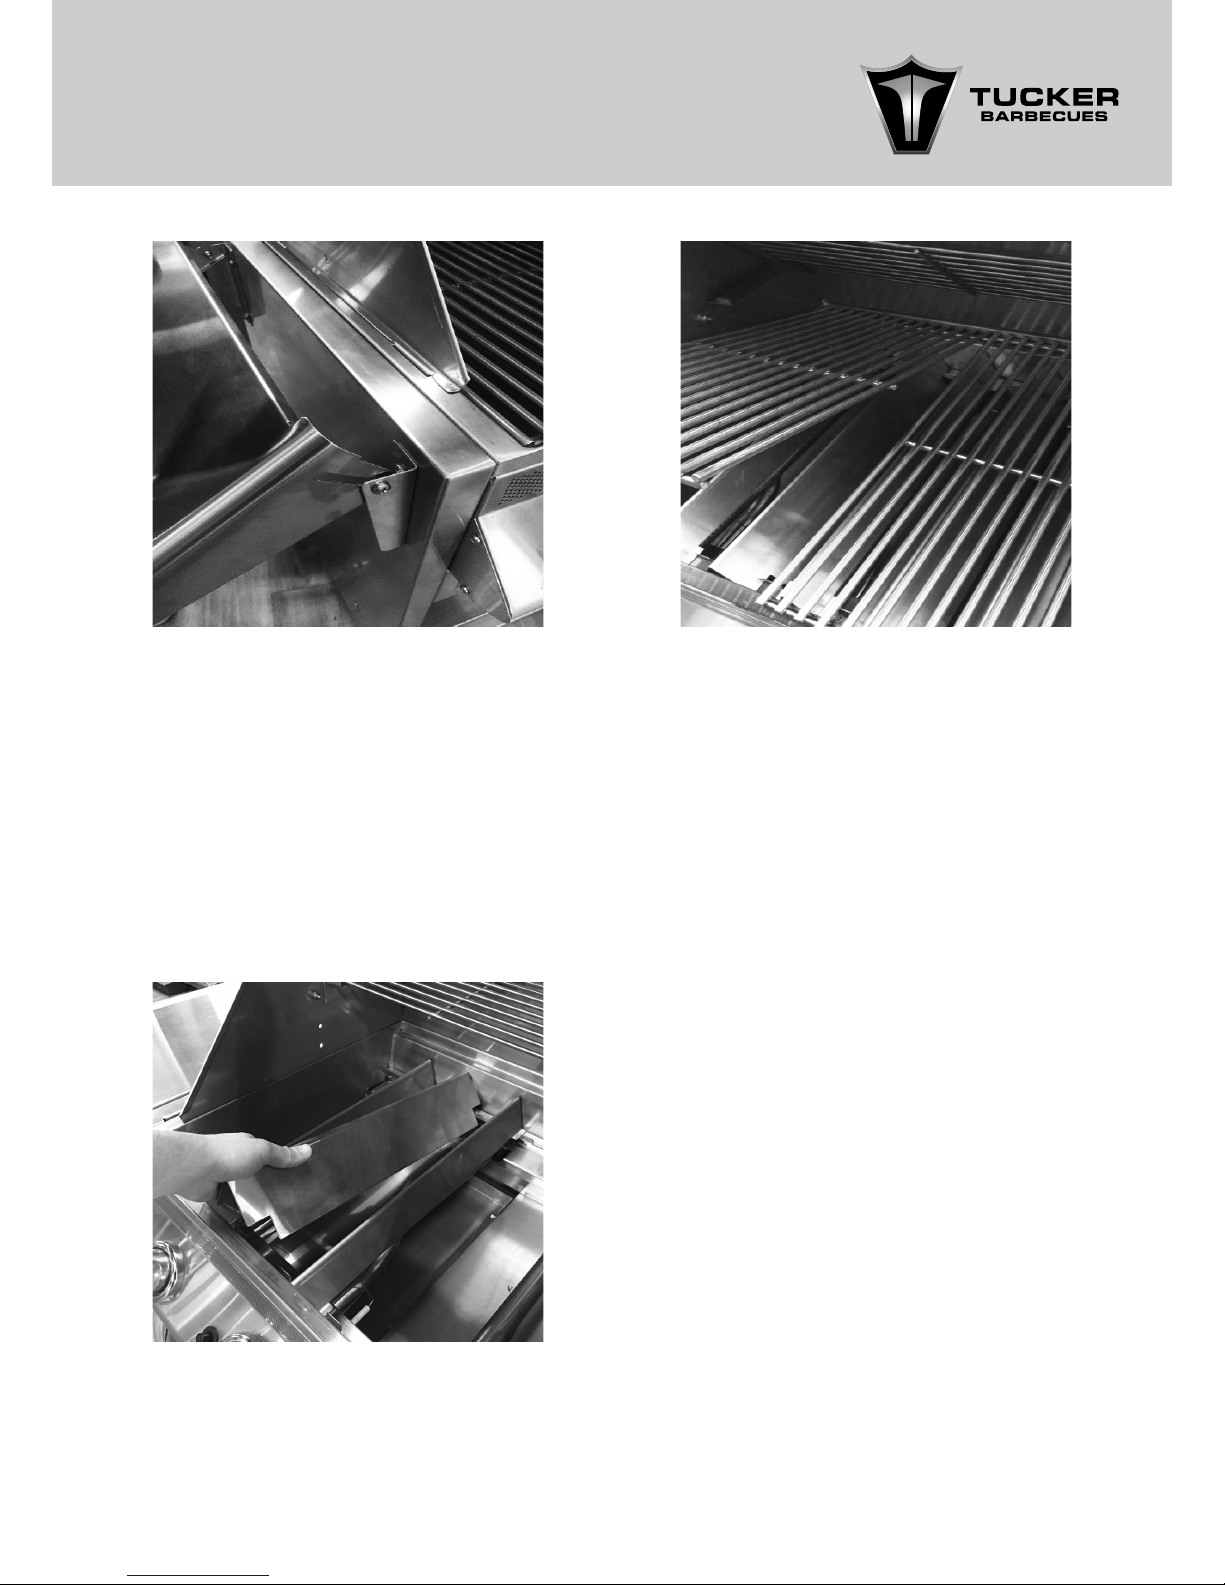
14. Next, place the Flare Guards into position
inside the BBQ.
15. Next place the Cooking Grills into the BBQ
above the Flare Guards and place the Solid
Hot Plate next to them.
16. The Roasting Hood can now be tted.
Remove any packaging, cable ties and
components from inside the Hood. You
should have a Rear Cooking Shelf, Roasting
Rack, Drip Pan and Handle for the Roasting
Hood inside.
17. First attach the Handle onto the front of the
Roasting Hood with the nuts provided.
18. To t the Roasting Hood onto the BBQ, the
base of the Roasting Hood has 4 x locating
tags that t into corresponding slots on the
top of the BBQ.
19. Slide the angled tags on the front of
the base of the Roasting Hood into the
corresponding slots in the front of the BBQ.
You will need to angle the base of the
Roasting Hood down toward the front of the
BBQ so that it allows the tags to slot into the
BBQ easier.
NOTE: The Flare Guards are only required
beneath the open Cooking Grill section of the
BBQ.
NOTE: The Flare Guards are NOT to be placed
under the Solid Cooking Plate as it will reduce
the ability of the BBQ to heat the Solid Cooking
Plate.
The smaller Flare Guards are to be placed
above each of the Burners that will be sitting
below the Cooking Grills.
The Larger Flare Guards are to be placed in
between each of the smaller Flare Guards.
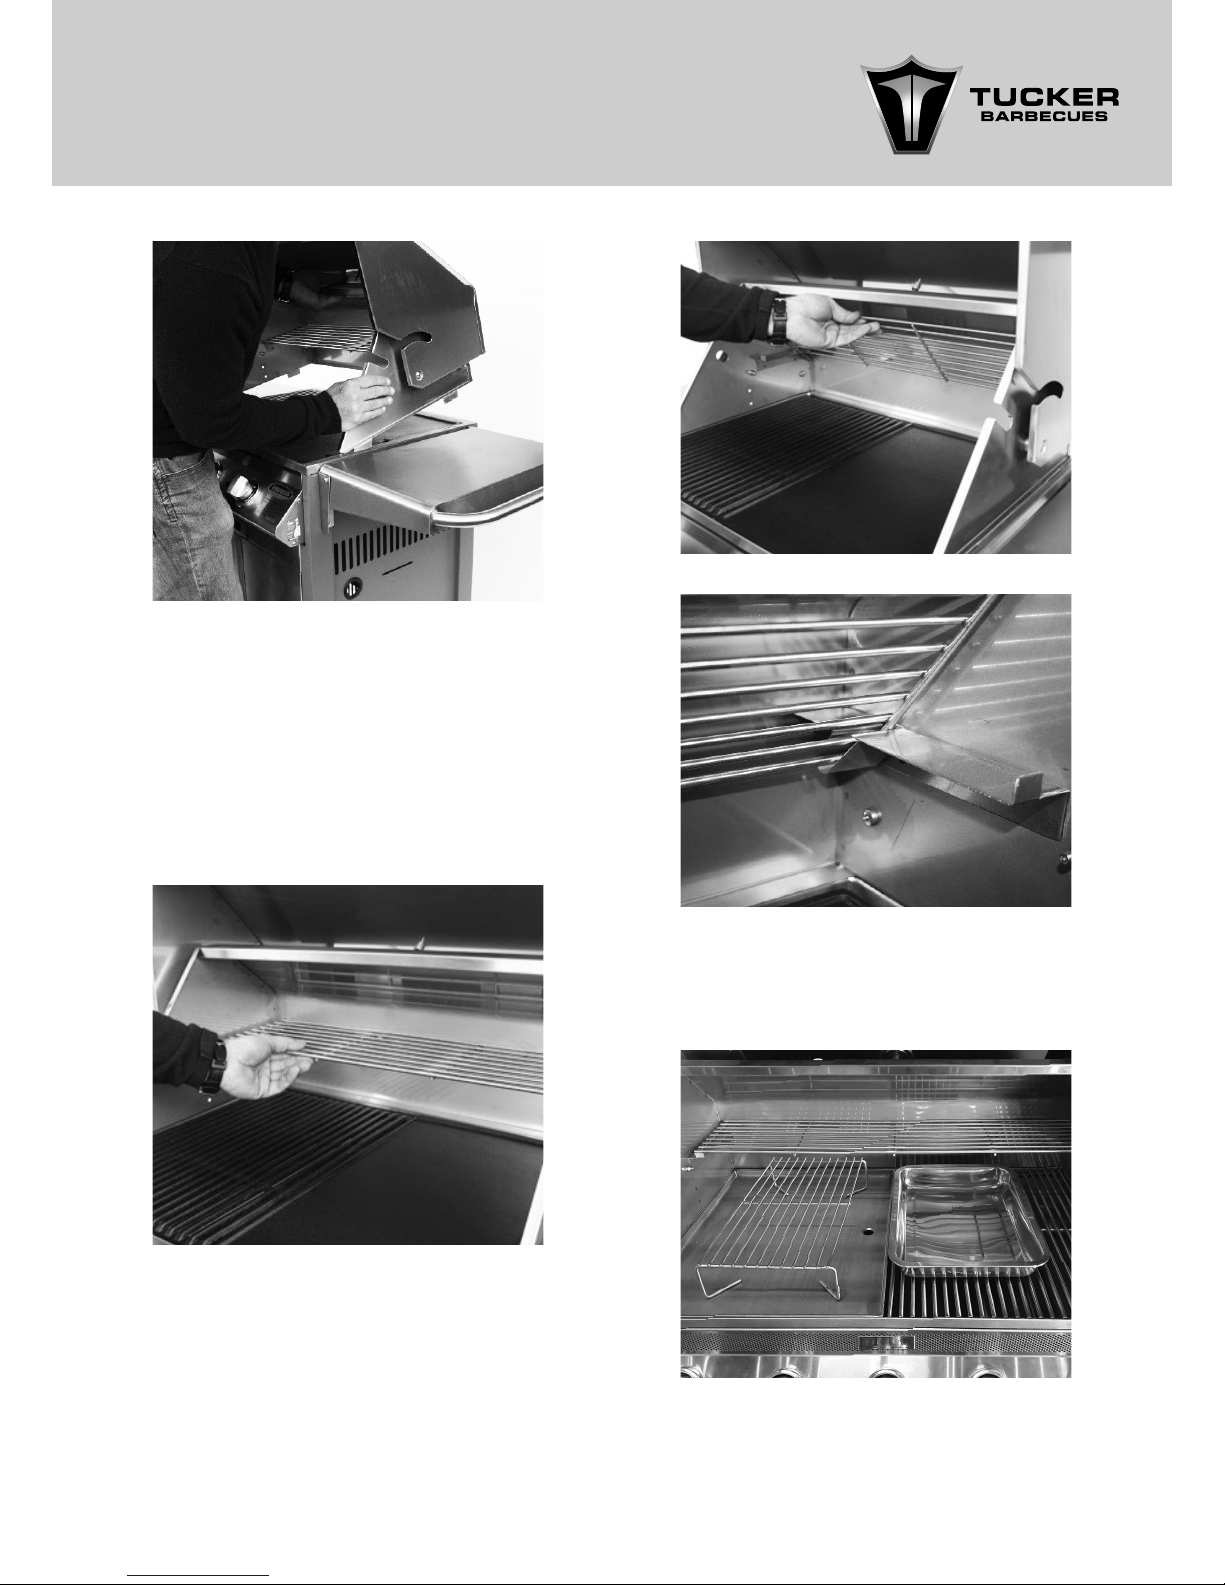
8
20. Once the front tags are located into the
BBQ, the tags on the rear of the Roasting
Hood base will locate straight down into the
corresponding slots on the back of the BBQ
for secure attachment.
21. Now place the Rear Cooking Shelf into the
rear of the Roasting Hood onto the support
brackets.
22. The Roasting Rack and Pan are both used
when Roasting and can be stored away
inside the Cabinet Tolley until required.
NOTE: The Rear Cooking Shelf can be stored
away inside the back of the Roasting Hood if
not required.
 Loading...