

Page 1
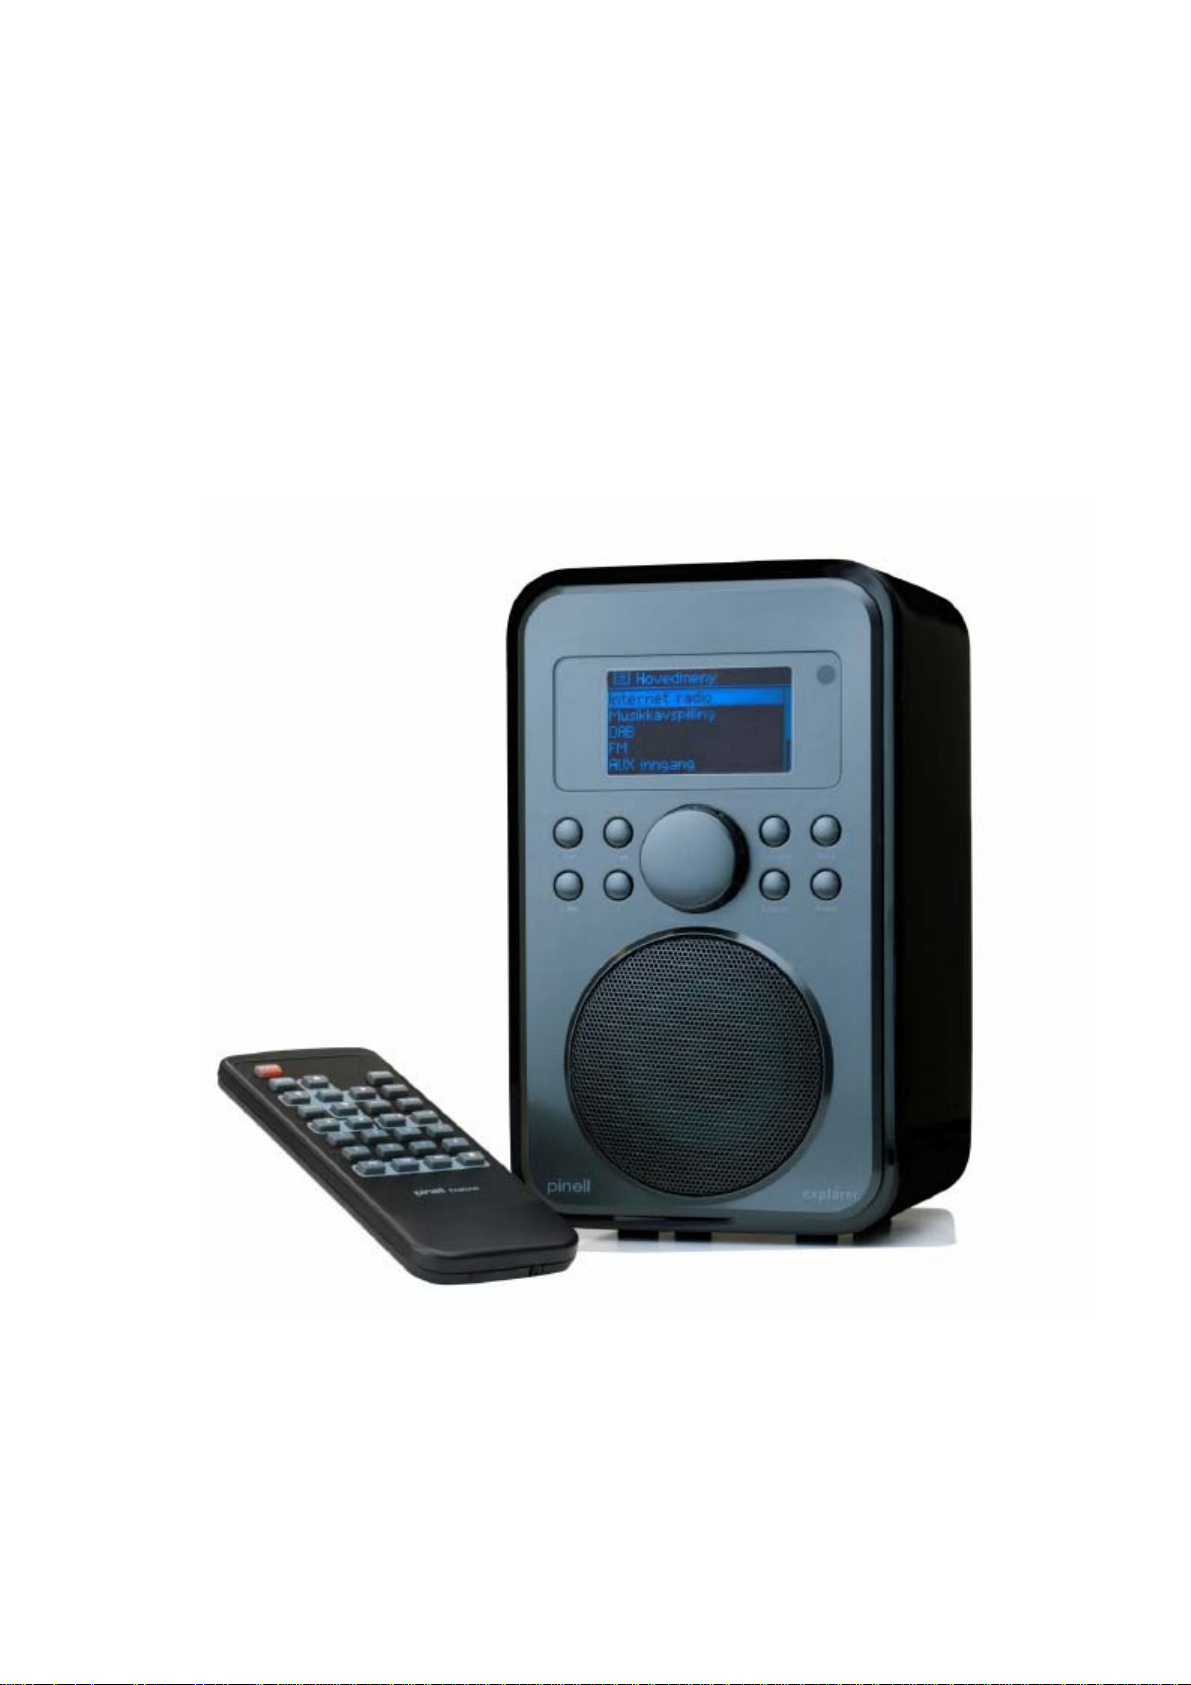
Pinell explorer
DAB+/DAB/FM/Internet Radio
User manual
1
Page 2
2
Page 3
3
Page 4
FCC RF Exposure Warning
This equipment complies with FCC RF radiation exposure limits set forth an uncontrolled
environment. This equipment should be installed and operated with a minimum distance of 20
centimeters between the radiator and your body. This transmitter must not be co-located or
operationg in conjunction with any other antenna or transmitter
4
Page 5

1.0 Function List . . . . . . . . . . . . . . . . . . . . . . . . . . . . . . . . . . . . . . . . . . . . . . . . . . . . . . . . . . . . . . . . . . . . . . 3
1.1 Front View of Machine . . . . . . . . . . . . . . . . . . . . . . . . . . . . . . . . . . . . . . . . . . . . . . . . . . . . . . . . . 3
1.2 Rear view of Machine . . . . . . . . . . . . . . . . . . . . . . . . . . . . . . . . . . . . . . . . . . . . . . . . . . . . . . . . 4
1.3 TOP View of Subwoofer . . . . . . . . . . . . . . . . . . . . . . . . . . . . . . . . . . . . . . . . . . . . . . . . . . . . . 4
2.0 Unit Description . . . . . . . . . . . . . . . . . . . . . . . . . . . . . . . . . . . . . . . . . . . . . . . . . . . . . . . . . . . . . . . . . . . . 4
3.0 Product Specification . . . . . . . . . . . . . . . . . . . . . . . . . . . . . . . . . . . . . . . . . . . . . . . . . . . . . . . . . . . . . . . 5
3.1 Functionality Description . . . . . . . . . . . . . . . . . . . . . . . . . . . . . . . . . . . . . . . . . . . . . . . . . . . . . . . .5
3.2 Frequency Range . . . . . . . . . . . . . . . . . . . . . . . . . . . . . . . . . . . . . . . . . . . . . . . . . . . . . . . . . . . .5
3.3 Display . . . . . . . . . . . . . . . . . . . . . . . . . . . . . . . . . . . . . . . . . . . . . . . . . . . . . . . . . . . . . . . . . . . . 5
3.4 Power Ampli fie r . . . . . . . . . . . . . . . . . . . . . . . . . . . .. . . . . . . . . . . . .. . . . . . . . . . . . . . . . . . . . . . 5
3.5 Input/Output . . . . . . . . . . . . . . . . . . . . . . . . . . . . . . . . . . . . . . . . . . . . . . . . . . . . . . . . . . . . . . . . . 5
3.5.1 Input . . . . . . . . . . . . . . . . . . . . . . . . . . . . . . . . . . . . . . . . . . . . . . . . . . . . . . . . . . . . . . . . . . 5
3.5.2 Output . . . . . . . . . . . . . . . . . . . . . . . . . . . . . . . . . . . . . . . . . . . . . . . . . . . . . . . . . . . . . . . . 5
4.0 Accessories . . . . . . . . . . . . . . . . . . . . . . . . . . . . . . . . . . . . . . . . . . . . . . . . . . . . . . . . . . . . . . . . . . . . . . . . 5
5.0 Unit Safety Certification. . . . . . . . . . . . . . . . . . . . . . . . . . . . . . . . . . . . . . . . . . . . . . . . . . . . . . . . . . . . . .5
6.0 Dimension . . . . . . . . . . . . . . . . . . . . . . . . . . . . . . . . . . . . . . . . . . . . . . . . . . . . . . . . . . . . . . . . . . . . . . . . . 5
7.0 View of remote control . . . . . . . . . . . . . . . . . . . . . . . . . . . . . . . . . . . . . . . . . . . . . . . . . . . . . . . . . . . . . . . .6
7.1Description of Remote control . . . . . . . . . . . . . . . . . . . . . . . . . . . . . . . . . . . . . . . . . . . . . . . . . . . . . . 6
5
Page 6

1.0 Function List
1.1 Front View of Machine
A
G
B
H
C
D
I
E
J
F
K
1.2 Rear View of Machine
P
Q
R
L
M
N
O
6
Page 7
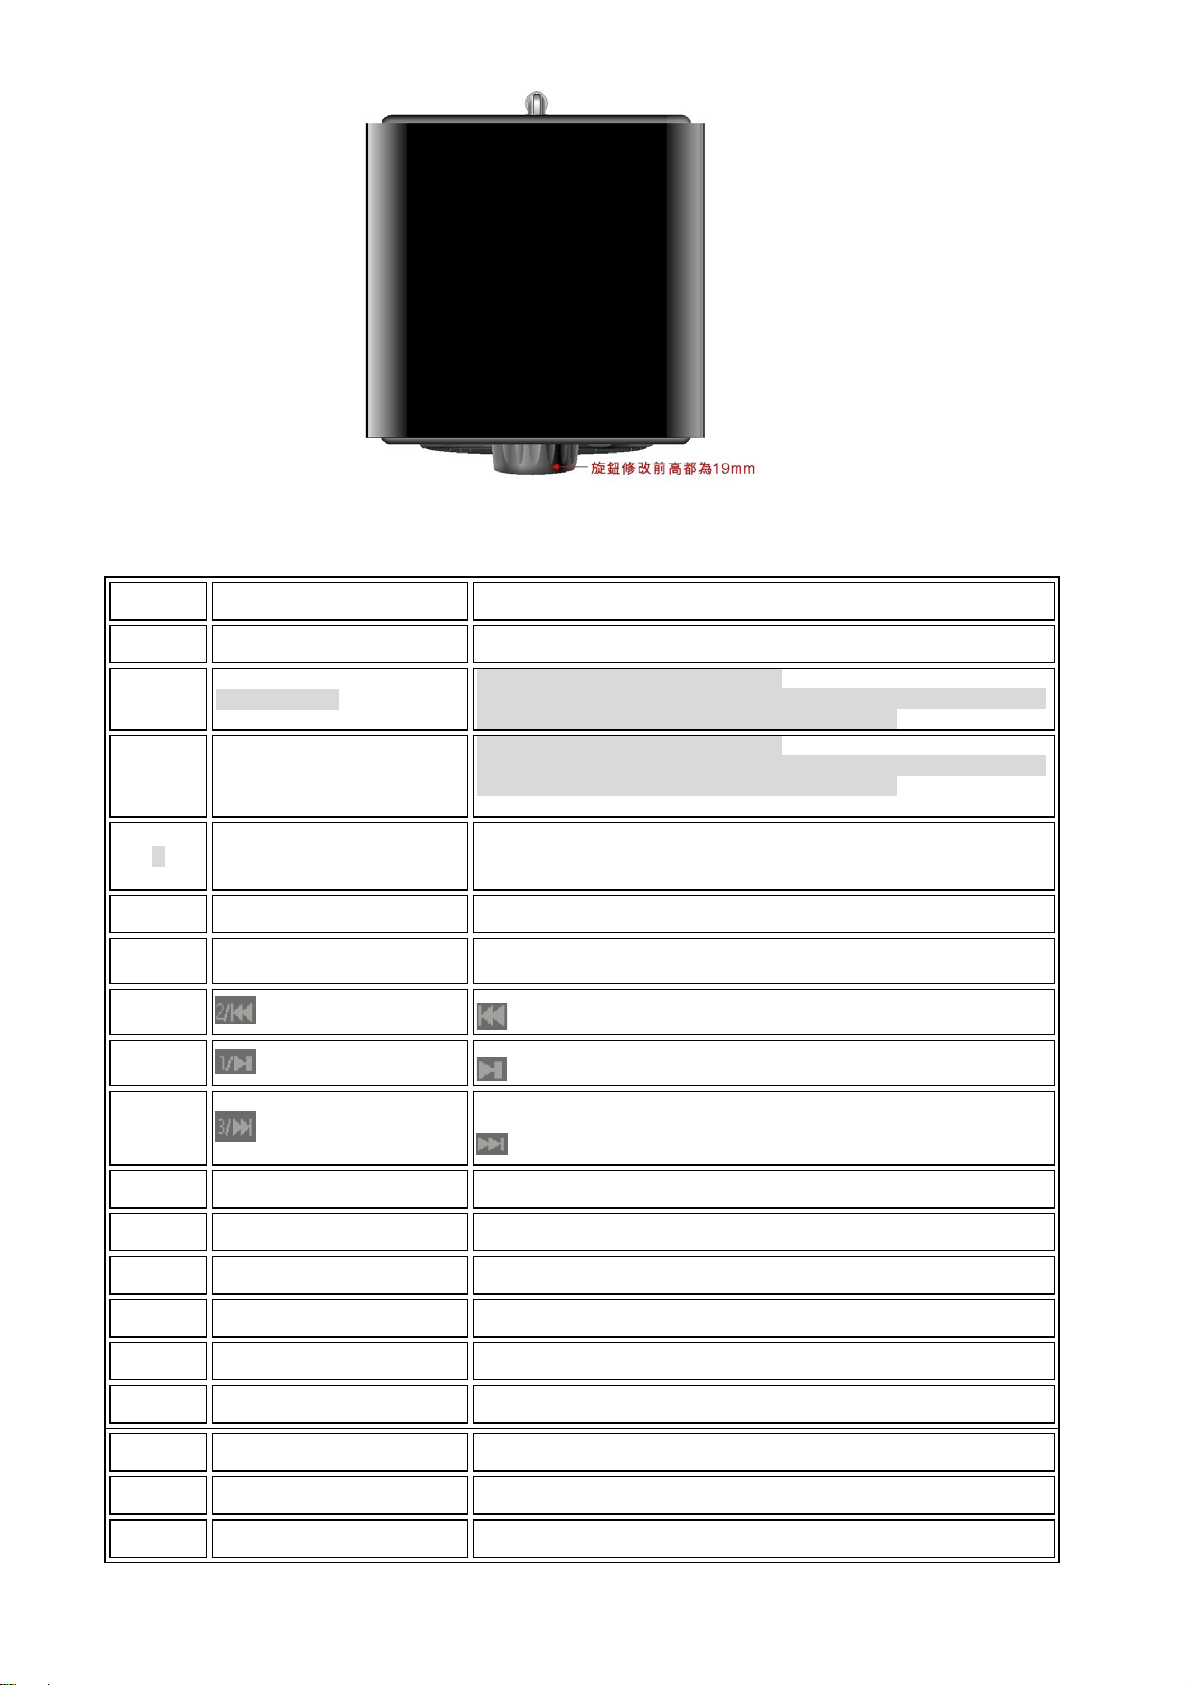
1.3 Top Vie w of Unit
Symbol Funcion Description
A LCD Display Display all information of system unit
Press to navigate through pages while
B Forward Button
Back Button
C
D VOL/ Menu / select Button
E Power Button
F Source Button
G
H
I
J 4 Button Press Numeric 4 to save current FM/DAB station frequency
K
Button
Button
Button
Speaker
In the main menu. Also used for highlighting characters when entering
An internet station’s name or entering your password
Press to navigate through pages while
In the main menu. Also used for highlighting characters when entering
An internet station’s name or entering your password
Turn knob right / left to increase /decrease volume.
Press button to select the item highlighted in the menu and press hold to
enter main menu
Press Power button to Power On unit when stand by mode.
Press button to show different mode, FM/ AUX in/ internet/Music
Player/DAB
Press Numeric 2 to save current Fm /DAB station frequency,
: Play last song in media player mode.
Press Numeric 1 to save current FM/DAB station frequency,
: play or pause current songs in media player mode.
Press Numeric 3 to save current FM/DAB station frequency,
: Play next song in media player mode.
2.75” 8Ωspeaker
L Exhaust Vent Exhaust vent outlet. Port tube.
M DC IN JACK Use to connect the 15V DC power adapter
N Ethernet plug Used to connect Ethernet
O Battery compartment Use to install 8 X AA battery
P Headphone jack 3.5Φ Stereo headphone type output jack
Q AUX IN Jack 3.5Φheadphone type jack for analog stereo AUX input
R FM Antenna 75 Ohms F-connector for aerial connection
7
Page 8

3.0 Product Specification
3.1 Functionality Description
¾ Alarm/ Snooze /Sleep
¾ RDS function
¾ Internet / FM / DAB+ / Aux in
3.2 Frequency Range:
¾ FM: 87.5~108 MHz / step 0.05 MHz
¾ DAB+ (Band III): 174~240MHz
¾ Internet Radio: 2412~2462MHz
3.3 Display:
¾ Dot 128 x 64
¾
View area: 56mm<L>x31mm<W>
¾
White character with Black background
3.4 Power Amplifier:
¾ Speaker: Mono output ( 2.75”)
¾ Amplifier: 5W @ 10% THD
¾ Frequency Response: 80 Hz ~ 20 KHz
3.5 Input/Output:
3.5.1 Input:
¾ 3.5mm AUX in Jack
3.5.2 Output:
¾ 3.5Φ Stereo Headphone Output Jack.
4.0 Accessories
¾ Brochure x1
¾ Adapter x1
¾ Remote control x 1
¾ 230V AC to 15V DC 1.5A wall hanging type switch power x1
5.0 Unit Safety Certification:
CE certification
6.0 Dimension
¾ 116 mm〈W〉x 190 mm〈H〉x110 mm〈D〉
8
Page 9
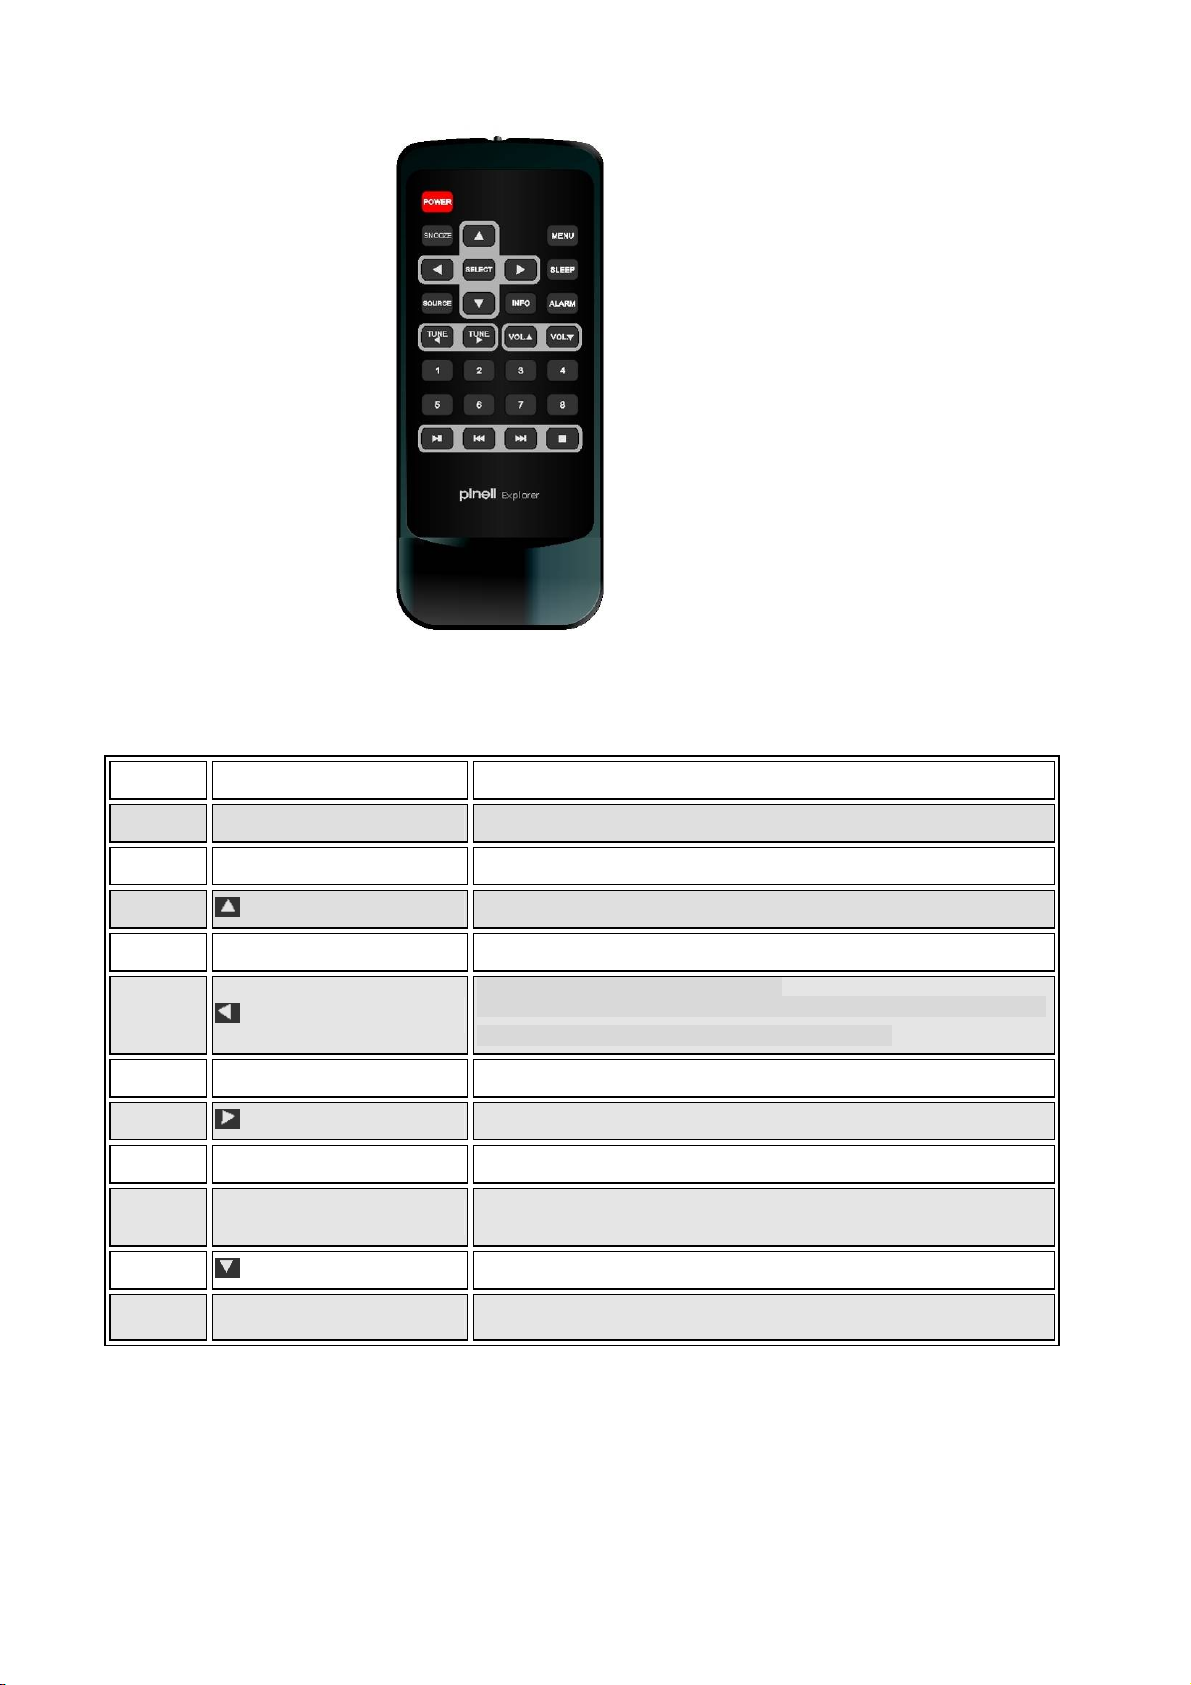
7.0 View of remote control
7.1 Description of Remote Control
Symbol Function Description
A Power Button
Press to power unit on or off
B Snooze Button Press to show a count down on the display during alarm sounds
C
Button
Press to move up through menu
D Menu Button Press this button to enter and exit the settings menu
Press to navigate through pages while
E Button
In the main menu. Also used for highlighting characters when entering
An internet station’sname or entering your password
F Select Button Press button to select the item highlighted in the menu
G Button Press to go back submenu
H Sleep Button Sleep function control and setting
I Source Button
Press button to show different mode internet/Music Player/DAB/
FM / AUX in
J Button Press to down through menu
K Info Button
In internet or DAB+, Fm mode, press to show audio format,
station description, genre, RDS and other related information.
9
Page 10
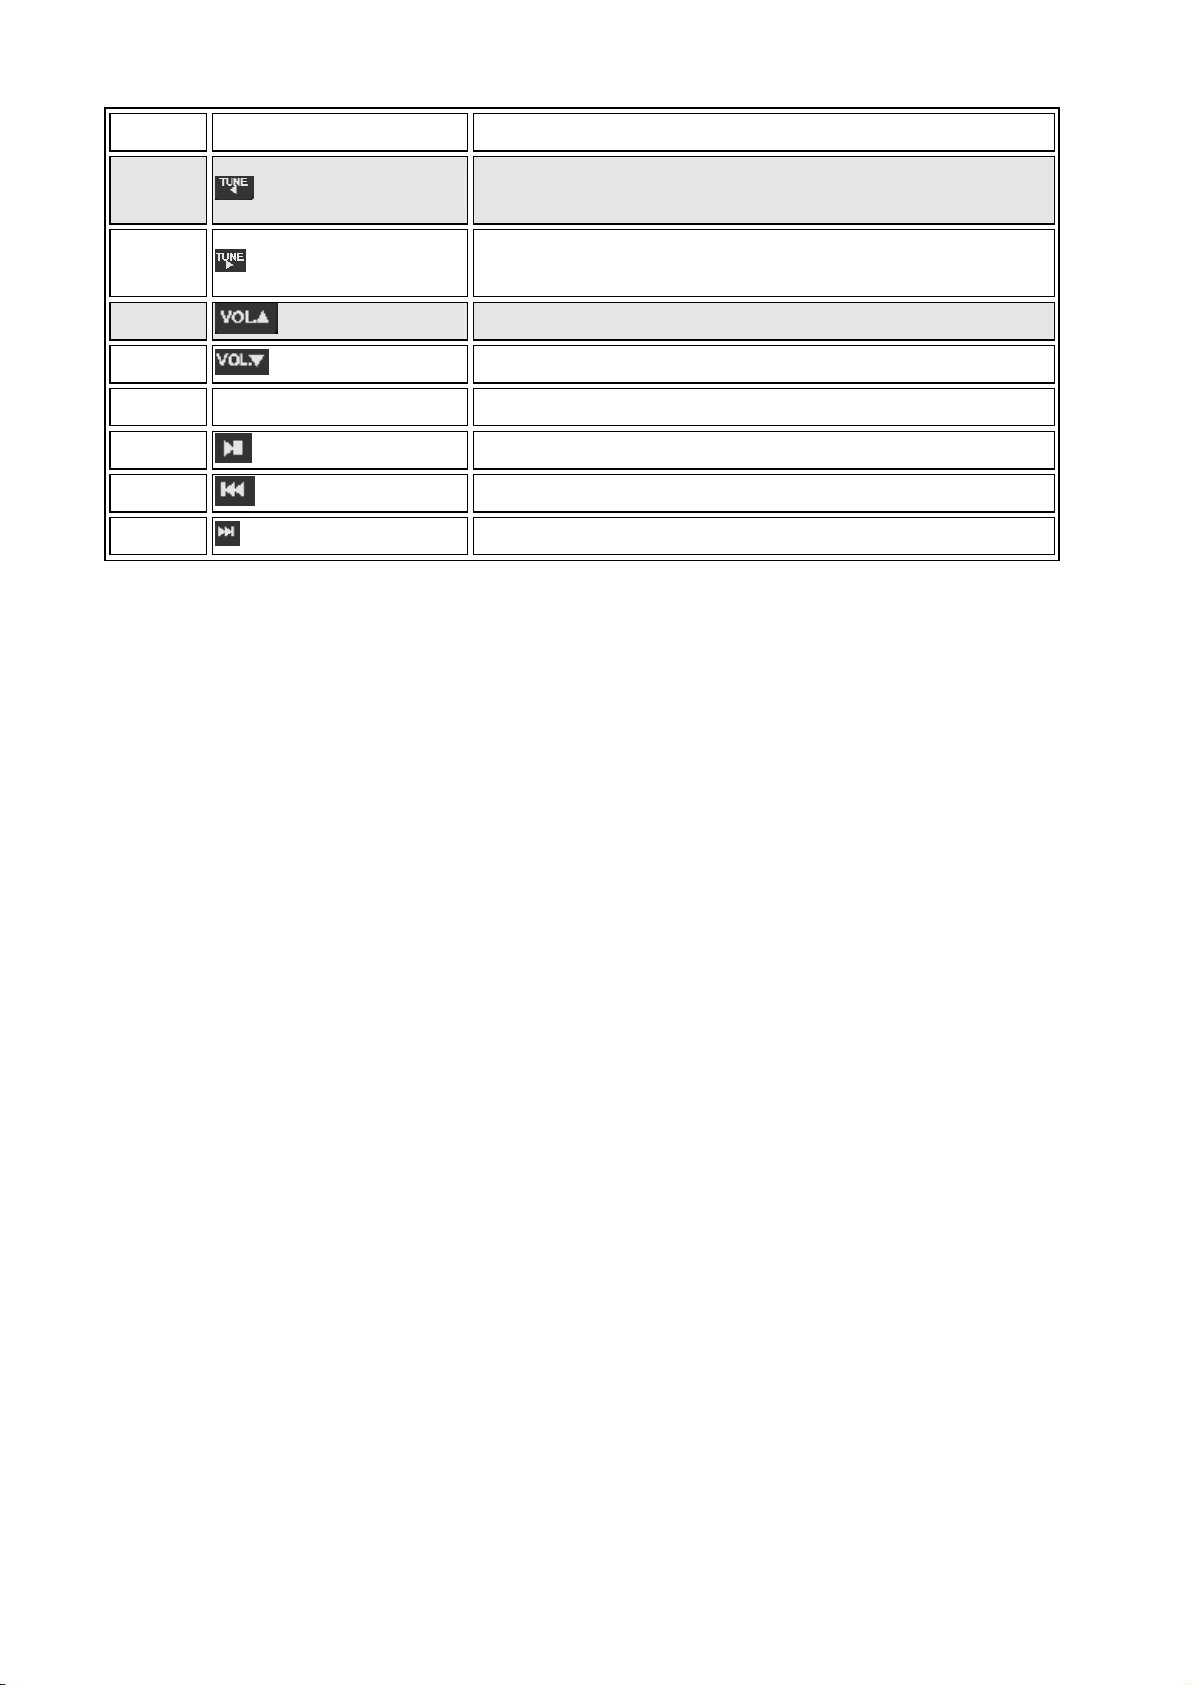
L Alarm Button Press to show alarm status and setting
In FM Mode, press briefly to tune frequency up; press for 2
M
Button
seconds to search next available radio station.
In Internet Mode: operation with menu control
n FM Mode, press briefly to tune frequency down; press for 2
N
Button
seconds to search previous available radio station
In Internet Mode: operation with menu control
O
P
Button
Button
Q Preset# 1~8 Button
R
S
T
Button
Button
Button
To increase the volume
To decrease the volume
press to save current FM/DAB/Internet station.
Media player control only, Play or pause song
Media player control only, play last song
Media player control only, play next song
10
Page 11
Getting started / setup
although theDAB+/DAB/FM/Internet Radio is sophisticated, getting started is simple. To play FM radio,
all you need is a power source (a 100-240 V mains supply).
For music Player mode, you need either a USB stick with music files or a wired/wireless ethernet
network and a UPnP music server (e.g. a PC).
For Internet-connected modes such as Internet radio or Pandora, you also need a broadband Internet
connection.
01 Place DAB+/DAB/FM/Internet Radio on a suitable shelf or table and plug it in to a power outlet.
02 To receive broadcast radio (FM), extend the telescopic antenna.
03 Press and hold standby to power on.
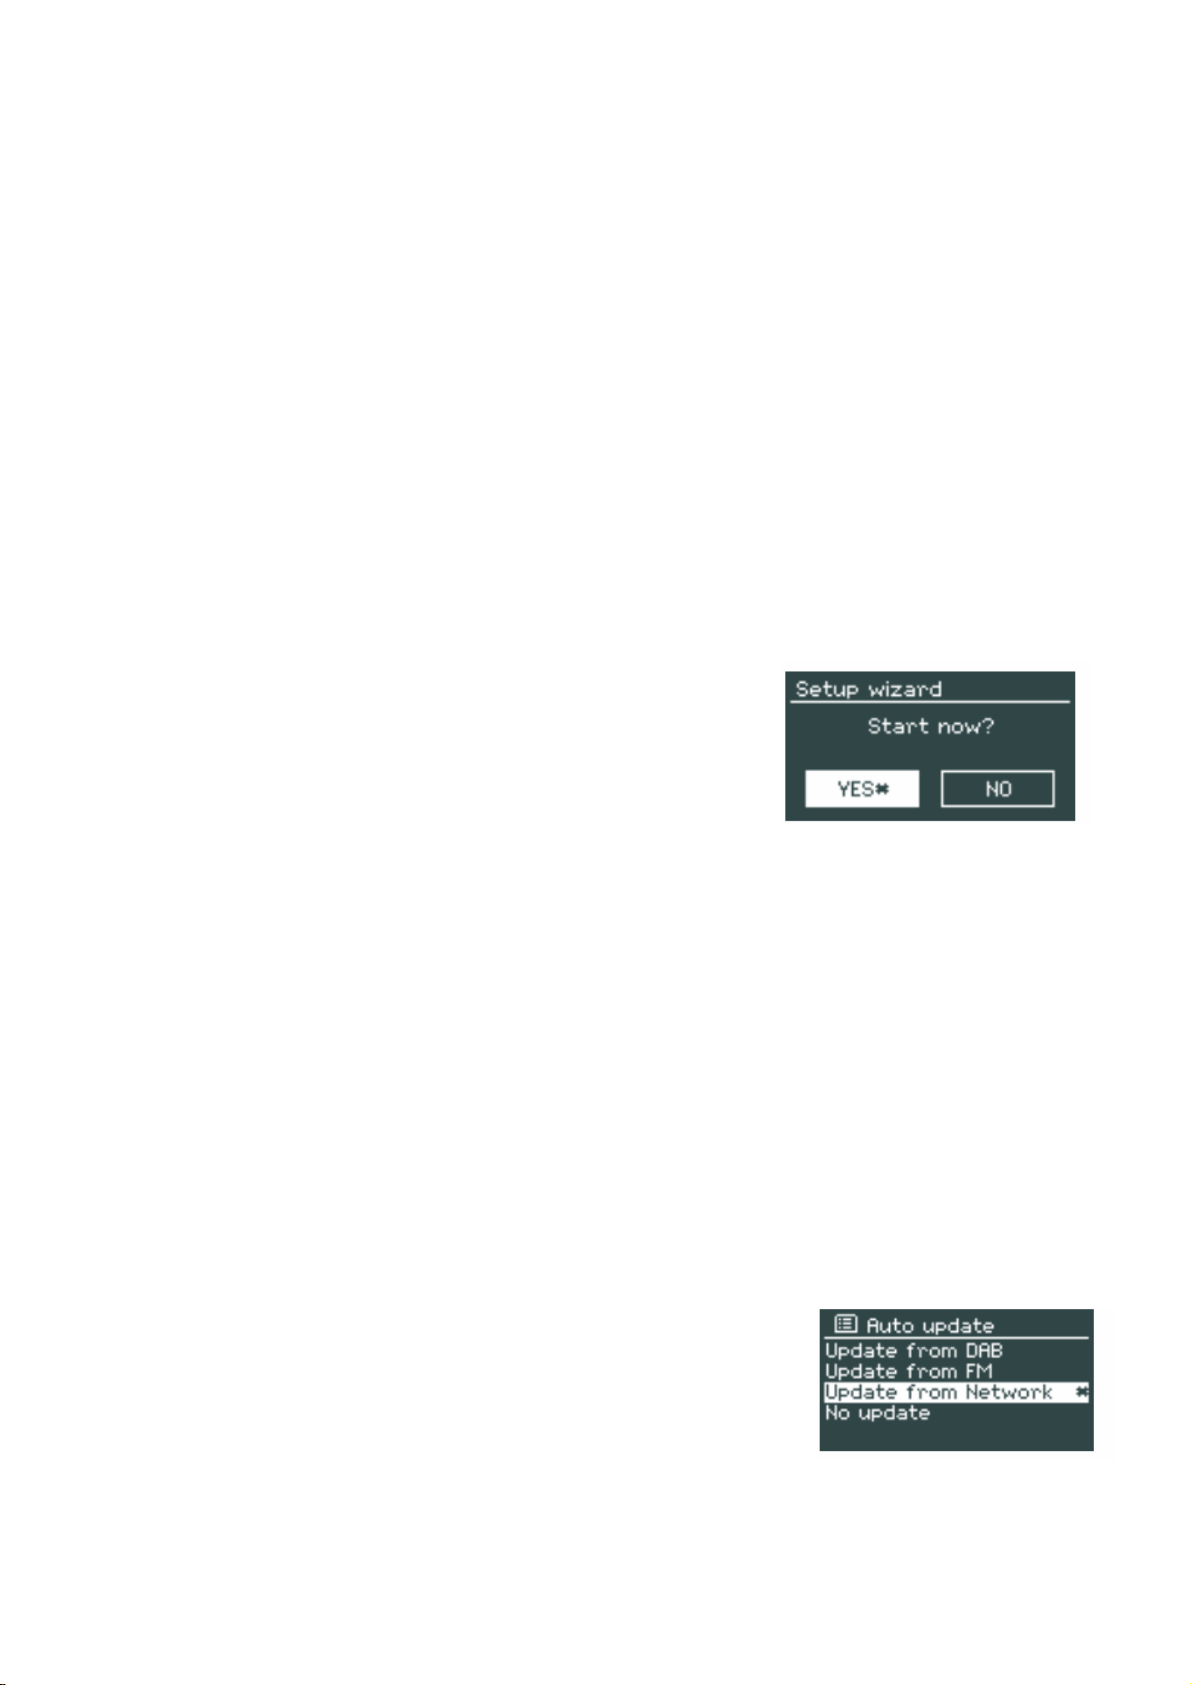
SETUP WIZARD
When DAB+/DAB/FM/Internet Radio is started for the first time, it runs through a setup wizard to
configure settings for
date/time and network. Once this has finished, the system is ready to
use in most modes.
Note: To change these settings later, select Menu > System settings >.
To run the setup wizard again, select Menu > System settings >
Setup wizard.
select yes to start the setup wizard.
Note: If you want to use a wired network, bypass the setup wizard.
If you choose no, the next screen asks if you would like to run the
wizard next time DAB+/DAB/FM/Internet Radio is started. The system then starts without configuring
time/date and network settings and enters the main menu.
Note: If power is removed while the wizard is in progress, the wizard will run again next time
DAB+/DAB/FM/Internet Radio is started.
12 / 24 hour display
To change between 12 and 24 hour display, select set 12 / 24 hour and then select your preference.
Tima / Date
The time and date can be updated manually or automatically. With auto-update, the time and date are
automatically synchronised with external clocks. auto-update is generally
more accurate.
Auto-update
The time and date can be updated manually or automatically. With
auto-update, the time and date are automatically synchronised with
external clocks. auto-update is generally more accurate.
FM use time signals broadcast with radio transmissions.
11
Page 12
Network uses a time signal sent from the Frontier silicon Internet radio portal when in anetworkconnected
mode.
01 select Update from FM, Update from network or no update.
02 set your time zone.
03 If your country uses daylight saving, the automatically updated time may be wrong by one hour.
When daylight savings are in effect (during the summer), turn on the daylight savings option.
DAB+/DAB/FM/Internet Radio will auto-update from the selected source when time information is
available
Manual set
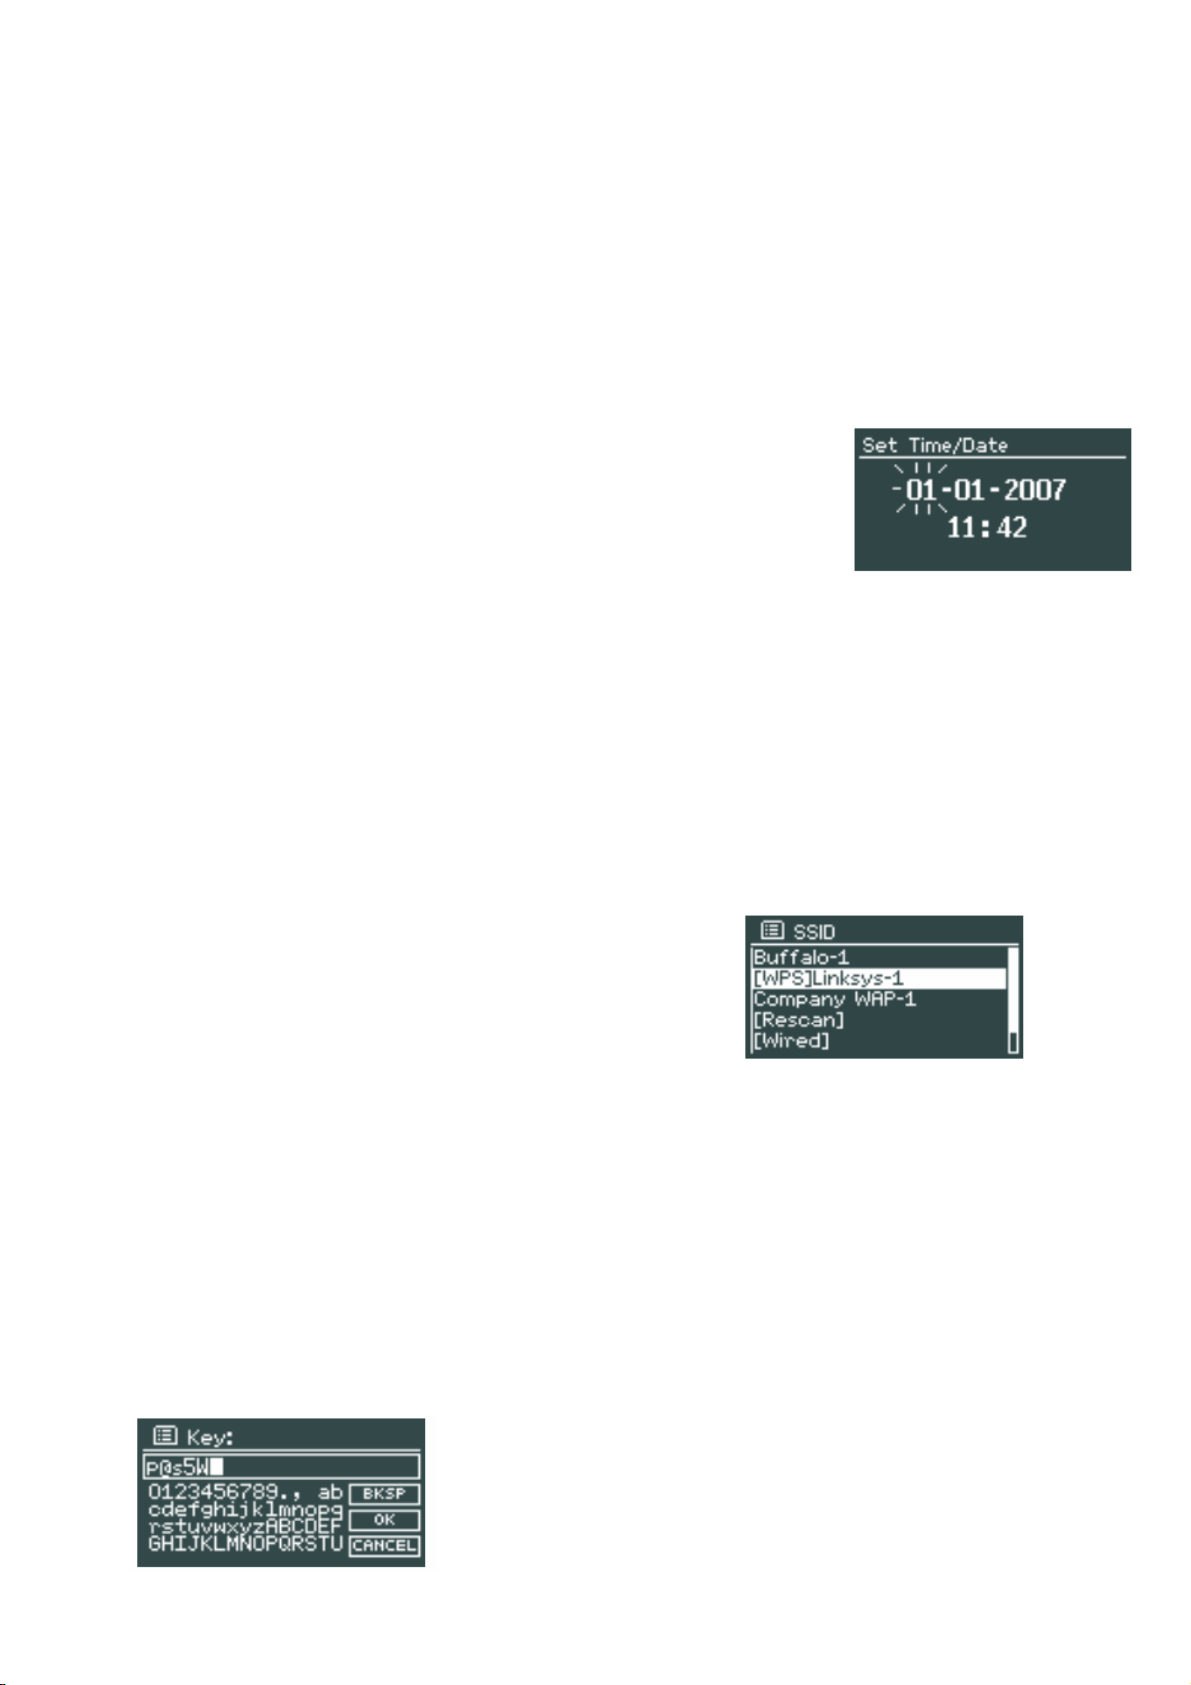
If you set no update, the wizard now prompts you to set the time and
date manually.
The date and time are displayed as dd-mm-yyyy and hh:mm am/Pm
with the first value, dd, active (flashing).
adjust each value with the select control. as each value is set, the next value becomes active and
flashes.
Net works
DAB+/DAB/FM/Internet Radio is compatible with all common network protocols and encryption
methods, including
Wi-Fi Protected setup (WPs).
To connect DAB+/DAB/FM/Internet Radio to your network, you
need either a wired router and an ethernet (rJ45 network) cable, or
a Wi-Fi wireless router, together with password key if set.
select:
‧ Wlan region / country
‧ Wi-Fi network (ssId)
Standard encrypted network
To enter the network's key (password), use the selection knob to move the cursor through the characters
and select. as each character is selected, the key is built up near the top of the display.
There are three options accessible by turning select back before the first characters (0123…)
Backspace, Ok and Cancel.
12
Page 13
Completion
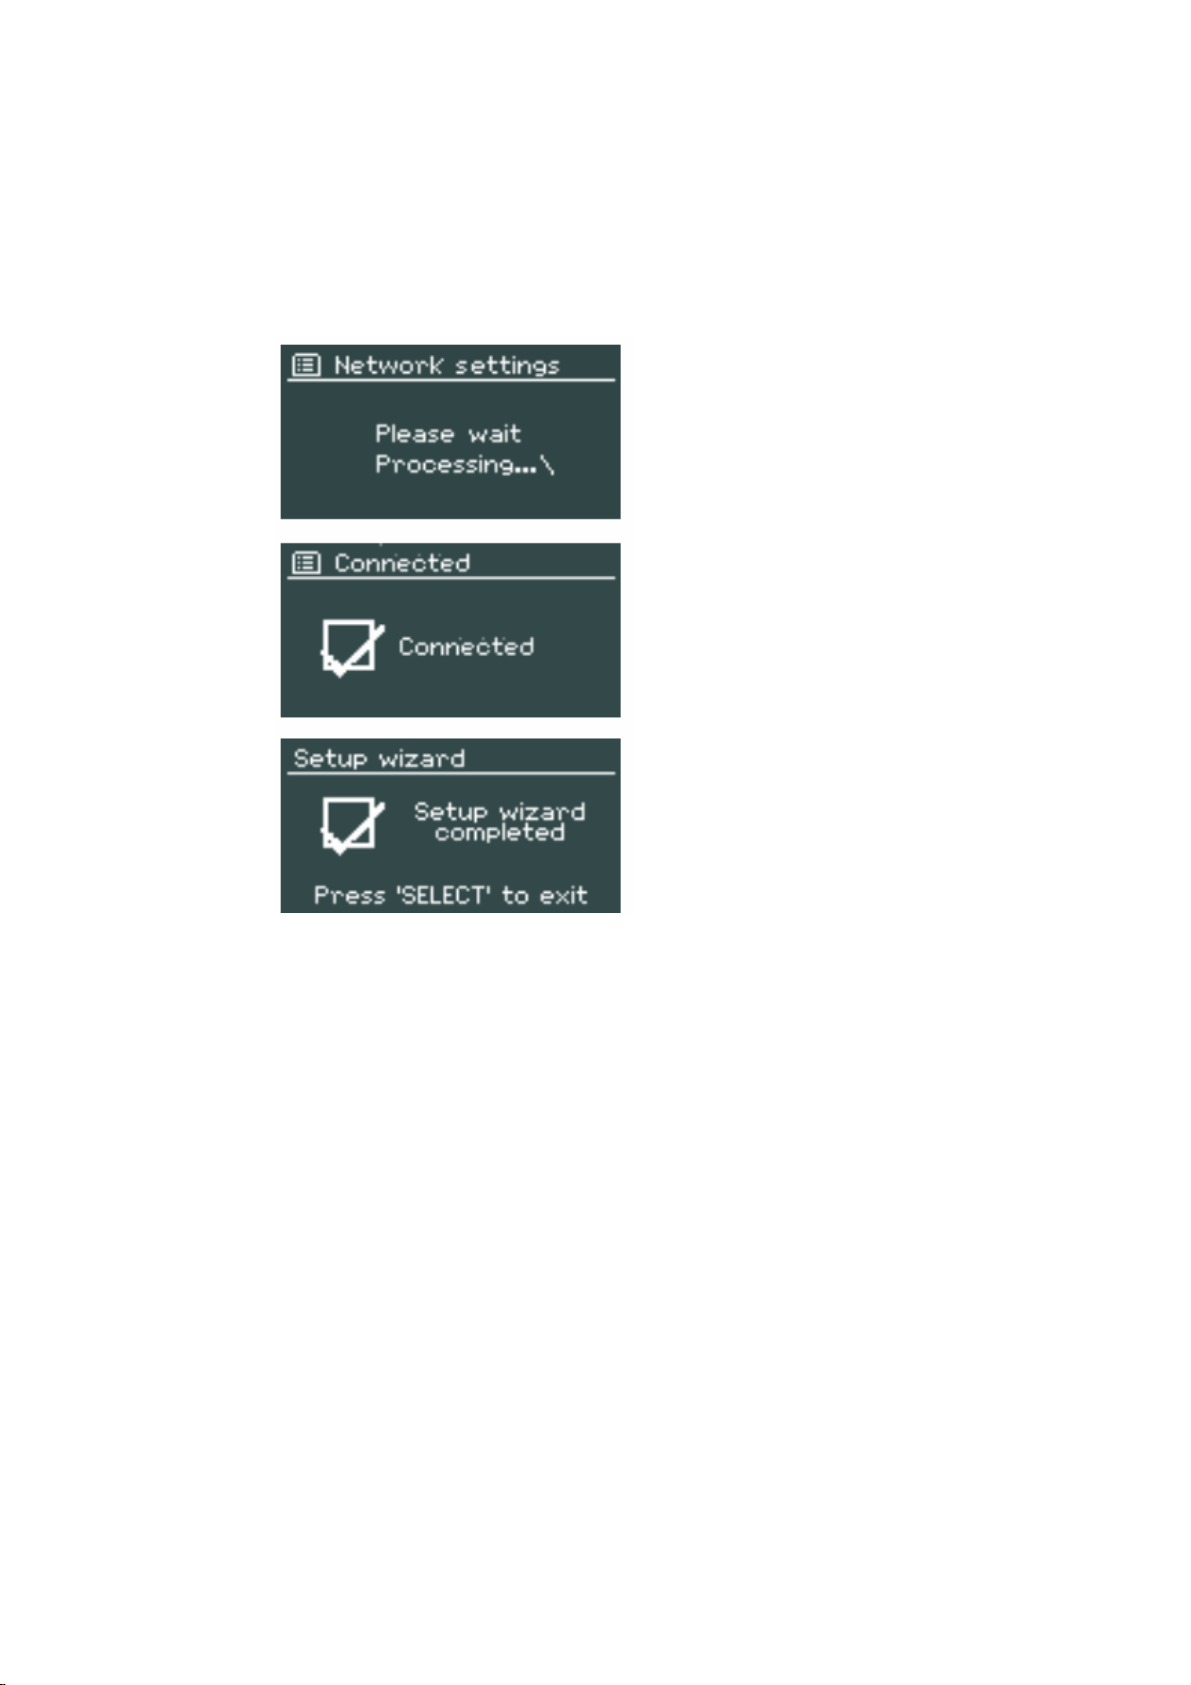
DAB+/DAB/FM/Internet Radio tries to connect to the selected network.
If connecting fails, DAB+/DAB/FM/Internet Radio returns to a previous screen to try again.
If the network connection is lost, DAB+/DAB/FM/Internet Radio automatically tries to reconnect.
NET WORK
DAB+/DAB/FM/Internet Radio remembers the last four wireless networks it has connected to, and
automatically tries to connect to whichever one of them it can find.
you can see the list of registered networks through menu > system settings > network > network
profile >. From here you can delete unwanted networks by turning and pressing select then confirming
delete yes.
There are also other options for viewing and manually altering network settings from menu > system
settings > network > (for example setting up a wired network). Users experienced with networking may
find these options useful for diagnosing and fixing network problems.
LANGUAGE
The default language is english. To change, select menu > system settings > language > then select
your language.
13
Page 14
Internet radio portal
REGISTRATION
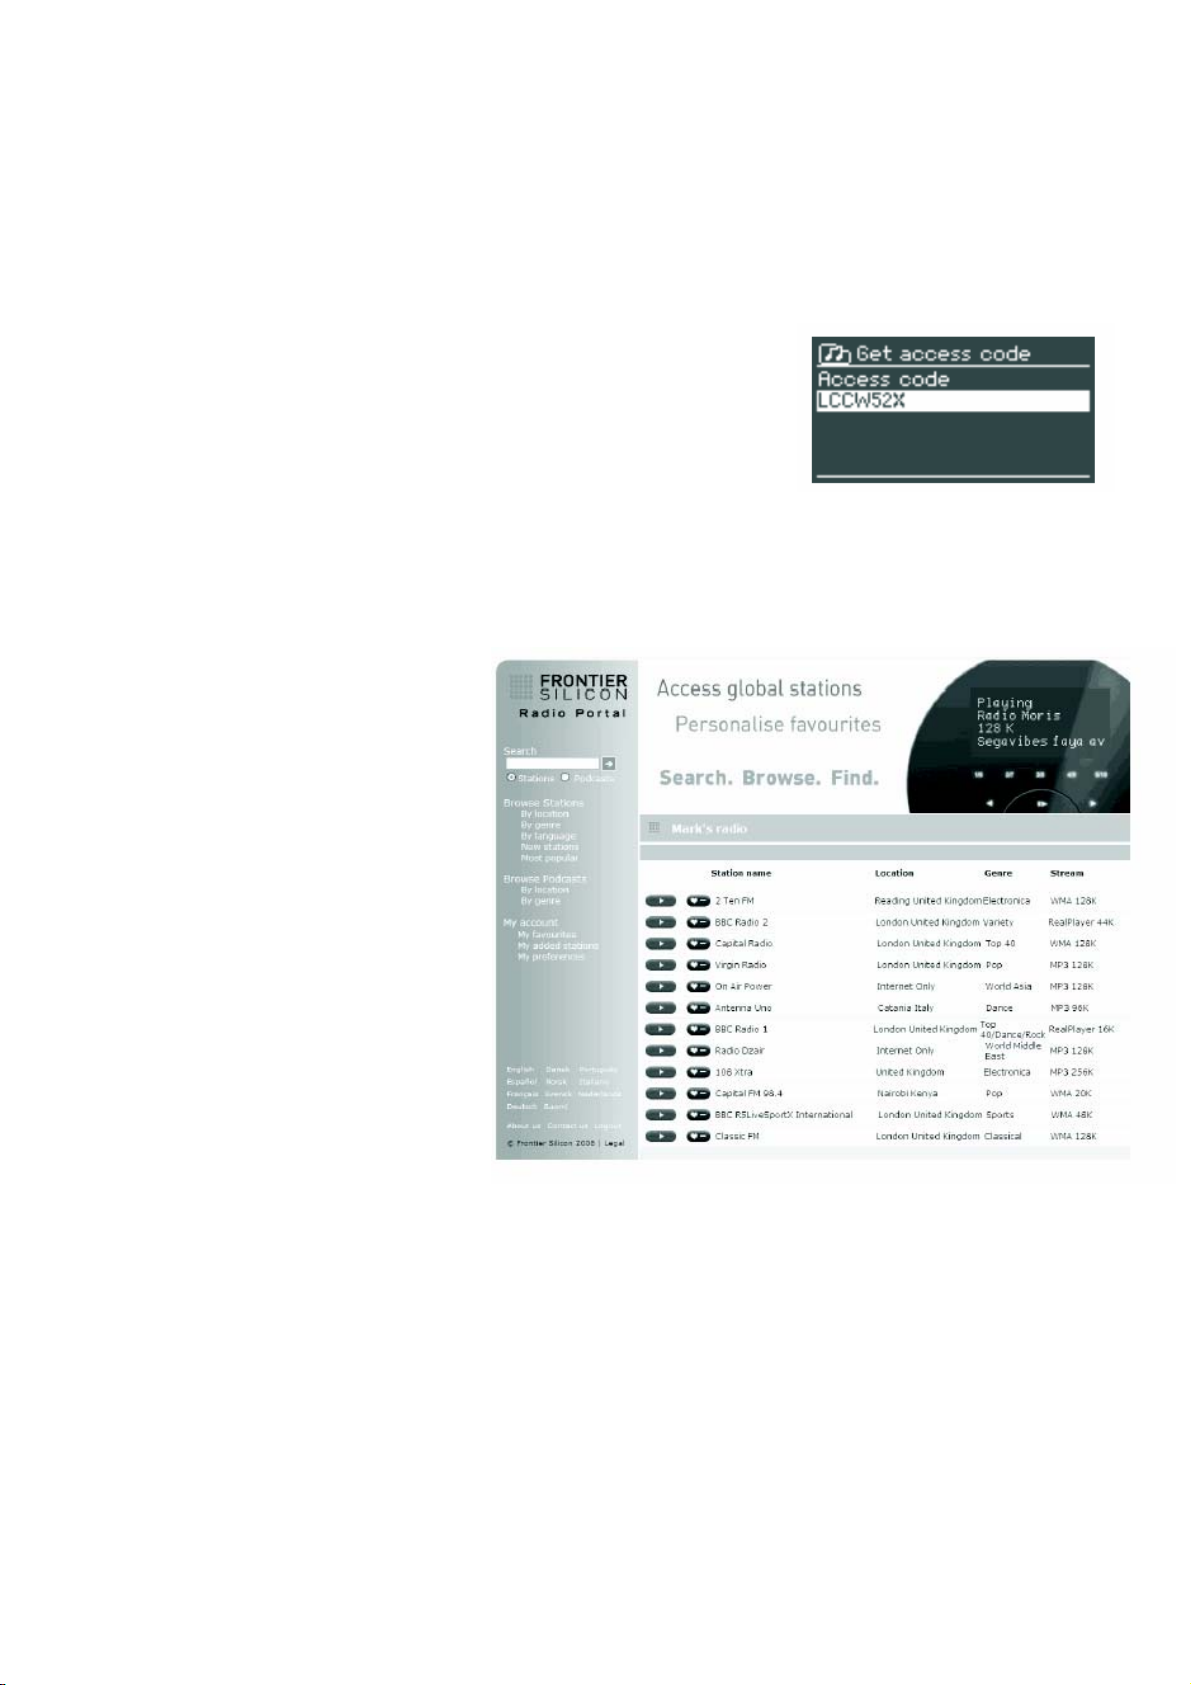
DAB+/DAB/FM/Internet Radio radio is equipped with a high quality Internet tuner module from Frontier
silicon. TheFrontier silicon Internet radio portal website allows you to
organise your favourites lists and also listen to Internet radio on a
computer.
To register your DAB+/DAB/FM/Internet Radio with the portal, first get
your radio's unique portal access code by selecting
menu > station list > Help > Get access code >.
Write down the access code.
Note: Do not confuse the portal access code with the Radio ID (from Menu > System settings > Info.)
Visit the portal website at: www.wifiradio-frontier.com
If this is your first visit to the portal,
register for a new account, entering
the following information:
‧ access code
‧ your e-mail address
‧ password
‧ radio model
(DAB+/DAB/FM/Internet Radio)
If you already have an account and wish to add an additional radio, log in to your account and select:
My preferences> Add another WI-FI Radio
Once your radio is registered with the portal, you can immediately use the Internet radio favourites and
added stations features.
14
Page 15
SETTING UP A MUSIC SERVER
In order for DAB+/DAB/FM/Internet Radio to play music files from a computer, the computer must be
set up to sharefiles or media.
UPnP media sharing allows devices like DAB+/DAB/FM/Internet Radio to play music from a shared
media library, navigating through tag menus such as artist, album or Genre. If you are running a suitable
server system such as a PC with Windows media Player 10 or later (WmP), and your music library is
well-tagged, then it is recommended to use media sharing. Only the UPnP server needs to be set up.
Note: iTunes does not currently work as a UPnP media server, but there are add-ons available to work
with an iTunes library.
SHARING MEDIA WITH WINDOWS MEDIA PLAYER
The most common UPnP server is Windows media Player (10 or later). alternatively, other UPnP
platforms and servers may be used. To set up WmP for media sharing, perform the following steps:
01 ensure that the PC is connected
to the network.
02 ensure that the radio is powered
on and connected to the same
network.
03 In WmP, add to the media library
the audio files and folders you
want to share with
DAB+/DAB/FM/Internet Radio
(library > add to library…)
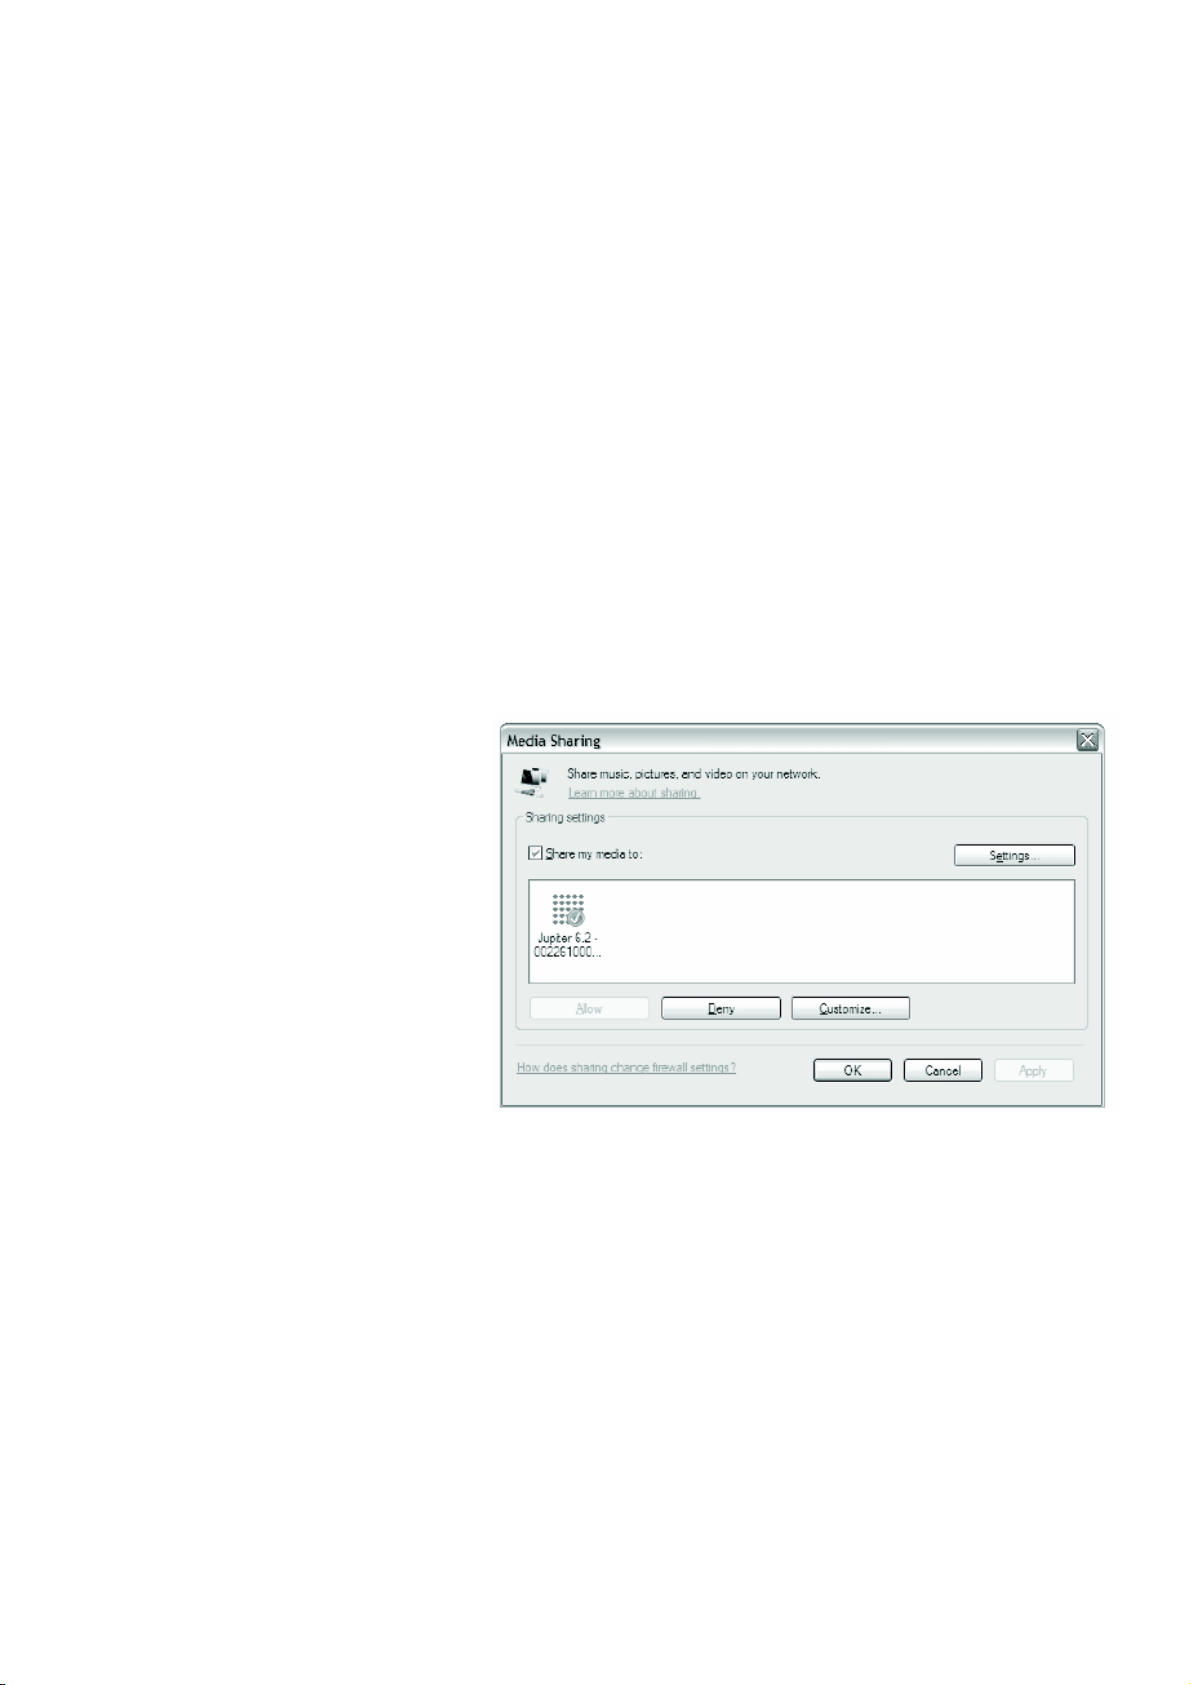
04 In WmP, enable media sharing
(library > media sharing…)
make sure that the radio has access to the shared media by selecting it and clicking allow. you can also
set a name for the shared media in settings… Click Ok to close the dialogue boxes.
The PC is now ready to stream the music to the radio. The WmP UPnP service runs in the background;
there is no need to start WmP explicitly.
15
Page 16
Internet radio mode
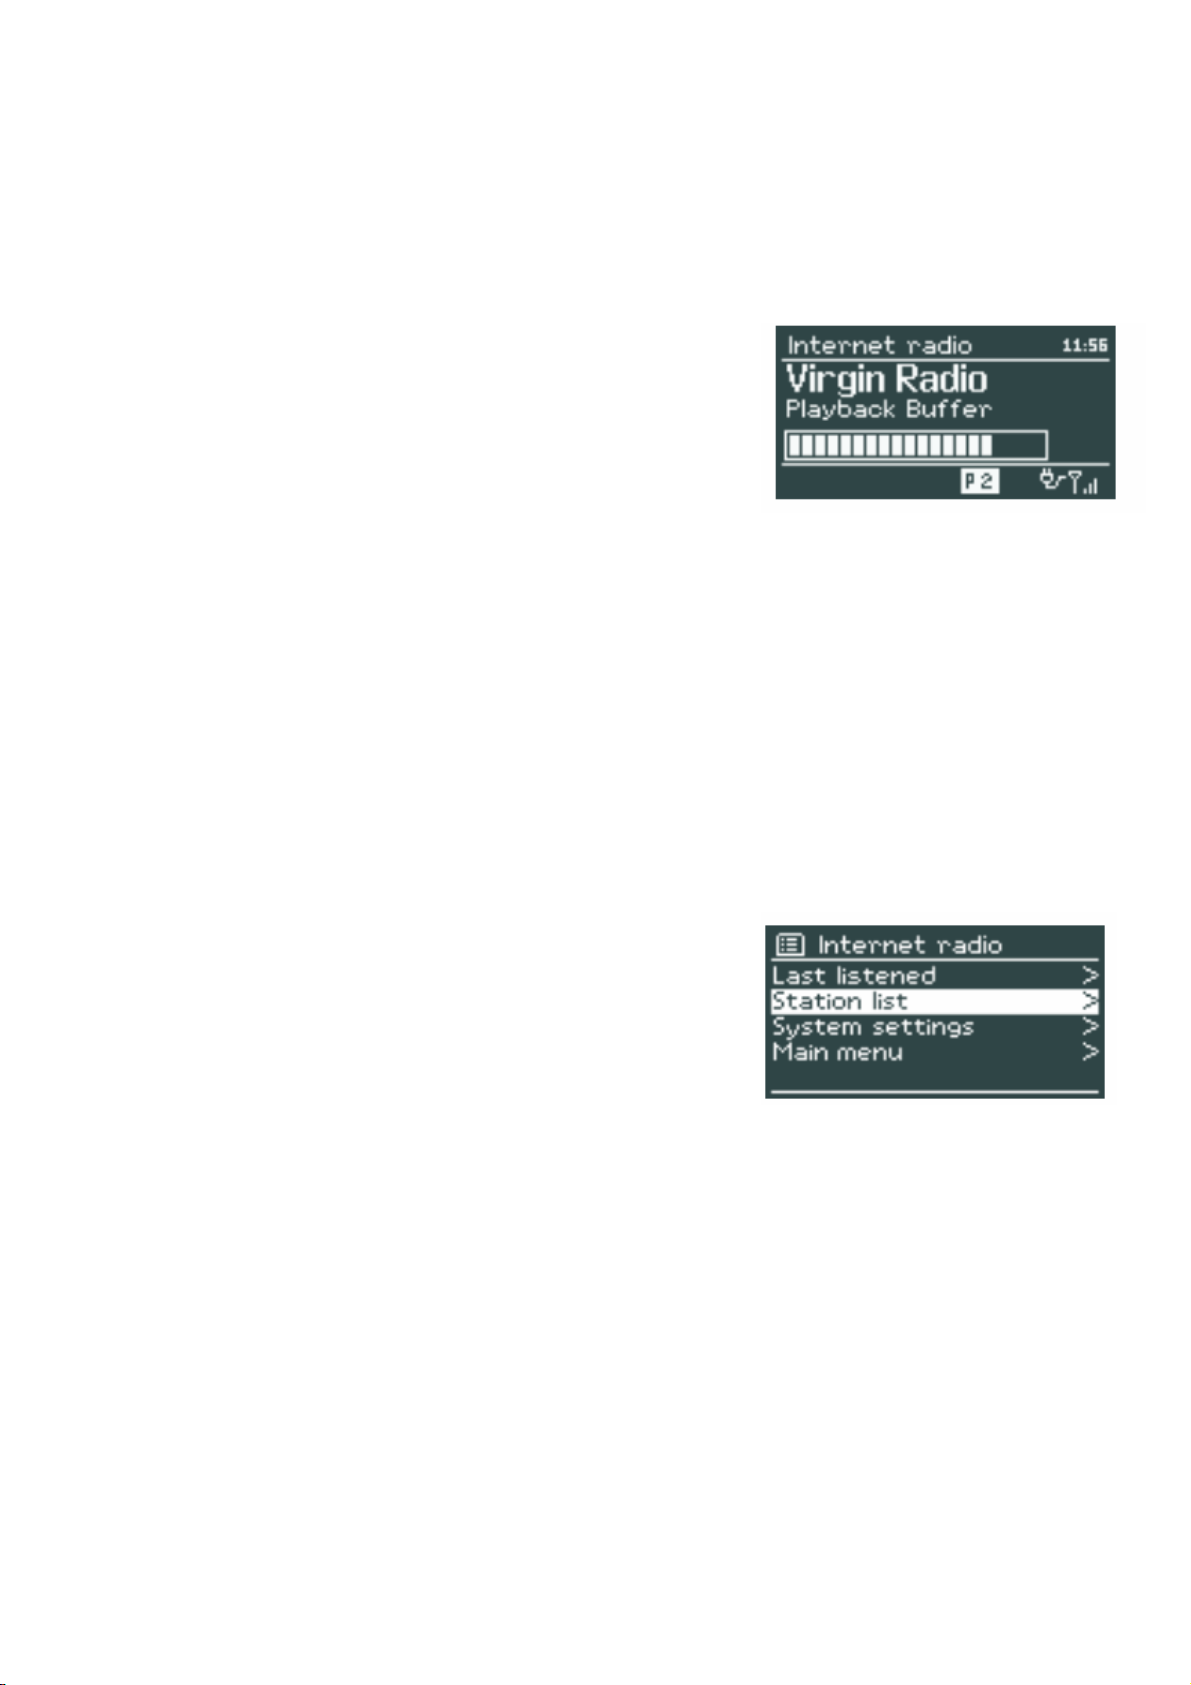
DAB+/DAB/FM/Internet Radio can play thousands of radio stations and podcasts from around the world
though a broadband Internet connection.
When you select Internet radio mode, DAB+/DAB/FM/Internet Radio contacts the Frontier silicon
Internet radio portal to get a list of stations, organised into different categories like Country, most
popular and Genre.
Once you select a station, DAB+/DAB/FM/Internet Radio connects
directly to that station.
The portal also enables multiple lists of favourite stations that you
can personalise, for example andy's stations, Jo's favourites, Talkshows.
To use the favourites feature, register your radio with the portal website as described earlier.
If you haveseveral Frontier silicon radios, you can register them all on the same account so that each
radio has access to your favourites lists. It is possible to add favourites either directly through
DAB+/DAB/FM/Internet Radio or through any computer with a web browser.
To enter Internet radio mode, either press mode until the display shows Internet radio or select
menu> main menu > Internet radio.
Note: The station list menu is provided from the Internet radio portal, so it is only accessible when is
connected to the Internet. Station lists and submenus may change from time to time.
There are several ways of selecting stations directly from the radio:
‧ last listened
‧ Presets.
From the portal through the menu > station list > menu:
‧ Favourites lists
‧ Browse by Country, Genre, most popular, newest
‧ search by keyword
‧ my added stations
If you are already listening to an Internet radio station, you can press Back rather than menu to quickly
return to the last visited branch of the menu tree. For example, suppose you were listening to new
Orleans radio through the browse facility as described later in the manual (BrOWse). Pressing Back
would return you to the Highlighted Blues stations menu. Pressing Back again would return you to the
Blues menu, and so on.
LAST LISTENED
When Internet radio mode restarts, the last-listened station is selected. To select another recently used
station, select menu > last listened then one of the stations listed. most recent stations appear at the
top of the list.
16
Page 17
PRESETS
Presets are stored in the radio and cannot be accessed from other radios.
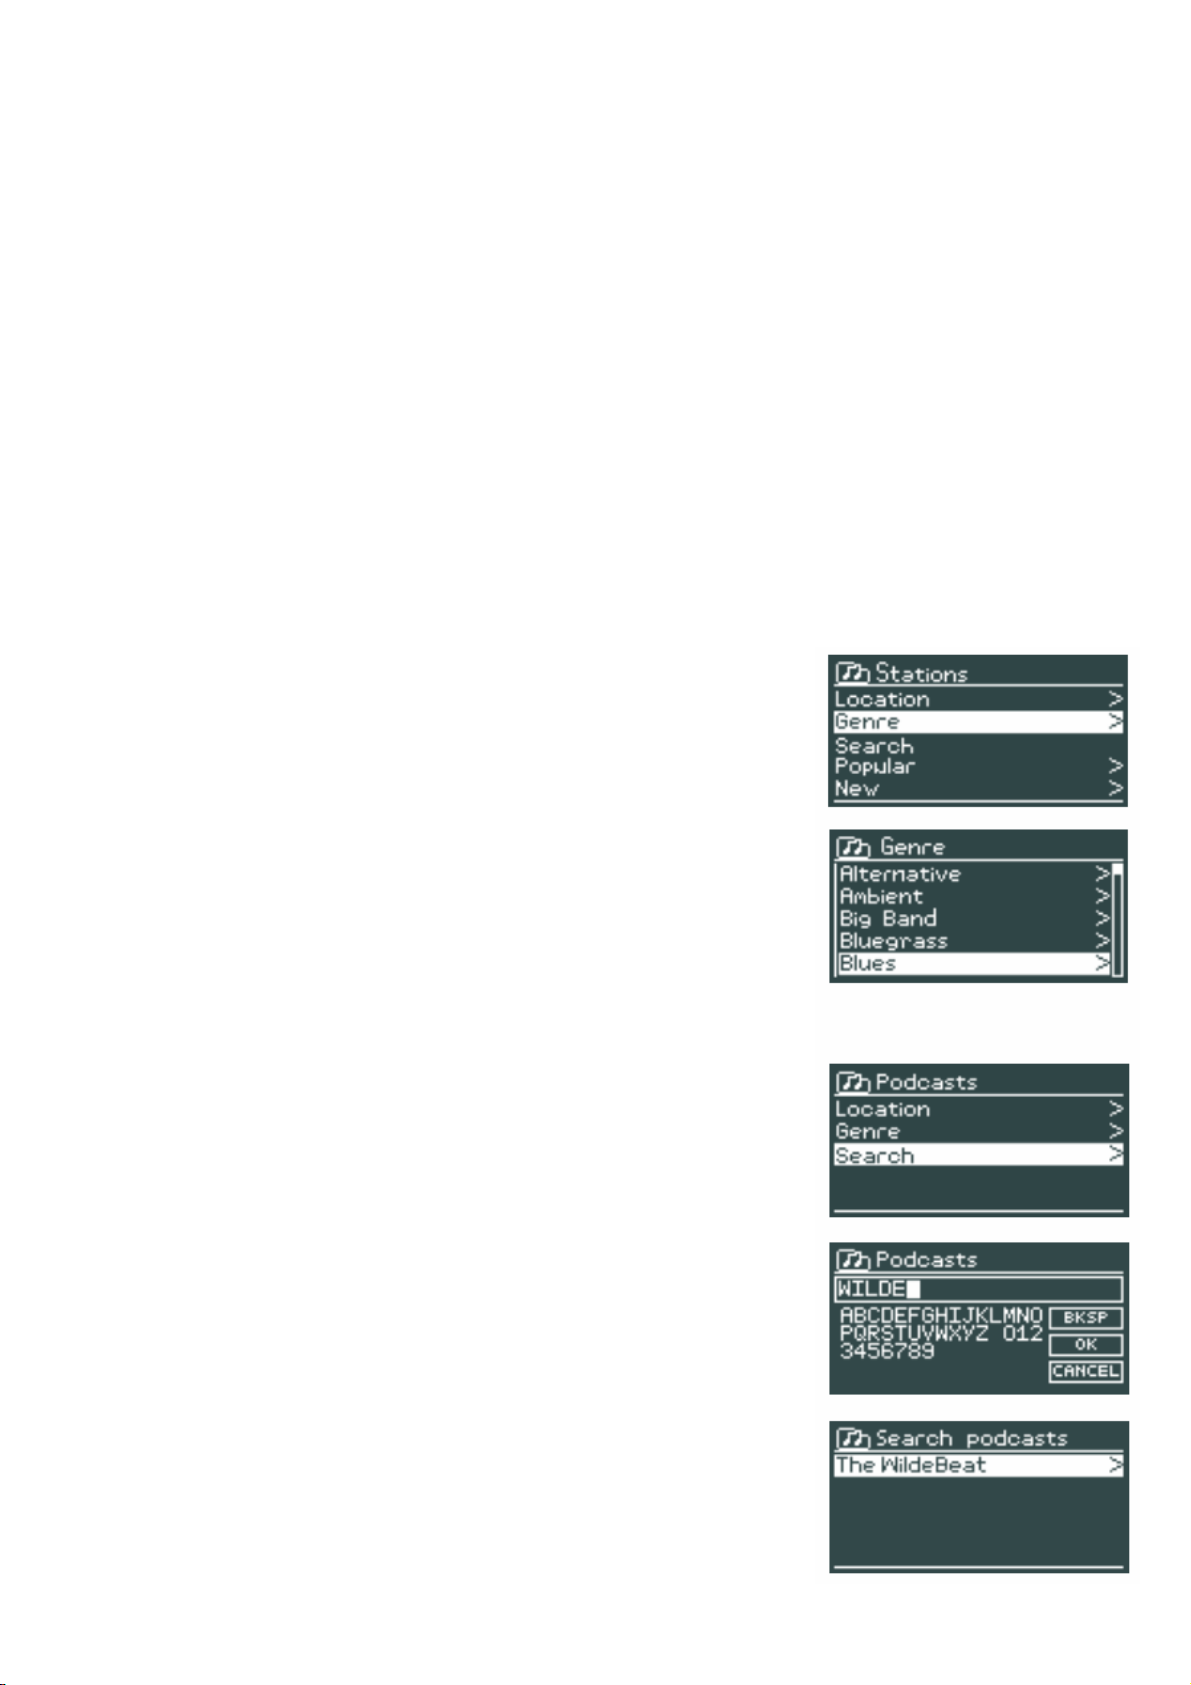
To store an Internet radio preset, press and hold the 1 button until the display shows the save preset
screen. select one of the 4 presets to save the currently playing station.
To select a preset, press 1 briefly, then select one of the listed preset stations. When a preset station is
playing, it shows Pn (P1, P2 etc) in the bottom of the screen.
Note: Operation of presets is identical for Internet radio and FM.
FAVOURITES
Favourites are stored with the Internet radio portal, and are available through all Internet radios registered
on the same account. Before favourites can be used, the radio has to be registered with the Internet
radio portal (see page ?).
To store a playing station as a favourite, press and hold selection knob until the display shows
`Favourite
added'. The station appears in the default favourites list stations.
To select a favourite, select menu > station list > my favourites > [Favourites list] > [station].
BROWSE
To browse Internet broadcasts, select menu > station list > then either
stations > or Podcasts >.
Browse through the menus to find broadcasts.
Note: BBC radio `Listen Again' programmes are accessible through
the
Podcast menu, for example Menu > Podcasts > Location > Europe
> United Kingdom > All shows > BBC Radio 4 > You and Yours >
20/10/2008 - October 20.
SEARCH
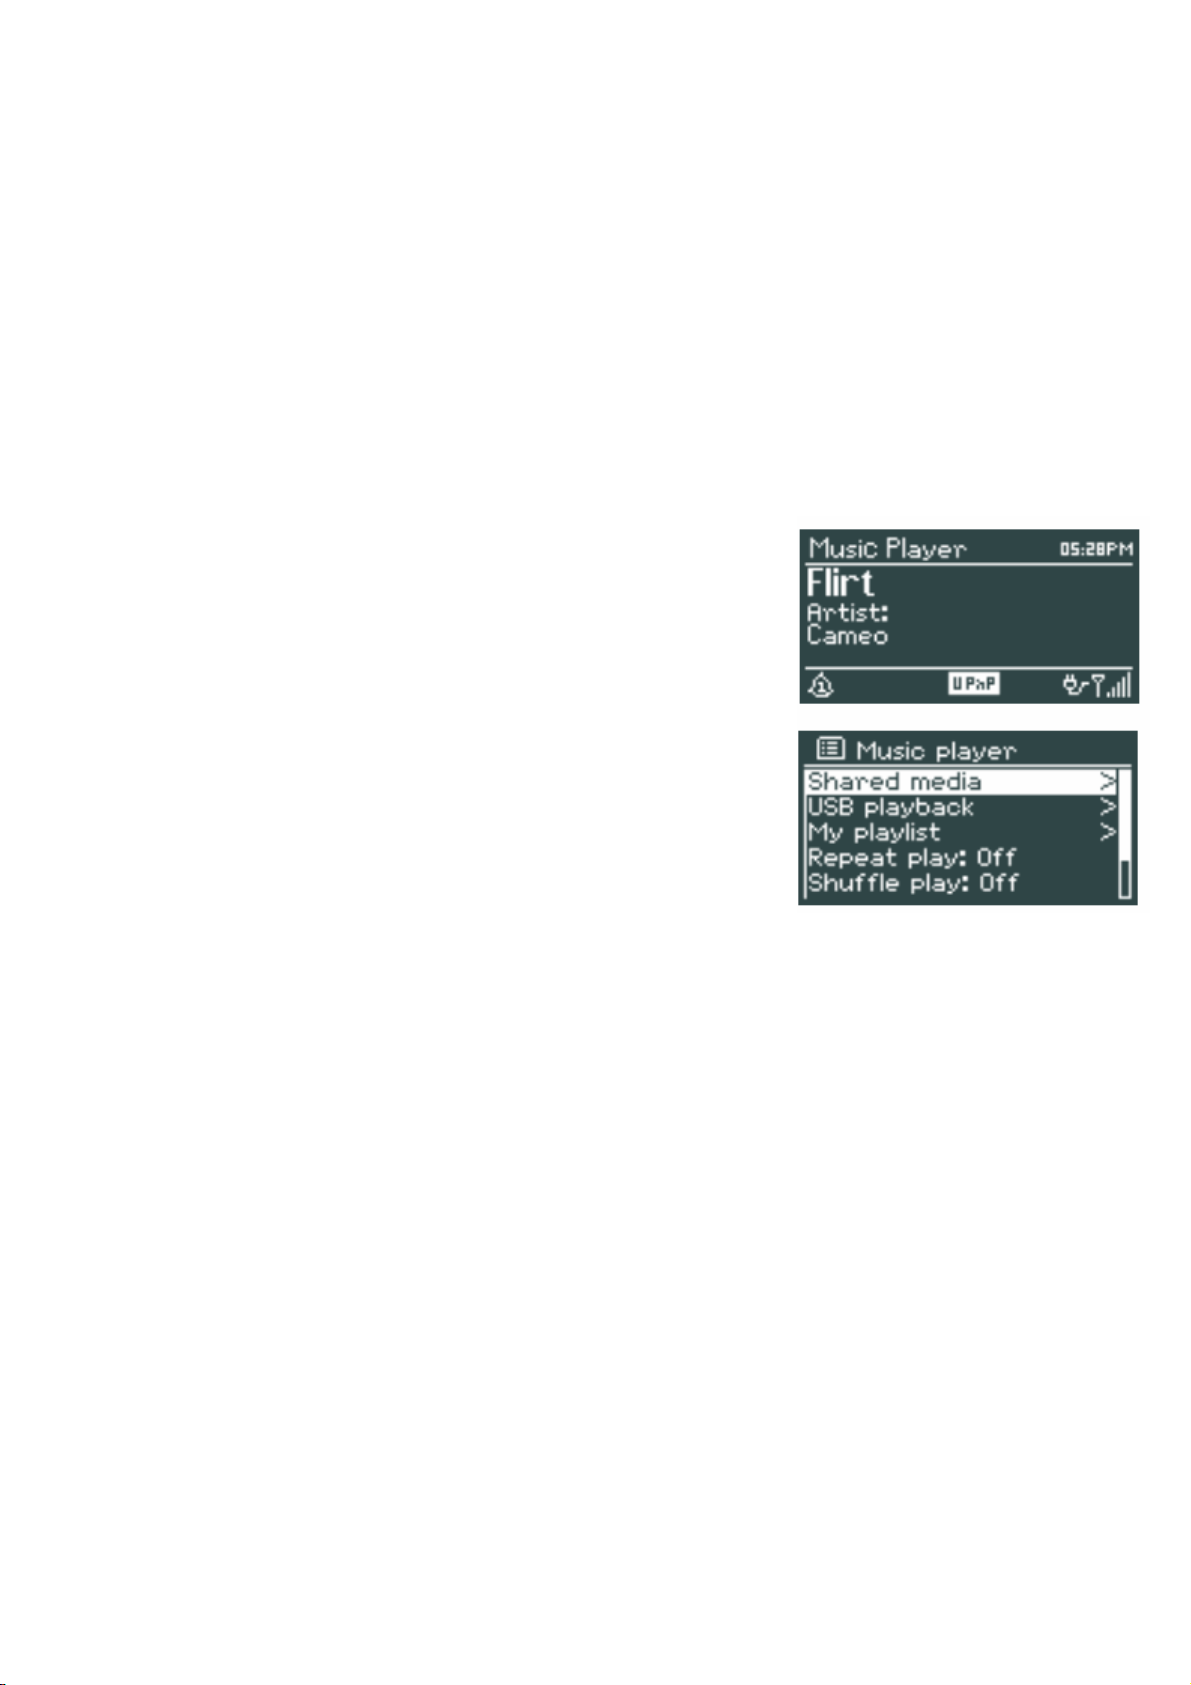
you can also search through Internet broadcasts for stations or podcasts
with particular keywords in their title.
To search, select menu > station list > then either stations > or Podcasts
>
enter a keyword by selecting characters then Ok. The search entry
screens are similar in operation to the Wi-Fi password entry screen.
select a broadcast from the list.
For podcasts, you may be able to select a particular episode.
17
Page 18
MY ADDED STATIONS
even though the Internet radio portal contains thousands of stations,
you may want to listen to stations not listed. you can add your own stations via the portal. These added
stations are accessible from DAB+/DAB/FM/Internet Radio by selecting menu > station list > my added
stations > [station].
NOW PLAYING INFORMATION
While the stream is playing, the screen shows its name and description. To view further information,
press Info each time you press Info , another set of information is displayed, cycling through
name/description, genre/location, reliability, codec/sampling rate, playback buffer and today's date.
Music Player mode
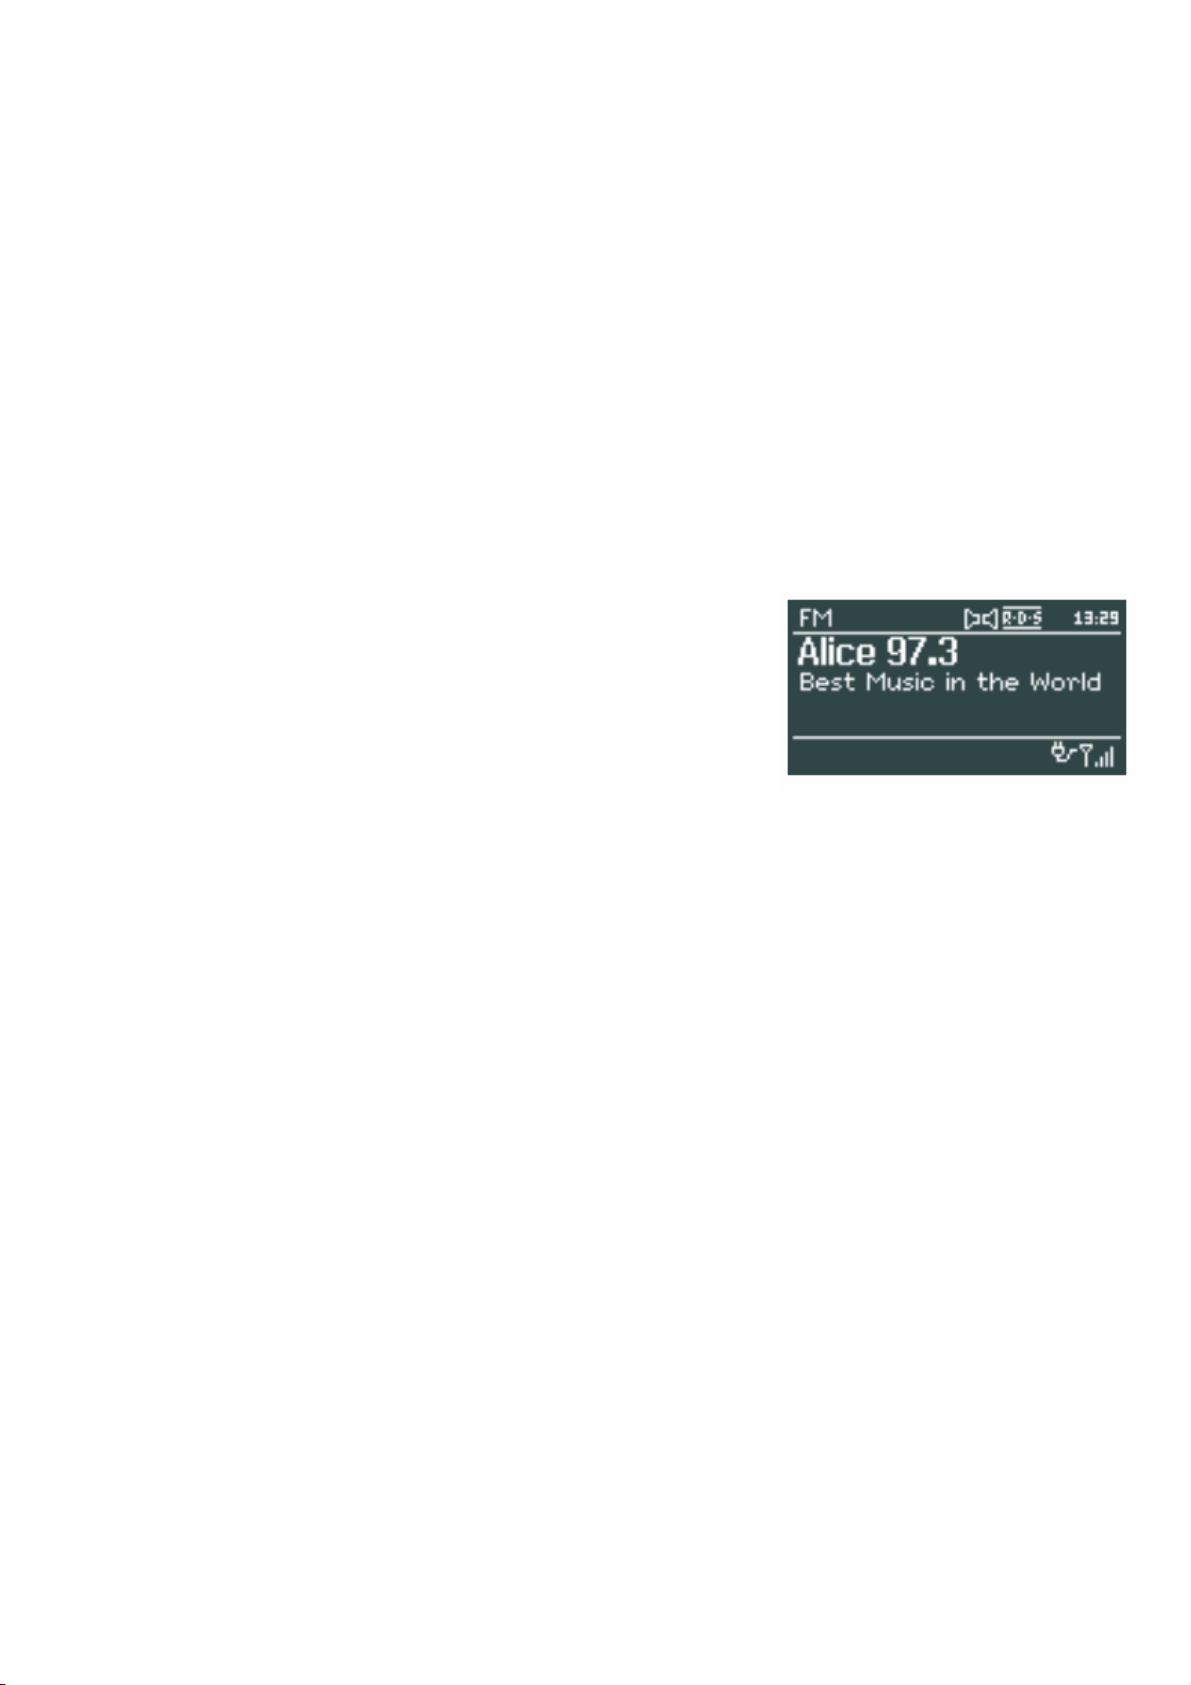
music player mode plays audio files such as mP3s, aaCs, Wmas or
FlaCs from a computer on the local network.
To enter music player mode, either press mode until the display shows
music player or select menu > main menu > music player.
Once in music player mode, press menu, then select either shared
media.
Note: DAB+/DAB/FM/Internet Radio does not have USB playback as
shown on the above image.
If you are already playing a music file, you can press Back rather than menu to quickly return to the last
visited branch of the menu tree. For example, suppose you were listening to the track Heat by the artist
50 Cent through browsing shared media as described in the section below. Pressing Back would return
you to the track listing for the album Get rich or die Tryin'. Pressing Back again would list all 50 Cent
albums. Pressing Back again would list all album artists, and so on.
you can use << and >> to move through tracks. Press and hold to rewind or fast forward and press
quickly to select previous or next track.
SHARED MEDIA (FROM UPNP MEDIA SERVER)
select menu > shared media >
If you have set up shared media (as described under sharing media with Windows media Player), you
should see an entry consisting of <computer name>: <shared media name>, for example JB-laptop:
audio. If you have more than one computer sharing media, the alternatives are listed. select the shared
media you want to play.
From this point on, the menus are generated from the shared media server (typically Windows media
18
Page 19
Player). The first menu shows a list of media types, for example music, Video, Pictures and Playlists.
DAB+/DAB/FM/Internet Radio can only play music and playlists.
There is also a search function, which finds tracks in a similar way to Internet radio search, as described
earlier.
From music, there are numerous ways of selecting tracks, including:
‧ Genre
‧ artist
‧ album
‧ Composer
‧ rating
Once you have found a track you want to play, press select . a short press plays the track immediately
and a long press adds the track to the playlist. you can also add entire albums to the playlist.
DAB+/DAB/FM/Internet Radio plays either the selected track or the playlist.
FM radio mode
FM radio mode receives analogue radio from the FM band and
displays rds (radio data system) information about the station and
show (where broadcast).
To enter FM mode, either press mode until the display shows FM
radio or select menu > main menu > FM.
SELECTING STATIONS
To find a station, press selection knob . The frequency display starts to run up as
DAB+/DAB/FM/Internet Radio the Fm band. alternatively, you can scan up or down by pressing and
holding the >> or << buttons or tune manually with quick presses, or by turning the select control.
PRESETS
To store an Fm preset, press and hold Preset until the display shows the save preset screen. select
one of the 4? presets to save the currently playing station.
To select a preset, press Preset briefly, then select one of the listed preset stations. When a preset
station is playing, it shows Pn (P1, P2 etc) in the bottom right of the screen.
NOW PLAYING INFORMATION
While the stream is playing, the screen shows its frequency, or if rds information is available, station
name and any further rds information such as programme name, track title and contact details. If no
information is available, just the frequency is shown. stereo broadcasts are indicated with an icon at the
top of the screen. To view further information about the broadcast, press Info .
each time you press Info , another set of information is displayed, cycling through rds text, further
rds text (station/programme type), frequency and today's date.
19
Page 20
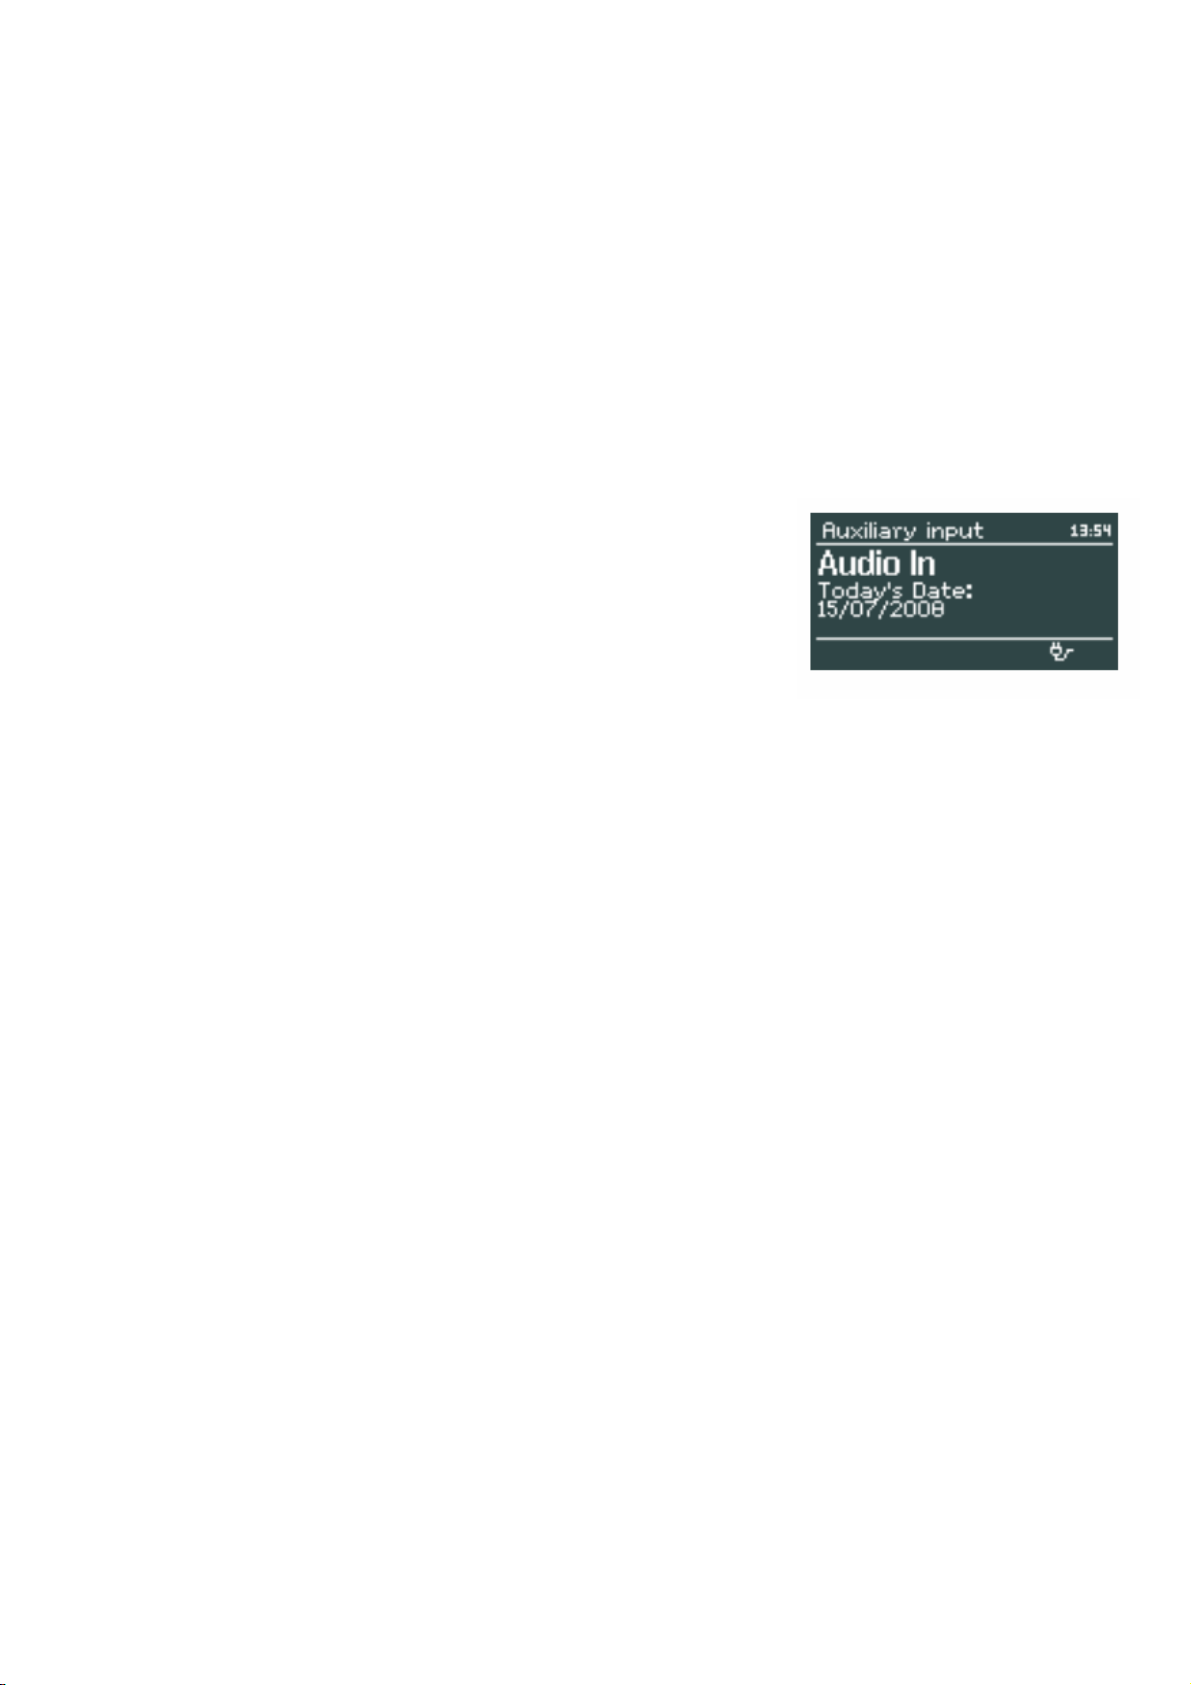
FM/AUX SETTNGS
SCAN SETTINGS
By default, Fm scans stop at any available station. This may result in a poor signal-to-noise ratio (hiss)
from weak stations.
To change the scan settings to stop only at stations with good signal strength, select menu > scan setting
> strong stations only? > yes.
AUDIO SETTINGS
By default, all stereo stations are reproduced in stereo. For weak stations,
this may result in a poor signal-to-noise ratio (hiss). To play weak
stations in mono, select menu > audio setting > Fm weak reception:
listen in mono only > yes.
AUX IN MODE
aux in mode plays audio from an external source such as an mP3 player.
To play audio with aux in mode
01 Turn the volume low on both DAB+/DAB/FM/Internet Radio and, if adjustable, the audio source
device.
02 Connect the external audio source to the aux In 3.5 mm stereo socket.
03 either press mode until the display shows aUX in or select menu > main menu > aUX in.
04 adjust the volume of DAB+/DAB/FM/Internet Radio (and, if necessary, the audio source device) as
required.
20
Page 21

Pinell Explorer - Quick Start Guide
Thank you for selecting Pinell Explorer. Your radio will give you many hours of music pleasure with
easy access to thousands of internet radio
stations worldwide, as well as a number of opportunities for streaming music.
Regardless of which country you're in, you can hear Norwegian and foreign radio.
You can also choose a genre of classical music, rock, jazz, etc.
Your Pinell gives you the radio station you prefer. Register your product at http://www.pinell.no
We will keep you updated on the development of your product (software updates, etc.) and provide you
other exciting news from Pinell.
User's Guide contains tips and advice on the use and possible problems. Check www.pinelldigital.com for
updates and news.
User manuals in other languages are available at www.pinelldigital.com (In English, Danish, Swedish,
and Finnish)
The information in this guide may change without notice. This guide is protected by Legislation of
copyrights.
No part of this guide must be copied or reproduced without permission from TT Micro AS.
Setting the WLAN/LAN:
‧ Broadband Internet connection must be available.
‧ You need a wireless access point (Wi-Fi) that is connected to your broadband connection,
preferably via a router.
‧ If the wireless network is configured to use Wired Equivalent Privacy (WEP) or Wi-Fi
Protected Access (WPA) data encryption, you must know the WEP or WPA code, so that the internet
radio can communicate with the Network
‧ If the wireless network is configured to accept predefined MAC addresses only , you must
define the MAC address of your radio in your wireless access point.
Radio's MAC address can be found here:
Main menu> System settings _Network _ View settings_ MAC address
‧ Ensure that the wireless access point is on and connected to broadband, or that the LAN cable
is properly connected before proceeding.
‧ For this part of the system to work, it is recommended that you reading the instructions that
came with the wireless access point or LAN connection device.
Specifications:
Internet Radio Frequency Range: 2412~2462MHz
FM Frequency Range: 87.5 ~ 108 MHz
Power Supply Input: 100V-240V, 50-60HZ
Power Supply Output: 15V 1.5A
21
 Loading...