

TT Micro TINY AUDIO C3 User Manual
Tiny Audio C3
English
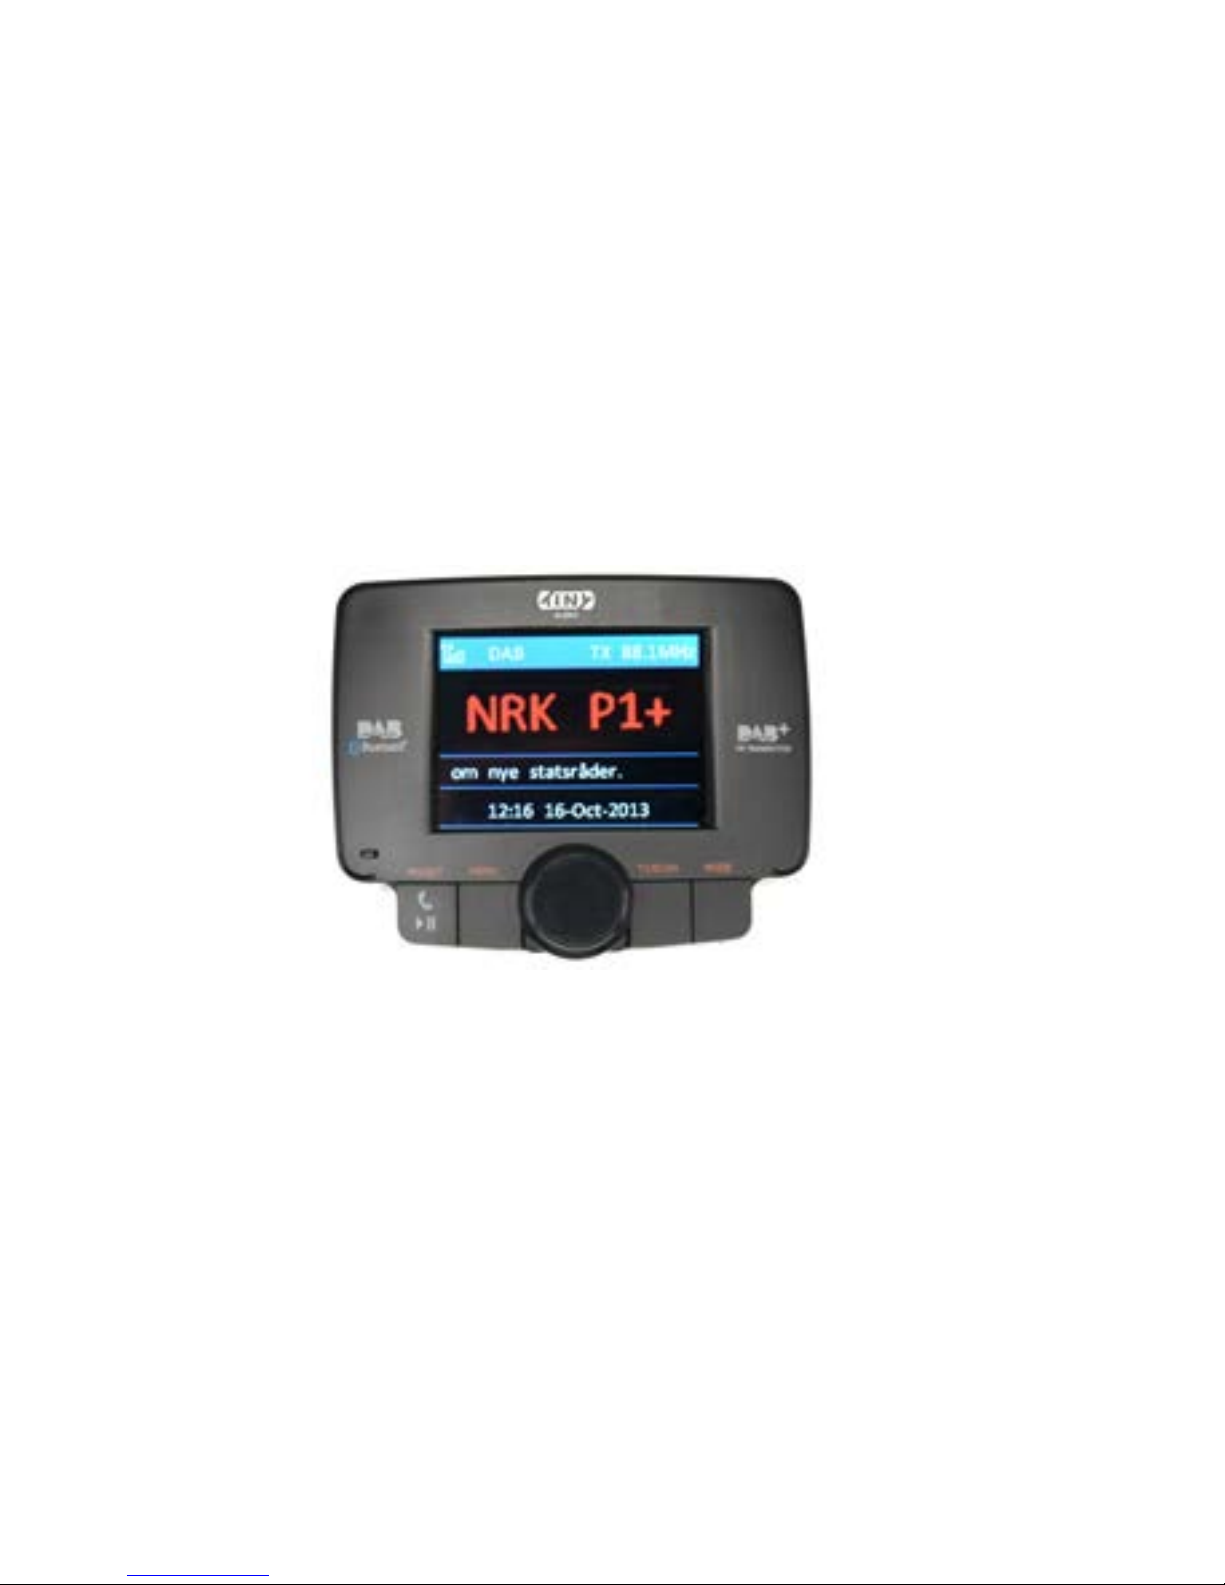
TINY AUDIO C3
Please read carefully before using this product
1

Tiny Audio C3
Safety Instructions:
1. Do not use this radio near water.
2. Clean with dry cloth.
3. Do not block any ventilation openings.
4. Do not use near heat objects.
5. Use accessories provided by manufacturer.
6. Do not dispose this radio to rain or moisture.
7. Do not allow this unit to be exposed to water, steam, sand or other
environmental hazards.
8. Do not leave your radio where excessive heat could cause damage.
2
Tiny Audio C3
3
Tiny Audio C3
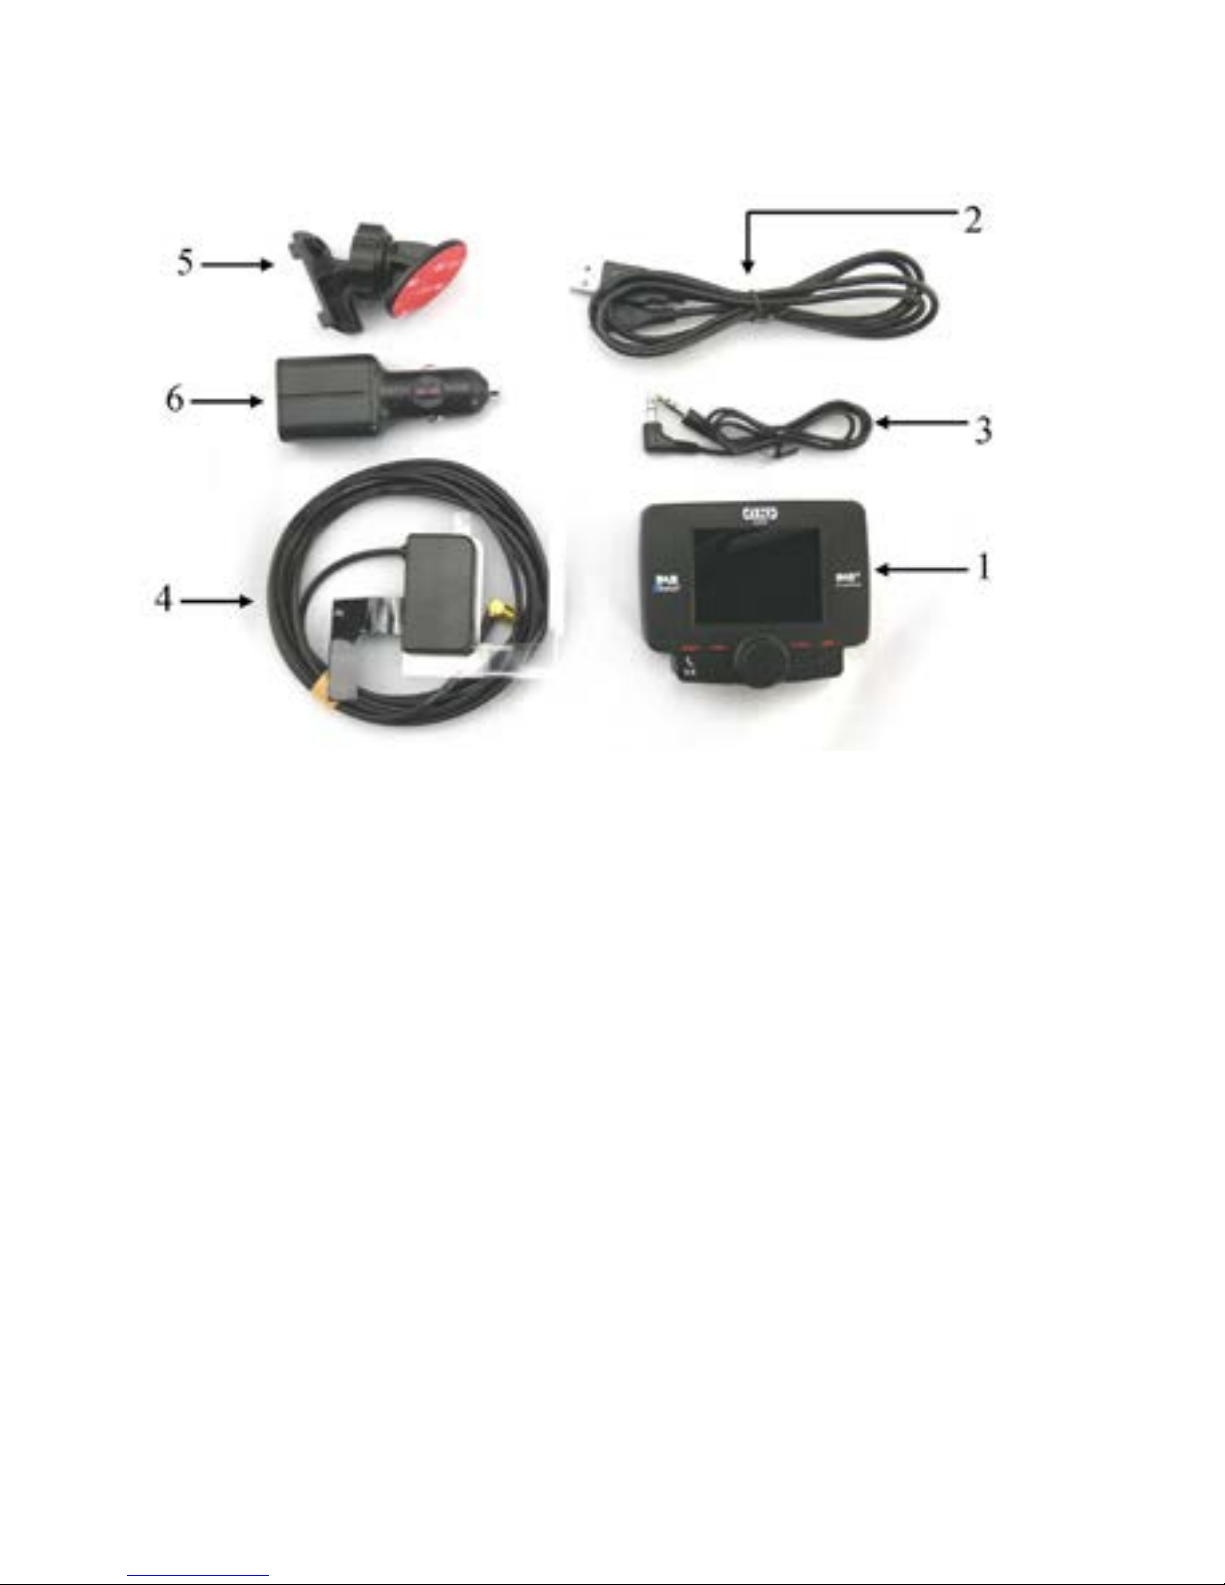
Main unit and accessories
1. Main unit, DAB reciver
2. Power cable / micro USB
3. 3.5 mm Aux cable
4. DAB, DAB+ antenna for main unit
5. Dash / window mounting bracket
6. Dual USB charger for 12/24V
4

Tiny Audio C3
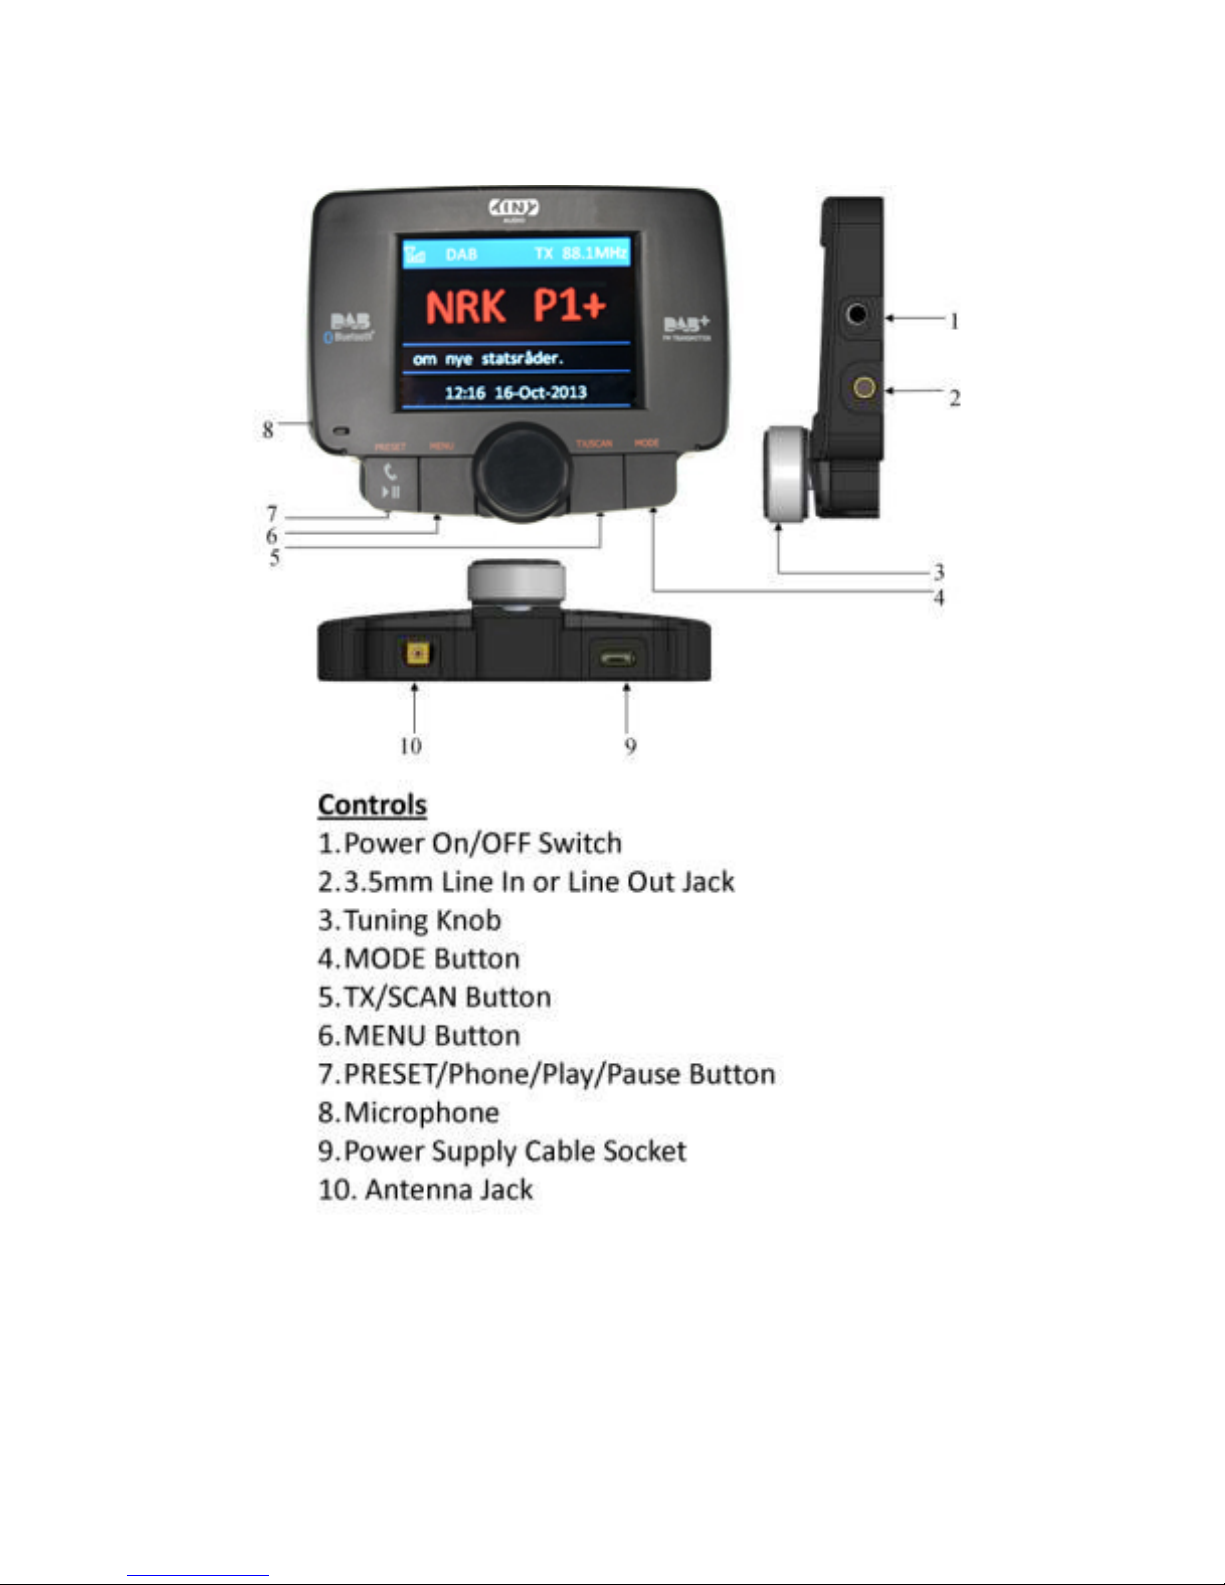
Operating your In-Car DAB+ Digital Radio Receiver:
1. Mount the TINY AUDIO C3 In-Car DAB+ Radio receiver to the dashboard
using the provided adhesive holder.
2. Connect one end of the USB power supply cable to Micro USB socket in
TINY AUDIO C3 and the other end to dual USB car charger. Plug the dual
USB car charger to the car cigar-lighter socket.
3. Connect the antenna to the antenna jack. ATTENTION! Proper antenna
installation is very important for a good result. See tips page 14.
4. Turn on the power with the “POWER SWITCH” and the display will show
“Tiny Audio” logo. Use “MODE” button to select DAB+ mode.
5. For first time use, you need to scan all the local DAB+ channels by pressing
and hold “TX/SCAN” button for 3 seconds to activate the “Auto Scan”, all
available DAB+ radio channels will be scanned and saved until another
“Auto Scan” is performed. During scanning, a scan moving bar will be
shown in the display to indicate the progress and the total number of
channels received.
6. Once it is scanned, you can select any DAB+ radio channels by the Tuning
Knob.
Receive signal from the In-Car DAB+ radio through line out cable:
1. Press and hold “MENU” button to enter menu mode, use Tuning Knob to
search for “Aux IN/OUT Select” and confirm by short press “MENU” again.
Use Tuning Knob to select “Aux-OUT” and confirm by short press “MENU”
button. Short press “MODE” button to exit menu. A headphone icon “
”
will be displayed at the top of the blue bar.
2. Connect your car audio stereo speaker “Aux-in” or “Line-in” to the “LINE
OUT” jack on the right-hand side of TINY AUDIO C3 with the provided
3.5mm audio cable.
5

Tiny Audio C3
Remark: In “Aux-Out” mode, there will be no FM transmission to the
car stereo.
Receive signal from the In-Car DAB+ radio through FM
transmission:
--Select FM Transmitting Frequency (Auto Mode):
1. Press and hold “MENU” button to enter menu mode, use Tuning Knob to
search for “Aux IN/OUT Select” and confirm by short press “MENU” again.
Use Tuning Knob to select “Aux-IN” and confirm by short press “MENU”
button.
2. Press “TX/SCAN” button to show FM transmitting frequency (TX FREQ).
3. Then press and hold “TX/SCAN” button for 3 seconds to activate the
automatic scanning of a “vacant” transmission
frequency without
interference with other channels. The scanning process will take
20-30
seconds to scan the frequency
automatically with a flashing display of
“---.-MHZ” and stop at a “vacant” frequency.
4. After a “vacant” frequency is found, press “TX/SCAN” button again to
confirm and exit setting or it will automatically confirm and exit the setting
after 3 seconds. The selected “vacant” frequency (TX FREQ) will be shown
at the top of the blue bar, e.g. TX108.0MHz
5. Then tune your car FM radio system to match the selected “vacant”
frequency (TX FREQ) for transmission of the audio signal from TINY AUDIO
C3 to your car stereo audio system.
Remark: To enable FM transmitter, you have to set the device into
“Aux-IN” mode.
6
 Loading...