

TTikorea TCB-1100 Instruction Manual
www.ttikorea.co.kr
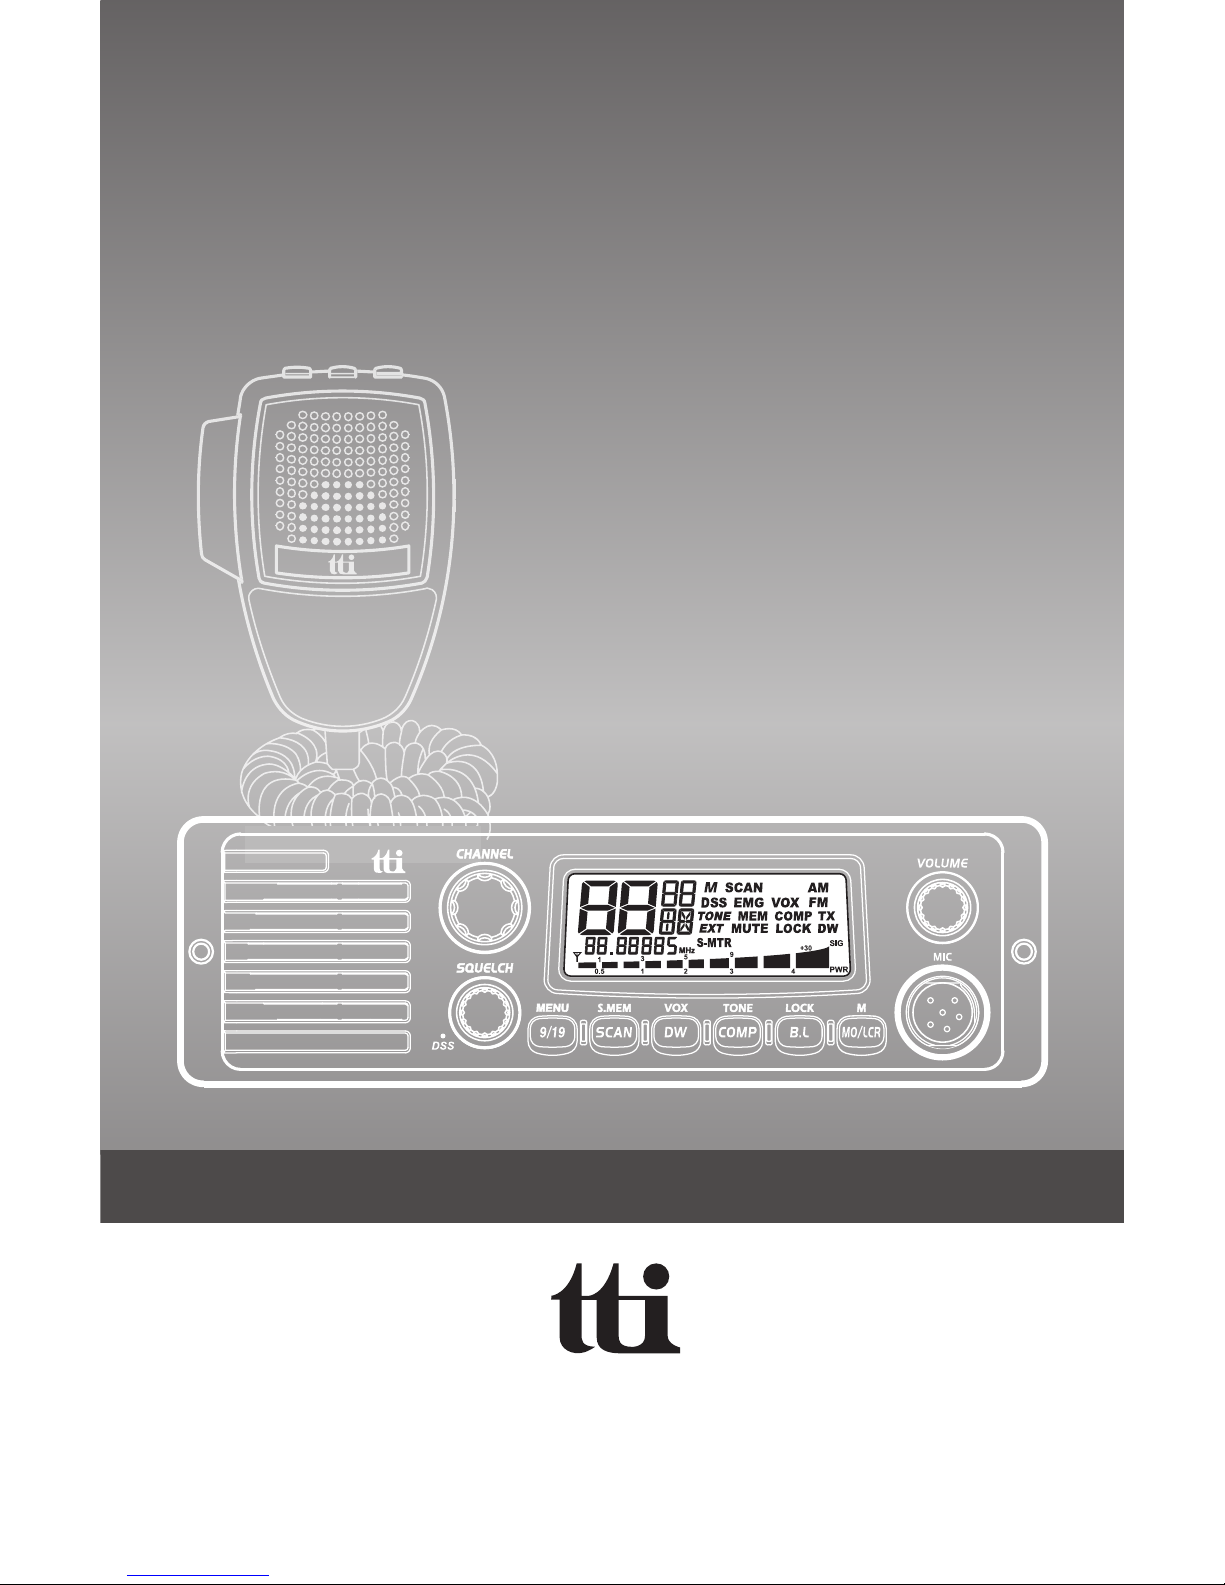
TCB-1100
4W MOBILE CB TRANSCEIVER
I N S T R U C T I O N M A N U A L

TCB-1100
English2
All our products are built to offer excellent value by combining
advanced features, great design and manufacturing quality.
To ensure you are familiar with the operation and features of your
radio, and in order to obtain the best performance, please read
this manual carefully before operation.
Our Thanks to You
Our Thanks to You and Customer Assistance
Thank you for purchasing a TTI CB TRANSCEIVER radio.
Properly used, this TTI product will give you many years of reliable s
ervice.
Our Thanks to You

TCB-1100
English 3
Contents
Contents
1. Introduction ........................................................... 4
2. Supplied Accessories................................................4
3. Installation ............................................................ 4
4. Transceiver Controls and Functions ............................ 7
5. LCD Display ......................................................... 13
6. Microphone ..........................................................
13
7. How to operated the Transceiver ........................... 14
8. Band Selection ...................................................... 14
9. Trouble Shooting ..................................................... 15
10. CE Declaration ................................................... 16
11. Safety Requirement ........................................... 16
12. Specifications ................................................... 17
13. Restrictions on the use ....................................... 18
14. Frequency Table
(1) Front Speaker .................................................... 8
(2) Channel Selector ................................................ 8
(3) LCD Display ...................................................... 8
(4) Volume & Power On/Off Knob ........................... 8
(5) Microphone Jack ............................................. 8
(6) Mode & LCR & Memory Button .............................9
(7) Backlighting & Lock Button ............................... 9
(8) Compander & Tone Button ................................ 9
(9) Dual Watch & Vox Button..................................9
(10) Scan&Scan Memory Button .............................10
(11) Emergency Channel(9/19) & Menu button ....... 11
(12) Squelch & DSS Knob .................................... 12
(13) Antenna Connector.......................................... 12
(14) S-Meter ......................................................... 12
(15) EXT Jack ....................................................... 12
(16) Power 13.2V DC ........................................... 12

TCB-1100
English4
Your transceiver is supplied with a full range of accessories to help you
get started and virtually benefit from all the features straight away.
TCB-1100 Transceiver
Microphone with cord
Power cable
Radio mounting bracket
Radio mounting thumb screw with rubber washer
Mounting screw with washer
(for transceiver bracket)
Mounting screw with washer
(for microphone bracket)
Microphone mounting bracket
Din Front Plate
Din Body Plate
Introduction
1. Introduction
2. Supplied Accessories
1 unit
1 unit
1 unit
1 unit
2 pieces
3 pieces
2 pieces
1 piece
1 unit
1 unit
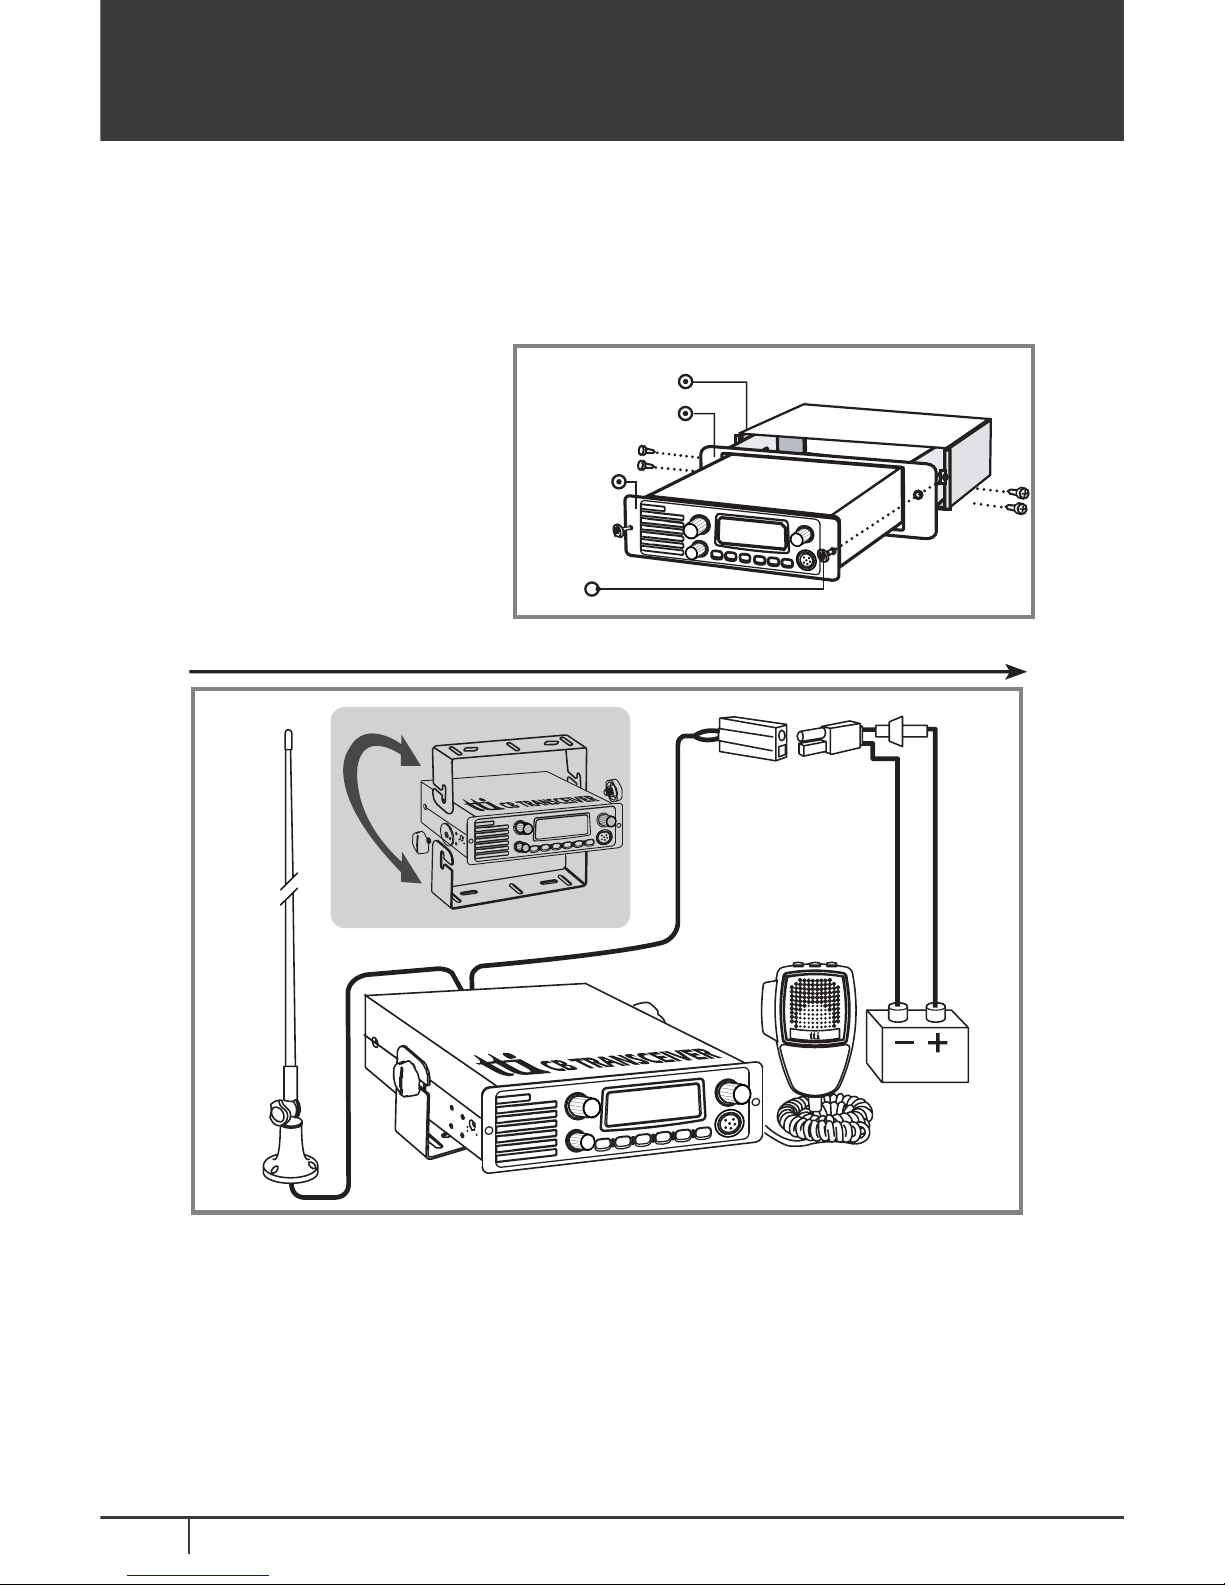
Normal Installation using Mounting Bracket
Plan the location of the transceiver and microphone first, which is most
convenient for the operation. The transceiver should normally be mounted horizontally, but may be
mounted vertically. The bracket supplied can
be fitted above or below the case allowing the TCB-1100 to be cradled
by the bracket or suspended from it.
3. Installation
TCB-1100 transceiver is designed to have a good performance in any
conditions that the transceiver operates, using rugged build chassis,
PCB’s and components. This transceiver is also designed for users’
convenience, implementing human ergonomics to locate the knobs and
buttons in the proper places. The combination of well designed knobs
and buttons as well as user friendly graphic layouts will lead users to
quickly adapt themselves for the easy operation. The newly applied
menu mode will make professional users more satisfactory with pleasure.
The elegant, luxury
and different colored LED light supporting the
face design will go well with any vehicles.
This instruction manual has been
designed to enable you to get the best
use from your CB Transceiver, therefore you are recommended to take a
few minutes to read this instruction manual before initial use of your CB
Transceiver.
TCB-1100
English 5
1) Put the mounting bracket on the proper location where you are going
to install.
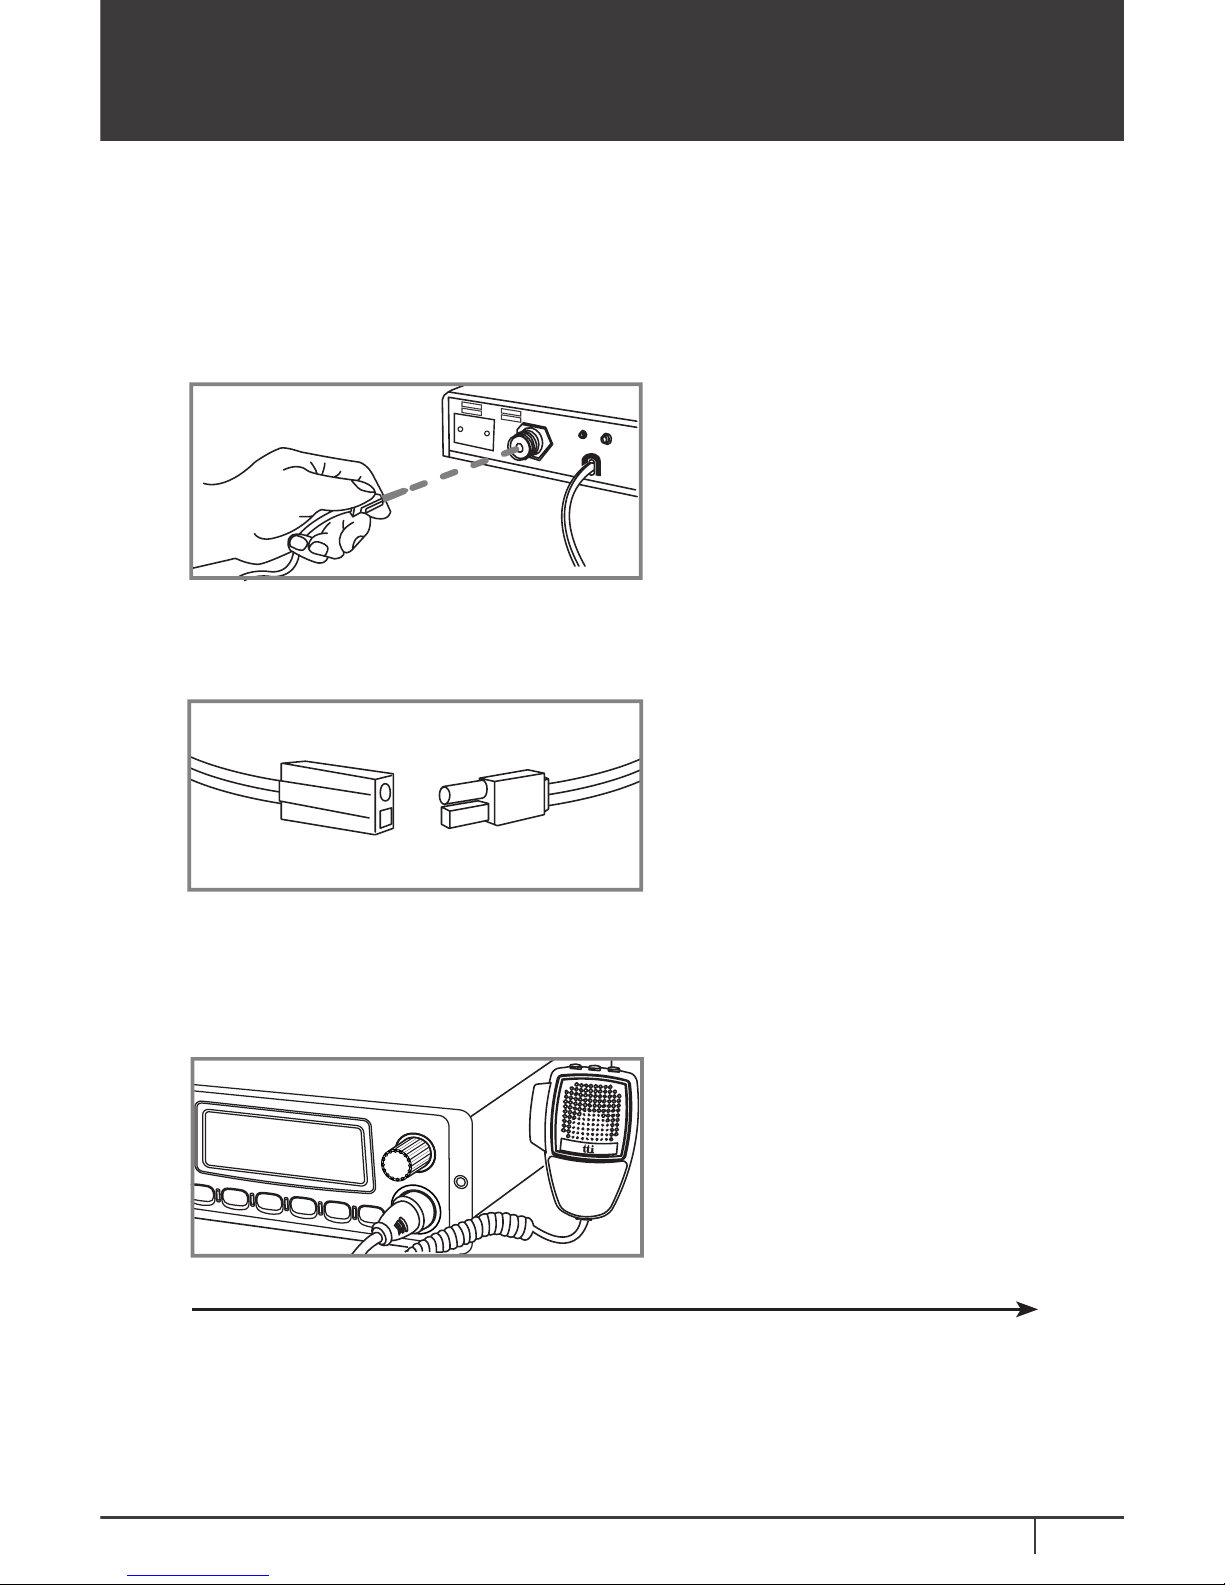
4) Connect the power cable directly to the vehicle battery or fuse box of
the car. Be careful to make sure of the polarity of the battery first and
connect the cable.
2) Drill holes and fix mounting
bracket on the location.
3) Connect the antenna
cable plug to the standard receptacle on the transceiver, which
is
marked “ANT”.
(Red: Positive Pole(+), Black:
Negative Pole(-). The same colo
rs ar
e shown on the battery
and in the fuse box of the car.)
5) Connect the power cable to the transceiver cable.
6) Mount the microphone bracket on
one side of the transceiver, or near
it using two screws included.
7)
Connect the microphone to the transceiver’s microphone receptacle.
Now you are ready to operate
the transceiver.
Installation
This transceiver is also designed to have the DIN size to be directly
installed into the audio compartment of your vehicle.
For this purpose, use the
TTI supplied installation supporting DIN plates.
All other connections and installations are
same as the above “Normal
Installation Using Mounting Bracket.”
Installing into Audio Compartment
Consider that this location of the transceiver should not interfere with the
driver and passengers. Choose a spot where the microphone and all controls
are easily accessible.
TCB-1100
English6
Installation
1) Install the Din-Body plate into the audio compartment (center fascia)
of your vehicle.(Use the ready made locking flaps.)
2) Set the transceiver in the
Din-Front plate, and insert the
transceiver
in the Din-Body plate.
It is very important to select a good quality high efficiency 27MHz
antenna. A poor quality antenna or one not designed for the 27MHz
band will give very poor performance and could cause damage to the
transceiver.
Installing an Antenna
CB Radio
Din-Front Plate
Din-Body Plate
Screw
3) Fix the screws through
the transceiver, Din-Front
plate and Din-Bodyplate.
1) Place the antenna as high as possible.
2) The longer the antenna is, normally the better is the performance of
the transceiver.
 Loading...