

TTI TSC-3000R Instruction Manual
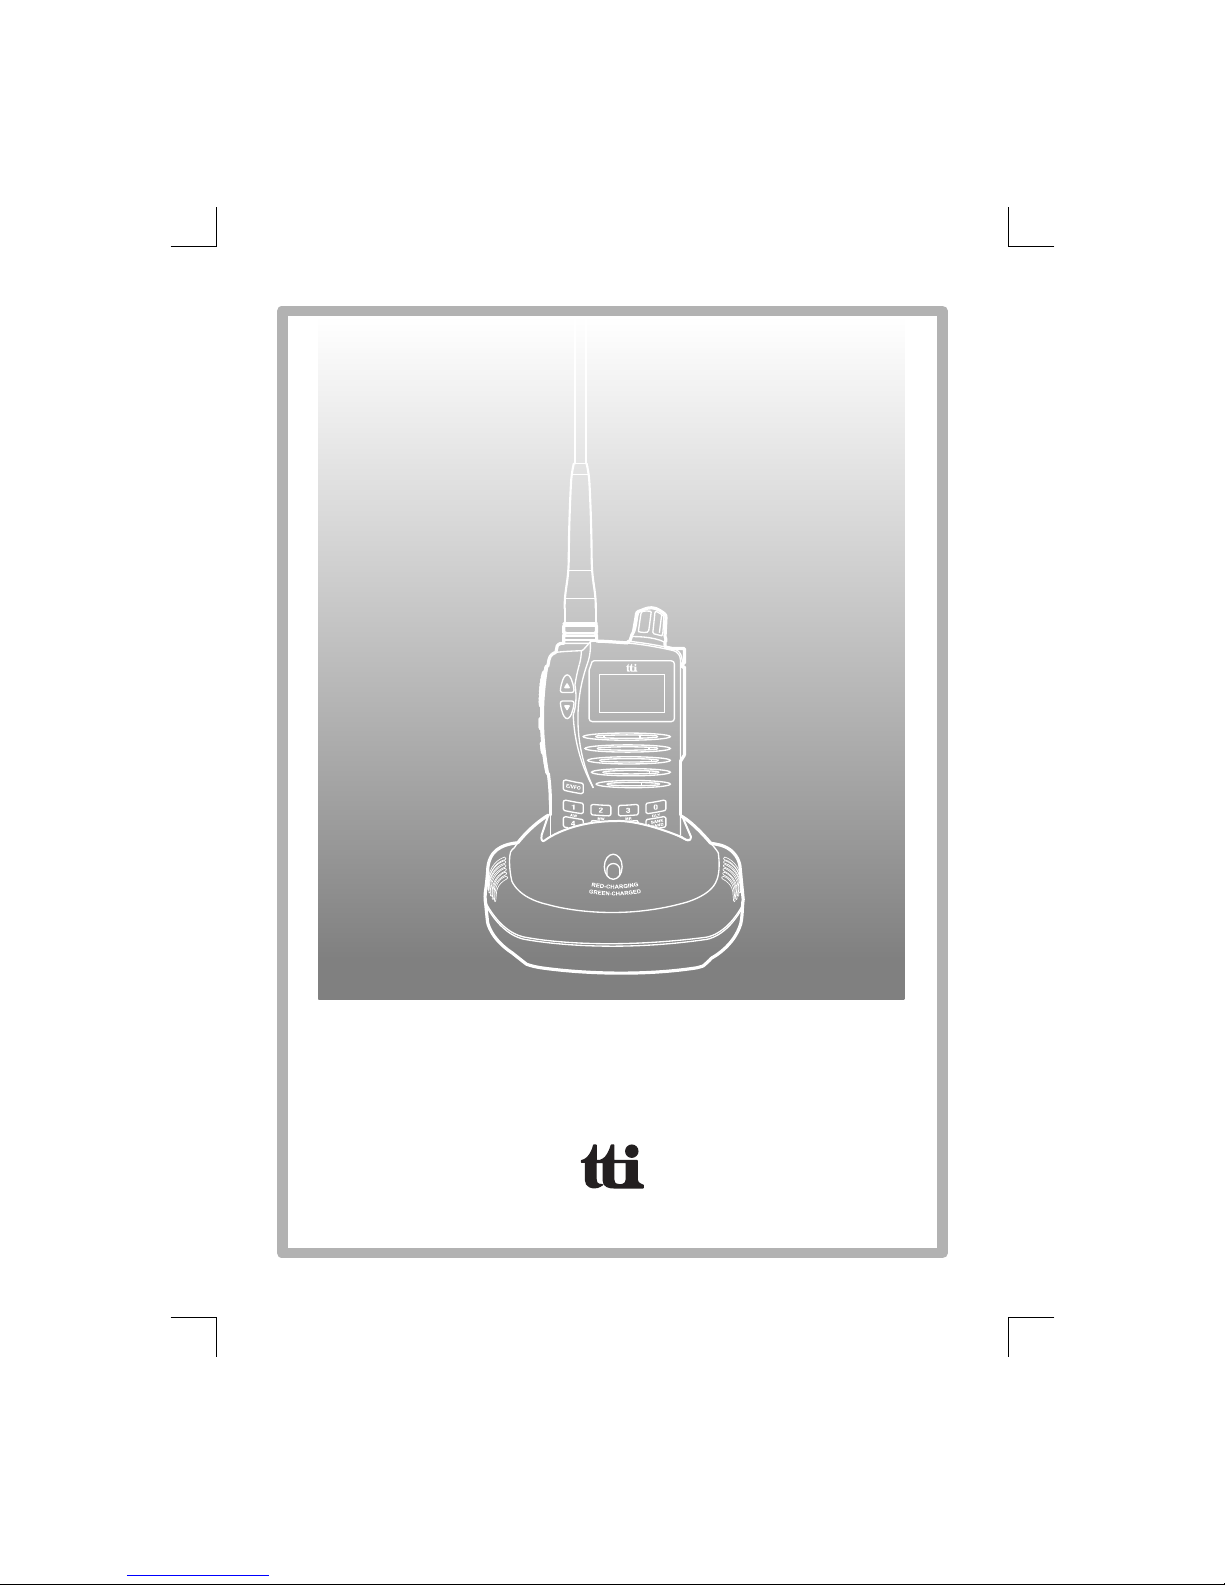
MULTIBAND SCANNING RECEIVER
INSTRUCTION MANUAL
www.ttikorea.co.kr
Manufactured by
TSC-3000R

CAUTIONS................................................. 5
1. SUPPLIED ACCESSORIES ...................... 6
2. FITTING AND REMOVING THE BATTERY
PACK ......................................................... 6
3. INSTALLING THE ANTENNA .................... 7
4. INSTALLING THE LANYARD .................... 7
5. CHARGING THE BATTERY ...................... 8
6. CONTROLS .............................................. 10
Power On/Off Lock Button .................. 11
Control Knob ....................................... 11
Up/Down Keys .................................... 11
Squelch Up/Down Keys ...................... 11
Function Keys ..................................... 11
Menu Keys .......................................... 11
Enter/VFO Keys ................................. 11
Keypad ................................................ 11
Accessory Jack .................................. 11
LCD Display ........................................ 11
Jack Cover Securiting Point ................ 11
Antenna ............................................... 11
Lanyard Slot ...................................... 11
7. KEYPAD .................................................... 12
8. EXTENDED FUNCTION KEYS ................ 13
AW ....................................................... 14
MW .......................................................14
MR .......................................................14
CANC ...................................................14
MODE ..................................................14
SKIP .....................................................14
DW .......................................................14
PRI ......................................................14
TONE ...................................................14
DLY ......................................................14
LMT ......................................................14
ATT ......................................................14
CONTENTS
ENGLISH

9. LCD DISPLAY ............................................ 15
10. GENERAL OPERATION ........................... 16
Turning the unit On or OFF ..................16
KEY Lock ............................................ 16
Volume ................................................ 16
Squelch ............................................... 16
Func Keys .......................................... 16
Menu Keys .......................................... 17
E/VFO Key [Enter/VFO] ...................... 17
Control Knob ....................................... 17
11. SELECTING FREQUENCIES ................... 18
Direct Frequency Input ........................ 18
Using the Control Knob ....................... 19
Mode Selection ................................... 20
Frequency Step Selection ................... 21
12. FREQUENCY BANDS ............................... 22
13. FREQUENCY SEARCH ............................ 23
Band Search ....................................... 23
Full Search .......................................... 24
Limited Search .................................... 25
Priority Search .................................... 28
Dual Watch ......................................... 30
14. MEMORY BANKS ..................................... 31
Manual Memories ............................... 31
Automatic Memories ........................... 31
Limited Search Memories ................... 32
Dual Watch Memories ........................ 32
15. STORING FREQUENCIES INTO THE
MEMORIES ............................................... 33
Manual Memories ............................... 33
Automatic Memories ........................... 35
Limited Search Memories ................... 37
Dual Watch Memories ........................ 40
16. CHANNEL SCAN ....................................... 42
Band Scan .......................................... 42
Full Scan ............................................. 43
Priority Scan ....................................... 44
CONTENTS
ENGLISH

17. MENU SETTINGS ...................................... 46
VFO Mode ........................................... 47
Memory Read Mode ............................ 48
18.COPYING FREQUENCIES BETWEEN
MEMORY BANKS ...................................... 49
Bank Copy ........................................... 49
Channel Copy ..................................... 50
Channel Move .................................... 51
All Clear .............................................. 52
Bank Clear .......................................... 53
Channel Clear ..................................... 54
19. CLONING STORED MEMORIES WITH
ANOTHER UNIT ....................................... 55
20. SPECIFICATION ....................................... 56
General ............................................... 56
Bank Copy ........................................... 57
21. NOTES ....................................................... 58
CONTENTS
ENGLISH

• Please read these instructions carefully before operating your
receiver. Your scanner is a complex and powerful unit with many
functions. Please retain this manual for future reference. Any
illegal use offending the national law is not allowed.
Never connect the receiver to the power source other than the
specified battery. Otherwise the damage to your receiver may
occur.
• N ev er us e th e r e ce ive r i n or ne a r t he m in ing are a, n ea r
explosives or where signs indicate ‘Blasting Area’. Never use or
charge the receiver in a potentially explosive atmosphere.
• Do Not place the receiver in front of the vehicle airbag.
Do Not operate the receiver on board the aircraft.
Always charge the receiver at normal room temperature.
• Always replace the accessory jack cover when the jack is not in
use.
• Use only munufacturer-supplied rechargeable battery in your
receiver.
• Do Not expose the receiver to water. It is not waterproof.
Avoid storing or charging the receiver in direct sunlight.
• Avoid storing the receiver in temperatures below -20°C or
above +60°C .
CAUTIONS
5
TSC-3000R
ENGLISH
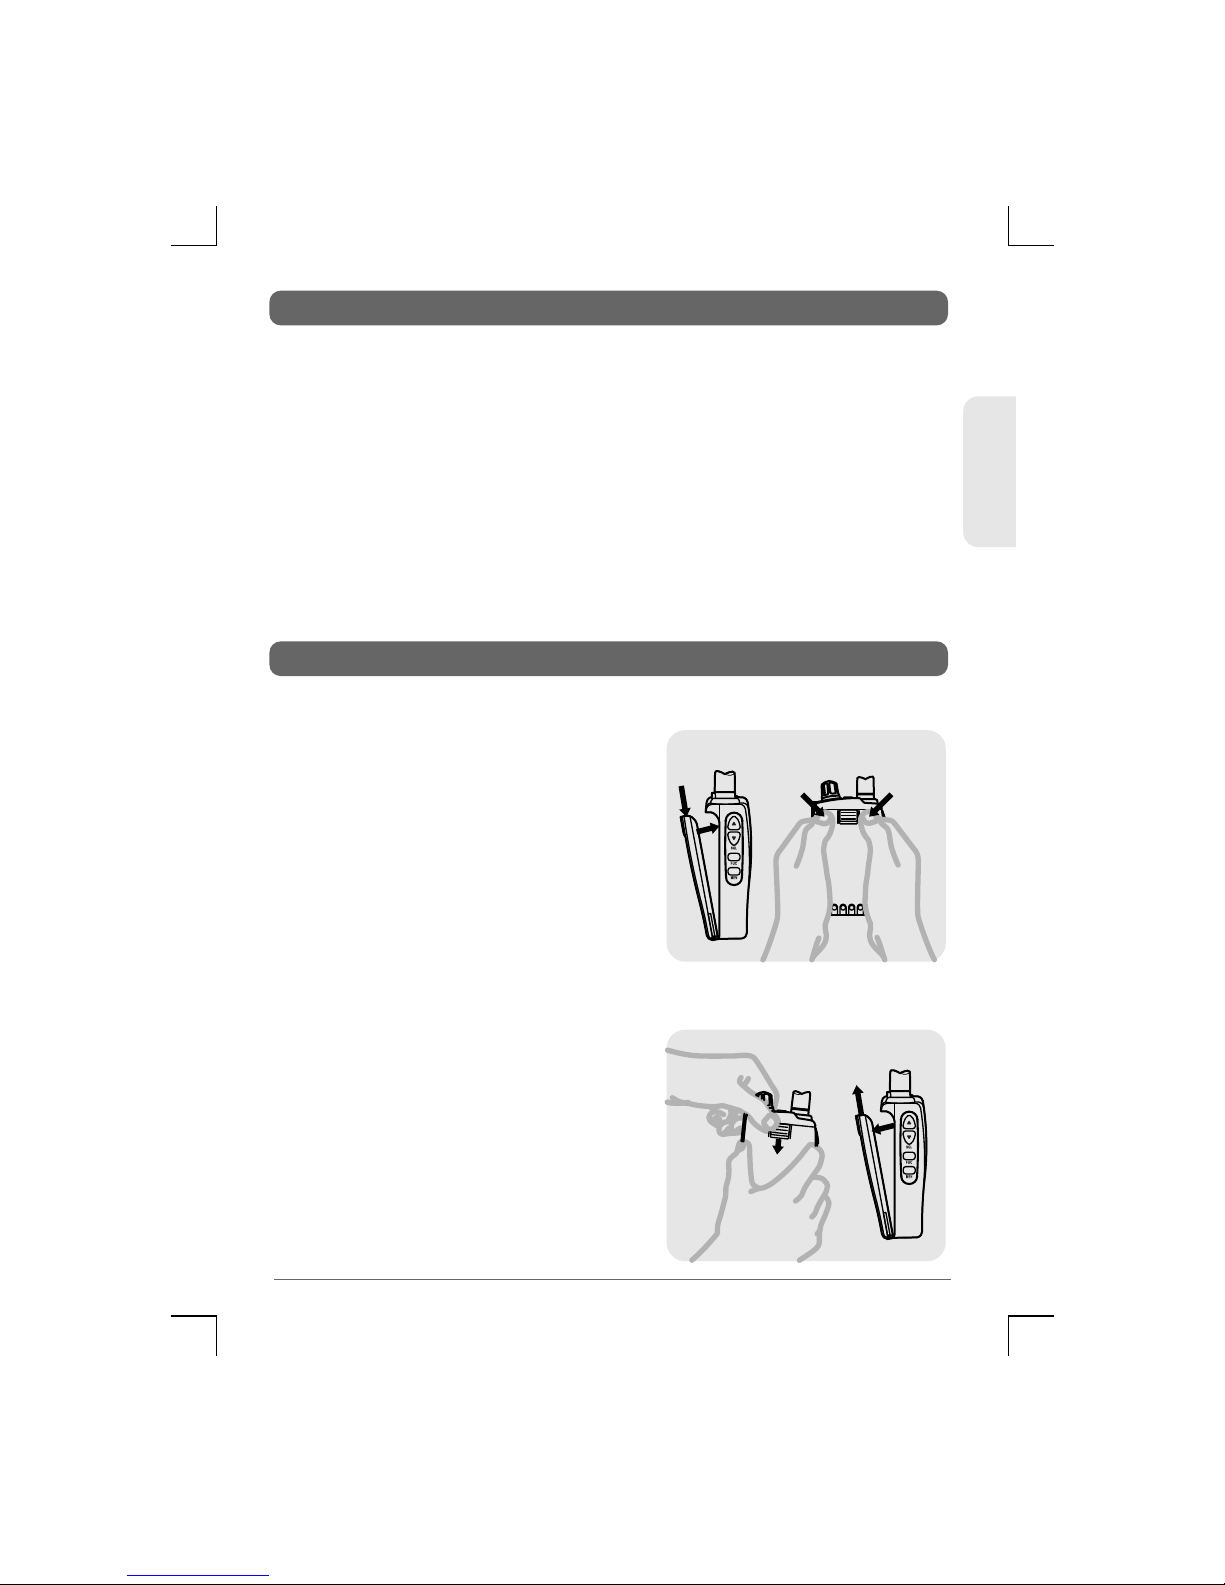
Removing
1) Ensure the receiver is switched
off.
2) Holding the receiver in one hand,
press do wn on the battery
release catch.
3) List the top of the battery pack
away from the receiver.
• Scanner Receiver
• Antenna
• Lanyard Strap
• Rechargeable Battery Pack
• Earphone
• Charger Cradle
• Power Adaptor
SUPPLIED ACCESSORIES
FITTING AND REMOVING THE BATTERY PACK
Fitting
1) Ensure the receiver is switched
off.
2) Align the bottom of the battery
pack with the securing slots in
the base of the receiver.
3) Press the top of the battery pack
into the back of the receiver until
it ‘clicks’.
ENGLISH
6
TSC-3000R
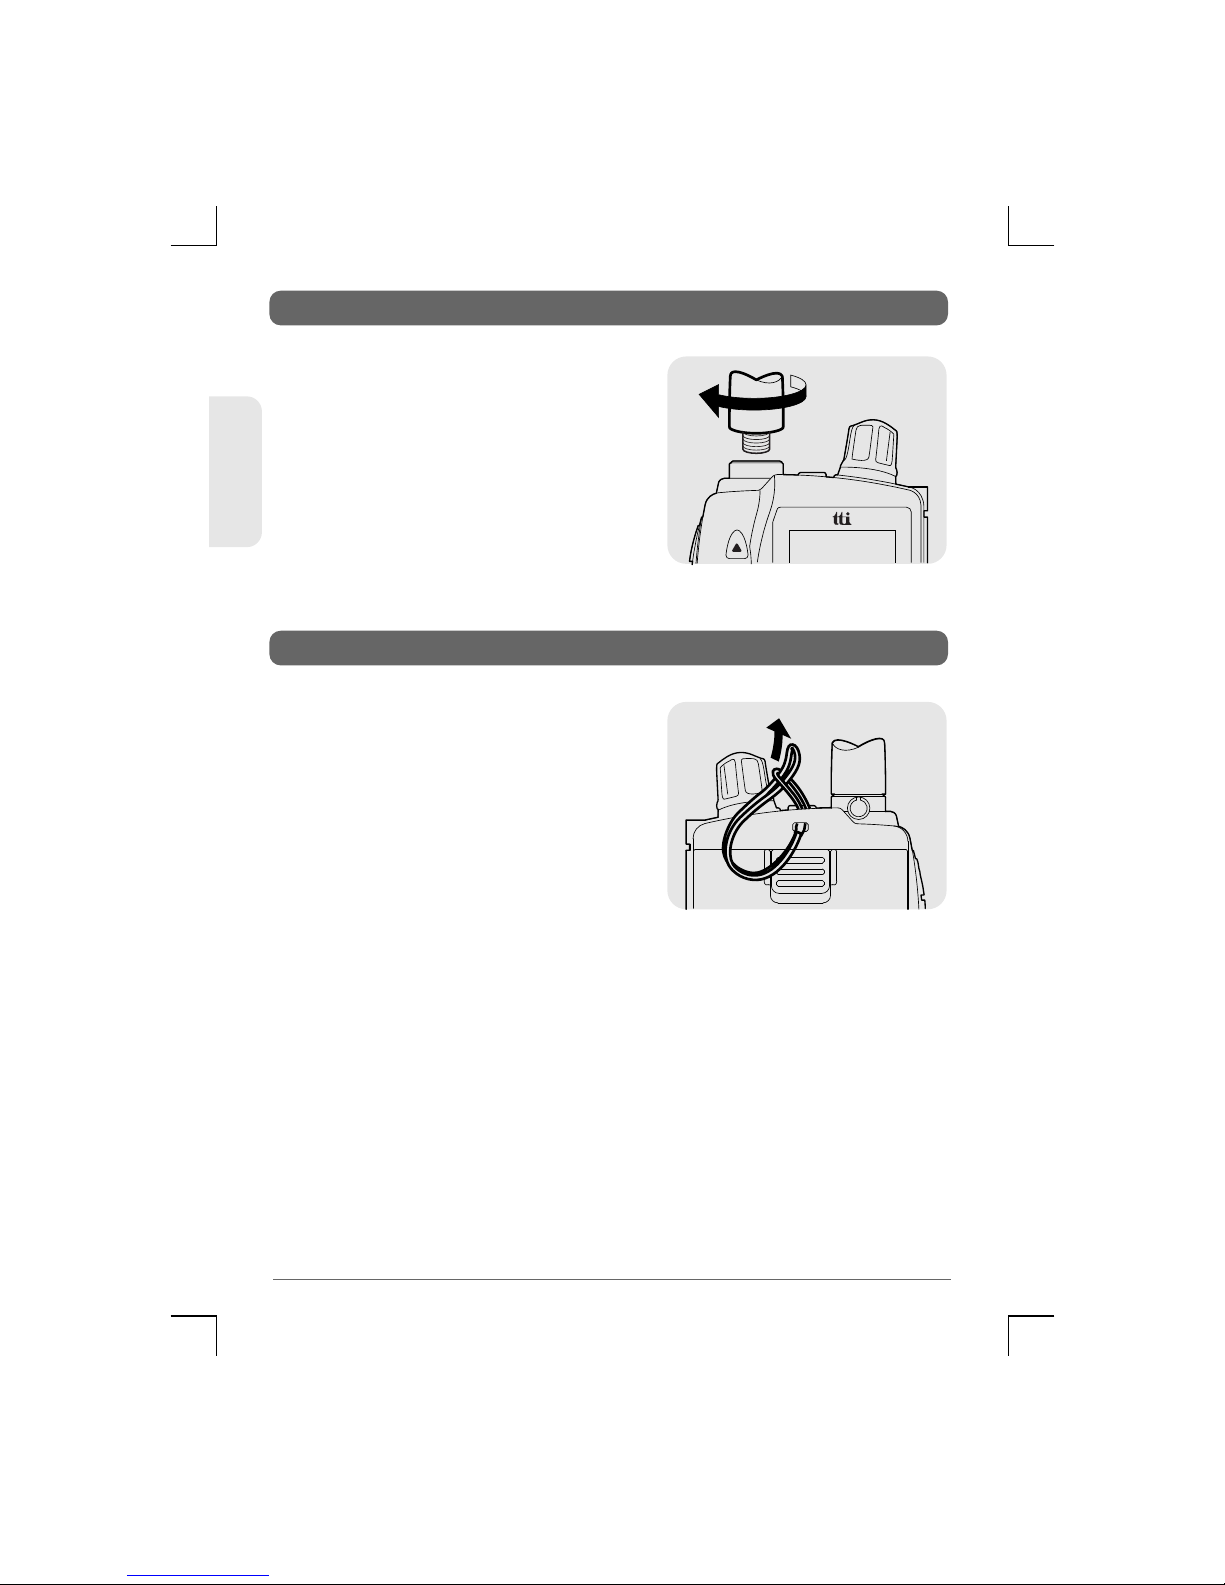
1) Pl ace the antenna o nto the
antenna socket on top of the radio.
2) Rotate the antenna clockwise to
screw into place.
3) Do not over tighten.
INSTALLING THE ANTENNA
1) Slide the small end loop of the
lanyard through the slot in the rear
of the receiver’s top panel.
2) Feed the large end of the lanyard
through the loop and tighten.
INSTALLING THE LANYARD
7
TSC-3000R
ENGLISH

Your scanner receiver is supplied with a rechargeable battery
pack, desktop charging cradle and AC adaptor.
The charging time for a discharged battery is typically 12– 15
hours. When the battery is fully charged, the LED will turn GREEN.
To charge the battery:
1) Fit the battery to the receiver (see instructions above). Ensure
the receiver is switched off.
2) Connect the AC Adaptor to the charging cradle.
3) Plug the AC adaptor into a mains power outlet.
4) Insert the receiver into the charging cradle until it ‘clicks’ home.
The charging LED will glow RED and charging will begin.
• If the charging LED blinks RED and GREEN or does not light
at all, remove the receiver into the cradle and reinsert it.
CHARGING THE BATTERY
ENGLISH
8
TSC-3000R
21
3
4
Adaptor DC Plug
1
AC Adaptor
2
Charging LED
3
Chaging Cradle
4
NOTE : If you find yourself in a position where you need to charge
the battery but the charging Cradle is not available, you
can plu g the A C Ad apto r dir ectl y int o the r ecei vers
charging socket located under the Accessory Jack cover.
9
TSC-3000R
ENGLISH
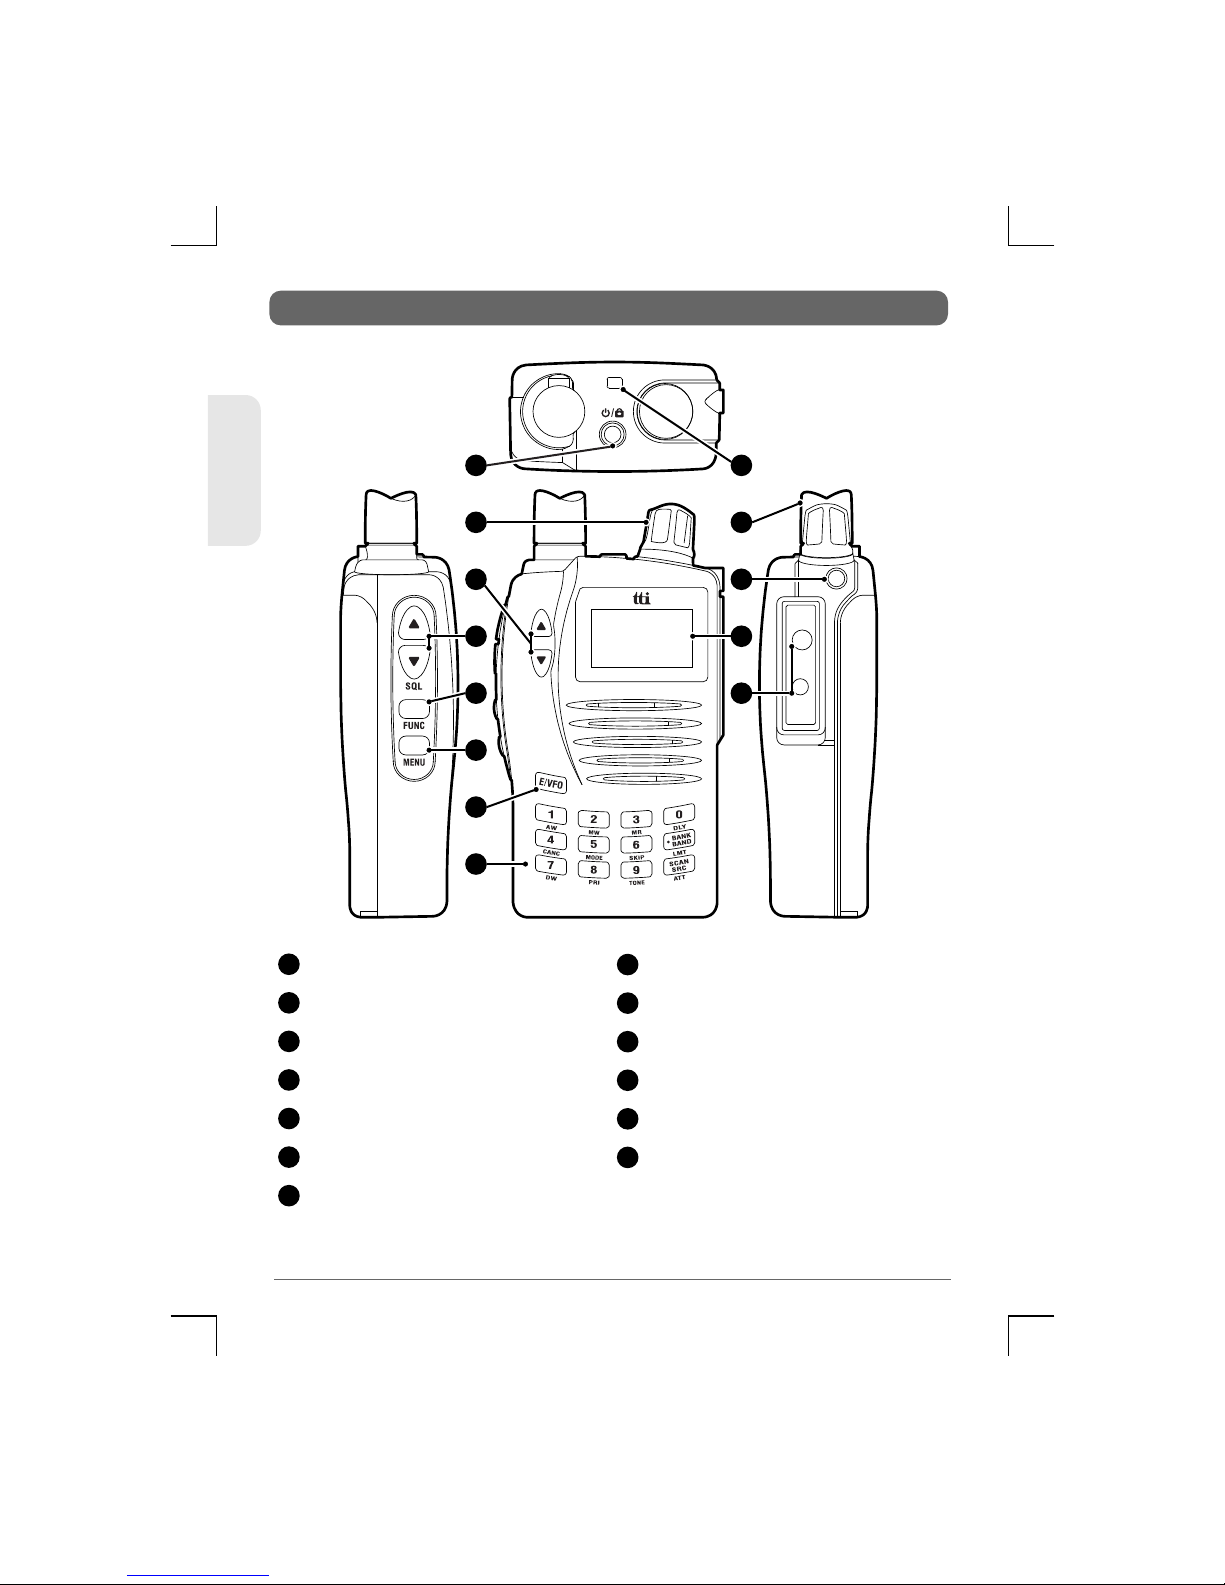
CONTROLS
1
9
11
12
7
8
10
13
4
6
5
3
2
Keypad
8
Accessory Jack
9
LCD Display
10
Jack Cover Securing Point
11
Antenna
12
Lanyard Slot
13
Power On/Off Lock Button
1
Control Knob
2
Up/Down Keys
3
Squelch Up/Down Keys
4
Function Key
5
Menu Key
6
Enter/VFO Key
7
10
TSC-3000R
ENGLISH

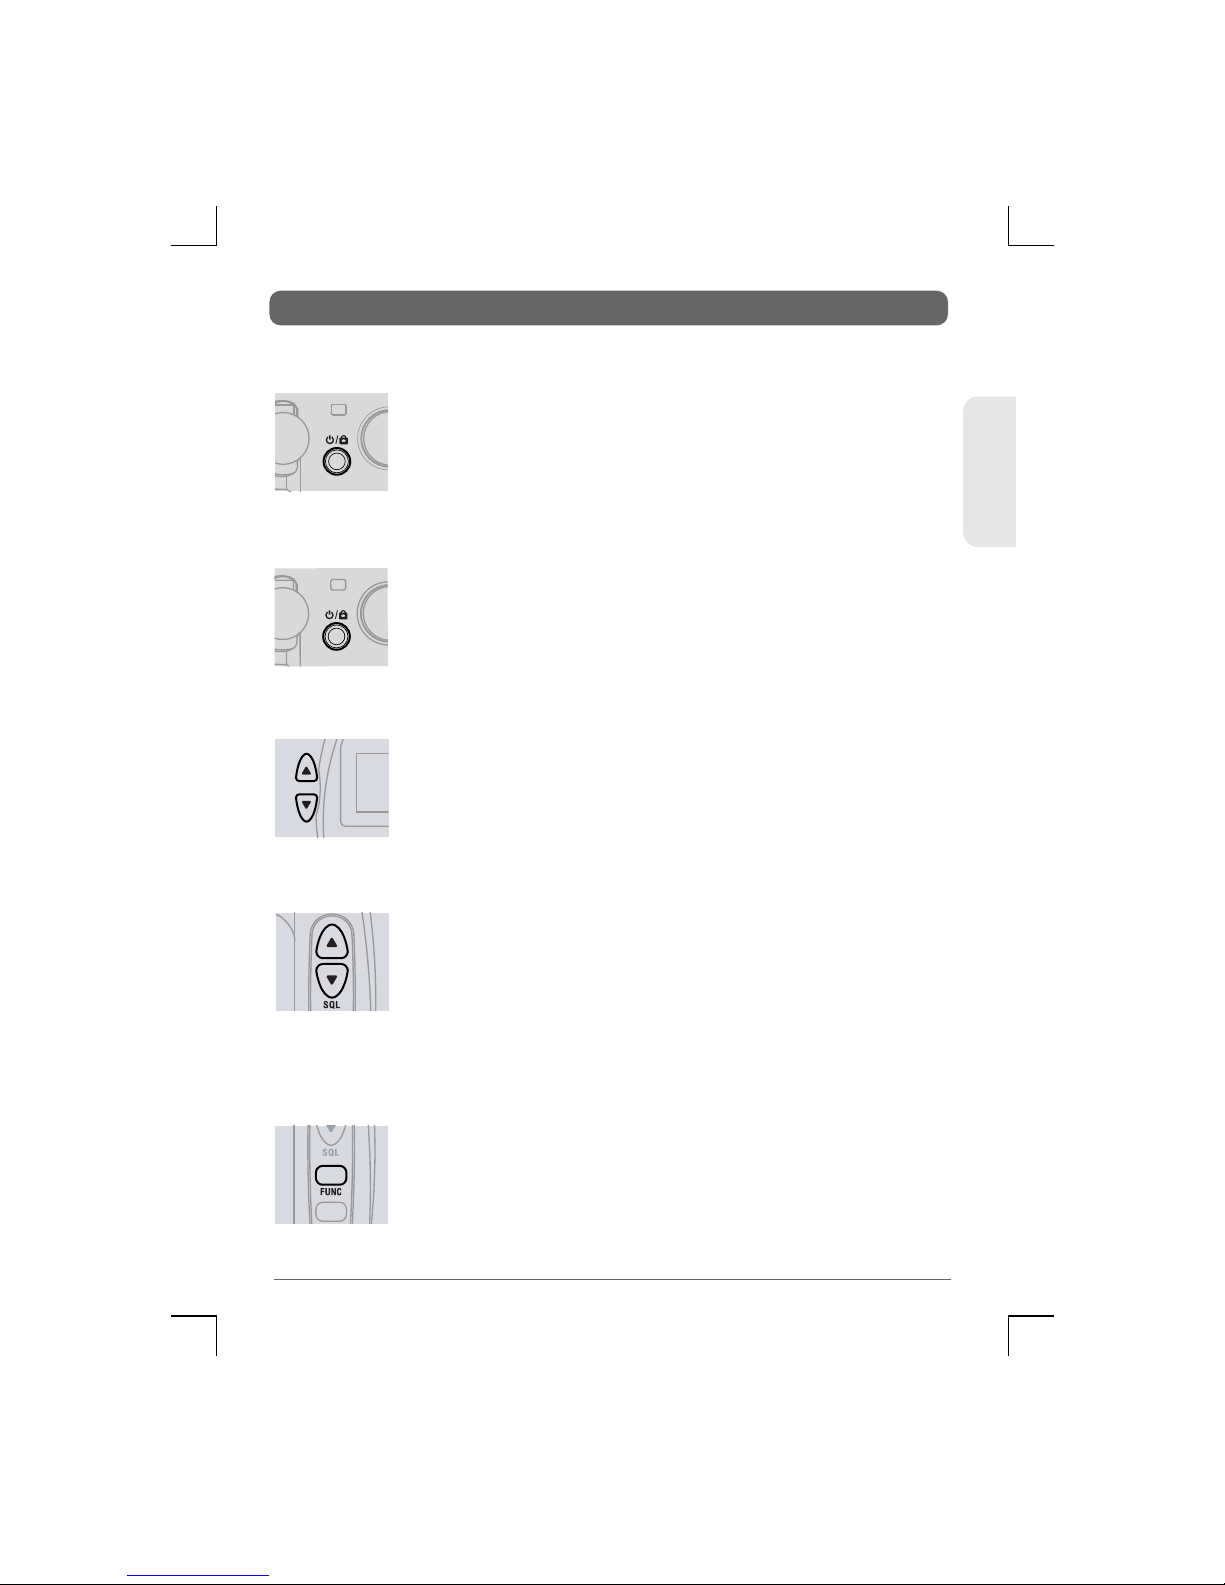
Power On/Off Lock Button
Turns the receiver on and off. Also Locks the keypad.
Control Knob
Selects frequencies and channels and selects values from menus.
Up/Down Keys
Adjusts the Volume and selects Menu items and frequency steps.
Squelch Up/Down Keys
Opens and closes the squelch.
Function Keys
Enables extended keypad functions.
Menu Keys
Provides access to setup menus.
Enter/VFO Keys
Confirms selections and selects the VFO mode
Keypad
Allows direct entry of frequencies and selection of functions.
Accessory Jack
Provides charging and earphone jacks.
LCD Display
Shows frequencies and selected functions.
Jack Cover Securing Point
Holds the accessory jack cover in place.
Antenna
Provides reception of signals.
Lanyard Slot
Allows connection of the Lanyard to protect the receiver from
being accidentally dropped.
1
2
3
4
5
6
7
8
9
10
11
12
13
11
TSC-3000R
ENGLISH
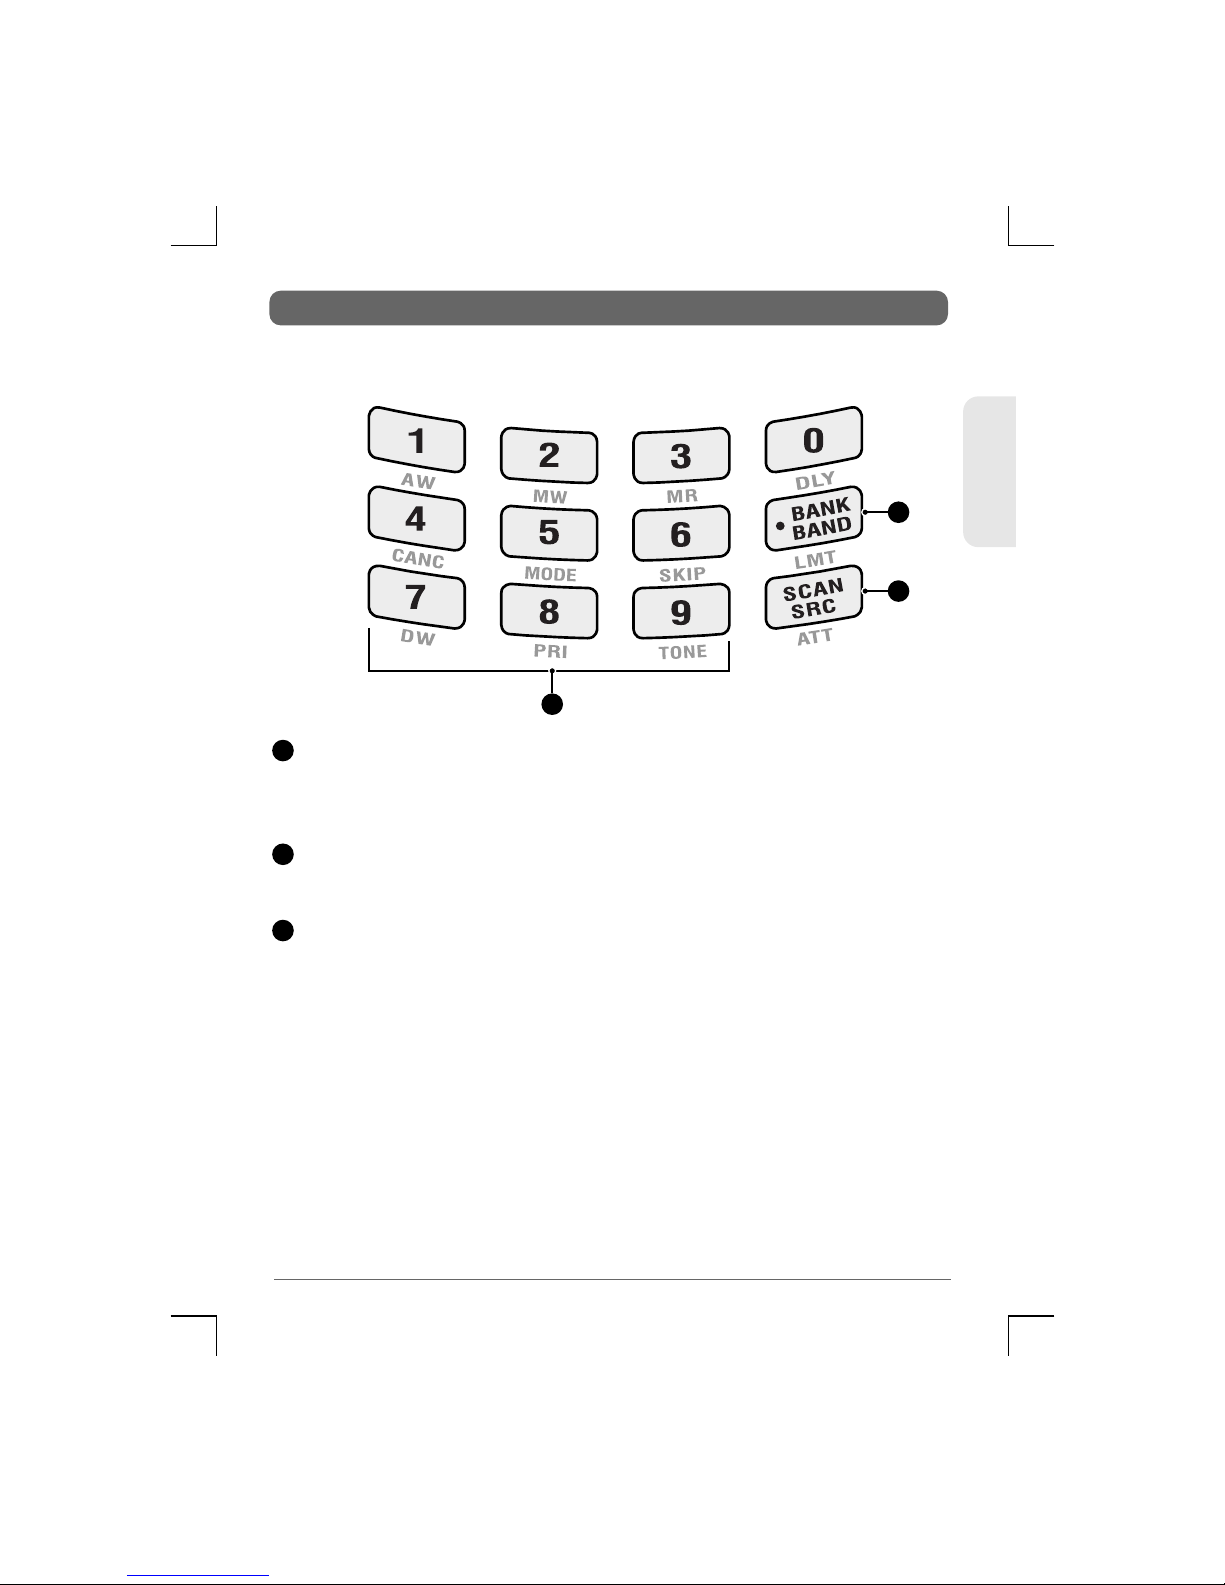
Direct Input Keys
Number Keys
Used to enter frequencies in VFO mode and to make direct
selected of Banks in memory Read mode.
Bank/Band Key
Used to change Memory Banks or Frequency Bands.
Scan/Search Key
Used to activate or deactivate the Scan function in memory read
mode or the Search function in VFO mode.
KEYPAD
2
3
1
1
2
3
ENGLISH
12
TSC-3000R
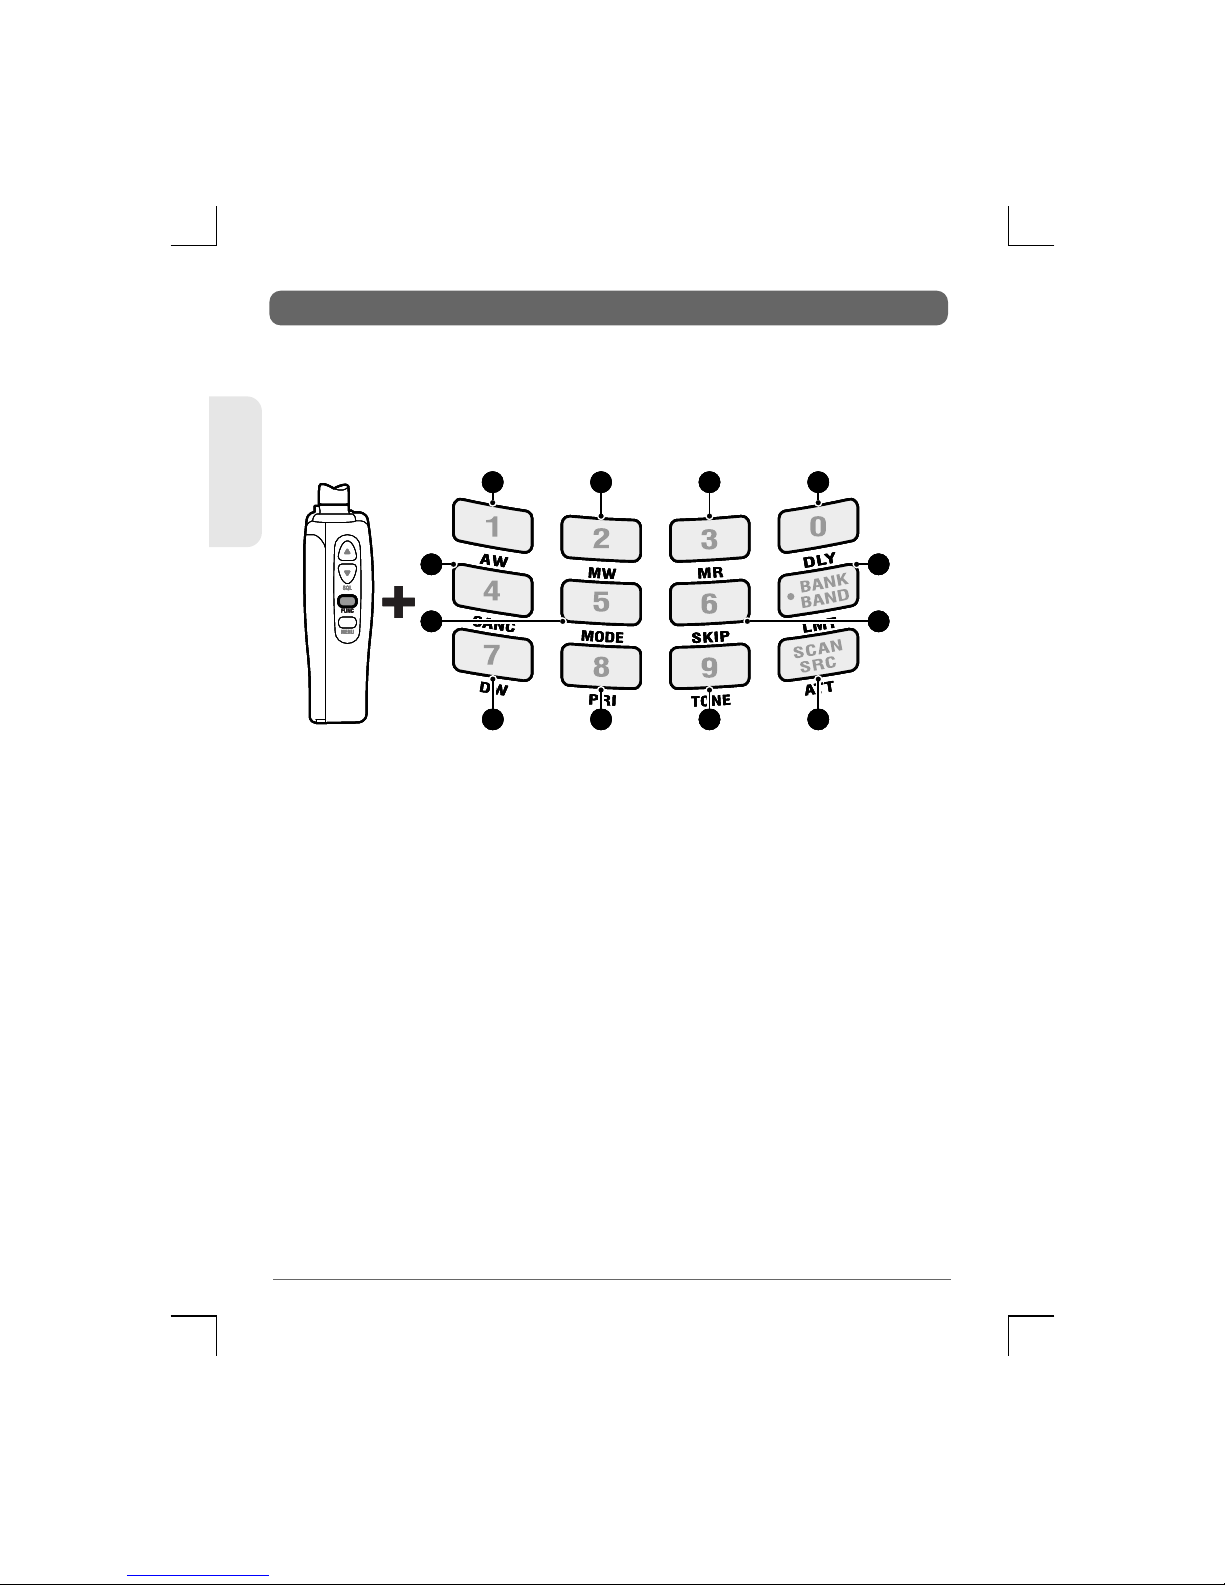
The Keypad Keys on the front panel have secondary functions
which are printed below each key. These secondary functions are
accessed after pressing the FUNC key.
EXTENDED FUNCTION KEYS
a
e
f
h
g
j
k
i
b
c
d
l
a
e
f
h
g
j
k
i
b
c
d
l
a
e
f
h
g
j
k
i
b
c
d
l
1
5
6
8
7
10
11
9
2
3
4
12
13
TSC-3000R
ENGLISH
Extended Function Keys
KEY FUNCTION
Automatic Write
DESCRIPTION
Automatically stores scanned
frequencies in the Automatic Memory
storage area.
Allows manual storage of
frequencies into the Manual Memory
storage area.
Allows reading of the frequencies in
the stored memories.
Manual Write
Memory Read
Used to Cancel an incorrect input.
Cancel
Selects the receiver modes (AM, FM,
WFM or Automatic).
Mode
Activates or Deactivates the Dual
Watch function.
Dual Watch
Used to Skip channels when Scanning
or Skip frequencies when Searching.
Skip
Activates or Deactivates the
selection of a Priority Channel.
Priority Channel
Allows the entry of upper and lower
frequency limits when Searching.
Limit:
Activates or deactivates the signal
attenuator to reduce the receiver's
sensitivity in strong signal conditions.
Attenuator:
Activates or Deactivates the selected
CTCSS/DCS tone. The required tone
is selected from the Menu function in
VFO mode.
Tone
Activates or Deactivates the Delay
timer which determines how long the
radio will wait on a frequency after a
signal has disappeared. The Delay
time is set from the Menu function.
Delay
ENGLISH
14
TSC-3000R
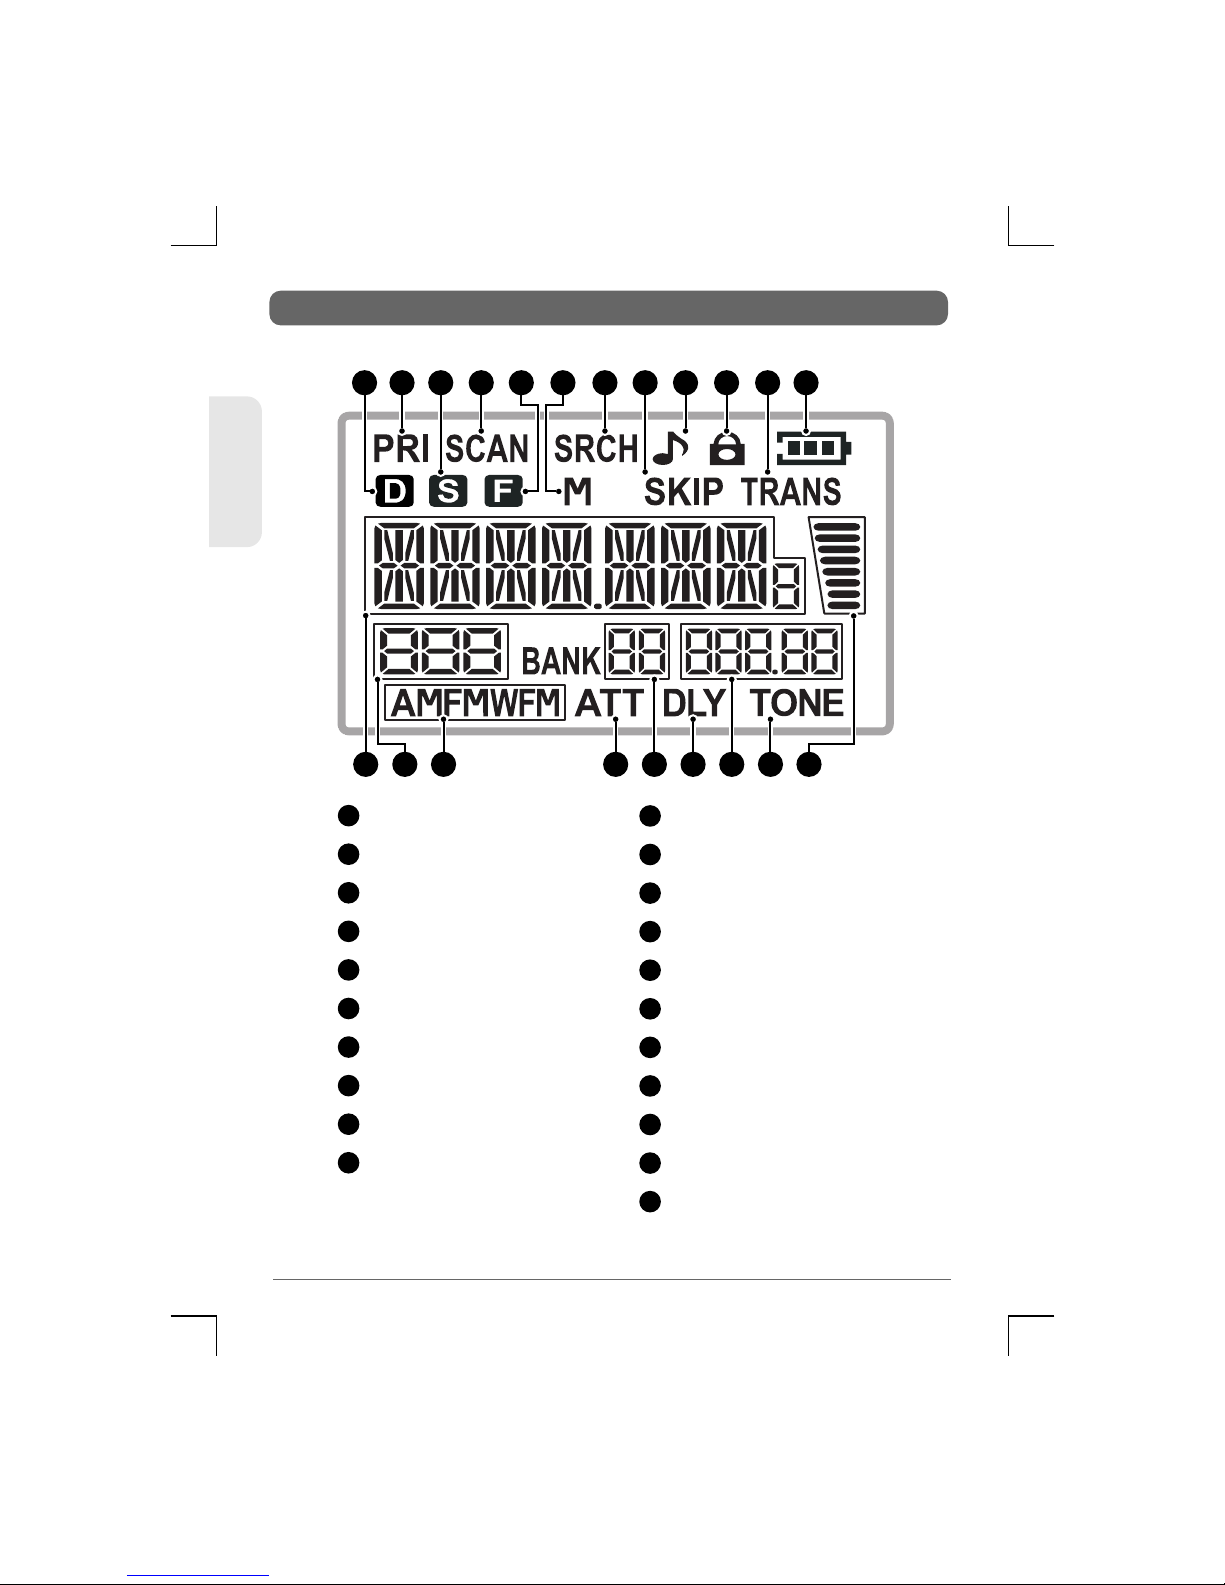
LCD DISPLAY
13 14
21
17
19
15 16 18
20
42 7 9
10 12
3 8
11
651
Dual Watch
1
Data Transfer
11
Priority Channel
2
Battery Charge Level
12
Power Save
3
Frequency Display
13
Scan
4
Channel Indicator
14
Function
5
AM, FM, WFM Mode
15
Memory
6
Attenuator
16
Search
7
Bank Number
17
Skip
8
Scan Delay Timer
18
Key Tone & Beep Tone
9
Frequency Step
19
Keypad Lock
Tone
20
Signal Meter
21
10
15
TSC-3000R
ENGLISH
GENERAL OPERATION
Turning the unit On or Off
Press and hold the RED Button on the top of the unit
to turn the unit ON.
Press and hold the RED Button again to turn the unit
OFF.
KEY Lock
Briefly press the RED Button on the top of the unit to
turn the Key Lock ON.
Briefly press the RED Button again to turn the Key
Lock OFF again.
Volume
Press the 5 key to increase the volume.
Press the 6 key to decrease the volume.
The volume level will be displayed from 00 to 31.
Squelch
Press the 5 key on the side of the radio to increase
the Squelch setting and the 6 key on to decrease
the Squelch setting. The Squelch level will be
displayed from 00 to 09. At maximum Squelch
setting, ‘AT’ is selected which represents an
automatic (preset) level setting.
Func Key
The Function key provides access to secondary
functions associated with the front panel keys. The
secondary function labels are printed below their
respective keys.
ENGLISH
16
TSC-3000R

Menu Key
The Menu key provides access to the radios
settings. The settings menus will vary depending on
which mode the receiver is in.
E/VFO Key [Enter/VFO]
Note: The receiver always selects the VFO mode each time it
turned on.
Press the E/VFO key to select the VFO mode.
Frequencies can now be entered directly from the
Keyboard. Press the E/VFO key to Enter (accept) the
selected frequency.
Control Knob
The Control knob is used to change the current
display option.
In VFO mode, rotate the Control knob to change the
displayed frequency at the selected frequency steps.
Rotate lockwise to increase the frequency and
counter clockwise to decrease the frequency.
In Menu mode, rotate the Control knob to change
the selected setting.
In Channel memory mode, rotate the Control knob
to step up or down through the memories.
17
TSC-3000R
ENGLISH
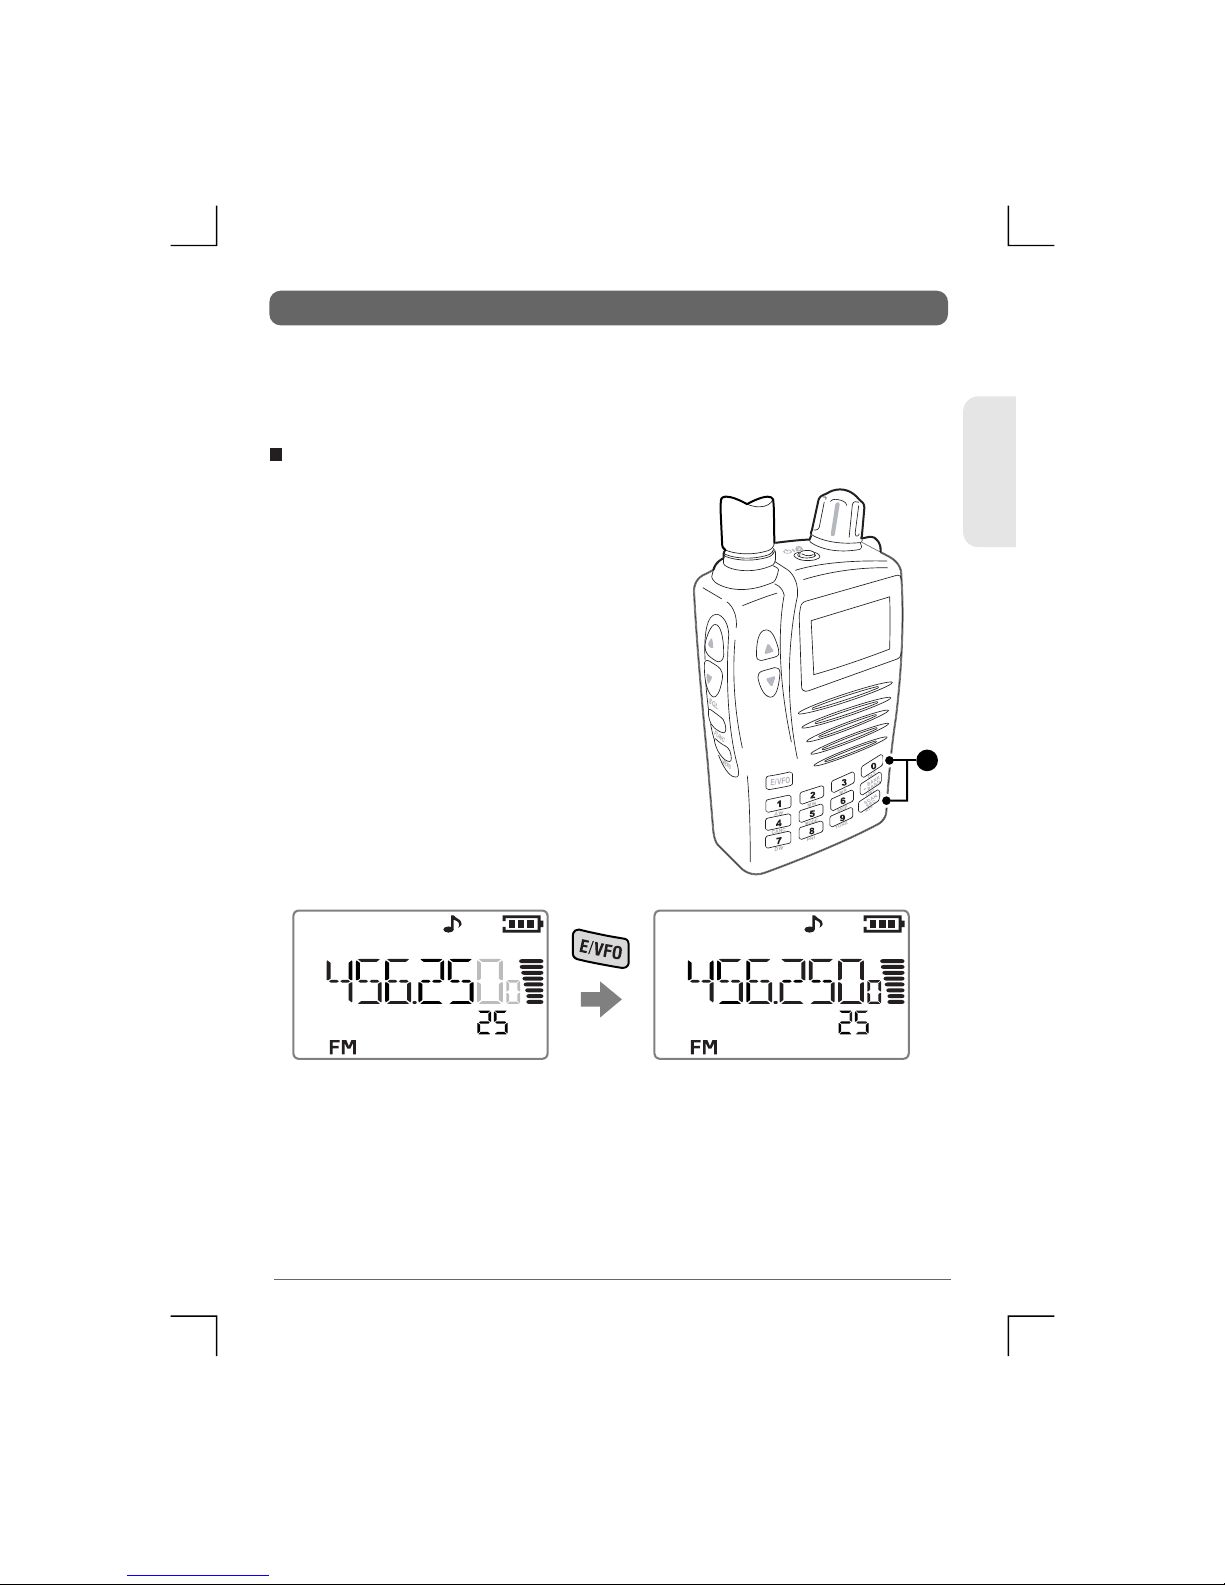
SELECTING FREQUENCIES
The receiver always selects the VFO mode when it is turned on.
You can select frequencies using one of the following methods:
Enter frequencies using the numbered
keypad. Don’t forget to include the
decimal point where applicable.
When you have entered the required
frequency, press the E/VFO key to
accept it. If the frequency you have
entered is not within the selected
frequency step, it is automatically
corrected to the nearest correct
frequency.
e.g. Entering 456.25 followed by
E/VFO results in 456.2500 being
selected.
Direct Frequency Input
1
ENGLISH
18
TSC-3000R
 Loading...