

Page 1
User Guide
mPOS Readers RP350x & RP457c
Mobile Payment Acceptance
User Guide for Android
Page 2

Disclosure Statements
Confidential Notice
The information contained herein is the property of Total System Services, Inc. ® (TSYS®). This
document contains CONFIDENTIAL information that is produced solely for the benefit of the
named parties. All parties should keep all information contained herein confidential, and on no
account should the information, in whole or in part, be disclosed or disseminated to any third
party without the express written permission of TSYS.
Copyright & Trademark
© 2017 Total System Services, Inc. ® all rights reserved worldwide. Total System Services, Inc., and
TSYS® are federally registered service marks of Total System Services, Inc., in the United States.
Total System Services, Inc., and its affiliates own a number of service marks that are registered in
the United States and in other countries. All other products and company names are trademarks
of their respective companies.
Page 3

Table of Contents
Introduction .............................................................................................................................. 4
Mobile Payment Acceptance 3.0 .......................................................................................... 5
Account Activation and Login ................................................................................................ 7
Activate Your Account ............................................................................................................................. 7
PIN Entry ...................................................................................................................................................... 13
Login to Your Account (if the app has been deleted) ..................................................................... 14
The Main Menu ...................................................................................................................... 16
Settings, Account Information, and Help ............................................................................. 17
Manage Settings ...................................................................................................................................... 17
Readers ...................................................................................................................................................... 24
EMV Readers ............................................................................................................................................. 25
Printers ......................................................................................................................................................... 30
View Account Information ..................................................................................................................... 32
Help ............................................................................................................................................................. 33
Customers .............................................................................................................................. 34
Manage Customer Information ............................................................................................................. 34
Add New Customer ................................................................................................................................. 35
Remove Customer Information ............................................................................................................. 42
Page 4

Table of Contents
Transactions ........................................................................................................................... 45
Add a Customer to a Transaction......................................................................................................... 46
Create a Transaction ............................................................................................................................... 48
Processing a Payment ............................................................................................................................. 50
Offline Payments ...................................................................................................................................... 58
Forced Authorizations .............................................................................................................................. 59
Partial Authorizations ............................................................................................................................... 62
Tips and Signature .................................................................................................................................... 67
Approved Transaction ............................................................................................................................. 68
Declined Transaction ............................................................................................................................... 69
History and Returns ................................................................................................................ 71
Transaction History .................................................................................................................................... 71
Page 5

User Guide
Introduction
Mobile Payment Acceptance (MPA) is an easy-to-use application on your smartphone with the
mPOS RP350x and RP457c devices that provides reliable, secure, and portable transaction
processing, as well as other useful features for managing your business. MPA can be
downloaded to a compatible device from the Google Play store; however, the available
features and functionality may differ depending on the device you use.
4 │ Mobile Payment Acceptance User Guide for Android
Page 6
User Guide
2.
Mobile Payment Acceptance 3.0
Application Download
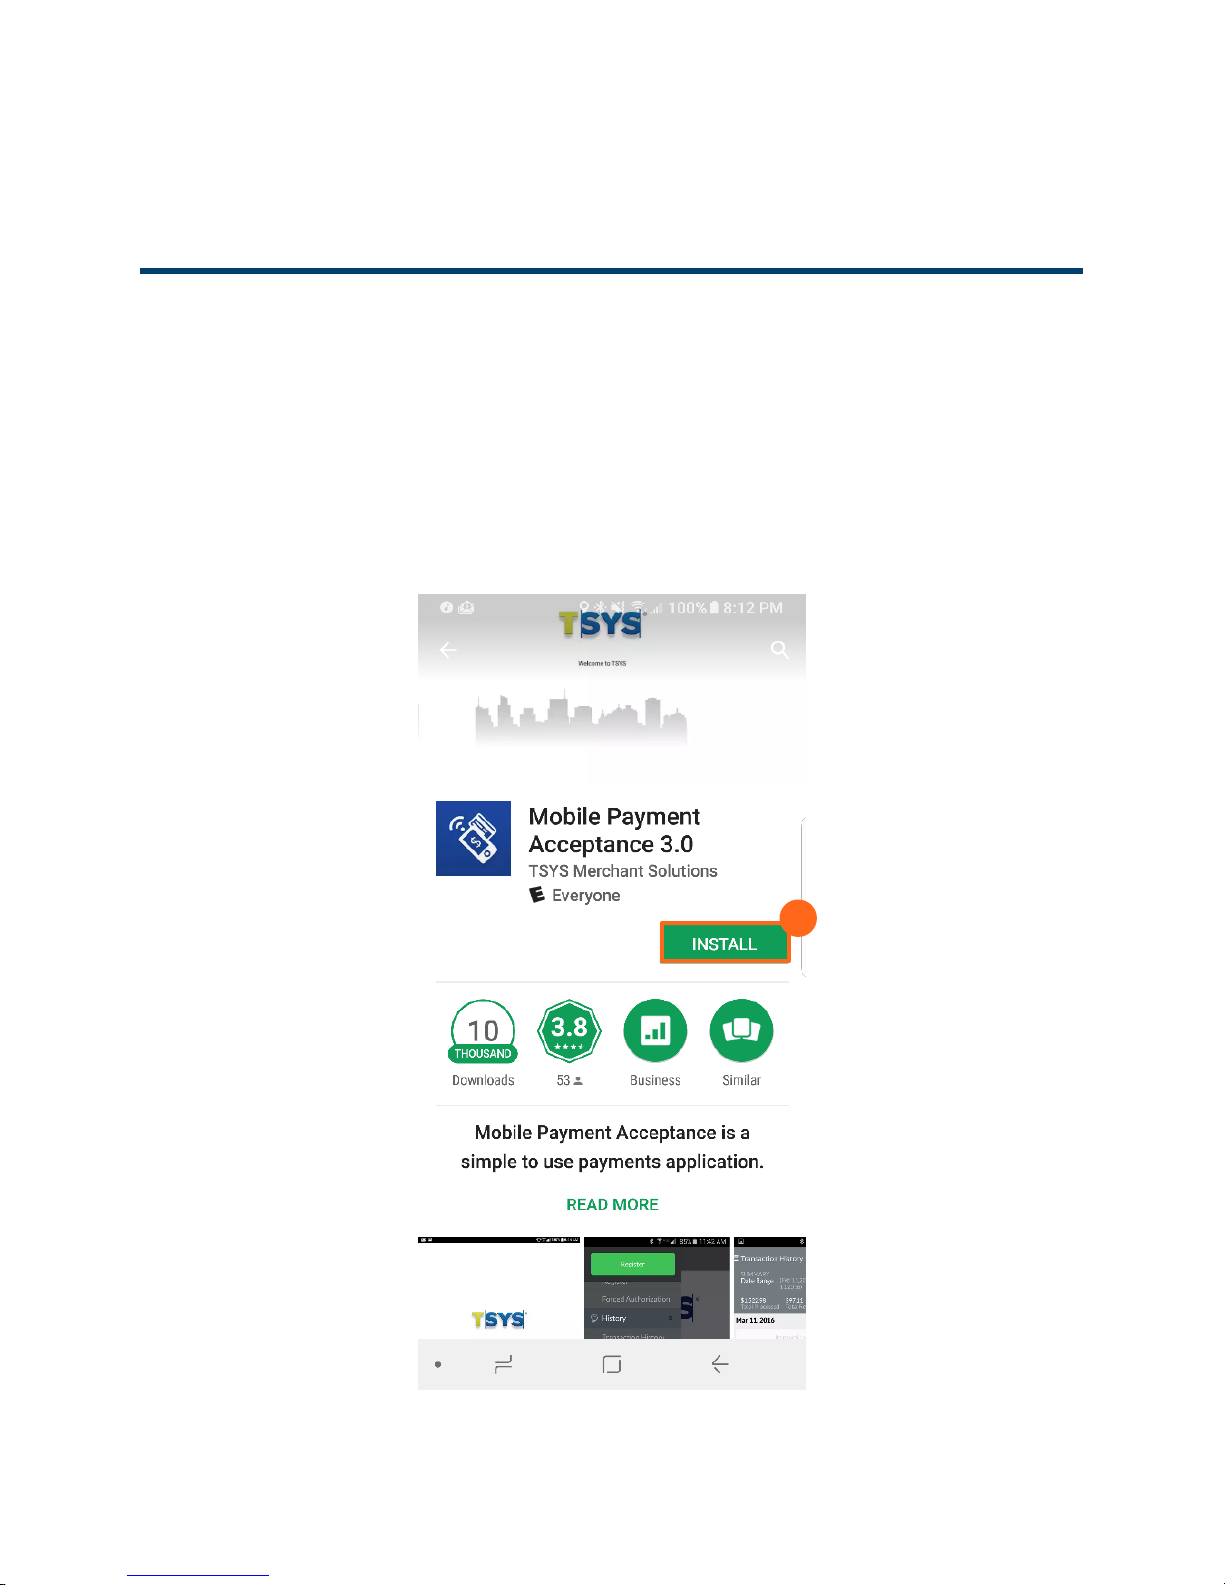
TSYS’ Mobile Payment Acceptance application is available in Google Play on Android
smartphone devices. The application is compatible with most devices running Android 4.4 and
higher. You can download the application from Google Play.
1. Open Google Play on your phone and search for TSYS Mobile Payment Acceptance.
2. Tap Install.
Mobile Payment Acceptance User Guide for Android
│
5
Page 7

User Guide
3.
3. Tap Accept to give Mobile Payment Acceptance access to functions of your phone that
facilitate features of the application.
Open the application once it finishes installing.
6 │ Mobile Payment Acceptance User Guide for Android
Page 8

User Guide
1.
Account Activation and Login
Activate Your Account
To begin processing payments with Mobile Payment Acceptance, you first need to activate
your merchant account. During the account activation process, you will create a password for
future login as well as a personal identification number (PIN) for quick access.
In order to activate your merchant account, you will need the email address associated which
contains your merchant account information as well as your truncated 12-digit Merchant ID and
14-digit Device ID numbers. Your non truncated Merchant ID will be provided to you during our
phone onboarding and training session.
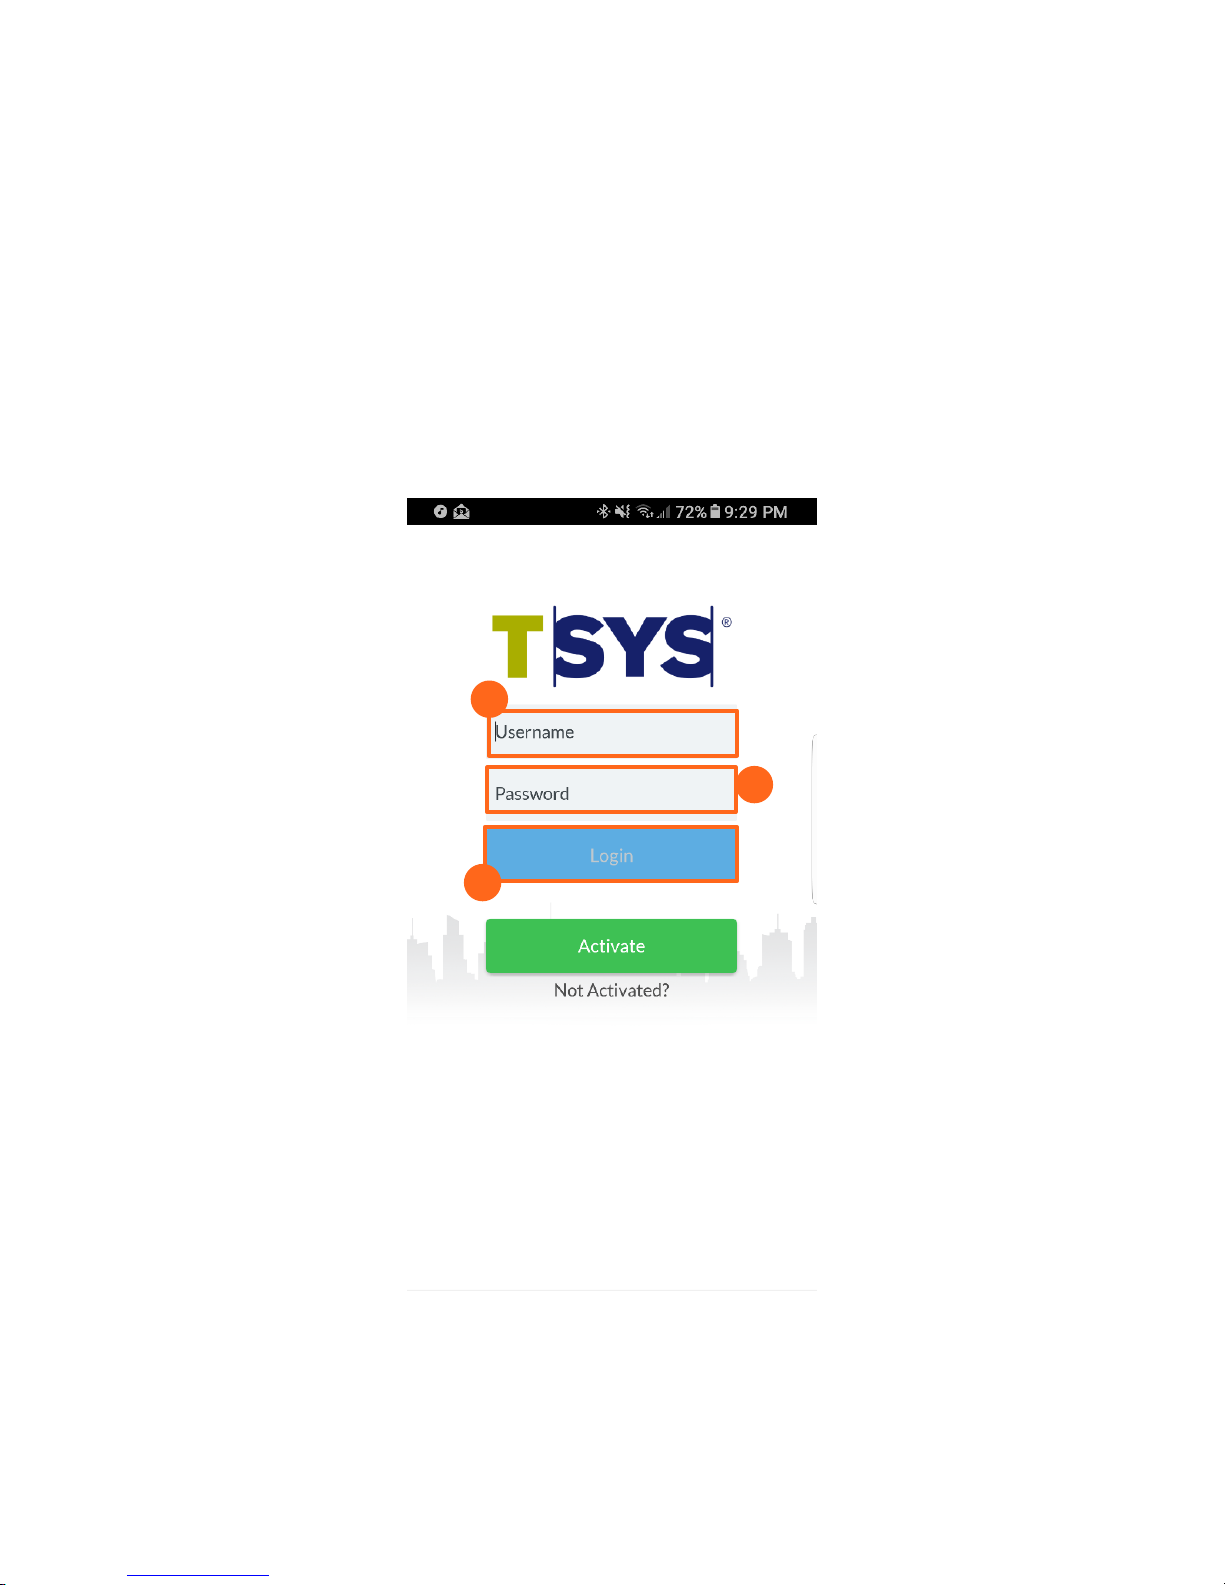
To activate your account and sign in for the first time:
1. From the Login screen, tap Activate to proceed to the Account Activation page.
Mobile Payment Acceptance User Guide for Android
│
7
Page 9
User Guide
5.
2.
4.
6.
3.
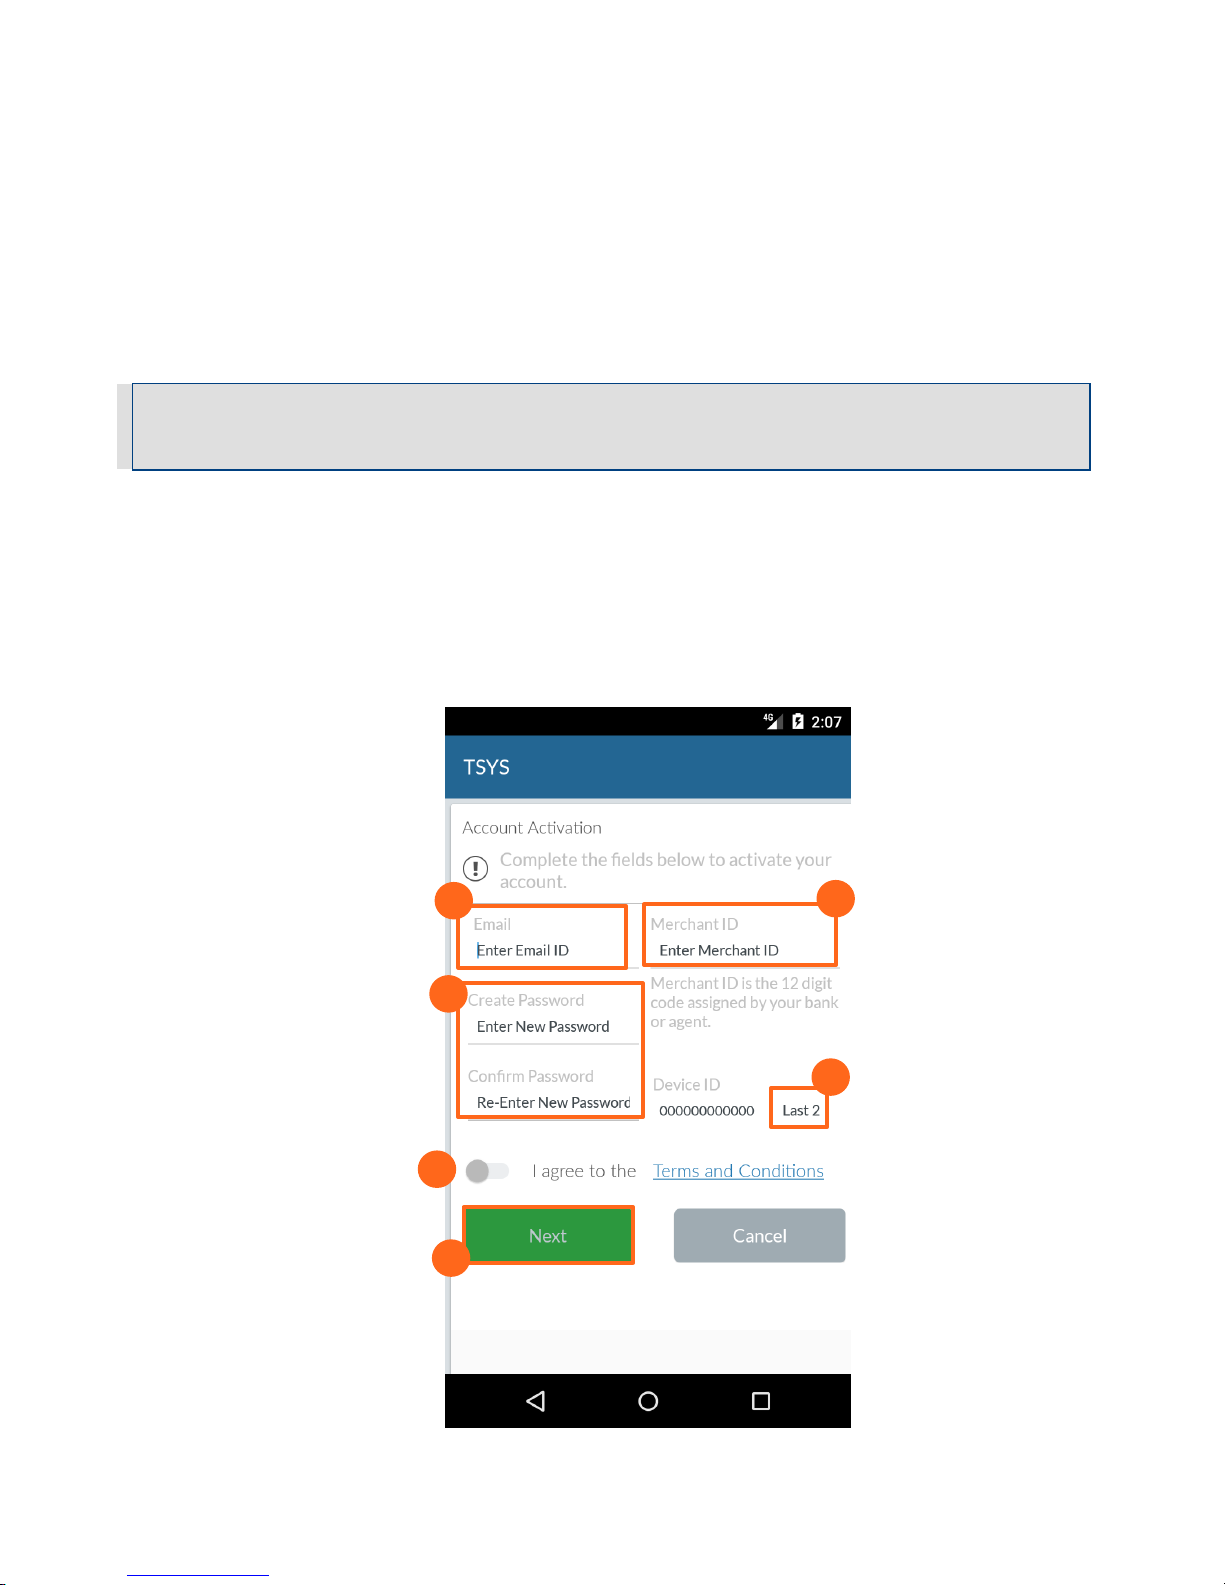
2. Enter the Email ID. This is the email used for correspondence related to the merchant
account.
3. Enter the 12 digit Merchant ID associated with your merchant account.
4. Enter and re-enter a NEW Password. Be sure to record this password for future use.
Note: The password must contain eight to sixteen characters, and consist of at least one number from
0 to 9, at least one uppercase and one lowercase letter from A to Z, and at least one special character
(! @ $ ^ * - _ .). Your password can not contain spaces or match any of the previous six passwords.
5. For the Device ID enter two digits to the end of the Merchant ID. If you have one device
this is 01, if you have 2 devices this is 02 and so on.
6. Move the slider to indicate that you agree with the Terms and Conditions.
7. Tap Next.
8 │ Mobile Payment Acceptance User Guide for Android
Page 10
User Guide
8.
9.
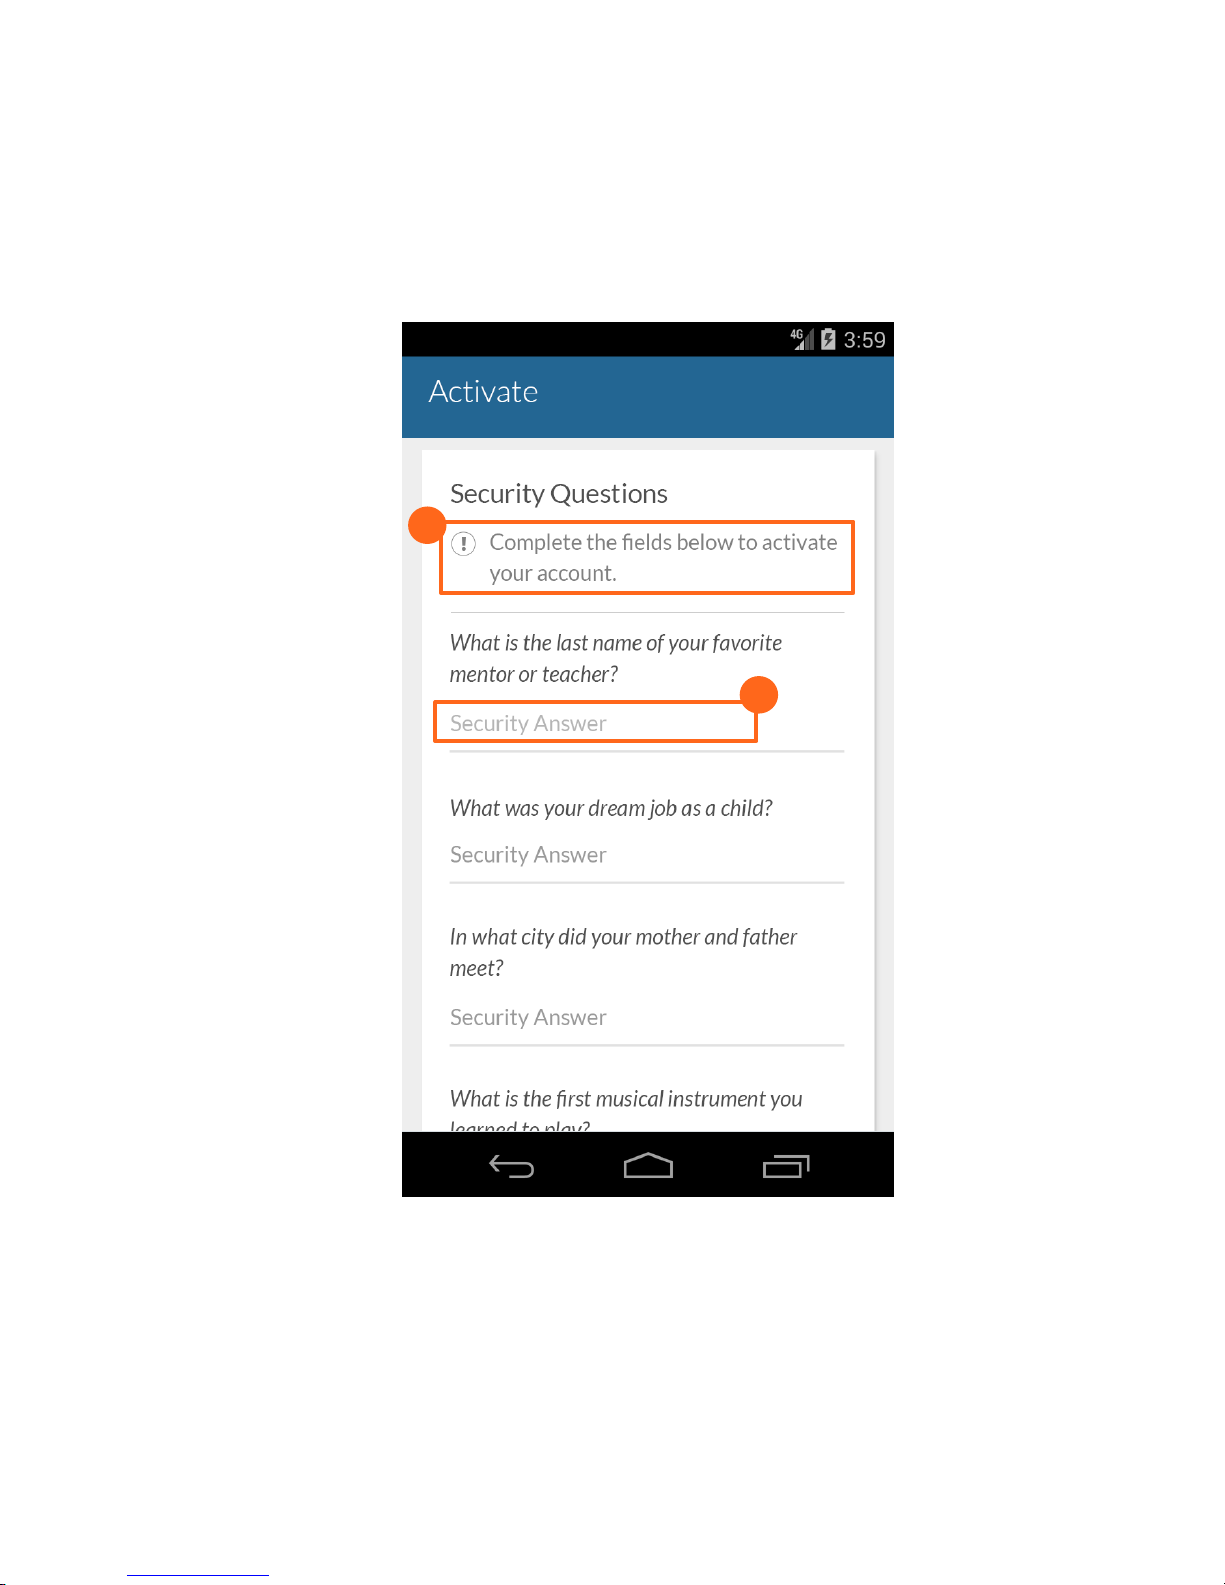
8. Tap each security question prompt and select a question.
9. Enter answers for each of the four security questions.
Mobile Payment Acceptance User Guide for Android
│
9
Page 11
User Guide
10.
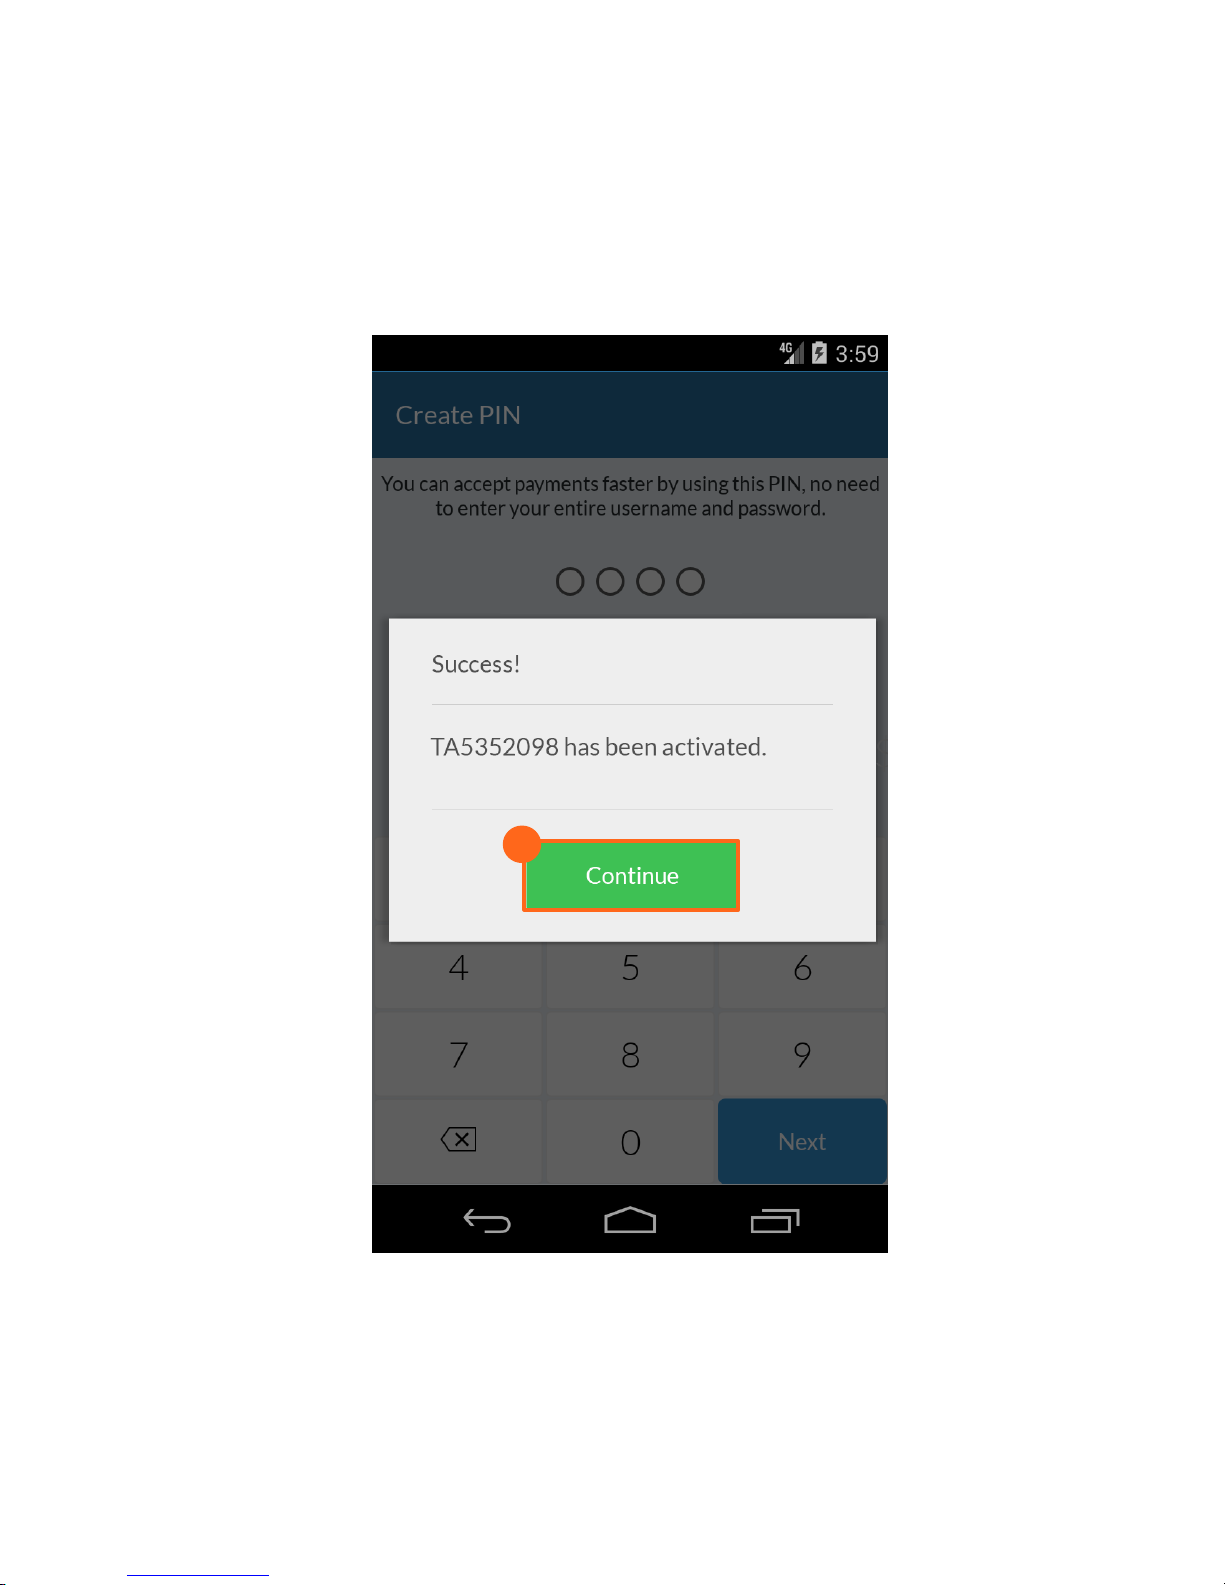
10. A dialog box will appear confirming the successful activation of your account. Tap
Continue to continue with the sign-in process. Please keep track of your TA number as
you may need it for a future login.
10 │ Mobile Payment Acceptance User Guide for Android
Page 12
User Guide
12.
11.
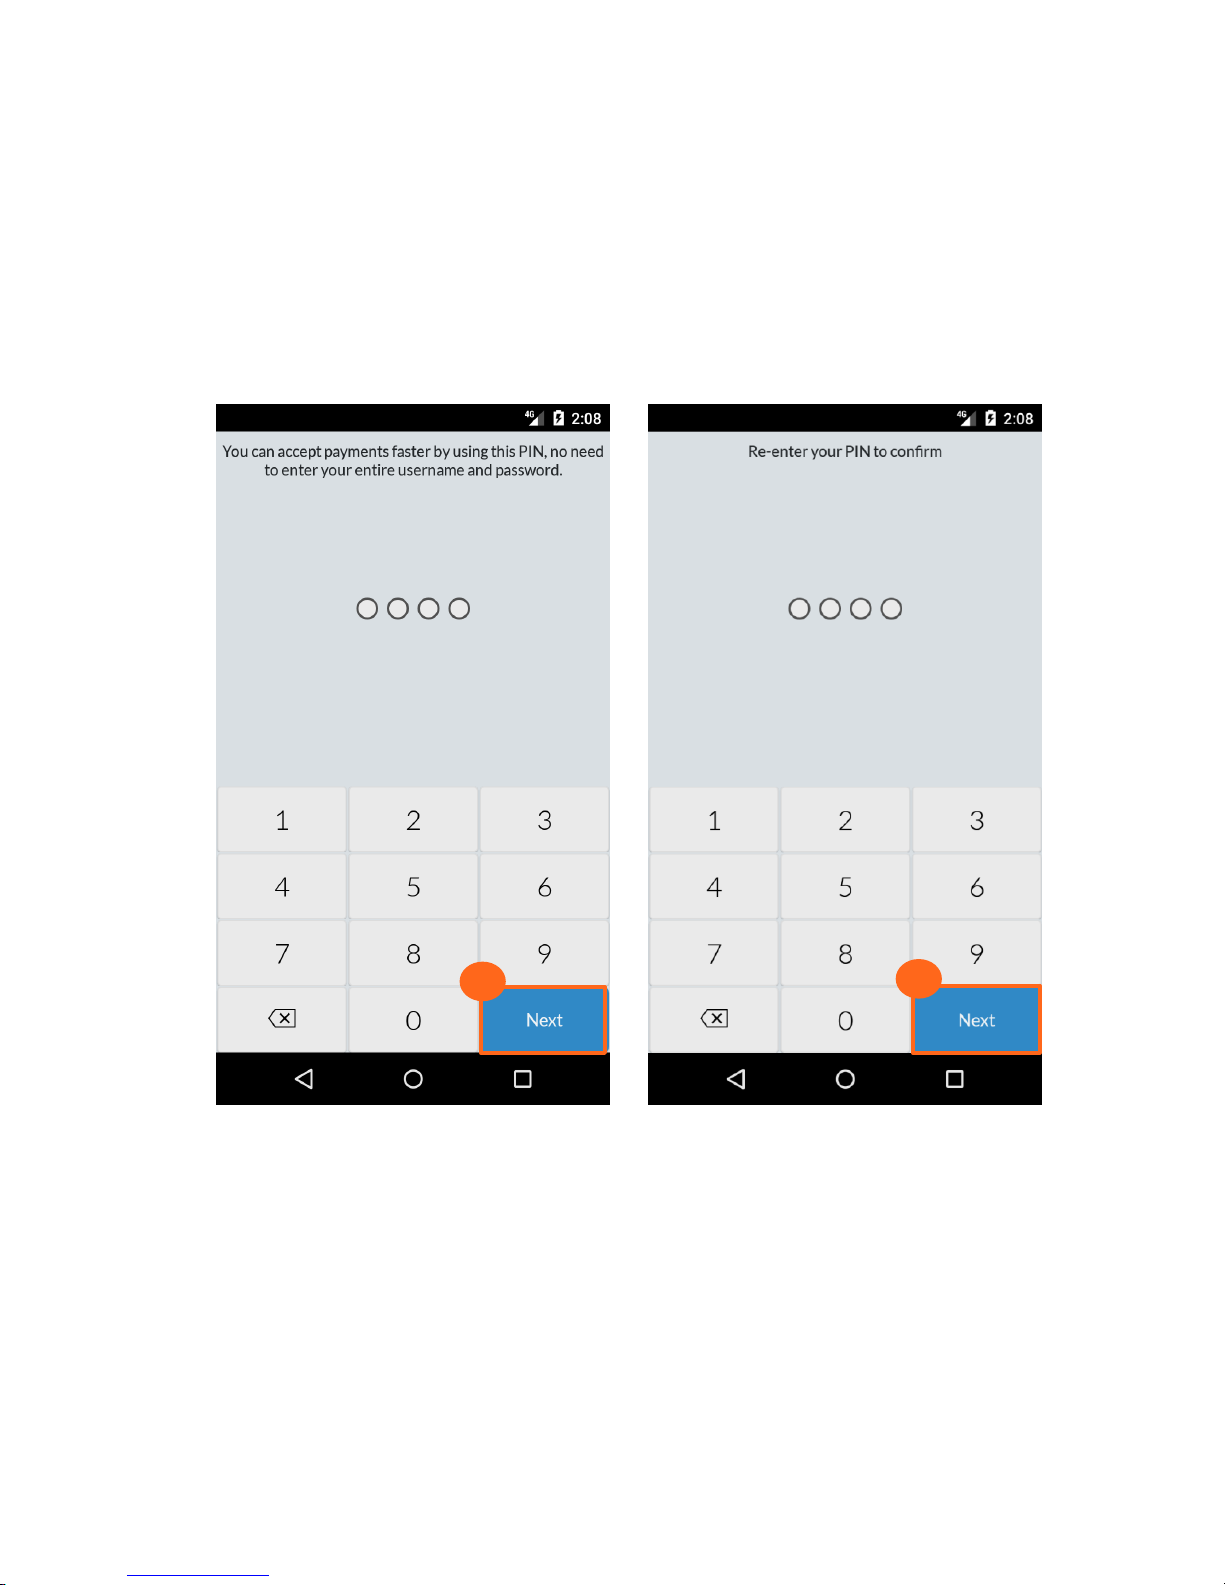
11. Use the number pad to create your new PIN and tap Next. Re-enter your PIN to confirm
it. Record this PIN for future use, as it can be used to quickly log into the application after
it times out, when the device is turned off, or when the application is closed and
reopened.
12. Tap Next to continue with the sign-in process.
Mobile Payment Acceptance User Guide for Android
│
11
Page 13
User Guide
13.
14.
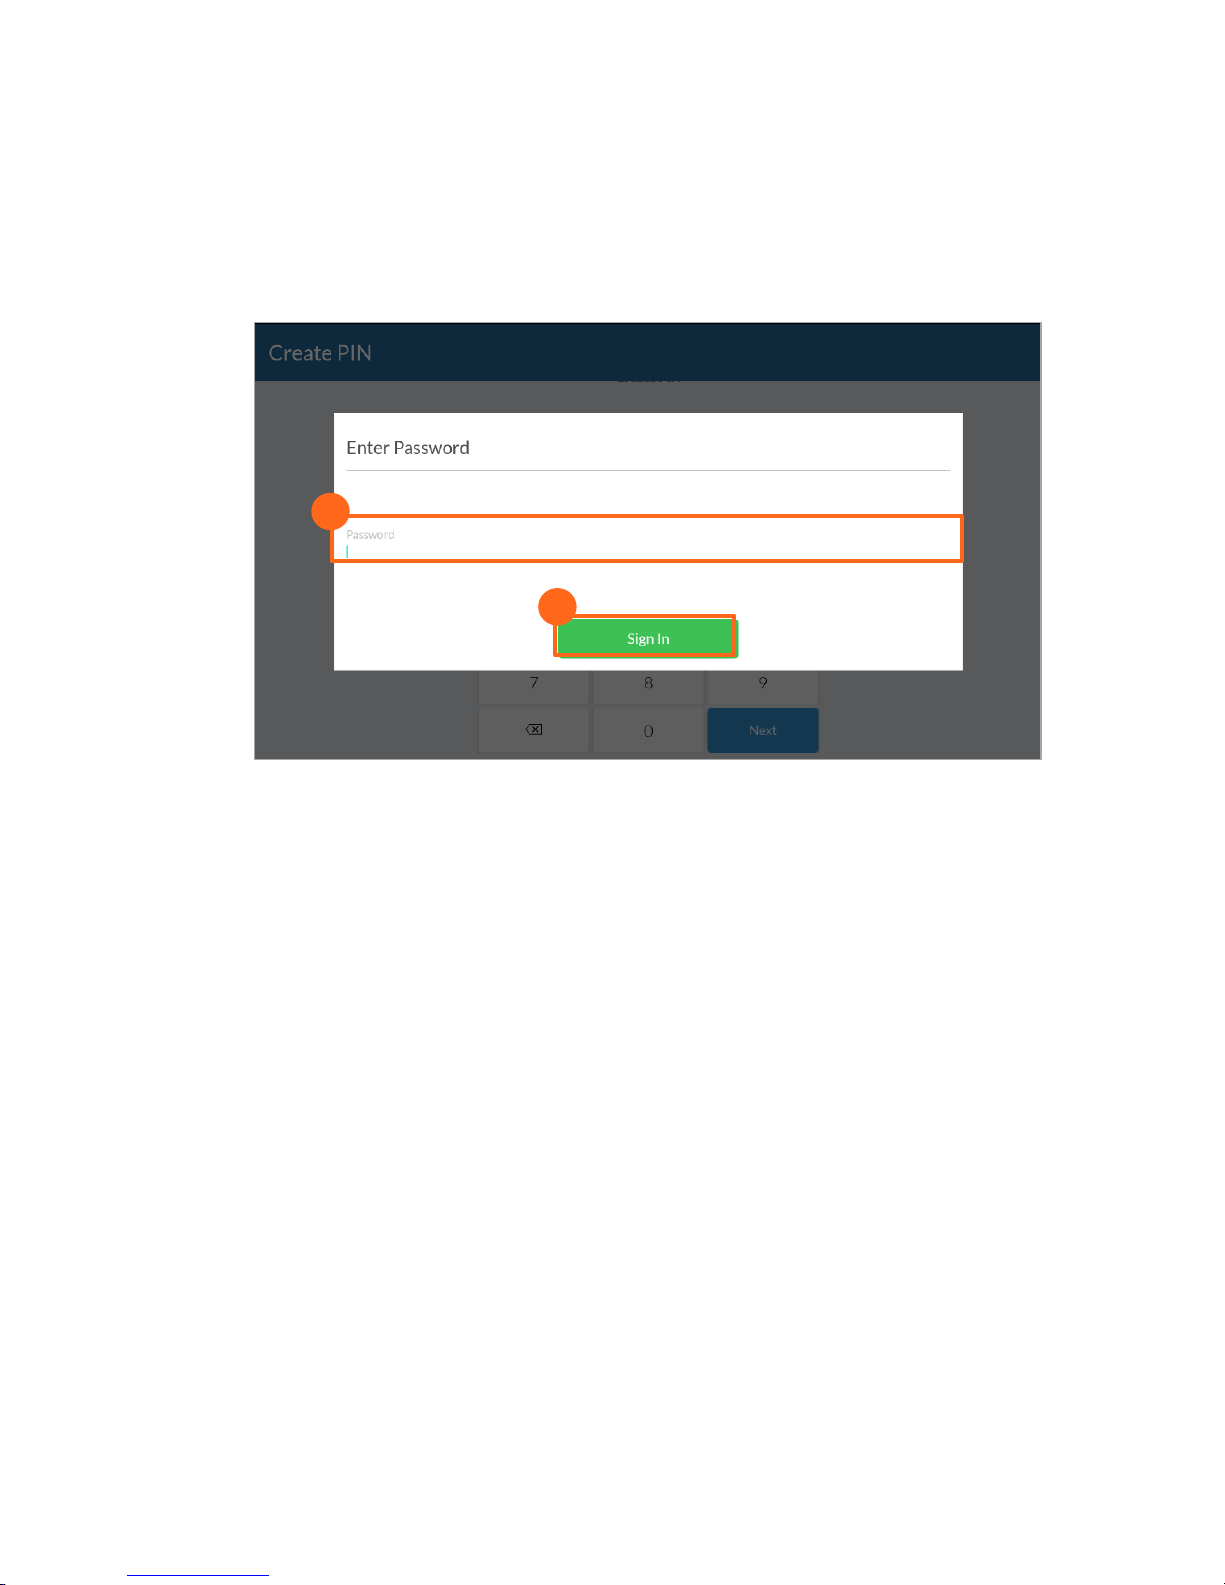
13. Enter the password you created during the activation process.
14. Tap Sign In to complete the account activation and sign-in process.
12 │ Mobile Payment Acceptance User Guide for Android
Page 14
User Guide
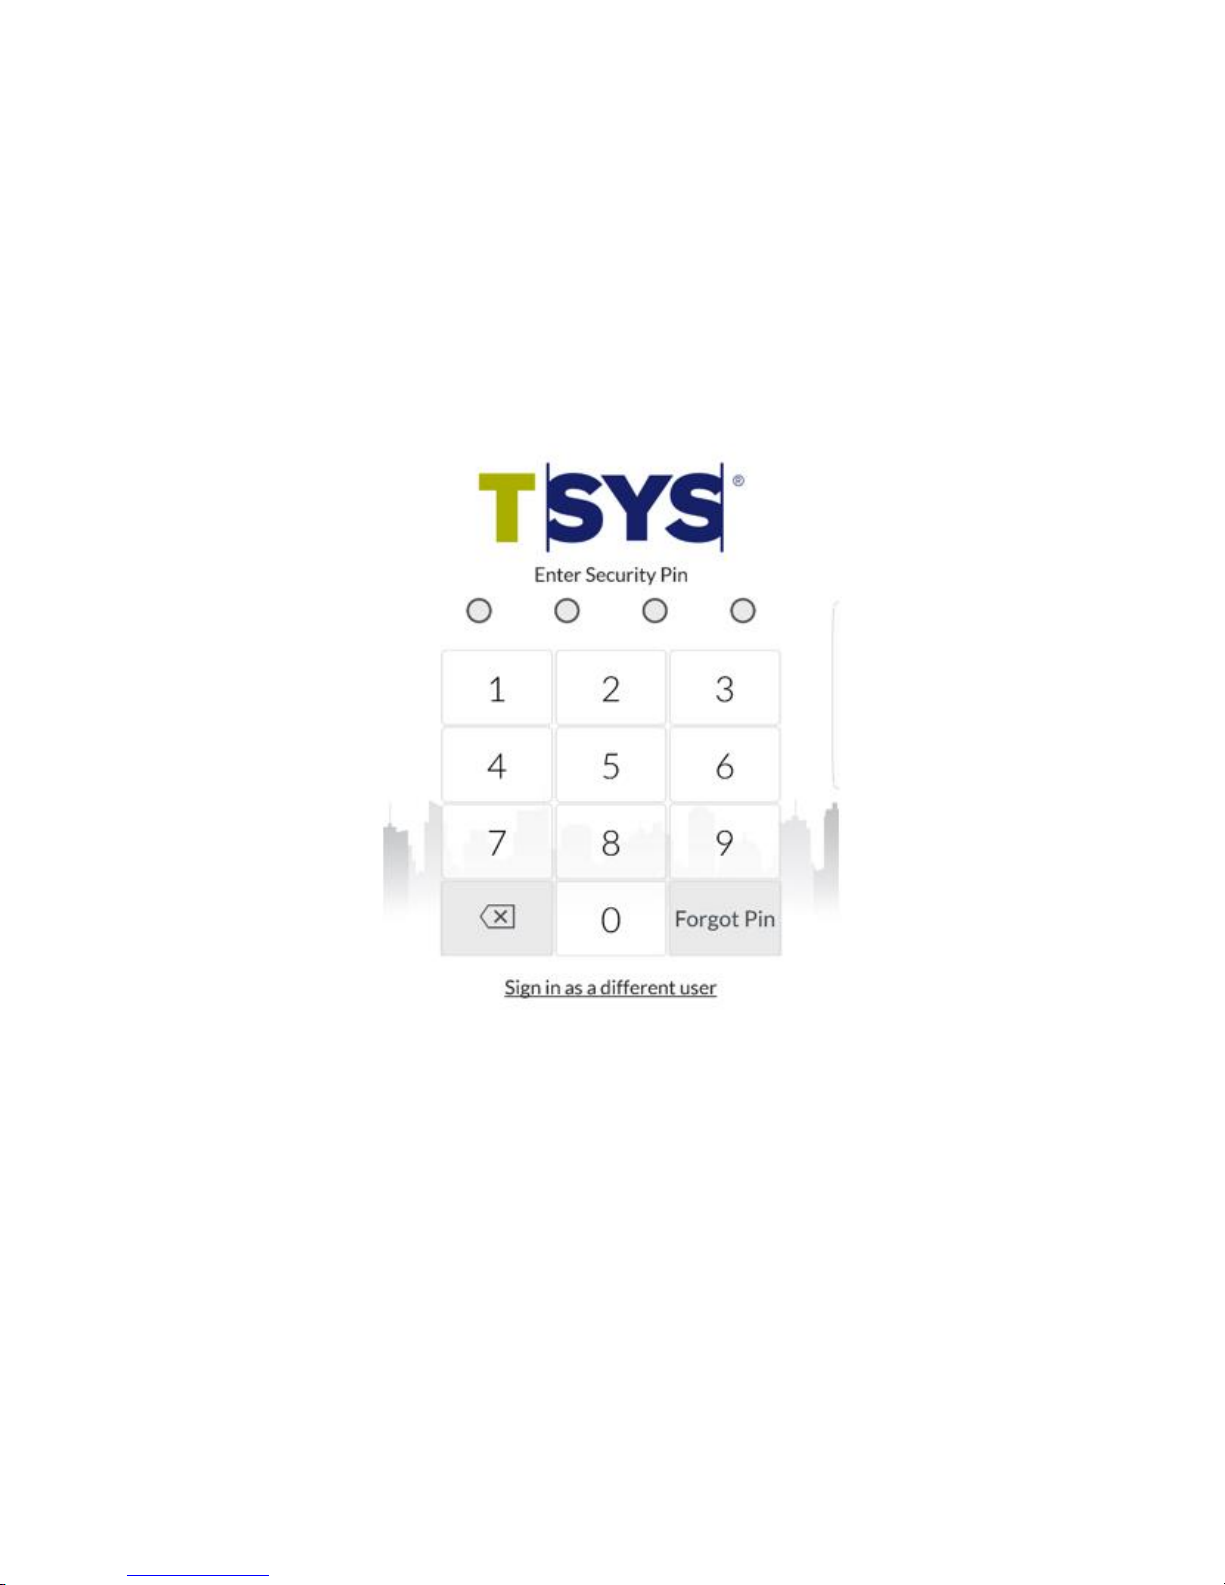
PIN Entry
After you activate and create a PIN, you only need to enter the PIN to access the application
unless the Mobile Payment Application gets deleted from the device.
If you tap the forgot PIN button, and see the message, “Admin PIN Cannot be Reset”, you will
need to clear all application data for Payments 3.0 through Device Settings and Log back in to
the application.
Mobile Payment Acceptance User Guide for Android
│
13
Page 15
User Guide
2.
3.
1.
Login to Your Account (if the app has been deleted)
If the application gets deleted after your initial account activation and your PIN login; you will
need to login via a different path that before:
1. From the Login screen, enter your TA# in the Username field
2. Enter your Password.
3. Tap Login.
14 │ Mobile Payment Acceptance User Guide for Android
Page 16
User Guide
5.
6.
4.
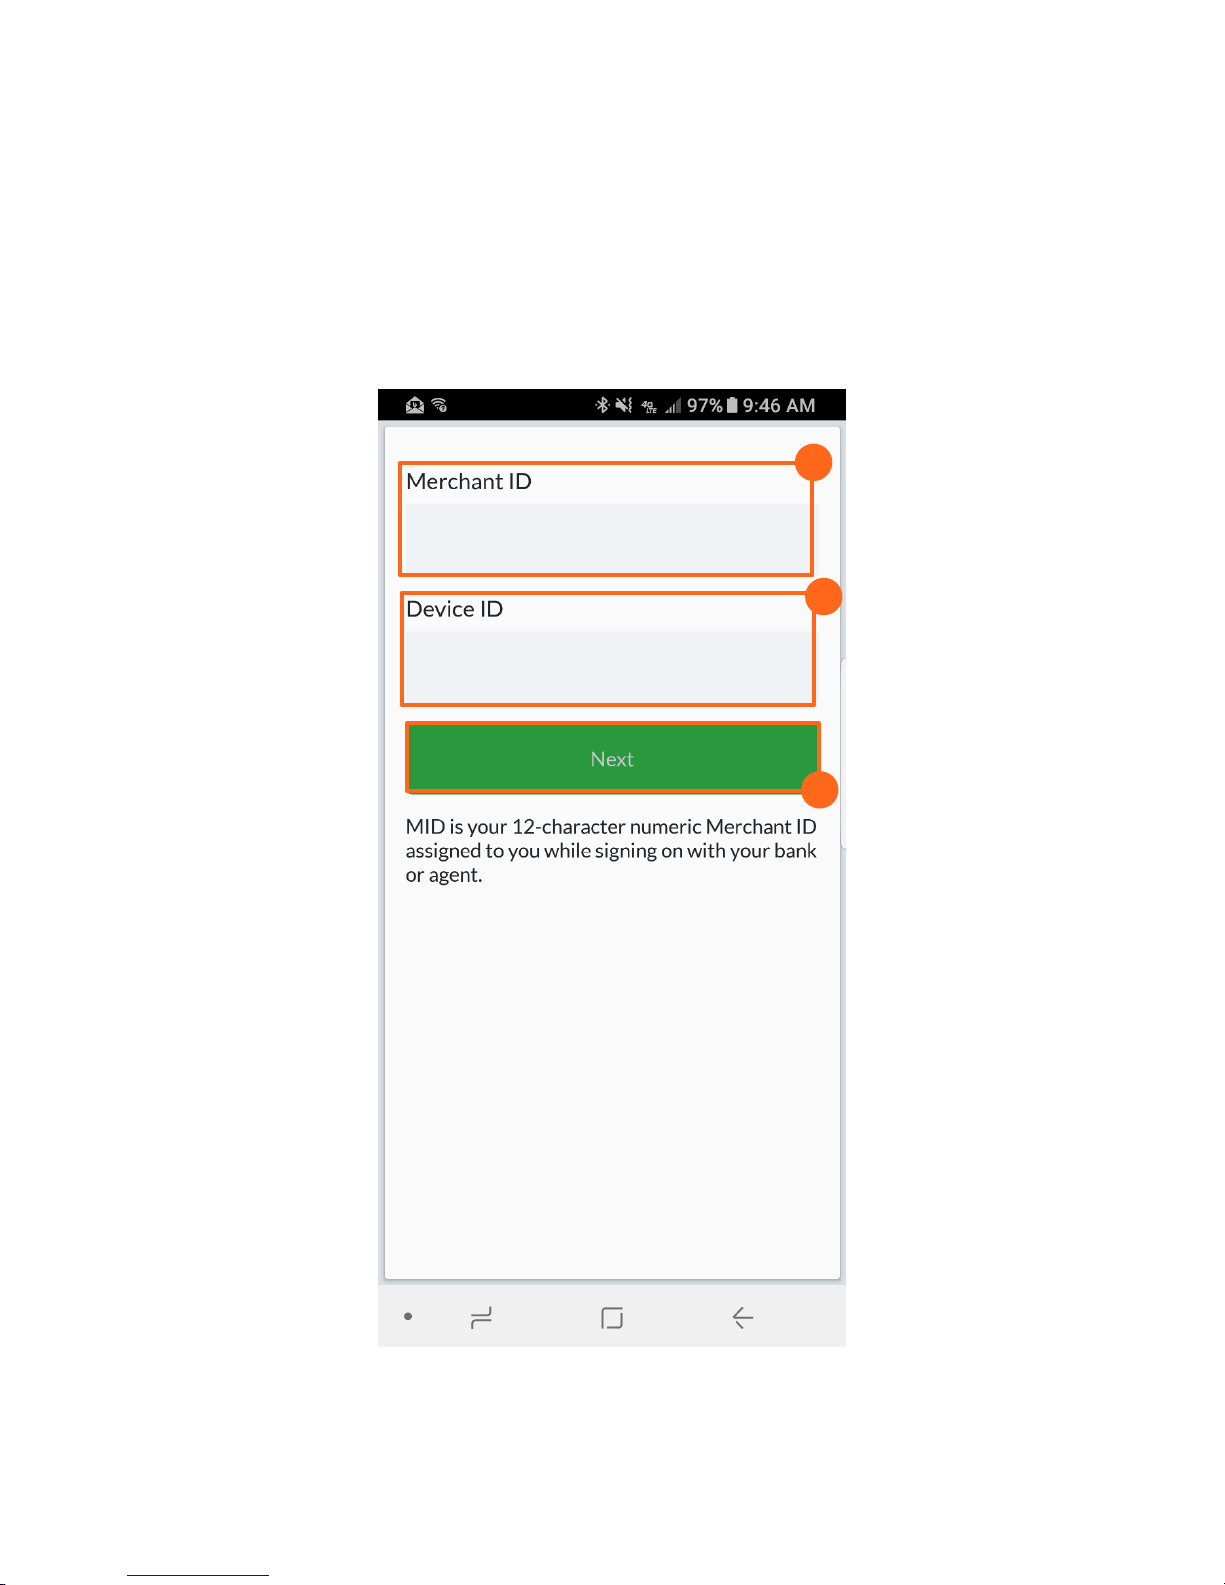
4. Enter the 12 digit Merchant ID associated with your merchant account.
5. For the Device ID enter two digits to the end of the Merchant ID. If you have one device
this is 01, if you have 2 devices this is 02 and so on.
6. Tap Next.
Mobile Payment Acceptance User Guide for Android
│
15
Page 17

User Guide
The following are the features and functionality accessible
from the main menu:
Transactions
Register – Perform a quick sale.
Forced Authorization – enter a previously obtained
authorization code from the issuing bank for a
customer’s transaction.
History
Transaction History – Filter and search transaction
history; view individual transactions; returns are
initiated from the transaction details in transaction
history.
Customers – Add, view, search and edit customer records.
Settings
Transactions – View, add and modify tax rate, tip
settings, signature requirements, and invoice numbers;
enable or disable auto-processing of offline
transactions (For more info see Offline Payments
Section of this User Guide.)
Readers – Connect to an audio jack or Bluetooth card
reader.
Printers – Scan for and connect to available printers.
Account – View processing summary, account
summary, and the current application version. You can
also change your password and sign out of the
application from here.
Help – View support information.
Sign Out – Sign out of the application.
The Main Menu
The Main Menu of MPA application gives you access to all of the features that allow you to
customize transactions, view sales data, manage product inventory, manage customer
information, and view or update settings. You can access the Main Menu from anywhere in MPA
by tapping the upper-left corner of the screen.
16 │ Mobile Payment Acceptance User Guide for Android
Page 18
User Guide
Settings, Account Information, and Help
Manage Settings
Mobile Payment Acceptance is customizable, allowing you to choose the transaction settings
that best fit your business needs. You can access and change settings from the Main Menu.
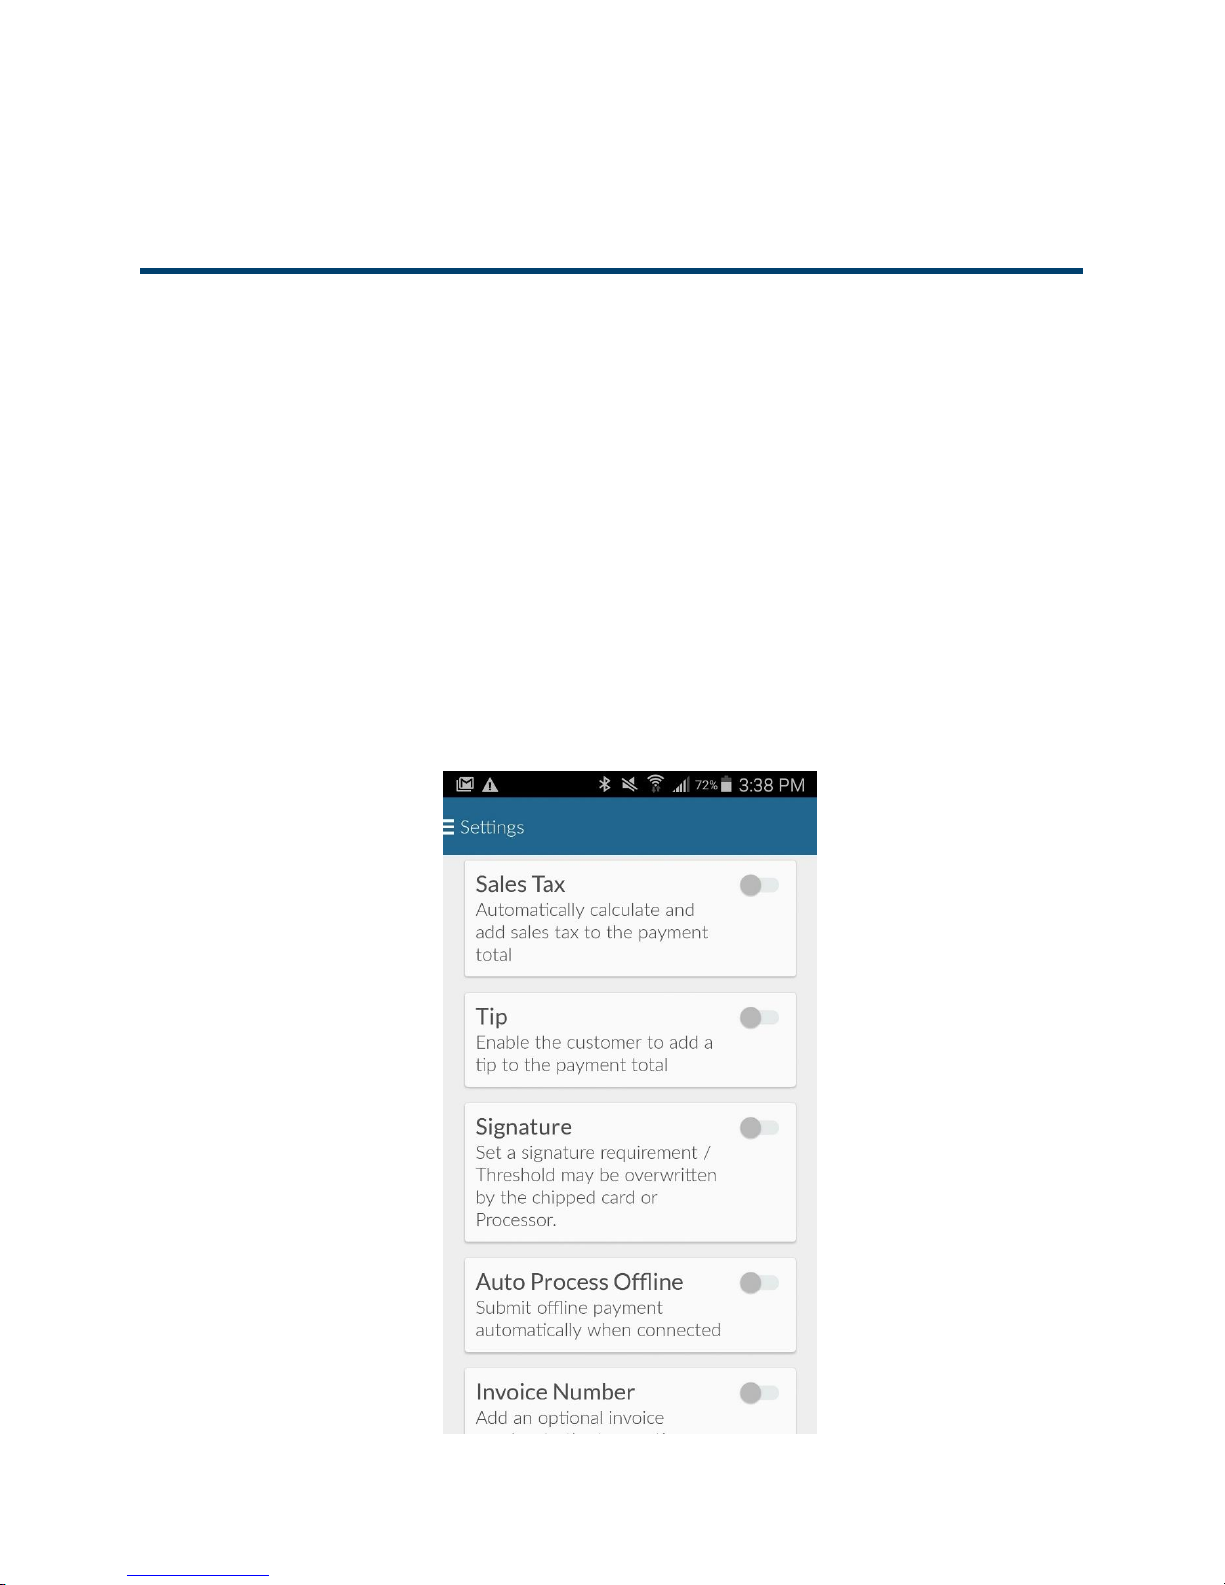
Transaction Settings
The Transactions option under Settings gives you access to the following functions:
Create or edit a tax rate
Enable and edit the tip feature
Set requirements for a signature
Enable your device to automatically process payments online when connected
Add invoice numbers to your transactions
Settings Page
Mobile Payment Acceptance User Guide for Android
│
17
Page 19
User Guide
1.
2.
3.
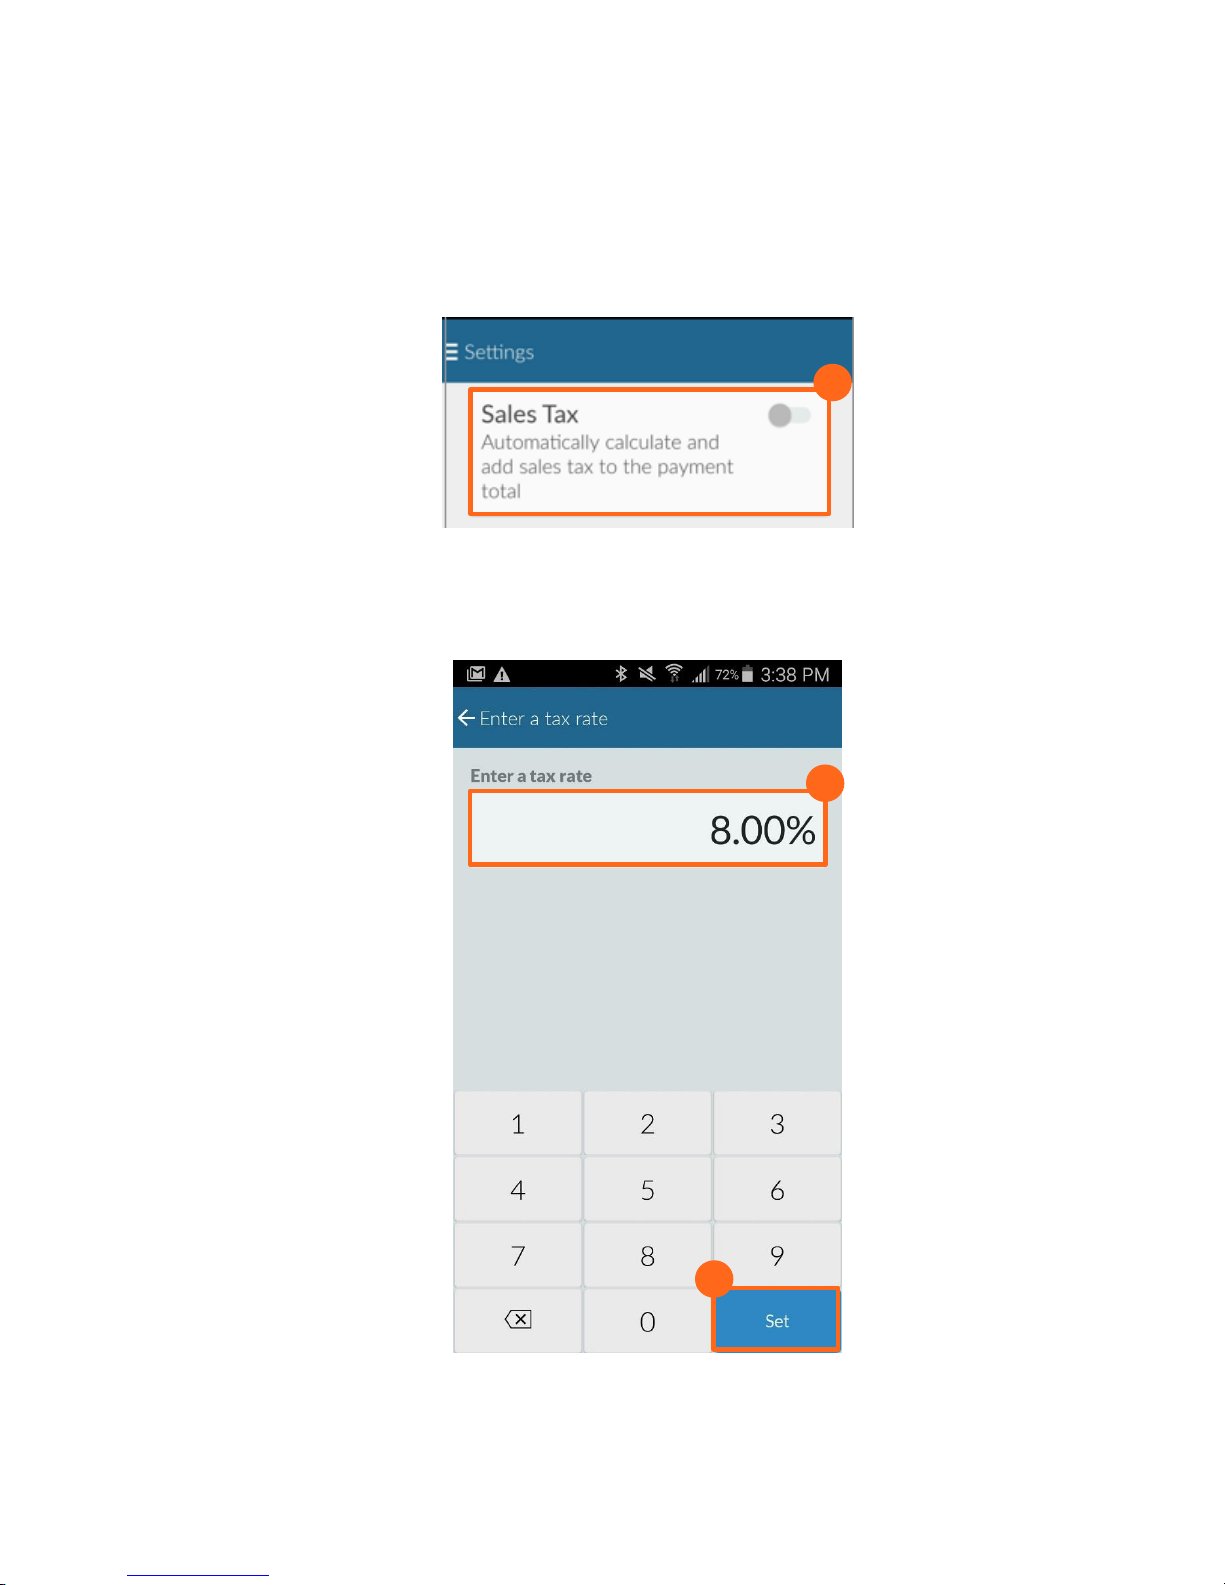
Create a New Tax Rate
1. Tap the Sales Tax slider to activate sales tax.
2. Enter Your Tax Rate.
3. Tap Set to save your Tax Rate.
18 │ Mobile Payment Acceptance User Guide for Android
Page 20

User Guide
Tap to enable the Tip feature.
Tap to edit tip options.
Enable Tips
If you want to be able to accept tips in your business, turn the Tip feature on from the
Transaction Settings. You may set four tip options. A Custom option is available to allow your
customers to set their own desired tip amount or percentage. Select up to four tip options to
display to your customers.
When the Tip feature is turned on, your receipt will always include a signature line, regardless of
any signature limit setting.
Settings Page
Mobile Payment Acceptance User Guide for Android
│
19
Page 21
User Guide
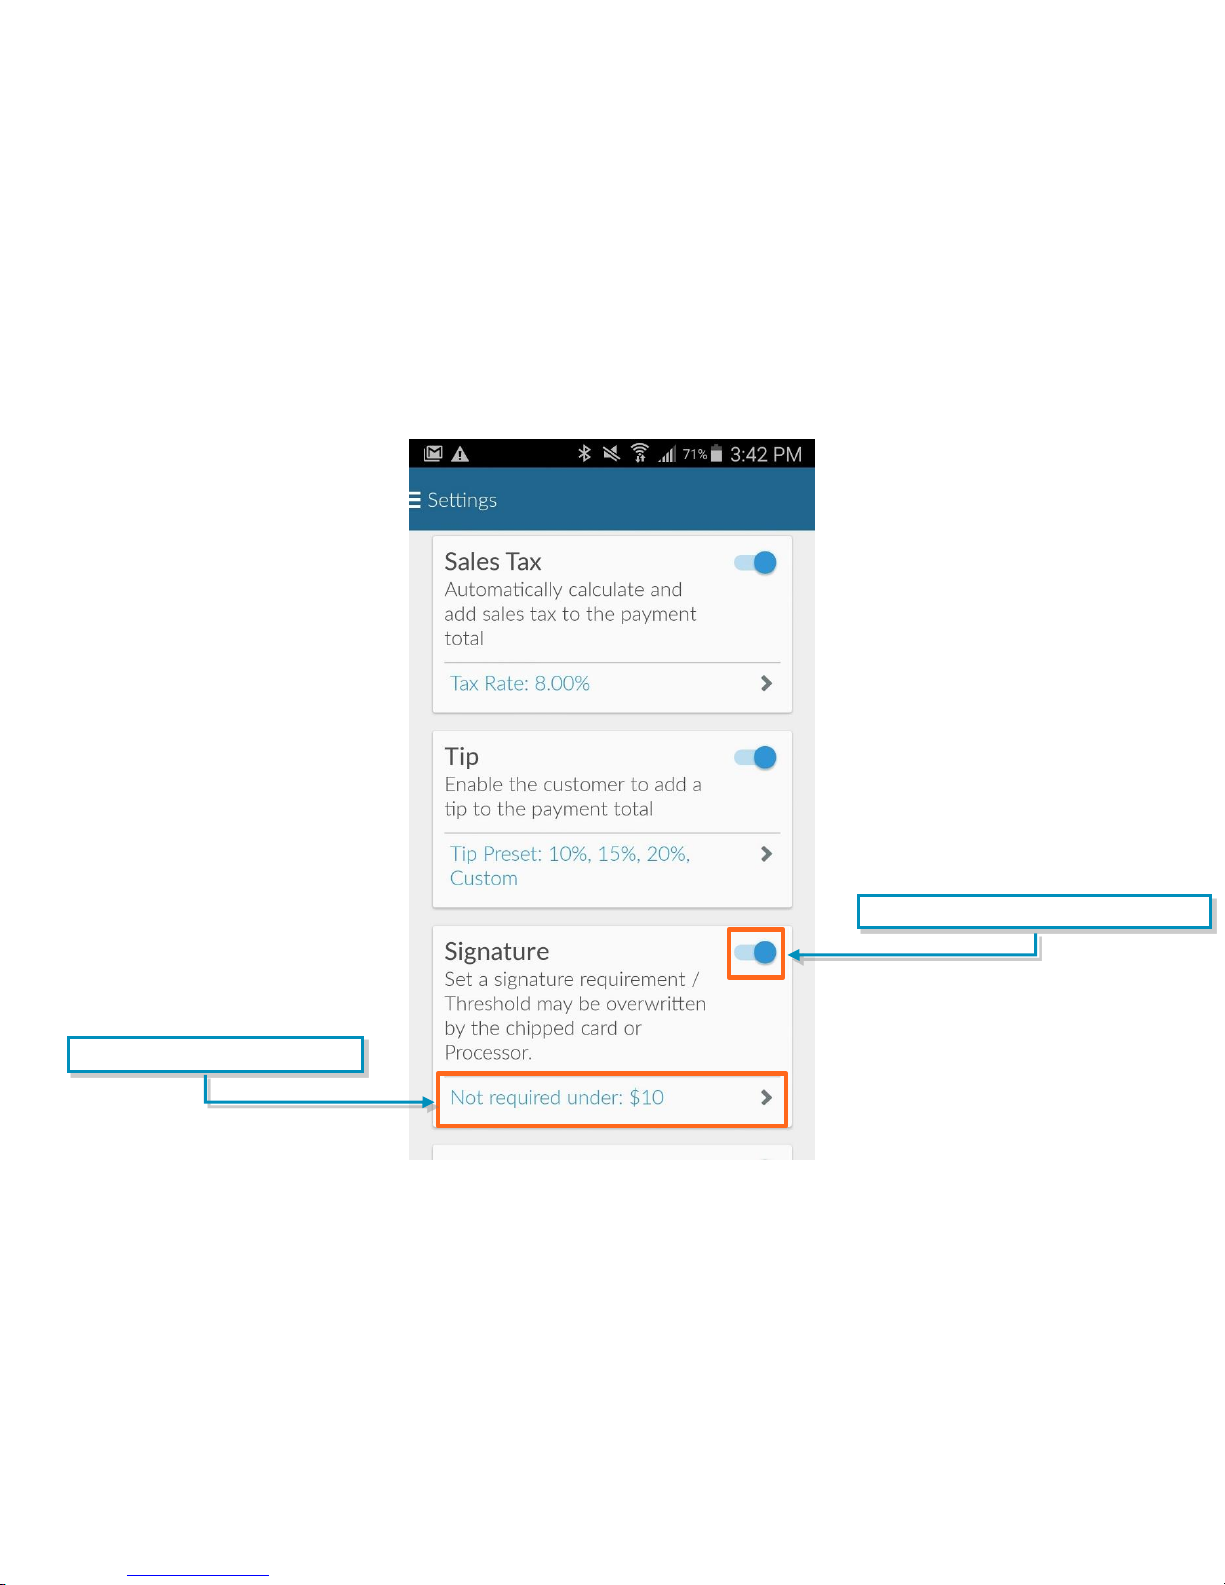
Tap to enable the Signature option.
Tap to edit signature amount.
Set Amount for Signature
Mobile Payment Acceptance lets you set the maximum transaction amount you will accept
without a signature. This amount may be overwritten by the processor, chipped card or if you
have enabled tip. If you do not set a limit, the application will not require a signature unless the
setting is overwritten. Requiring a signature for higher dollar transactions will help limit your
financial risk.
Settings Page
20 │ Mobile Payment Acceptance User Guide for Android
Page 22
User Guide
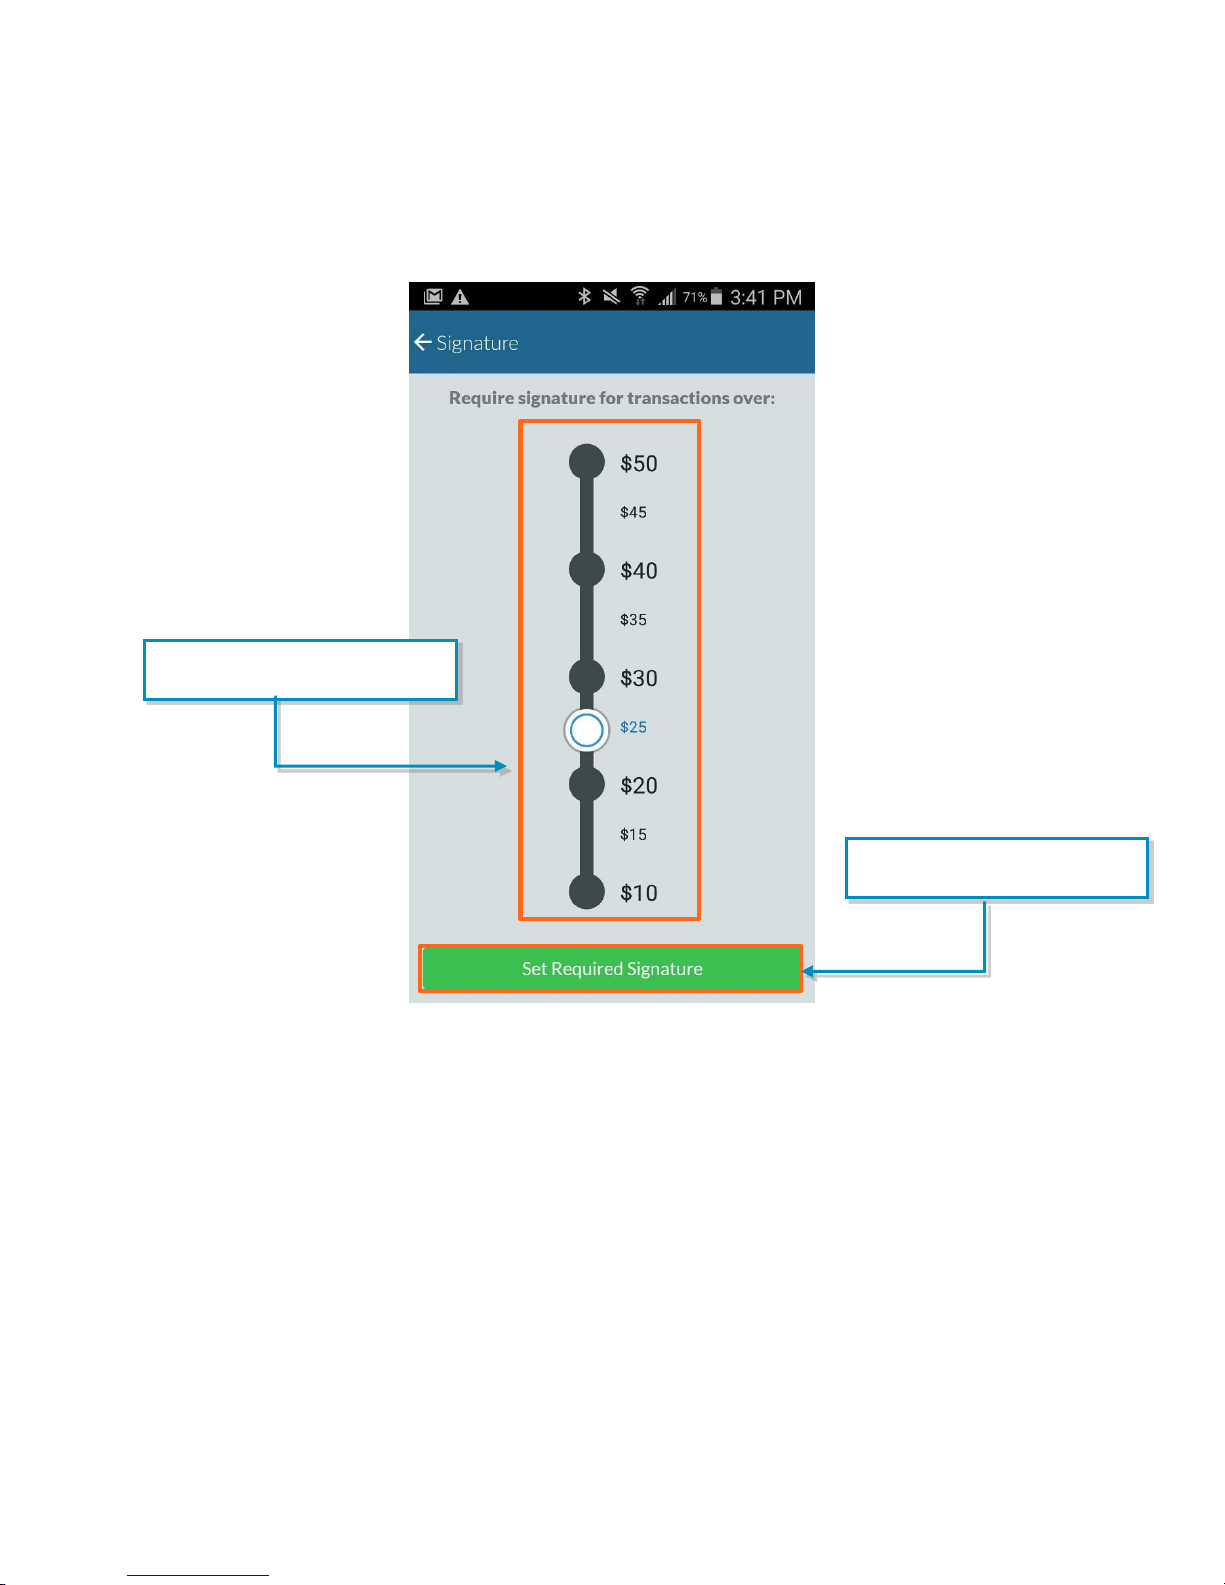
Tap the slider to change the
signature requirement amount.
Tap to Set Required Signature
save to your tip options.
Signature Settings
Mobile Payment Acceptance User Guide for Android
│
21
Page 23
User Guide
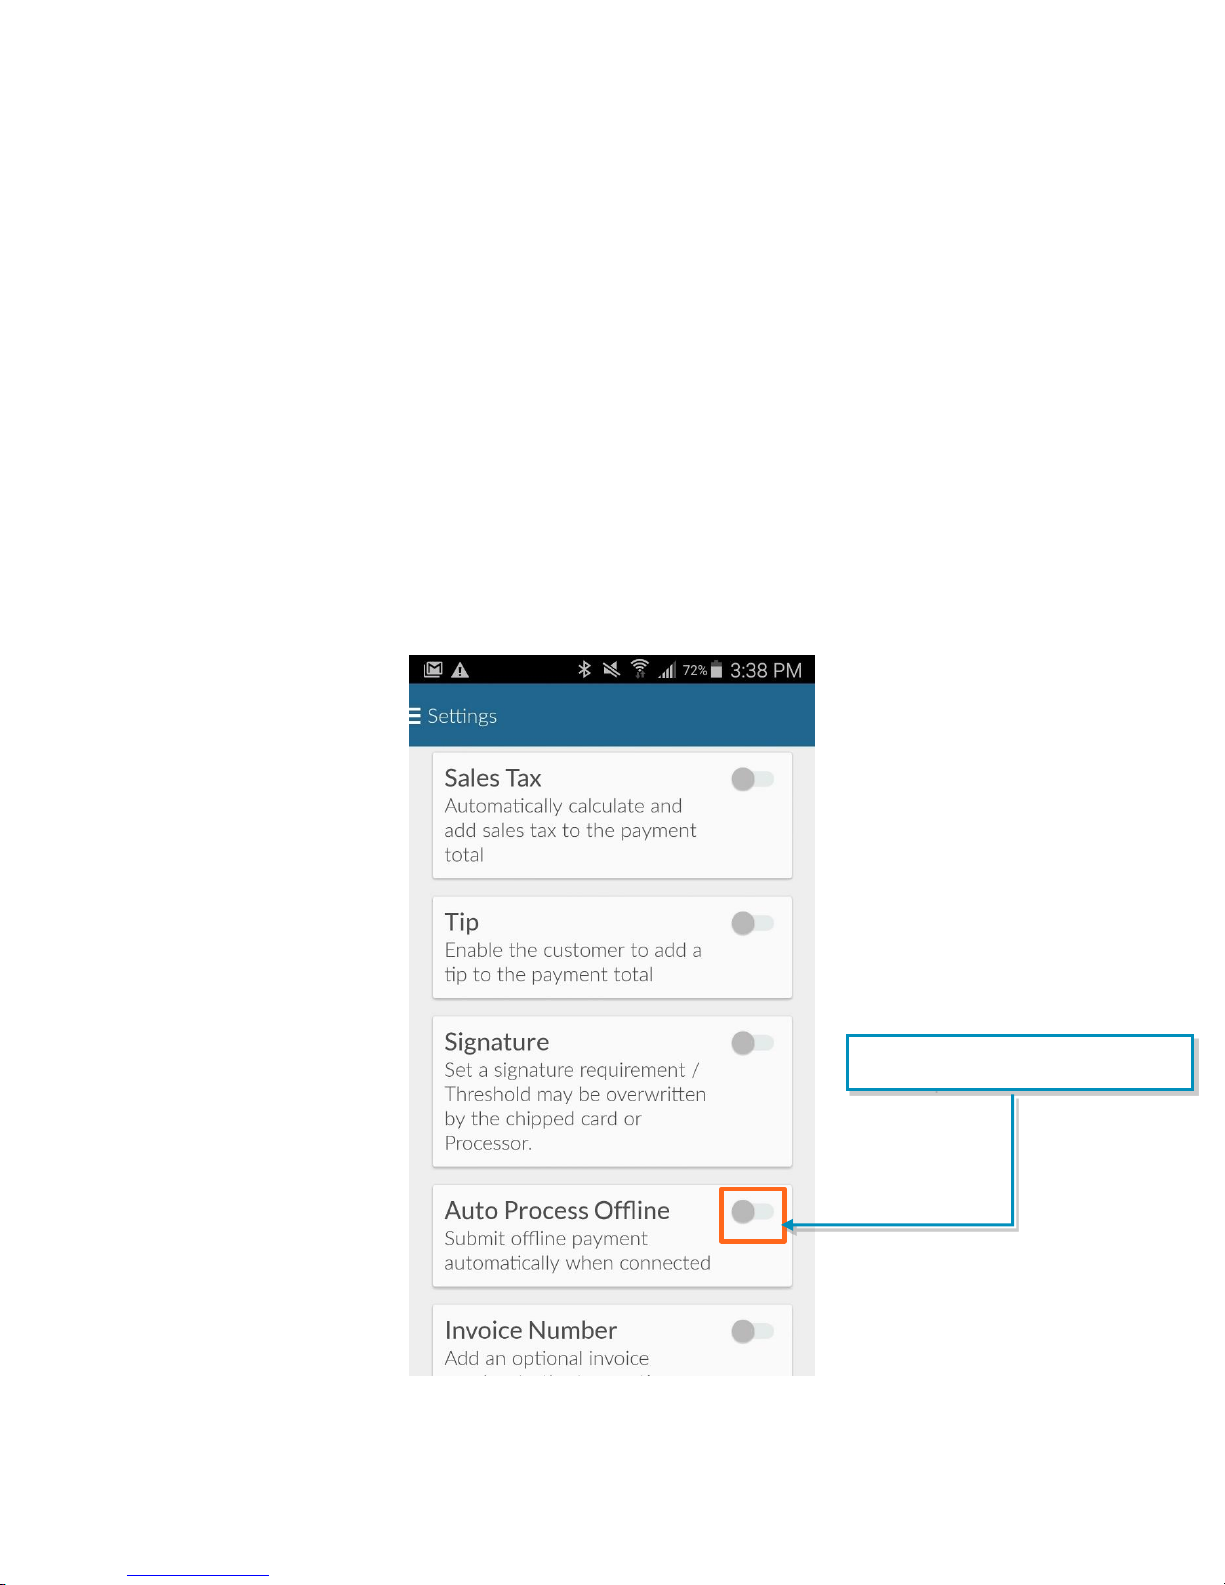
Tap to enable the Auto Process
Offline option.
Enable Auto Offline Processing
The Auto Process Offline feature can save time and ensure transactions are processed.
Sometimes your device may lose its connection to the Internet. When this happens, transactions
run offline, and the device stores the transactions as encrypted data. If the Auto Process Offline
feature is turned on, the application will automatically start processing those transactions in the
background as soon as connectivity is reestablished on the device.
If the Auto Process Offline feature is turned off, you must select each pending transaction
individually to process. Disabling Auto Process Offline will not prevent the acceptance of
payments while your phone is offline. Offline transactions are risky as they do not generate
approval codes. Please go to the Offline Payments Section in this guide (page 59) for more
information and risks associated with Offline Payments.
Settings Page
22 │ Mobile Payment Acceptance User Guide for Android
Page 24
User Guide
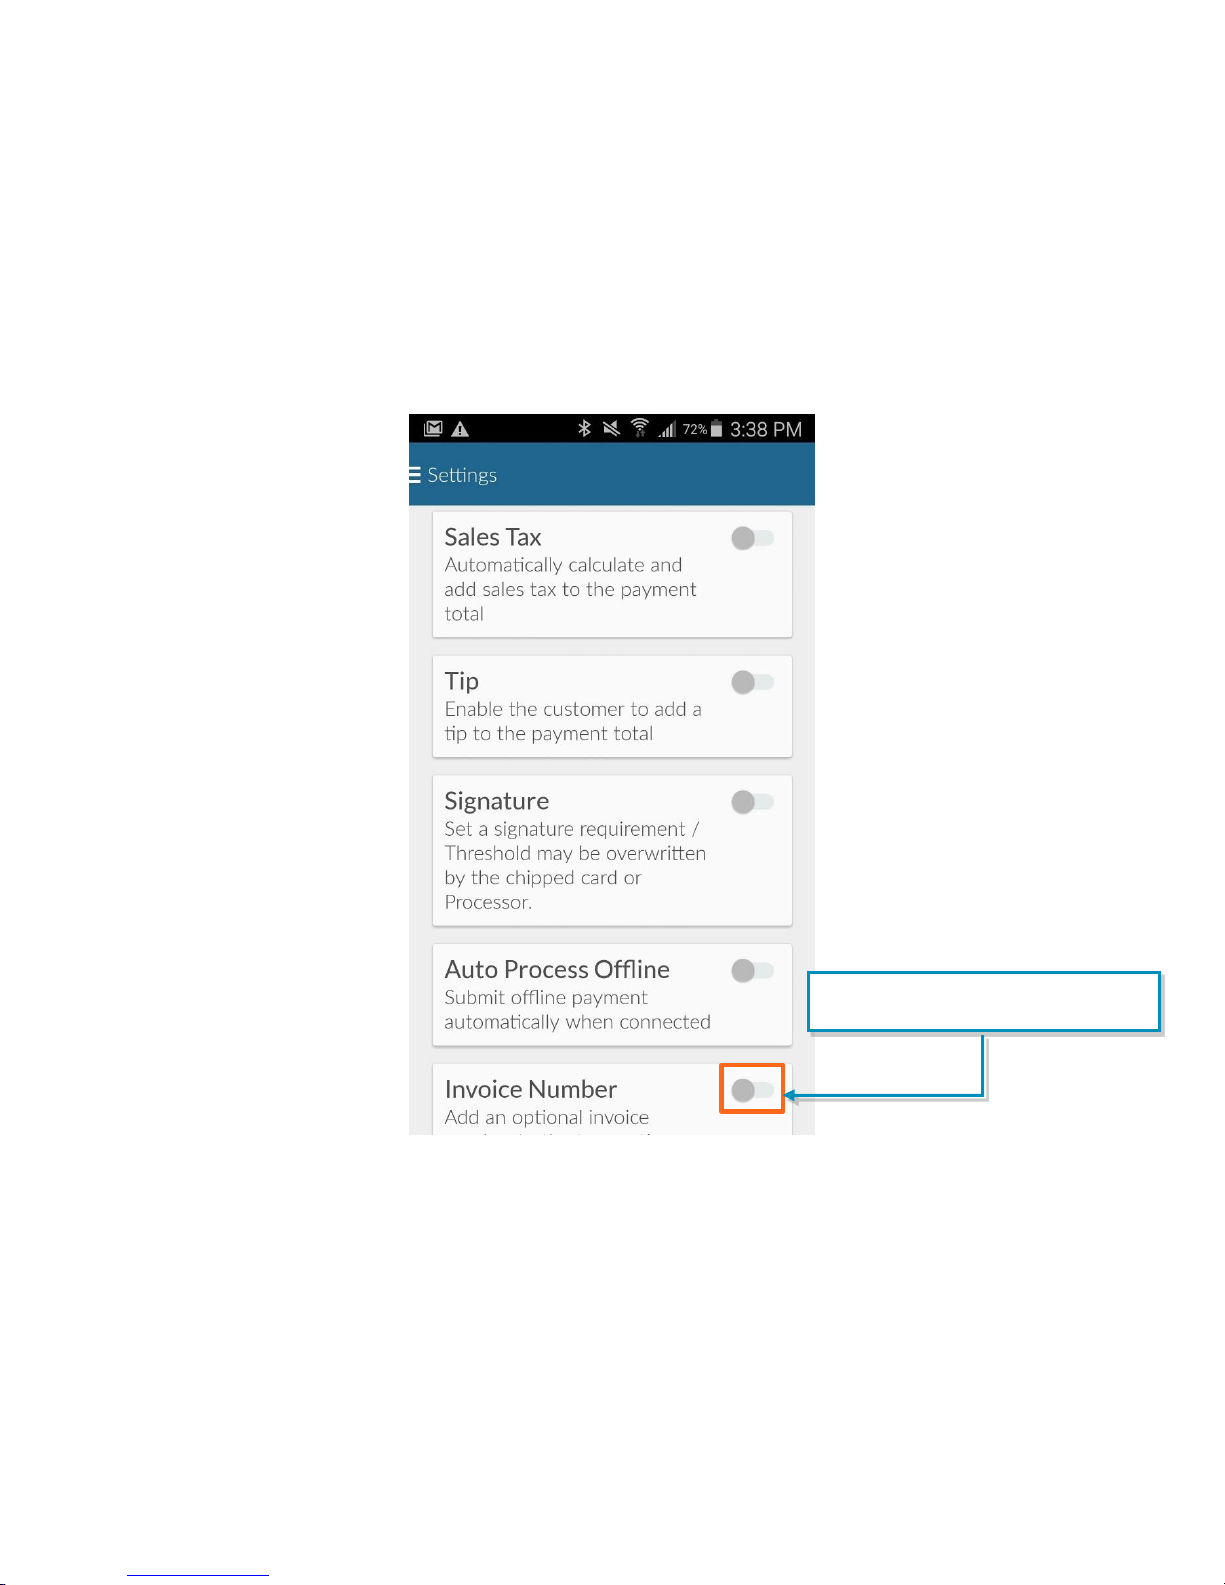
Tap to enable invoice numbers for
transactions.
Enable Invoice Numbers
Adding invoice numbers to transactions is another option you may choose, depending on your
business needs. Simply turn on the Invoice Number feature under Transaction Settings and you
will begin seeing a field for invoice numbers every time you process a transaction. The invoice
number is user-defined. If a number isn’t entered, the transaction ID will be used as a default.
Settings Page
Mobile Payment Acceptance User Guide for Android
│
23
Page 25
User Guide
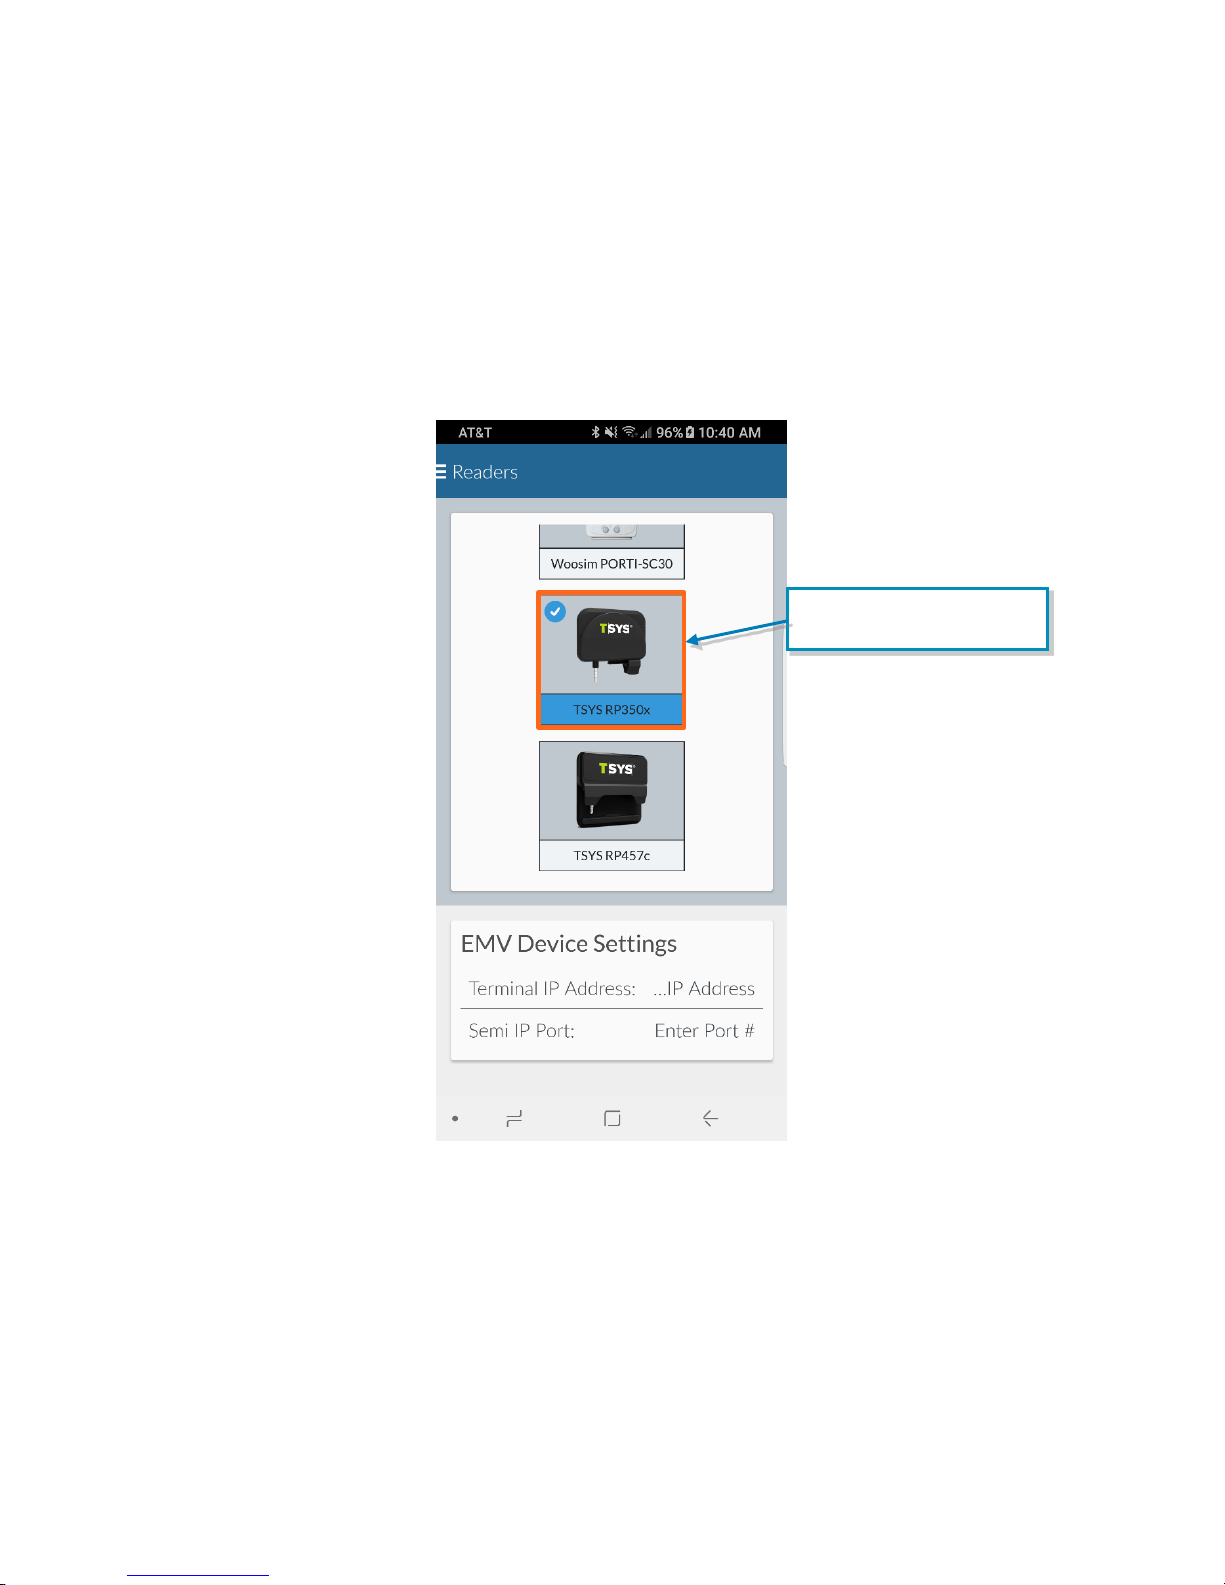
Tap the card reader that
is used with your device.
Readers
You can connect to card readers from the Readers page, which is accessible from the Main
Menu of the MPA Application. Once attached and turned on, most devices will pair
automatically, though some may require additional steps.
Readers Page
24 │ Mobile Payment Acceptance User Guide for Android
Page 26

User Guide
Battery
Status
LED Behavior
Full
On all the time
Low
On and off for 1sec, alternating
every 3sec
Very low
On and off for 1sec, alternating
every 6sec
No capacity
Off
Charging
On and off, alternating every 1sec
Reader Status
LED/Beep Behavior
Ready
The Red LED on the side of the reader will be On.
Waiting for card
The reader will beep prompting user to enter the card. One
LED on top of the reader will turn on (Contactless only).
Reading the card
Two LED lights turn on.
Card read successful
Three LED lights turn on.
Card Processing
Error/Multiple
Contactless Cards
detected
All lights are turned off to indicate the contactless interface is
not available.
Card Processing Error
Only the fourth LED light turns on indicating conditions for using
the contactless interface have not been satisfied (ex:
Enhanced security may require a card swipe or insert).
EMV Readers
EMV Card Readers require power in order to read the chip embedded in EMV cards. Therefore,
the EMV readers supported by Mobile Payment Acceptance contain batteries. To ensure
optimal performance, keep these readers charged as much as possible. Between transactions,
the readers will go into “power saving mode” and will need to be started for the next
transaction.
EMV Reader LED Lights
Battery Status
On the RP350x, a red LED next to the USB port indicates the battery status.
Card Reader - Transactions
On the RP457c, there are 4 LEDs on top of the reader that indicate the reader status. The reader
will beep to prompt for a card read (dip/swipe/tap).
Mobile Payment Acceptance User Guide for Android
│
25
Page 27

User Guide
ROAM RP350x
The ROAM RP350x is an EMV card reader that supports EMV chip and signature and magnetic
swipe. It connects to the phone through the audio jack.
ROAM RP457c
The ROAM RP457c is also an EMV card reader that supports EMV chip and signature, magnetic
swipe as well as NFC/Contactless. It can connect via audio jack or Bluetooth.
Bluetooth Pairing Instructions for the ROAM RP457c
1. Close all applications on your phone.
2. Make sure Bluetooth is turned on in your phone’s settings.
3. Connect the RP457c to your phone using the audio jack. If you are using a thick case,
you may need to remove it while connected to the RP457c using the audio jack.
4. Check that media volume is set to the maximum level (Any time the application can’t
find the RP457c when connected via audio jack, check the media volume first.)
5. Launch the MPA app.
6. Turn the reader on using the button on the left side.
26 │ Mobile Payment Acceptance User Guide for Android
Page 28

User Guide
7.
8.
8.
7. In the app, go to Settings > Readers from the main menu.
8. Tap on the RP457c option and tap Pair.
Mobile Payment Acceptance User Guide for Android
│
27
Page 29

User Guide
9.
9. Tap OK to Connect reader to audio jack.
When the audio jack pairing is complete, unplug the RP457c and exit Settings
Return to Settings>Reader and tap RP457c
Select the RP457c again
28 │ Mobile Payment Acceptance User Guide for Android
Page 30
User Guide
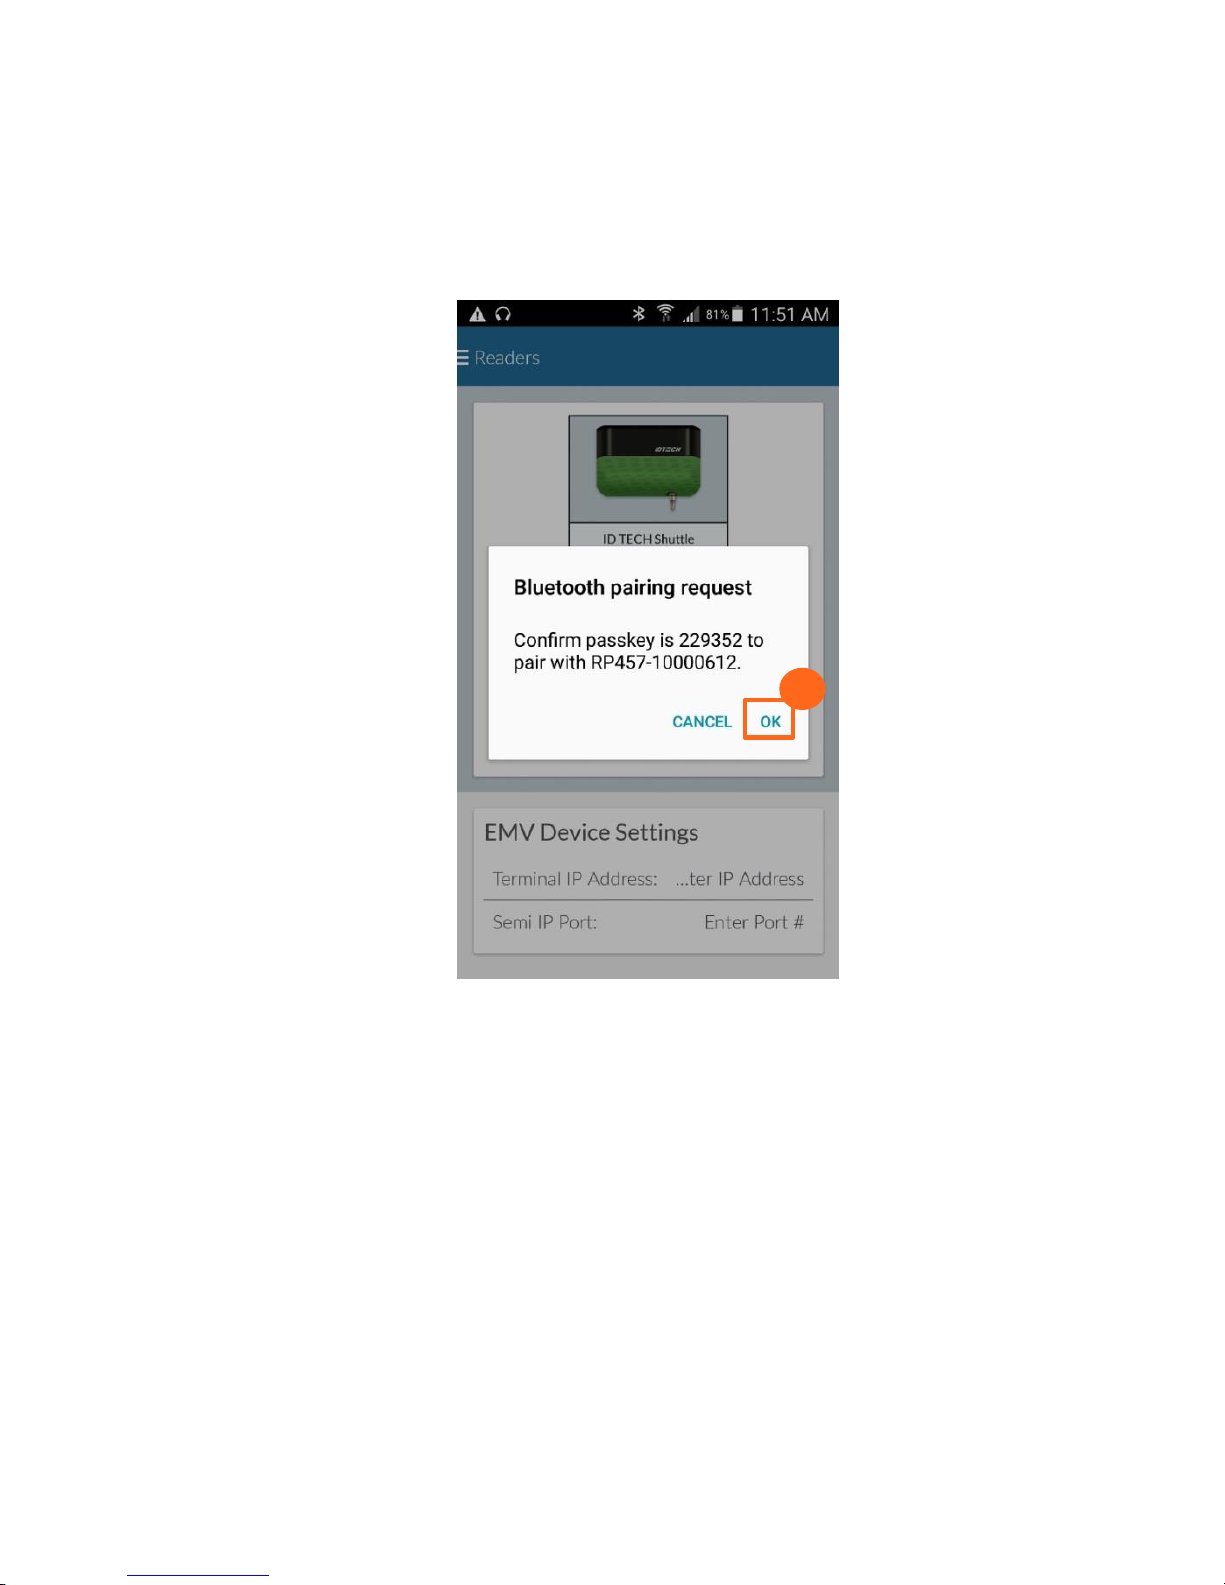
10.
10. Tap OK to Bluetooth pairing request.
Mobile Payment Acceptance User Guide for Android
│
29
Page 31

User Guide
1.
Printers
Mobile Payment Acceptance supports the use of receipt printers. Navigate to the Printers page
in the menu to connect to a receipt printer or to view the printer to which you previously
connected.
To connect to a receipt printer:
1. Tap Scan for Printer.
Printers Page
30 │ Mobile Payment Acceptance User Guide for Android
Page 32

User Guide
2.
2. Select your printer model from the list of supported printers and follow the prompts to
connect to your selected printer.
Mobile Payment Acceptance User Guide for Android
│
31
Page 33

User Guide
Pending transactions
Settled transactions
Account
information
Tap to change your
password
Tap to sign
out of MPA
View Account Information
The Account page gives you a quick view of the dollar amount you have processed in the last
15 days and the last 30 days, the amount still pending settlement, some basic account
information like your username, and the current application version you have installed on your
device.
You can also change your password or sign out of the application from this screen.
Account Page
32 │ Mobile Payment Acceptance User Guide for Android
Page 34
User Guide
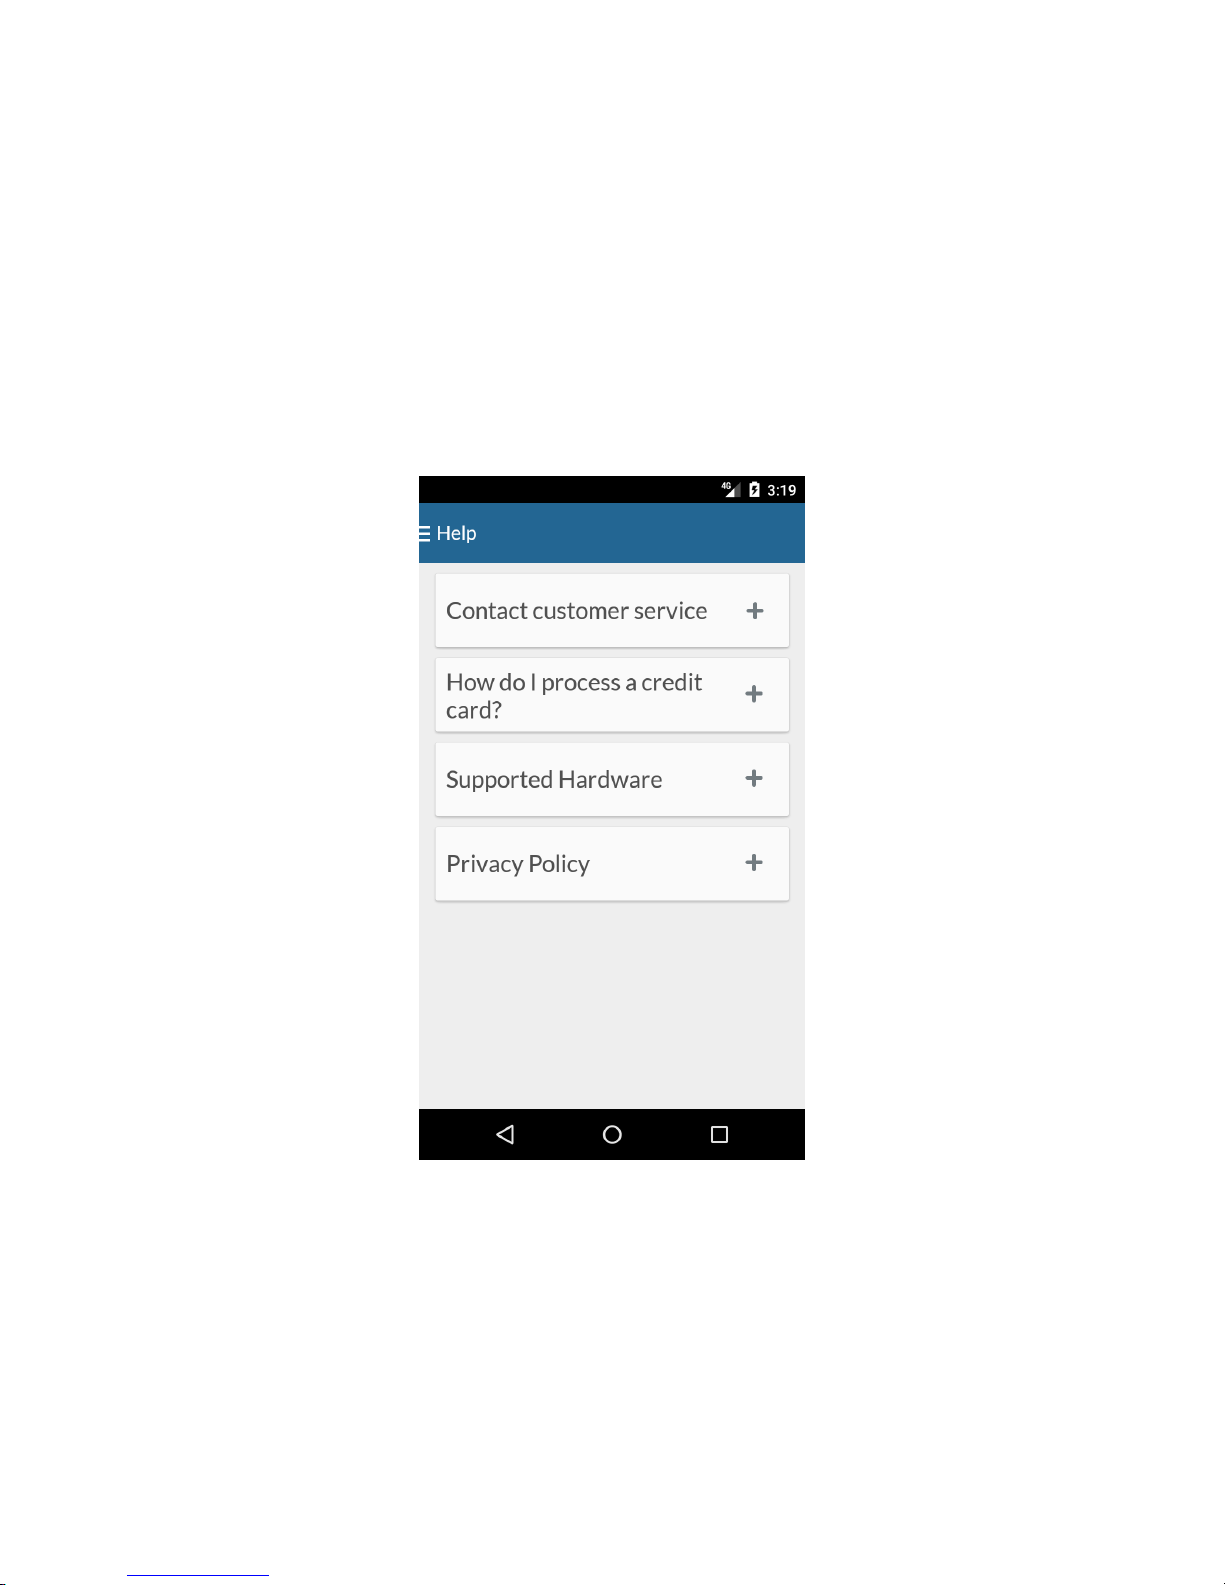
Help
If you need help, you can access the Help page from the Main Menu. The Help page provides
you with customer service contact information, a brief explanation of how to process a credit
card, a list of supported hardware with connection instructions for the RP350X and RP457c, and
a link to the privacy policy.
Help Page
Mobile Payment Acceptance User Guide for Android
│
33
Page 35

User Guide
Create a new
customer-
Sort customers-
Filter and search for customers.
Tap an individual customer to display
or edit the customer’s details-
Customers
Manage Customer Information
Your business needs may require the recording of customer information. Mobile Payment
Acceptance allows you to manage this information to provide excellent customer service. You
can view, add, and edit customer information from the Customers page, which is accessible
from the Main Menu.
The Customers page provides a list of all the customers you have entered, along with their
information. This page is equipped with a search option and a filter to view active and inactive
customers. You can also sort customers in ascending or descending order.
Customers Page
34 │ Mobile Payment Acceptance User Guide for Android
Page 36

User Guide
1.
Add New Customer
You can add a customer using the Create New Customer button or by duplicating an existing
customer’s profile and changing the necessary information.
Create a New Customer
To add a new customer using the Create New Customer button:
1. Tap Create New Customer.
Mobile Payment Acceptance User Guide for Android
│
35
Page 37

User Guide
3.
2.
2. Enter all available customer information, including name, address, and business
information. The minimum required information for a new customer is a first and last
name. If you provide an email address, it will be used for the email receipt feature.
3. Tap Save.
36 │ Mobile Payment Acceptance User Guide for Android
Page 38

User Guide
1.
Duplicate a Customer
To add a new customer by duplicating an existing customer’s profile:
1. Tap the customer’s profile you wish to use as a template.
Mobile Payment Acceptance User Guide for Android
│
37
Page 39

User Guide
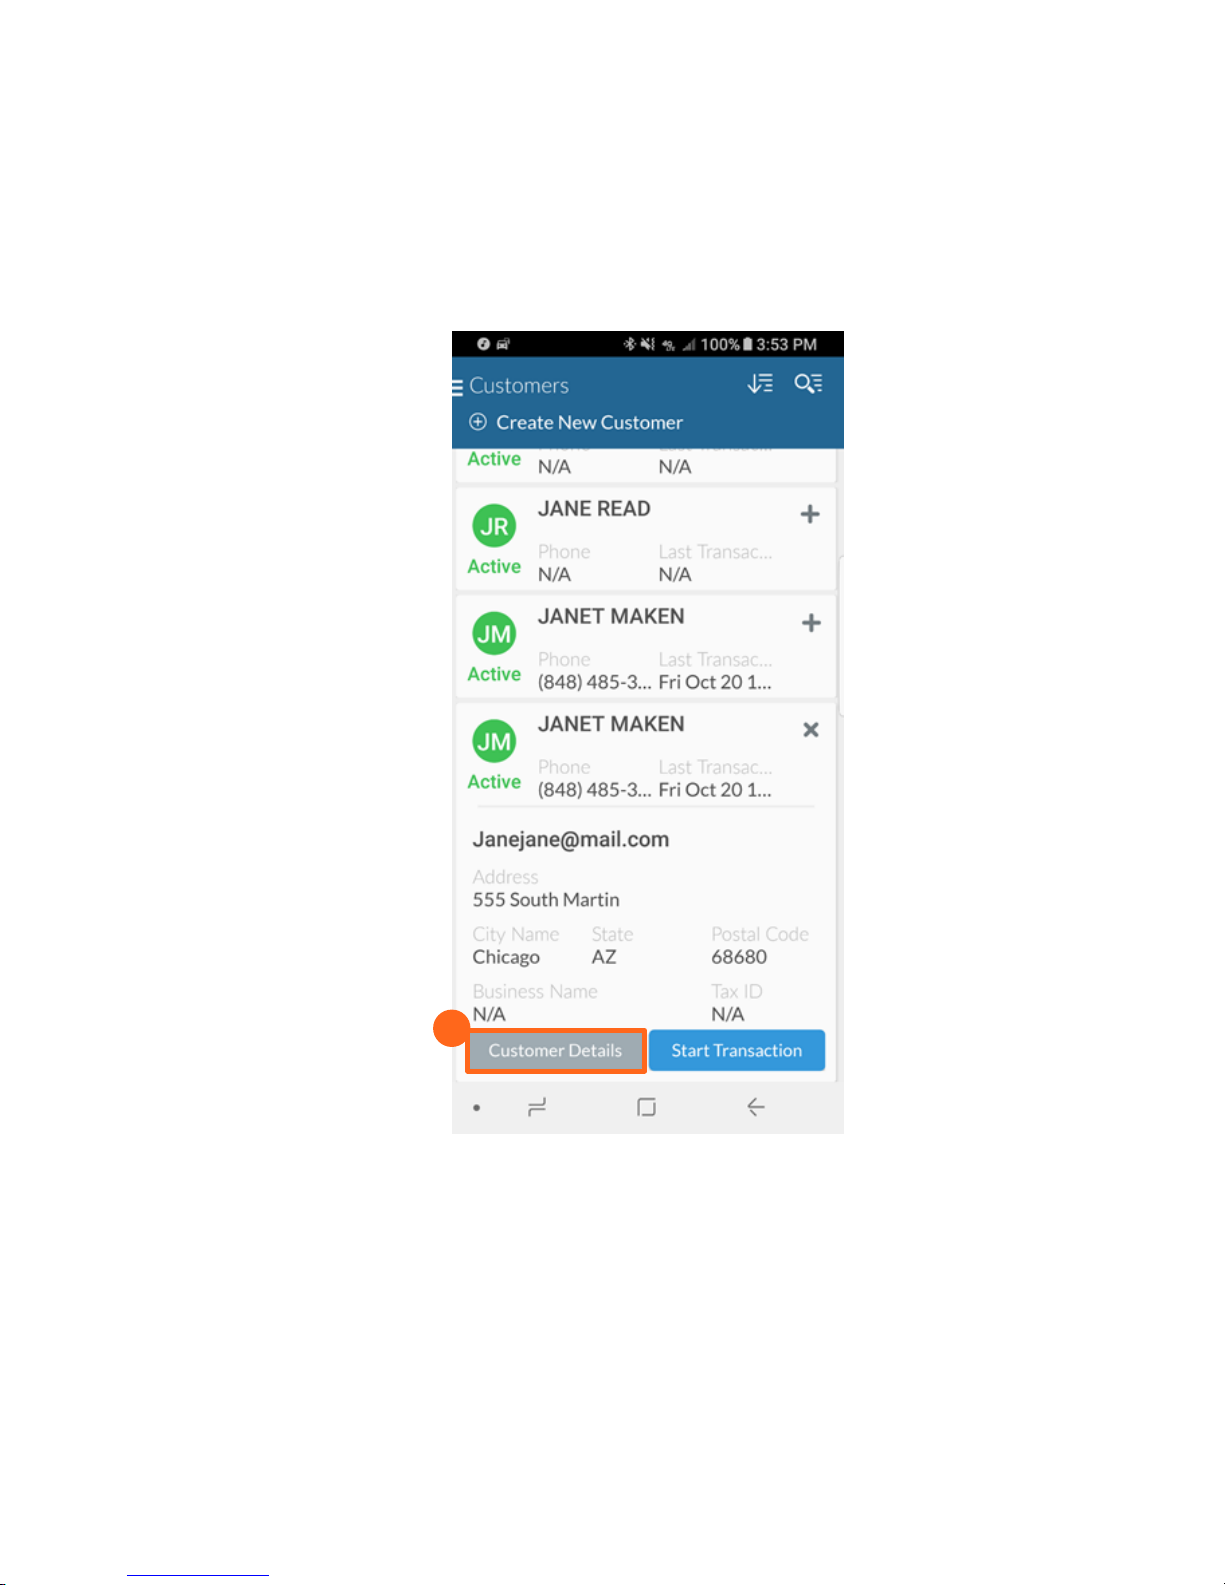
2.
2. Tap Customer Details.
38 │ Mobile Payment Acceptance User Guide for Android
Page 40

User Guide
3.
3. Tap Duplicate Customer. The duplicate customer will appear.
Mobile Payment Acceptance User Guide for Android
│
39
Page 41

User Guide
4.
5.
4. Tap the newly created duplicate profile.
5. Tap Customer Details.
40 │ Mobile Payment Acceptance User Guide for Android
Page 42

User Guide
6.
7.
6. Edit the customer information as needed.
7. Tap Save.
Mobile Payment Acceptance User Guide for Android
│
41
Page 43

User Guide
Activate or deactivate a customer.
Remove Customer Information
You can change a customer’s visibility from the Customer Details screen so their information no
longer shows on your active customer list. You can reactivate the customer’s information at any
time by turning on the visibility again.
Customer Information Page
You can also permanently remove a customer from your customer list. Removal of a customer
will affect reporting.
42 │ Mobile Payment Acceptance User Guide for Android
Page 44
User Guide
1.
Remove a Customer
To remove a customer from your customer list:
1. Tap Customer Details for the customer you wish to remove.
Mobile Payment Acceptance User Guide for Android
│
43
Page 45

User Guide
2.
2. Tap Remove. Follow the prompt and confirm or cancel your decision to complete the
process.
44 │ Mobile Payment Acceptance User Guide for Android
Page 46

User Guide
Transactions
Mobile Payment Acceptance makes it easy to perform a transaction. The Register, which is used
to start a transaction, is the default home screen, so you can start a transaction as soon as you
are logged in.
Register Page
Mobile Payment Acceptance User Guide for Android
│
45
Page 47

User Guide
1.
1.
Add a Customer to a Transaction
1. If you would like to add a customer your transaction, tap the symbol in the Customer
Name (optional).
46 │ Mobile Payment Acceptance User Guide for Android
Page 48

User Guide
3.
2.
4.
2. Tap Search Customer to find the customer in your customer database.
3. If the customer is not in your customer database, tap Create New Customer to create a
new customer record.
4. If the customer record you need appears at the top of the list, simply tap that record to
add it to your transaction.
Mobile Payment Acceptance User Guide for Android
│
47
Page 49

User Guide
1.
2.
Create a Transaction
1. Enter Amount.
2. Tap Next.
48 │ Mobile Payment Acceptance User Guide for Android
Page 50

User Guide
3.
3. If you turned the Tax Rate setting on, the sales tax will be calculated and added to the
transaction total automatically. You will see this updated Order Total on the Select
Payment Type Screen.
Mobile Payment Acceptance User Guide for Android
│
49
Page 51

User Guide
Processing a Payment
You can review the transaction total, select a payment method or return to the register.
Mobile Payment Acceptance supports multiple payment options
Credit Payments
o Card Readers - Magnetic Stripe (MSR) only and EMV
o Manually enter card information
o Offline payments
o Forced authorization
o Partially authorized payments
Cash Payments
50 │ Mobile Payment Acceptance User Guide for Android
Page 52

User Guide
2.
Swipe left or right to
find your card reader
1.
Card Reader
If you did not set up your card reader before processing your first transaction, you will need to
do so now.
1. Scroll through the compatible card readers to find the reader you’ve chosen.
2. Tap Set default card reader under your chosen reader. Refer to the Settings>Readers
section of this guide for more information on pairing card readers.
Mobile Payment Acceptance User Guide for Android
│
51
Page 53

User Guide
1.
Note:
EMV Card Readers require battery power in order to read the chip embedded in EMV Cards. As
such both the RP350x and RP457c contain internal batteries. These readers should be kept
charged in order to ensure optimal performance. Between transactions these readers will go
into a “power saving mode” to conserve battery. Upon reaching the Select Payment Type
screen, the RP457c will need to be started for the next transaction via the Start Card Reader
button. RP350x should start automatically on this screen. If it does not automatically start after a
few seconds, try initiating the connection manually by pressing the Start Card Reader button
and selecting the RP350x as pictured below.
1. Tap Start Card Reader.
52 │ Mobile Payment Acceptance User Guide for Android
Page 54

User Guide
2.
2. Select the correct reader when it is displayed. This may take several seconds depending
on the devices’ battery and length of time since it was last connected to the
application. Tapping the reader multiple times can cause further delay.
Note: – Because the RP457c can connect through audio jack or Bluetooth, it will show up twice
in this display. Choose the option that has the connection you are currently using.
Mobile Payment Acceptance User Guide for Android
│
53
Page 55

User Guide
3.
3. The customer will be asked to confirm the transaction amount and tap OK.
54 │ Mobile Payment Acceptance User Guide for Android
Page 56

User Guide
4.
4. When the message EMV Transaction – Present Card appears, the customer can dip or
tap their chip card, tap their NFC-enabled wireless device or swipe a non-EMV card. Tap
Cancel to return to the select Payment Type Screen.
Mobile Payment Acceptance User Guide for Android
│
55
Page 57

User Guide
1.
Manual Card Entry
1. Tap Manual Card Entry.
56 │ Mobile Payment Acceptance User Guide for Android
Page 58

User Guide
3.
2.
2. Enter the card information in the available fields.
3. Tap Process Order.
Mobile Payment Acceptance User Guide for Android
│
57
Page 59

User Guide
3.
2.
1.
Offline Payments
You may find yourself using Mobile Payment Acceptance in an area with spotty cellular and/or
Wi-Fi coverage.
1. If you do not have an internet connection when you are ready to process a payment,
tap Continue to store the payment information until you are reconnected to the internet.
2. If you believe you may have regained internet connection, tap Retry.
3. Tap Cancel if you do not want to proceed with this transaction.
Notes regarding Offline Transactions:
If you continue with an offline transaction you will be assuming a financial risk if the card
is not accepted when submitted for processing.
The app does not store transactions captured by EMV readers. The merchant would
have to manually key the card data.
Capture customer contact information when accepting offline transactions so you are
able to reach a customer if their card is declined.
If you have not turned on Auto Process Offline Transactions in settings, be sure to go into
Transaction History once you have an internet connection and select each offline
transaction for processing.
58 │ Mobile Payment Acceptance User Guide for Android
Page 60

User Guide
1.
2.
Forced Authorizations
There may be times when you need to enter a forced authorization. Access the Forced
Authorization Only feature from the Main Menu. Once you obtain the authorization code
provided by voice authorization, you can enter the authorized amount and proceed as you
would with a regular transaction. Note: Forced Authorizations are only valid if received via the
Voice Authorization phone number.
To process a transaction using the Forced Authorization Only feature:
1. Enter the authorized amount using the number pad.
2. Tap Next.
Mobile Payment Acceptance User Guide for Android
│
59
Page 61

User Guide
3.
4.
3.
3. Enter the credit card information as you would with a manual card transaction.
4. Tap Process Order.
60 │ Mobile Payment Acceptance User Guide for Android
Page 62
User Guide
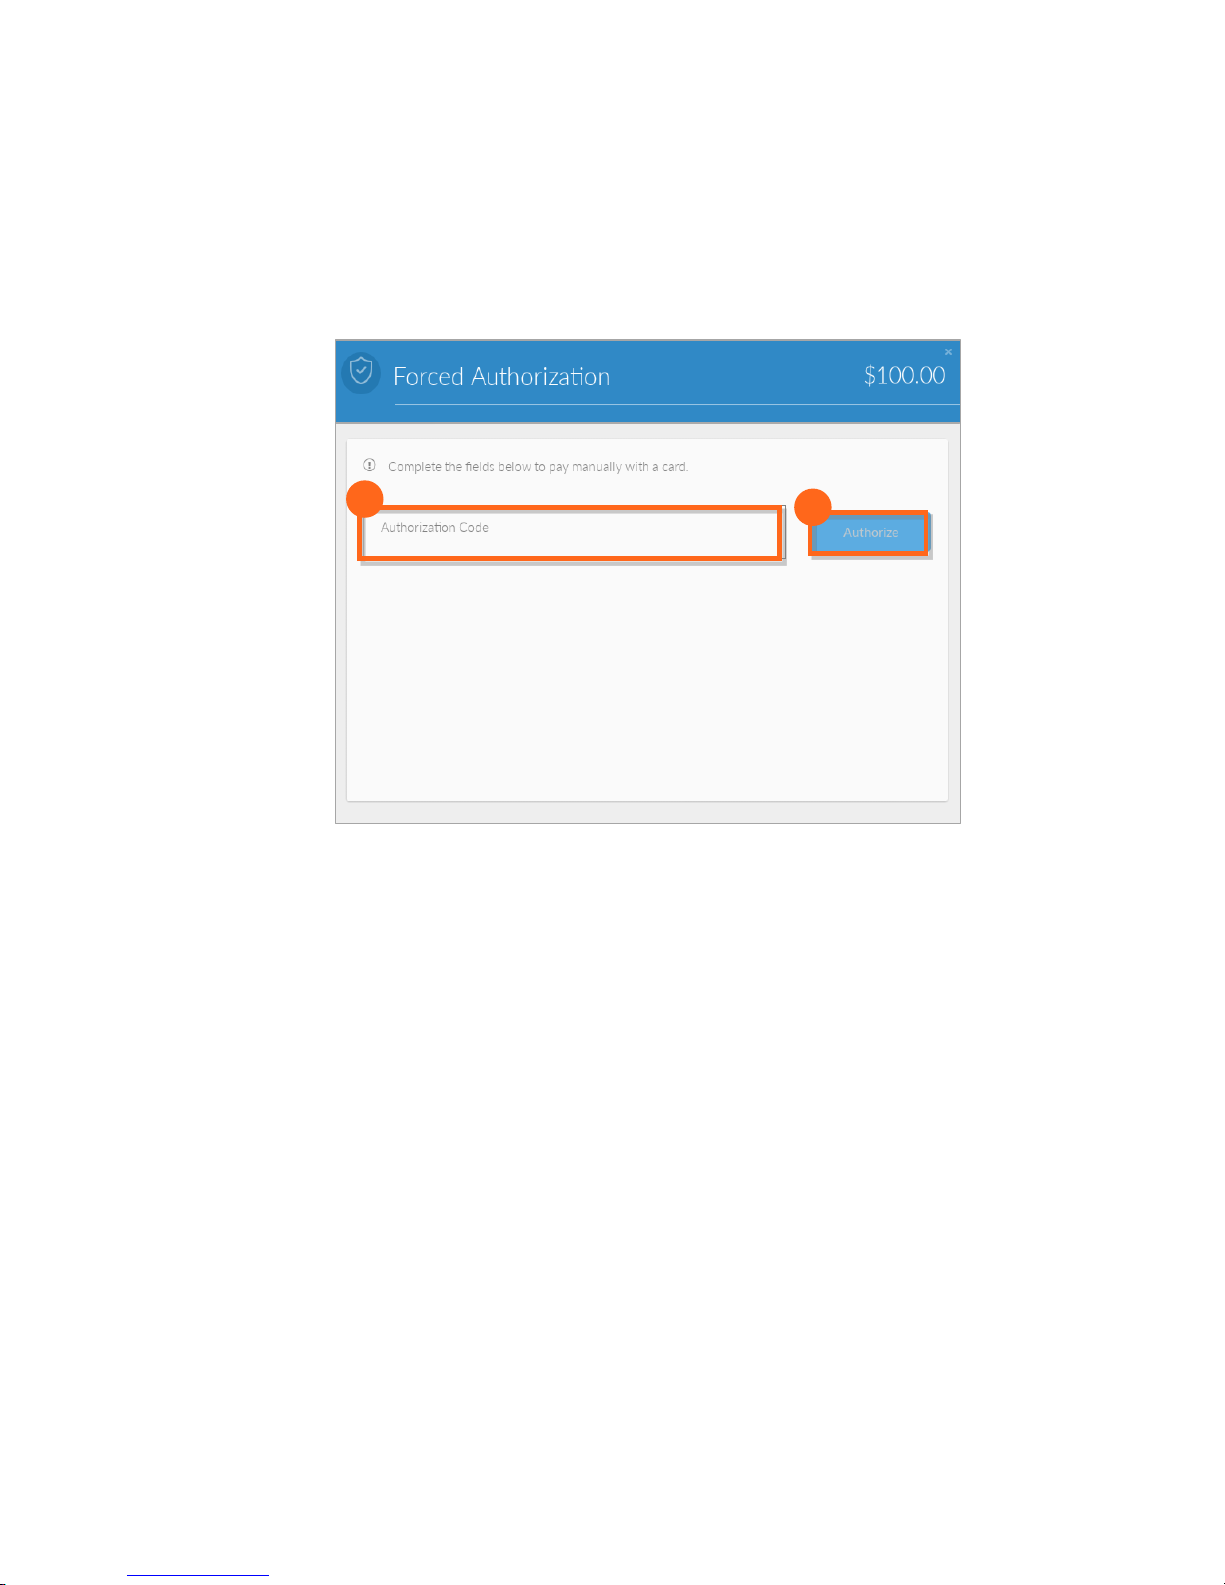
5.
6.
5. Enter the 5- or 6-digit Authorization code obtained from the Issuer or Voice Authorization
Center.
6. Tap Authorize and follow any and all additional steps in order to complete the
transaction.
Mobile Payment Acceptance User Guide for Android
│
61
Page 63

User Guide
3.
2.
1.
Partial Authorizations
When a customer presents a payment type that does not have sufficient funds to cover their
purchase, instead of a decline, you may be given the option to accept a partially authorized
transaction.
1. If a payment is authorized for less than the full transaction amount, you will receive a
message with the Balance due amount.
2. To accept the amount that was approved, tap Submit Additional Payment.
3. If either you or the customer choose not to proceed with the purchase, tap Cancel
Transaction and the authorization will be voided.
62 │ Mobile Payment Acceptance User Guide for Android
Page 64

User Guide
4.
4. If you choose to submit an additional payment, a new transaction will open with the
balance due already added to the Register. Simply complete this transaction as you
would any other to collect the remaining balance.
Mobile Payment Acceptance User Guide for Android
│
63
Page 65

User Guide
1.
Cash Transaction
1. In the Payment Type Screen, Tap Cash Payment.
64 │ Mobile Payment Acceptance User Guide for Android
Page 66

User Guide
3.
2.
2. Enter the cash amount using the number pad.
3. Tap Process.
Mobile Payment Acceptance User Guide for Android
│
65
Page 67

User Guide
3.
4.
4. Tap Confirm to complete the transaction.
66 │ Mobile Payment Acceptance User Guide for Android
Page 68

User Guide
1.
Tips and Signature
1. If you have enabled the tip option in the settings, the customer will select the tip amount
before confirming the transaction total for an EMV transaction and after credit card
approval for non-EMV transaction.
Signature is captured after the transaction is approved. In some circumstances, it is on the
same screen as the tip selection.
Mobile Payment Acceptance User Guide for Android
│
67
Page 69

User Guide
3.
1.
2.
Approved Transaction
The last screen in a successful transaction is the confirmation screen.
1. Tap Print Receipt if you are connected to a receipt printer and would like to provide the
customer with a printed receipt.
2. Enter an email address to send the customer their receipt electronically. If you added a
customer while in the register, their email address will be pre-populated. If you enter a
new email address, the application will ask if you would like to save that customer.
3. Tap Done to return to the register.
68 │ Mobile Payment Acceptance User Guide for Android
Page 70

User Guide
1.
Declined Transaction
When a credit card is declined, you will have the option to go back to the Select Payment Type
screen or cancel the order.
1. A declined transaction will include a decline or error message. Tap OK to clear the
message.
Mobile Payment Acceptance User Guide for Android
│
69
Page 71

User Guide
3.
2.
2. On the next screen, tap Choose Another to return to the Select Payment Type screen.
3. Tap Cancel Order to cancel the transaction completely.
70 │ Mobile Payment Acceptance User Guide for Android
Page 72
User Guide
History and Returns
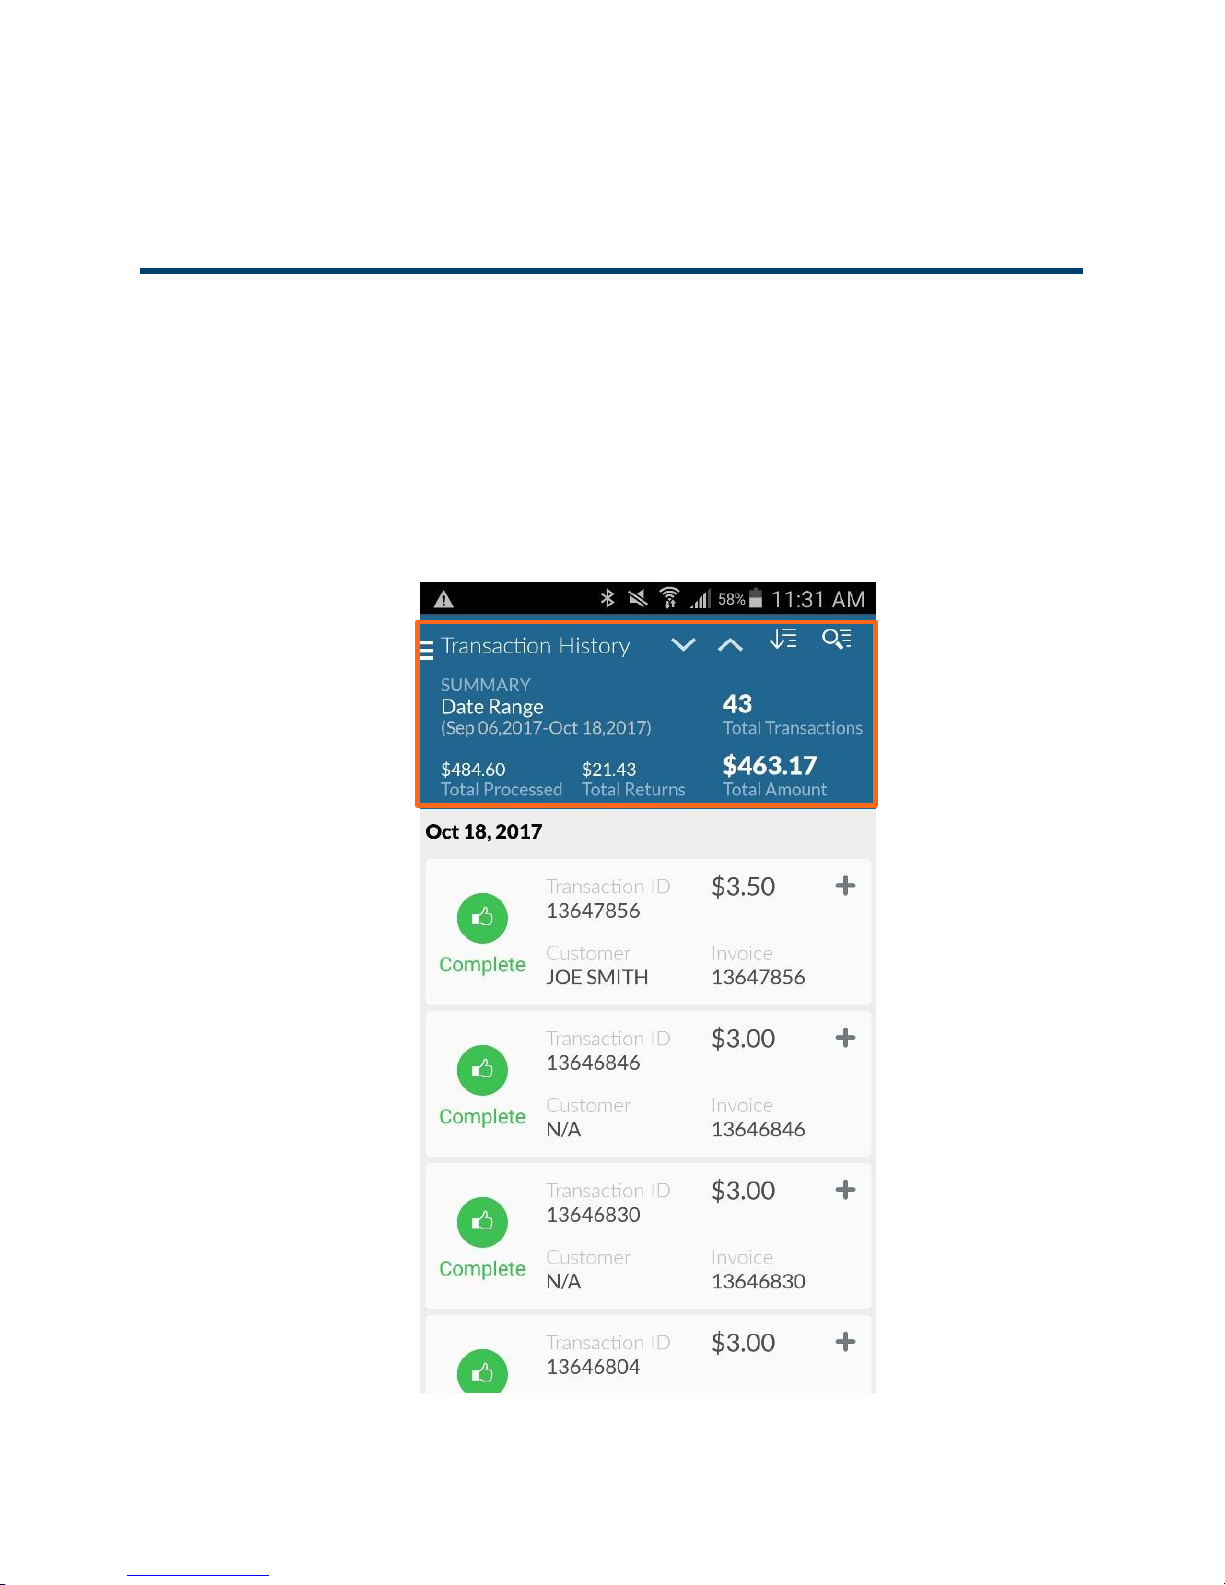
Transaction History
You can access a list of your transactions from the Transaction History option on the Main Menu
of the MPA application. Filter and search transaction history; view individual transactions; returns
are initiated from the transaction details in transaction history. Transaction History provides details
for up to 13 months of data as well as the status of each transaction.
The Summary details at the top of the transaction list are for the transactions selected by your
sort and filter criteria.
Mobile Payment Acceptance User Guide for Android
│
71
Page 73

User Guide
Sort by Date, Customer, Price and Payment Type.
72 │ Mobile Payment Acceptance User Guide for Android
Page 74

User Guide
Filter and Search by Transaction ID, Card #, Customer Name, Transaction Status, Payment
Type, Date Range and Price Range.
Mobile Payment Acceptance User Guide for Android
│
73
Page 75

User Guide
1.
Receipt Details
1. Tap the + next to a record to expand it within the list and view additional details.
74 │ Mobile Payment Acceptance User Guide for Android
Page 76

User Guide
2.
2. In the expanded transaction record, view payment type and cardholder name or
resend the receipt email.
Mobile Payment Acceptance User Guide for Android
│
75
Page 77

User Guide
3.
3. View Receipt Details to view the remaining transaction details.
76 │ Mobile Payment Acceptance User Guide for Android
Page 78

User Guide
2.
1.
Receipt Details
1. View additional transaction details on the View Receipt Details screen.
2. Email the transaction receipt.
Mobile Payment Acceptance User Guide for Android
│
77
Page 79

User Guide
1.
Returning a transaction
1. Tap Return Transaction to refund some or all of the transaction amount.
78 │ Mobile Payment Acceptance User Guide for Android
Page 80

User Guide
1.
2.
3.
4.
Returning a transaction (Partial return)
1. For a partial return enter the return amount in the Subtotal field. The amount available to
return is listed above the field. The amount available reflects any partial returns previously
processed.
2. Enter the Tip amount to refund.
3. Enter the Tax amount to refund.
4. Tap Process Return.
Mobile Payment Acceptance User Guide for Android
│
79
Page 81

User Guide
5.
5. Confirm the return amount.
80 │ Mobile Payment Acceptance User Guide for Android
Page 82

User Guide
1.
2.
Returning a transaction (Full Amount)
1. Use the Return screen to process a full return or void.
2. For a full return or void, tap Return Full Amount.
Mobile Payment Acceptance User Guide for Android
│
81
Page 83

User Guide
3.
3. View the return details in transaction history.
82 │ Mobile Payment Acceptance User Guide for Android
 Loading...