

TSST SH-216CB User Manual

TSST SH-216CB DVD+/-RW Drive User's Guide
The information below is provided by the supplier of the referenced device without independent
verification by Dell and is subject to the restrictions and disclaimers noted below.
Introduction
Using the Drive
Troubleshooting
Specifications
Drive Connectors
Regulatory
Information in this document is subject to change without notice.
© 2012 Toshiba Samsung Storage Technology, Inc. All rights reserved.
Trademarks used in this text: TSST is a trademark of Manufacturer's Name, Inc.; Dell and the
DELL logo are trademarks of Dell Inc. Microsoft and Windows are registered trademarks of
Microsoft Corporation.
Restrictions and Disclaimers
The information contained in this document, including all instructions, cautions, and regulatory
approvals, and certifications is provided by the supplier and has not been independently verified or
tested by Dell. Dell cannot be responsible for damage caused as a result of either following or
failing to follow these instructions.
All statements or claims regarding the properties, capabilities, speeds, or qualifications of the part
referenced in this document are made by the supplier and not by Dell. Dell specifically disclaims
knowledge of the accuracy, completeness, or substantiation for any such statements. All questions
or comments relating to such statements or claims should be directed to the supplier.
Export Regulations
Customer acknowledges that these Products, which may include technology and software, are
subject to the customs and export control laws and regulations of the United States ("U.S.") and
may also be subject to the customs and export laws and regulations of the country in which the
Products are manufactured and/or received. Customer agrees to abide by those laws and
regulations. Further, under U.S. law, the Products may not be sold, leased or otherwise transferred
to restricted end-users or to restricted countries. In addition, the Products may not be sold, leased
or otherwise transferred to, or utilized by an end-user engaged in activities related to weapons of
mass destruction, including without limitation, activities related to the design, development,
production or use of nuclear weapons, materials, or facilities, missiles or the support of missile
projects, and chemical or biological weapons.
Initial release: Oct 2012

Back to Contents Page
Introduction: TSST SH-216CB DVD+/-RW Drive
User's Guide
Manufacturer Model Name and Number | Drive Description | Special Features of the Drive
Manufacturer Model Name and Number
TSST SH-216CB SATA Half-Height DVD+/-RW Drive.
Drive Description
This drive reads & writes to CD and DVD media (Refer to Specification section for specific media
types). This drive has a half-height (HH) form factor.
Special Features Of the Drive
The TSST SH-216CB DVD+/-RW Drive has the following features:
. Support Max 5X read for DVD-RAM
Please read all restrictions and disclaimers.
Back to Contents Page
Back to Contents Page
Using the Drive: TSST SH-216CB DVD+/-RW
Drive User's Guide
Front Panel | Drive Operation | Emergency Eject | Cleaning Media | Cleaning the Drive
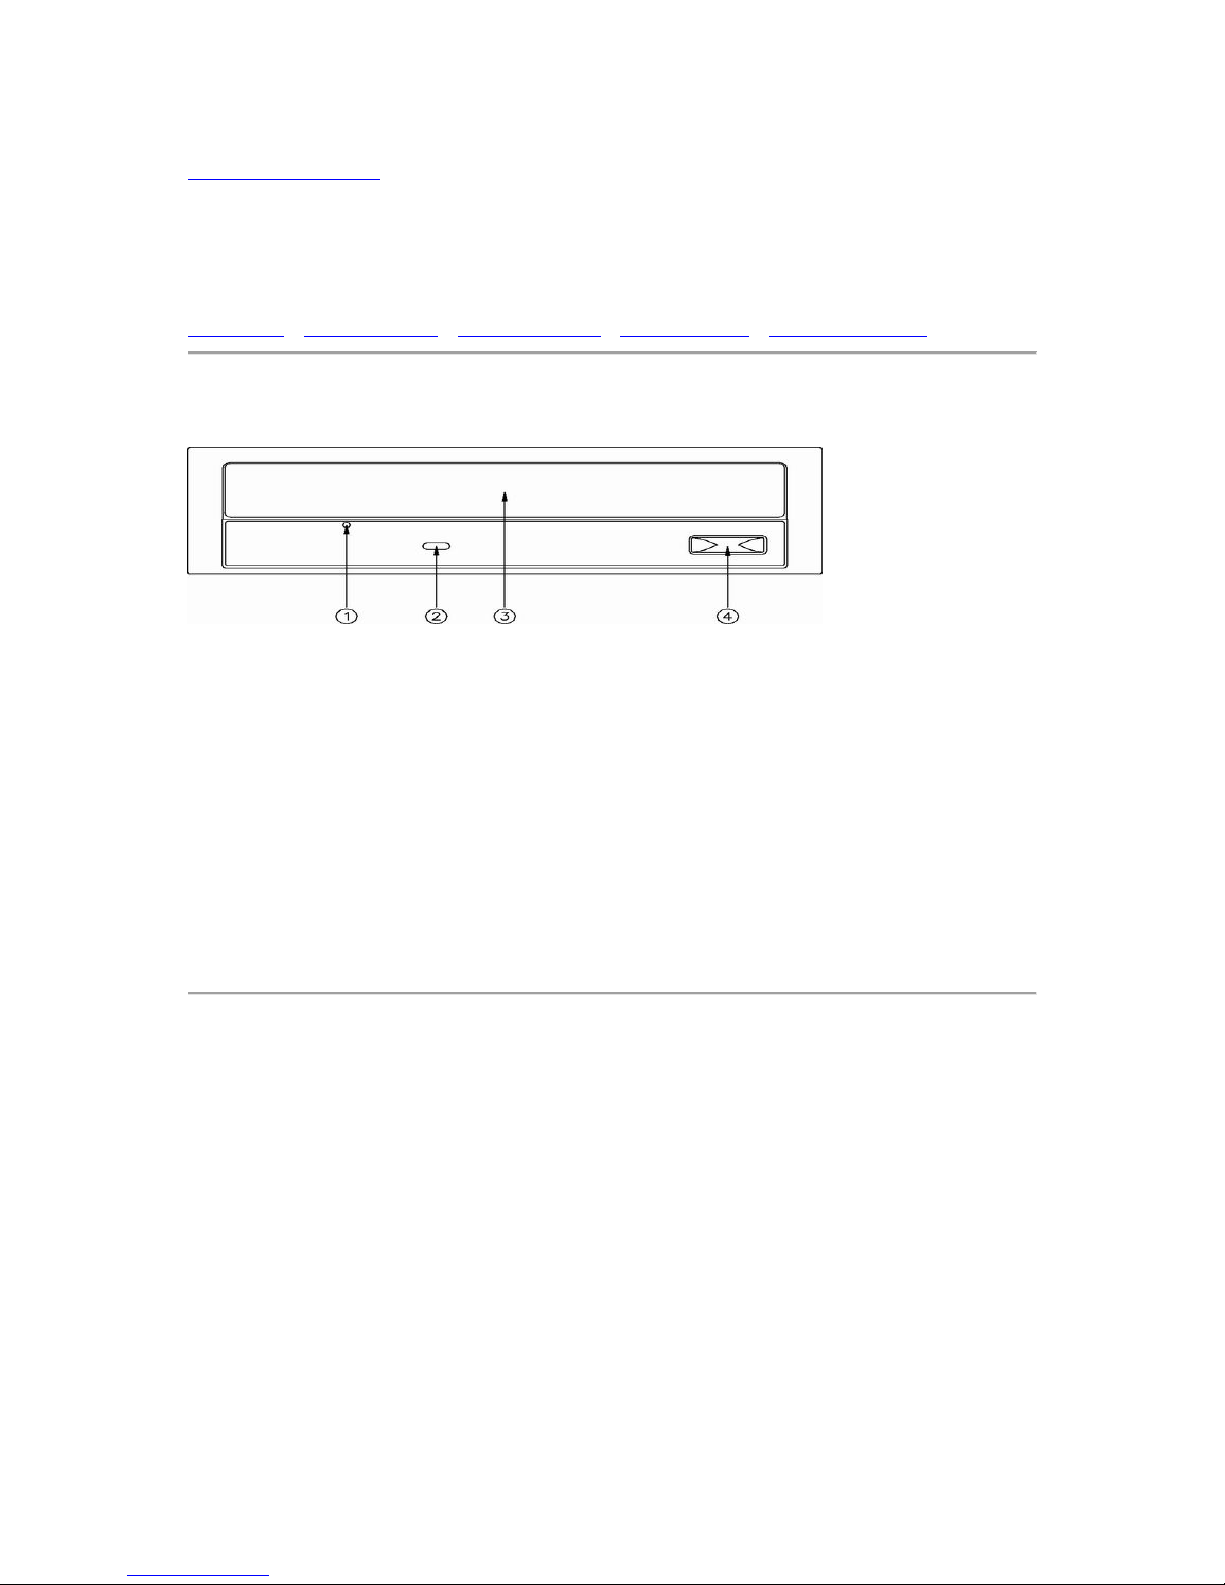
Front Panel
1. Emergency Eject Hole
If the disc tray does not open when you press the eject button, power off the
computer, insert a pin or unfolded paper clip in the hole and push firmly. Refer to
Emergency Eject instructions below.
2. Indicator Light
The light blinks when there is drive activity.
3. Disc Tray
The disc tray opens automatically when you press the eject button. When you
place a disc in the tray, ensure that the label on the disc is facing outwards. If you
are not loading or unloading a disc, the tray should remain closed.
4. Eject Button
Press this button to open/close the disc tray. This button works only when power is
supplied to the drive.
The position of these features may depend on the specific drive.
Drive Operation:
Inserting a Disc
Press the eject button. The disc tray will be ejected.
Place the disc in the center of the tray with the label side facing up.
Push the eject button to close the tray.
Using the HH Drive Installed Vertically
To insert a disc in a drive that is mounted vertically, perform the following steps:
1. Locate disc holders (4 locations) on the disc tray.
2. Position the disc behind disc holders.
3. Close the drive by gently pushing in the tray or pressing the eject button.

CAUTION: Only 12 cm discs can be used when the drive is installed vertically. Do
not place 8 cm discs in the tray when using the drive installed in this way.
Removing a Disc
Press the eject button. The disc tray will be ejected.
Remove the disc.
Push the button in order to close the tray.
NOTE: During some drive activities, the drive will not allow the tray to open even
when the eject button is pressed.
Usage Guidelines
Do not press down on the disc tray when it is opening or closing.
Do not place objects on the disc tray.
Never use a damaged, broken, scratched, or deformed disc.
Keep the disc tray closed when the drive is not in use.
NOTE: High-speed drives spin the disc at a high rotational speed. If a disc has
printing on only half of the disc, or if there is a slight imbalance in the disc,
the imbalance is greatly magnified by the high speed, causing the drive to
vibrate or produce a fan-like noise. These effects are inherent in the highspeed technology and do not indicate a problem with the drive.
Emergency Eject
The procedure described below can be used to remove a disc from the drive if the eject button is
disabled by software or a power failure occurs.
1. Turn the computer off.
2. Insert a small diameter rod or a stiff wire (a straightened paper clip about 1.2 mm
[0.047 in] in diameter) into the emergency eject hole and push firmly.
3. The disc tray is ejected by about 10 mm (0.39 in). Pull the disc tray out.
[Remove above section for 12.7 mm and 9.5 mm slot drives when Emergency
eject feature is not accessible to the user.]
NOTE : Do not insert more than 50 mm (1.9 in) in depth.
Inserting more than 50 mm (1.9 in) may damage the drive.
Cleaning Media
If dust or fingerprints get on the disc, wipe it with a soft cloth from the center to the edge.
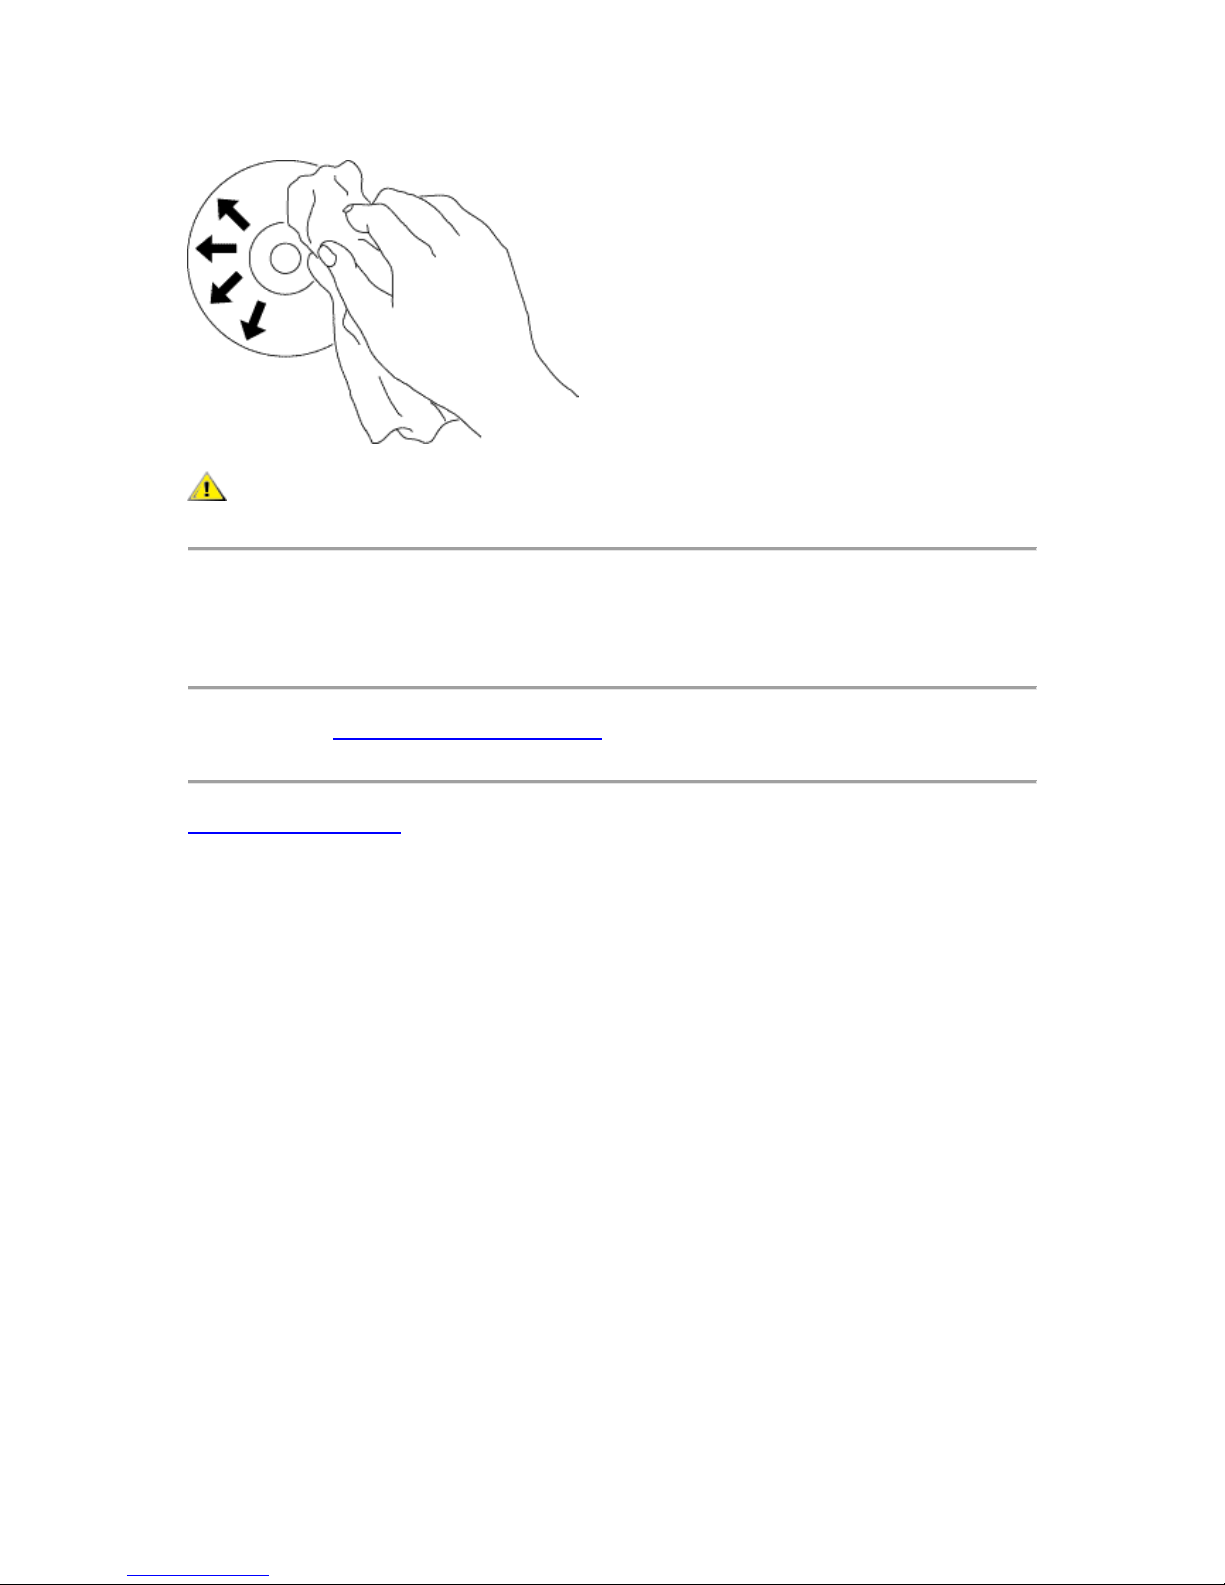
CAUTION: Do not use benzene, paint thinner, record cleaner, solvent, or static
repellent. This can damage the disc.
Cleaning the Drive
Cleaning the inside of the drive is not recommended.
Please read all restrictions and disclaimers.
Back to Contents Page

Back to Contents Page
Troubleshooting: TSST SH-216CB DVD+/-RW
Drive User's Guide
Symptoms and Solutions
Please refer to the Introduction section to determine if the drive in your system is a Half Height
(HH) or slim device.
Symptoms and Solutions
Symptoms Solutions
1. Drive is not
recognized by
system.
1-1. Ensure that the power connector is inserted and seated
properly. Please refer to the Drive Connectors section.
1-2. Is the interface connector inserted and seated properly? Please
refer to the Drive Connectors section.
2. Cannot read or play
disc.
2-1. If the disc is dirty (fingerprints, etc.), clean it with a nonabrasive cloth from the disc center hole to the outside.
2-2. If the disc is scratched and warped, do not insert it into the
drive.
2-3. If the disc is inserted upside-down, re-insert it in the proper
direction.
2-4. If the drive is not recognized, refer to section 1 above.
2-5. Check to see that the necessary software applications are
installed correctly.
3. Certain types of disc
do not play.
3-1. This drive only supports discs with the formats indicated in the
Specifications section. It cannot read the data on discs with other
formats. Check the disc's format.
4. When playing an
audio CD, drive
shows disc activity
but there is no
sound.
4-1. The CD player application may need to be set to "Digital." In
Windows Media Player, for example, from the menu bar, click on
"Tools," then "Options," and then click on the "Device" tab. Select
the drive and click on the "Properties" button. Set the playback
mode to "Digital."
5. Drive will not write
or read at maximum
speed.
5-1. Ensure disc is clean and free of scratches.
5-2. Media from different manufacturers or purchased at different
times will record at different speeds. The drive will adjust the
available recording speeds to achieve the highest write quality.
6. Cannot eject disc.
6-1. Check to see that the system is powered up.
6-2. For drives with LED indicator, and it does not light up, refer to
section 1 above.
6-3. [For HH and tray drives only] Use Emergency Eject Instructions
to open the tray. Please refer to the Using the Drive section.
6-4. If the system is capable of booting into an operating system,
attempt to issue an eject command from within the operating
system.
 Loading...