

Page 1
TS PERFORMANCE
WE ARE DIESEL
Bosch Common Rail Shim Kit
Installation Manual
Page 2
Continued
Installation of Fuel Rail Valve Shim Kit
Bosch Common Rail
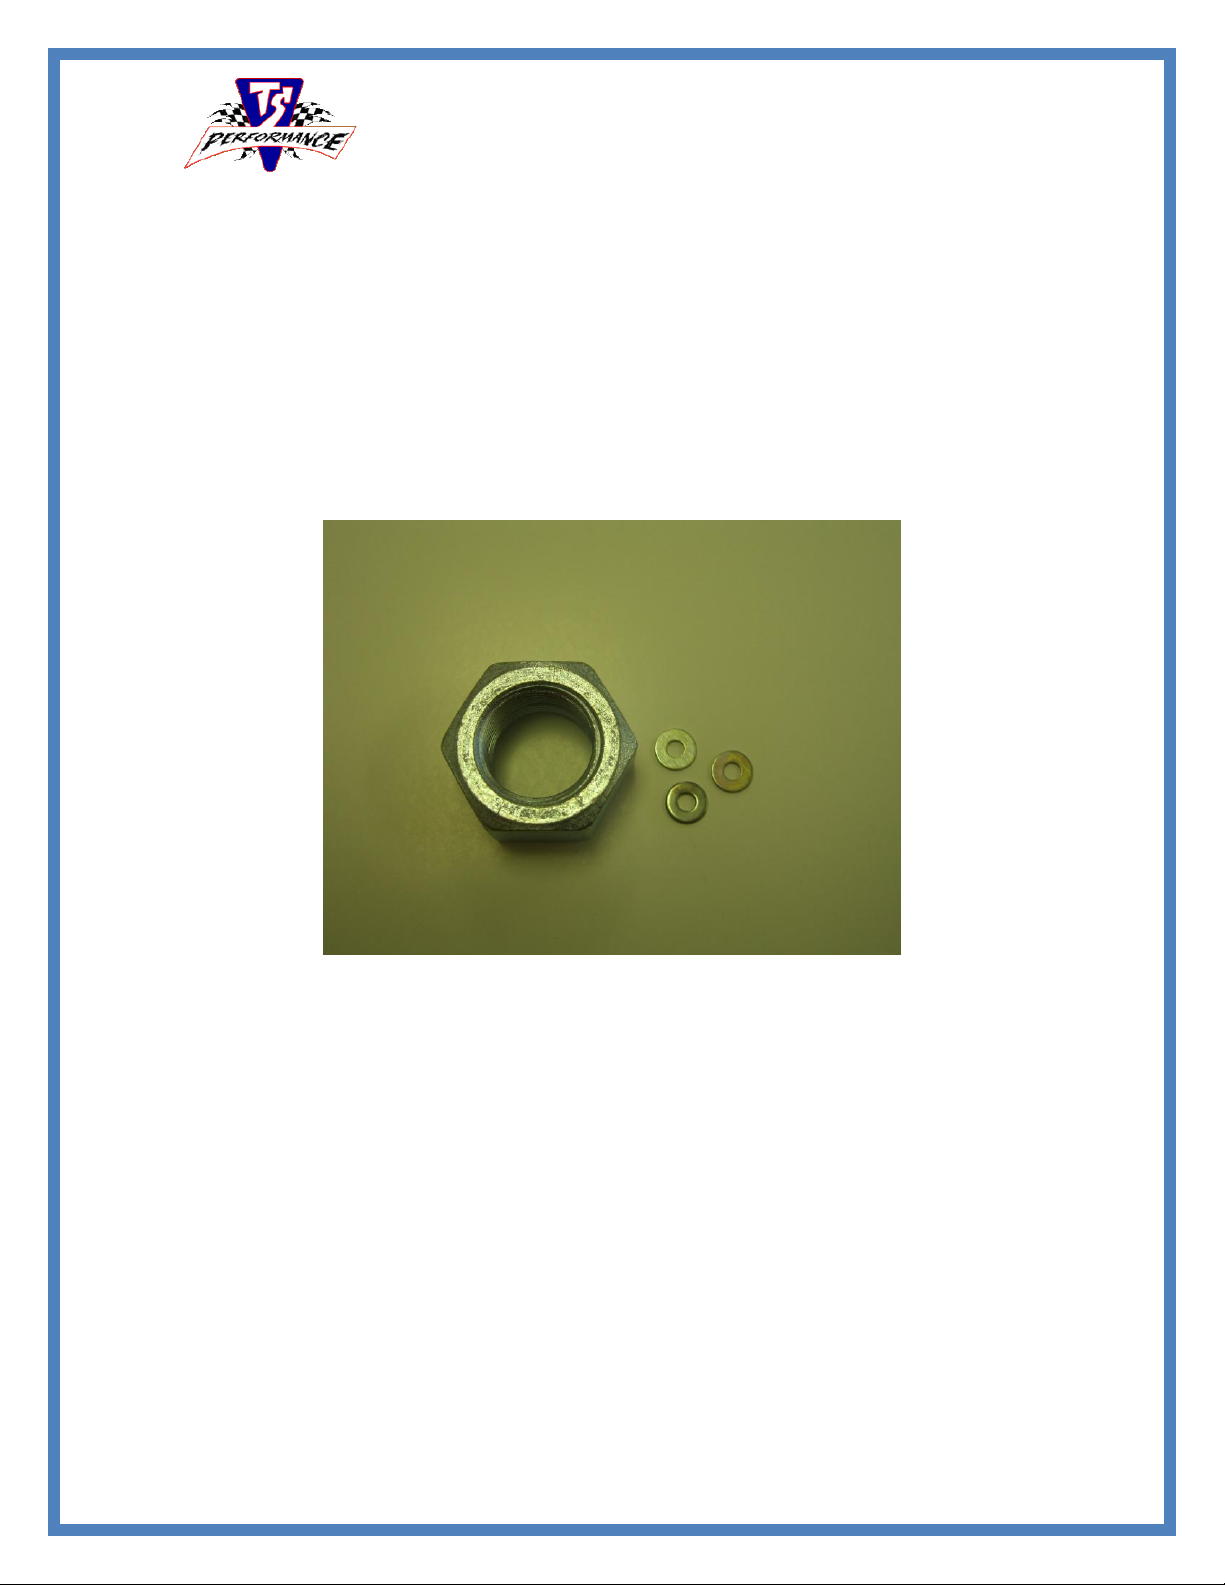
This kit includes a Separation tool and (3) .20” shims
1. Fuel pressure valve can now be located in the end
of the fuel rail. Use an 18mm boxed wrench or socket
to remove the valve from the fuel rail.
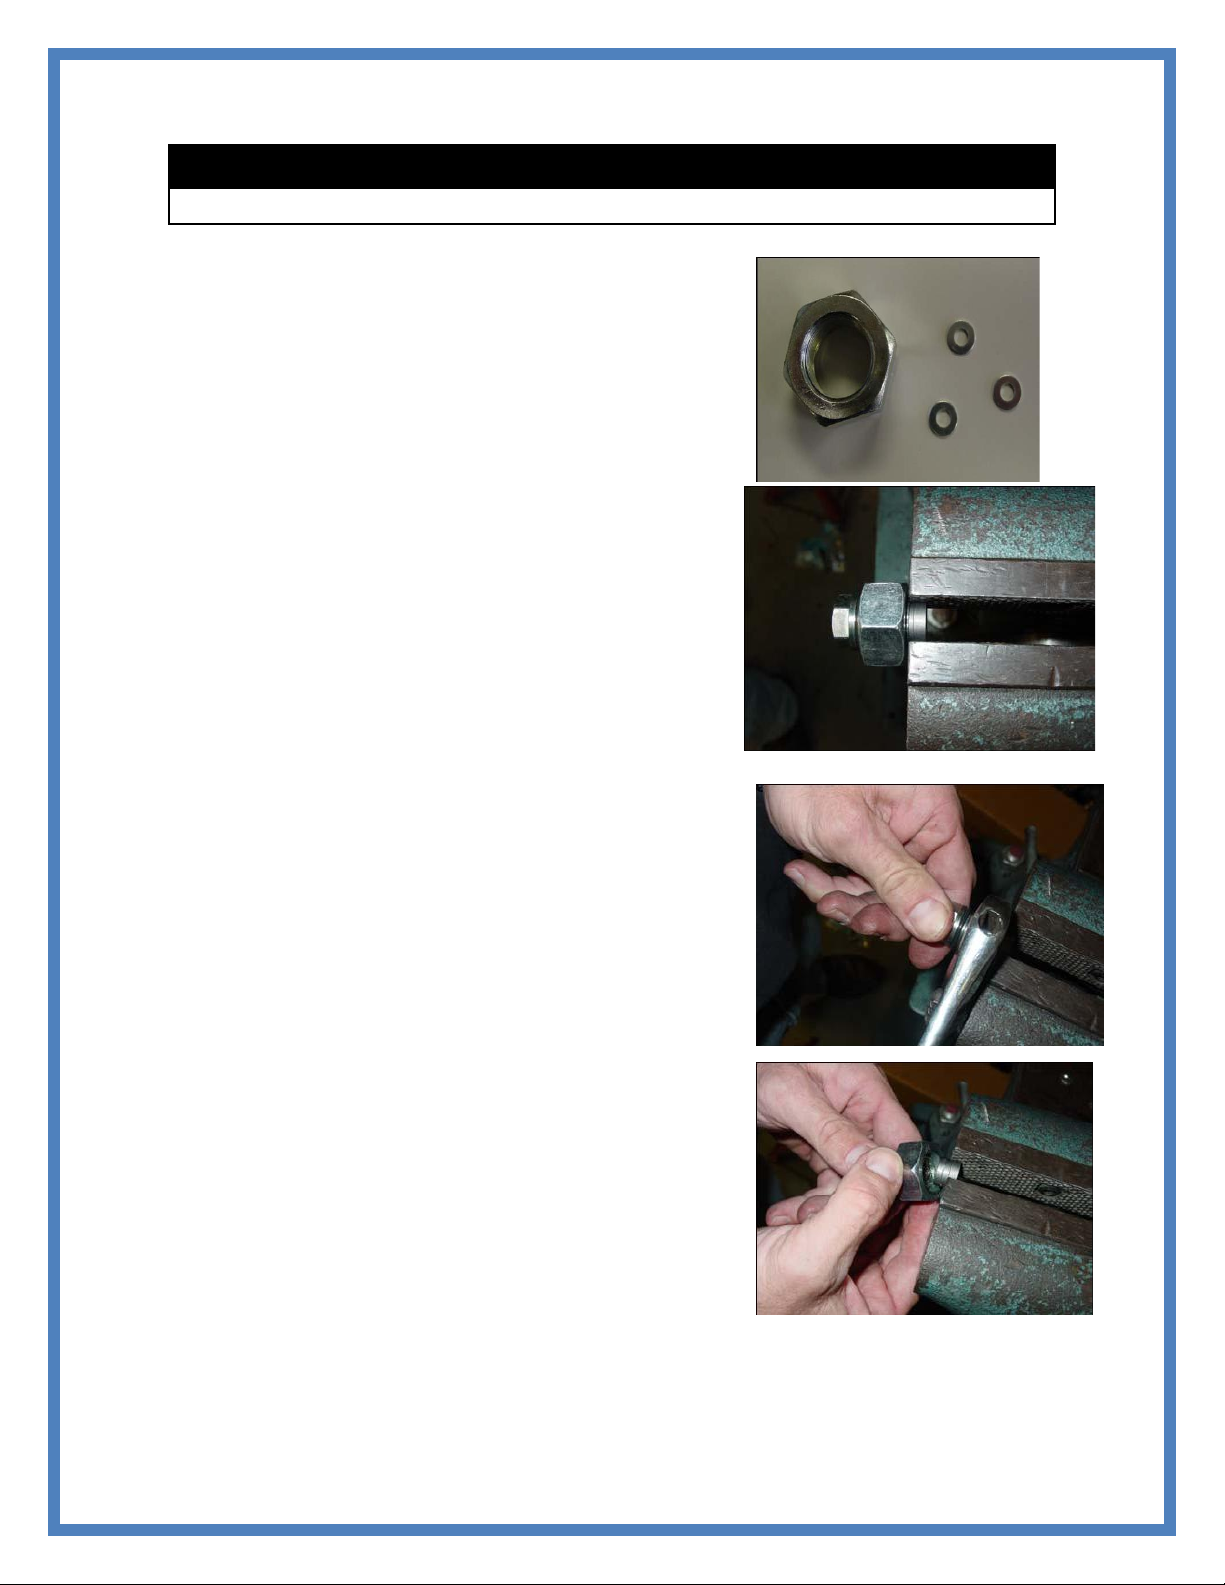
2. Take valve and thread supplied nut tool onto
valve.
Then place valve in a vice,
Clamping down on sides of valve cap.
3. Use a wrench to unscrew supplied nut in order to
remove valve cap. Be careful to hold end of valve
while doing this! It is spring loaded and you don’t want
to loose parts!
There is a small pin in the cap that you remove. It is
located behind the washer with the 3 holes. Be sure it
does not fall out. If it does the truck will not start
once the valve is re-installed. If it does fall out be
sure to re-install it. It should be flush with the cap
when inserted properly.
4. Another view of removing the valve cap after
loosening in step 5.
Page 3
Continued
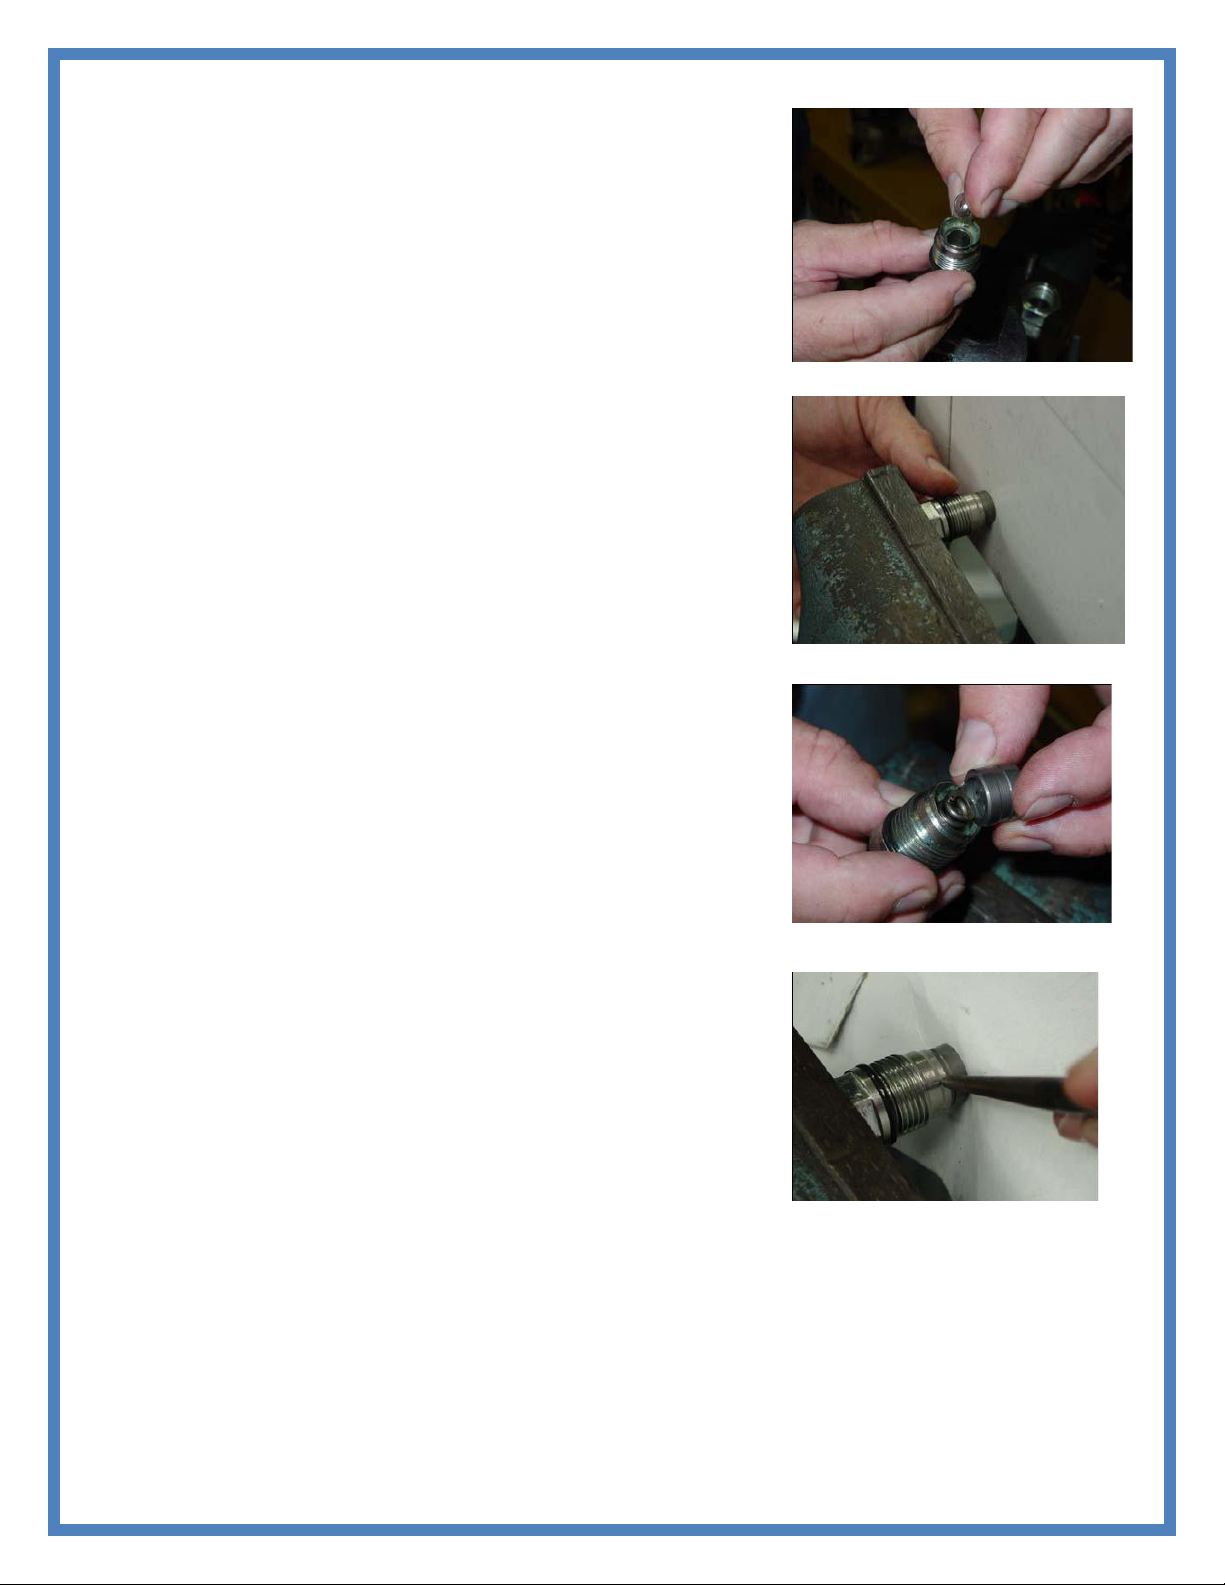
5. Removing the metal spring, then insert the 3 supplied
metal shims into valve. Now re-insert the metal spring
back into the valve.
6. Place valve back in vice, now with a thick piece of
cardboard or piece of wood behind valve cap to prevent
damage to the valve seal surface. Tighten vice so that the
valve cap reenters valve until fully seated. No need to
over-tighten; just tighten until snug.
7. Replace valve spring and then cap. Note that there are
3 holes in a triangle position on the inside of the valve cap
that does not need to be removed from cap and should
face towards spring as it did when it was removed, hole
alignment is not necessary.
8. Take a small punch and small hammer and re-apply
the 3 factory indentations along the lip where the valve
casing covers the valve cap. You may need to loosen the
vice slightly to rotate the valve to access all 3
indentations, but do not let the spring push the cap out
any! Make sure that the cap stays fully seated in valve
while rotating. After doing so loosen the vice and make
sure that the valve cap is held by the indentations.
9. Now place the valve back into the rail and tighten to
150lb. feet. If it is not tight enough fuel may bleed past the valve and cause the
engine to run poorly.
If there are any questions on the product or installation, give us a call at
TS Performance (270) 746-9999
Page 4

Continued
TS Performance
851 Lovers Ln
Bowling Green, KY 42103
270-746-9999
www.tsperformance.com
READ CAREFULLY BEFORE INSTALLING ANY TS PERFORMANCE PRODUCT
REMEMBER THIS IS A HIGH PERFORMANCE PRODUCT. USE AT YOUR OWN RISK. FOR OFF ROAD USE ONLY.
Do not use this product until you have carefully read the following agreement. This agreement sets forth the terms
and conditions for the use of the TS Performance product. The installation of this product indicates that the buyer has
read and fully understands this agreement and accepts its terms and conditions.
DISCLAIMER OF LIABILITY
TS Performance, its distributors or dealers shall in no way be responsible for the product’s proper use and service. The
buyer of this system hereby waives all liability claims. The buyer acknowledges that he is not relying on the sellers
skill or judgment to select or furnish goods suitable for any particular purpose and that there are no liabilities which
extend beyond the description on the face hereof, and the buyer hereby waives all remedies or liabilities, expressed or
implied arising by law or otherwise, (including without obligations of the seller with respect fitness, merchantability
and consequential damages) or whether or not occasioned by the seller’s negligence.
The seller disclaims any warranty and expressly disclaims any liability for personal injury or damages. The buyer
acknowledges and agrees that the disclaimer of any liability for personal injury is a material term for this agreement
and the buyer agrees to indemnify the seller and to hold the seller harmless from any claim related to the item of the
equipment purchased. Under no circumstances will the seller be liable for any damages or expenses by reason of use or
sales of any such equipment.
The seller assumes no liability regarding the improper installation or misapplication of its products. It is the installer’s
responsibility to check for proper installation and if in doubt the manufacturer is to be contacted.
LIMITED LIFETIME WARRANTY
STATEMENT POLICY
The warranty policy is the best warranty within the high performance diesel industry.
All TS Performance products have been inspected, tested and trial in the factory laboratories and on the
field.
Nothing in this Statement of Policy shall alter or enlarge the terms of warranties, obligation or liabilities of
these products.
TS Performance is not responsible or liable for any products damaged or destroyed due to improper
installation.
TERMS OF WARRANTY
The defective product must be freight prepaid and returned to TS Performance for further investigation,
otherwise this warranty shall be deemed null and voided and of no effect.
This warranty is void on any products that show evidence of misapplication, negligence, and improper
installation, and abuse, lack of proper maintenance or alternation from its original design.
In no event will TS Performance be liable for any consequential or incidental damages for breach of any
express or implied warranty on the product.
This warranty is not transferable or assignable.
TS Performance is not responsible or liable for any products damaged or destroyed due to improper
installation
.IN THE EVENT THAT THE BUYER DOES NOT AGREE WITH THIS AGREEMENT: THE
BUYER MAY PROMPTLY RETURN THIS PRODUCT IN A NEW ANDN UNUSED
CONDITION WITH A DATED PROOF OF PURCHASE TO THE PLACE OF PURCHASE
WITHIN TEN (10) DAYS FROM DATE OF PURCHASE FOR A FULL REFUND.
Page 5
Continued
WWW.TSPERFORMANCE.COM
FOR TECHNICAL SUPPORT
(270) 746-9999
 Loading...