

Page 1
TS PERFORMANCE
WE ARE DIESEL
Page 2
Continued
Contents
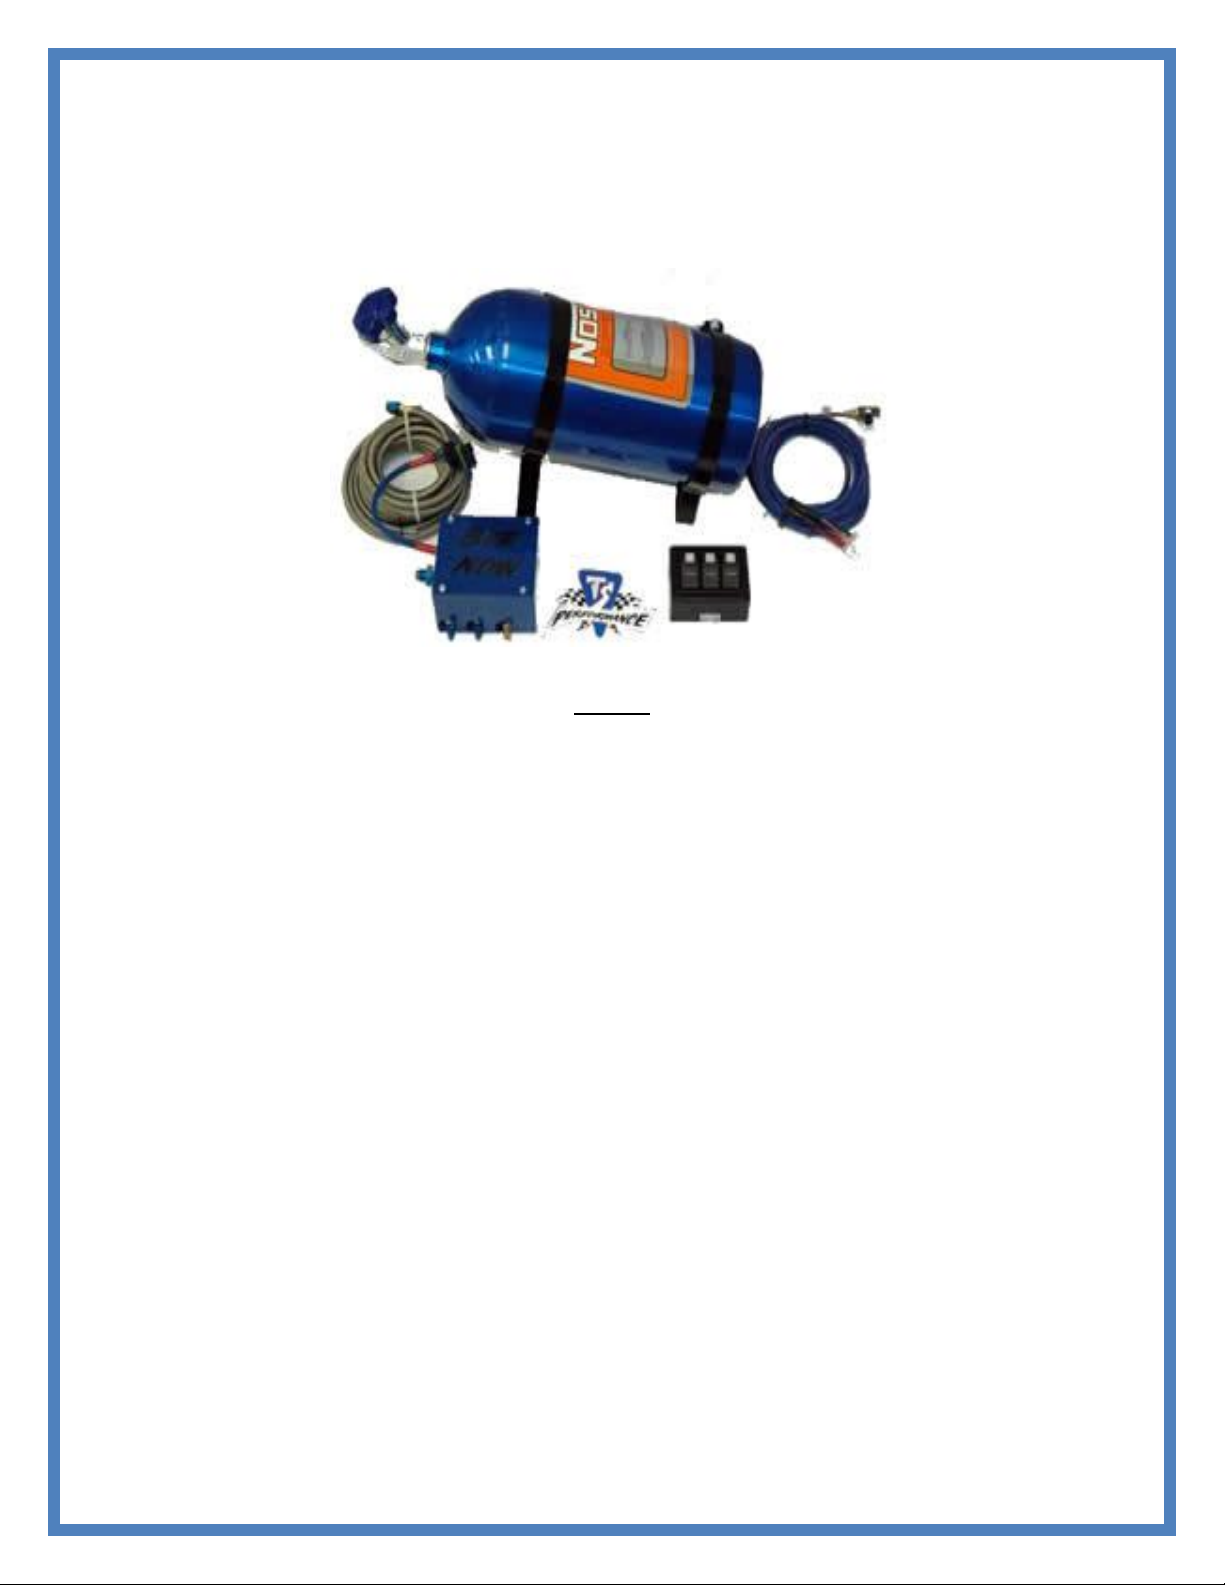
(1) 10lb. Nitrous Bottle Bottle Brackets
(3) Solenoids (1) Control Box
(1) Pre-Made Wire Harness (2) Nitrous Jets
(2) 1/8” Nozzles 10ft #3 Line
14ft #6 Line (2) #3 Straight AN fittings
(2) #3 90 degree AN fittings (1) #6 Bottle Nut Adapter
(1) Nitrous Gauge (1) 1/8” 27 NPT tap
(1) WOT Switch
Installation Instructions
Read and fully understand all instructions before attempting to install the
TS Performance PowerFool 2 Nitrous Kit
Note: Nitrous is a Power additive and should be used only for race purposes this is not intended for street
use. For off road use only.
1. Disconnect batteries and remove keys from ignition.
2. Decide where you would like to mount your Command Center. (The Command center is a black
box with 3 switches. The switch to the left is the On/Off switch. The middle switch is the Purge
button and the right switch is the 2nd Stage button.) We recommend an area that is accessible and
with-in reach while driving the vehicle.
3. Mount the solenoid box in the engine compartment. Make sure the box is mounted flat and away
from moving objects.
4. Route the purple, blue and orange wires with pre-terminated pins through the firewall to the
engine compartment. They will be in wire sleaving with a 12 gauge red wire.
5. Use the supplied weather-pac connector and attach it to the wires coming through the firewall. It
should have a black wire with an eyelet on the other end. (The eyelet should be connected to a
constant ground.) Insert the purple wire into location A, the blue wire into location B and the
Page 3

Continued
orange wire into location C. Make sure the wires will not pull out and close the cover. Now
attach this connector to the connector coming from the solenoid box.
6. Attached the supplied Fuse Link to the 12 Gauge red wire. This wire will connect directly to the
battery. (Use a 30 amp fuse in fusible terminal after wiring is complete.)
7. Mount the supplied momentary switch to the fuel pedal. The switch should be press when the fuel
pedal is pressed all the down. (This will activate the first stage when you are at Wide Open
Throttle WOT.)
8. Route the pink wire in the wire harness to the momentary switch you just mounted. It should be
connected to the NC2 connector on the switch. The COM1 should have a black wire with an
eyelet connected to a constant ground.
9. Route the green wire in the harness to the Brake pedal. You will use the supplied wire tap and
connect to the wire that has power only when the brake pedal is pressed. This acts as a safety for
the system. When the brake is pressed the system will be shut down.
10. Route the black wire in the harness to a constant ground inside the cab.
11. Mount the Nitrous Nozzles. We recommend mounting stage 1 pre-intercooler and stage 2 post-
intercooler.
12. Drill the holes for the nozzles using a C drill or a 15/64 size. Then use a tap size of 1/16 27npt.
13. Make sure to turn the nozzles so that they spray the nitrous with the airflow.
14. Measure the distance from the solenoid box to the nozzles and cut the small line to length. Place
the A/N fittings on the lines and route the lines to the nozzles away from excessive heat and
moving parts.
15. Insert the jets into the nozzles and connect the lines to the nozzles and solenoid box. Stage 1
should have a larger jet than stage 2. The solenoid closest to the purge solenoid is stage 2.
16. Bend the purge line so that it exits the engine compartment and does not spray onto the vehicle or
glass, and attach securely.
17. Mount the Nitrous bottle brackets in the bed. If you choose to mount the bottle inside the cab, you
will need to mount a blow-off tube to the bottle.
18. Route the #6 line from the bottle to the solenoid box. Make sure to route it away from excessive
heat and moving parts.
19. Test the system before turning on the bottle. Arm the system by turning the control panel switch
on. The switches should light-up. With the truck turned off press the fuel pedal all the way. Have
someone at the solenoid box listen for it to come on. Hit the stage 2 button and listen for the click.
Do the same with the purge button. If any of the solenoids do not click, check your connections.
Spraying Nitrous
1. Make sure the nitrous bottle is filled and turned on.
2. Check the bottle pressure and make sure the pressure is a minimum of 900lb to a maximum of
1050lb. (If the bottle pressure is low, you will not feel the full effect of the nitrous.)
3. When you are ready to use the nitrous turn the control panel on and purge the system. At first you
will not see any nitrous. This is known as Head Pressure. When the discharge from the line turns
white, you have nitrous to the solenoids.
4. To activate the 1st stage, simply press the pedal all the way.
5. The 2nd stage is activated when you want by pressing the 2nd stage button on the control panel.
You can do this at any time while at wide open throttle. (Do not hit the 2nd stage unless you are
at wide open throttle due to lack of fuel.)
6. If you would like to order and handheld 2nd stage button you can do so by ordering one that can be
wired directly into the system.
If there are any questions on the product or installation of the module give us a call at
TS Performance (270) 746-9999
Page 4

Continued
TS Performance
851 Lovers Ln
Bowling Green, KY 42103
270-746-9999
www.tsperformance.com
DISCLAIMER
READ CAREFULLY BEFORE INSTALLING ANY TS PERFORMANCE PRODUCT
REMEMBER THIS IS A HIGH PERFORMANCE PRODUCT. USE AT YOUR OWN RISK. FOR OFF ROAD USE ONLY.
Do not use this product until you have carefully read the following agreement. This agreement sets forth the terms
and conditions for the use of the TS Performance product. The installation of this product indicates that the buyer has
read and fully understands this agreement and accepts its terms and conditions.
DISCLAIMER OF LIABILITY
TS Performance, its distributors or dealers shall in no way be responsible for the product’s proper use and service. The
buyer of this system hereby waives all liability claims. The buyer acknowledges that he is not relying on the sellers
skill or judgment to select or furnish goods suitable for any particular purpose and that there are no liabilities which
extend beyond the description on the face hereof, and the buyer hereby waives all remedies or liabilities, expressed or
implied arising by law or otherwise, (including without obligations of the seller with respect fitness, merchantability
and consequential damages) or whether or not occasioned by the seller’s negligence.
The seller disclaims any warranty and expressly disclaims any liability for personal injury or damages. The buyer
acknowledges and agrees that the disclaimer of any liability for personal injury is a material term for this agreement
and the buyer agrees to indemnify the seller and to hold the seller harmless from any claim related to the item of the
equipment purchased. Under no circumstances will the seller be liable for any damages or expenses by reason of use or
sales of any such equipment.
The seller assumes no liability regarding the improper installation or misapplication of its products. It is the installer’s
responsibility to check for proper installation and if in doubt the manufacturer is to be contacted.
LIMITED LIFETIME WARRANTY
STATEMENT POLICY
The warranty policy is the best warranty within the high performance diesel industry.
All TS Performance products have been inspected, tested and trial in the factory laboratories and on the
field.
Nothing in this Statement of Policy shall alter or enlarge the terms of warranties, obligation or liabilities of
these products.
TS Performance is not responsible or liable for any products damaged or destroyed due to improper
installation.
TERMS OF WARRANTY
The defective product must be freight prepaid and returned to TS Performance for further investigation,
otherwise this warranty shall be deemed null and voided and of no effect.
This warranty is void on any products that show evidence of misapplication, negligence, improper
installation, and abuse, lack of proper maintenance or alternation from its original design.
In no event will TS Performance be liable for any consequential or incidental damages for breech of any
express or implied warranty on the product.
This warranty is not transferable or assignable.
TS Performance is not responsible or liable for any products damaged or destroyed due to improper
installation.
IN THE EVENT THAT THE BUYER DOES NOT AGREE WITH THIS AGREEMENT: THE BUYER MAY
PROMPTLY RETURN THIS PRODUCT IN A NEW ANDN UNUSED CONDITION WITH A DATED PROOF OF
PURCHASE TO THE PLACE OF PURCHASE WITHIN TEN (10) DAYS FROM DATE OF PURCHASE FOR A
FULL REFUND.
Page 5

Continued
WWW.TSPERFORMANCE.COM
FOR TECHNICAL SUPPORT
(270) 746-9999
 Loading...