

TSO Products TPG Series User Manual
User Guide for TPG Parallel Guide System
Publication 696-009 Rev C
Effective 07/01/2019 ©2019 TSO Products Page 1 of 3
Thanks for purchasing this genuine TSO Product.
Should you have any product questions or issues, please contact us toll-free at 800-727-0311 (U.S.), 239-236-5526 (international),
or email us at info@tsoproducts.com.
Introduction
The patent-pending TPG Parallel Guide System attaches quickly and easily to the TSO GRS-16 Guide Rail
Square with a tool-free design utilizing comfort grip knobs that work with or without work gloves.
Calibration is simple, effective and maintained even when the guide rail square is removed, stowed away,
and re-deployed.
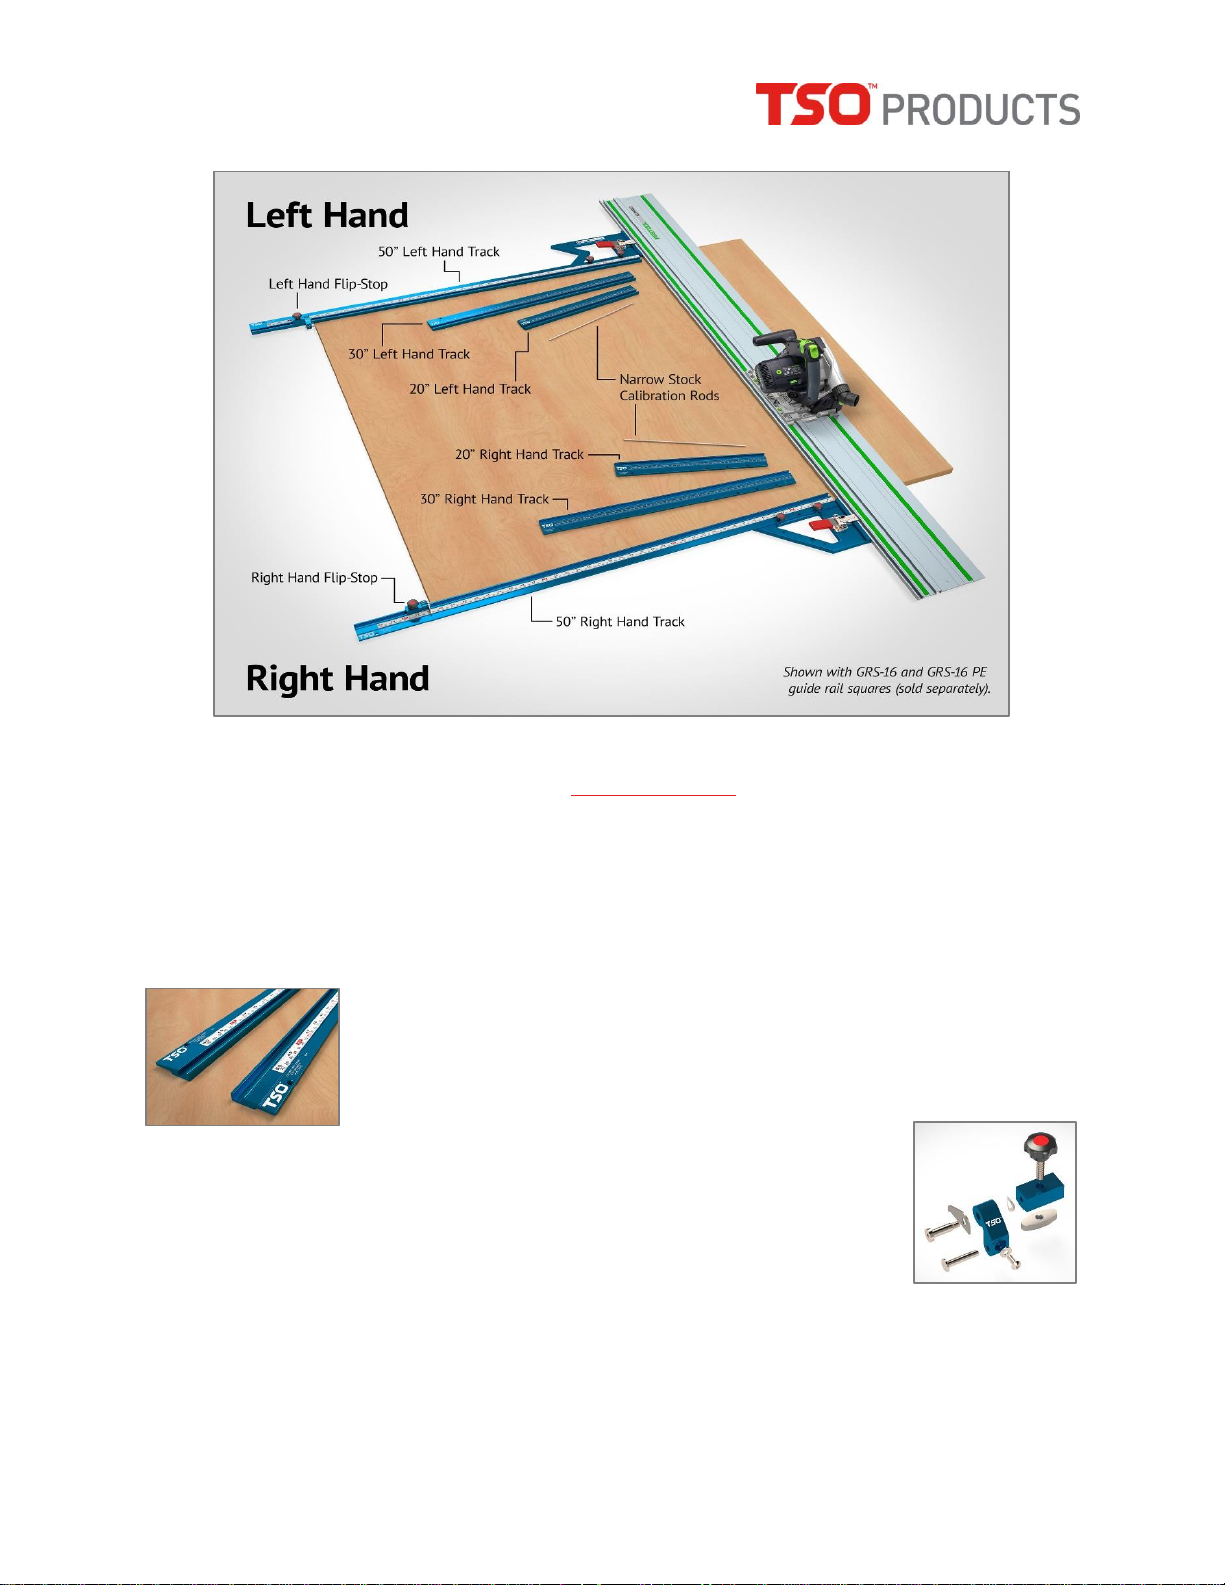
The TPG Parallel Guide T-Track is a proprietary aluminum extrusion incorporating a
t-slot compatible with Festool® and Makita® guide rails. The TPG-20 and TPG-30
T-tracks feature a permanent laser-engraved scale in both inches and millimeters,
while the longer TPG-50 T-Tracks come with an applied Starrett® scale in both
inches and millimeters.
The TPG Parallel Guide Flip-Stops are precision machined and
assembled for LEFT Hand and RIGHT Hand T-tracks. The appropriate configuration is
included with each set of T-tracks. The Flip-Stops are now designed to be reversible
LEFT / RIGHT for user disassembly and reconfiguration. These Flip-Stops feature a
unique parallax-free viewing cursor enabling fast, accurate adjustment.
Attachment of the Flip-Stop to the T-Track uses TSO’s distinctive keystone clamp with
self-aligning feature, torpedo-shaped nut plate for easy insertion, and generously sized
knobs for user comfort. Optionally, additional Flip-Stops can be purchased separately and added to the same
T-Track, providing more convenience when making cuts of multiple widths.
User Guide for TPG Parallel Guide System
Publication 696-009 Rev C
Effective 07/01/2019 ©2019 TSO Products Page 2 of 3
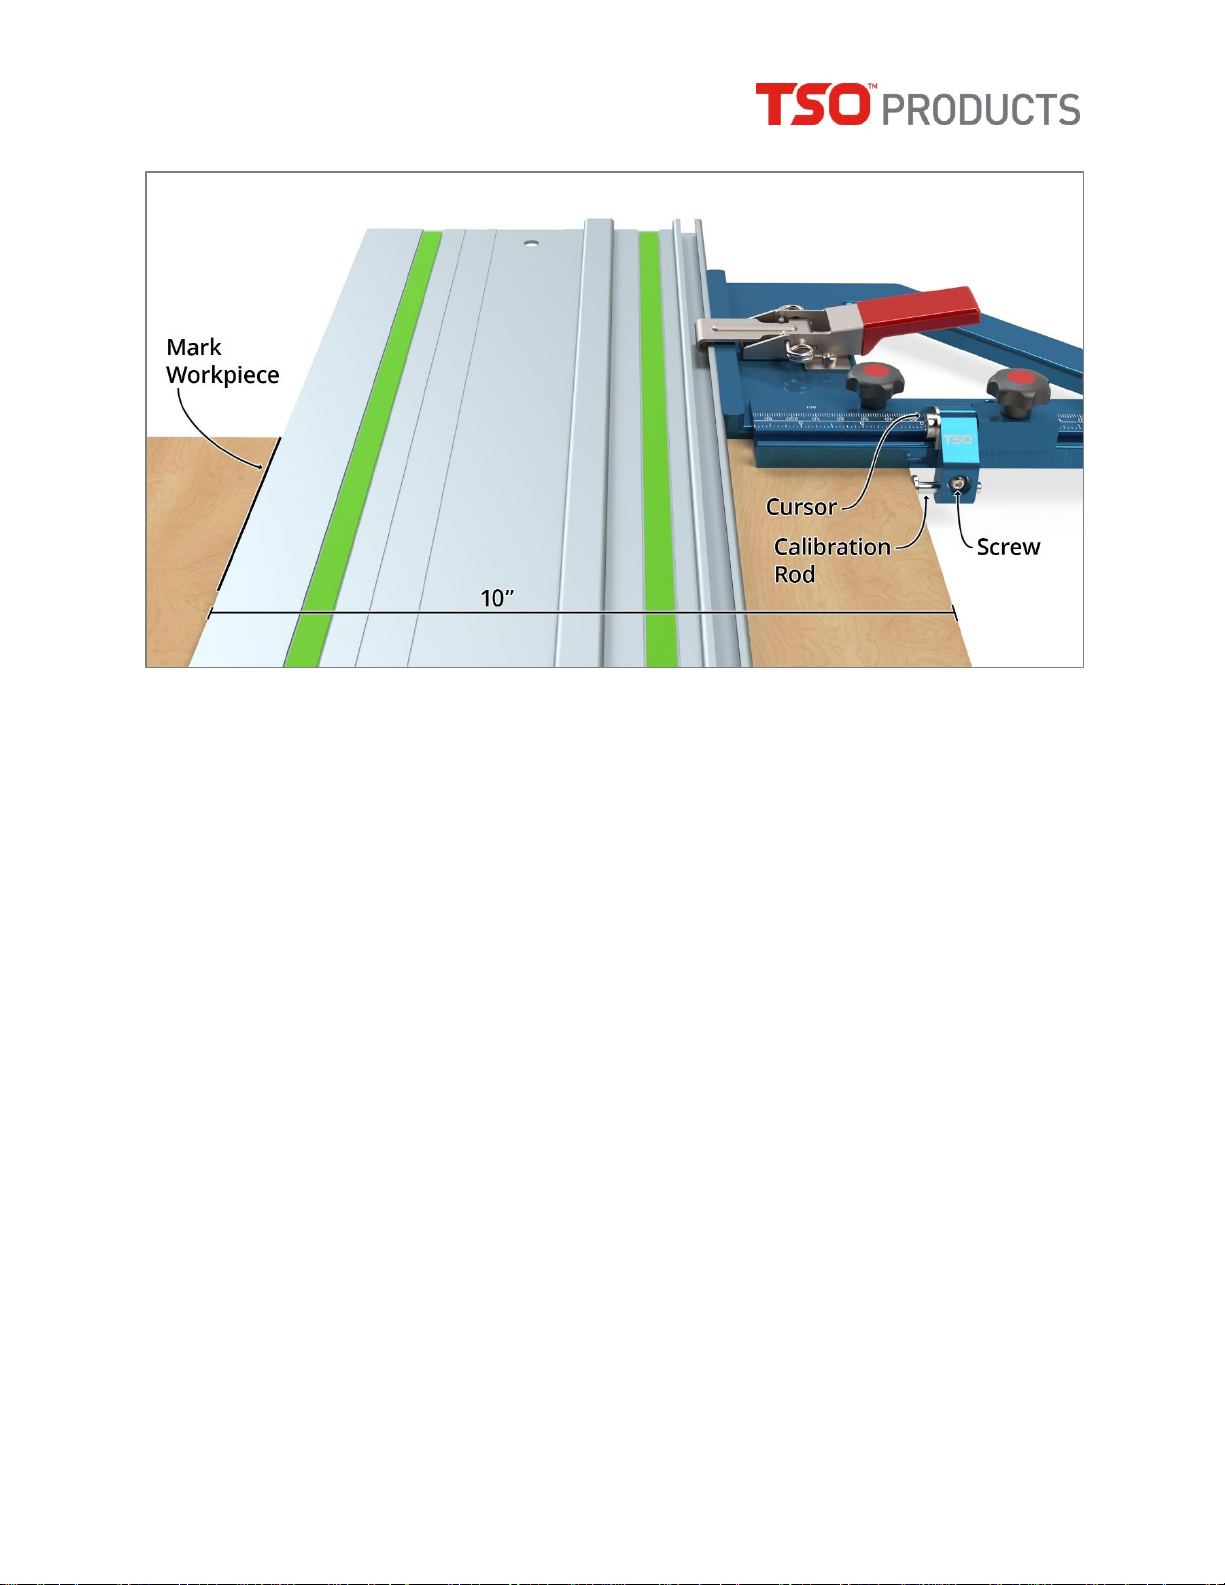
Calibration for stock wider than the guide rail
1. Mount the TPG Parallel Guide T-Track to the GRS-16 Guide Rail Square using the (2) M6 x 10 mm
knobs provided.
2. Slide the Flip-Stop onto the TPG Parallel Guide T-Track, cursor end first, and secure the knob.
3. Attach the GRS-16 Square + Parallel Guide assembly to the right end of the Festool® or Makita®
guide rail.
4. Mark a line on the workpiece at 10 inches (254 mm) from the edge.
5. Place the assembled Guide Rail + GRS-16 Square + Parallel Guide on the workpiece and set the
cursor to the 10-inch (254 mm) mark.
6. Loosen the Screw securing the Calibration Rod and slide the rod so that it contacts the edge of the
workpiece. Then tighten the screw securely with the 2.5 mm L-wrench provided.
7. This calibration should be complete for this saw and guide rail combination, but cuts should be
checked occasionally to confirm nothing has changed.
Use
1. Confirm that stock is wider than the guide rail.
2. Set the cursor on the TPG Parallel Guide to the required width of cut.
3. Set the saw to the required depth of cut.
4. Position the reference edge of the GRS-16 Guide Rail Square against the edge of the workpiece
perpendicular to the cut.
5. Move the Parallel Guide + Guide Rail so that the head of the Calibration Rod rests against the edge
of the workpiece which will be parallel to the cut.
6. It may be helpful to raise the guide rail slightly to ease the friction caused by its anti-slip strips and
make it easier to reposition.
 Loading...