

Page 1

DIGITAL VOICE RECORDER
PAPYRUS-III
PAPYRUS-III Titan
USER MANUAL
Page 2

CONTENTS
INTRODUCTION ........................................................................................................... 3
1 DESCRIPTION AND USE ..................................................................................... 4
1.1 Purpose ................................................................................................................. 4
1.2 Technical characteristics ....................................................................................... 5
1.3 Package contents ................................................................................................... 5
1.4 Appearance and functions ..................................................................................... 7
1.5 Operating Instructions ......................................................................................... 11
1.6 Computer requirements ....................................................................................... 12
2 PREPARATION PROCEDURES AND OPERATION ORDER ......................... 13
2.1 Battery Charging ................................................................................................. 13
2.2 Software installation ........................................................................................... 13
2.3 Connection to the PC .......................................................................................... 19
2.4 Launch the «Papyrus Tool» software .................................................................. 19
2.5 Description of the «Papyrus Tool» software ....................................................... 20
2.6 The recording settings ......................................................................................... 24
2.7 Setting up clock and timer .................................................................................. 26
2.8 Setting up a PIN-code ......................................................................................... 30
2.9 Memory testing ................................................................................................... 38
2.10 Downloading and playback of audio files ........................................................... 39
2.11 Deleting of the recorded data .............................................................................. 44
2.12 Restore of deleted data ........................................................................................ 44
2.13 Setting up remote control Unit ............................................................................ 45
2.14 Remote control operation .................................................................................... 46
2.15 Using the device .................................................................................................. 47
3 TROUBLESHOOTING ........................................................................................ 50
4 TECHNICAL SERVICE ....................................................................................... 52
5 STORAGE AND MAINTENANCE ..................................................................... 53
6 TRANSPORTATION REGULATIONS ............................................................... 54
7 UTILIZATION ...................................................................................................... 55
8 PRODUCT LIFETIME AND MANUFACTURER’S WARRANTY .................. 56
2
Page 3

INTRODUCTION
It is essential to familiarize yourself with this user manual (UM)
before turning o n the digital voice recorders Papyrus III and Papyrus III
Titan (referred as the device below).
Observe all precaution measures when using the device.
Check the content according to the part 1.3 of UM before use.
3
Page 4

1 DESCRIPTION AND USE
1.1 Purpose
1.1.1 The digital voice recorder Papyrus-III (Papyrus-III Titan)
(referred as the device below) is the professional audio recording
device intended for high quality recording of audio information in a
noisy environment.
1.1.2 The meetings, talks, interview and other indoor and outdoor
activities can be audio recorded using the device with built-in or external
microphones. The voice can be recorded from the distances of up to 5
meters indoor and 1-2 meters outdoor in the city environment using builtin microphone.
1.1.3 The digital voice recorder Papyrus-III has a remote control.
The wireless remote control can be used to start and stop the recording
and to check the condition of built-in battery. The area of remote control
operation is not less than 3 meters in the direct eyesight.
To work at a distance with a digital voice recorder Papyrus-III
Titan remote control function is available only when recording using
the remote microphone.
1.1.4 The device automatically switches for usage of the
external/internal microphone when the external microphone is
connected/disconnected.
4
Page 5

1.2 Technical characteristics
1.2.1 Technical characteristics of the device are given in Table 1.
Table 1
Parameter
Value
Internal memory, Gb
32
Sampling rate, kHz
32
16
Recording time, h
76
153
ADC resolution, bit
12
Dynamic range, dB
82
Power supply
Built-in Li-Ion battery
1320 mA·h
Current consumption in power off mode, mA
not more than 0,3
Standby current consumption in voice
activated recording mode, mA
not more than 0,5
Current consumption in RC mode, mA
not more than 1
Current consumption in recording mode
(under fully charged battery), mA
not more than 10
Continuous recording time from fully charged
battery, h
not less than 160
Transfer time of full volume of audio
information to the computer’s hard drive
«Papyrus-III» /«Papyrus-III TITANIUM»,
min
not more than 320/80
Dimensions, mm
77х43х11
Temperature range, ˚C
from 0 to plus 50
1.3 Package contents
1.3.1 The package content of the device is given in Table 2.
5
Page 6
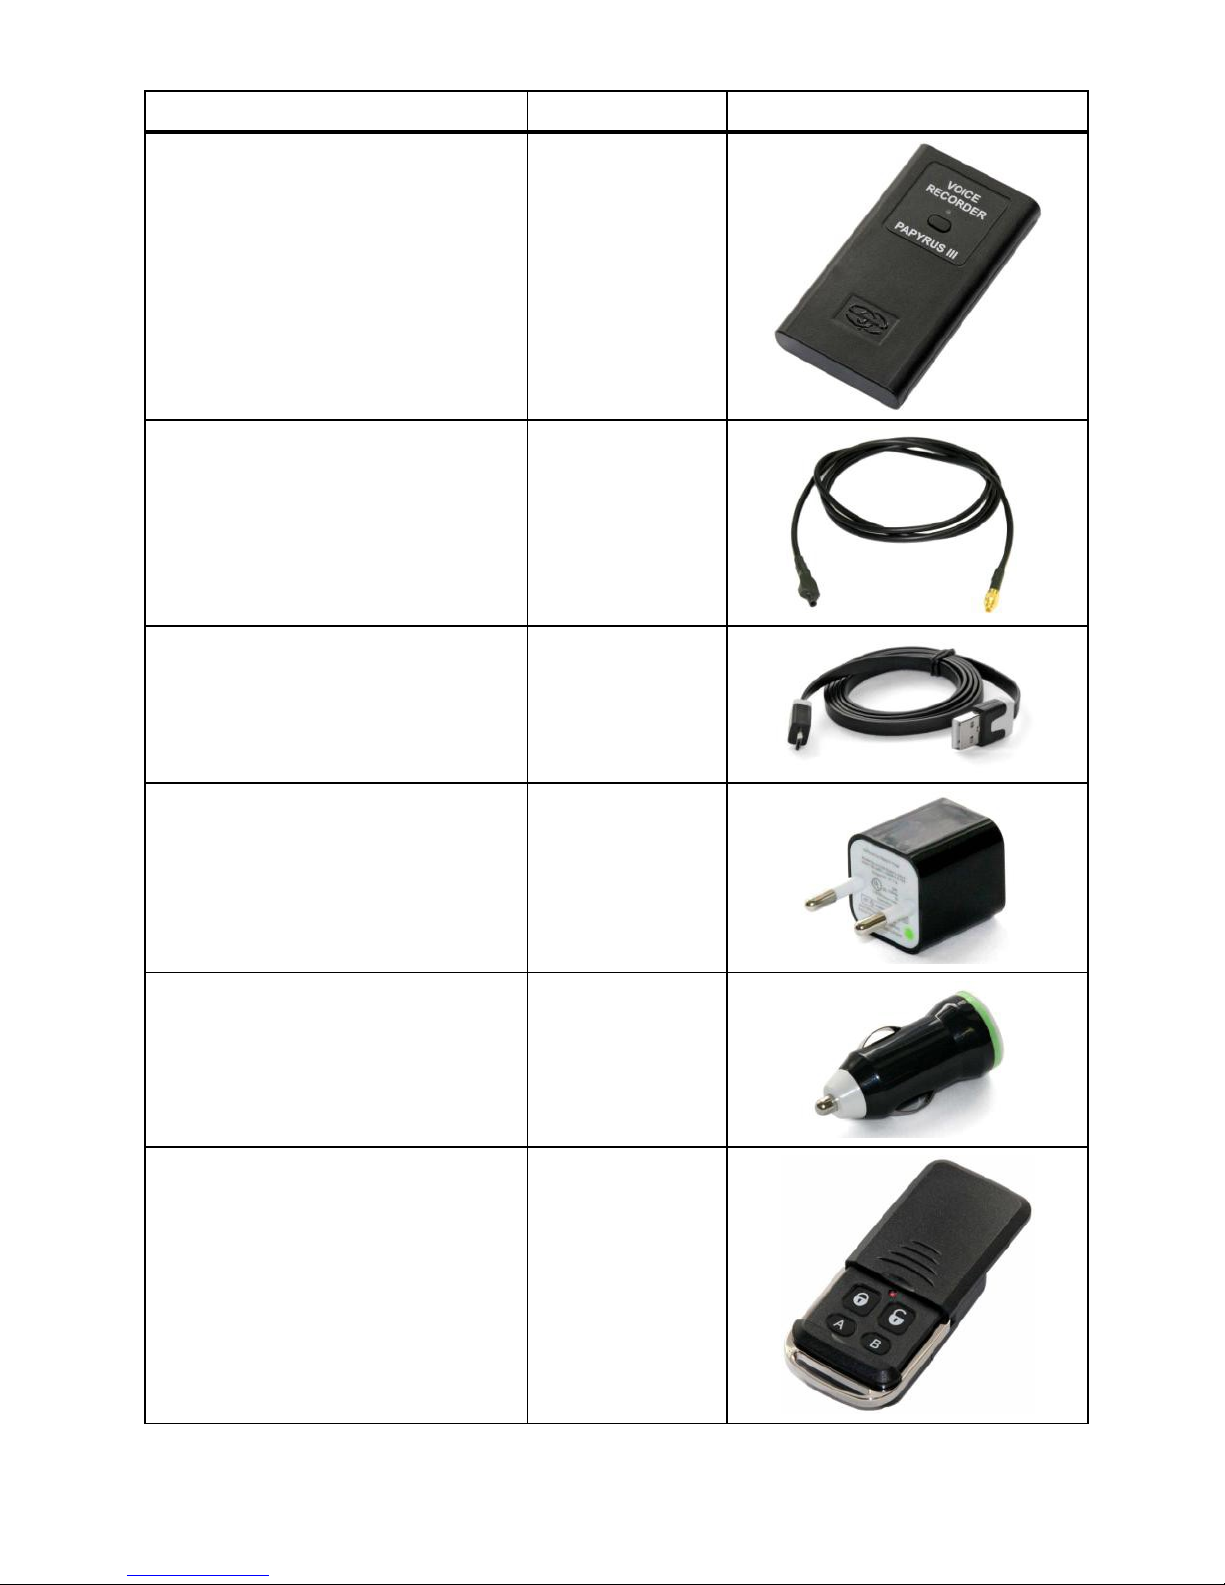
Table 2
Name
Number
Appearance
Digital voice recorder
«Papyrus-III»
1 pc.
External microphone
1 pc.
USB - micro USB cable
1 pc.
Charger (220 V)
1 pc.
Vehicle charger 12 V
1 pc.
Remote control unit
1 pc.
6
Page 7
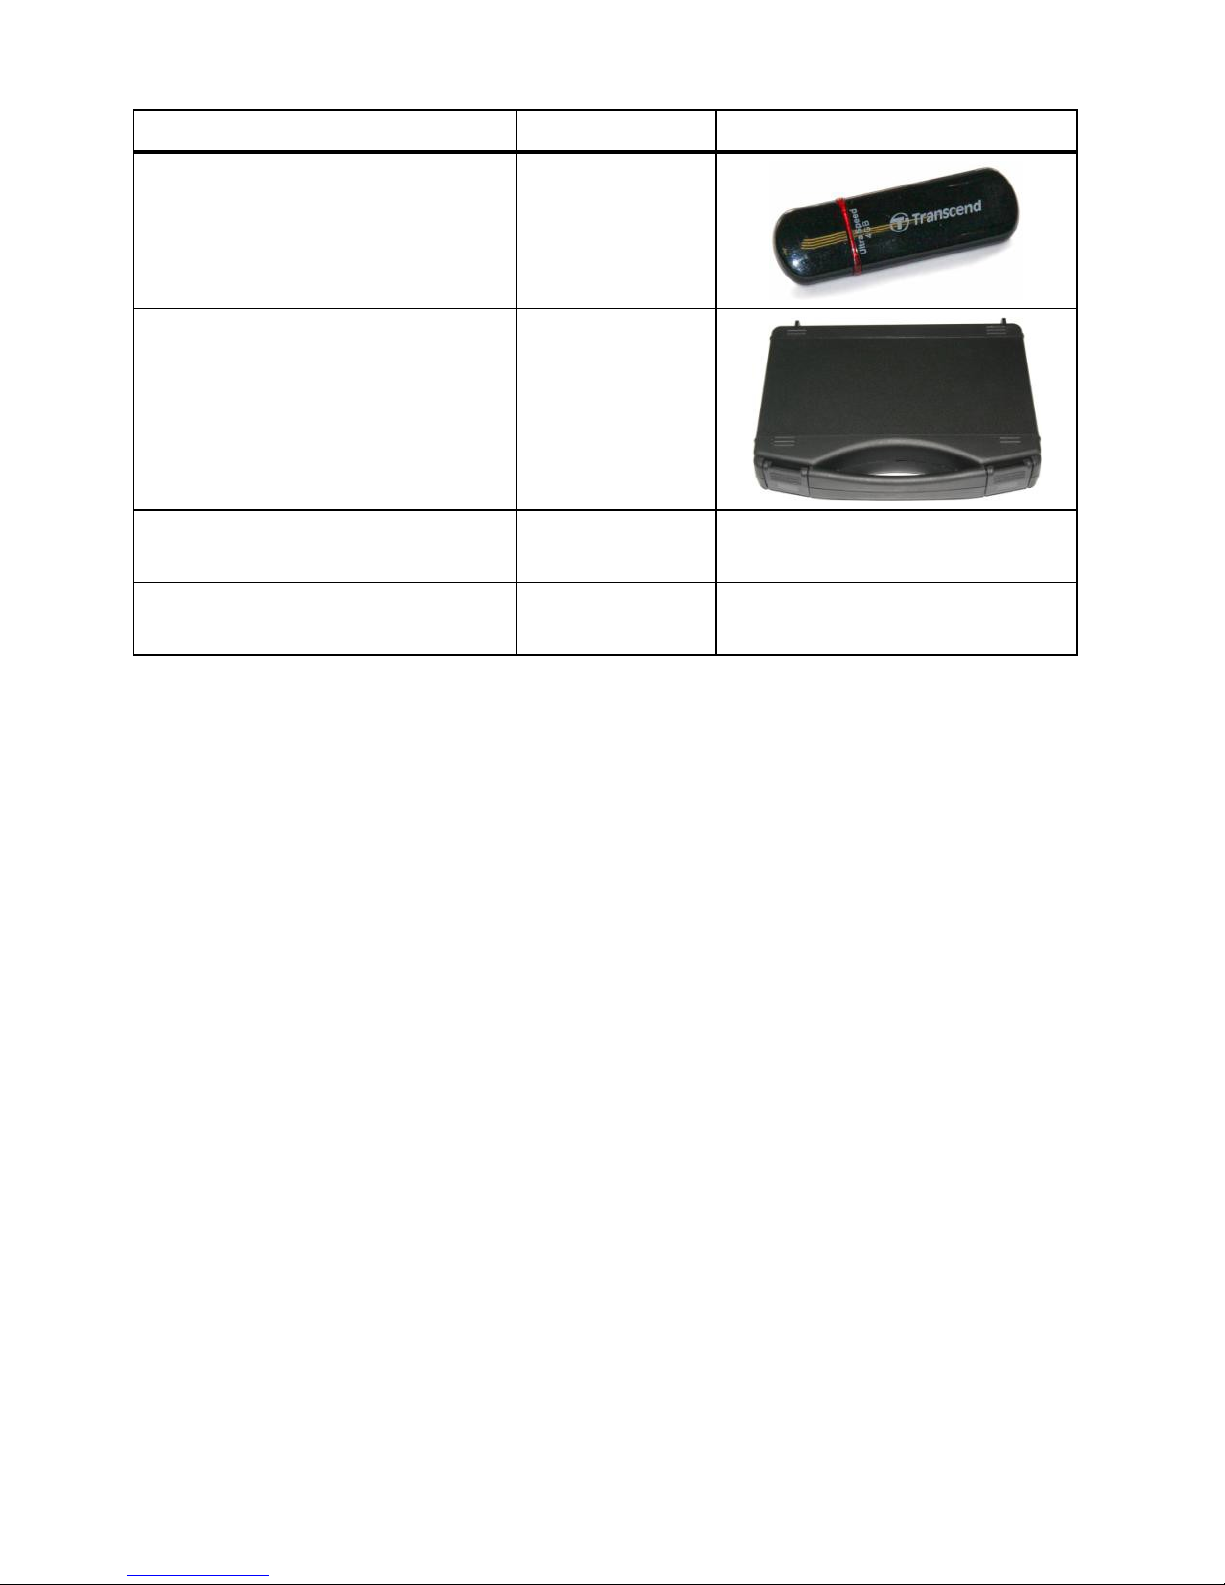
Table 2 continued
Name
Number
Appearance
USB flash drive with
software («Papyrus Tool»)
1 pc.
Case with compartments
1 pc.
User manual
1 pc.
-
Certificate
1 pc.
-
1.4 Appearance and functions
1.4.1 The device has compact and user-friendly design.
The device has exceptionally user-friendly interface and does not
require any prior training before use. Only basic skills of working with
programs in Windows operation system are required.
Audio information is recorded into the internal memory, making
the device «invisible» for kinematic voice recorder detectors.
The voice recording in noisy environment is possible due to high
dynamic range of recorded signals.
1.4.2 A special software «Papyrus Tool» must be installed to the
computer before using the device (see part 2.2 of UM). The flash drive
with the software is included in the package (see Table 2).
When the device is connected to the computer (see part 2.3 of UM),
the user may change settings of recording quality, voice activation
7
Page 8
settings (recording is automatically started when a preset acoustic level is
exceeded – Voice Activation System «VOX»), settings for protection
from unauthorized access to information and enabling/disabling of RC
function.
The audio recordings can be listened to only after the device has
been connected to the computer and files with extension «wav» have
been downloaded from the internal memory of the device to the hard
drive of the computer.
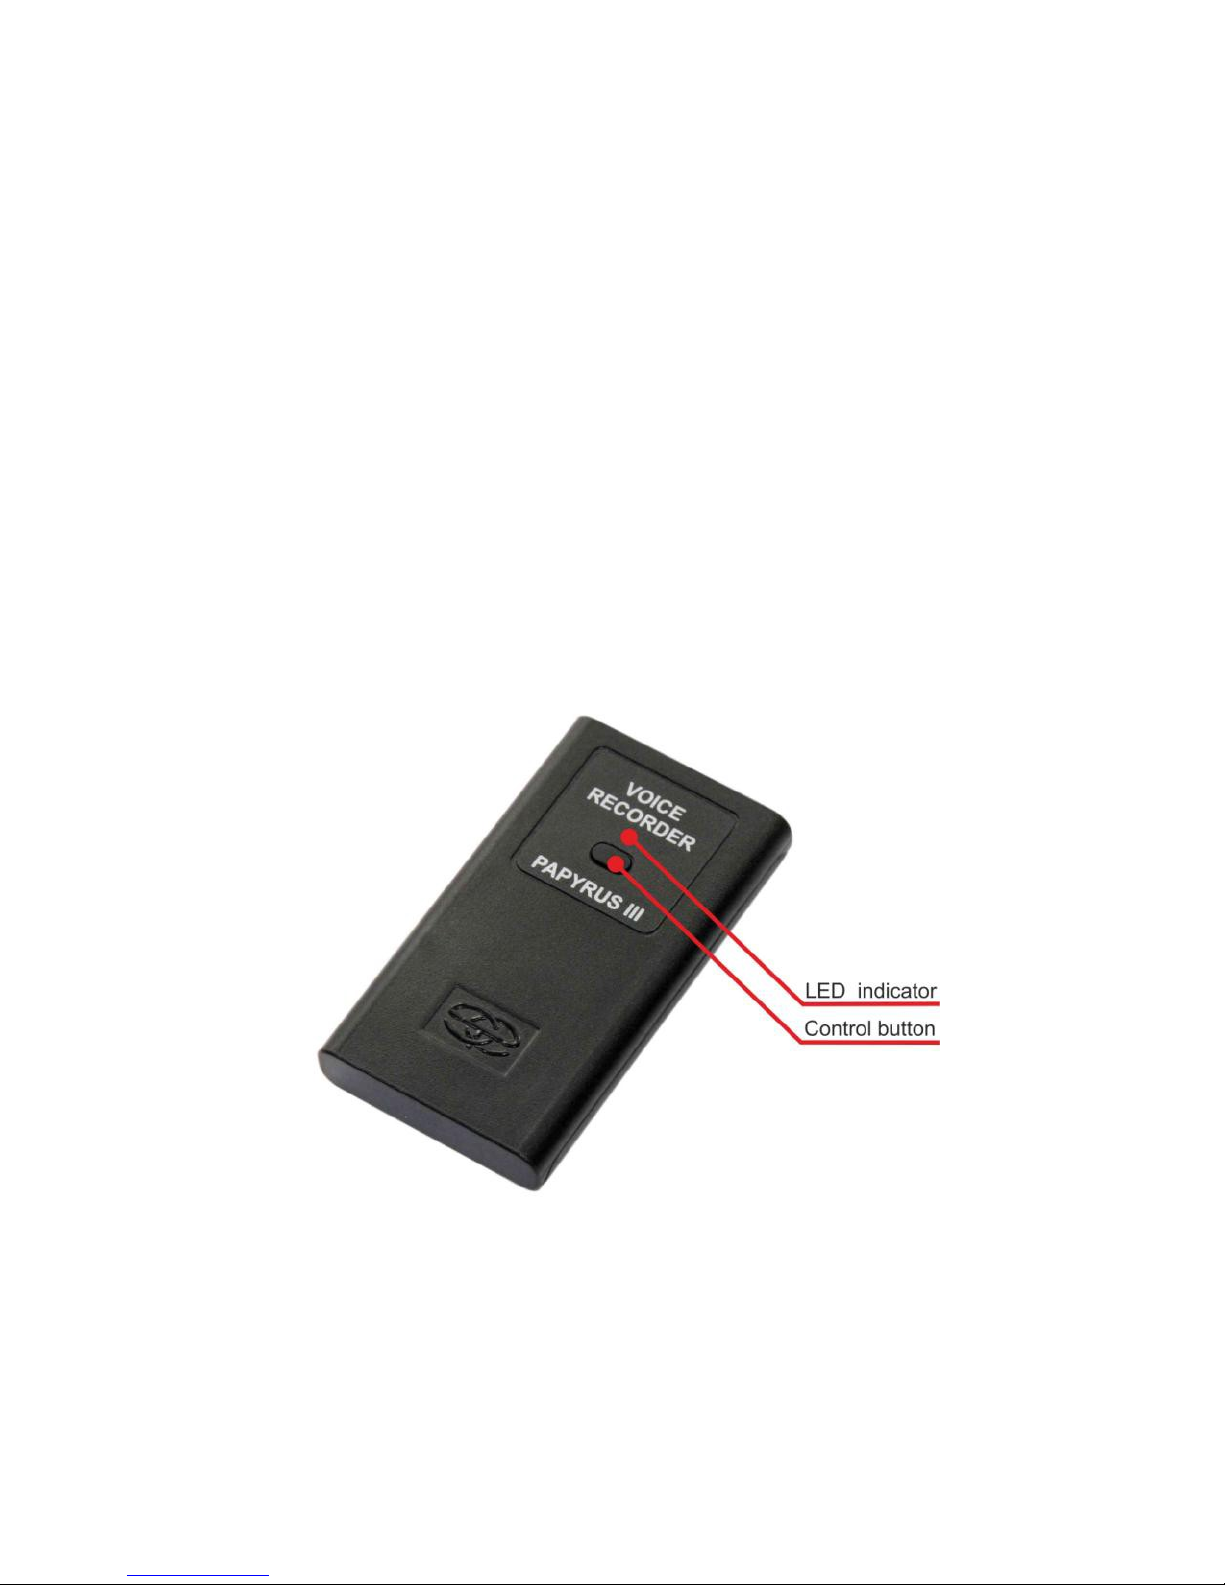
1.4.3 The device has built-in microphone, external microphone
connection port, LED indicator, device operation control button,
recording control slide switch, and micro USB port.
The appearance of the device is presented on Pictures 1 and 2.
Picture 1 – The appearance of the device (1)
8
Page 9
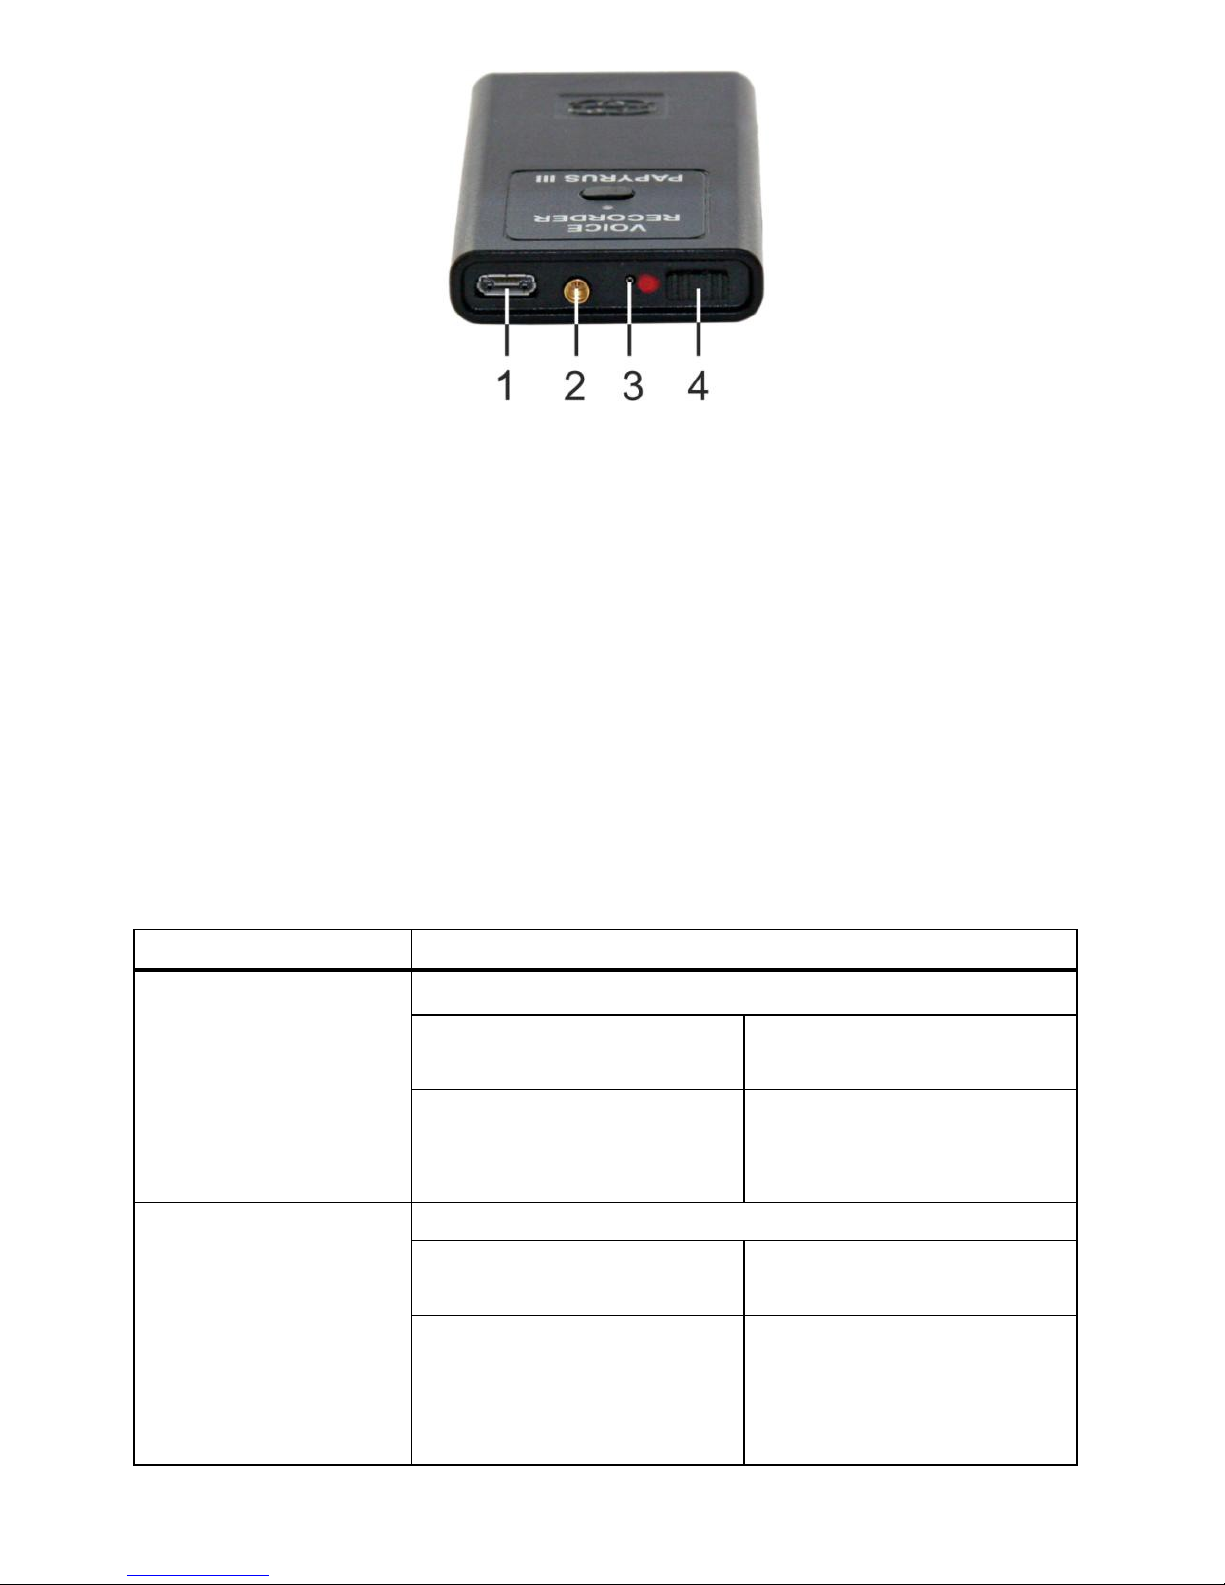
Picture 2 – The appearance of the device (2)
The control button and LED indicator on the top panel of the
device are used to control the operation mode of the device (Picture 1).
The upper side panel of the device contains micro USB port (1),
external microphone connection port (2), built-in microphone (3) and
recording slide switch (4) (Picture 2).
The various operation modes of the device and the corresponding
colors of the LED indicator (Picture 1) are given in Table 3.
Table 3
The device mode
LED indicator signal and color
The device is not
connected to
computer/charger
When the control button is pressed (Pic. 1)
Blinking: recording is
in progress
Shining: recording is
stopped
Green color: Battery is
100% full
Red color:
Battery is 25% or less
level
The device is
connected to
computer/charger
When the control button is not pressed (Pic. 1)
Blinking: recording is
in progress
Shining: recording is
stopped
Green color: Battery is
100% full
Red color:
Battery is being
charged from USB port
9
Page 10

1.4.4 The remote control unit, included in the package, allows to
start/stop of the recording, and also to check the device status.
ATTENTION! An on / off recording by remote control from a
digital voice recorder «Papyrus-III TITAN» is possible only when
connecting a remote microphone.
ATTENTION! Before attempting to use remote control, unit
check if remote control function is activated in the device (see part 2.6).
The appearance of the remote control unit is given on Picture 3.
Picture 3 – Remote control Unit
There are four control buttons and the status LED indicator on the
front panel under the movable protection cover. Buttons functions of the
remote control are listed in Table 4. The remote control vibrates in
response to commands.
10
Page 11

Table 4
Button
Purpose
Vibration response
Stop recording
2 long vibrations
Start recording
1 long vibration
Operation mode control
(recording start/stop)
1 or 2 long vibrations
Battery charge level control
Short vibrations (3, 6 or
9), corresponding to the
charge level of battery,
from empty to full
The full list of the remote control vibration signals is given in
Table 6.
1.5 Operating Instructions
1.5.1 ATTENTION! If an incorrect PIN code is entered three
times in a row, all audio files will be automatically deleted from the
device memory.
1.5.2 It is strongly prohibited to disassemble the device to avoid its
break down.
1.5.3 Protect the device from mechanical damage, moisture,
temperature difference, direct sunlight.
1.5.4 Do not use physical force while disconnecting the USB-cable
from the device.
1.5.5 Do not use physical force while connecting/disconnecting the
external microphone to/from the device.
1.5.6 Avoid overheating of the device (over 80° C) – this may
cause battery inflammation or explosion.
11
Page 12

1.5.7 The product is designed for use in normal environmental
conditions (temperature range from 0oC to +40oC; relative air humidity
from 30 to 80 %; atmospheric pressure from 645 to 795 mm mercury).
1.5.8 The built-in battery should be charged periodically while
the Product is in use. The battery should be charged at least once for half
a year even if the Product was not in use.
1.6 Computer requirements
1.6.1 The computer with the equal or higher parameters must be
used with the device:
• operational al system: Windows XP SP3, Windows Vista,
Windows 7;
• free space on the hard drive of not less than 16 Gb;
• port USB 2.0 (1.1);
• audio card.
12
Page 13

2 PREPARATION PROCEDURES AND OPERATION
ORDER
2.1 Battery Charging
2.1.1 The internal battery of the device can either be charged via
the USB port of the computer or the mains line of 220 V using charger
included in the set or by use of vehicle electrical network (12V). The
color of battery LED indicator (Picture 1) changes from red (battery is
empty) to green (battery is charged) throughout the charging process. The
total charging time is no longer than five hours.
2.1.2 For built-in battery charging from USB port the PC connect
the device as given in part 2.3 of UM.
2.1.3 For built-in battery charging from 220 V mains line connect
the micro USB - USB cable from the set to the micro -USB port of the
device (point 1 on Picture 2) and to the USB port of the Charger.
2.1.4 For built-in battery charging from a vehicle electrical network
connect the micro USB - USB cable from the set to the micro-USB port
of the device (feature 1 on Picture 2) and to the USB port of the Vehicle
charger 12 V connected to the vehicle electrical network.
2.2 Software installation
2.2.1 Place USB flash drive with software («Papyrus Tool») from
the package (Table 2) to USB port of the PC. Launch «setup.exe» file
located on the USB flash drive for «Papyrus Tooll» software installation.
ATTENTION! Disconnect the device from the computer before
«Papyrus Tool» installation.
13
Page 14
ATTENTION! The «Papyrus Tool» software must be installed
with administrator rights.
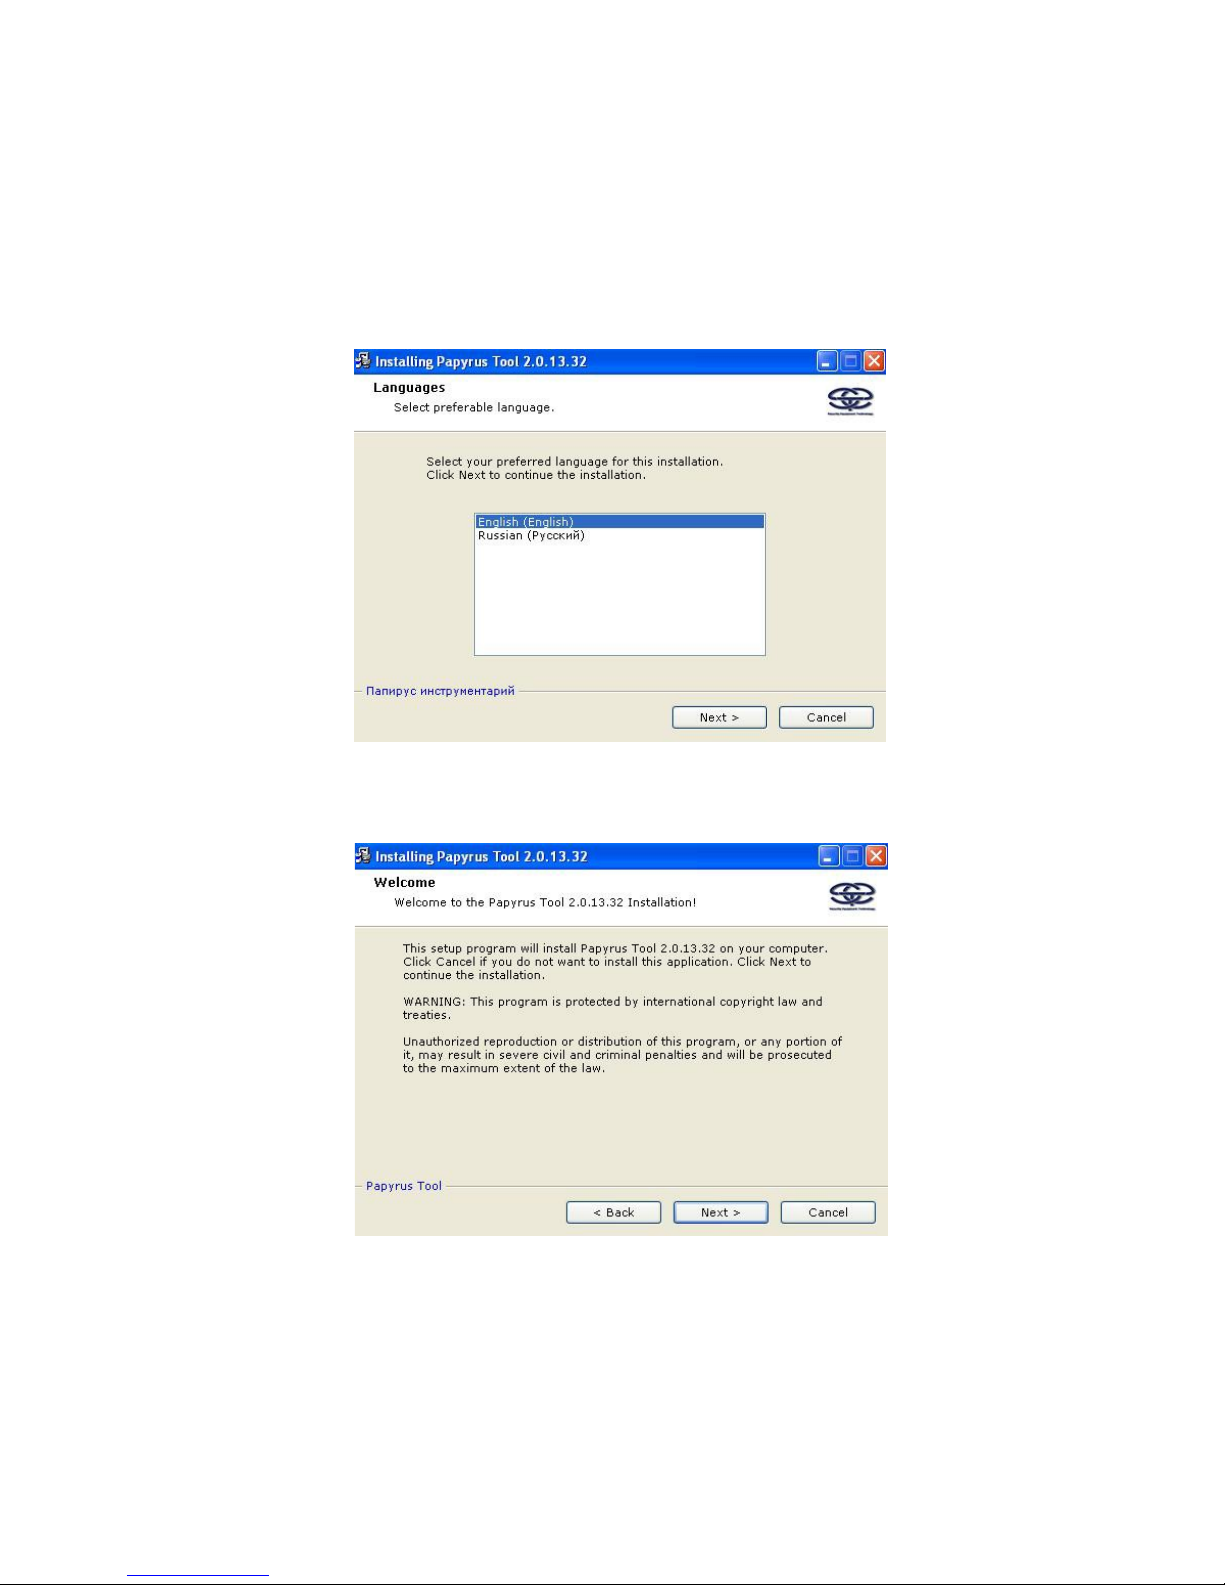
2.2.2 Select the language of the software interface from the
language selection window, and follow the directions to install software
(Pictures 4 – 7).
Picture 4
Picture 5
14
Page 15

Picture 6
Picture 7
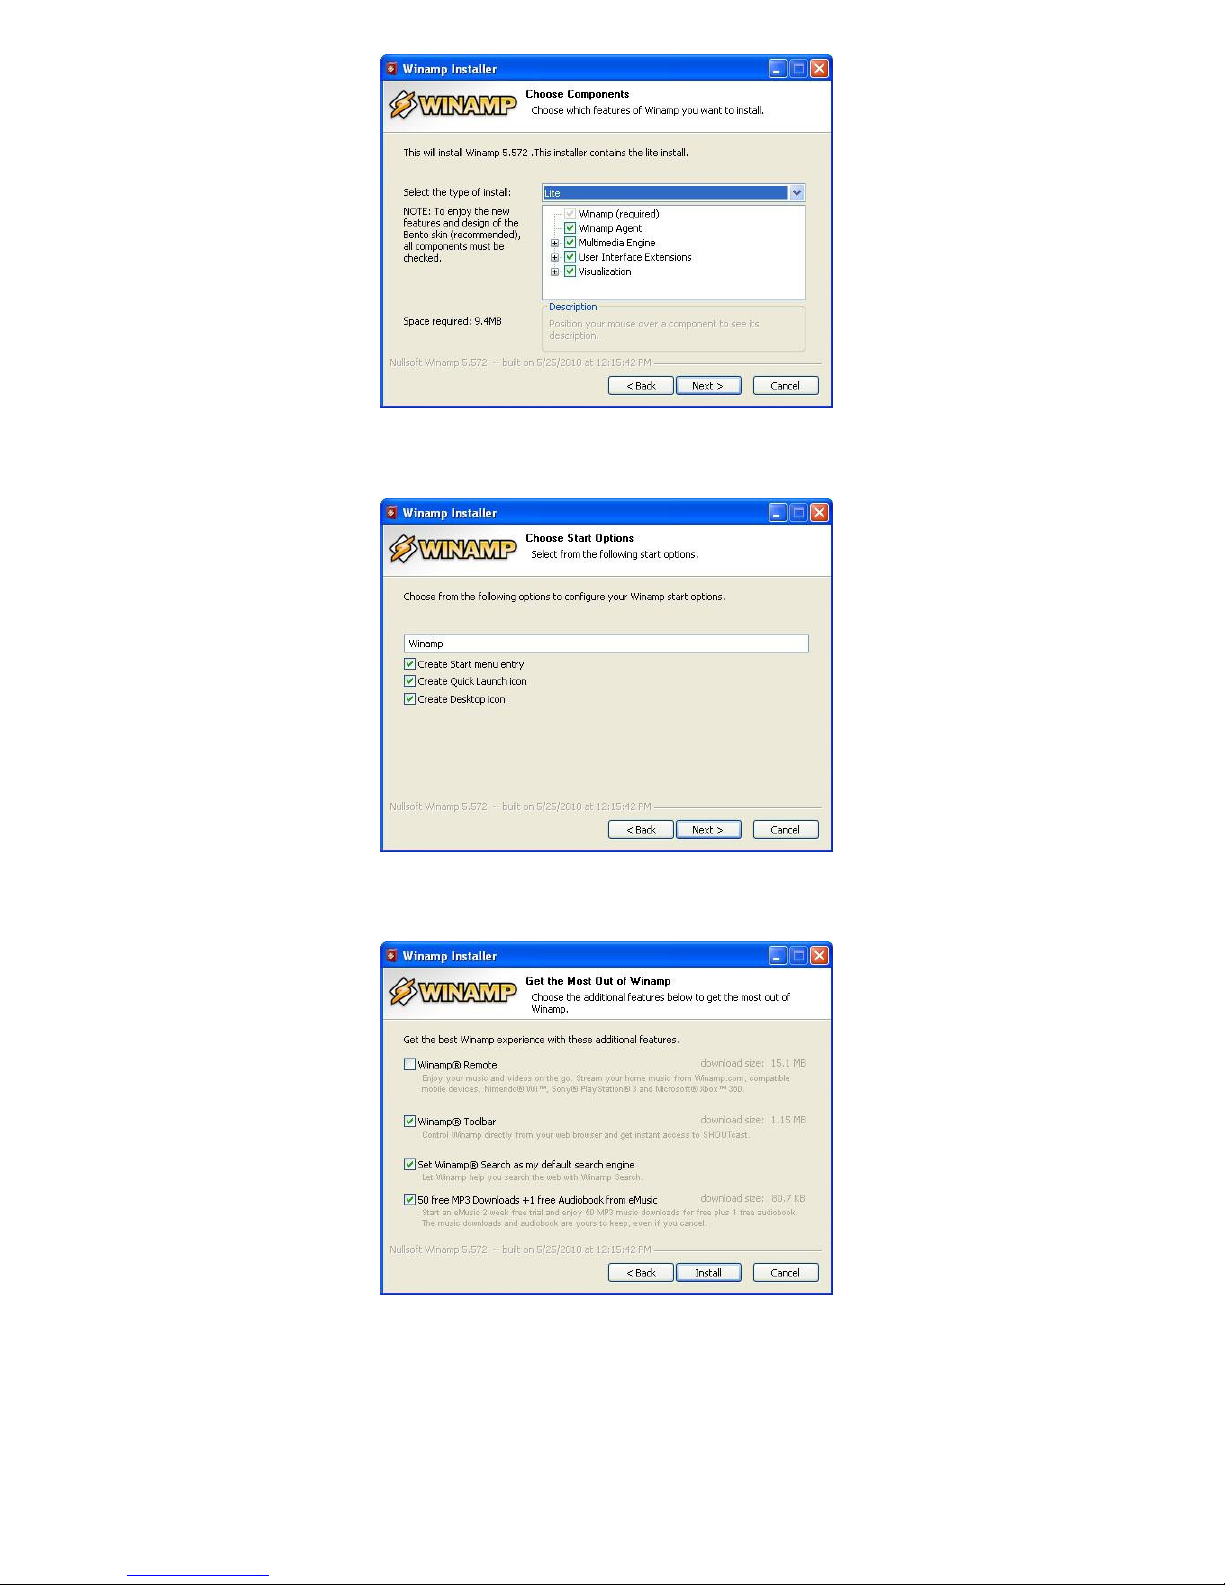
2.2.3 The programs «WinAMP» and «Adobe Reader» are
necessory for the «Papyrus Tool» software to function correctly. The
instalation of these programs will be suggested automatically by the
installation wizard.
If these two programs have been installed previously, the
installation process of the «Papyrus Tool» software should be finished.
Follow the installation instructions to install «WinAMP» and
«Adobe Reader» programs (Pictures 8 – 17).
15
Page 16

Picture 8
Picture 9
Picture 10
16
Page 17
Picture 11
Picture 12
Picture 13
17
Page 18

Picture 14
Picture 15
Picture 16
18
Page 19

Picture 17
2.3 Connection to the PC
2.3.1 Connect the micro USB - USB cable from the set to the
micro USB port of the device (feature 1 on Picture 2) and to the USB
port of the computer.
2.4 Launch the «Papyrus Tool» software
2.4.1 Turn on the power of the computer and wait until the
operation system is loaded.
2.4.2 Connect the device to the PC (following instructions from
part 2.3 of this manual).
ATTENTION! During the first connection of the device to the
computer wait for the message from the computer that the voice
recorder is detected. If the message does not appear, wait several
minutes.
2.4.3 Press the «Start» button and select «Programs →
Papyrus Tool → Papyrus Tool».
19
Page 20

2.5 Description of the «Papyrus Tool» software
2.5.1 Software window
2.5.1.1 The appearance of the software window is shown on the
Picture 18.
Picture 18 - Appearance of the «Papyrus Tool»
software window
2.5.2 Control panel
2.5.2.1 The control buttons of the device are located on the
control panel (Picture 19):
• «Record» – begin recording;
• «Stop» – stop recording;
• «Download» – download information to the computer;
• « Delete» – delete from the device memory.
Picture 19 - Control panel
20
Page 21

2.5.3 Status bar
2.5.4.1 The operation mode of the device is displayed on the
status bar (Picture 20):
Picture 20 - Status bar
1) «N/L» – recording mode indicator:
• «N» – «Normal» mode: recording stops after the memory of
the device is full;
• «L» – «Continuous loop» mode: recording continues in cycle
until timer stops the recording or until the battery runs out.
2) «V/_» - «VOX» mode indicator:
• «V»- the device is in «VOX» mode;
• «_» - «VOX» mode is disabled.
3) R:<h>.<min>.<sec> – duration of recorded audio information.
4) F:<h>.<min>.<sec> – remaining time available for the
recording.
5) «Ready/Busy» – status indicator of the device:
• «Ready» - the device is ready for use;
• «Busy» - the device is busy.
21
Page 22

6) «RECORD/PAUSE/STOP/READ/DELETE/WAIT/ERROR/FORMAT»
- recording process indicator:
• «RECORD» - recording is ongoing;
• «PAUSE» - recording is paused during «VOX» mode;
• «STOP» - recording is stopped;
• «READ» - recorded data downloading;
• «DELETE» - deleting of the recorded data;
• «WAIT» - settings updating;
• «ERROR» - error;
• «FORMAT» - hard drive formatting.
7) «Charging../Charged» – battery charging process indicator:
• «Charging..» - battery is charging;
• «Charged» - battery is fully charged.
2.5.4 Main menu of the software
2.5.4.1 The main menu of the software contains the following
instructions:
• to open and play back audio files («File» tab) (Picture 21),
downloaded to the hard drive of computer using «Download» button
(Picture 18);
Picture 21 «File» tab
22
Page 23

• to control the device settings («Settings» tab)
(Picture 22);
Picture 22 – «Settings» tab
• to open the help windows for program (Picture 23, item 1) and
device (Picture 23, item 2) - «About» tab. The location of the «About»
tab is shown on Picture 23.
Picture 23 – Location of «About» tab
23
Page 24

2.6 The recording settings
2.6.1 Choose the «Audio settings» from the «Settings» tab in the
main menu to setup the recording settings. The window «Audio
parameters» appears when the «Audio settings» option is selected. The
appearance of the window «Audio parameters» is shown on Picture 24.
Picture 24 - Window «Audio parameters»
2.6.2 The description of parameters from the «Audio parameters»
window is given in Table 5.
24
Page 25

Table 5
Console Indicator
Function
Meaning
Recording
Normal
Recording mode
selection
Recording stops when the memory is
full
Continuous
loop
«Cyclic» recording mode – when the
memory is full, recording continues by
overwriting the earlier recorded
fragments
Samplerate
16 KSa
Audio sampling
rate selection
16 KHz
32 KSa
32 KHz
Voice
activation
system
Enable
Voice activation
function
«VOX» is an indicator of voice
activation function
Level
(1-16)
Level of the sound when the device
activates recording (from 16 (low
sensitivity) to 1 (high sensitivity)
standard units)
Delay
(1-255)
Time delay in seconds for recording
stoppage after the latest sound level
threshold crossing
Lock the
recording
switch when
the timer is
activated
V
Locks recording
button
Lock the recording switch if at least one
of the preset recording timers is
activated.
Remote
control
enabled
V
Remote control
activation
Enables remote control function
Save Closes «Audio parameters» windows and saves chosen parameters
Cancel Closes «Audio parameters» window without saving of chosen parameters
25
Page 26

2.7 Setting up clock and timer
2.7.1 Select «Time settings» from the «Settings» tab from the main
menu to set up clock and timer. The appearance of the window «Time
settings» is shown on Picture 25.
Picture 25 –«Time settings» window
2.7.2 Press the «Set system time» button to set date and time from
the computer. After pressing the button the field of date and time settings
in the «Time settings» window (Picture 26) will have the same data as
the program running computer.
Picture 26
26
Page 27

2.7.3 The program provides setting of up to eight independent
timers (Picture 26).
To set up a timer:
1) Choose timer with a tick (Picture 27).
2) Choose date and time for the beginning of the recording.
(Picture 28).
3) Choose date and time when recording should be stopped
(Picture 29).
4) When «Every Week» is ticked (Picture 30) the recording will
be turned on once a week (starting from the set up date) at the time preset
on the timer. Recording will be turned off once a week (starting from set
up date) at the time preset on the timer.
5) When «Every Day» is ticked (Picture 30) the recording will be
turned on every day once a day (starting from the set up date) at the time
preset on the timer. Recording will be turned off every day once a day
(starting from the set up date)at the time preset on the stop recording
timer.
ATTENTION! If «Every Week» and «Every Day» are not ticked
the recording will be started and stopped at the preset date and time.
ATTENTION! If «Every Week»/»Every Day» is ticked the date
and time of the timer will be automatically changed to one day/week
ahead, after recording is complete.
6) Save selected settings by pushing «Save» button, in case the
settings are selected noncorrectly push «Cancel» button.
27
Page 28

Picture 27
Picture 28
28
Page 29

Picture 29
Picture 30
29
Page 30

2.8 Setting up a PIN-code
2.8.1 Set up a PIN-code to protect the data, saved on the recorder,
from unauthorized downloading. The window with the PIN-code request
will appear when the downloading of audio files from protected device is
attempted.
ATTENTION! If a wrong PIN-code is entered three times in a
row, all audio files will be automatically deleted from the device
memory.
2.8.2 Setting up a PIN-code
1) Select «Pin code setting» from the «Settings» tab from the
main menu. (Picture 31).
Picture 31
2) Enter a new four-digit PIN-code in the field «Enter four digits
or 0000 to clear PIN» in the «Enter new PIN code» window (Picture 32),
and confirm by pressing the «OK» button.
30
Page 31

Picture 32
At this stage it is possible to set option to delete all data stored in
the device memory without the future possibility of recovery, when
wrong PIN-code is entered three times. The option can be selected by
ticking the «Destroy memory» field (Picture 33). Press «Yes» button at
the pop-up window «Warning» (Picture 34) to confirm your choice.
Picture 33
Picture 34
31
Page 32

3) Confirm PIN-code by reentering of earlier entered PIN-code’s
four digits in the «Enter four digits or 0000 to clear PIN» field (Figure
35), and press «OK» button to finish. If the PIN-code is wrongly keyed in
during PIN-code confirmation, software will prompt to select a new PINcode and confirm it.
Picture 35
4) PIN-code confirmation window will appear (Picture 36). Press
«OK» button to continve.
Picture 36
2.8.3 PIN-code changing
1) Select «Pin code setting» from the «Settings» tab from the main
menu (Picture 37).
32
Page 33

Picture 37
2) Enter old four-digit PIN-code in the field «Enter four digits or
0000 to clear PIN» of the «Enter old PIN code» window (Picture 38) and
confirm by pressing the «OK» button.
Picture 38
3) Enter a new PIN-code (Picture 39) and confirm by pressing
«OK» button.
33
Page 34

Picture 39
4) Confirm new PIN-code by entering 4 digits of new PIN-code in
the field «Enter four digits or 0000 to clear PIN» (Picture 40), confirm by
pressing «OK» button to finish the procedure.
Picture 40
ATTENTION! In case the previous PIN-code (Picture 38) is
noncorrectly entered the program will notice a wrong PIN-code entering
(Picture 41). If the previous PIN-code is noncorrectly entered 3 times in
a row all the audio files will be deleted from the device memory.
Picture 41
34
Page 35

5) If the PIN-code was set up correctly information window will
pop up (Picture 42). To continue press «OK».
Picture 42
2.8.4 PIN-code cancellation
1) Select «PIN code settings» from the «Settings» tab in the main
menu (Picture 43).
Picture 43
2) Enter old four digit PIN-code in «Enter four digits or 0000 to
clear PIN» in the pop up window «Enter old PIN code» (Picture 44),
then press «ОК» button to confirm.
35
Page 36

Picture 44
3) Key in four zeros in the «Enter four digits or 0000 to clear PIN»
field (window «Enter new PIN code») (Picture 45), then press «ОK»
button to confirm.
Picture 45
4) To confirm PIN-code enter four zeros in the «Enter four digits
or 0000 to clear PIN» field (window «Confirm PIN code») (Picture 46),
to confirm press «ОK» to finish operation.
36
Page 37

Picture 46
ATTENTION! In case the previous PIN-code (Picture 44) is
noncorrectly entered the program will notice a wrong PIN-code entering
(Picture 47). If the previous PIN-code is noncorrectly entered 3 times in
a row all the audio files will be deleted from the device memory.
Picture 47
5) Information window will pop up to confirm clearing of the PIN-
code (Picture 48). To continue press «OK».
Picture 48
37
Page 38

2.9 Memory testing
2.9.1 ATTENTION! Preventing the recorded data erase one
should download all the recorded files to the computer hard drive
before starting of device memory formatting procedure, otherwise all
the data will be erased.
2.9.2 Select «Format memory» from the «Settings» tab from the
main menu to test the device memory. The window with warning about
the data loss will appear (Picture 49).
Picture 49
Press «Yes» button to confirm or «Cancel» to cancel.
After memory testing (Picture 50) information window about faulty
sectors of built-in memory will appear. Number of faulty sectors may
vary from 0 to 32.
ATTENTION! This information is significant for manufacturer
only. Faulty sectors won’t affect the quality of the device performance.
38
Page 39

Picture 50
2.10 Downloading and playback of audio files
2.10.1 In order to download audio files from the device to the PC:
1) Connect the device to the computer (see part 2.3).
2) Launch the «Papyrus Tool» software and press the “Download”
button in the main window (Picture 51).
Picture 51
3) The «Download recordings» window will appear on screen
(Picture 52).
The «All» button is for all information (all files) downloading, the
«Select» button is for downloading of files selected by the user.
39
Page 40

Picture 52
4) Pressing the «All» button will launch the «Select Folder to
Save» window, where folder for saving files can be selected (Picture 53).
Picture 53
5) It is possible to save files either in the default folder located at
the address: C:\Username\Documents\Papyrus («Username» is the name
of particular user of the PC) or in any other folder:
• press «OK» button to save files in the default folder;
• press «Browse» to save files in the existing folder, select the
desired folder in the appeared window and press «OK» button (Picture
54);
Picture 54 – «Folder selection» window
40
Page 41

• press «Create» to make a new folder for saving files.
Information window will pop up (Picture 55). To confirm creation of the
folder press «OK».
Picture 55
After confirmation «Select Folder to Save» window (Picture 56)
with folder address will appear. To save files in the new folder press
«OK».
Picture 56
6) Press «Select» button on the «Download recordings» window to
download selected files (Picture 51).
7) After scanning, the «Records List» window displaying list of
recordings will appear and the required files can be selected by putting
ticks in the boxes beside them (Picture 57).
8) Press «Deselect All» button to cancel selection of all selected
files.
9) To exclude some files from downloading, select them and press
41
Page 42

«Inverse Selection» button – unnecessary files will be excluded from the
list.
Picture 57
10) Press «Download Selected» button.
11) Select the folder to download files (see part 2.10.1, point 4).
12) If the recorder is protected with PIN-code (see part 2.8), it is
necessary to enter PIN-code before downloading the information.
ATTENTION! If a wrong PIN-code is entered three times, all
audio files will be automatically deleted from the device memory.
2.10.2 Choose tab "File" of the main menu and select tab
«Play» (Picture 58) for listening to the downloaded files. The default
application for playing files is Nullsoft company's «WinAmp» player
distributed for free.
Also «Papyrus Tool» program establishes files within indicated
folder according to the start time of each record (Picture 59) . One can
listen to these files by use of any Windows media application.
42
Page 43

Picture 58
Figure 59 – «Papyrus» folder
43
Page 44

2.11 Deleting of the recorded data
2.11.1 To delete recorded audio files from the device, it is
necessary to:
1) Connect the device to the PC (see part 2.3).
2) Run «Papyrus Tool» program according to part 2.4.
3) Press «Delete» button in the window of the «Papyrus Tool»
program (Picture 60) to delete all files from the memory of the device.
Picture 60
2.12 Restore of deleted data
2.12.1 To restore the deleted data, select «Settings» tab from the
main menu and press «Disclose memory» (Picture 61). Recorded data
will become available for downloading to PC.
ATTENTION! If the «Destroy memory» option was activated
during set up of the PIN-code (see part 2.9.2 point 2) and the data was
deleted because PIN-code was keyed in incorrectly, the data cannot be
restored.
44
Page 45

Picture 61
2.13 Setting up remote control Unit
2.13.1 Install batteries in the remote control Unit by taking off the
back panel of the device (Picture 62).
Picture 62 – Remote control Unit with opened
battery compartment
ATTENTION! Follow the polarity when installing batteries.
ATTENTION! Only silver-zinc 1.5 V batteries should be used.
ATTENTION! Do NOT use expired batteries.
2.13.2 After batteries have been installed the remote control Unit is
45
Page 46

ready to operate.
2.14 Remote control operation
2.14.1 ATTENTION! Before attempting to use remote control,
check if remote control function is activated in the device (see part 2.6).
2.14.2 ATTENTION! Avoid using several devices with activated
remote control option simultaneously. It can lead to faulty operation of
the devices.
2.14.3 ATTENTION! Do not forget to switch off remote control
function after finishing of the recording. It can help you to extend
battery life time in the standby mode and avoid situation described
above.
2.14.4 To operate the remote control press one of four buttons on
it. Button functions are described in Table 6.
2.14.5 After pressing remote control button red LED indicator will
blink to confirm the data exchange between the remote control and the
device (Picture 63), to confirm data exchange the remote control Unit
will vibrate. Different vibration signals are described in Table 6.
Picture 63
46
Page 47

Table 6
Button/purpose
Vibration response
Voice recorder mode
Any button
No signal
Device is out of the remote control’s
operating range or remote control option is
disabled
“start recording”
1 long
Recording began or in progress
3 long
Error*
“stop recording”
2 long
Recording is stopped or is not in progress
“Operation mode
control (recording
start/stop)”
1 long
Recording is in progress
2 long
Recording is not in progress
“Battery charge level
control”
1 short
Battery is empty
3 short
Battery charge level is around 10%
6 short
Battery charge level is around 30%
9 short
Battery is fully charged
*In case of an error occurrence it is recommended to check if similar devices with activated RC function are
located in the operating range. If there are no similar devices in the RC operating range one should shorten
the distance between the voice recorder and the RC Unit. In case of recurring error it is recommended to apply
to the manufacturer.
2.15 Using the device
2.15.1 The control button and the LED indicator (Picture 64) are
used to control the device when it is not connected to the PC.
The signals of the LED indicator during various operation modes of
the device are listed in Table 7.
47
Page 48

Table 7
Picture 64
The device mode
LED indicator signal and color
The device is not
connected to
computer/charger
When the control button is pressed (Pic. 64)
Blinking: recording is
in progress
Shining: recording is
stopped
Green color: Battery is
100% full
Red color:
Battery is 25% or less
level
The device is
connected to
computer/charger
When the control button is not pressed (Pic. 64)
Blinking: recording is
in progress
Shining: recording is
stopped
Green color: Battery is
100% full
Red color:
Battery is being
charged from USB port
2.15.2 To start the recording, move the recording switch towards
the microphone. To stop the recording, move the recording switch away
from the microphone. The location of the recording switch and the
microphone are shown on Picture 65.
48
Page 49

1 – micro USB port
2 – external microphone connection port
3 – microphone
4 – recording switch
Picture 65
2.15.3 Connect the external microphone to the external
microphone connection port (Picture 66) of the device to record using the
external microphone. The external microphone connection port is located
on the top panel of the device (point 2 on Picture 65).
The switch from the built-in microphone to the external
microphone is automatic.
Picture 66
49
Page 50

3 TROUBLESHOOTING
3.1 The list of possible malfunctions of the device, their reasons
and possible way to repair them are given in Table 8. Please contact the
manufacturer if the problem cannot be resolved.
Table 8
Malfunction Possible reason Way to remove
The LED indicator is
shining continuously
when the recording is
started
The LED indicator is shining
in red color – battery is
empty
Charge the battery
(see part 2.1)
In the “Record Normal”
mode the memory of the
voice recorder is full
Empty the device
memory
(see part 2.11)
In the voice activated
recording mode, the level of
signal is lower than the
recording threshold
Change the settings of
the Voice Activation
System “VOX”
(see part 2.6)
The RC Unit LED
indicator is not shining
The batteries are low or not
installed
Change/install RC Unit
battery
(see article 2.13.1)
The remote control
produces 3 long vibration
signals when the
recording is
started/stopped (“Error”)
RC function is not activated
Activate RC function for
the device (see article
2.6)
RC is out of operation zone
Shorten the distance
between the device and
the RC Unit
(see article 1.1.3)
Similar devices with
activated RC function are
located within the RC Unit
operating range
Disable the RC function
of the similar devices
3.2 The current consumption in the standby mode (see Table 1)
must be considered when the voice activated recording function “VOX”
(see part 2.7) is used. An example of estimation of the operation time of
the voice recorder in the voice activated recording mode is given below:
50
Page 51

Standby time of voice activated recording: 1000 hours;
Current consumption in standby voice activated recording mode:
350 µA;
Capacity of fully charged battery: 1320 mA·h;
Current consumption in recording mode: 6 mА;
Maximum recording time with fully charged battery: 160 hours;
Remaining recording time after the voice activation: (1320-
(1000*0,35))/6 = 161 hours.
51
Page 52

4 TECHNICAL SERVICE
4.1 The presence of all required parts of the device and their
condition must be checked carefully to ensure the device is fully
functional before the intended use.
4.2 The battery must be charged periodically. The battery must be
charged once every six months, regardless of the usage frequency of the
device.
4.3 It is recommended to charge battery before use, if the device
was not in use for a long period time.
ATTENTION! It is forbidden to use expired batteries.
52
Page 53

5 STORAGE AND MAINTENANCE
5.1 The device must be stored in the environment protected from
the influence of atmospheric precipitation, in the absence of corrosive
and other damaging fumes.
5.2 Store the device in dry room in the temperatures between +15
о
С and +35оС.
5.3 If the device was stored at temperatures out of the working
range, it must be kept for at least 30 minutes in the temperatures from
0ºС to +40ºС before it can be used.
5.4 Do not store the device with empty battery.
5.5 The extended storage of the remote control, included in the
package, must be done without the batteries.
5.6 The device must be stored in the closed case provided by the
manufacturer. The arrangement of the device and the components inside
the case is shown on Picture 67.
Picture 67 – Case with compartments containing the voice
recorder and other components
53
Page 54

6 TRANSPORTATION REGULATIONS
6.1 Avoid overheating (over 60°С) and overcooling (under −30°С)
the device.
6.2 Transport the device in the casing that protects form
mechanical damage and moisture. The device can be transported by any
means of transportation (by air in the airtight compartment).
6.3 Avoid falls and other impacts that may lead to mechanical
damages during transportation.
54
Page 55

7 UTILIZATION
7.1 The service time of the device is 5 years. The use of the device
must be terminated beyond the service time.
7.2 Utilize the device according to the user-company rules.
7.3 In case the device was sent to the manufacturer for repair and
was deemed unfit for repair, the manufacturer will recommend in writing
utilizing the device.
7.4 Utilize the used batteries according to the local environmental
rules.
ATTENTION! Improper utilization of batteries may lead to
environmental pollution.
ATTENTION! Utilization of batteries in the fire may lead to
burns and explosion.
55
Page 56

8 PRODUCT LIFETIME AND MANUFACTURER’S
WARRANTY
8.1 The lifetime of the device is 5 years.
8.2 Manufacturer guarantees the functionality of the device and
compliance to the technical specifications during 12 month from the date
of sale, the user has to follow the use regulations. Warranty repair is free
of charge.
8.3 Manufacturer is not responsible (including the warranty
period) for malfunctions resulted from not following the user manual
instructions.
8.4 The warranty repair is void for devices with mechanical
damages, signs of external impacts or out of order due to users not
following use regulations given by manufacturer. The repair of such
devices may be arranged with manufacturer, and the cost of repair is
borne by user.
8.5 The warranty does not extend to the batteries.
56
 Loading...