

TS-market MAVR-H264x4 Operation Manual

Audio/Video Recorder
mAVR H.264x4 TFT
Operation Manual
1.2 (2012-04-05)
Version 2012
TS-Market

2
Overlook ........................................................................ 3
Video Recorder’s Appearance ..................................... 5
Technical Characteristics ............................................6
Operating the Recorder ............................................... 8
Working with Memory Cards ..................................... 20
Storage format of the recordings on the card ......... 21
View Video Records ...................................................21
Battery Charging ........................................................ 27
In Box ........................................................................... 27
Warranty ...................................................................... 28
Technical Support ......................................................28
Appendix 1. Recorder Menu of Settings .................. 29
Appendix 2 Base diagram of the connectors ......... 31
Contents

3
Overlook
Video Recorder MAVR-H264x4 TFT (hereinafter called the
Recorder) is intended for professional recording of video and audio
data either from an external source or from built-in video camera
and microphone onto SD or SDHC ash memory cards to be further
played back. The Recorder provides the opportunity to insert up to 4
memory cards for both parallel and alternate recording.
Specications
The MAVR-H264x4 TFT Video Recorder has the following
specications:
• Recording of video signal either from an external source or
from the built-in video camera (H.264) in AVC format, providing
resolution of 640x480 for video camera or 720x576 for an external
source;
• Video signal scaling (image compression) and cropping up to
96x96;
• Adjustable video signal ltering;
• Independent setting of bitrate for audio and video stream;
• Adjustable frames per second for video stream;
• Automatic regulation of built-in video camera sensitivity (can be
deactivated);
• Automatic correction of white balance for built-in video camera;
• Flicker suppression to eliminate the affect of day electric lamps
etc (at the frequency 50 and 60 Hz);
• Disposition of text onto video signal (date, time, GPS data, text
line) – up to 2 lines with 24 symbols each depending on the
resolution selected;
• When recording video signal – automatic or manual selection of
video standard to be used;

4
• Option to set video signal parameters (brightness, contrast,
saturation, colour);
• Recording of audio signal either from an external sound source
(MF input) or from built-in microphones in AAC format (mono or
stereo);
• Manual or automatic adjustment of the amplication of audio
channels;
• Data recording is performed directly into MP4 format without any
further converting;
• Parallel recording of video data onto two cards;
• Option to view video records directly from the Recorder;
• Built-in clock and calendar;
• Starting Recording by:
- “Rec” Switch on the sensor screen;
- timer;
- control input signal;
- built-in motion detector;
- VAS (Voice Activating System);
- signal from Analog-to-digital adapter;
- prehistory recording.
• Circular recording onto memory card (1 or several memory
cards);
• Power supply either from an external source or by built-in Li-ion
rechargeable battery. When powered from an external source
rechargeable battery is being charged;
• Power supply for an external power consumer (for
example video camera) with output voltage option
(5 or 12 V);
• Option to work with GPS-receiver;
• Setting of parameters through menu or with the help of “Manager”
program;
• Option to select interface language (Russian, English);
• Opportunity to upgrade internal software.
5
Video Recorder’s Appearance
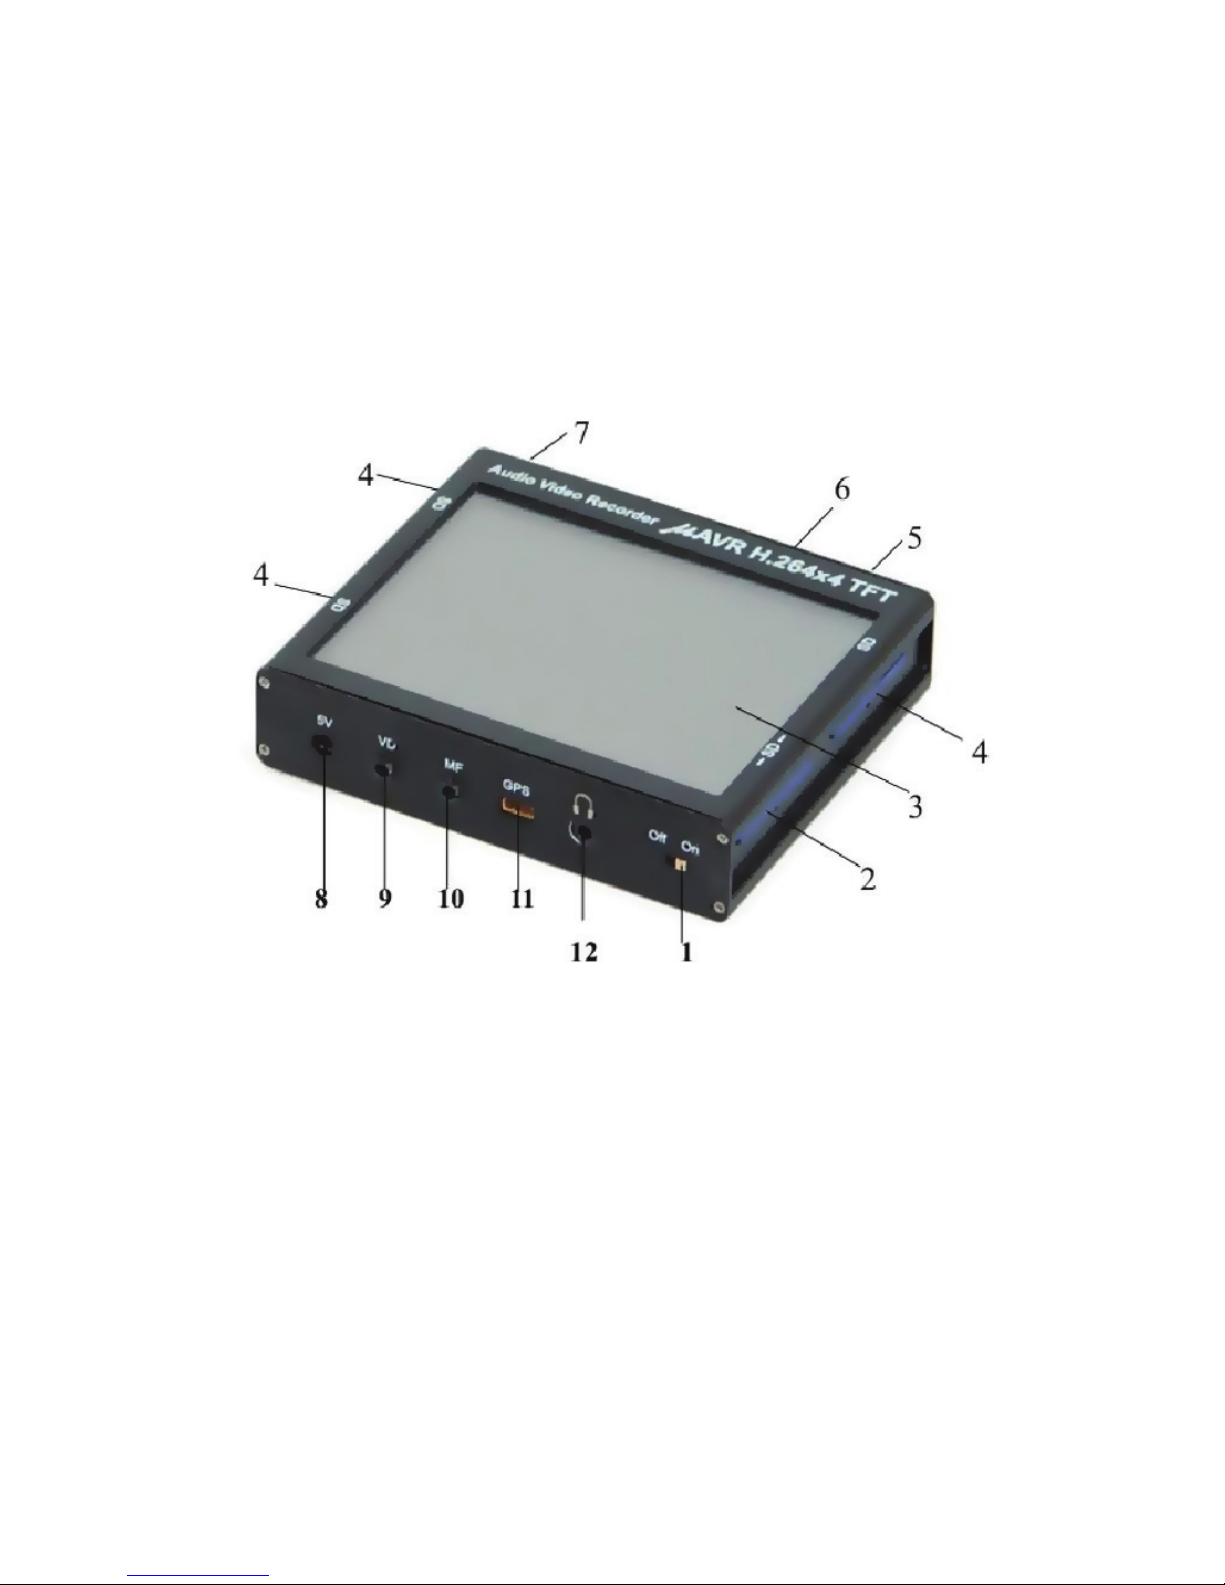
1. «On-Off» Switch;
2. Connector for master card with LED indicator;
picture 1
3. Touch screen;
4. Connector for memory card with LED indicator;
5. Right Microphone;
6. Video Sensor;
7. Left Microphone;
8. Connector for “5V” external power supply;
9. Connector for “VD” external devices;
10. Connector for “MF” remote microphones;
11. Connector for GPS receiver and analog-to-digital adapter;
12. Connector for headphones.
6
Technical Characteristics
Parameter
Parameter value
Min Max
Video Parameters
Resolution of built-in video camera 640х480
Video input resolution
720х480 (NTSC)
720x576 (PAL, SECAM)
Frame size of video stream
160х120, 320х240, 640х480
(built-in video camera);
180x120, 360x240, 720x480
(NTSC);
180x144, 360x288, 720x576
(PAL, SECAM)
Frames per second 1, 2, 5, 10, 15, 30
Video compression standard AVC (H.264)
Bitrate, Kbs
64,96,128,192,256,384,512,768,
1024, 1536, 2048 (1536 and
2048 only at record paralleling
deactivated)
Video input resistance, Ohm 75
Supportable video standards
NTSC (M, 4.43)
PAL (B, G, H, I, M, N)
SECAM
Built-in video camera sensitivity 1 lx
Viewing angle of built-in video
camera, degrees
64
Dynamic range of built-in video
camera, dB
68

7
Audio parameters
Sample rate, Hz 44100
Resolution, bit 16
Audio compression standard AAC
Audio bitrate, Kb/s 32, 64, 96, 128
Amplication range, dB 60
Dynamic range, dB 92
Frequency range, Hz 80 20000
Resistance for electret microphones,
KOhm
3.0
Voltage of electret microphones, V 2.5
Screen parameters
Resolution, pixels 320x240
Storage carrier parameters
Memory cards in use 1 4
SD card capacity, Gb 2
SDHC card capacity, Gb 4 32
File system FAT-32
Power system parameters
Rechargeable battery Li-ION (2200 mAh)
Battery life in record mode, hours
(video camera not taken into
account)
4 8
Battery life in stand-by mode,
months
12
Charging time from an external
source, hours
5
External source voltage, V 4.5 5.5
External source current, A 1.7
External video camera voltage, V: 5 or 12
External video camera current, mA 150

8
Operating the Recorder
Getting Started
• Launch the manager program by copying it onto the PC;
• Insert memory card into the card reader;
• At the time the program was launched select “Settings”, press the
button “Setup” and set up:
a. Interface language (the same language will be used in the
recorder);
b. The path to the memory card (“Source data”);
c. The folder to store converted recordings (“Output data”);
d. Click on “OK”.
• If necessary memory card can be formatted. To do this click on the
“Format ...”. The le system type must be “FAT32”;
• Prepare master card for the recorder:
a. Set the required settings for the recorder;
b. Click on “Prepare”.
The root folder of the memory card displays the following service
les:
- mavr-h264x4_tft_v1.bin;
- mavr-h264x4_tft_v1.cfg;
- ru_std.skn or en_std.skn.
• Insert the prepared card into the main slot (lower right);
• The remaining slots of the recorder accept memory cards without
preliminary preparation. The only condition is the le system type
to be “FAT32”;
• Turn on the recorder using On-Off switch and wait for the menu to
appear on the screen.
9
Display Calibration
For smooth operation of the Recorder perform calibration
before starting. To do this click on Settings – System –
Display calibration. By a thin object click on the central four-headed
arrow pointer on the screen.
Attention: don’t use any writing materials – the screen can get
deteriorated.
After that click on “Back” in the top-right corner to go back to the
Menu.
Operation Modes
After starting the Recorder one of the 3 operation modes can be
selected:
• Record;
• View;
• Setting.
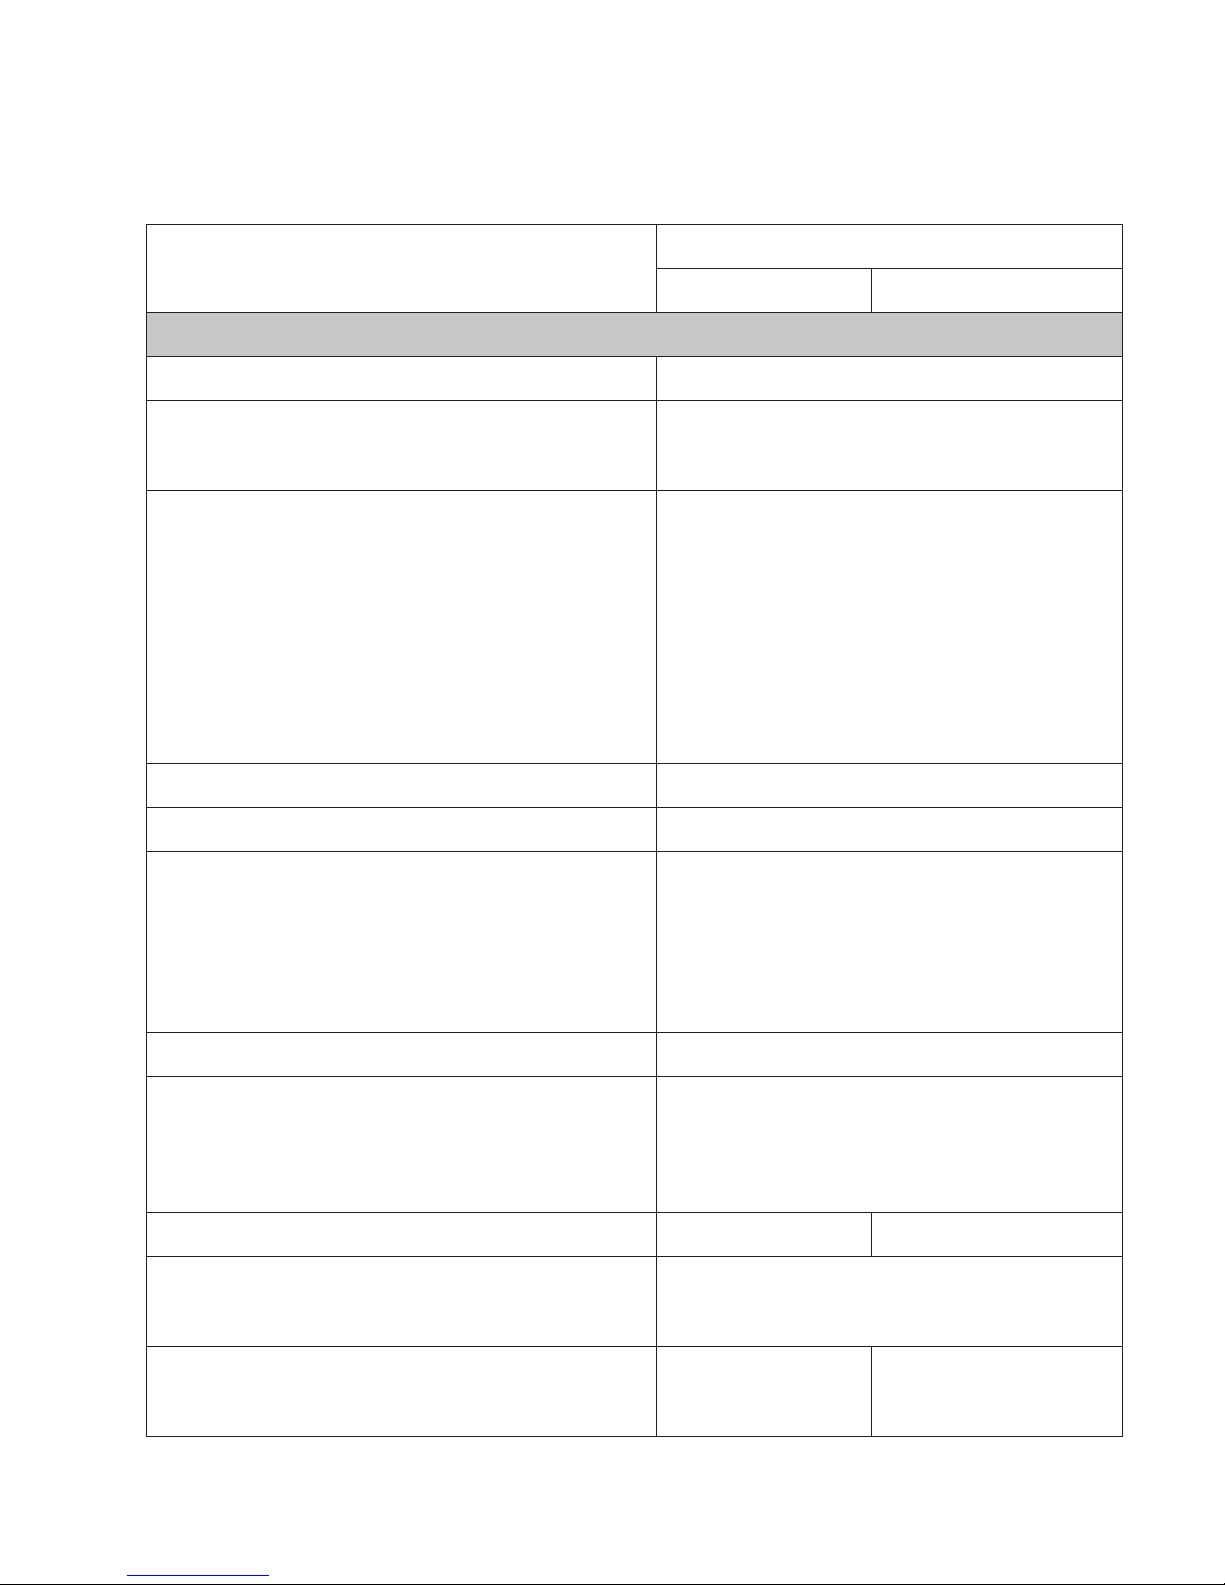
Starting the Recorder
There are 4 connectors for memory cards in the Recorder. The
Recorder reads service information necessary for the Recorder’s
operation from the memory card in the slot (position 2). This
information is recorded onto the memory card when preparing it in
“Manager” program.
There also can be SD or SDHC
memory cards formatted in FAT-32
format in other slots. When starting
recording the data will be recorded
onto the memory card marked by an
arrow on the touch screen.
RECORD
VIEW
SETTING
picture 2
10
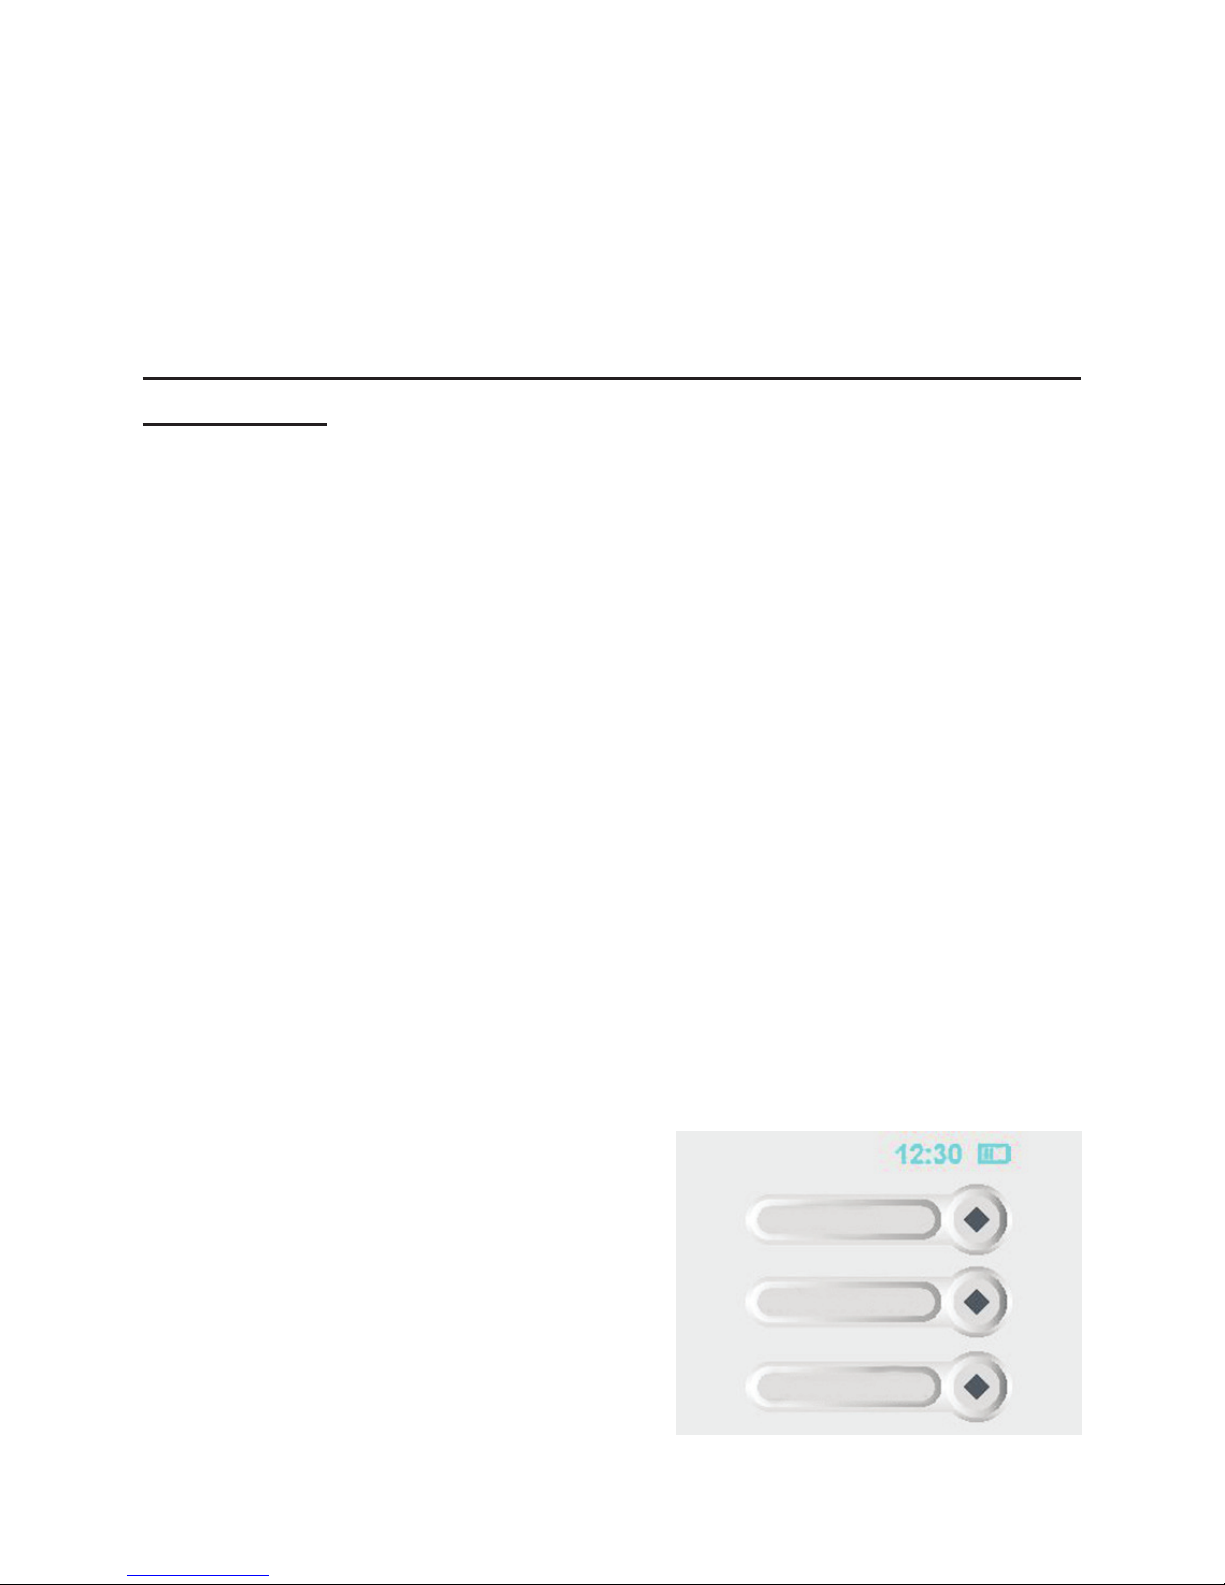
After scanning has been completed you can start recording (the Rec
button is active);
If you select “2 cards” mode, recording is performed onto two cards
inserted into the slots on one side of the recorder (right or left). If one
of the cards is not inserted, recording is disabled;
In the “2 cards” mode you can choose any of the two cards - the top
or bottom;
The screen displays the amount of free space on the selected card
(as percentage of the
card’s capacity). The “2 cards” mode shows values for both cards rst for the selected card,
then for the parallel one.
picture 3
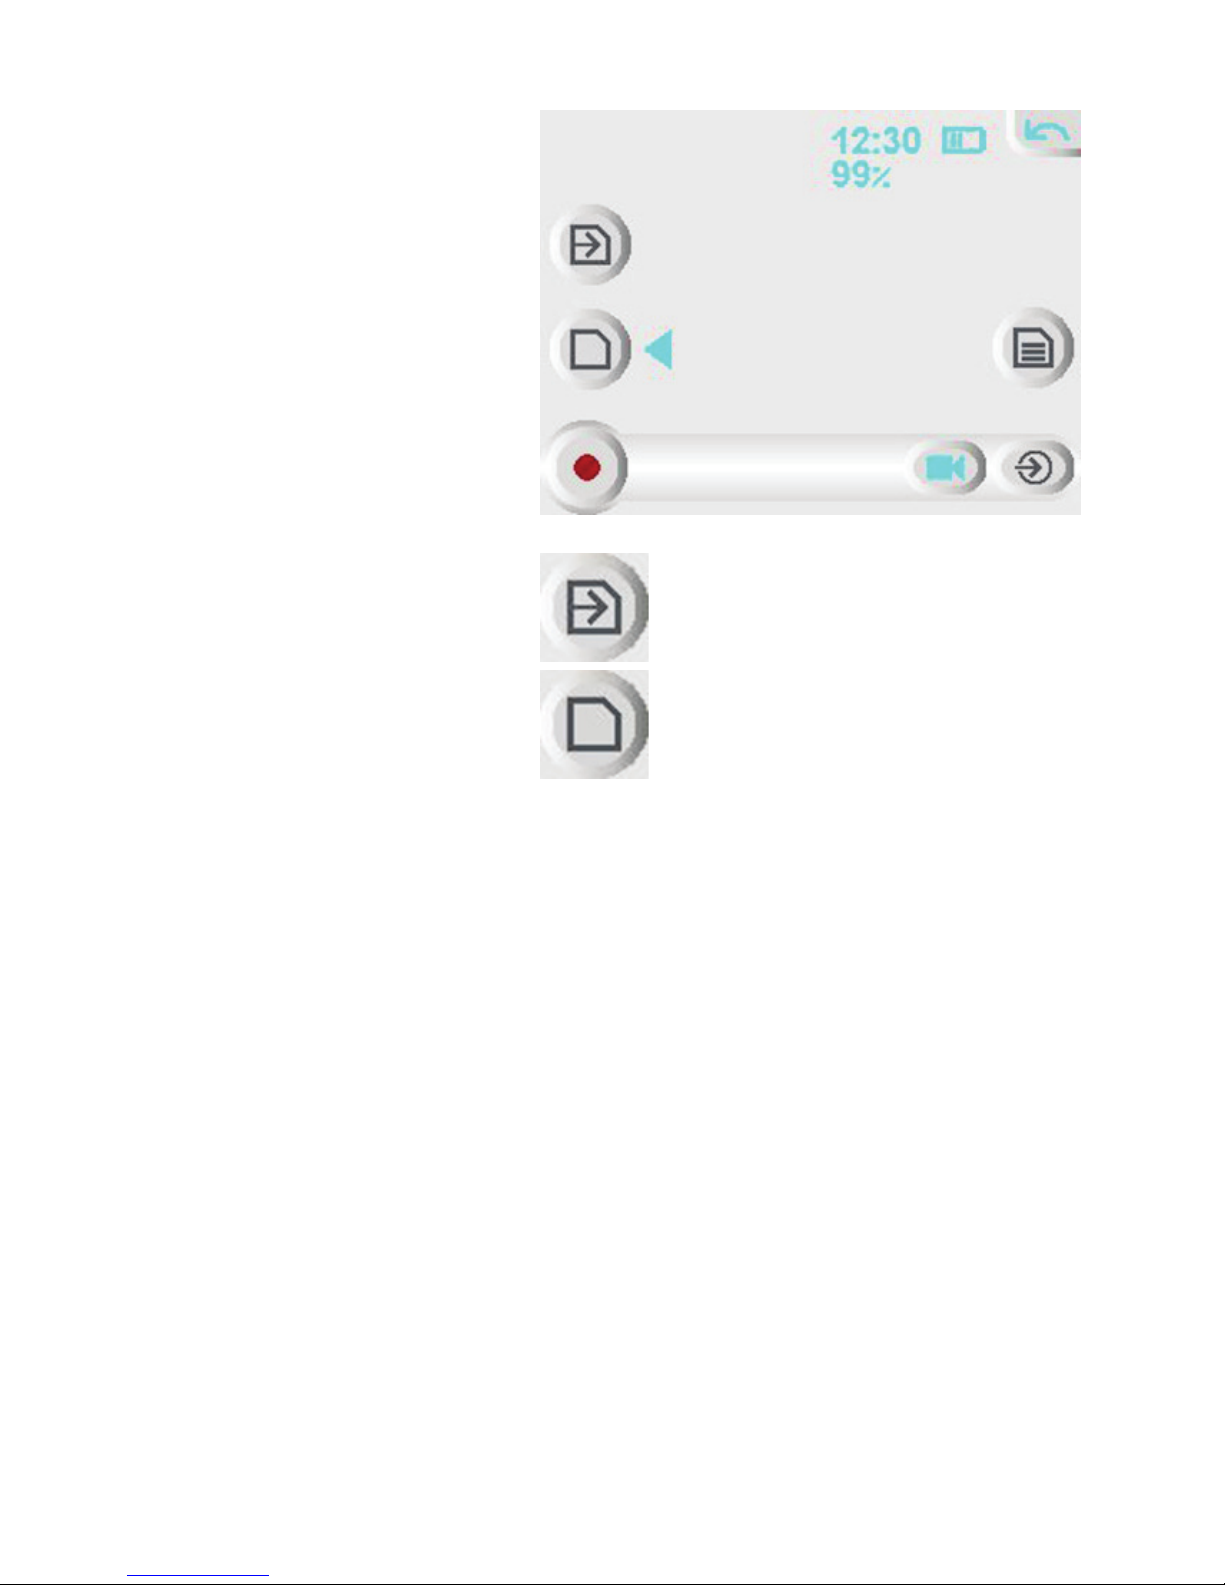
scanning process icon
scanning is completed
Arrow indicator can
be moved from one
memory card onto the
other by clicking on the
corresponding button. The
indicator moves through
inserted memory cards.
It takes some time to scan
the card. Scanning time
depends on the card’s
capacity and the number of
recordings stored there.
The selected card is
scanned more quickly;
 Loading...