

Page 1
QUICK START
GUIDE
The Edge Personal Noise Dosimetry
Page 2
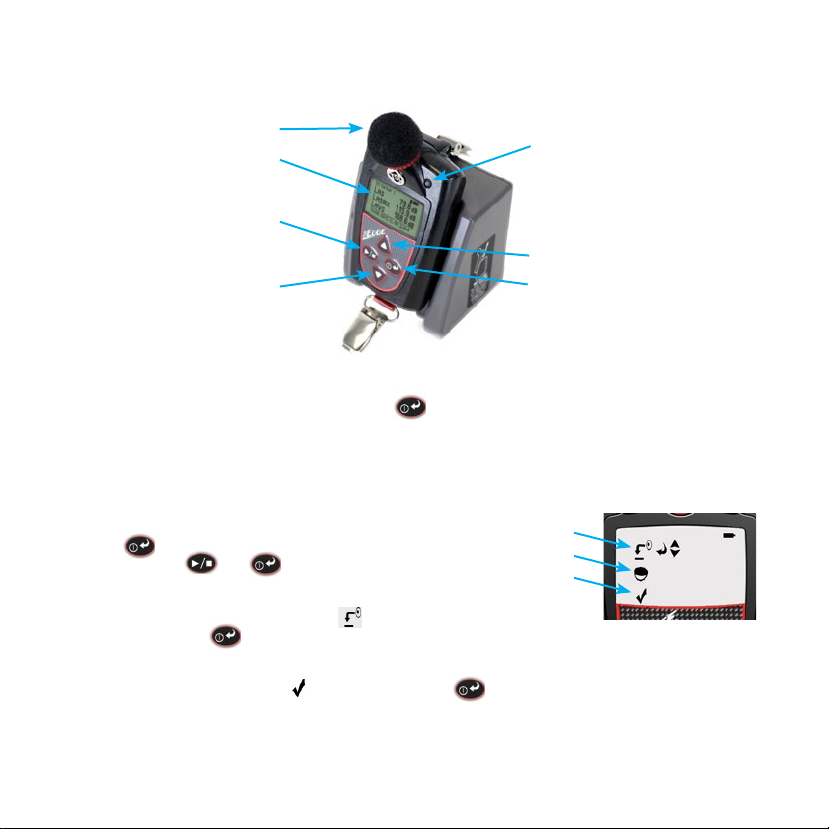
Edge Display and Keypad
Microphone and Windscreen
Measurement Display
Run/Stop Key
Down Arrow
LED Indicator
+ Red - indicates dose has exceeded the
alarm level
+ Amber - indicates stopped
+ Green - indicates measuring
Up Arrow
On/O/Enter Key
Turning on
1. Turn on the Edge by pressing and releasing the key.
Resetting
Resetting (or clearing the data) is performed by either using the TSI Quest Detection Management
Software DMS when downloading or setting up parameters. Another option is from the Edge’s shortcut
reset menu.
+ To reset from the keypad ensure the Edge is o, then:
1. Press key.
2. Press and hold and keys when the splash
screen appears. The shortcut menu will appear
(see right).
3. Press the up arrow until the reset icon is selected.
4. Press and hold the key until it shows the les
were deleted.
A 3, 2, 1 countdown and a shaded bar indicates reset.
5. To exit, press down arrow until icon is selected. Press key.
Reset Icon
Contrast Icon
Exit Icon
2
Page 3
Calibrating
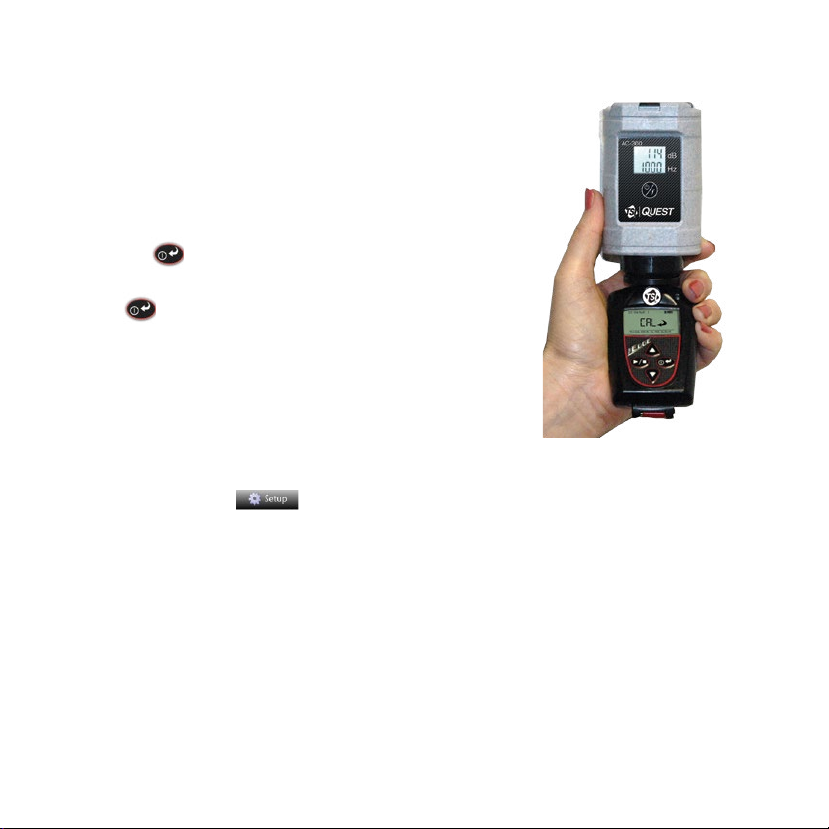
A calibration may be performed before and/or after a dosimetry test.
1. Remove the windscreen while the Edge is turned on and stopped.
2. Slide the Edge into the cavity of the calibrator, ensuring the
adapter ring is inserted into the calibrator.
3. Turn on the calibrator. Set the calibrator to 114 dB and 1000 Hz
(if applicable).
4. “CAL” will ash on the Edge display automatically detecting the
calibration screen.
5. Press the key to trigger the calibration screen.
6. To adjust the calibration value on the display, repeatedly press the
up/down arrows to match 114.0 dB.
7. Press key to exit.
Viewing and/or navigating data
1. Press the up/down arrow keys to navigate through the
measurements and parameters.
Setting up the Edge
All the Edge parameters are setup via TSI Quest Detection Management Software DMS in the Instrument
Communication panel or button from the DMS start screen.
3
Page 4
Running a study
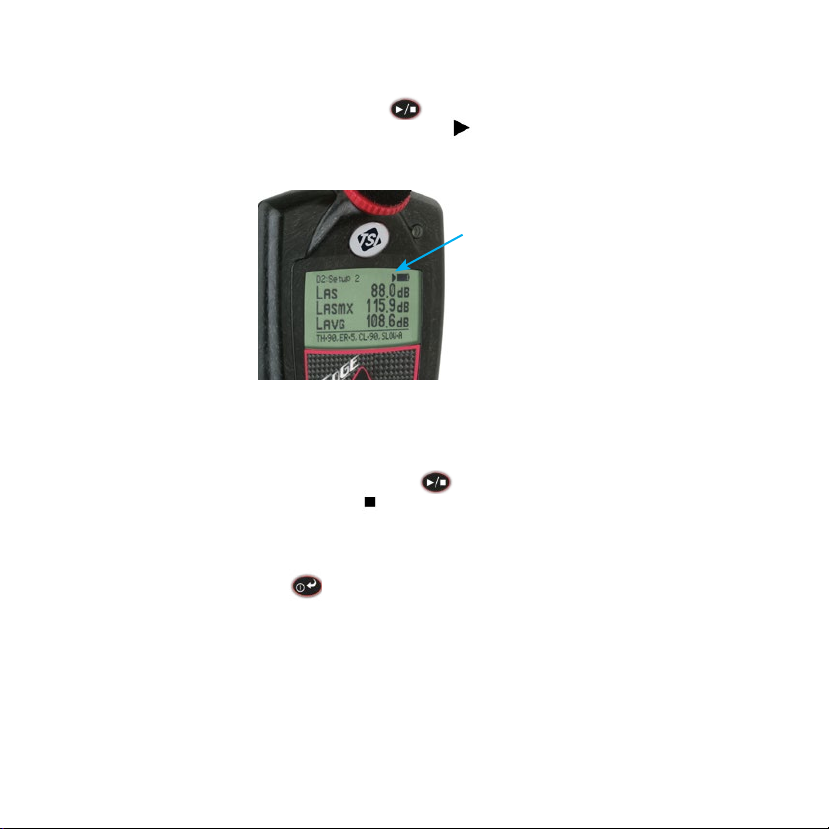
1. Once the Edge is turned on, press and hold the button.
+ A 3, 2, 1 countdown will appear. Then, a run indicator will appear on the top of the display.
Also the LED will ash green unless this was disabled in the DMS via the heartbeat eld.
Screen Indicators:
in run mode
Ending a study
1. While running a study, press and hold the run/stop button.
+ A 3, 2, 1 countdown will appear and the indicator will appear on the top of the display.
Turning o
1. Press and hold the on/o enter button for the count down.
4
Page 5
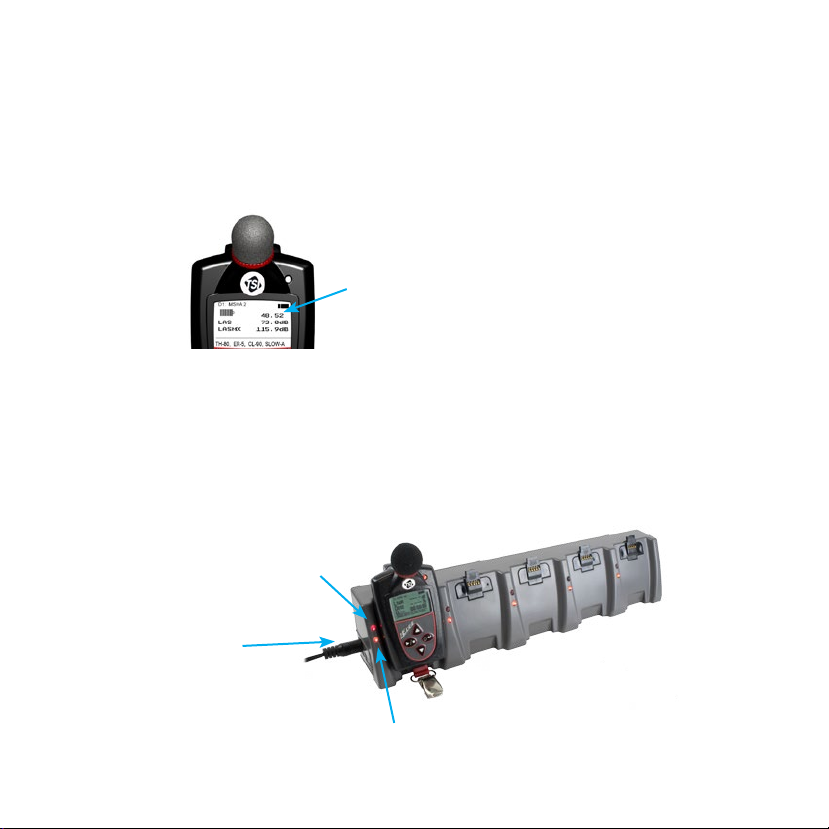
Charging
When the battery is fully discharged, allow approximately 3 to 4 hours to recharge your Edge.
Tip: to quickly check battery power remaining on the Edge, press the up/down arrow key to view the
battery power symbol and hours on the display.
(See user manual for customizing display if it does not appear.)
Battery Power: 48 hours and 52 minutes remaining
1. To charge, plug in the power adapter to the EdgeDock.
+ The EdgeDock’s lower LED will appear solid amber when powered on.
2. Slide the Edge downward onto the hook of the EdgeDock until it clicks. It should be fully seated.
+ The top LED will appear as red ashing if charging or solid green when fully charged.
Charging Status: Upper red ashing LED
Power Adapter
Powering Docking Station: LED appears as red ashing
5
Page 6
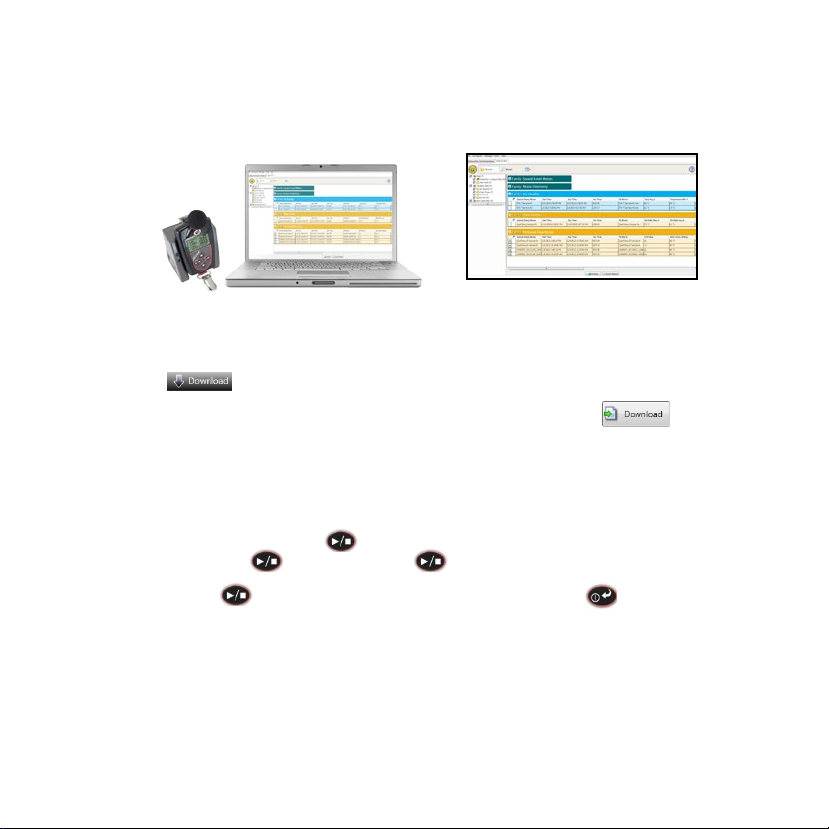
Downloading data and DMS
Communicating
1. To communicate with DMS and the Edge, turn on the Edge and plug in the USB cable from the edge to
the PC. Then, open TSI Quest Detection Management software DMS.
2. Click on the button. The instrument communications panel will appear. Select the Edge
instrument and model from the dosimetry family.
3. Click on the Edge(s) check boxes in the EdgeDock-5 section and then select the button.
+ DMS will state Download completed. Select the Data Finder tab to view your data
(if not automatically selected.)
4. See user manual for more details.
DMS start screen
Locking/unlocking
1. Turn the dosimeter on and press the button to start measuring.
2. To enable the lock, press button. Then press three consecutive times, within one
second intervals.
3. To unlock, press the button within one second intervals and then press button.
6
Page 7

Common noise dosimeter terms
Criterion Level (CL) - expressed in decibels (dB),
it is the maximum allowable accumulated noise
level that results in 100% dose. Regional noise
standards specify criterion level.
Peak level - the highest instantaneous sound
level that the microphone detects. Unlike the Max
Level, the peak is detected independently of the
slow or fast response time the unit is set for.
Dose - expressed in percent, it is the percent of
the maximum exposure that has accumulated
over the run time. 100% is the maximum
allowable exposure. 100% dose occurs for an
average sound level equal to the criterion level for
an 8 hour period.
Exchange Rate (Doubling Rate) (ER)- the
decibel level that would double or halve the sound
exposure. For instance with a 3 dB exchange
rate the sound exposure doubles with every 3 dB
increase, and the sound exposure is halved every
3 dB decrease. Regional noise standards specify
the exchange rate.
- stands for “level average” and is the average
L
avg
sound level measured over the run time.
L
- stands for “level equivalent” and is the
eq
average sound level measured over the run time
but is calculated with a 3 dB exchange rate with
no threshold.
Max Level - the highest weighted sound level
that occurred, also allowing for the response time
that the meter is set to. If the meter is set for A
weighting with Slow response then the Max level
is the highest A weighted sound that occurred
applying the Slow response time.
Response Time (Fast, Slow, Impulse) - how
quickly the circuitry responds to changing noise
levels. These are ANSI/IEC dened response times.
Most occupational noise standards require slow
response time.
Threshold Level (Cut O) - noise levels below
the threshold are integrated as zero decibels. This
will aect L
regional noise standards specify the threshold
, Leq, TWA, and Dose values. Most
avg
level, if any.
TWA (Time Weighted Average) - takes the
noise exposure accumulated in the run time and
applies an eight hour time period. If the meter was
in run for 5 minutes, the TWA takes that 5 minutes
of noise input and averages it into an 8 hour run
time. The TWA in this case would be much lower
than the L
.
avg
Weighting (A,C,Z) - frequency lters that
cover the frequency range of human hearing.
A weighting greatly attenuates high and low
frequency noise to mimic how the human ear
hears noise. C weighting also attenuates high
and low frequency noises, but not nearly as much
as A weighing. Z weighting does not apply any
attenuation, or weighting, to any frequency.
Most regional noise standards require a weighted
measurements.
7
Page 8
Quest is a trademark, and TSI and the
TSI logo are registered trademarks of
TSI Incorporated.
TSI Incorporated
North America and Asia Pacic
Telephone: +1 800-680-1220 (USA)
+1 651-490-2860 (Outside USA)
Fax: +1 651-490-3824
E-mail: [email protected]
P/N 098-610 Rev J ©2018 TSI Incorporated
- Visit our website www.tsi.com for more information.
Europe, Middle East, and Africa
Telephone: +49 241-52303-0
Fax: +49 241 52303-49
E-mail:
 Loading...