

TSC Auto ID Technology 2007003 Users Manual

DuraLabel Pro 200 /
DuraLabel Pro 300

1. Introduction.........................................................................................1
2. Getting Started....................................................................................1
2.1 Unpacking and Inspection............................................................1
2.2 Equipment Checklist .....................................................................1
2.3 Printer Parts...................................................................................3
3. Setup....................................................................................................4
3.1 Setting Up the Printer ...................................................................4
3.2 Loading the Ribbon.......................................................................4
3.3 Loading Label Stock.....................................................................6
3.4 External Label Roll Mount Installation (Option) .........................8
3.5 Peel-off Module Installation (Option)...........................................9
3.5.1 Loading the Paper in Peel-off Mode....................................12
3.6 Cutter Module Installation (Option) ...........................................14
3.6.1 Loading Label in Cutter Mode .............................................17
3.7 Instructions to Top Cover Operation.........................................18
Contents
4. Power on Utilities..............................................................................21
4.1 Ribbon and Gap/Black Mark Sensor Calibration......................21
4.2 Gap/Black Mark Calibration;Self-test;Dump Mode..............22
4.3 Printer Initialization.....................................................................25
4.4 Black Mark Sensor Calibration ..................................................26
4.5 Gap Sensor Calibration ..............................................................26
4.6 Skip AUTO.BAS...........................................................................26
5. Maintenance......................................................................................28
5.1 Cleaning.......................................................................................28
6. Troubleshooting................................................................................29
6.1 LED Status...................................................................................29
6.2 Print Quality.................................................................................30
7. Specifications ...................................................................................31
7.1 Printer Specifications .................................................................31
7.2 Label Stock Specifications.........................................................31
7.3 Ribbon Specifications.................................................................31
8. LED and Button Operation...............................................................33
8.1 LED...............................................................................................33
8.2 Button Operation.........................................................................33
Update History......................................................................................36
i

Compliances
CE Class B:
EN55022: 1998+A1: 2000+A2: 2003
EN55024: 1998+A1: 2001+A2: 2003 IEC 61000-4 Series
EN61000-3-2: 2006 & EN61000-3-3: 1995+A1: 2001
FCC Part 15, Class B
This device complies with Part 15 of the FCC Rules.
Operation is subject to the following two conditions:
(1) this device may not cause harmful interference and
(2) this device must accept any interference received, including interference
that may cause undesired operation.
UL, CUL
C-Tick:
CFR 47, Part 15/CISPR 22 3rd Edition: 1997, Class B
ANSI C63.4: 2003
Canadian ICES-003
TÜV-GS: EN60950: 2000
1

1. Introduction
Thank you for purchasing the Thermal Transfer and Direct Thermal
Bar Code Printers. Although the printer takes only a small amount of space, it delivers
reliable, superior performance.
2. Getting Started
2.1 Unpacking and Inspection
This printer has been specially packaged to withstand damage during shipping. Please
carefully inspect the packaging and printer upon receiving the bar code printer. Please
retain the packaging materials in case you need to reship the printer.
2.2 Equipment Checklist
One printer unit
One Windows labeling software/driver CD disk
One sample ribbon roll
One sample label roll
One label spindle (1 inch diameter core)
Two label spindle fixed tabs
Two 1.5” core adapter
One paper core for ribbon rewind spindle
Two ribbon supply/rewind spindles
One Centronics interface cable
One auto switching power supply
One power cord
One quick start guide
If any parts are missing, please contact the Customer Service Department of your
purchased reseller or distributor.
Options
External label roll mount
1

Label spindle (3-inch diameter core)
Programmable keyboard
Stand-alone LCD keyboard
Automatic cutter module
Peel off module
Internal Ethernet print server
External 802.11b/g wireless print server
2

2.3 Printer Parts
Clear Window
Ribbon Access Cover
LED Indicator
Feed Button
Printer Top Cover
Top Cover Open Lever
Fig. 1 Top front view
6
1. USB Interface
2. Centronics Interface
3. RS-232C DB-9 Interface
4. Power Jack
5. Power Switch
6. Rear Paper Guide
1
2
3
4 5
Fig. 2 Rear view
3
3. Setup
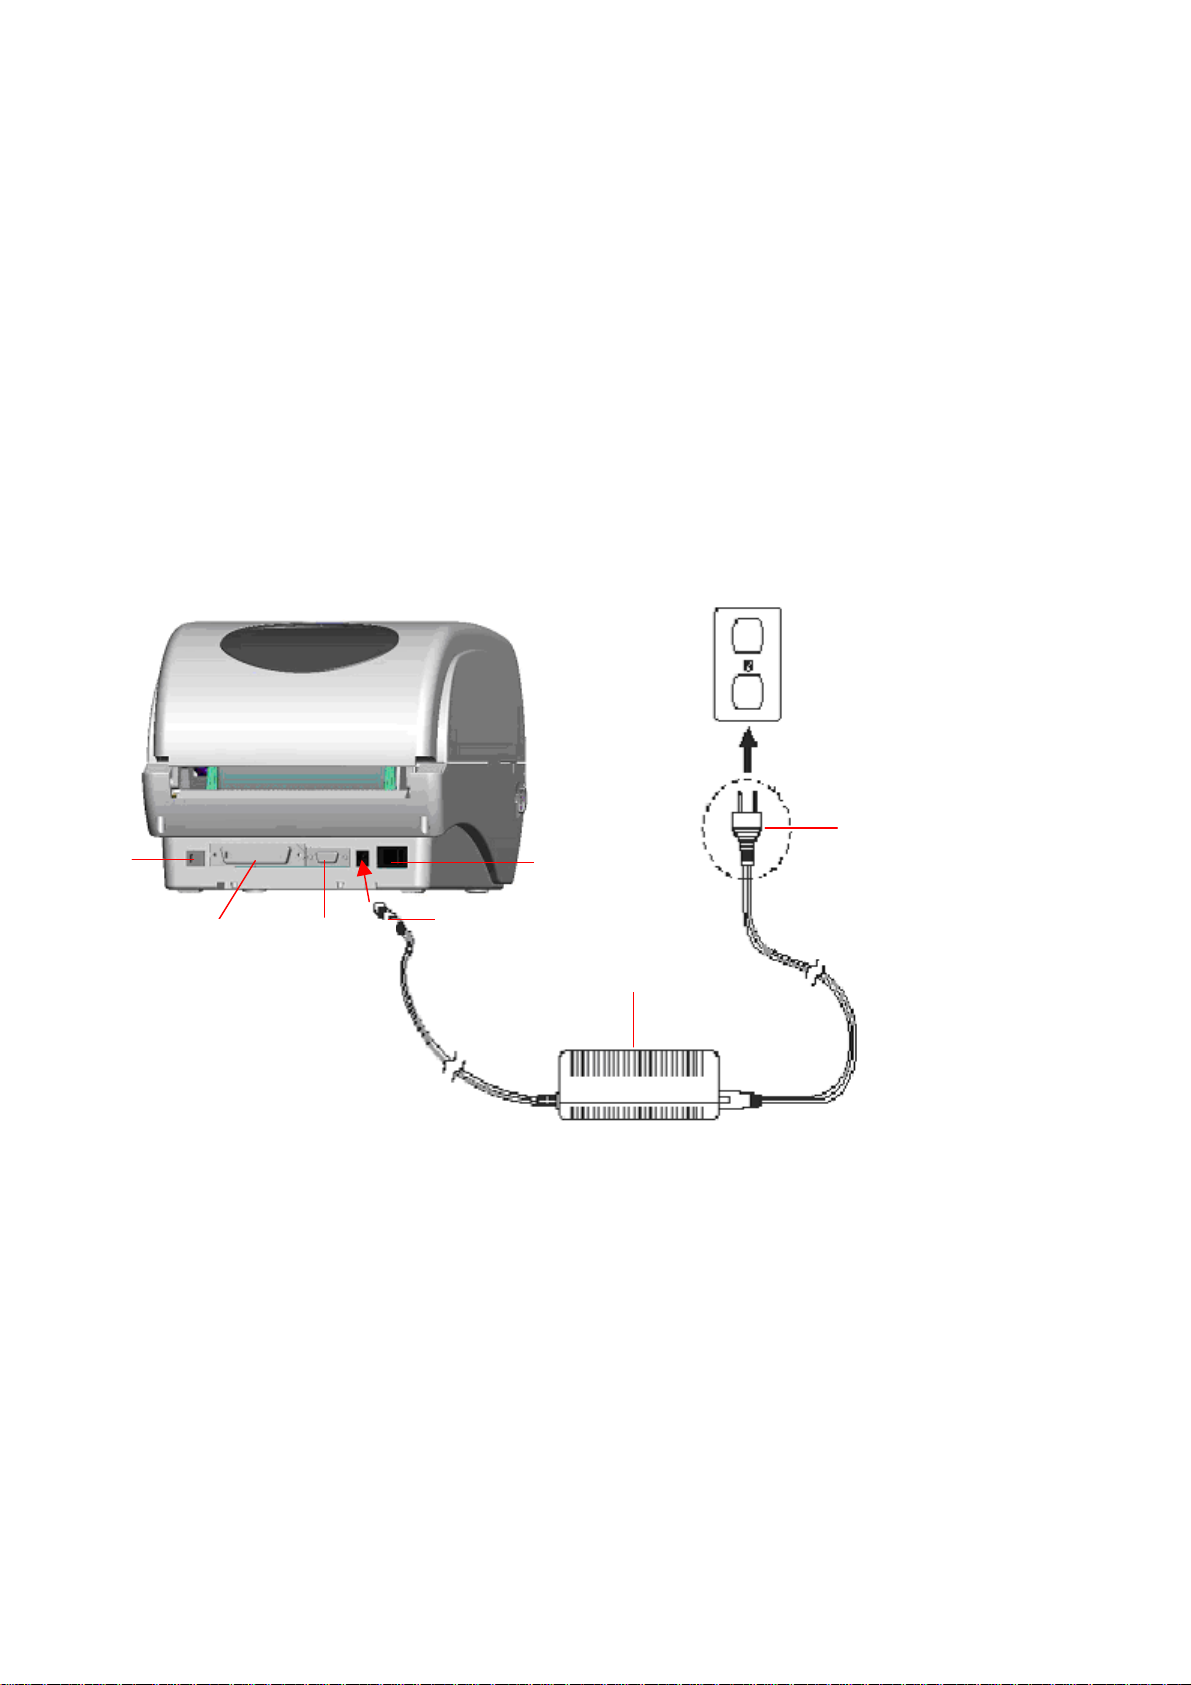
3.1 Setting Up the Printer
1. Place the printer on a flat, secure surface.
2. Make sure the power switch is off.
3. Connect the printer to the computer with the Centronics or USB cable.
4. Plug the power cord into the power supply connector at the rear of the printer, and
then plug the power cord into a properly grounded receptacle.
USB
Plug
Power Switch
Power Cable
Centronics
RS-232C
Power Supply
Fig. 3 Attach power supply to printer
3.2 Loading the Ribbon
The printer will detect if the ribbon is installed after turning on power on and it will set
printing mode to thermal transfer or direct thermal printing mode. If printer does not
detect the ribbon, the ribbon take up motor will be turned off.
Make sure both the ribbon access window and the printer top cover are closed prior to
4
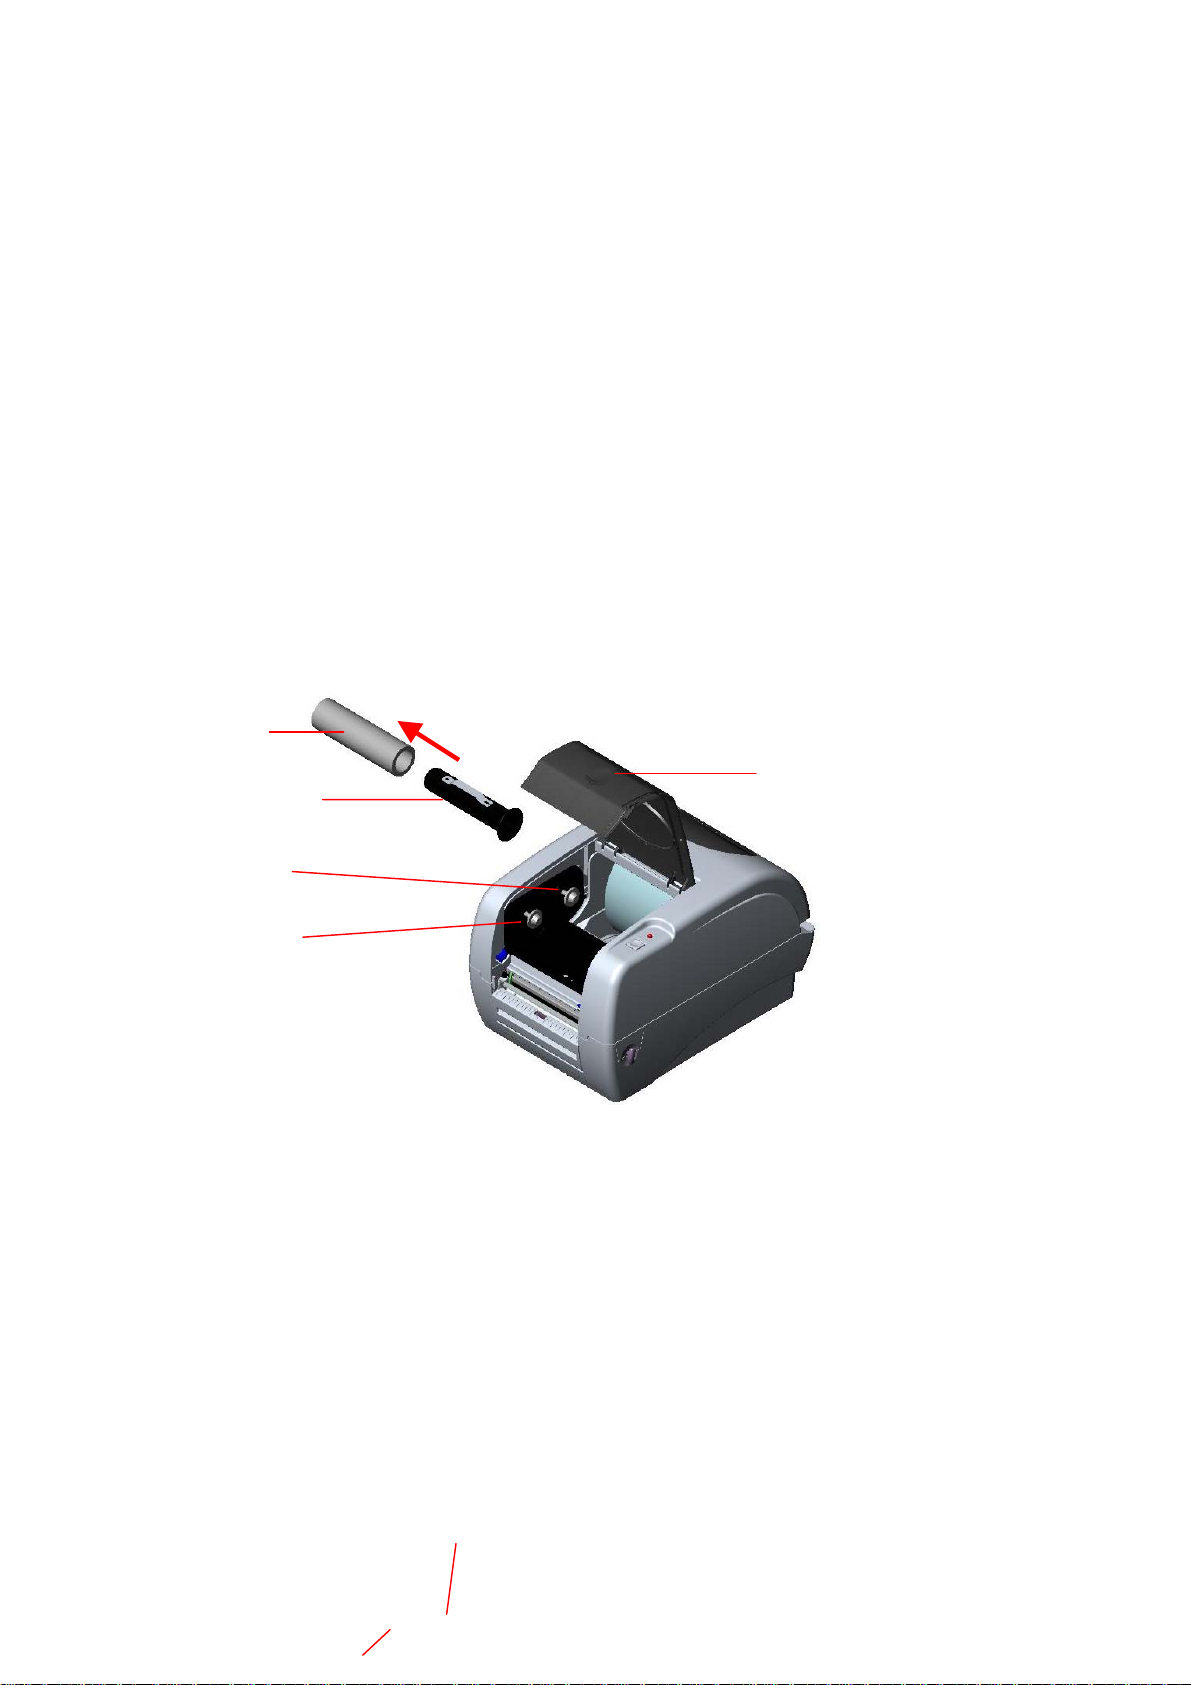
powering up the printer.
r
Please follow the steps below to install the ribbon into printer.
1. Push down on the ribbon access window to unlatch and open the cover.
2. Place a paper core onto the ribbon rewind spindle.
3. Mount the ribbon rewind paper core on the front hubs.
4. Install a ribbon on the ribbon supply spindle.
5. Mount the ribbon supply spindle on the rear hubs.
6. Thread the ribbon leading tape downward pass the print head.
7. Attach the ribbon leader to the ribbon rewind paper core.
8. Rotate the ribbon rewind paper core until the ribbon leader is thoroughly, firmly
encompassed by the black section of the ribbon.
9. Close the ribbon access window.
Paper Core
Ribbon Access Cove
Ribbon Spindle
Back Hub
Front Hub
Fig. 4 Ribbon installation (I)
Ribbon supply spindle
Ribbon
5

Rear Hub
p
Fig. 5 Ribbon installation (II)
3.3 Loading Label Stock
1. Insert a 1” label spindle into a paper roll ( * If your paper core is 1 inch, remove the
1.5” core adapter from the fixed tab. If label width is 4 inch wide, two fixing tabs are
not required. ).
1.5” Core
Adapter
*
Paper Roll
Printing Side
Face U
Fixed Tab
1” Label Spindle
Fig. 6 Label roll installation (I)
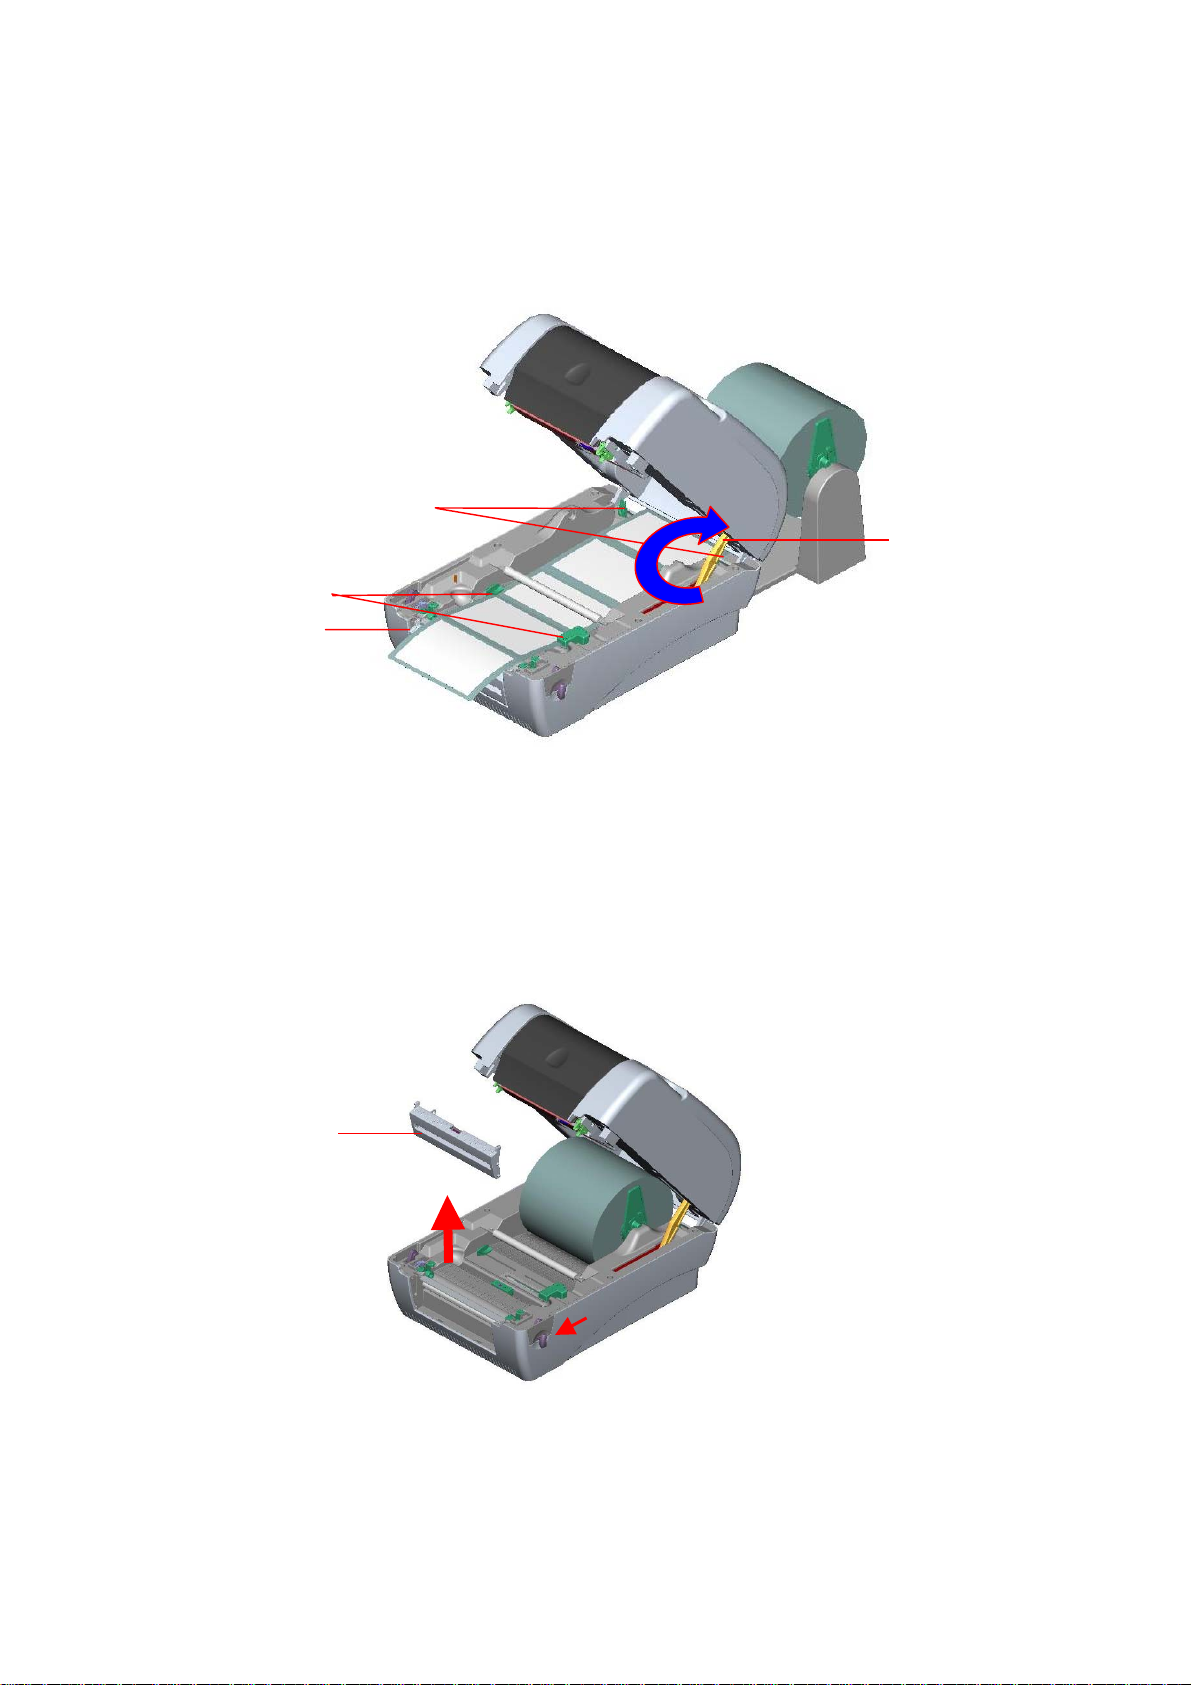
2. Open the printer’s top cover by releasing the green top cover open levers located on
each side of the printer and lifting the top cover. A top cover support at the rear of the
printer will hold the printer top cover open.
6
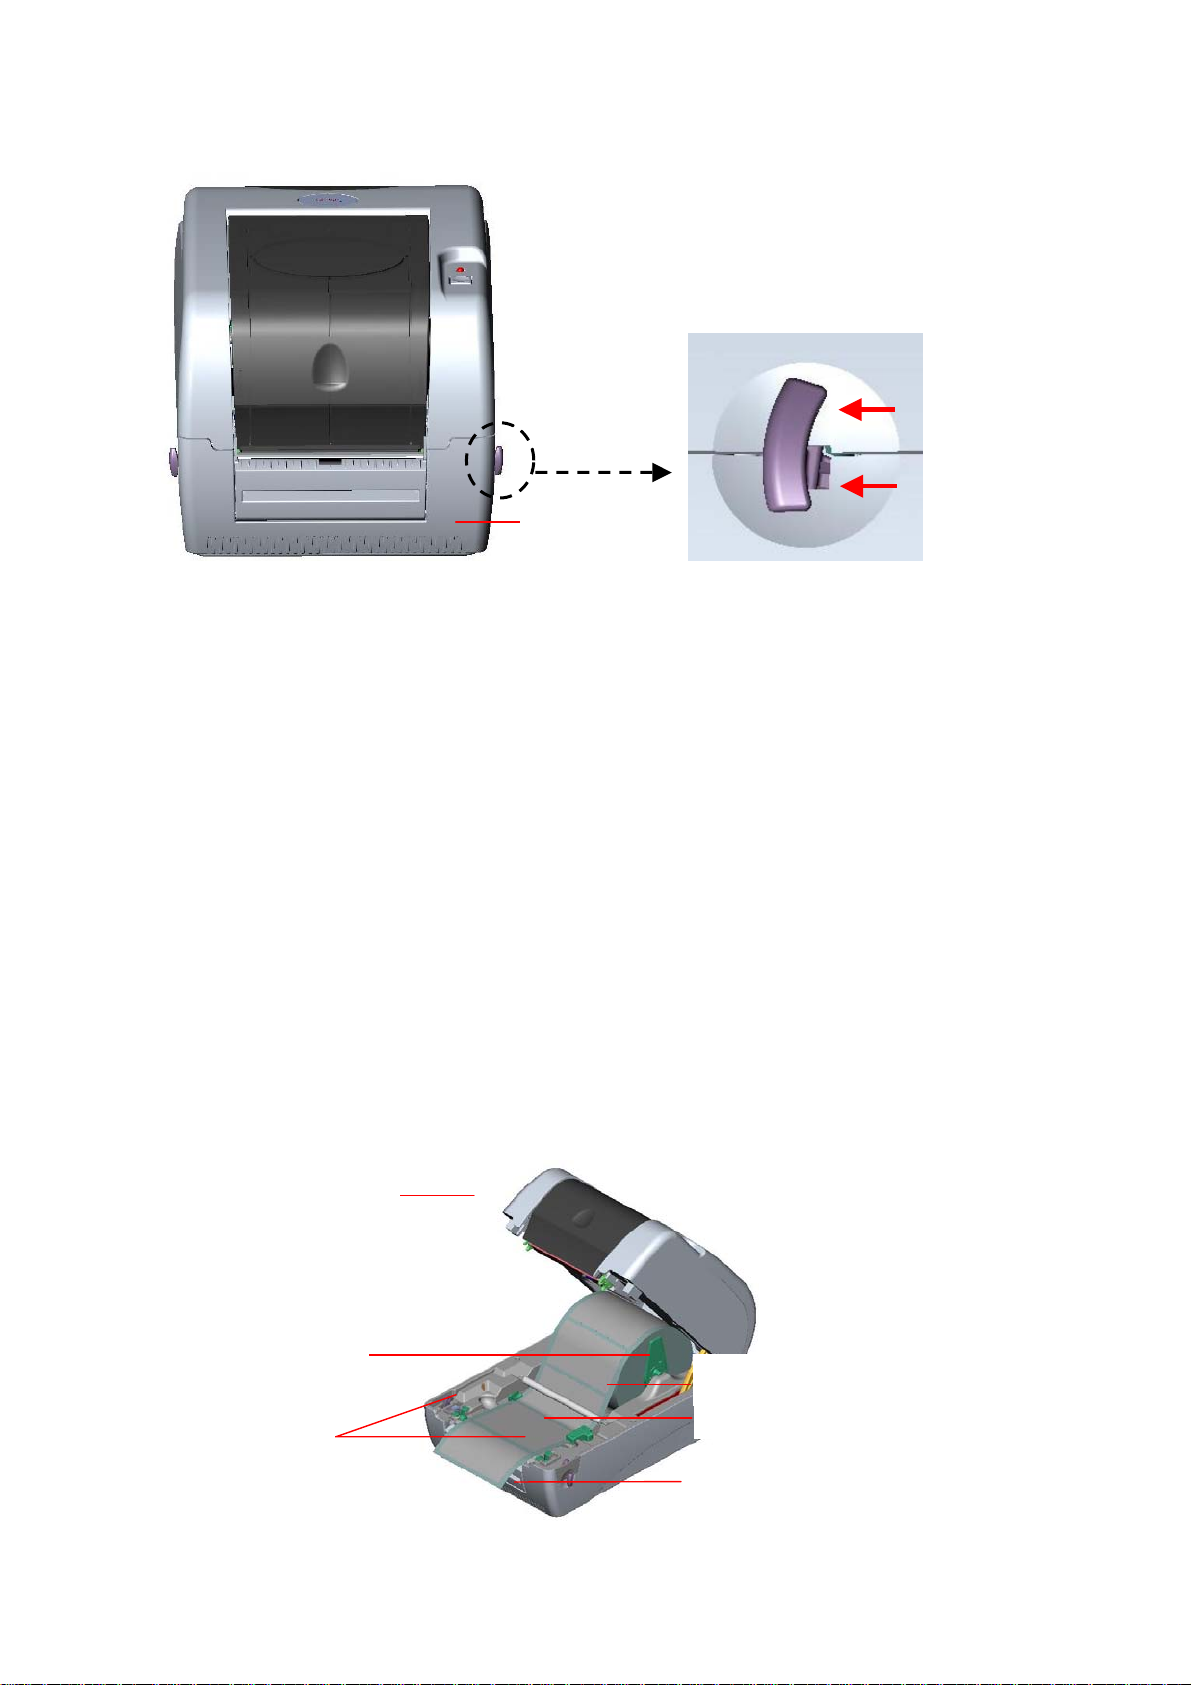
Lower Cover
r
Fig. 7 Pull the lever to open the cover
3. Place a roll of paper onto the center of the paper roll mount.
4. Feed the paper, printing side face up, through the Teflon bar and the paper guide and
pass over the platen.
5. Adjust the green center-biased paper guides to slightly touch the edges of the label
backing.
6. To close the printer top cover, lift the cover to the ultimate open angle then use both
hands to close the cover gently. Close the printer top cover slowly and make sure the
cover latches securely.
Note:
1. Make sure hands are not placed between printer top cover and lower cover
when close the top cover.
2. Do not free fall the top cover.
3. Failure to securely close and lock the cover will result in poor print quality.
Printer Top Cover
Top Cover Support
Paper Roll Mount
Paper Guide
Teflon Ba
Top Cover Open Lever
7
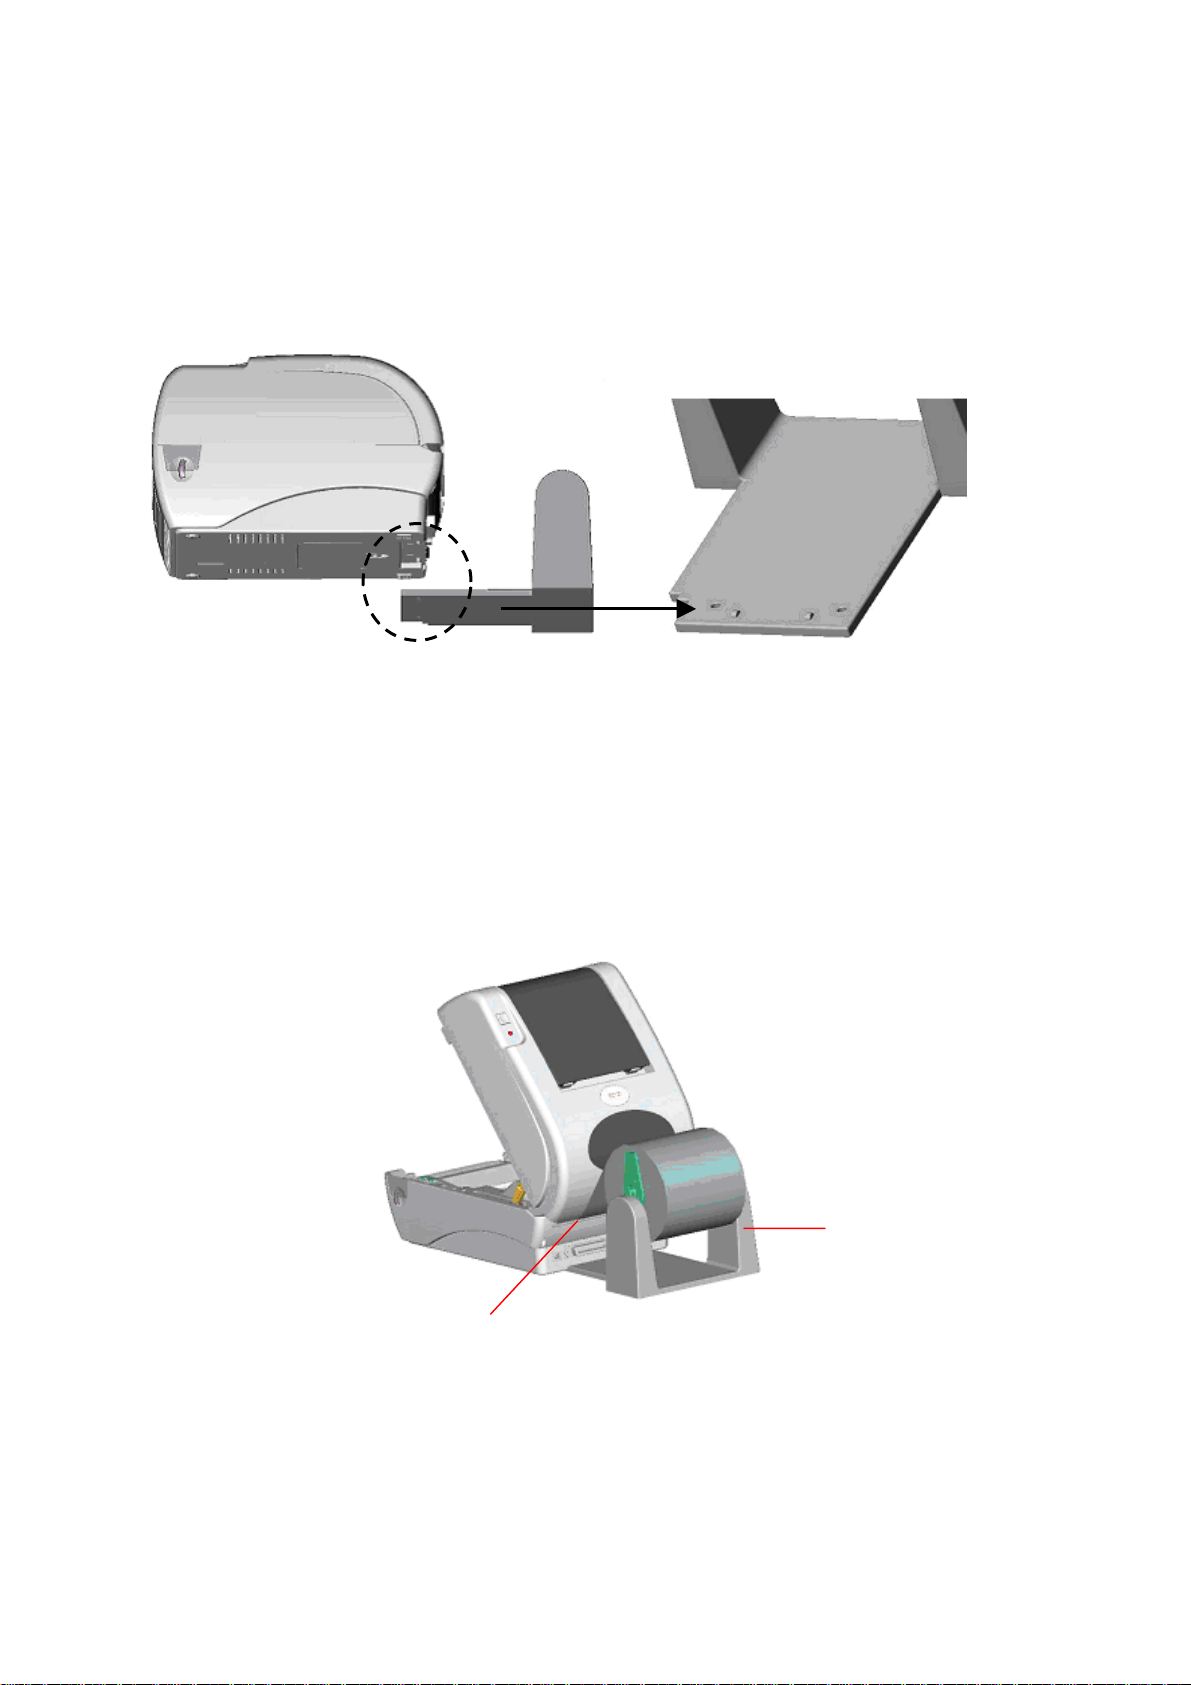
Fig. 8 Label installation (II)
3.4 External Label Roll Mount Installation (Option)
1. Attach an external paper roll mount on the bottom of the printer.
Fig. 9 Attach the external roll mount to the printer
1. Open the printer top cover by releasing the top cover open levers. The top cover
support will hold the printer top cover.
2. Install a roll of paper on the external paper roll mount.
3. Feed the paper to the external paper feed opening through the rear paper guide.
External Paper Roll
Mount
External Paper Feed Opening
Fig. 10 External roll mount label installation (I)
4. Feed the paper, printing side face up, through the paper guide and pass over the
platen.
8
5. Adjust the paper guides to fit the paper width.
6. Close the printer top cover by lifting the top cover to the maximum opening angle then
push down the top cover gently.
Rear Paper Guide
Top Cover Support
Paper Guide
Platen
Fig. 11 External roll mount label installation (II)
3.5 Peel-off Module Installation (Option)
1. Open the top cover and remove the front panel from the printer.
Front Panel
Fig. 12 Remove the front panel
2. Open the top cover and hold it and push down and push backward the top cover
support then push backward the top cover.
9
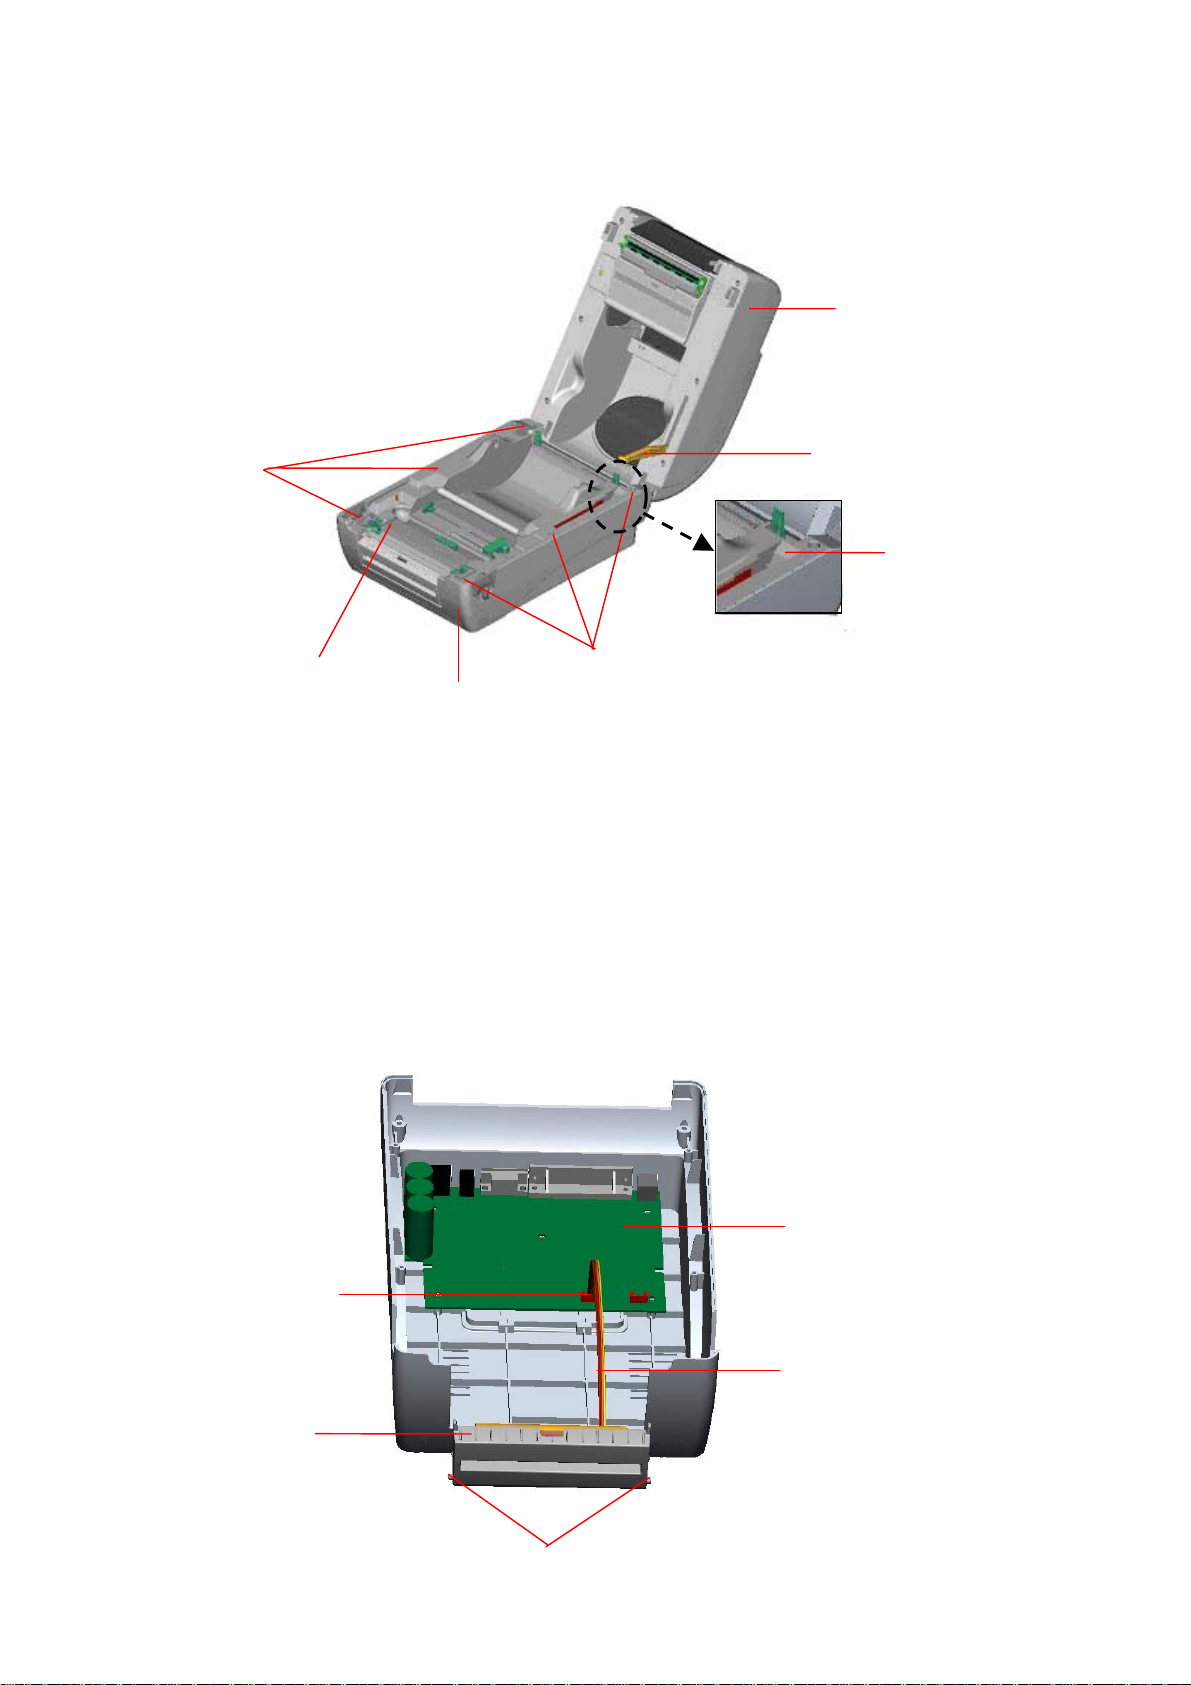
3. Use a screwdriver to screw off 6 screws on the lower inner cover.
r
Top Cover Support
Screws
Top Cover
Flute
Lower Inner
Cover
Screws
Lower Cove
Fig. 13 Remove 6 screws from lower inner cover
4. Upside down the printer. Remove two screws at the hinge and remove one screw at
memory card cover.
5. Hold the lower cover to lift up the top cover open levers to separate the lower inner
cover and the lower cover.
6. Arrange the cable through the bezel. Connect the peel-off panel cable to the 5-pin
socket on printer PCB.
PCB
5-pin Socket
Peel-off panel
Cable
Peel-off
panel
10
 Loading...