

Page 1
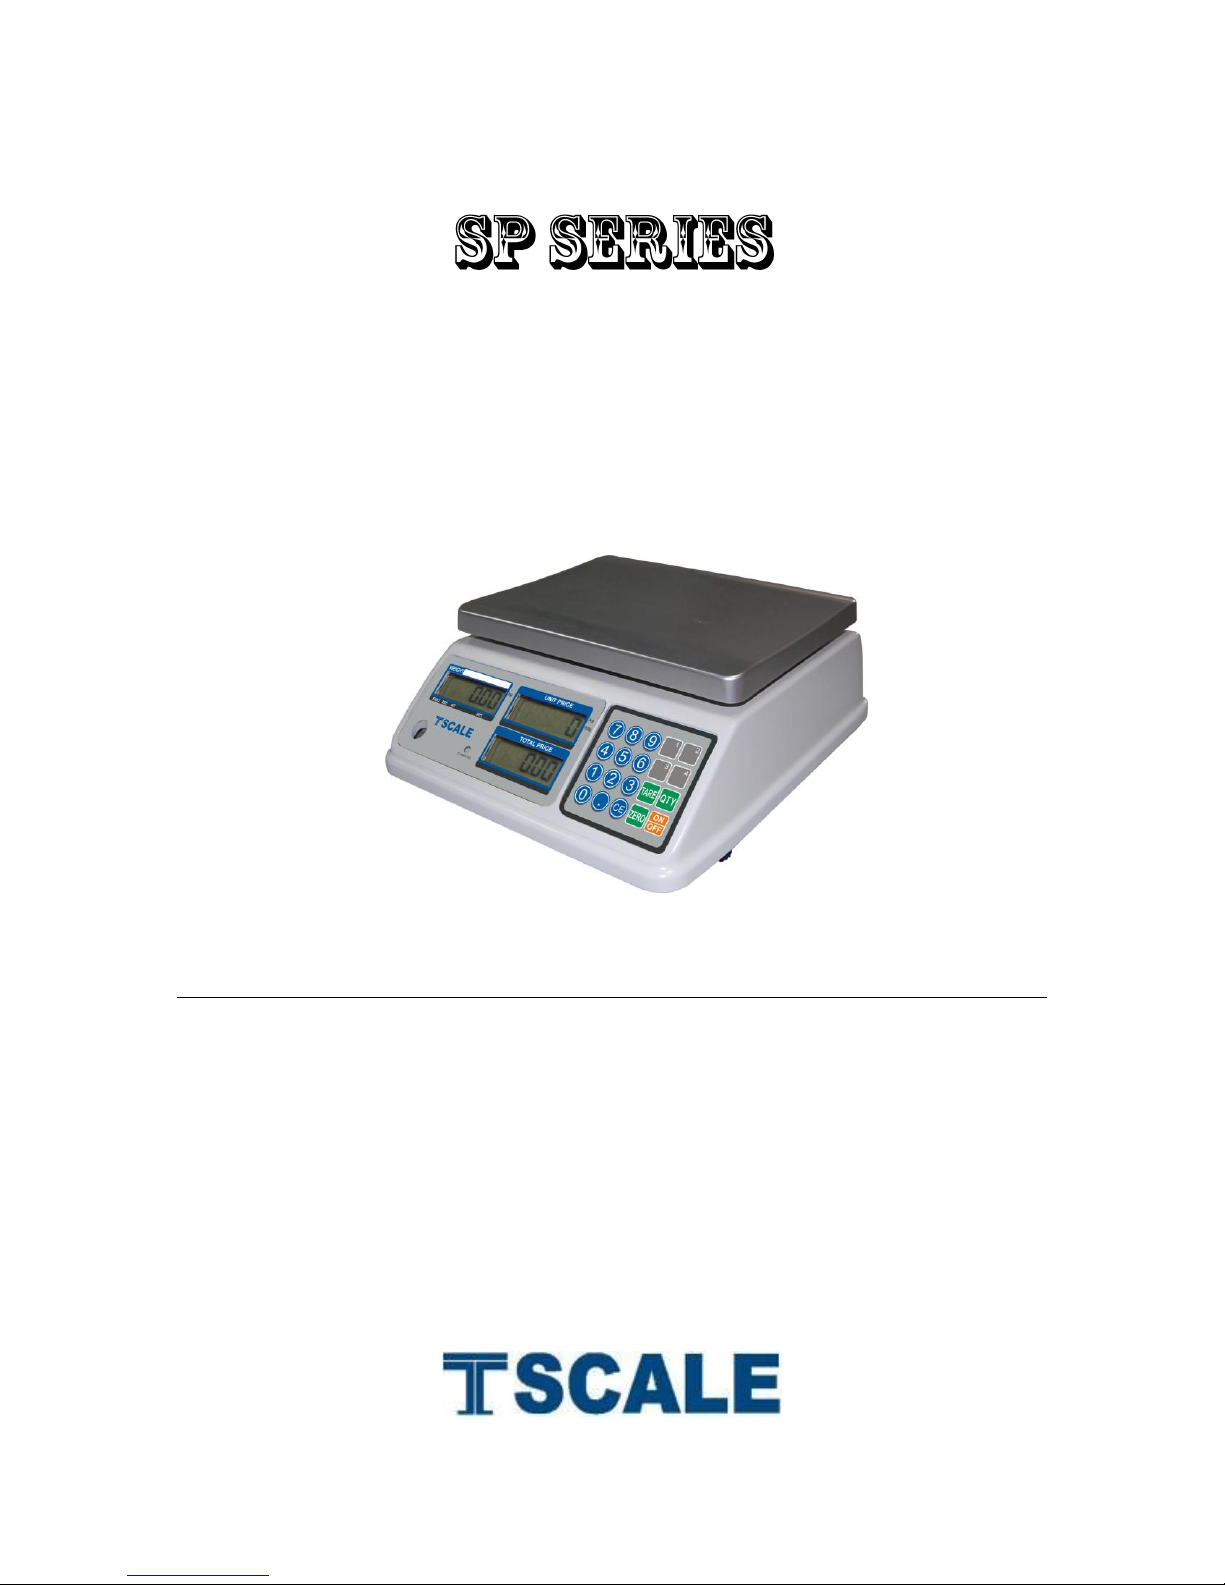
Water proof scale
TECHNICAL MANUAL
Page 2

SP Series Technical Manual
- 1 -
Page 3

SP Series Technical Manual
- 2 -
CONTENTS
1. PRECAUTIONS……………………………………………………………..3
2. INTRODUCTION……………………………………………………………4
3. SPECIFICATIONS……………………………………………………….....5
DIMENSION…………………………………………………………………5
4. INSTALLATION……….…………………………………………………….7
5. PARTS DESCRIPTION…......................................................................9
6. OPERATION………………………………………………………….………..12
1. Power ON/OFF…………………………………………………………12
2. Zero……………………………………………………………………...12
3. Tare……………………………………………………………………...12
4. Unit Quantity…………………………………………………………….….12
5. Commodities without weighing……………………………….……….13
6. Backlight…………………………………………………………………....13
7. Auto Power Off…………………………………………………..……….13
7. PARAMETER………………………………………………………….……….14
8. CALIBRATION…………………………………………………………..……..16
9. DRAWING……… … … … … ………………………………… … … … . .. 17
PARTS NAME………………………………………………………………….18
10. ERROR CODE……………………………………………………………...20
Page 4
SP Series Technical Manual
- 3 -
CAUTION
Permit only qualified persons to service the instrument
Before connecting or disconnecting any components, remove the
power.
Failure to observe these precautions bodily harm or damage to or
destruction of the equipment.
1. PRECAUTIONS
Avoid installing the scale in direct sunlight, which may cause discoloration.
Avoid overloading that could cause damage to the scale.
If the scale is not to be used for a long period of time, remove all batteries
from the battery compartment to avoid leakage.
Avoid stack materials on the scales, when scale is not in use.
Avoid unsuitable tables. The tables or floor must be rigid and not vibrate.
Do not place near vibrating machinery.
Avoid unstable power sources. Do not use near large users of electricity
such as welding equipment or large motors.
Do not mix the type of batteries. Replace all the batteries at the same time
(Dry Cell).
Only use original SP adaptor, other could cause damage to the scale.
When the scale is used with an adaptor, the does not conform to IP-67
protection.
IP 6 5
Protected against:
Protected against entry of dust
IPCode (International Protection Rating) of IEC 60529
Page 5

SP Series Technical Manual
- 4 -
2. INTRODUCTION
The SP series weighing scales is fully water proof scale.
It is suitable for sanitary applications, general weighing, price computing
and accumulation applications
IP65 waterproof technology
ABS Plastic housing.
Super low power consumption.
Optional options for dry cell battery and rechargeable battery.
15mm LCD with white LED back light display.
20 mechanical switches
Page 6
SP Series Technical Manual
- 5 -
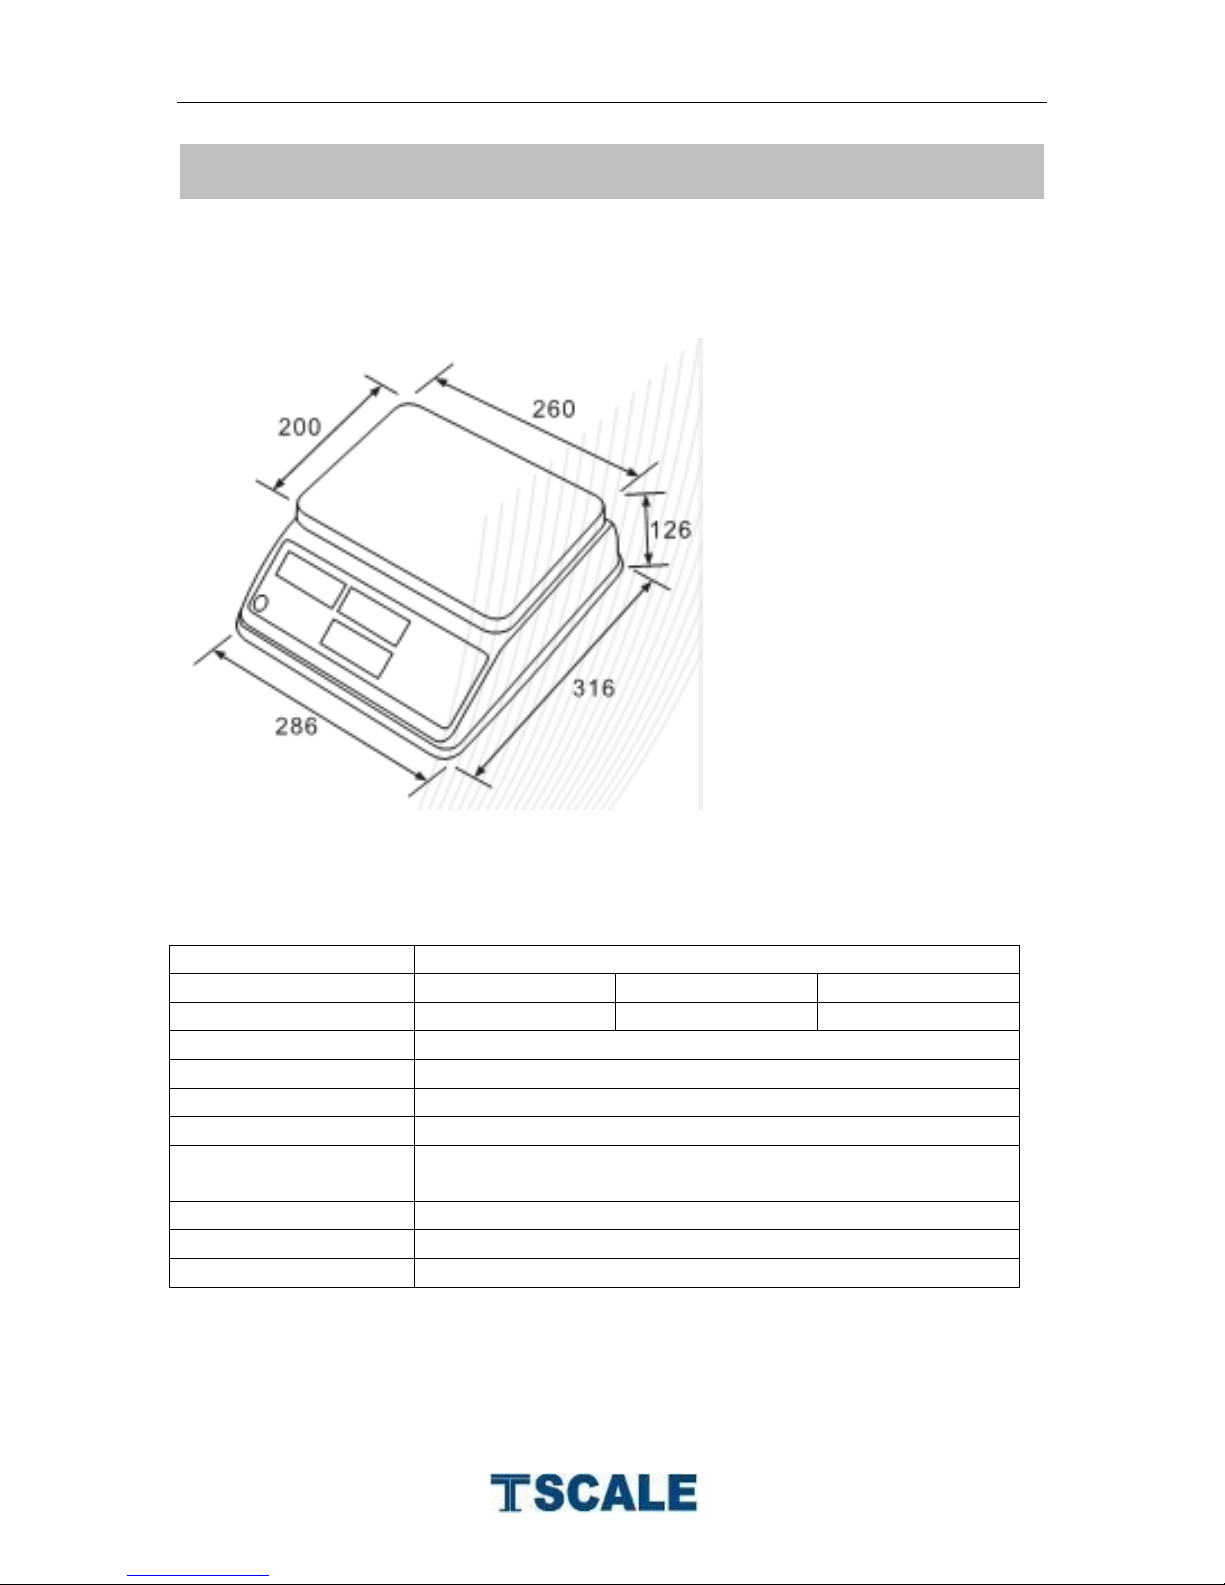
Model
SP
Capacity
3kg
6kg
15kg
Division
1g
2g
5g
External Resolution
3000/6000/Dual
Display
15mm LCD x 3 display with White back light
Pan Size
200mm x 260mm
Keypad
20 mechanical keys
Operate
Temperature
0°C - 40°C /32°F - 104°F
Power
Adaptor 12V/500mA, Battery 6V/3.2 AH
Internal Counts
Up to 60000
Weight
Lead Acid 4.2 kg
3. SPECIFICATIONS
DIMENSION
SPECIFICATION
Page 7
SP Series Technical Manual
- 6 -
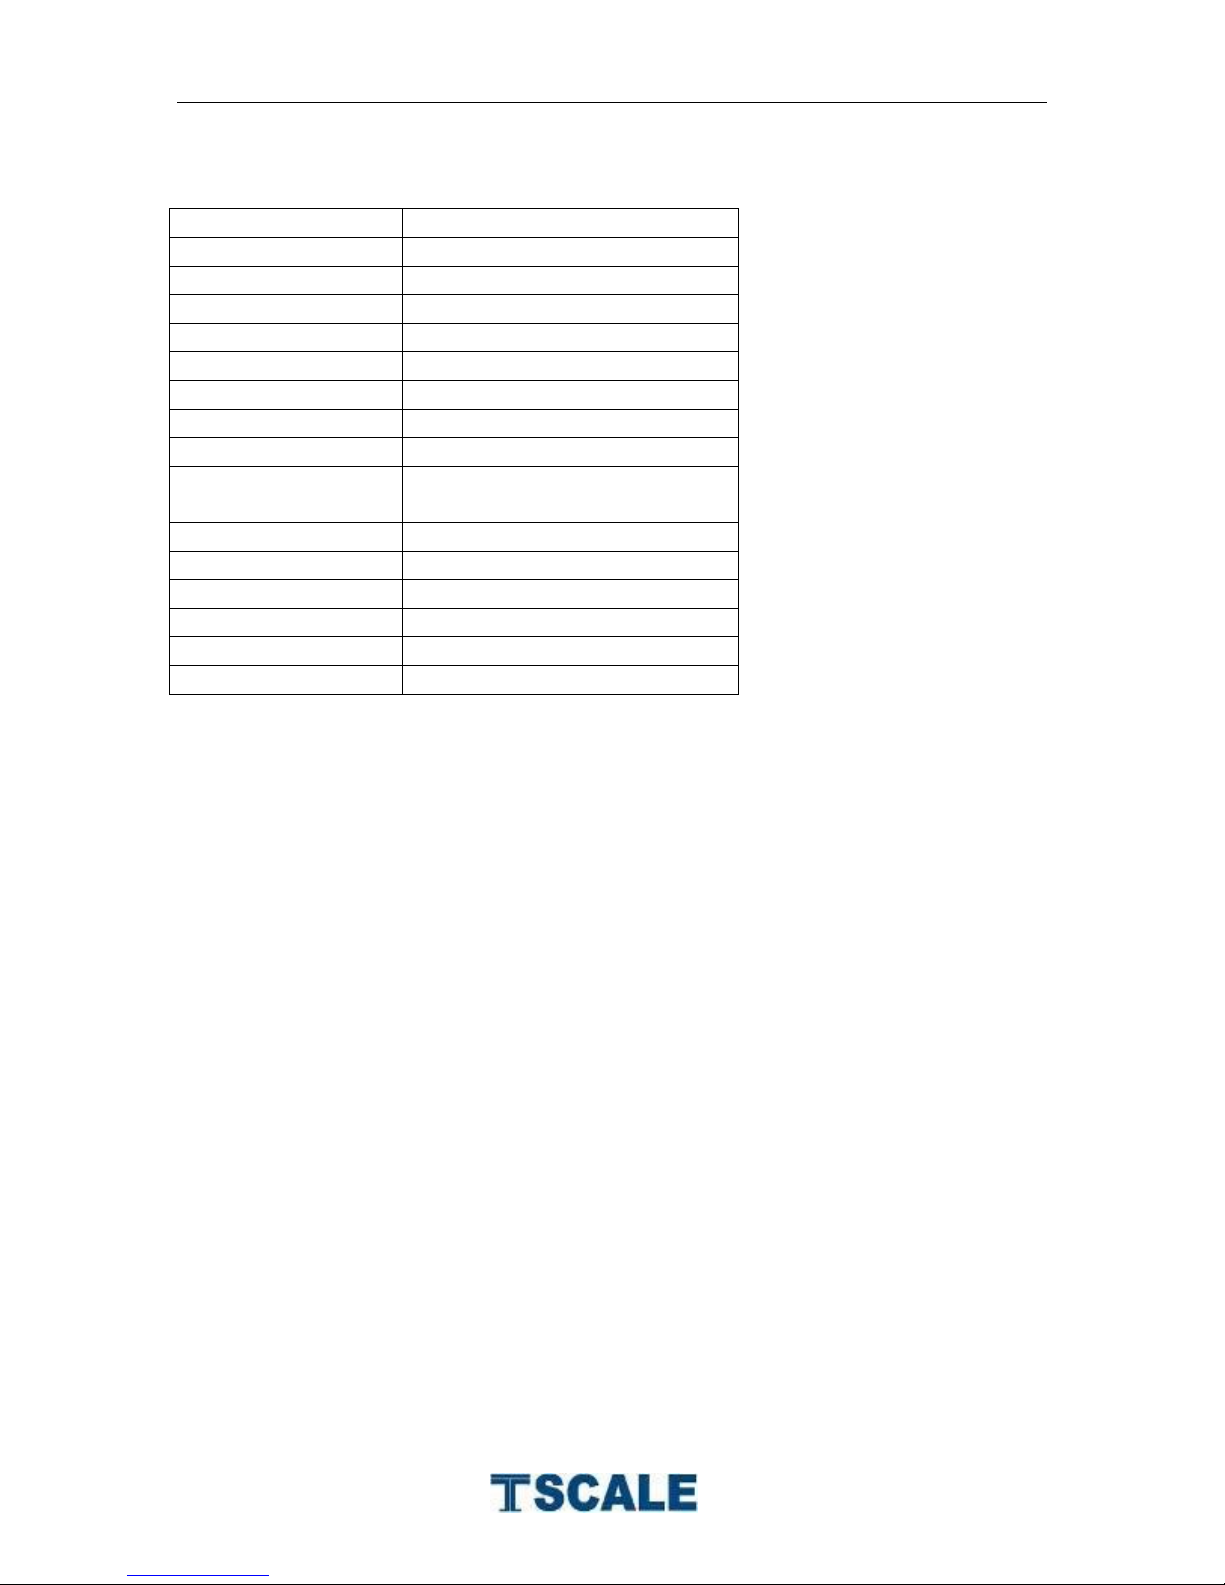
Model No
L6D
Rated Capacity
6~50 (kg)
Rated Out put
2.0 mV/V±0.2 mV/V
Excitation Voltage
18 VDC
IP Level
IP65
Material
Aluminum Alloy
Cable
Φ 3.8mm four core shield
Input Resistance
409Ω ±6Ω
Out put Resistance
350 Ω ± 3Ω
Temperature
Range
-10°C ~ +40°C
Safe overload
150 %R.C
Ultimate overload
300 %R.C
Repeatability
0.02 %R.O
Creep
0.02 %R.O/ 20min
Zero Balance
± 0.2 mV/V
Weight
200g
Load cell specifications
Page 8
SP Series Technical Manual
- 7 -
4. INSTALLATION
Unpacking
Carefully take the balance out of its package, make it sure its not damaged and
all accessories are included.
Remove the Indicator from the carton.
Remove the protective covering. Store the packaging and to use if you
need to transport the scale later.
Inspect the scale and terminal for damage.
Make sure all components are included
Accessories,
1. Balance
2. Adaptor
3. Pan
4. Product manual
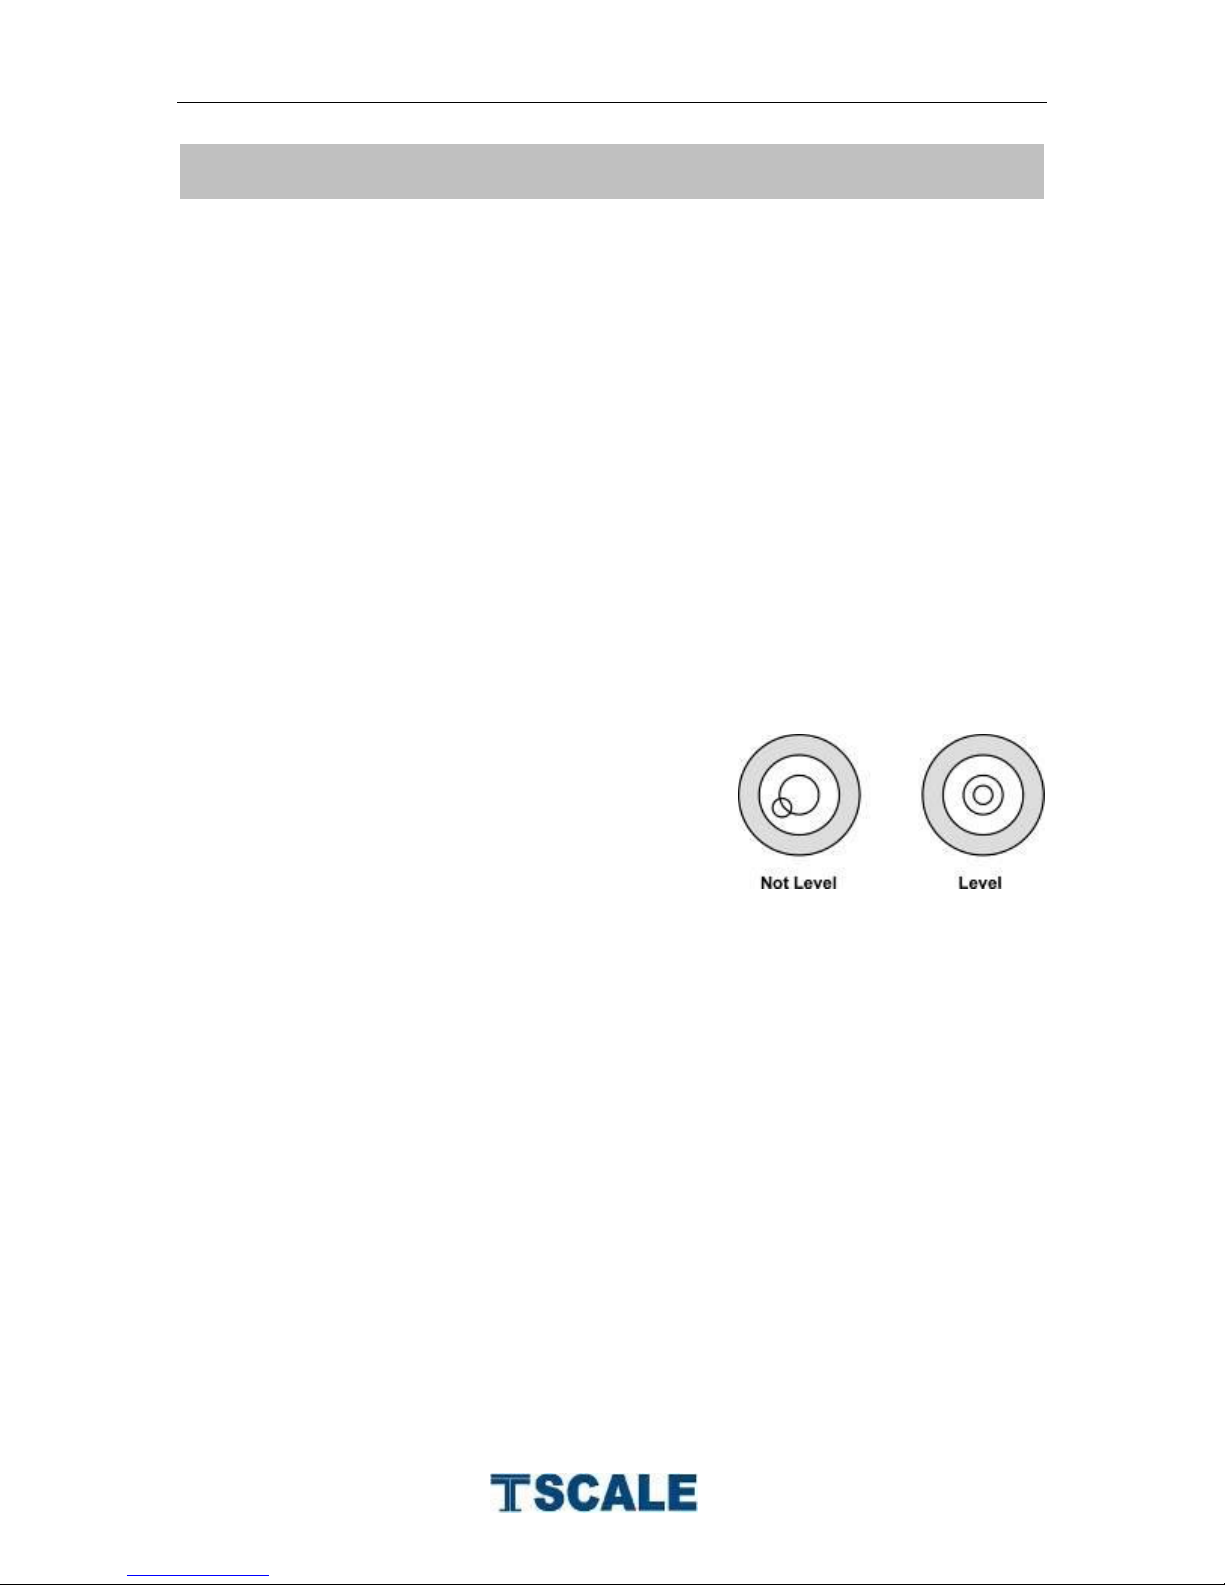
Level Adjusting
Place the scale on a table.
Check the water mark. If, bubble is not centre
adjust the leveling feet until reach centre. Check
the level when you change the location.
Charging Battery
To charge the battery insert the adaptor pin to jack, jack is locating below
the scale. Adaptor simply plug into the mains power. The scale no needs
to be turned on.
The battery should be charged for 12 hours for full capacity.
Left side of the display there is an LED to indicate the status of battery
charging. When the scale is plugged into the mains power the internal
battery will be recharged. If the LED is green, the battery has a full charge.
If it is red, the battery is nearly discharged and if yellow, the battery is
being charged.
Do not use any other type of power adaptor than the one supplied with the
scale.
Verify that the AC power socket outlet is properly protected.
Note: Please charge the battery before using the scale for the first time
Page 9
SP Series Technical Manual
- 8 -
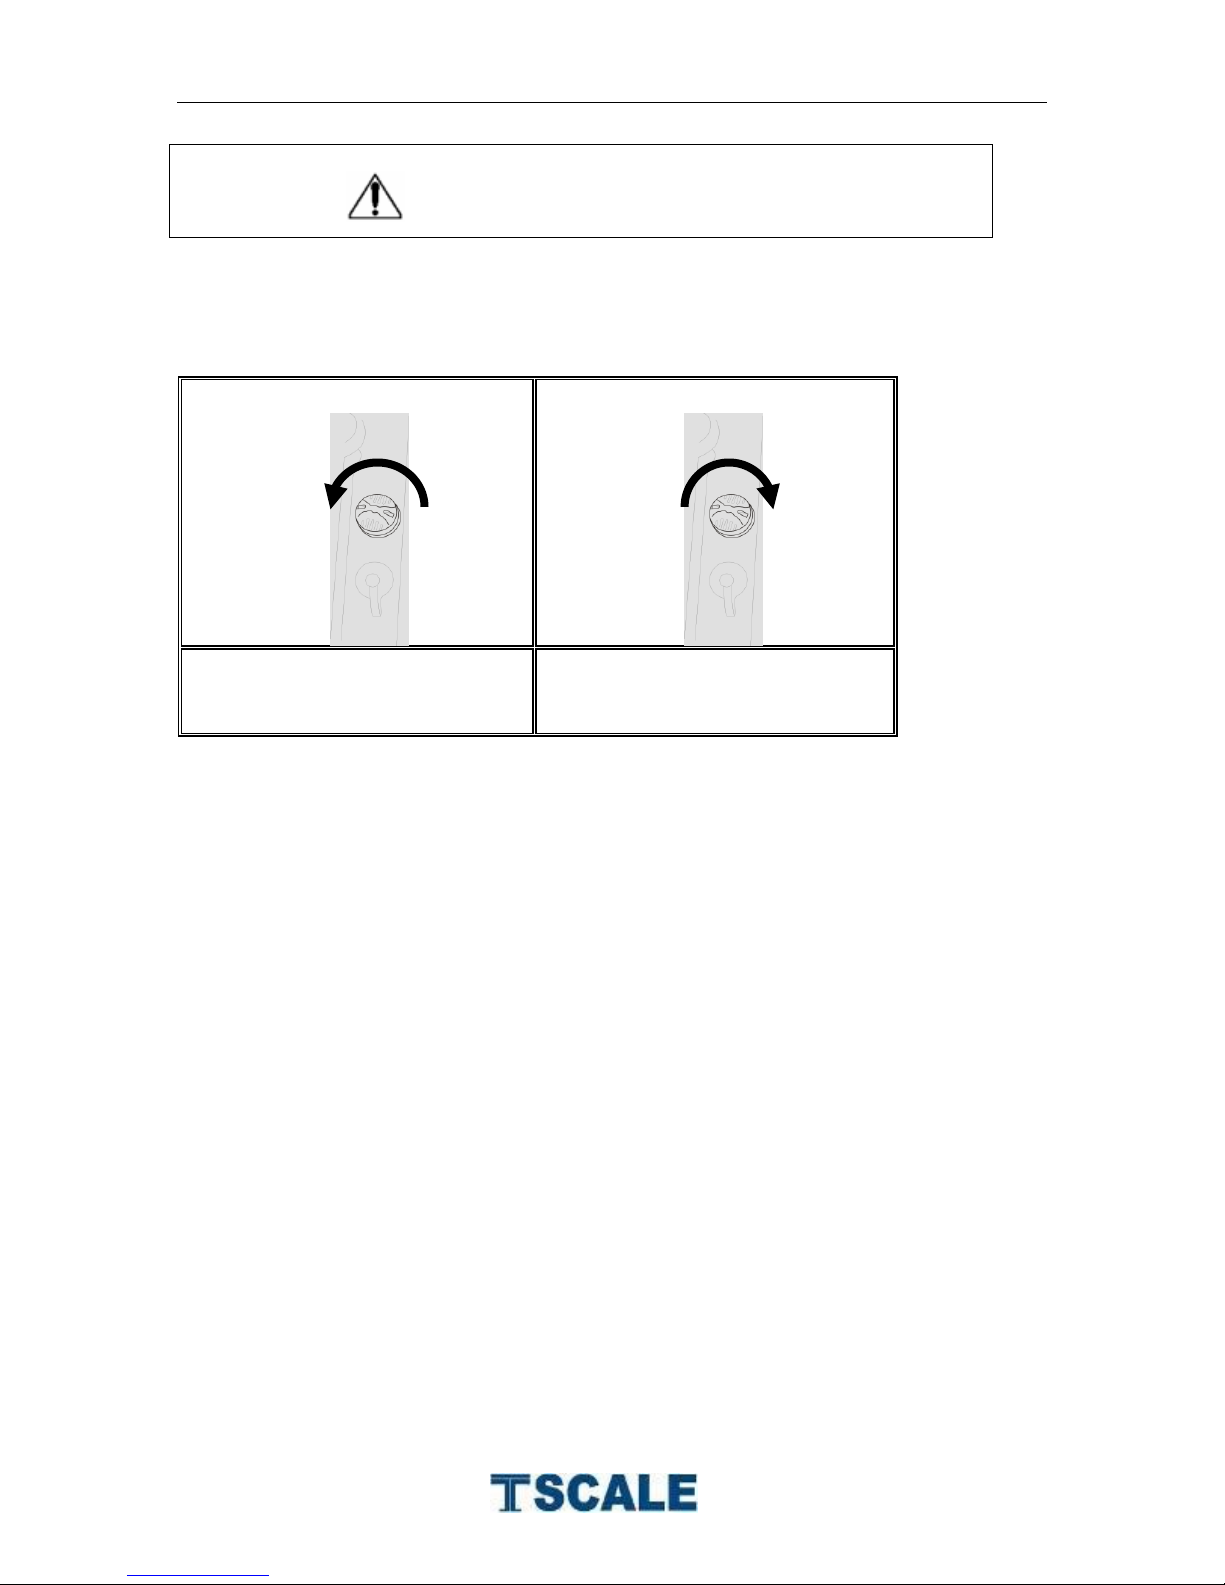
CAUTION
When want to weigh, release
screw for getting normal
pressure
When want to wash, tight screw
for getting seal
Below the scale there is a breathable knob. Its default setting is for weigh. If you
want to wash tighten the knob, after wash release the knob for weigh
Installation
Place the scale on a table..
Connect the adaptor pin in to the indicator adaptor jack.
Adaptor jack is locating, rear side of the scale.
Adaptor connects into your AC power socket. Pluggable equipment
must be installed near an easily accessible socket outlet with a
protective ground/ earth contact.
Turn on the On/Off key. If you want to turn off, press the key again.
Display will be show the version number and will be starting self checking.
After self checking, display will be come to normal weighing mode.
Warm-up time of 15 minutes stabilizes the measured values after
switching on.
Calibrate with exact calibration weights, minimum 1/3 of the scale capacity
want to use for calibration. For calibration see details in parameter.
Then you can start your operation
Page 10
SP Series Technical Manual
- 9 -
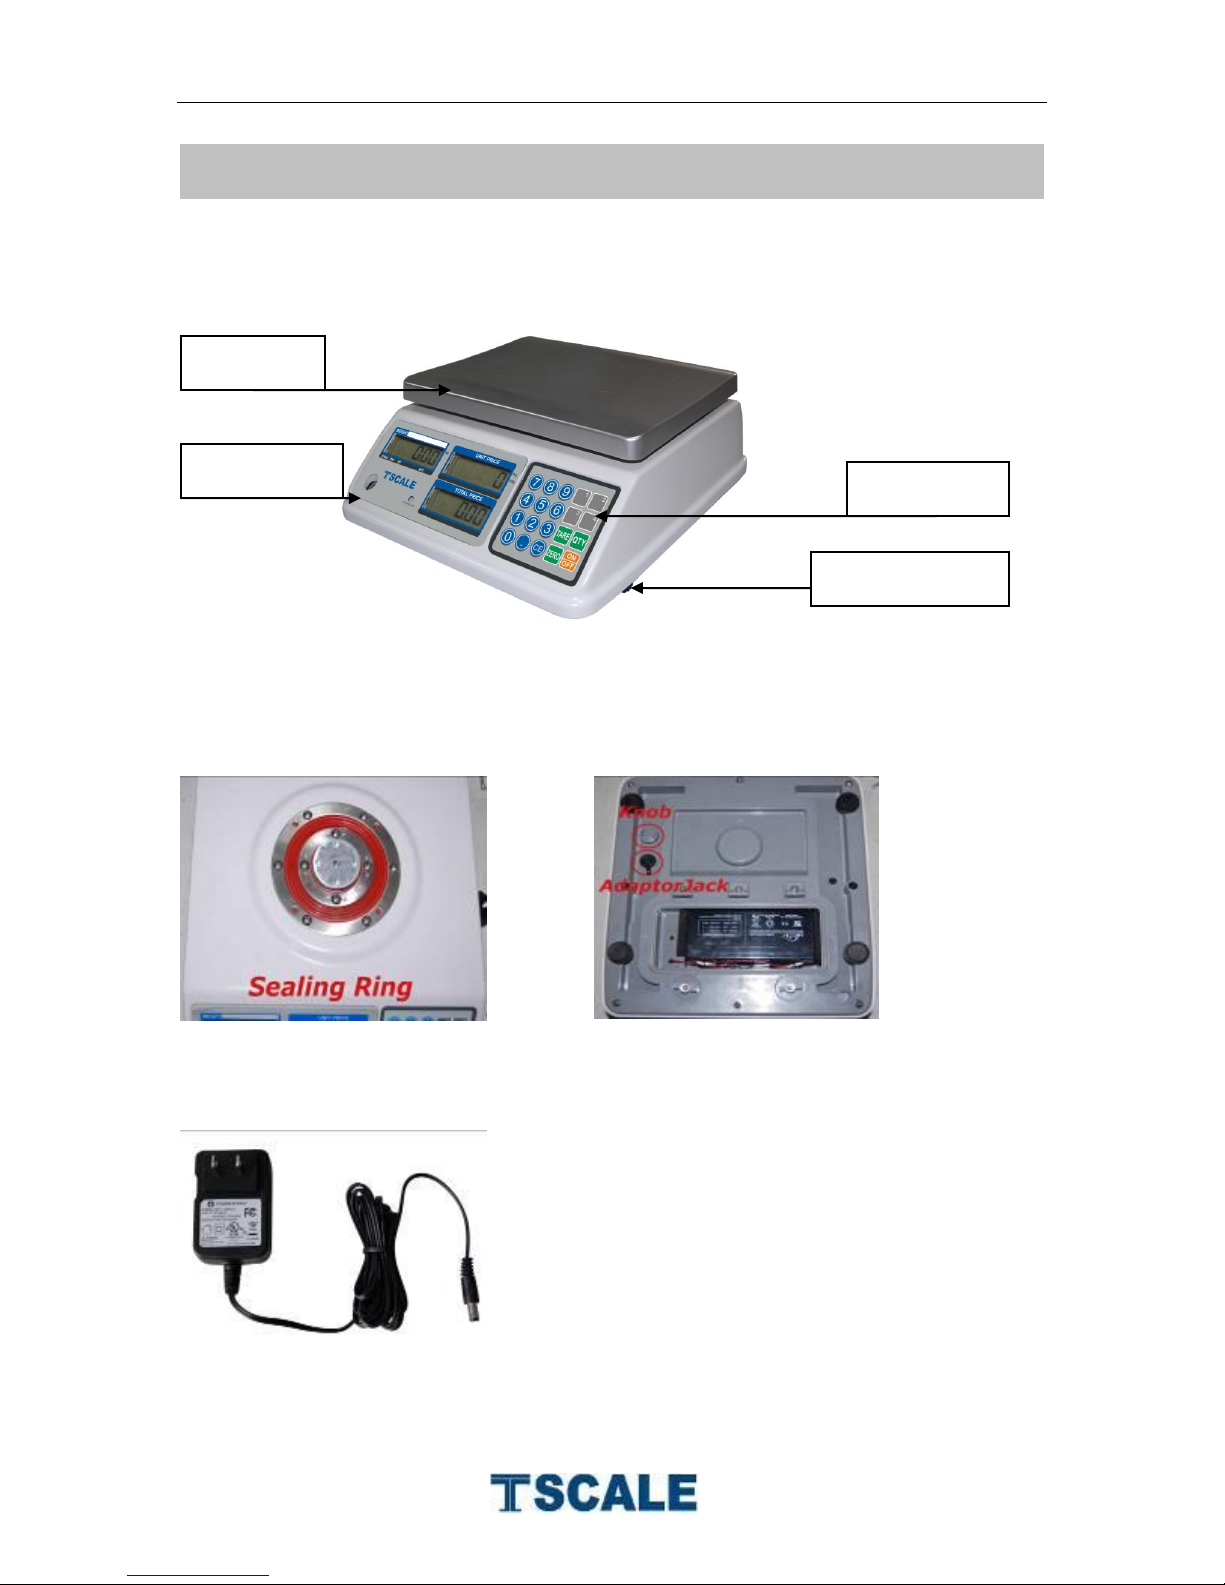
Pan
Leveling Feet
Key board
Spirit Level
5. PARTS DESCRIPTION
Overall View
Sealing Ring Breathable knob &
Adaptor jack
Adaptor
Page 11
- 10 -
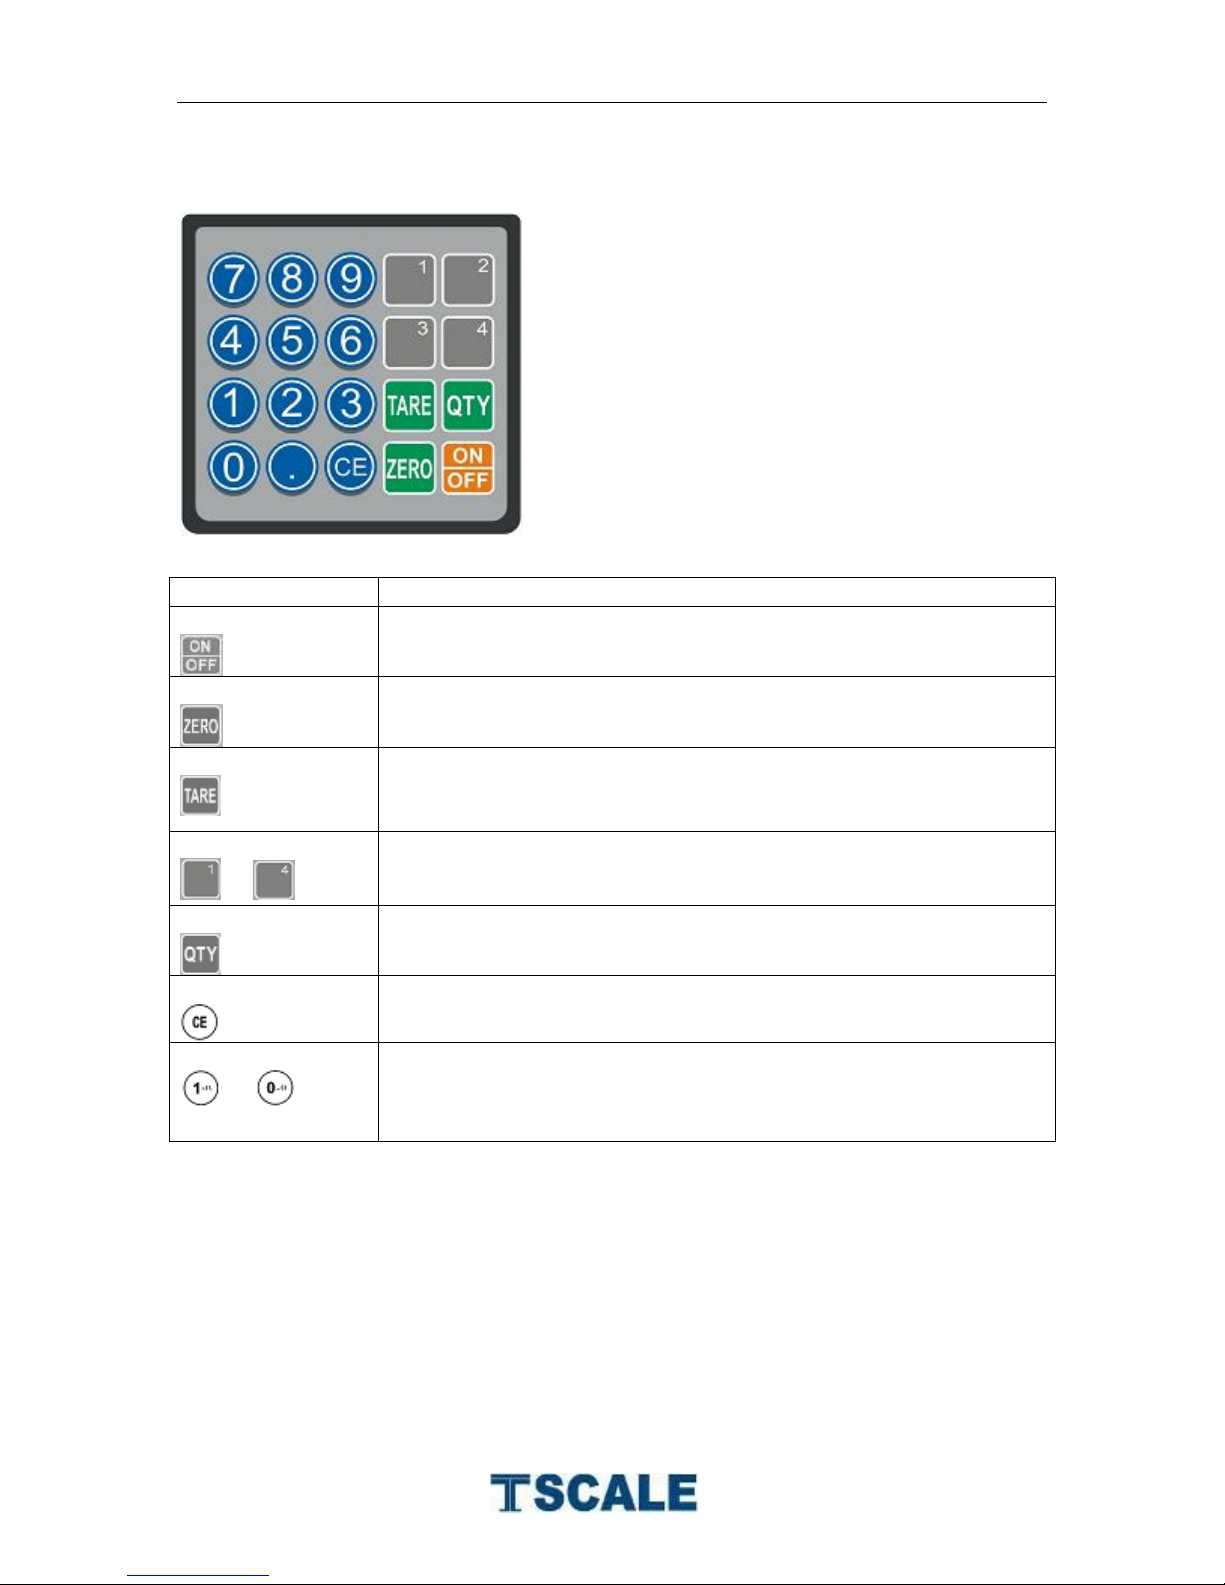
Keyboard
Keys
Description
Turn the scale power On/Off
Set the display to zero.
Enter the clear tare weights, Storing the current weight as
tare value
to
PLU keys
Quantity key, use for with out weighing.
Clear incorrect entries and error conditions
to
Numeric Keys. Enter to individual unit weights and the
present tare
SP Series Technical Manual
Page 12
- 11 -
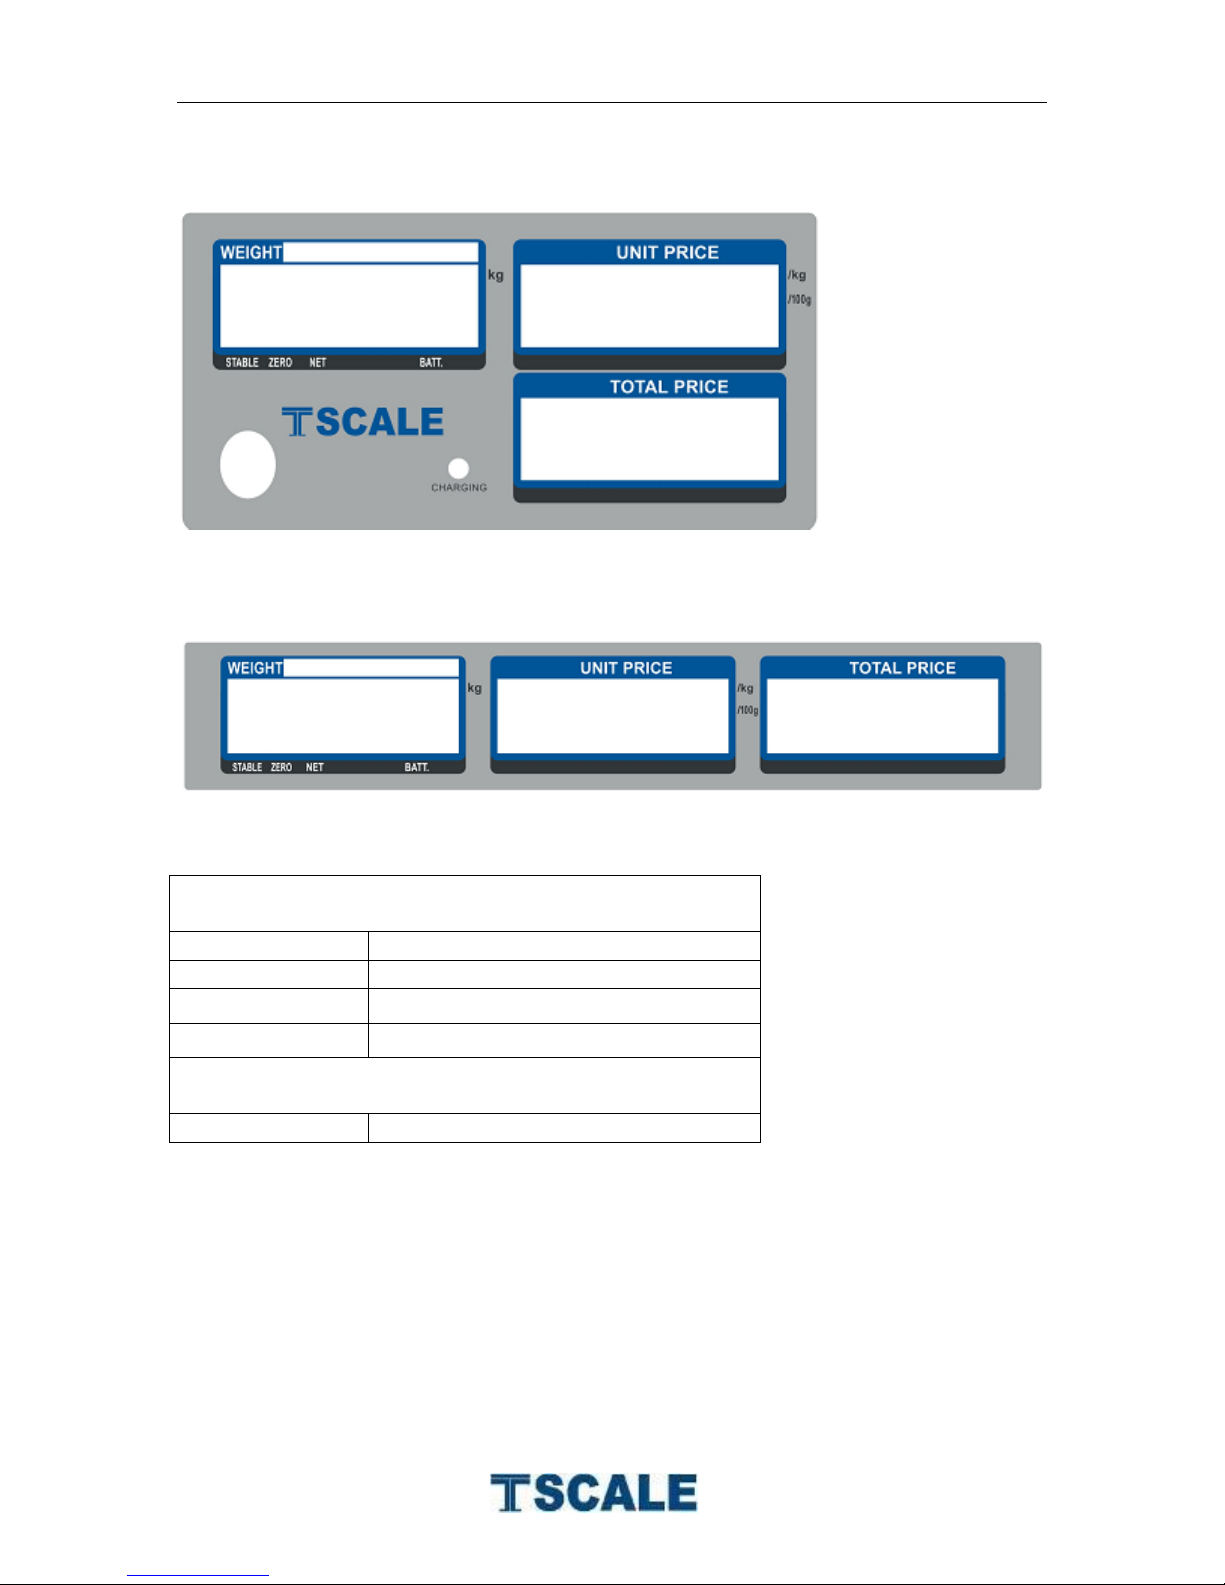
Display
Display Weight
STABLE
Stability Display
ZERO
Zero display
NET
Net Weight
BATT
Low Battery
Display Unit Price
kg/ 100g
Current unit weight
Rear Display
SP Series Technical Manual
Page 13
SP Series Technical Manual
- 12 -
Unit_0
select
--------
6. OPERATION
Initial Start-up
Warm-up time of 15 minutes stabilizes the measured values after switching on.
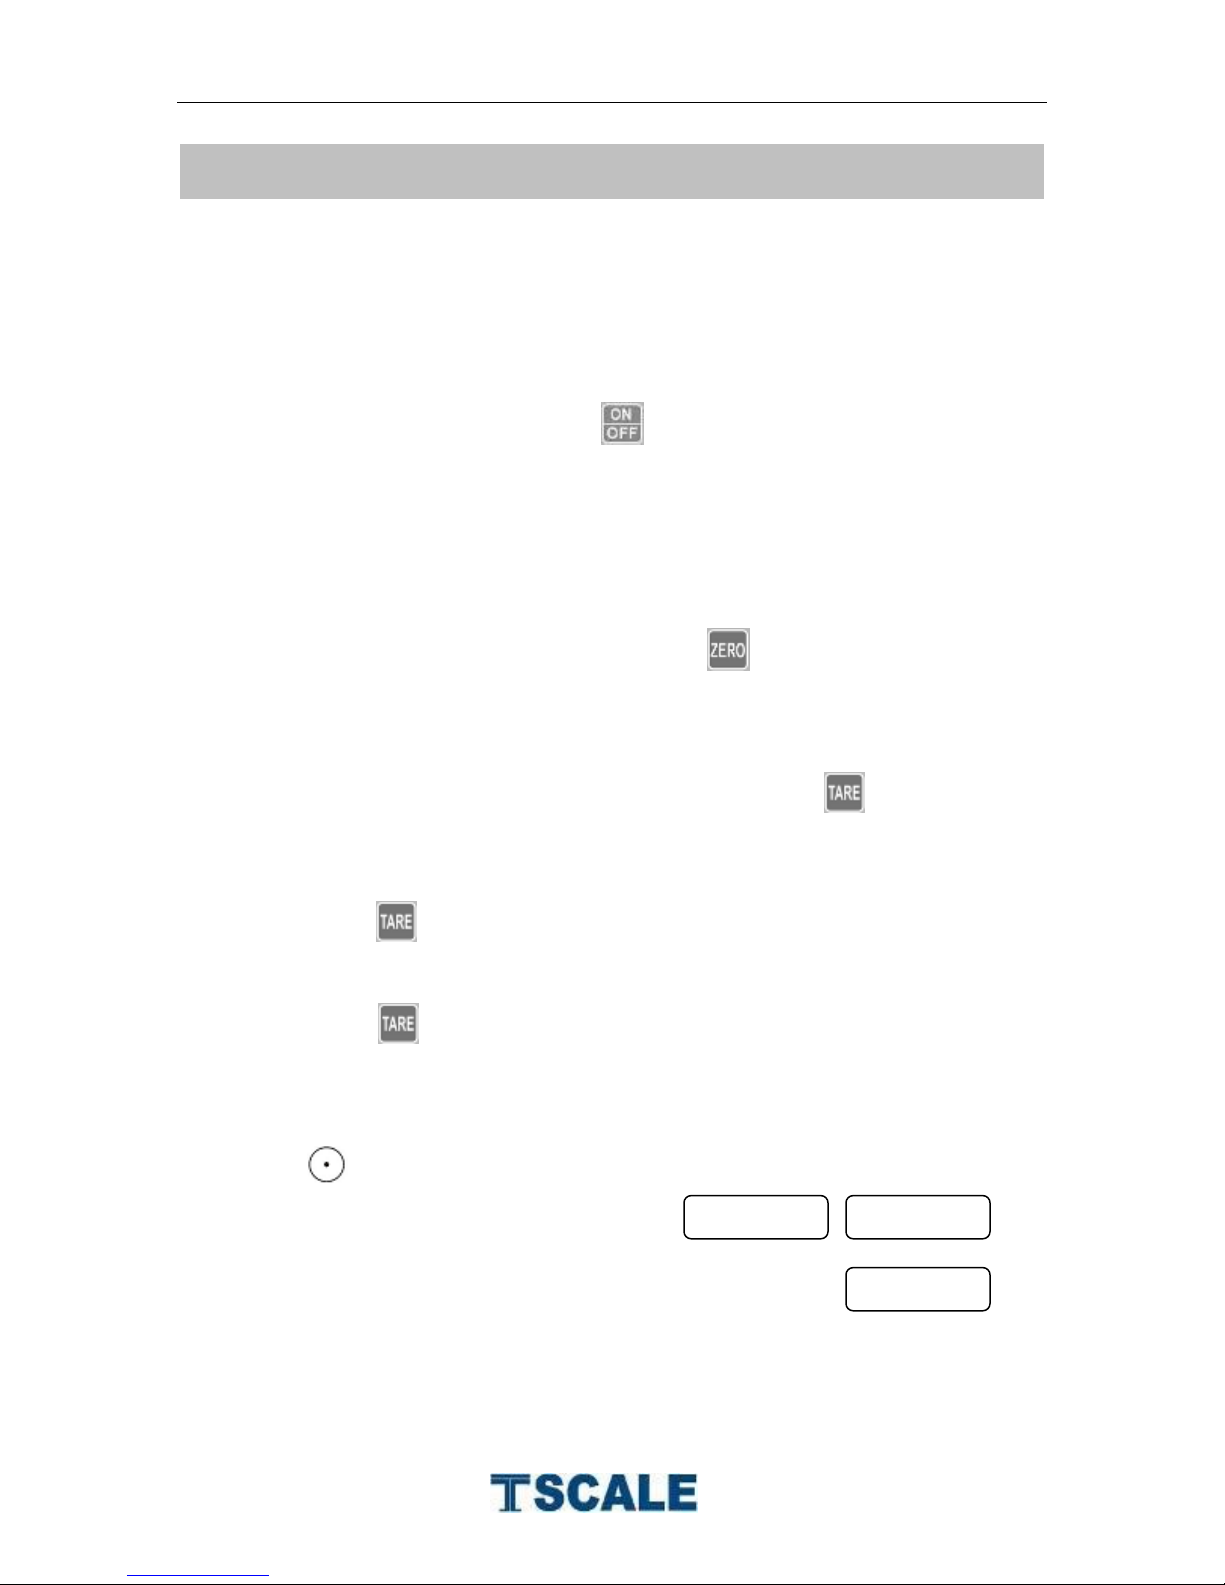
1. Power ON/OFF
Switch on the scale by pressing . The display is switched on and the
self test is started.
If you want to switch off press the key again.
2. Zero
Environmental conditions can lead to the balance exactly zero in spite
of the pan not taking any strain. However, you can set the display of
your balance to zero any time by pressing key and therefore
ensure that the weighing starts at zero.
3. Tare
The weight of any container can be tared by pressing button so that
with subsequent weighing the net weight of the object being weighed is
always displayed.
Load weight on the pan.
Press key. Zero is displayed, and tare is subtracted.
Remove weight from the platform. Tared weight is displayed. It can
set only one tare value. It can display with a minus value.
Press key. Zero is displayed, tare weight is cleared.
4. Unit Quantity
Hold key 3 seconds to change the weighing unit kg / g.
Press 0 or 1 key to select the weighing unit kg or 100g
Page 14
SP Series Technical Manual
- 13 -
Of 0
To set auto off function turn off, for scale always
on
Of 3
Set to turn off three minutes later
Of 5
Set to turn off five minutes later
Of 10
Set to turn off 10 minutes later
Of 3 0
Set to turn off 30 minutes later
Bt mode
auto
off
0
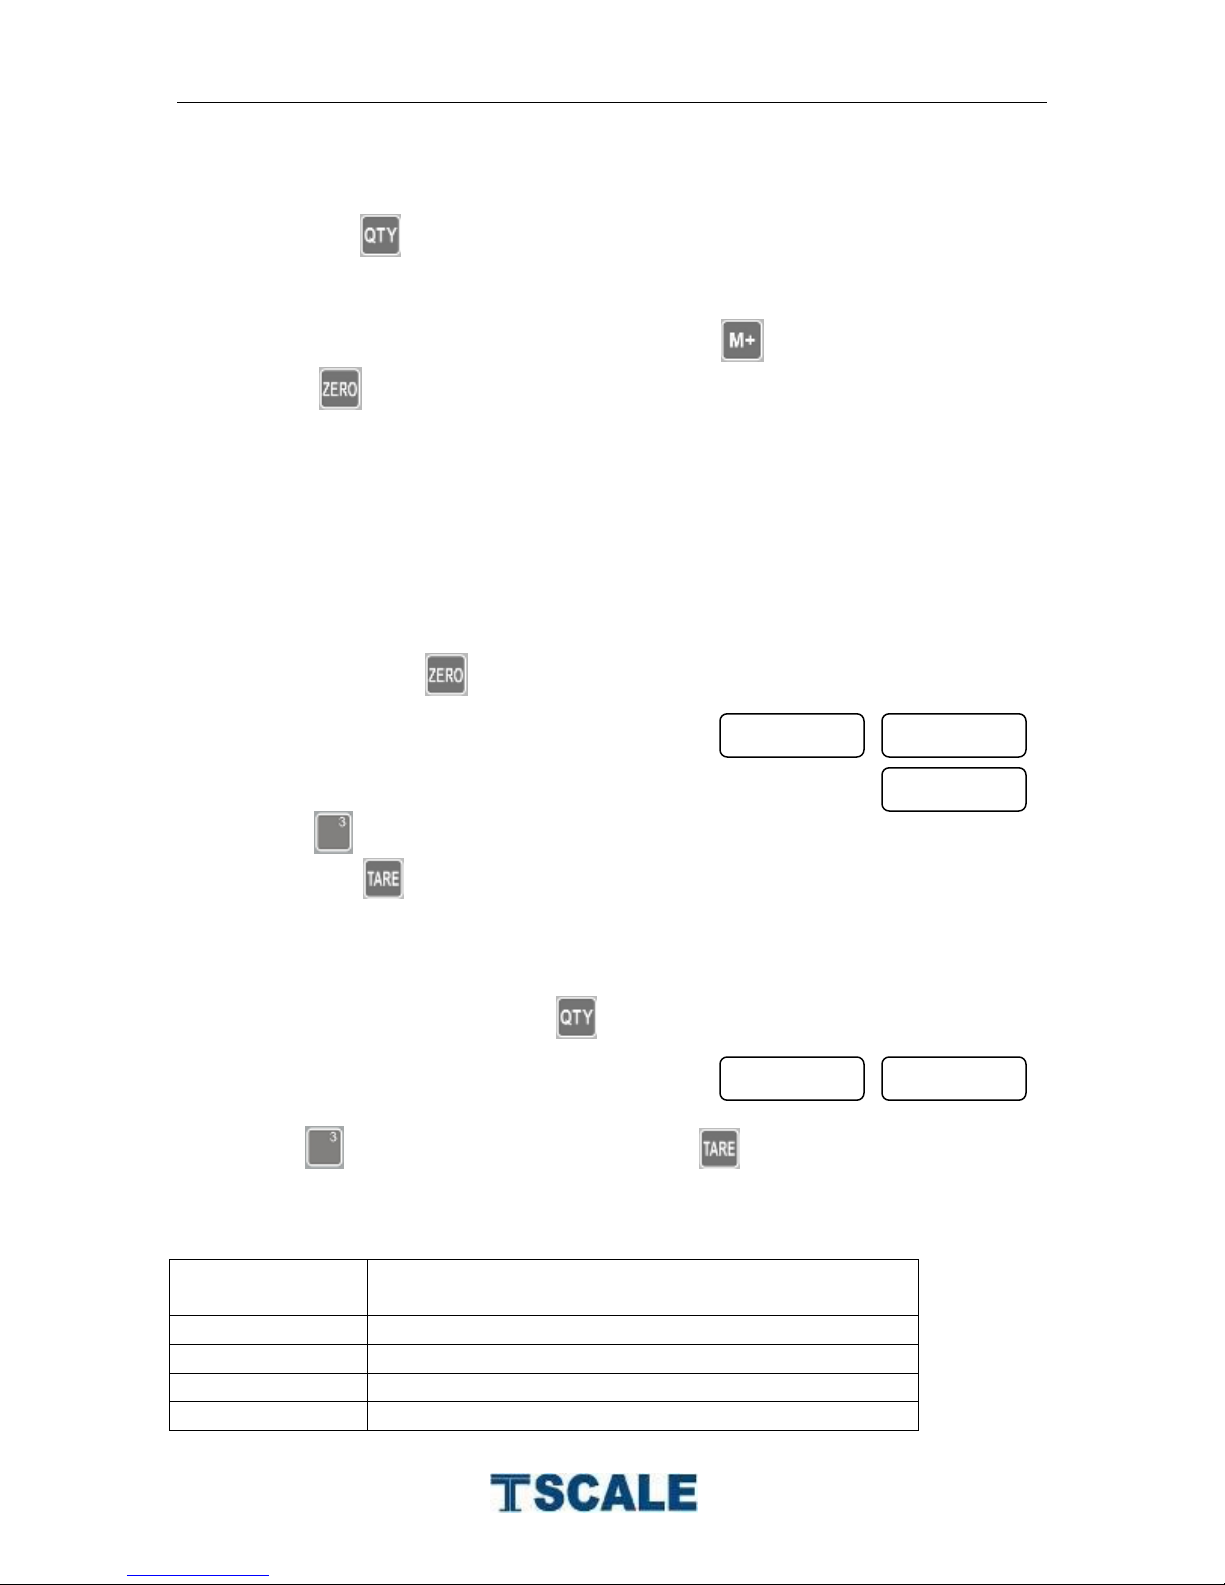
5. Commodities with out weighing
Enter the unit price by pressing numeric keys
Press the key
Enter the quantity by pressing numeric keys.
Display will be show the total price
If want to add this value into memory, press key.
Press key to return normal weighing.
6. Backlight
In SP scale has three different backlight modes.
Auto: Turn on back light automatically, when the scale start to use.
On : Turn on back light full time.
Off : Back light turn off,
Press and hold key 3 seconds.
Display will be shown
Press key or press 1/2/3 keys to change the mode to auto, on, off
Then press to confirm.
7. Auto Power Off
SP scales have automatic power turn off function.
Turn on the scale, press the key during the start up
Display will be shown
Press to change option and then press to confirm.
Options:
Page 15
SP Series Technical Manual
- 14 -
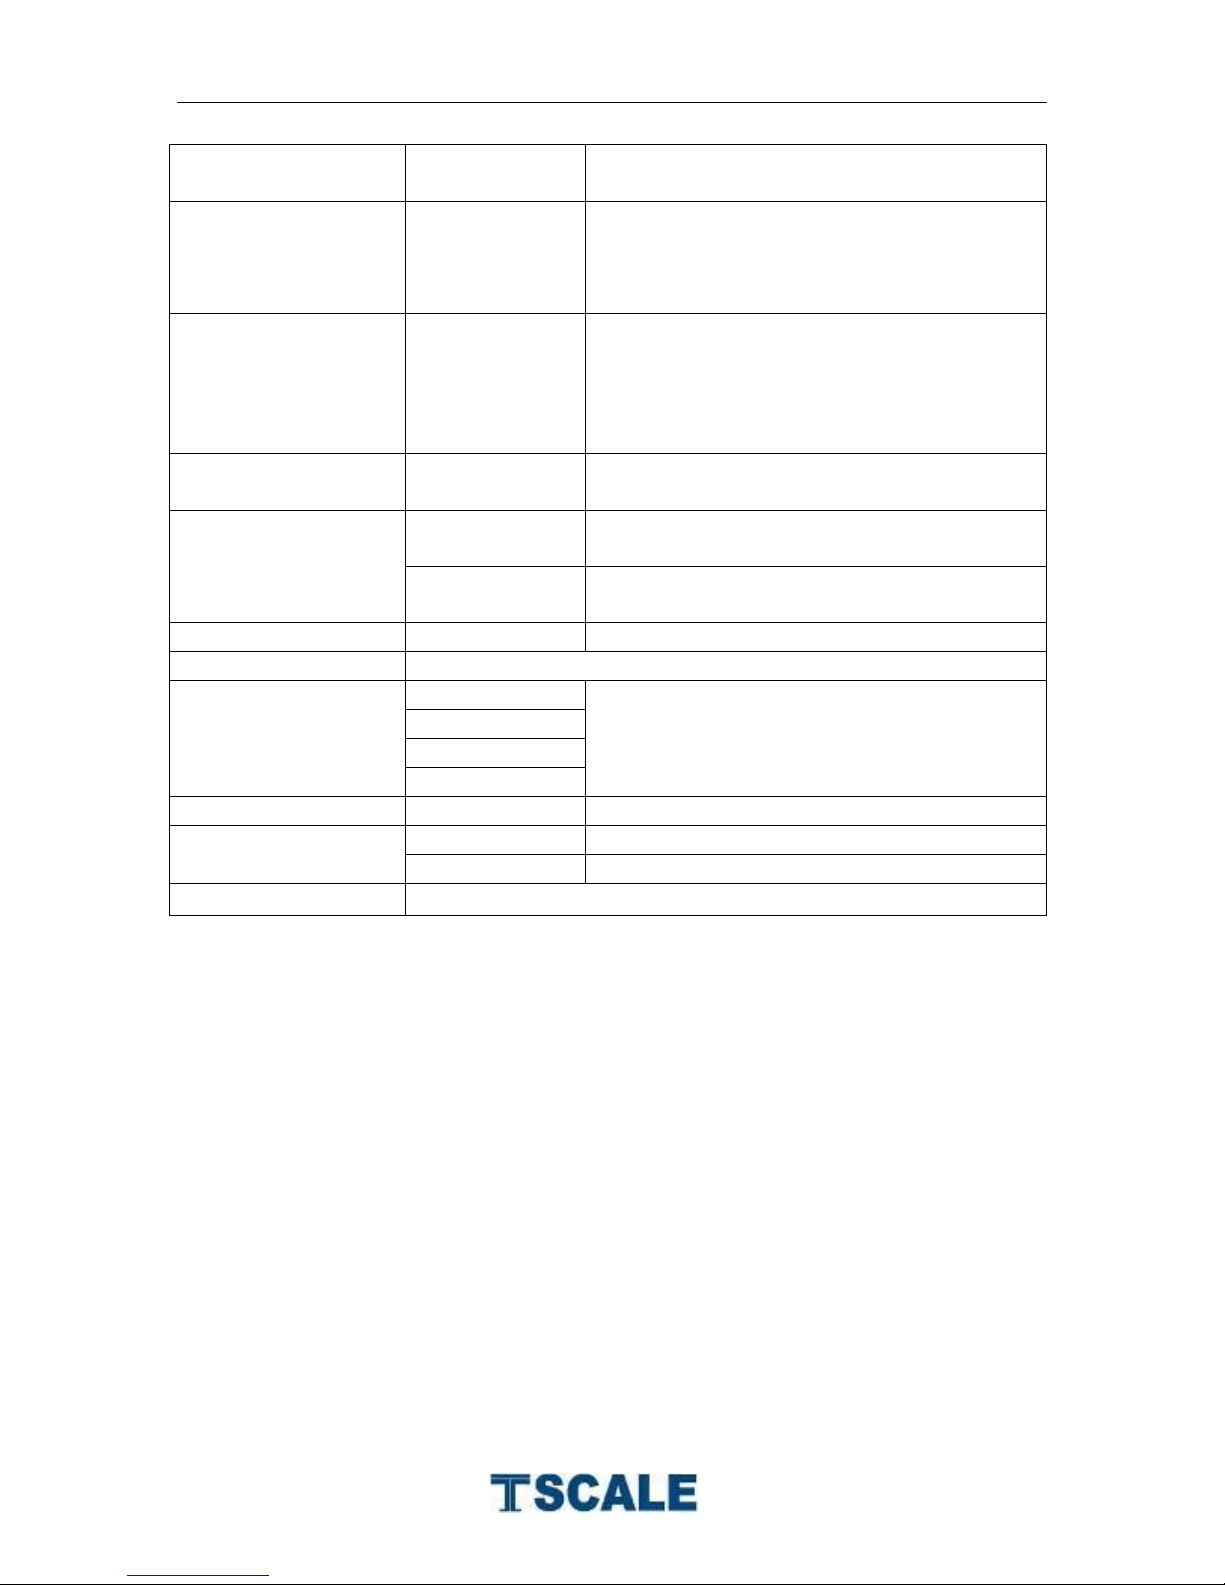
Menu
Description
F0 cal
Calibration
F1 res
3 000
Set Resolution
6000
dual
F2cap
3 kg
Set Scale Capacity
6 kg
15 kg
3 0 kg
F3 pdesl
0
To set the weight decimal point
0.0
0.00
0.000
F4 pdesc mode
Price desc
fix
To set the unit price decimal
F0
cal
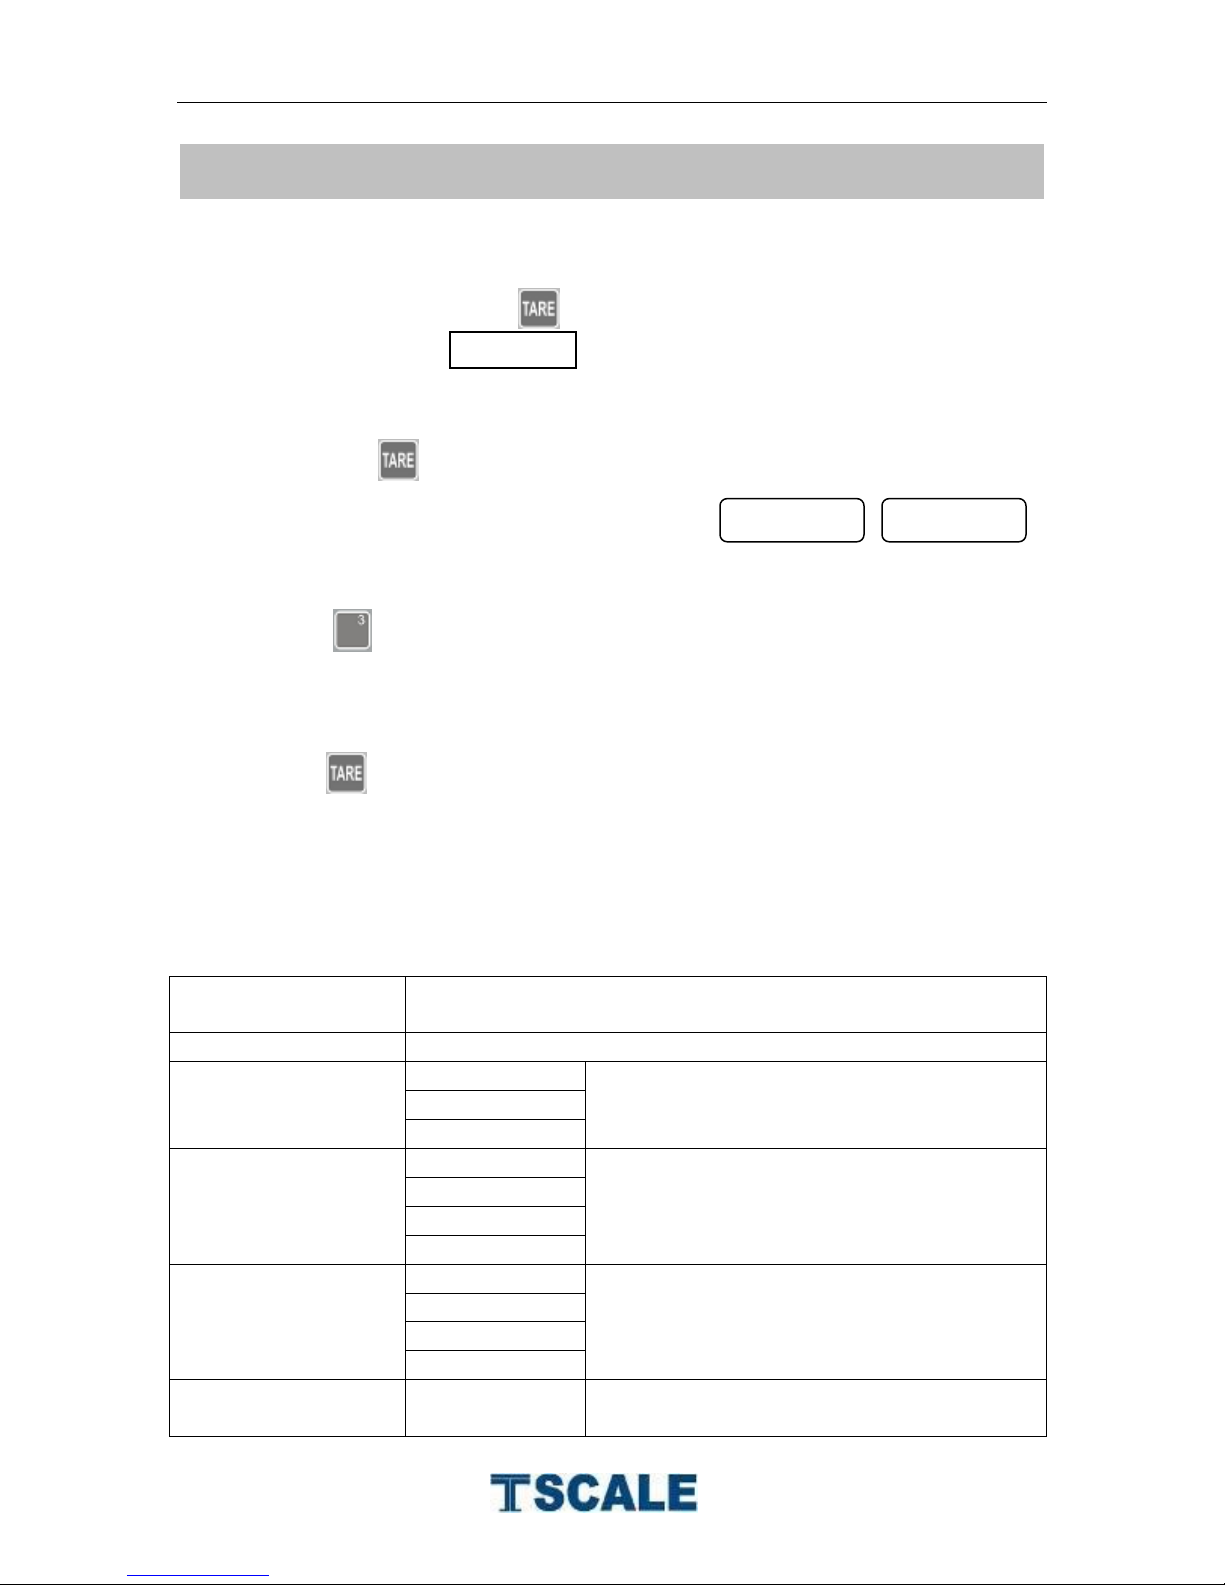
7. PARAMETERS
Enter the Menu
Turn on the scale. Press during that start up until display will be
shown
Enter the Password. Press 0000 and press
Then press to confirm, display will be show
Select the Menu
Press , it can choose menu block one by one
Enter the Selected Menu
Press , it can confirm which will be shown displayed
Note: Before enter into the menu, press the calibration switch to
operate the function; Switch is locating near the battery.
Parameter Block
Page 16
SP Series Technical Manual
- 15 -
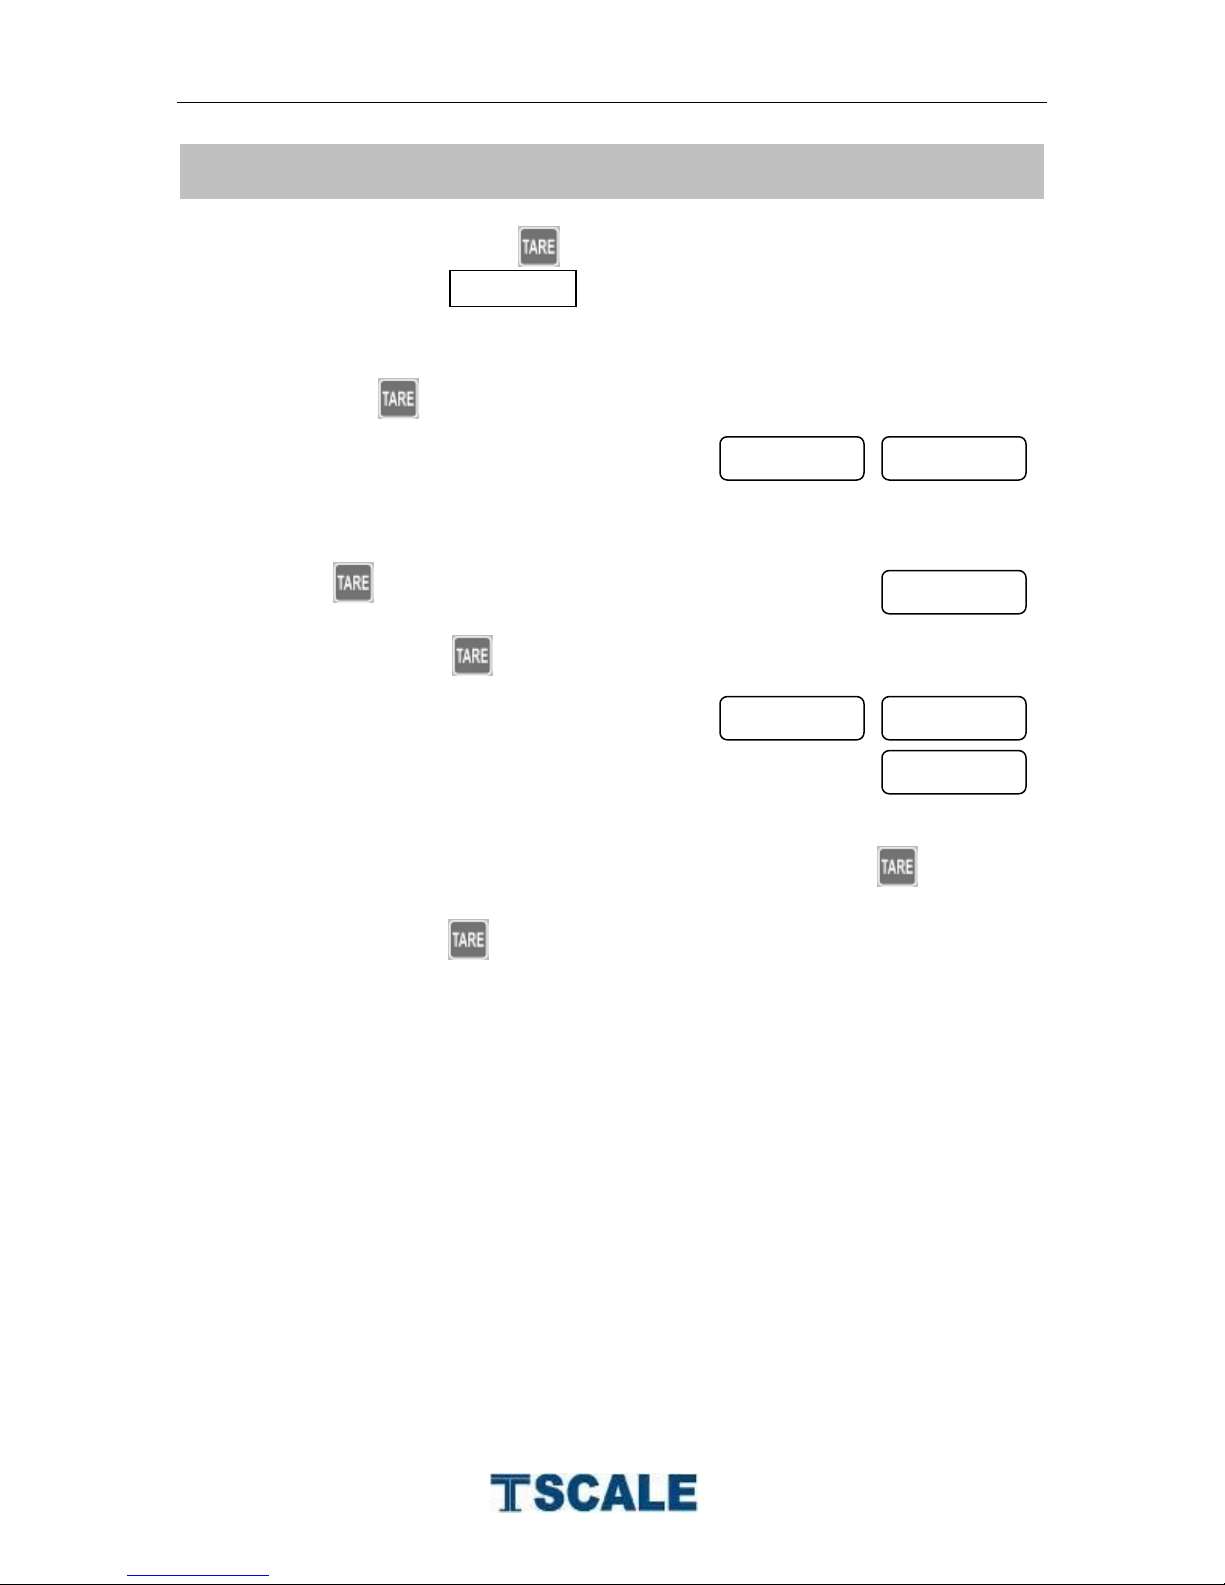
Price desc
float
F5 init zero
Init 2
To set the auto zero range.
Options: 0 / 2/ 4 / 10 / 20
/ 3 0
F6 re zero
Re 2
To set the re zero range (manual zero
range)
Options: 0/ 2/4 /10 / 20 / 50 /
100
F7 track zero
Azn
To set the track zero range
Options: 0 .5 d / 1d / 2d / 4 d
F8 scsiue tare
s tare on
Turn On re tare function, it can continue
the tare operations
s tare off
Turn off re tare function, it can do only
one time.
F9 p unit
Unit_2 off
No function
F10 counts
Internal counts
F11 spd
Speed 7 .5
Set AD speed
Speed 15
Speed 3 0
Speed 6 0
F12 gra
Grav
To set local gravity
F13 pin
P1
Enter the new password
P 2
Re enter the new password
F14 reset
To reset the factory settings
Page 17
SP Series Technical Manual
- 16 -
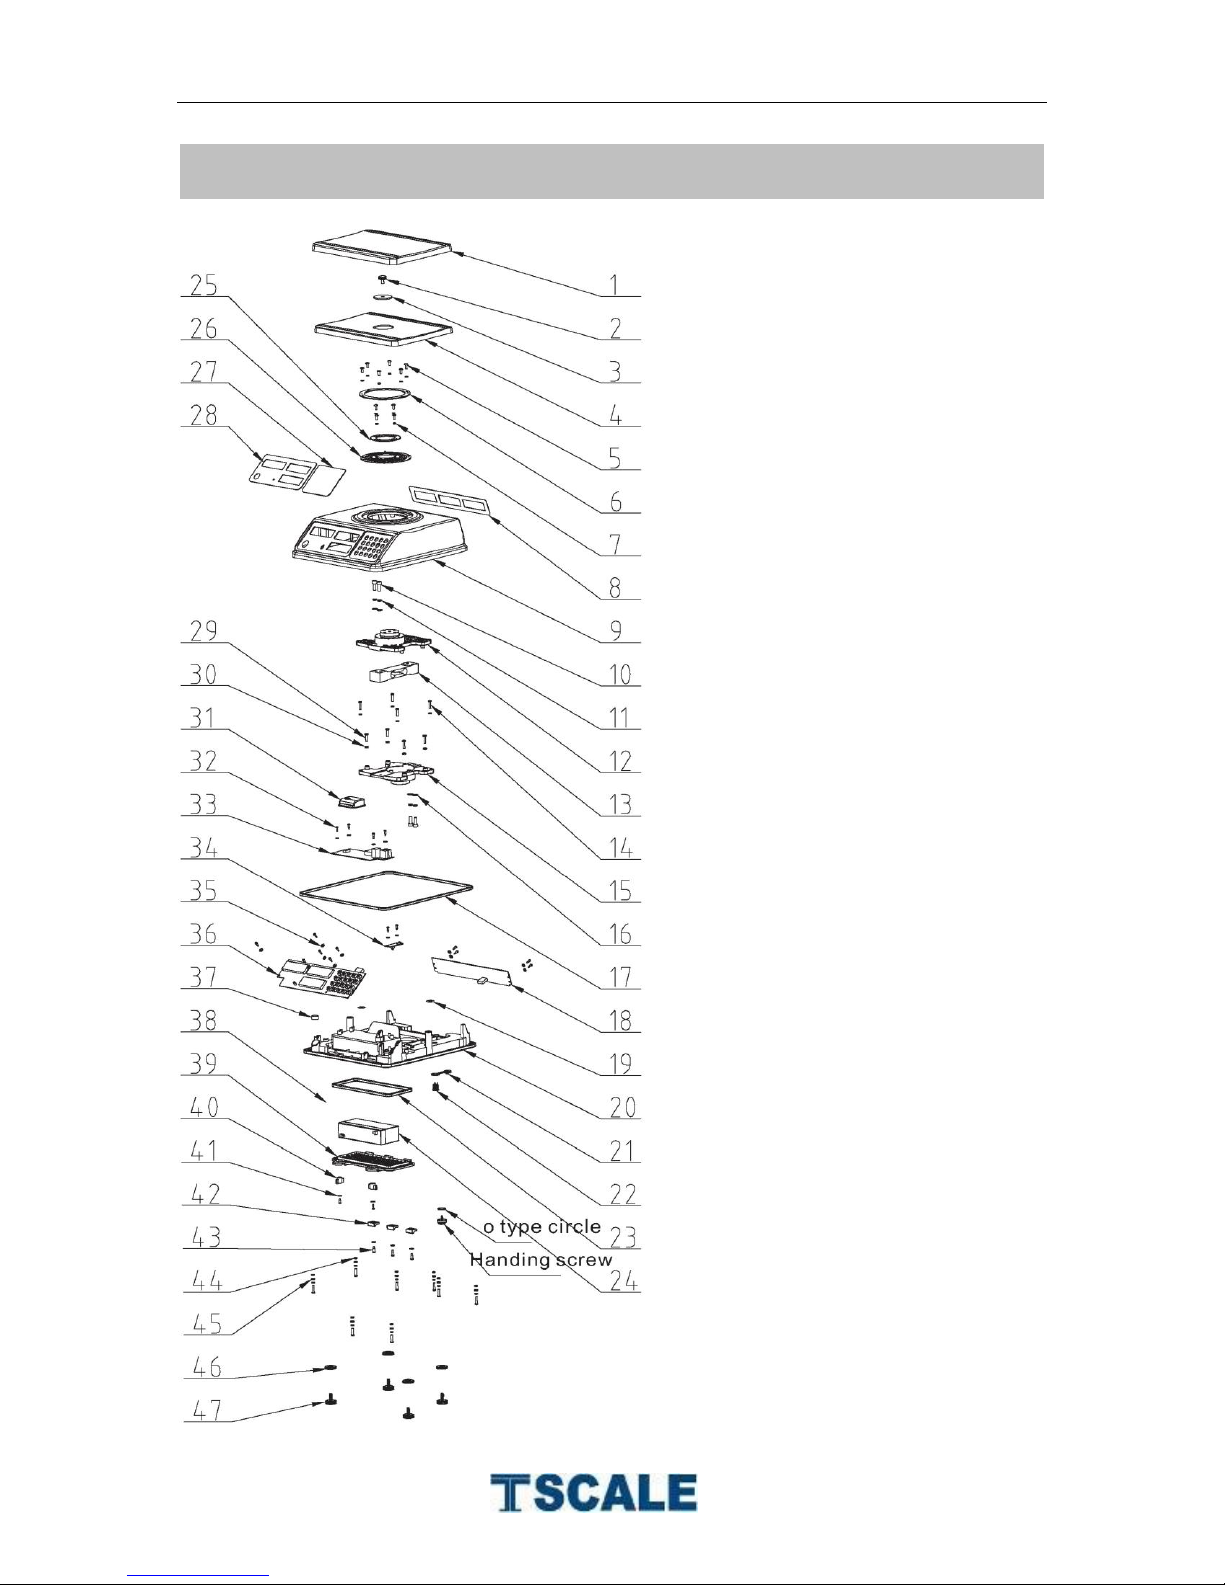
F0
cal
unload
cal
load
3. .000
8. CALIBRATION
Turn on the scale. Press during that start up until display will be
shown
Enter the Password 0000
Then press to confirm, display will be show
Press the calibration switch to operate the function; Switch is locating near
the battery.
Press to confirm and display will be shown
After stable press to confirm and display will be shown
Shown current calibration weight value. If necessary press to change
the value and keep the calibration weight on the platform. After stable
indicator on press key to confirm.
Display will be come back to the menu.
Incase display will show any error message or incorrect measurement,
repeat the calibration again.
Page 18
SP Series Technical Manual
- 17 -
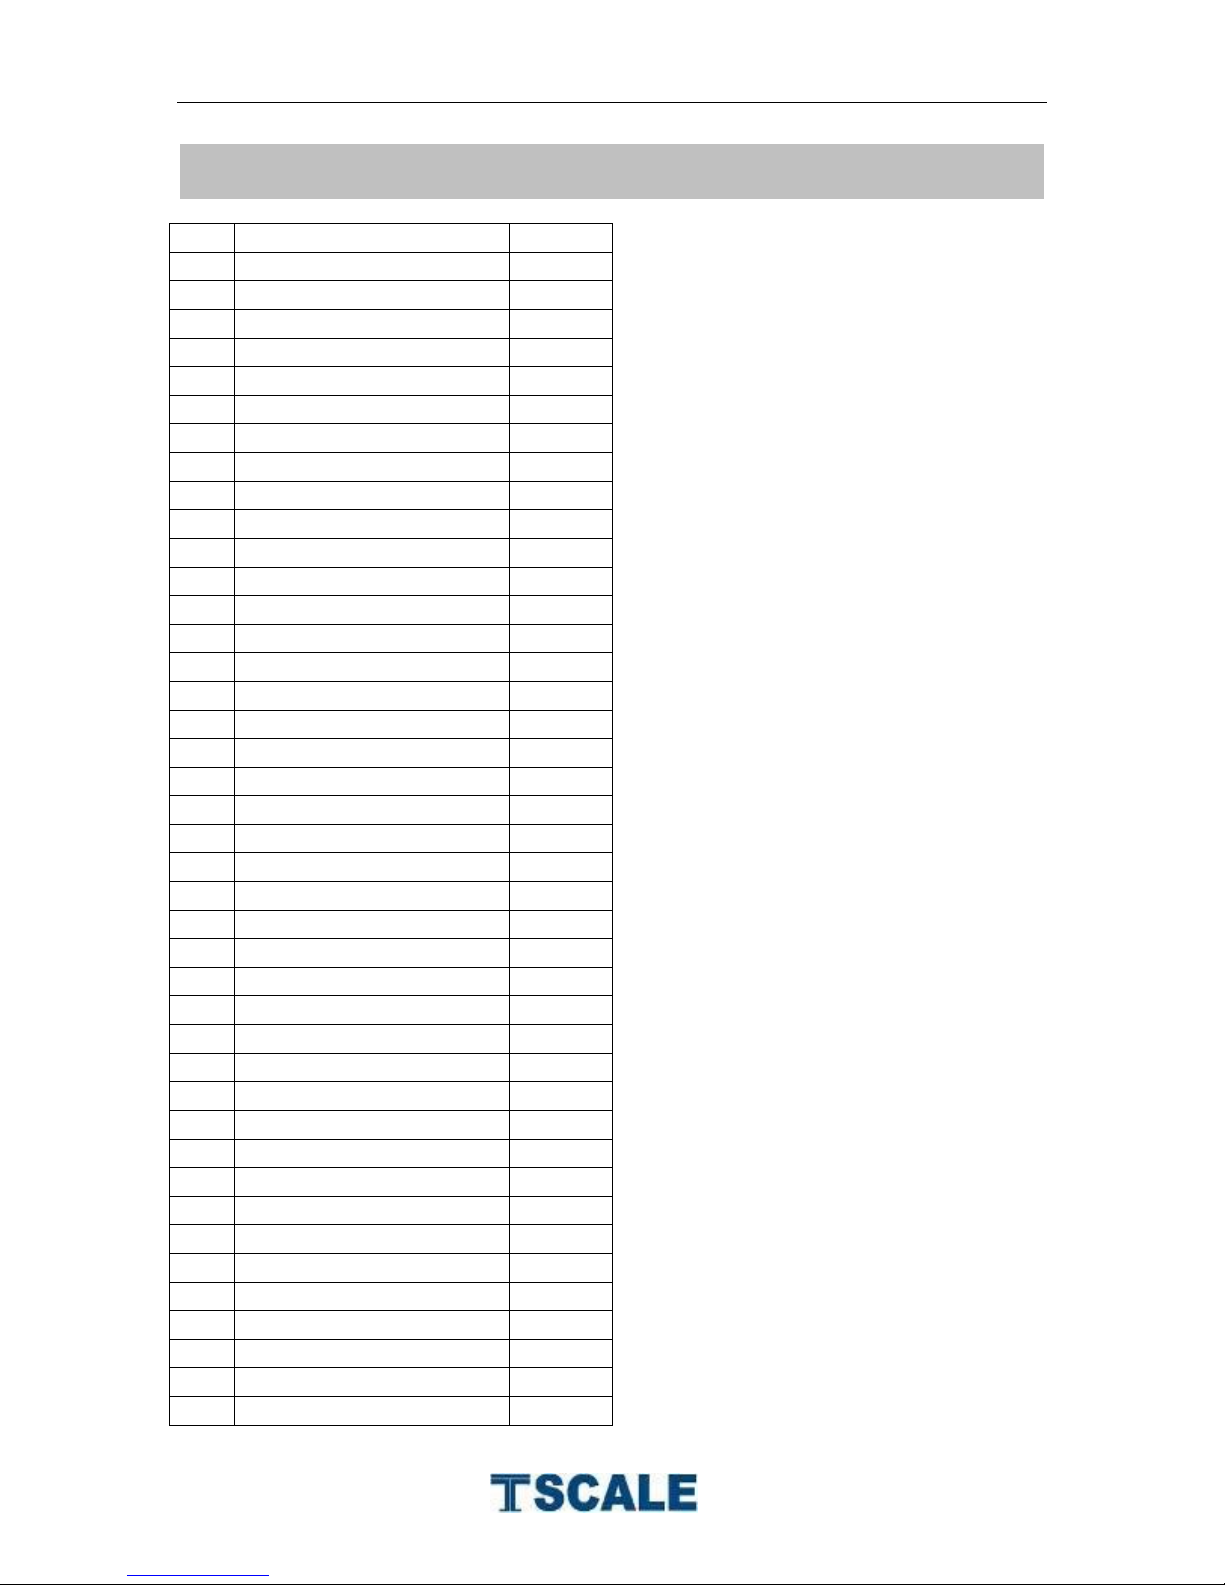
9. DRAWING
Parts List
Page 19
SP Series Technical Manual
- 18 -
No
Parts Name
Qty
1
SST Pan
1 2 Screw with handle
1 3 Spacer
1 4 ABS Pan
1 5 M4*10 Star Screw
10 6 Film Fix Circle 1
1 7 M4 Spring Washer
22 8 Rear Display Overlay
1 9 Top Cover
1
10
Allen Screw
4
11
M6 Spring washer
4
12
Load cell upper bracket
1
13
Load cell
1
14
M4* 16 Hexagon Screw
4
15
Load cell lower bracket
1
16
M6 Washer
4
17
Rubber Seal
1
18
Rear Display PCB
1
19
Breathable Film
20
Bottom Cover
1
21
Adaptor Rubber Cap
1
22
Adaptor Jack
1
23
Seal Rubber 2
1
24
Rechargeable battery
1
25
Film Fix Circle 2
1
26
Film
1
27
Key board Overlay
1
28
Front Display Overlay
1
29
M4*16 Hexagon Screw
4
30
M4 Hexagon Nuts
4
31
AD seal Box
1
32
M3*10 Star screw
18
33
Main PCB
1
34
Calibration switch
1
35
Screw gasket
16
36
Main display board
1
37
Level Bubble
1
38
Battery Spacer (Foam)
2
39
Battery Cover
1
40
Battery box cover fixer1
2
41
M4 Washer
5
9. DRAWING
Page 20

SP Series Technical Manual
- 19 -
42
Battery box cover fixer2
3
43
M4*13 Star Screw
5
44
Sealed Washer
8
45
Washer Cover
8
46
Foot fixer
4
47
Foot
4
Page 21
SP Series Technical Manual
- 20 -
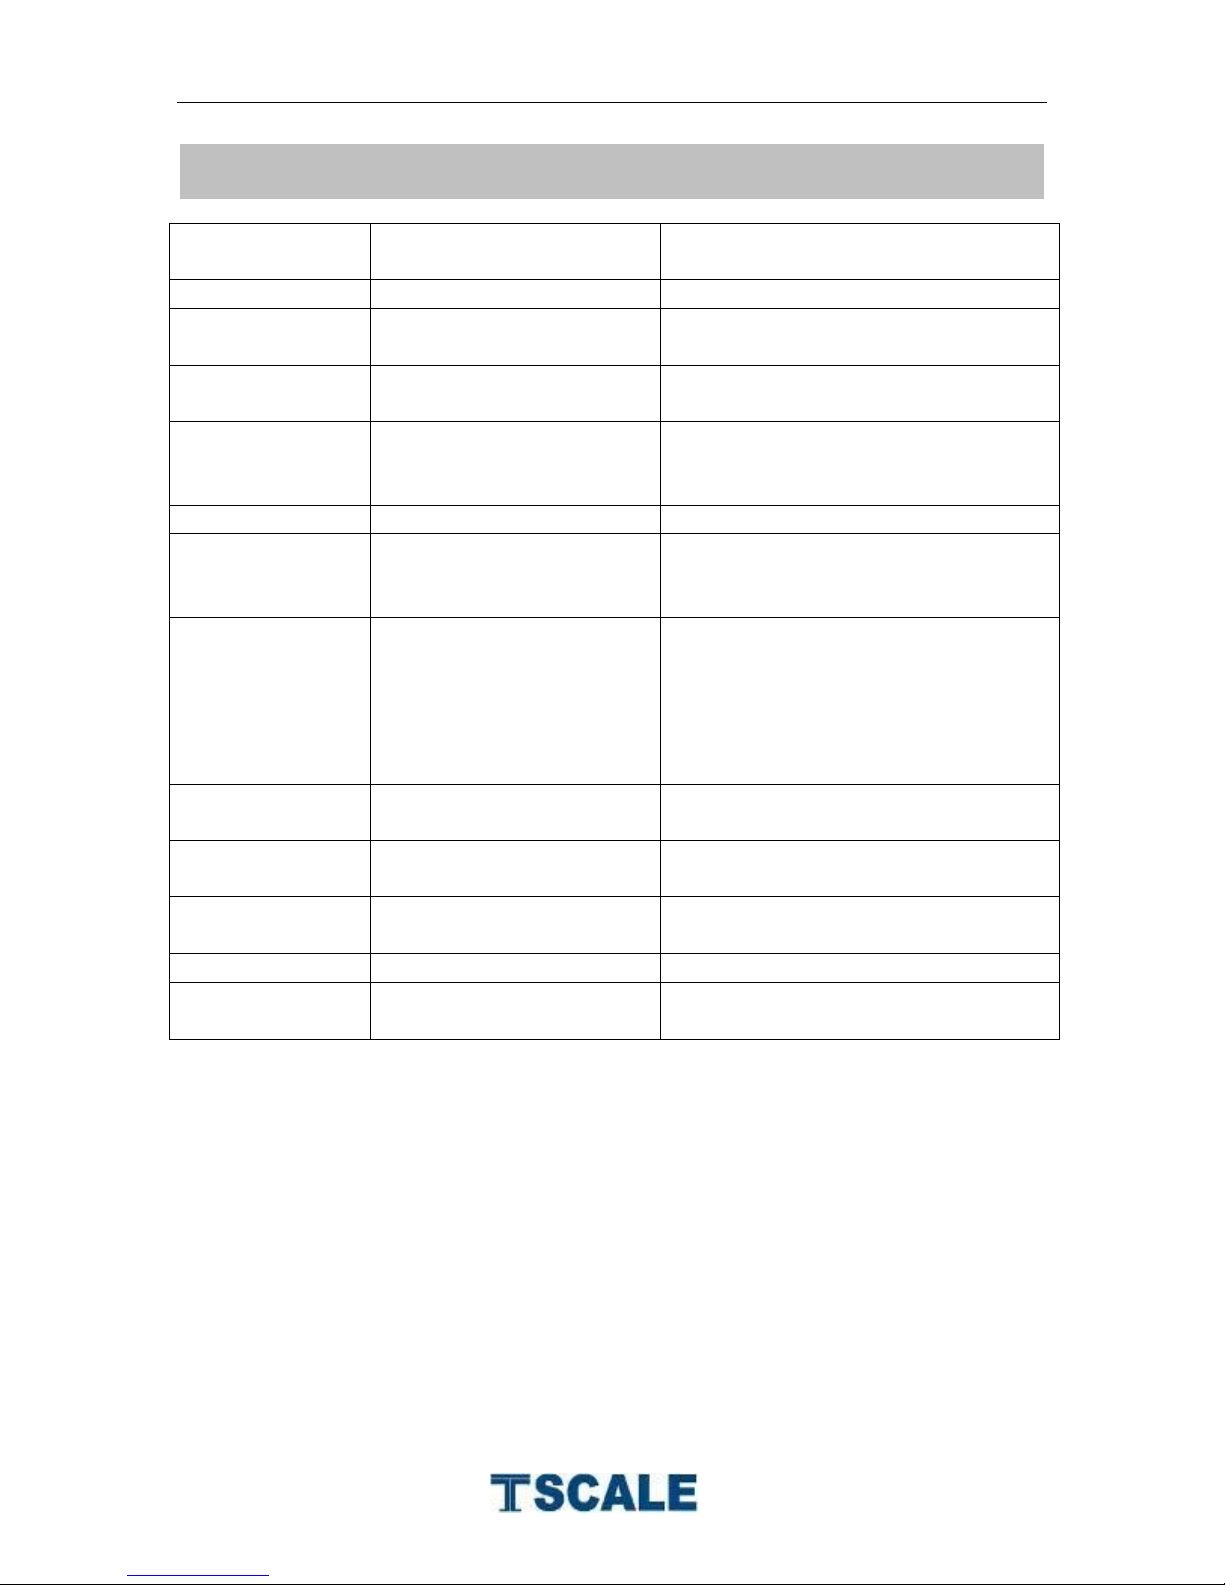
Error Message
Description
Solution
-----
Maximum load exceeded
Unload or reduce weight
Err 1
Incorrect date
Enter the date by using format
“yy;mm:dd”
Err 2
Incorrect time
Enter the time by using format
“hh:mm:ss”
Err 4
Zero setting error
Zero setting range exceeded due
to switching on.(4%max)
Make sure platform empty.
Err 5
Key board error
Check the keys and connecter.
Err 6
A/D value out of range
Make sure platform empty and
check the pan is installed proper.
Check the load cell connectors.
Err 9
Unstable Reading
Check any air variation, vibration,
RF noise and touching some
where.
Check the load cell and
connecters.
Err 17
Tare out of range
Remove the load and restart scale
again.
--ol--
Over range
Remove the load.
Re calibrate
Fai l h /
fai l l
Calibration Error
Re calibrate
Err p
Printer error
Check the printer and settings
Ba lo /
lo ba
Battery low
Re charge battery, check the
voltages.
10. ERROR CODE
Page 22
SP Series Technical Manual
- 21 -
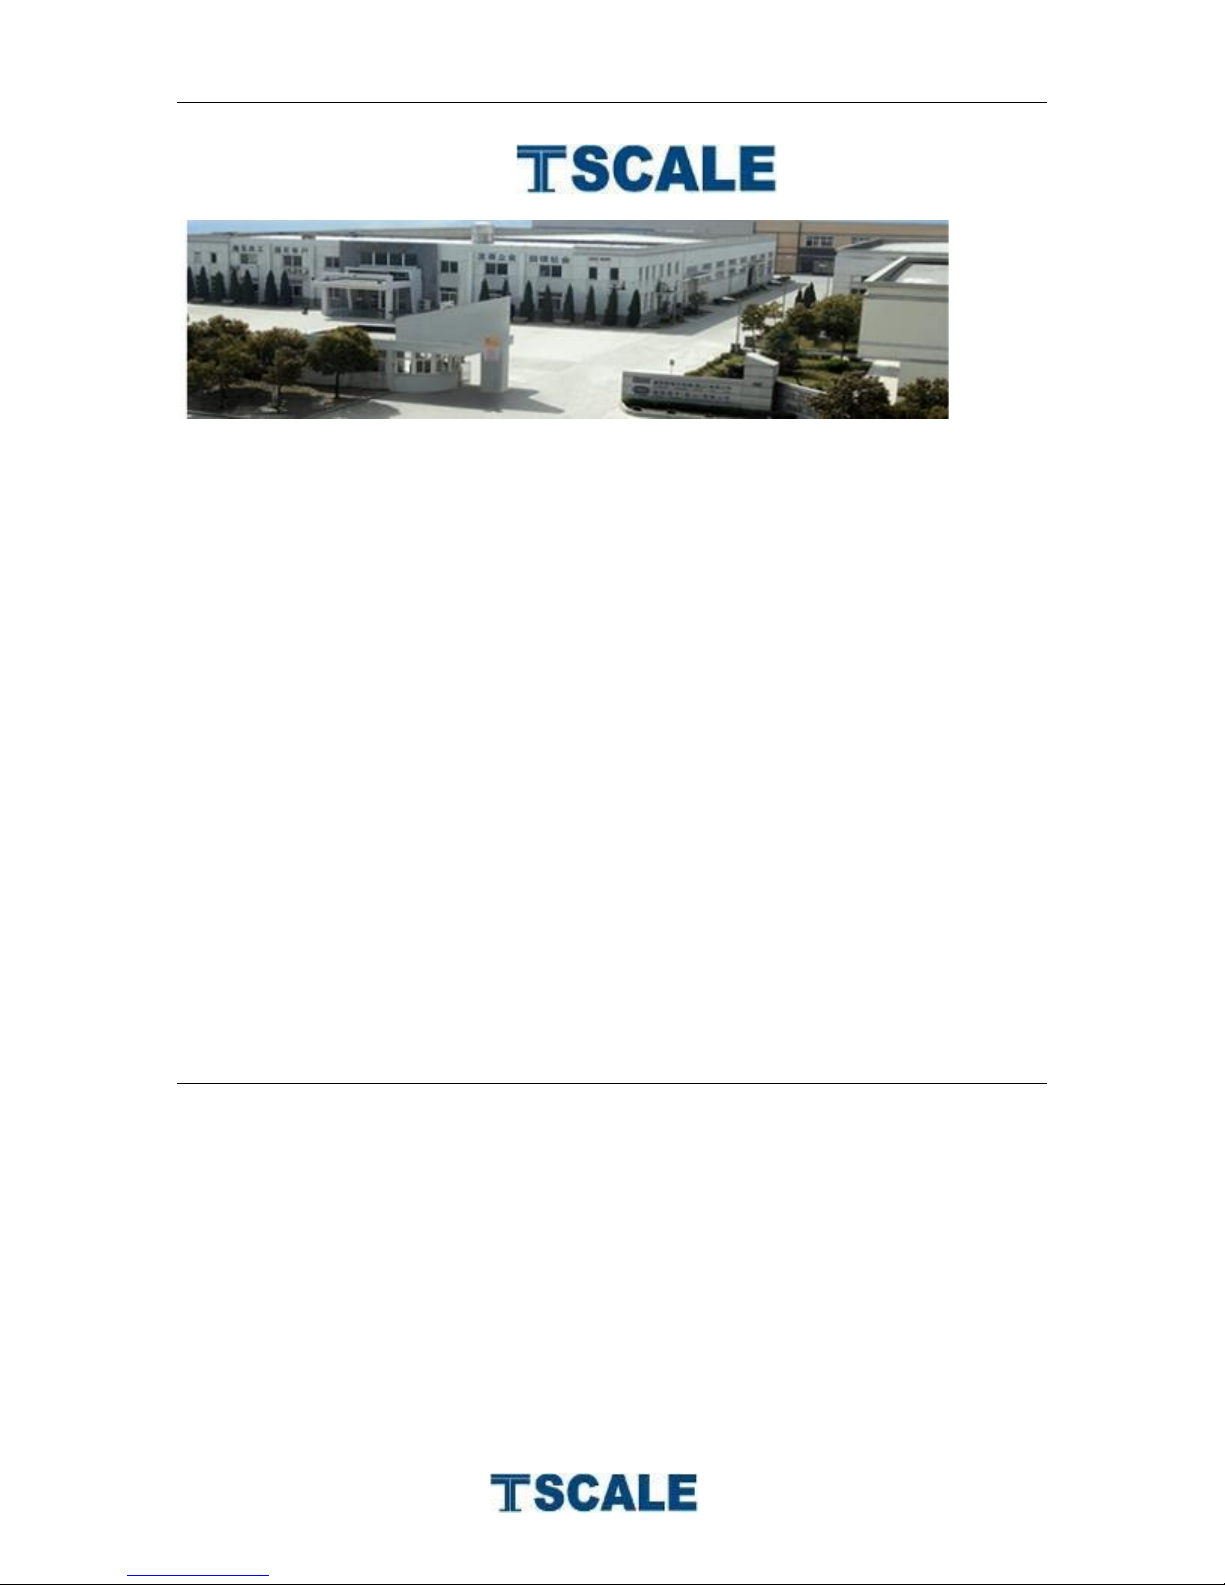
The company was founded in Taiwan in 1967 as Taiwan Scale Mfg Co., Ltd in
order to produce Mechanical Weighing Instrument. Today, this privately owned
company is recognized worldwide as a leading Electronic Weighing Scale
Manufacturer. The core business of TSCALE is the development, manufacture,
worldwide sales/marketing and service of electronic weighing instruments.
The TSCALE products
Medical Scale
Counting Scale
Tabletop Scale
Retail Scale
Precision Scale
Platform Scale
Weighing Indicator
Crane Scale
Floor and Pallet Scale
Accessory
Software
TSCALE has its manufacturing unit in Kunshan, China, ISO 9001 certified
company, OEM/ODM partner,more than 20 products have OIML certifications
from Holland’s NMI and Denmark’s Delta.
TScale Electronics Mfg. (Kunshan) Co., Ltd.
99, Shunchang Road, Kunshan, Jiangsu,
China
Tel : +86 512 57067900 / 57669080
Fax: +86 512 5769508 / 57669100
Taiwan Scale Mfg. Co., Ltd
282, Sec.3, Hoping W.Rd., Taipei,
Taiwan
Tel : +886 2 23068203
Fax: +886 2 23044354
 Loading...