

Page 1
Limited One Year Warranty
(Commercial Applications)
T&S warrants to the original purchaser (other
than for purposes of resale) that such product is
free from defects in material and workmanship for
a period of one (1) year from the date of purchase.
During this one-year warranty period, if the product
is found to be defective, T&S shall, at its options,
repair and/or replace it. T o obtain warranty service,
products must be returned to...
T&S Brass and Bronze Works, Inc.
Attn: Warranty Repair Department
2 Saddleback Cove
Travelers Rest, SC 29690
Shipping, freight, insurance, and other
transportation charges of the product to T&S and
the return of repaired or replaced product to the
purchaser are the responsibility of the purchaser.
Repair and/or replacement shall be made within a
reasonable time after receipt by T&S of the returned
product. This warranty does not cover Items which
have received secondary fi nishing or have been
altered or modifi ed after purchase, or for defects
caused by physical abuse to or misuse of the
product, or shipment of the products.
Any express warranty not provided herein, and
any remedy for Breach of Contract which might
arise, is hereby excluded and disclaimed. Any
implied warranties of merchantability or fi tness
for a particular purpose are limited to one year in
duration. Under no circumstances shall T&S be
liable for loss of use or any special consequential
costs, expenses or damages.
Some states do not allow limitations on how
long and implied warranty lasts or the exclusion or
limitation of incidental or consequential damages,
so the above limitations or exclusions may not apply
to you. Specifi c rights under this warranty and other
rights vary from state to state.
Attention California Residents:
“WARNING: This product contains chemicals
known to the State of California to cause cancer,
and birth defects or other reproductive harm.”
P/N: 098-012448-45 Rev.1
Date: 08-08-17
Drawn: TEH
Checked: DMH 09-20-17
Approved: JHB 10-09-17
Installation and
Maintenance
Instructions
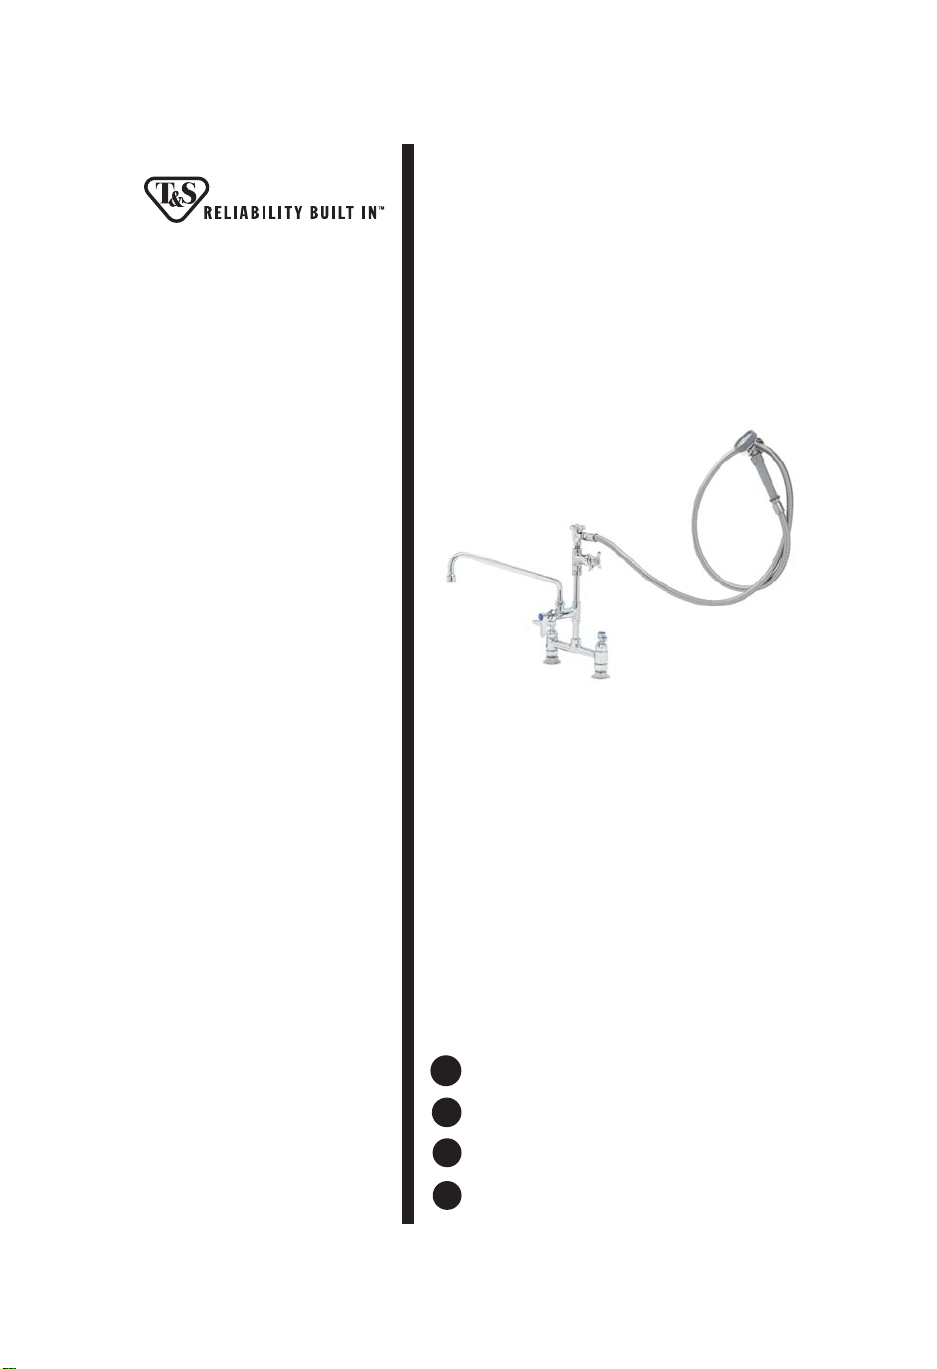
FAUCET WITH
NOZZLE AND SPRAY
HOSE ASSEMBLY
B-0177
Español:
ES
Instrucciones de instalación y mantenimiento
Français:
FR
Instructions pour l’installation et la maintenance
Deutsch:
DE
Installations- und Wartungsanleitungen
中文:
CN
安装与维护说明
Page 2
29
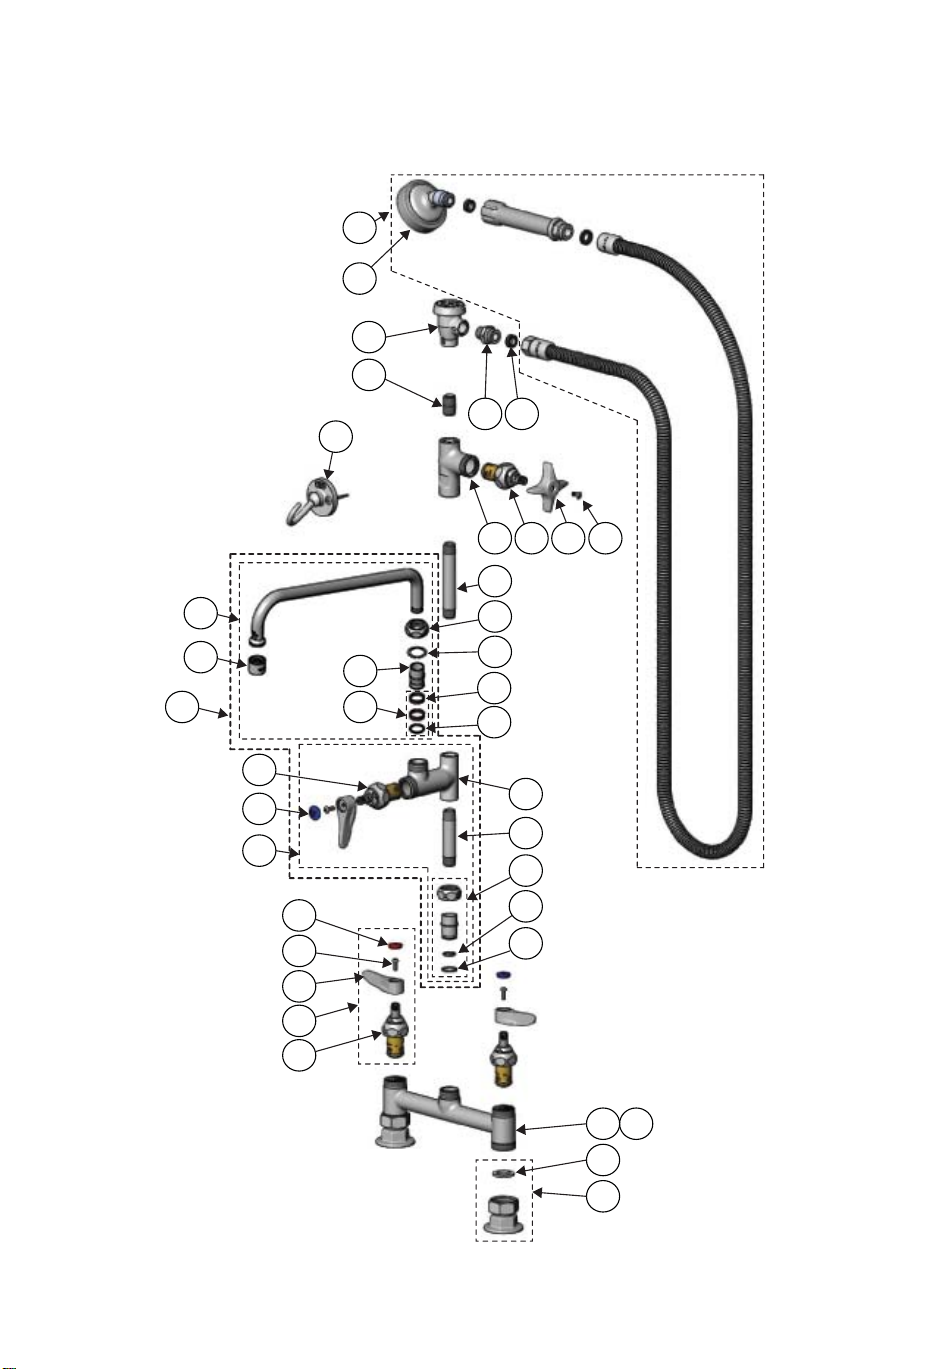
Exploded View
18
19
15
14
16 17
20
11 12 13 37
10
36
21
30
25
22
34
31
8
8
9
7
5
6
35
33
32
24
23
26
27
28
1
2
4
3
2
Page 3

Part Number Guide
Pre-Rinse Unit with Balancer
11 Asm, Faucet (Swivel) 002829-40
2 Faucet Body (Swivel) N/A
3 Flange, 1/2” NPT Female Eccentric 00AA
4 Washer, Coupling Nut 001019-45
5 Asm, Quarter-Turn Eterna Cartridge, RTC (new style) 002712-40NS
Asm, Quarter-Turn Eterna Cartridge, LTC (new style) 002711-40NS
Asm, Quarter-Turn Cerama Cartridge, RTC (new style) 012446-25NS
Asm, Quarter-Turn Cerama Cartridge, LTC (new style) 012447-25NS
6 Cartridge Only, Eterna w/ Spring Checks, RTC 012443-40NS
Cartridge Only, Eterna w/ Spring Checks, LTC 012442-40NS
Cartridge Only, Cerama w/ Check Valves, RTC 012394-25NS
Cartridge Only, Cerama w/ Check Valves, LTC 012395-25NS
7 Lever Handle 001638-45NS
8 Index, Button noted below
Cold (Blue) 018506-19NS
Hot (Red) 001193-19NS
9 Screw, Handle 000925-45
10 Nipple, 3/8” x 4” N/A
11 Valve Body N/A
12 Cartridge, Quarter-Turn Eterna w/ Spring Checks, RTC 012443-40NS
12 Cartridge, Quarter-Turn Cerama w/ Check Valve, RTC 012394-25NS
13 Handle
14 Nipple, 3/8” Close 0002535-25
15 Vacuum Breaker, 3/8” NPT B-0968
16 Adapter, 3/8” NPT Male x 3-4-14 UN 053A
17 Washer, #27 010476-45
18 Asm, Flexible Stainless Steel Hose B-0080-H
19 Asm, Angled Spray Face 1.42 GPM B-0107-035
20 Dummy Wall Hook B-0104-D
37 Screw, Handle 000922-45
, 4-Arm 002521-45
3
Page 4

Part Number Guide
Add-On Faucet Assembly
21 Asm, EasyInstall Add-On Faucet w/ 12” Swing Nozzle B-0156-EZ
22 Asm, EasyInstall Add-On Faucet Less Nozzle B-0155-LNEZ
23 Nipple, 3/8” x 3” 000358-40
24 Body, Add-On Faucet N/A
25 Cartridge, Quarter-Turn Eterna w/ Spring Check, RTC 012443-40NS
12 Cartridge, Quarter-Turn Cerama w/ Check Valve, RTC 012394-25NS
26 EasyInstall Installation Kit EZ-K
27 O-Ring 001065-45
28 Lock Washer 014200-45
29 Asm, 12” Swing Nozzle 062X
30 Stream Regulator, Full Flow B-PT
31 Swivel Repair Kit 011643-45
32 O-Ring 001074-45
33 Sleeve, Swivel (quantity 2) 011429-45
34 Swivel Piece N/A
35 Washer, Swivel Piece 009538-45
36 Nut, Swivel Piece N/A
4
Page 5

Add-On Faucet Installation:
EN
If installing to an existing rigid pre-rinse unit or base
faucet
1. Make sure that no.28 is seated properly inside the faucet
body.
2. Grab add-on faucet assembly and lower the EasyInstall
end- tting into faucet body. Press down until the end tting “pops” in. Rotate to desired position.
3. Lock the EasyInstall add-on faucet in place by tightening
the lock nut.
10
24
28
To Install Swing Nozzle:
1. Insert no.29 into no.24.
Note: See Repair Kit 011643-45 for replacement of no.32
and no.33.
2. Tighten no.36 rmly with a wrench.
Instalación del grifo añadido:
ES
Si realiza la instalación en una unidad de prelavado o en un grifo de base rígidos existentes:
1. Asegúrese de que el no. 28 esté bien asentado dentro del cuerpo del grifo.
2. Tome la unidad de grifo añadido e introduzca el accesorio de extremidad EasyInstall en el
cuerpo del grifo. Empuje hacia abajo hasta que el accesorio de extremidad encaje. Gírelo hacia
la posición deseada.
3. Fije el grifo añadido EasyInstall en su lugar apretando la tuerca de bloqueo.
34
33
32
Para instalar la boquilla giratoria:
1. Inserte el no. 29 en el no. 24.
Nota: Vea el kit de reparación 011643-45 para las refacciones del no.32 y 33.
2. Apriete rmemente el no. 36 con una llave.
29
36
2
Enlarged View
Dibujo Ampliado
vue agrandie
Vergrößerte Ansicht
放大图
FR
INSTALLATION DU ROBINET SUPPLÉMENTAIRE :
En cas d’installation sur une unité de pré-rinçage rigide ou un robinet de base existant
1. Assurez-vous que le N°.28 est correctement installé à l’intérieur du corps du robinet.
2. Saisissez le dispositif de robinet supplémentaire et abaissez le raccord d’extrémité EasyInstall
dans le corps du robinet. Appuyez vers le bas jusqu’à ce que le raccord d’extrémité « s’insère
avec un déclic ». Faites pivoter vers la position souhaitée.
3. Verrouillez le robinet supplémentaire EasyInstall en place en serrant le contre-écrou.
Pour installer l’embout à balancier :
1. Insérez le N°.29 dans le N°.24.
Remarque :Voir le kit de réparation 011643-45 pour le remplacement des N°.32 et 33.
2. Serrez bien le N°.36 avec une clé.
Montage der Zusatz-Armatur:
DE
Für die Montage an eine vorhandene, starre Vorspüleinheit oder Basisarmatur
1. Sicherstellen, dass Nr. 28 richtig im Armaturenkörper sitzt.
2. Die Zusatz-Armatur halten und das EasyInstall-Endstück in den Armaturenkörper absenken.
Nach unten drücken, bis das Endstück einrastet. In die gewünschte Stellung drehen.
3. Die EasyInstall-Zusatz-Armatur durch Festziehen der Sicherungsmutter in ihrer Position sichern.
5
Page 6

Zur Montage der Schwenkdüse:
1. Nr. 29 in Nr. 24 einsetzen.
Hinweis: Zum Austausch von Nr. 32 und Nr. 33 siehe Reparatursatz 011643-45.
2. Nr. 36 mit einem Schraubenschlüssel fest anziehen.
附加龙头安装:
如需安装在一个已有的固定式预冲洗花洒装置或龙头底座上
3.请确保28号准确无误地置入龙头本体中。
4.抓住附加龙头,将快装尾部装入龙头本体,向下按直至整个尾部都嵌入本体。将其旋转至
所需位置。
5.拧紧锁紧螺母将快装附加龙头锁定住。
安装摇摆水嘴:
CN
1.将29号装入24号中。
注意:替换32号和33号详见安装包011643-45。
2.用扳手拧紧36号。
Faucet Installation:
EN
1. Shut o water supply and drain lines. Drill (2) two holes,
approximately 1” [2.5 cm] diameter in wall with 8” [20 cm]
centers, where you are installing no.1.
2. Apply te on tape or pipe joint compound to water supply lines.
3. Connect no.2 to water supply lines by screwing no.3 with eccentric centers onto nipple
supplied by others and tighten no.3 against countertop. Make sure no.4 is in place. Nut under
countertop to be supplied by others. Trim supply lines if necessary.
2
water supply line
(supplied by others)
Linea de surtido
(surtidos por otros)
Wasserleitungsrohr
(nicht in der Lieferung
Le tuyau qui fournir l’eau
(fournir par les autres)
Instalación del grifo:
ES
1. Corte el suministro de agua y drene las líneas. Perfore dos (2) ori cios de un diámetro
aproximado de 2.5 cm (1”) en la pared con centros de 20 cm (8”) en donde instale el no.1.
2. Aplique cinta de te ón o compuesto para uniones de tubería a las líneas de suministro de agua.
3. Conecte el no.2 a las líneas de suministro de agua atornillando el no.3 con centros excéntricos
sobre la boquilla suministrada por terceros y ajuste el no.3 sobre la cubierta superior.
Asegúrese de que el no.4 esté en su sitio. La tuerca que se coloca debajo de la cubierta
superior debe ser suministrada por terceros. Recorte las líneas de suministro si es necesario.
enthalten)
供水线(需自配)
countertop
mostrador
Le comptoir
Arbeitsplatte
台面
8”
[20cm]
3
nut
tuerca
L’écrou
Mutter
螺母
6
Page 7

Installation du robinet :
FR
1. Coupez l’alimentation en eau et les conduites d’évacuation. Percez (2) deux trous d’environ 1
po. [2,5 cm] de diamètre dans le mur avec les axes écartés de 8 po. [20 cm], à l’endroit où vous
installez le N°.1.
2. Appliquez du ruban de té on ou un composé pour joints sur les conduites d’alimentation en
eau.
3. Raccordez le N°.2 aux conduites d’alimentation en vissant le N°.3 avec des centres excentrés
sur le mamelon d’autres fournisseurs et serrez le N°.3 contre le comptoir. Assurez-vous que le
N°.4 est bien en place. L’écrou sous le comptoir doit provenir d’autres fournisseurs. Coupez
les conduites d’alimentation si nécessaire.
Montage der Armatur:
DE
1. Wasserzufuhr ausschalten und Rohre entleeren. Zwei (2) Löcher, ca. 1” [2,5 cm] Durchmesser,
mit 8” [20 cm] Abstand zwischen den Mitten bohren, wo Nr. 1 installiert werden soll.
2. Te onband oder Rohrleitungs-Dichtmittel an die Wasserzulau eitungen anbringen.
3. Nr. 2 an die Wasserzulau eitungen anschließen; hierzu Nr. 3 mit exzentrischen Mitten auf den
bauseitigen Stutzen schrauben und Nr. 3 gegen die Arbeitsplatte festziehen. Sicherstellen,
dass Nr. 4 vorhanden ist. Die Mutter unter der Arbeitsplatte wird bauseitig bereitgestellt.
Zulau eitungen nach Erfordernis kürzen.
龙头安装:
CN
1.关闭供水和排水阀门,在你需要安装1号的墙壁上开2个直径约为1”[2.5cm],间距为
8”[20cm]的孔。
2.在供水管上缠上生料带或装上水管接头。
3.将3号装到偏心的两个孔中自配的接头上,装上2号并连接供水,将3号拧紧在台面上。确
保4号在适当的位置上。台面下的螺母需要自己配。如果有必要,可减少供水线。
Installation of Control Valve:
EN
1. Apply Te on tape on threaded ends of no.10.
Place no.10 into no.11 and tighten.
2. Place no.10 into no.22 and tighten.
Vacuum Breaker and Hose
Installation:
3. Attach no.18 to no.16 (make sure no.17 is in
place).
4. Turn on water supply and check for leaks.
Instalación de la válvula de control:
ES
1. Aplique cinta de te ón en los extremos con rosca
del no.10. Coloque el no.10. en el no.11 y ajuste.
2. Coloque el no.10 en el no.22 y ajuste.
Instalación del interruptor de vacío y la manguera:
1. Conecte el no.18 al no.16 (asegúrese de que el no.17 esté en su sitio).
2. Abra el suministro de agua y compruebe que no haya fugas.
7
15
11
10
16
17
18
22
Page 8

16
15
11
10
Installation de la vanne de commande:
FR
1. Appliquez du ruban de té on sur les extrémités letées du N°.10. Placez le N°.10 dans le N°.11
et serrez.
2. Placez le N°.10 dans le N°.22 et serrez.
17
18
22
Installation du brise-vide et du tuyau souple:
3. Fixez le N°.18 au N°.16 (assurez-vous que N°.17 est bien en place).
4. Ouvrez l’arrivée d’eau et recherchez des fuites.
Einbau des Regelventils:
DE
1. Te onband an die Gewindeenden von Nr. 10 anbringen. Nr. 10 in Nr. 11 einsetzen und
festziehen.
2. Nr. 10 in Nr. 22 einsetzen und festziehen.
Montage des Unterdruckschalters und des Schlauchs:
3. Nr. 18 an Nr. 16 anbringen (sicherstellen, dass Nr. 17 vorhanden ist).
4. Wasserzufuhr anschalten und auf Dichtigkeit prüfen.
控制阀安装:
CN
1.在10号的螺纹尾端缠上生料带,将10号装入11号中并拧紧。
2.将10号装入22号中并拧紧。
真空断流器和软管安装:
3.将18号附加到16号上(确保17号在合适的位置上)。
4.打开供水并检查是否漏水。
8
Page 9

9
Page 10

RELATED T&S BRASS PRODUCT LINE
B-0175
Wall-Mounted Faucet
with 12” Swing Nozzle
and Spray Unit
B-0176
Deck-Mounted Faucet
with 12” Swing Nozzle
and Spray Unit
T&S BRASS AND BRONZE WORKS, INC.
A fi rm commitment to application-engineered plumbing products
2 Saddleback Cove, P.O. Box 1088, T & S Brass-Europe
Travelers Rest, SC 29690 ‘De Veenhoeve’
Phone: (864) 834-4102 Oude Nieuwveenseweg 84
Fax: (864) 834-3518 2441 CW Nieuwveen
E-mail: tsbrass@tsbrass.com The Netherlands
 Loading...