

Page 1
Limited One Year Warranty
T&S warrants to the original purchaser (other than
for purposes of resale) that such product is free from
defects in material and workmanship for a period of
one (1) year from the date of purchase. During this
one-year warranty period, if the product is found to
be defective, T&S shall, at its options, repair and/
or replace it. To obtain warranty service, products
must be returned to...
T&S Brass and Bronze Works, Inc.
Attn: Warranty Repair Department
2 Saddleback Cove
Travelers Rest, SC 29690
Shipping, freight, insurance, and other transportation charges of the product to T&S and the return
of repaired or replaced product to the purchaser are
the responsibility of the purchaser. Repair and/or
replacement shall be made within a reasonable time
after receipt by T&S of the returned product. This
warranty does not cover Items which have received
secondary finishing or have been altered or modified after purchase, or for defects caused by physical abuse to or misuse of the product, or shipment
of the products.
Any express warranty not provided herein, and
any remedy for Breach of Contract which might arise,
is hereby excluded and disclaimed. Any implied
warranties of merchantability or fitness for a particular purpose are limited to one year in duration. Under
no circumstances shall T&S be liable for loss of
use or any special consequential costs, expenses
or damages.
Some states do not allow limitations on how long
and implied warranty lasts or the exclusion or limitation of incidental or consequential damages, so
the above limitations or exclusions may not apply
to you. Specific rights under this warranty and other
rights vary from state to state.
P/N: 098-003159-45 Rev.2
Date: 990601
Drawn: CW
Checked: MAB 11-12-99
Approved: MVW 11-13-99
Installation and
Maintenance
Instructions
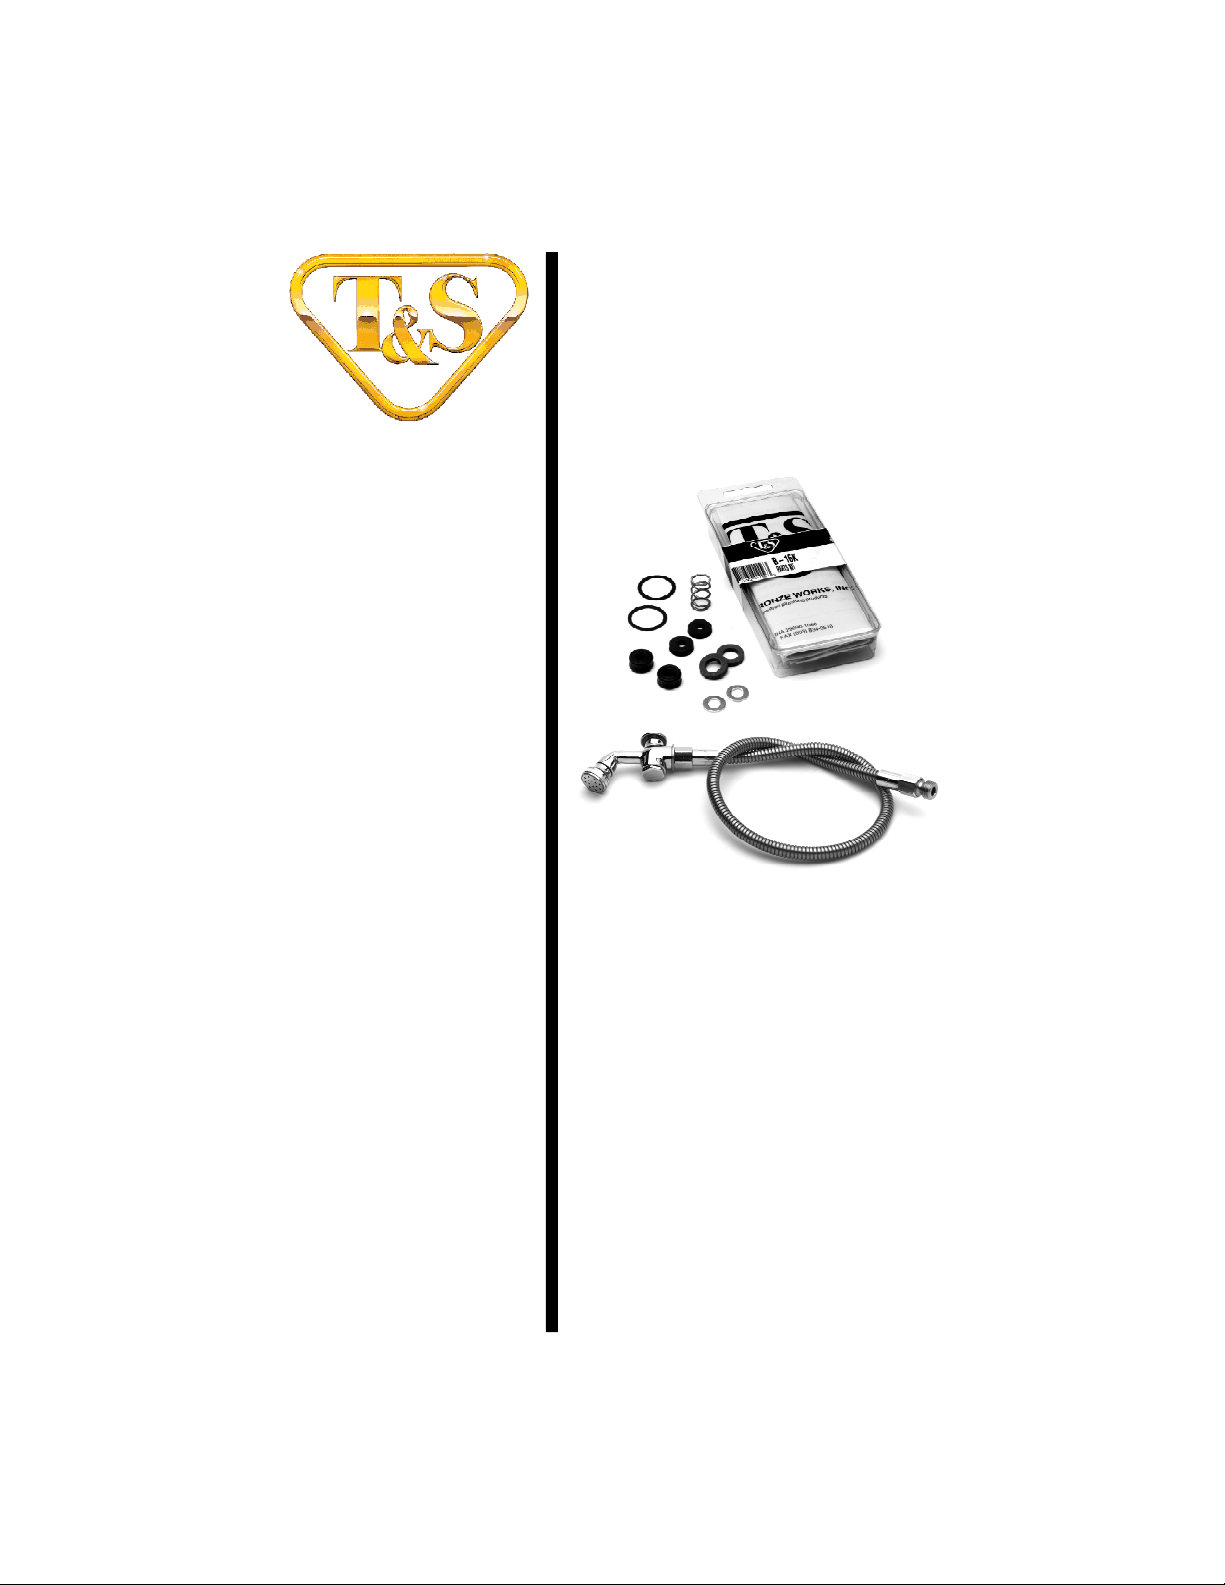
B-16-K Parts Kit
B-0101 Pre-Rinse Spray
Deutsch: Installations- und
Wartungsanleitungen
Español: la Instalación y las
Instrucciones de
Mantenimiento
Français: les Instructions
d’Installation et
d’Entretien
Page 2
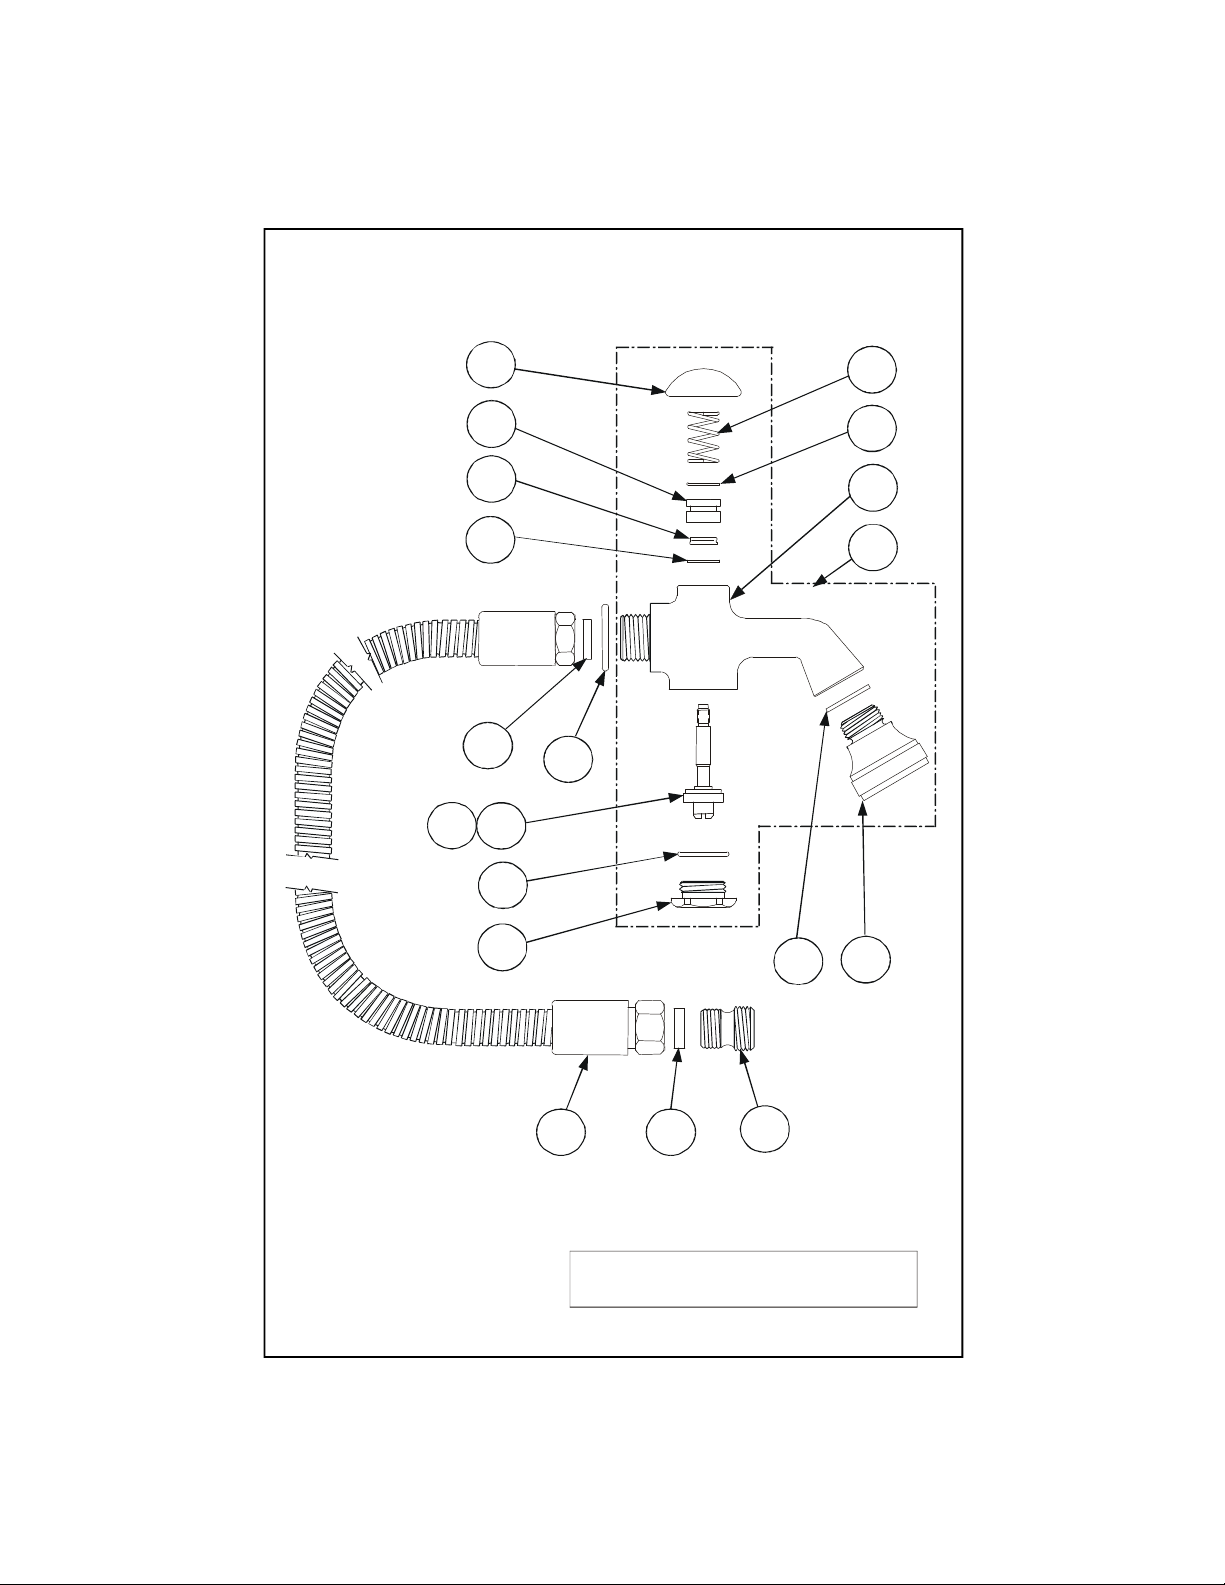
Exploded View
3
4
Some items are listed for instructional purposes
181613
14
1
5
6
10
7
8
16
2
15
9
11
12
17
*
and may not be sold as separate parts.
2
Page 3

Part Number Guide
Asm, Spray Valve
Pre-Rinse Assembly
1
2 Body, Valve 000171-40
3 ‘O’-Ring, Bonnet 001063-45
4 Spring 000894-45
5 Cap 000622-40
6 Insert, Spray Valve *
7 Quad Ring *
8 Washer, Bonnet 000974-45
9 Asm, Stem *
10 Washer, Seat 001094-45
11 ‘O’-Ring, Insert 001062-45
12 Cap, Hex (T&S) 000623-40
13 Washer, GN Tip 001043-45
14 Asm, Spray Head 002209-40
15 Washer, Ring 001010-40
16 Washer, Hose Barrel 010476-45
17 Hose, SS Flex 36” B-0036-H
18 Adapter 000547-25
Body, Valve 002857-40
Replacement Parts Kit - (B-16K)
4 Spring 000894-45
8 Washer, Bonnet 000974-45
9 Packing Stem 001100-45
10 Seat Washer 001094-45
11 'O'-Ring 001062-45
16 Washer, #27 010476-45
3
Page 4

General Instructions
To replace worn parts:
1
10
2
678
1
1. Shut off water supply and drain
lines. Hold no.1 in one hand, with
no.5 in palm and unscrew no.12 at
bottom of no.1 with a wrench.
5. Unscrew no.5 and remove from
no.2. Discard old no.6 and replace
with new no.6. Place no.3 on top of
no.6, under new no.4. Place no.5 on
top of no.4, loosely.
2. Remove no.12. Discard and replace
no.11.
5
10,9
11
12
3. Holding no.5 in hand, unscrew
no.9 and remove.
9
5
4
3
6. Hold no.5 (in place) and no.2 in
one hand, push and screw no.9 up
through no.2 until snug
5
2
9
11
12
stem
4. Unscrew stem from seat holder,
discard old no.10 and replace with
new no.10. Reassemble these three
parts.
seat
holder
7. To replace no.16, unscrew no.17
from no.1 and remove, then replace
with new no.16. (Both ends if
necessary).
17
4
16 15
Page 5

Para reemplazar las partes
Instrucciones
Generales
1
10
2
678
2
1
desgastadas:
1. Cierre la fuente principal de agua y
desagüe las tuberias. Sostenga la
parte No.1 en la mano con la parte
No.5 en la palma, destornille la parte
No.12 a la base de la parte No.1 con
una llave.
2. Remueva la parte No.12. Desheche
y reemplaze la parte No.11.
5
5. Destornille la parte No.5 y
remuévala de la parte No.2. Desheche
la parte vieja No.6 y reemplaze con
una parte nueva No.4. Flojamente
coloque la parte No.5 sobre la parte
No.4.
5
4
3
10,9
11
12
3. Sosteniendo la parte No.5 en la
mano, destornille la parte No.9 y
remueva.
9
tallo
4. Destornille el tallo del sostén del
aciento, desheche la parte vieja No.10
y reemplaze con una parte No.10
nueva. Reensamble estas tres partes.
sostén del
aciento
6. Sostenda la parte No.5 (en sitio) y
la parte No.2 en una mano, empuje y
atornille la parte No.9 a través de la
parte No.2, hasta que este ajustado.
5
9
11
7. Reemplaze la parte No.16,
destornille la parte No.17 de la parte
No.1 y remuévela, luego reemplaze
con una parte nueva No.16. (Ambos
lados si es necesario.)
17
16 15
12
5
Page 6

Instructions
Générales
Pour remplacer les parties
2
678
2
1
1
10
usées:
1. Fermer la réserve de l’eau et
égoutter la tuyauterie. Tenir N°.1 dans
un main, avec le N°.5 dans la paume et
dévisser N°.12 au fond de N°.1 avec
une clef.
5. Dévisser N°.5 et enlever de N°.2.
Mettre au rebut le vieux N°.6 et
replacer avec un nouveau N°.6.
Mettre N°.3 sur N°.6 et le nouveau
N°.4. Mettre N°.5 sur N°.4 sans
serrer.
5
2. Enlever N°.12. Mettre au rebut et
remplacer N°.11.
5
10,9
11
12
3. En tenant N°.5 dans le main,
dévisser N°.9 et enlever.
9
Le Tuyau
4. Dévisser le tuyau du lieu où rester
le joint d’étanchéité et mettre au rebut
le vieux N°.10 et replacer avec un
nouveau N°.10. Réassembler ces trois
parties.
Le Lieu Où
Rester Le Joint
D’Étanchéité
4
3
6. Tenir N°.5 (à sa place) et N°.2 dans
un main, pousser et visser N°.9 à
travers N°.2 jusqu’ il être bien ajusté.
5
9
11
7. Pour remplacer N°.16, dévisser
N°.17 de N°.1 et enlever, puis
remplacer avec un nouveau N°.16.
(Chaque extrémité si nécessaire).
17
16 15
12
6
Page 7

Allgemeine
Anleitungen
Ersatz von Verschleißteilen:
2
678
2
1
1
10
1. Wasser absperren und
Wasserleitungen entleeren. Nr. 1 in
einer Hand halten, mit Nr. 5 in der
Hand, Nr. 12 am Unterteil von Nr.1 mit
Schraubenschlüssel
2. Nr. 12 entfernen und durch Nr. 11
ersetzen .
5. Nr. 5 losschrauben und von Nr. 2
entfernen. Altes Nr. 6 herausnehmen
und durch neues Nr. 6 ersetzen. Nr. 3
auf Nr. 6 unter und neues Nr. 4
aufsetzen. Nr. 5 lose auf Nr. 4
aufsetzen.
5
4
5
10,9
11
3. Nr. 5 in der Hand halten, Nr.9
losdrehen und entfernen.
9
Schaft
Halter der
Auflagefläche
12
3
6. Nr. 5 festhalten und mit Nr. 2 in
einer Hand Nr. 9 durch Nr. 2
durchschieben und festziehen, bis
Nr. 2 fest angeschraubt ist.
5
9
11
7. Um Nr. 16 zu ersetzen, Nr.17 von
Nr.1 losschrauben und entfernen,
dann durch neues Nr. 16 ersetzen
(beide Enden, falls erforderlich).
12
4. Schaft von der Auflagefläche
losdrehen, altes Nr. 10 entfernen und
durch neues Nr. 10 ersetzen. Diese
drei Teile wieder zusammensetzen.
17
7
16 15
Page 8

RELATED T&S BRASS PRODUCT LINE
B-0106
PRE-RINSE
BRUSH SPRAY
UNIT
B-0102-C
POT & KETTLE
FILLER
T&S BRASS AND BRONZE WORKS, INC.
A firm commitment to application-engineered plumbing products
2 Saddleback Cove, P.O. Box 1088, T & S Brass-Europe
Travelers Rest, SC 29690 ‘De Veenhoeve’
Phone: (864) 834-4102 Oude Nieuwveenseweg 84
Fax: (864) 834-3518 2441 CW Nieuwveen
E-mail: tsbrass@tsbrass.com The Netherlands
 Loading...