

Page 1

Orion 2.0
WIRELESS DISTANCE CAMERA
USER GUIDE
www.trysight.com
Page 2

Congratulations on the purchase of your Orion 2.0 Wireless Distance
Camera. Please read the manual fully before using. Orion is a distance
camera that works seamlessly with your Mercury 12 device. The latest
version of this manual is available on our website at www.trysight.com
Enclosed Parts:
1 Power Charger
1 Micro USB to USB charging cable
1 User Manual
1 Orion Camera
1 Gooseneck Arm with Clamp
Page 3
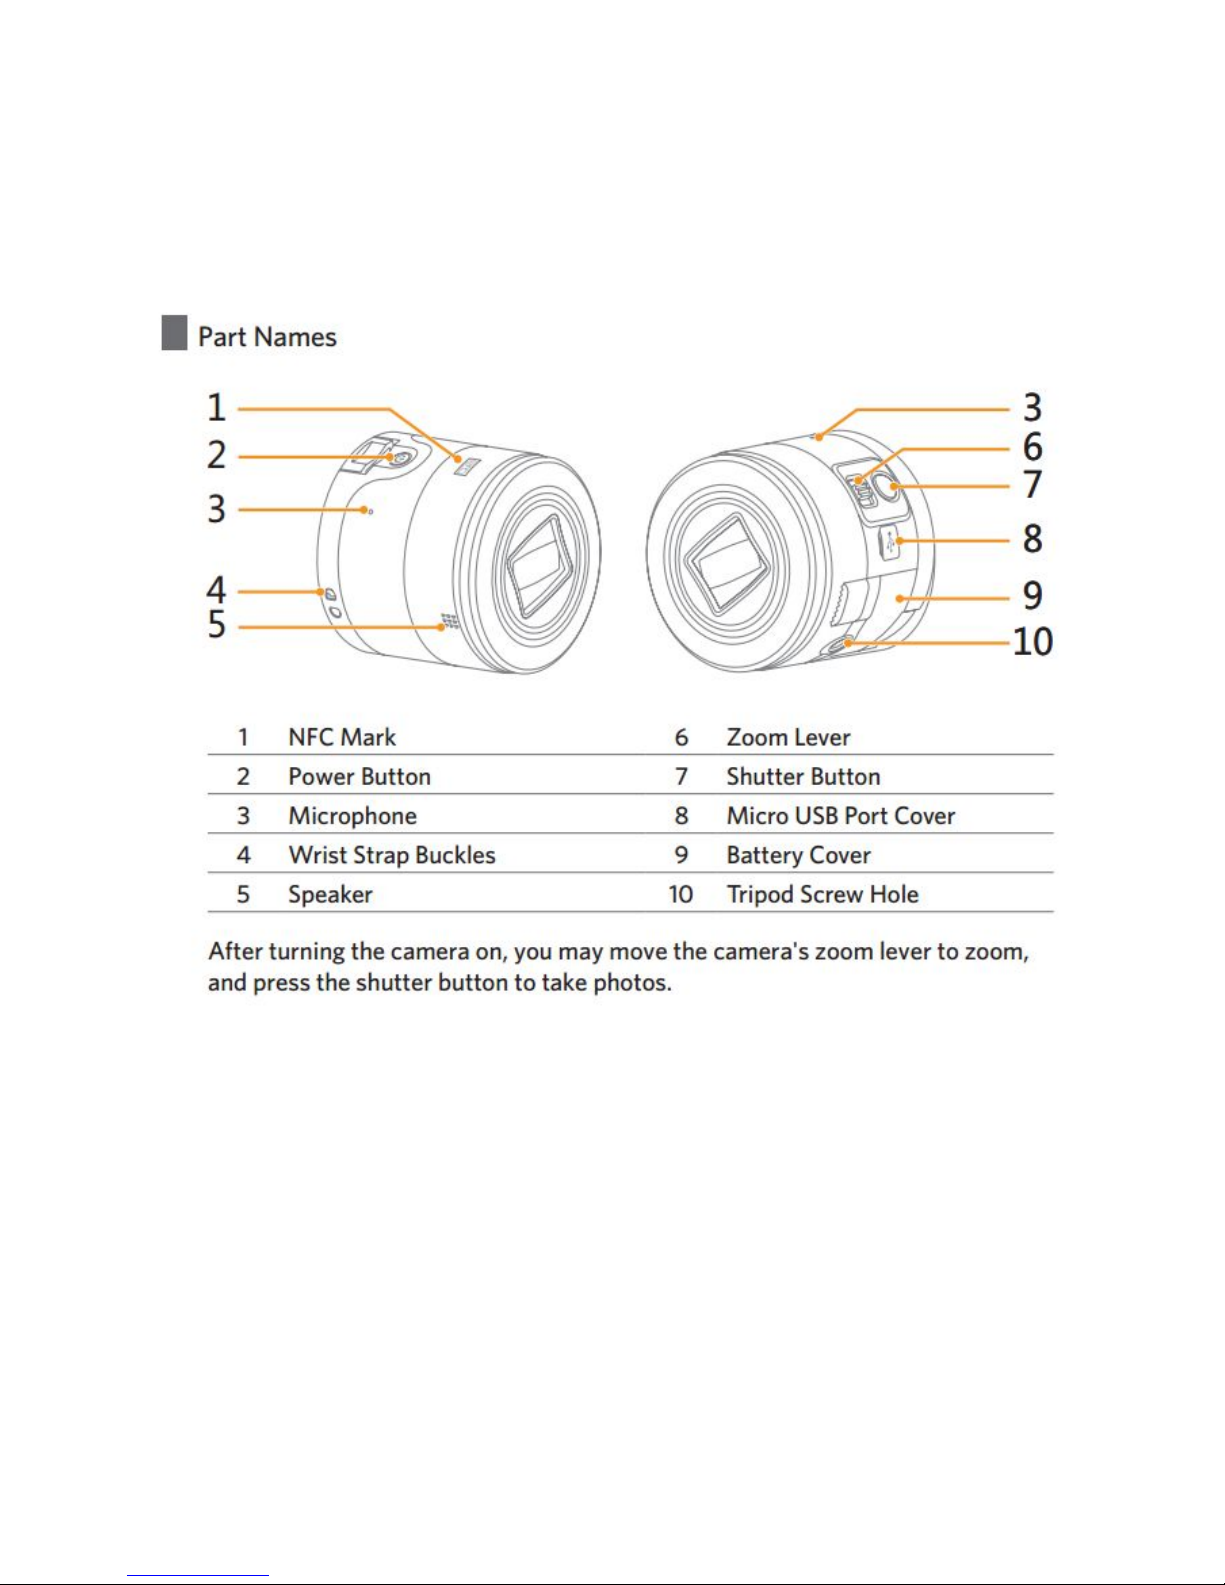
DEVICE LAYOUT
Page 4

POWER ON/OFF
Hold down the Power button for 2 seconds to start the unit. After
about 15 seconds the unit will be ready to use. If the unit doesn't start,
the likely cause is the battery is not charged. To charge the battery,
plug in the power adapter to an electrical outlet and use the provided
USB cable to connect the device to the charger. You may also charge
the unit by connecting it to a USB port on your computer, however the
camera needs to be switched off for it to charge via the computer. If
the camera is on, it will not charge via the computer’s USB port and will
instead appear as a USB storage device.
After charging for 30 minutes the unit should have sufficient power to
start. However, to fully charge the unit it will take 2-3 hours. To power
off the unit, hold down the power button for 2 seconds. A short sound
will play indicating the unit is shutting down. The lens will retract into
the body of the camera and this indicates the camera has been turned
off.
CONNECTING TO CAMERA
Once the camera has initialized, it broadcasts a WiFI signal which begins
with the name "PIXPRO". You can connect to the camera the same way
you connect to any wireless network. Open the Wireless connection
settings on your device and connect to the network name that starts
with "PIXPRO". The network password is 12345678. You can choose the
“Connect Automatically” checkbox to avoid this step in the future.
Page 5

Once you connect to the camera, start the ReadDesk TE software on
your Mercury 12 device. A telescope icon should appear on the bottom
left of the screen as shown below. If the camera is turned off or not
connected, the telescope icon will not appear.
Clicking the telescope icon will display the video stream from the Orion
Camera.
Page 6

CAMERA CONTROLS
To Zoom In/Out move the zoom lever up or down. The camera
will autofocus after zooming.
To Save the image on screen, press the round Shutter Button.
The image is saved on the camera itself and not on your
computer. You will need to transfer the images to your
computer by connecting the camera to your computer using
the provided USB cable. The camera appears as a USB device
when connected to the computer and the files on it will be
Page 7

accessible.
CONTACT INFORMATION
Technical Support: 866-499-2921
Hours: 9:30 – 5:30 EST
Email: support@trysight.com
 Loading...