

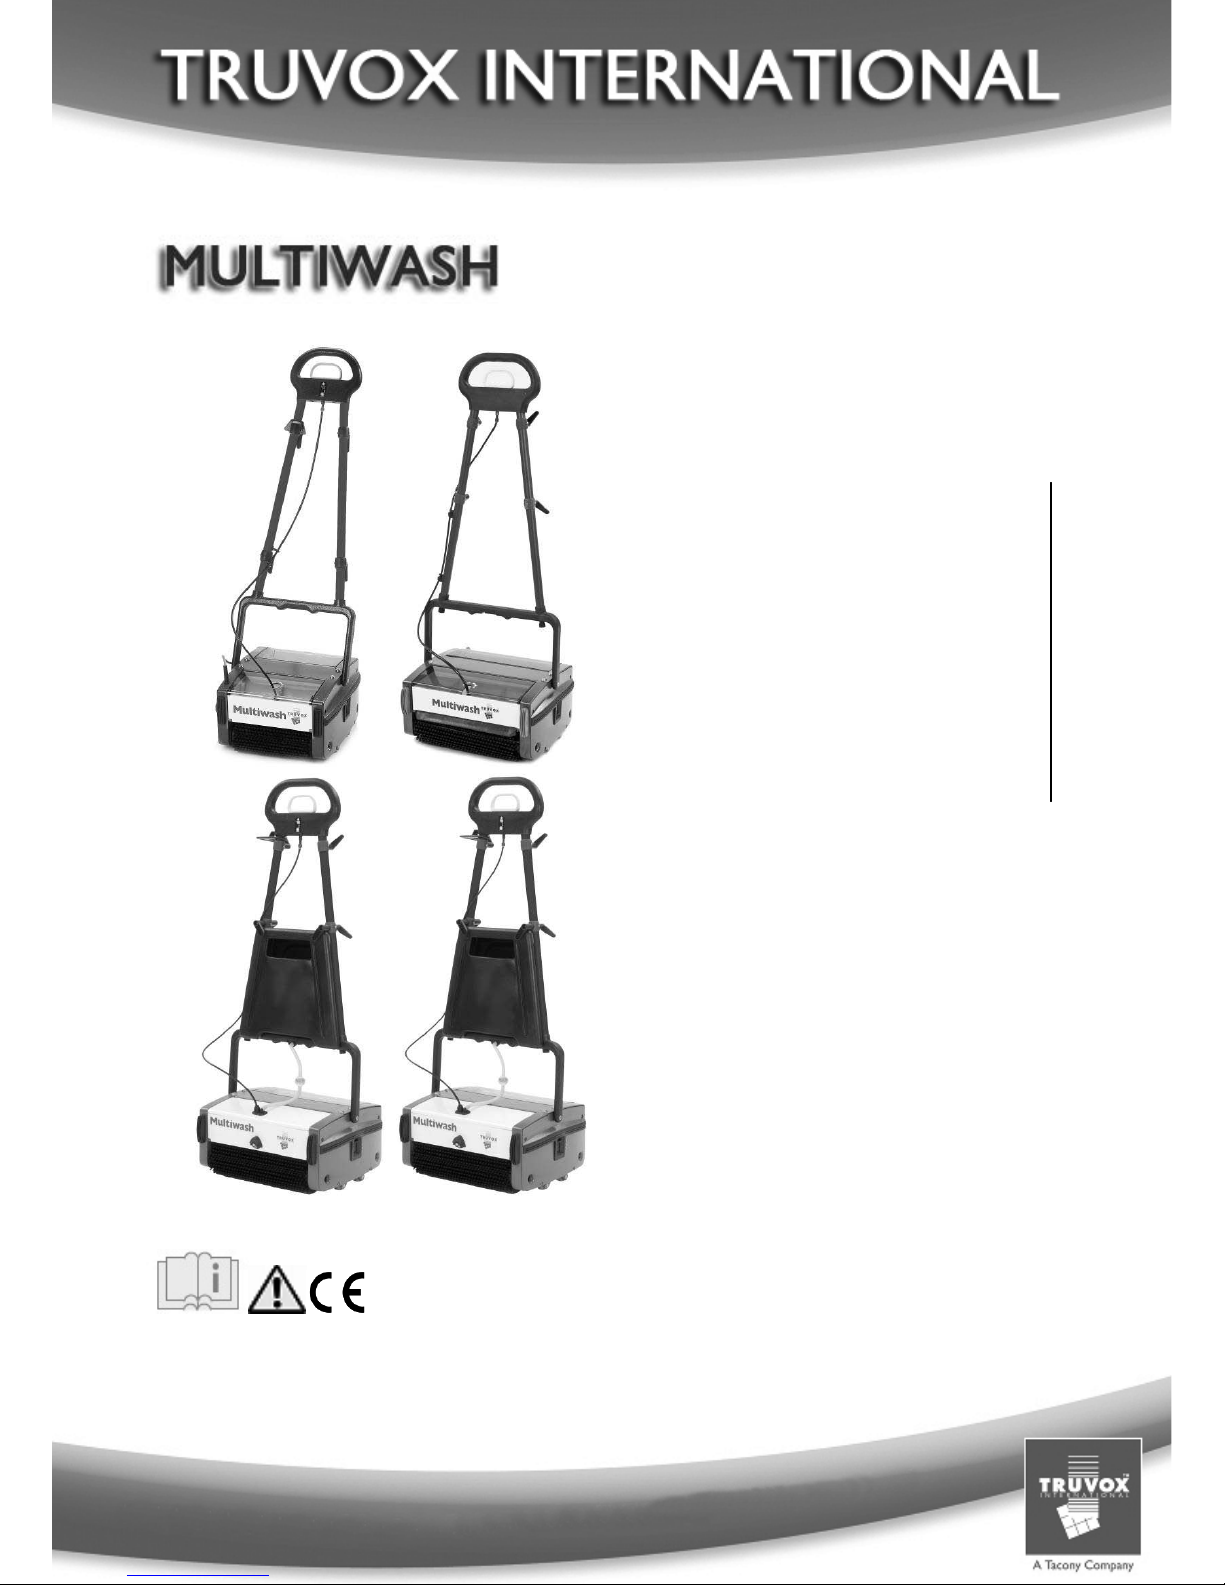
Truvox Multiwash 240, Multiwash 340, Multiwash 440 User Manual
USER MANUAL
EN
2
BEDIENUNGSANLEITUNG
DE 10
MANUEL D'UTILISATION
FR 20
MANUAL DEL USUARIO
ES
29
03-5977-0000 05/12 V.1
www.truvox.com
1
2
MULTIWASH
The following manual contains important information
about the machine and safety advice for the operator.
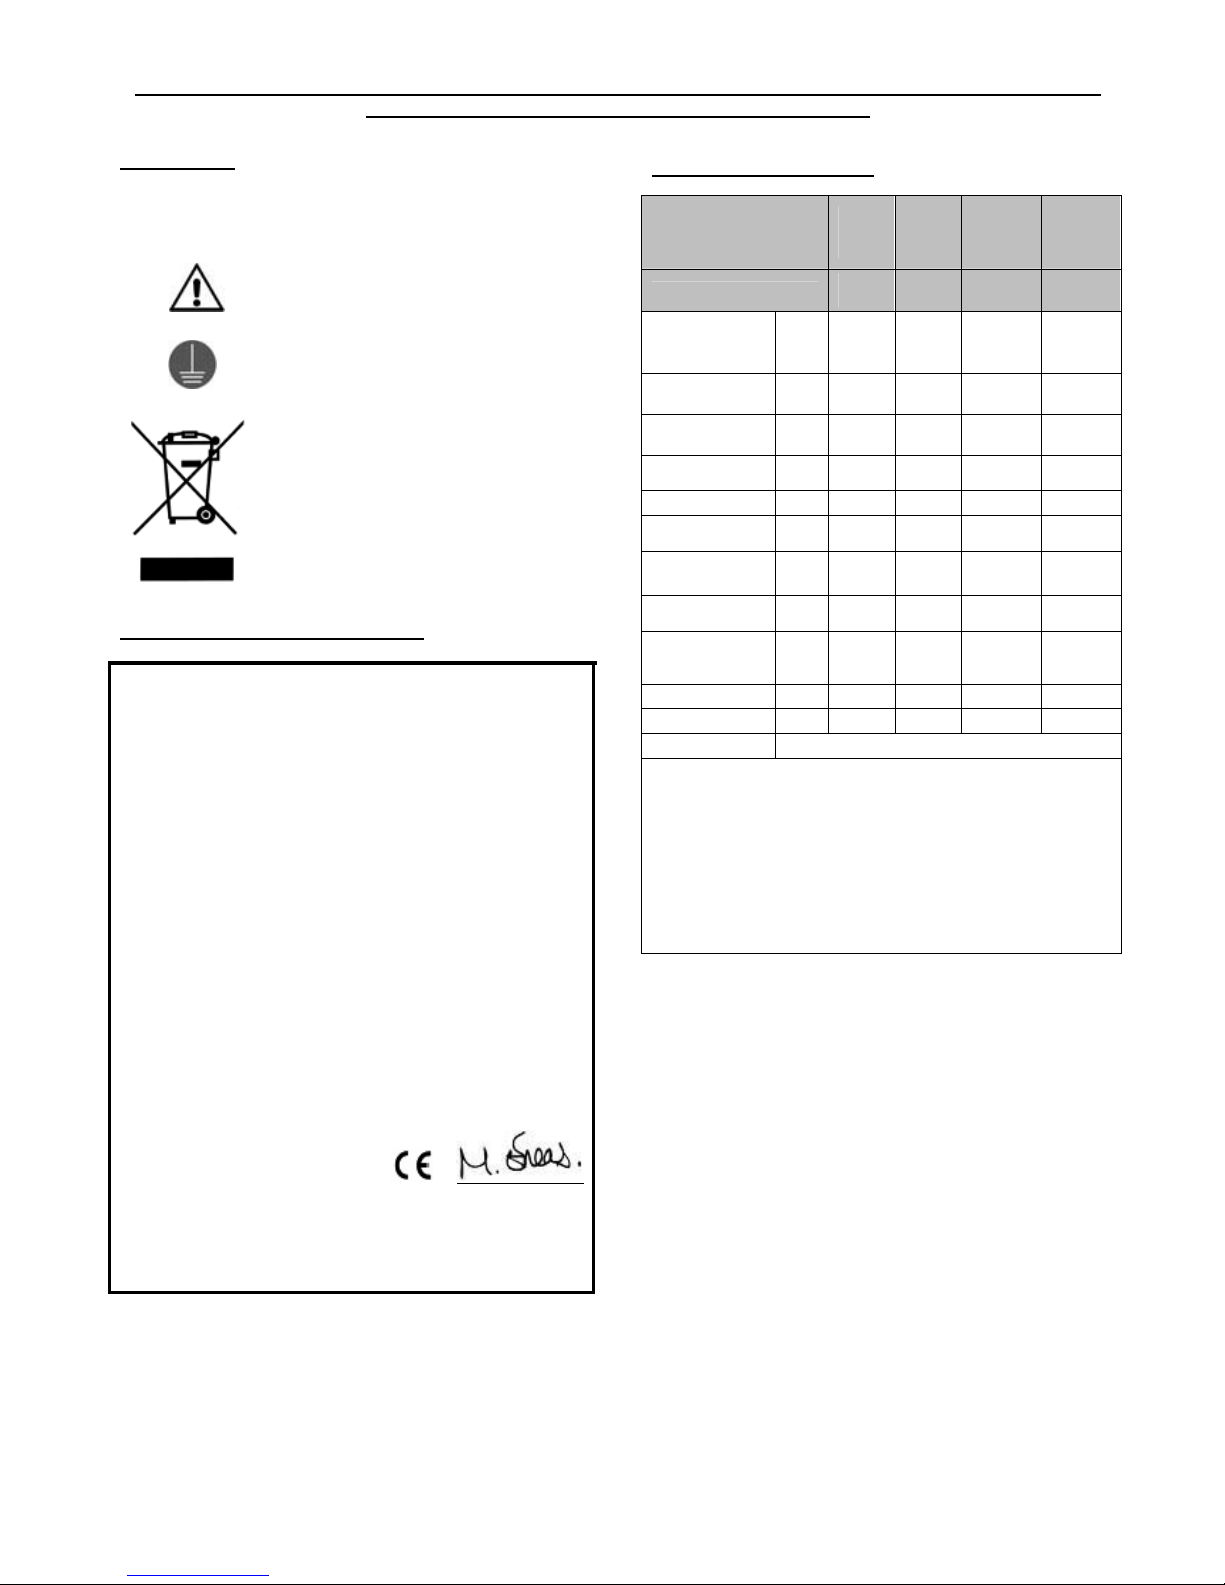
WARNING
Earth Ground Symbol
Waste Electrical & Electronic
Equipment (WEEE)
Do not dispose of this device with
unsorted waste. Improper disposal
may be harmful to the environment
and human health. Please refer to
your local waste authority for
information on return and collection
systems in your area.
TECHNICAL SPECIFICATIONS
Model
Multi
wash
240
Multi
wash
340
Multi
wash
340
(Pump)
Multi
wash
440
(Pump)
Product Code
MW
240
MW
340
MW340/
PUMP
MW440/
PUMP
Voltage AC
(~)/
Frequency
V/
Hz
230/
50
230/
50
230/
50
230/
50
Motor power
(+ pump)
W 400 600
600 +
26
1000 +
26
Productivity
rate
m²/h 650 930 - 1150
Solution
tank
capacity
l 1.2 1.7 4 4
Brush width cm 24 34 34 44
Brush speed rpm 650 650 650 650
Brush
pressure
g/cm
²
250 250 250 250
Sound
pressure
level
dB(
A)
68 69 69 71
Dimensions
(L x W x H)
cm
37.8x
34 x
111.8
37.8 x
44 x
111.8
37.8 x
44 x
111.8
37.8 x
54 x
111.8
Weight kg 20 23 25 28
Cable length m 12 12 12 12
Warranty 1 year
• Noise levels measured at a distance of 1 meter from machine and
1.6 metres above floor, when washing a hard floor. Measurements
recorded using a hand held meter.
• Handle vibration does not exceed 2.5 m/s², when operating on a
smooth hard surface.
• Above dimensions are approx. Since the company’s policy is to
continuously improve the product, there could be changes without
prior notice.
If you have any queries or questions, please contact
the supplier who you purchased the machine from or
Truvox International.
Truvox International Limited
Third Avenue, Millbrook, Southampton, Hampshire,
SO15 0LE, United Kingdom; Tel.: +44 (0) 23 8070 6600,
Fax: +44 (0) 23 8070 5001; Email: sales@truvox.com;
Web: www.truvox.com
EC DECLARATION OF CONFORMITY
Machine Type: Floor cleaning machine
Type: Multiwash
Model: MW240…,
MW340…,
MW340/Pump…,
MW440/Pump…
This machine is in conformity with the following EU
directives:
2006/42/EC
2004/108/EC
Applied
harmonised
standards
Machinery Directive
The EMC Directive
EN60335-1, EN60335-2-72,
EN55014-1, EN55014-2,
EN610003-2, EN610003-3,
EN62233
Truvox International
Malcolm Eneas
Third Avenue, Millbrook
Operations Manager
SO15 0LE, Southampton
Hampshire, England
Southampton, 01-11-2008
ORIGINAL INSTRUCTIONS
WARNING - READ THESE INSTRUCTIONS BEFORE USING THE MACHINE & RETAIN FOR FUTURE REFERENCE
3
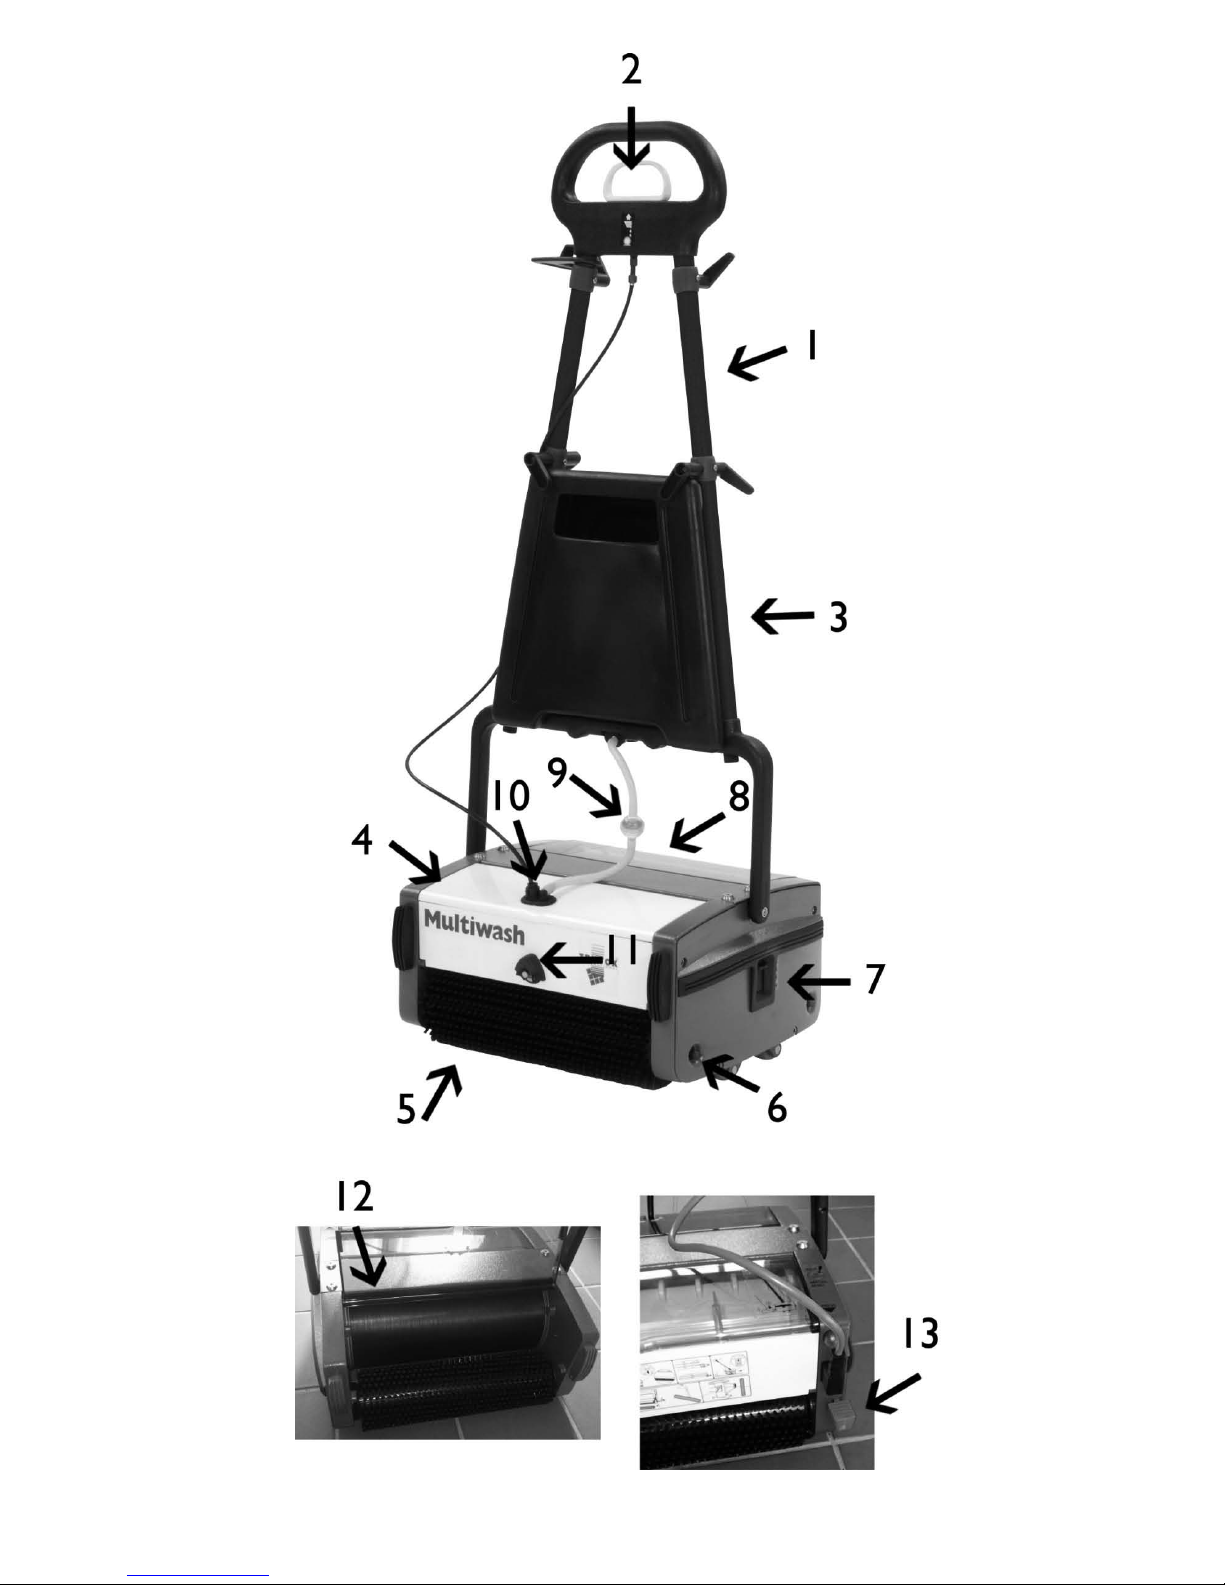
Please refer to machine pictures on page 1
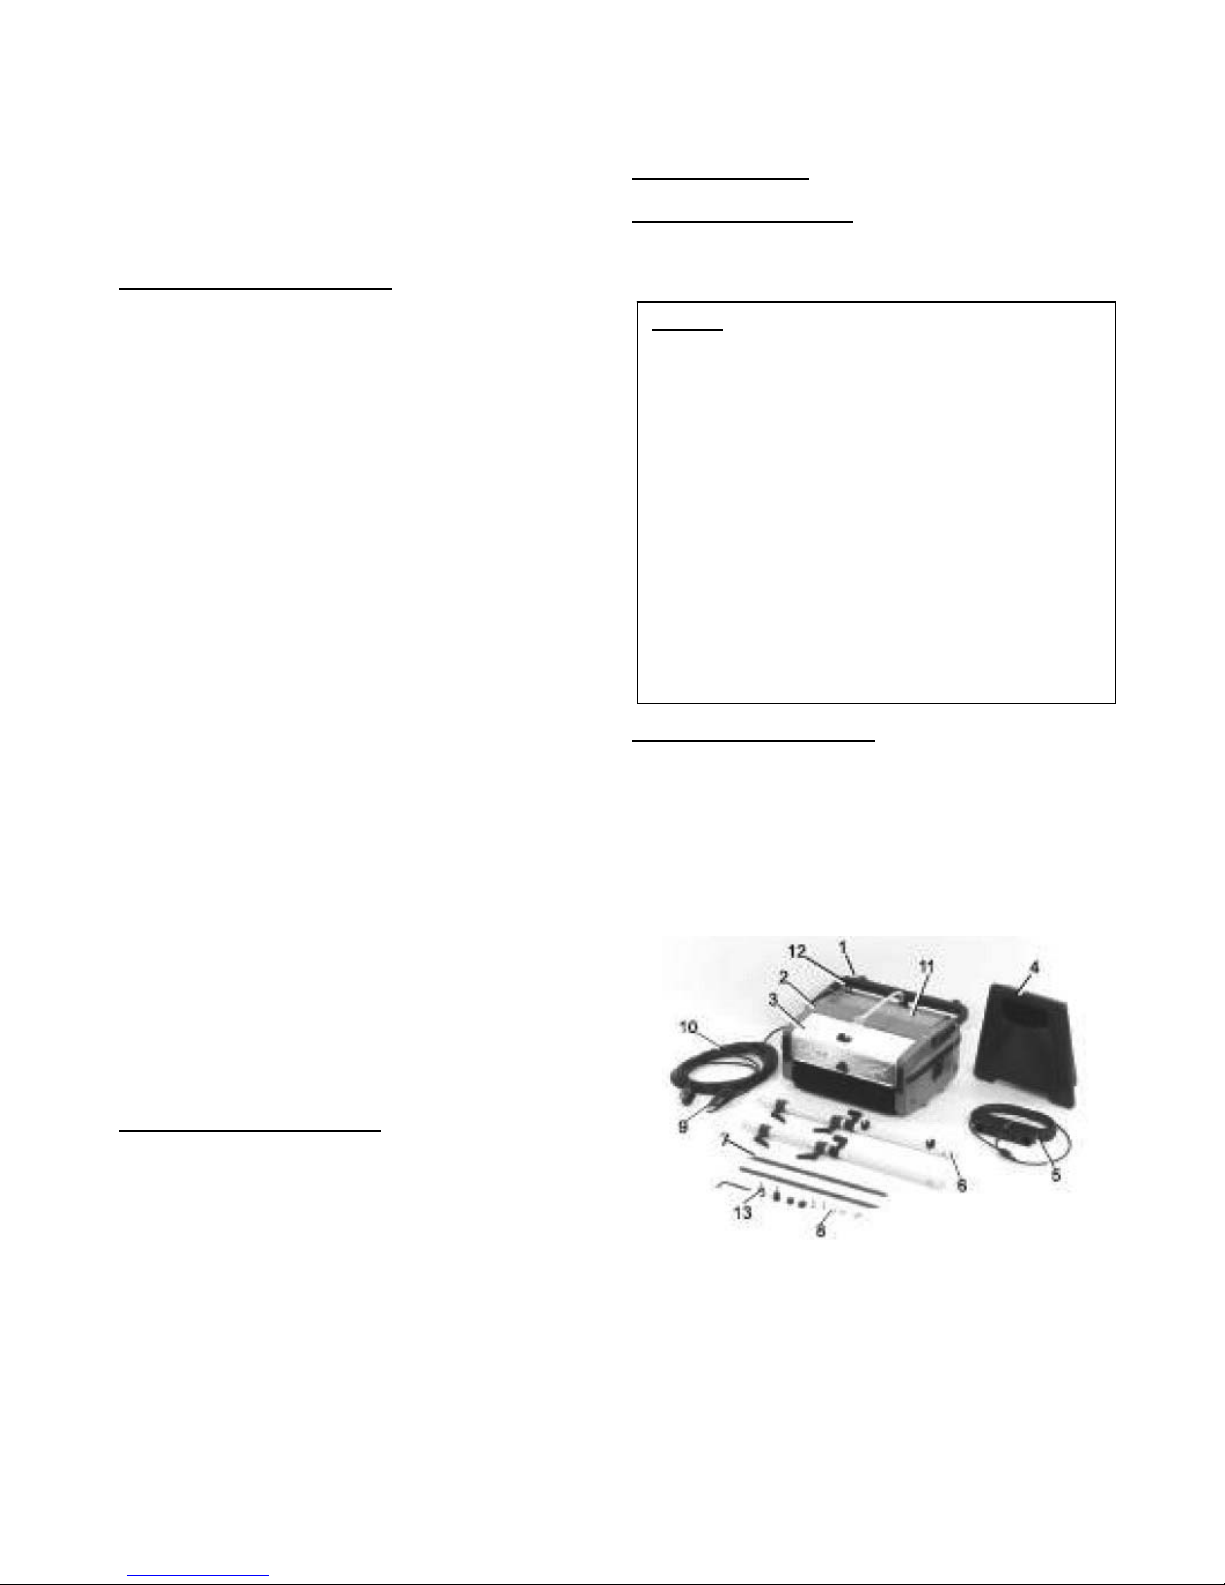
1
2
3
4
5
6
Top handle
Liquid discharge
control handle
Solution tank
(optional)
Boot
Main brush
Brush shaft
7
8
9
10
11
12
13
Transport/ working
knob
Recovery tank
Filter
Lid cap
Nozzle
Conveyor drum
Pedal
1. Product information
The Multiwash floor cleaning machines are designed for
use on smooth, even floors in indoor areas. They can be
used on most floor surfaces including short-pile carpet,
wood, PVC, rubber and stone. They should not be used
on rough uneven surfaces. The machine is intended for
commercial use, for example in hotels, schools, hospitals,
factories, shops, offices, rental businesses and other than
normal housekeeping purposes.
The following instructions contain important information
about the machines and safety advice for the operator.
These instructions are valid for the following models:
Multiwash - MW240…, MW340…, MW340/Pump…,
MW440/Pump…
Equipment must be operated, serviced and maintained in
accordance with the manufacturer’s instructions. If in
doubt contact the supplier of your machine.
1.1 Important safety advice
When using this machine, basic safety
precautions should be followed, including the
following:
• This machine must only be used for the manufacturer’s
approved application as described in this manual.
• Please note that the safety information described in the
manual supplements and does not replace standards in
force in the country in which the machine is used.
• WARNING - Only use accessories and spare parts
provided with the machine or those approved by the
manufacturer. The use of other spare parts or
accessories may impair the safety of the machine.
• CAUTION - This machine is for dry indoor use only and
should not be used or stored outdoors in wet conditions.
• All parts are to be positioned as indicated in the
instructions before using the machine.
• The machine must be unpacked and assembled in
accordance with these instructions before connecting to
the electrical supply.
• DO NOT use where hazardous dust is present.
• DO NOT use in an explosive atmosphere.
• DO NOT pick up or use near flammable fluids, dusts or
vapours.
• DO NOT use to clean up any burning or lighted
materials such as cigarettes, matches, ashes or other
combustible objects.
• Take care when using a machine near the top of stairs
to avoid overbalancing.
• Only use the machine on firm level surfaces. DO NOT
use on a gradient or more than 2% slopes.
• DO NOT operate this machine on rough uneven
surfaces e.g. industrial concrete floors.
• DO NOT use on coarse concrete surfaces.
• DO NOT use outdoors e.g. on patios, decks or rough
surfaces.
• DO NOT sweep over wet surfaces.
• WARNING – Do not fill machines with water hotter than
50°C.
• DO NOT use diesel/petrol or corrosive detergents to
wash floors.
• DO NOT wash and vacuum corrosive, flammable and/
or explosive liquids, even if diluted.
• DO NOT put any object into openings. DO NOT use
with any opening blocked; keep free of dust, debris and
anything that may reduce airflow.
• DO NOT cover machine when in use.
•
DO N
OT lea
ve the machine connected to the electricity
supply when not in use; always remove the plug from
the socket outlet.
• DO NOT leave machine running unattended.
• This machine should always be connected to a fully
earthed power supply of the right voltage and frequency.
• The machine shall be disconnected from its power
source during its cleaning or maintenance and when
replacing parts or accessories, by removing the plug
from the socket-outlet.
• DO NOT use if it has been damaged, left outdoors or
dropped into water.
• DO NOT operate switches or touch the mains plug with
wet hands as this may cause electric shock.
• WARNING - Keep the power supply cord clear of
moving parts (and/or rotating brushes). During operation
hazard may occur when running the machine over the
power supply cord.
• DO NOT operate the machine with a damaged supply
cord or plug, or after the machine malfunctions or is
damaged in any way. Contact an authorised Service
Agent for repair or adjustment.
• DO NOT pull or carry by the supply cord. DO NOT use
cord as a handle, close door on cord or pull cord around
sharp edges or corners.
• The plug of the power supply cord must be removed
from the socket-outlet before commencing cleaning of
the machine or undertaking maintenance operations.
• DO NOT kink or twist the power cord and keep cord
away from heated surfaces.
• When unplugging, pull the plug, not the supply cord.
• The power supply cord must be regularly inspected for
signs of damage. If the power supply cord is damaged,
it shall only be replaced by a suitable cord by the
manufacturer, its service agent or a similar qualified
person in order to avoid a hazard.
• The battery charging lead is to be regularly inspected for
signs of damage. If the lead is damaged, it shall only be
4
replaced by the manufacturer, its service agent or a
similar qualified person in order to avoid a hazard.
• When recharging ensure area is sufficiently ventilated.
• DO NOT run the machine dry, as this could damage the
floor surface or the machine itself.
• Never use excessive foaming or highly corrosive
cleaning solutions.
1.2 Guidelines for the operator
• This machine is not intended for use by persons
(including children) with reduced physical, sensory or
mental capabilities, or lack of experience and
knowledge, unless they have been given supervision
or instruction concerning use of the machine by a
person responsible for their safety.
• Operators must be fully trained in the use of the
machine in accordance with these instructions, able to
perform user maintenance and the correct selection of
accessories.
• Operators should be physically capable to manoeuvre,
transport and operate the machines.
• Operators should be able to recognise unusual
operation of the machine and report any problems.
• Keep children and unauthorised persons away from
the machine when in use.
• Keep cleaning solutions away from children and pets
at all times.
• CAUTION - This machine is for dry indoor use only
and should not be used or stored outdoors in wet
conditions.
• DO NOT clean the machine using water sprays or jets.
• Keep hair, loose clothing, hands, feet and all other
parts of the body away from openings and moving
parts.
• Keep machine clean and in good operating condition.
• Let the machine do the work. Grip the handle as lightly
as possible.
• Stand with feet slightly apart to maintain good balance.
Avoid twisting the body more than 45 degrees.
• Wear suitable footwear to avoid slipping.
• Wear suitable clothing to keep dry and warm.
• Where possible implement job rotation and adequate
rest periods to avoid continuous use of the same
muscles.
• DO NOT smoke when using the machine.
1.3 Transporting the machine
CAUTION - THIS MACHINE IS HEAVY
Do not attempt to lift the machine without assistance.
Incorrect lifting techniques may result in personal injury.
We advise that the manual handling regulations are
followed. Please refer to the technical table for details on
weight of machine. The machine can be moved to the
area to be cleaned by pushing the pedal down, pulling the
handle backwards and then pushing the machine. When
transporting the machine ensure that all components,
tanks and removable parts are securely fastened. When
transporting the machine the handle should be locked in
the upright position. Take extreme care when moving the
machine up or down steps or stairs. CAUTION – Bumping
over thresholds, kerbs and similar obstacles can damage
the machine. Small obstacles can be overcome by pulling
the machine backwards.
2. Preparing for use
2.1 Electrical connection
Before connecting the machine to the power supply,
check that your supply voltage corresponds with that
marked on the rating label on the machine.
2.2 Unpacking the machine
1. Bottom handle 8. Screws & washers
2. Machine body 9. Cable retainer
3. Pump Housing (Pump) 10. Power cord
4. Auxiliary Tank (Pump) 11. Recovery tank
5. Top handle & pull cable 12. Hook
6. Handle LH & RH 13. Knob
7. Brush shafts (2)
Fig.1
1. To save packing space and to ensure the safety of the
machine during transportation, the Multiwash comes to
you with its handle dismantled. Ensure that the listed
parts are present as shown and identify them in order
to understand the assembly instructions.
2. Remove the hook which holds the bottom handle with
the machine body while holding the bottom handle.
UK only
The supply cord for 230v models is fitted with a plug
containing a 13 amp fuse. Should the fuse require
replacement it must only be replaced by a 13 amp
fuse conforming to BS1362, and the fuse cover must
be refitted. If the fuse cover is lost the plug must not
be used until the correct replacement cover is fitted.
Should an extension cord be used, ensure cord rating
is adequate for the equipment. Do not use extension
cord in coiled condition as this could result in
overheating of the cord. The power supply cord plus
any extension leads should not exceed 30 m in total.
The cross-section of any extension cable wiring must
be at least 2, 5 mm².
WARNING – THIS APPLIANCE MUST BE
EARTHED.
5
WARNING - Since the bottom handle is spring loaded,
care must be taken when removing the hook to avoid
sudden springing back leading to possible injury to
personnel.
2.3 Setting up the machine
1. Insert the two tubular handles into the bottom handle
and secure them using knob (2 off) by tightening
lightly. Ensure that the handles are assembled
according to their marked position and the cable
holding hooks are pointing towards the rear.
2. Slide the electric cable retainer into the top portion of
RH handle.
3. Fit the top handle over the tubular handles and secure
them with washer and screw (2 sets).Ensure that the
label on the top handle is facing the front of the
machine. Now tighten firmly both the knobs and
screws alternately. Insert the dummy caps provided to
cover the screws (2 off) in the top handle.
4. Pass the free end of the pull cable through the plastic
guide in RH Handle. Press and twist clockwise to firmly
secure the cable end to the fresh water tank
(Standard).
5. Fix the auxiliary tank firmly into the bottom handle by
holding the top handle.
6. Rotate the knob to hold the auxiliary tank.
7. The brushes are only loosely packed in the machine
for transit, therefore the brush shafts must be fitted
before operating the machine. Push the shafts through
the brushes from the side of the machine. To remove
brushes, push the brush shaft out from the side of the
machine using the fingers and withdraw the shaft.
Normally the standard brush will be supplied with the
machine. Brushes should be selected according to the
type of floor surface to be cleaned, and the degree of
dirt to be removed, please refer Brush Selection Guide.
8. The machine is now ready for use.
2.4 Working principle
1. Cleaning liquid in the solution tank is applied to the
floor by either gravity (Standard) or Spray (Pump).
2. The counter rotating brushes scrub the floor and also
throw the dirty water on the conveyor drum. The front
brush does most of the scrubbing and drying. The rear
brush completes the scrubbing and collects the
remaining water off the floor.
3. A blade fitted to the dirty water tank wipes the drum
and collects the dirty water.
Fig. 2
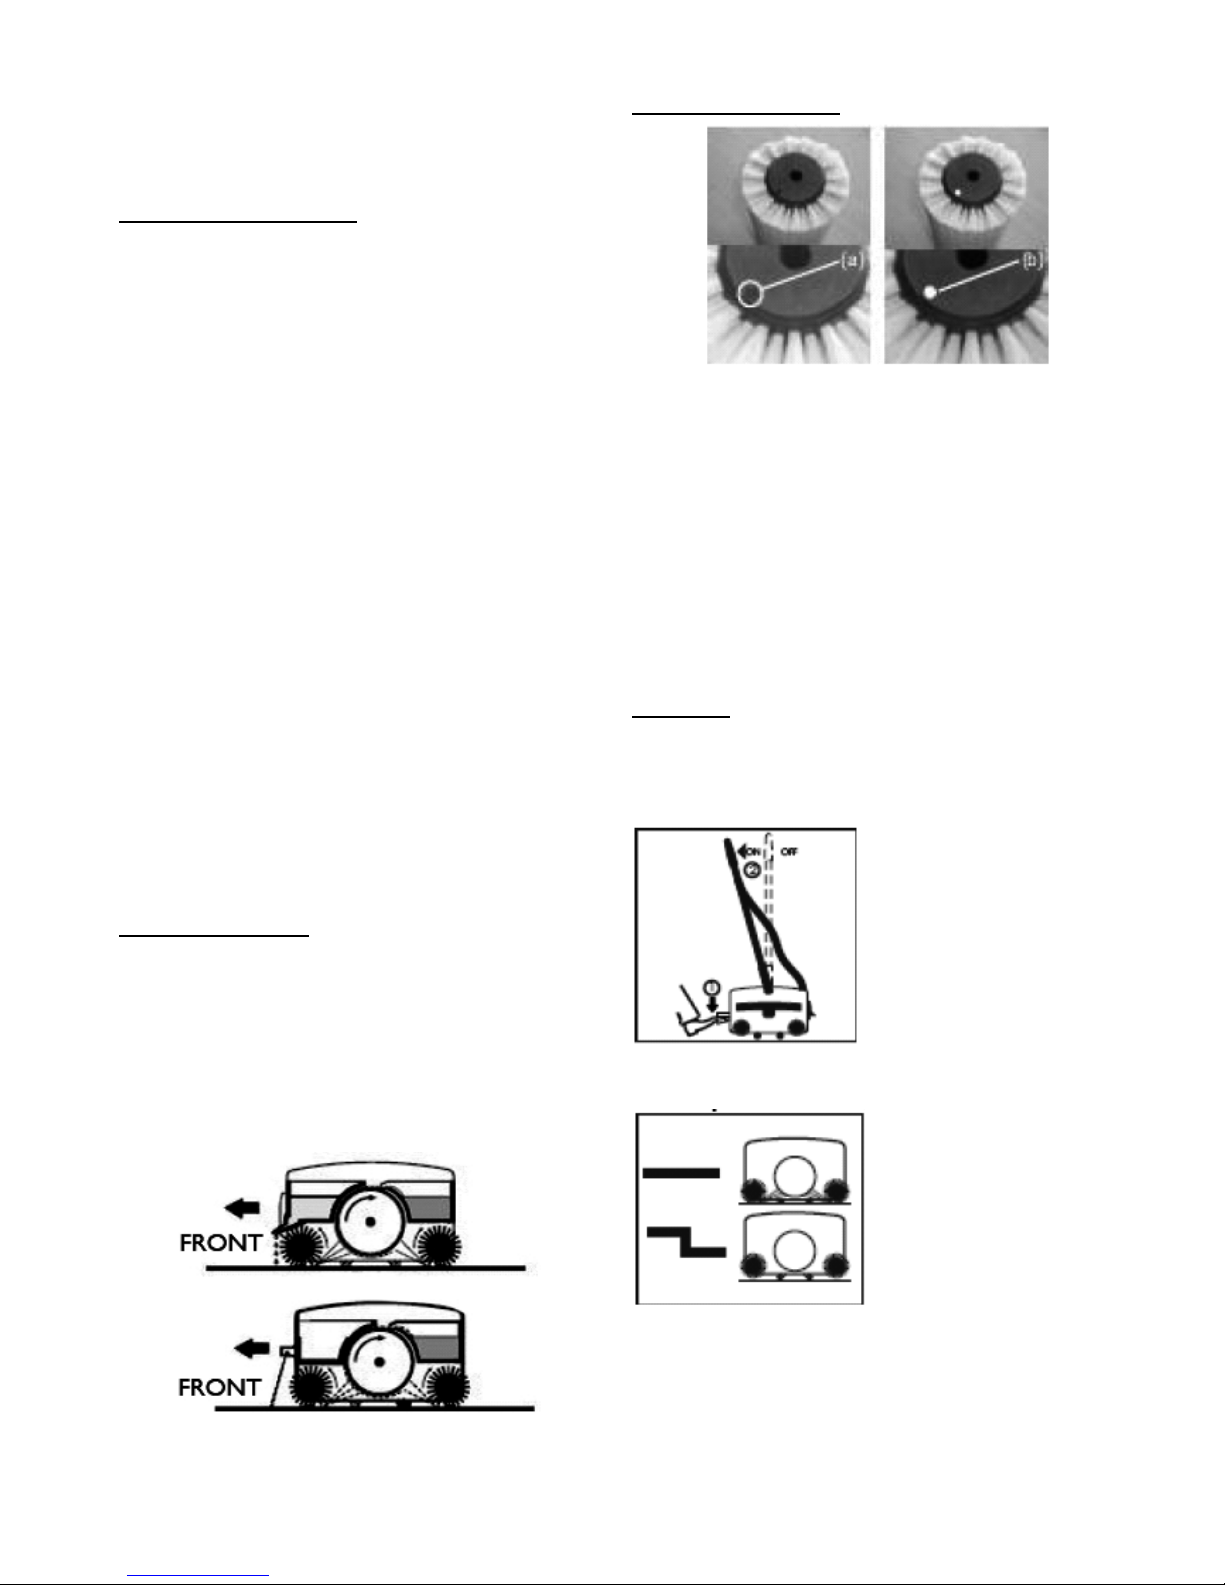
2.5 Brush identification
Fig. 3
(a) Hole provided for plugging button
(b) Brush with button plugged
This is applicable when the customer has more than one
set of brushes of same type. Distinct colour coding make it
easy to separate tools into their correct areas of use.
Washroom tools are kept in the restroom; kitchen tools
are kept in the kitchen - reducing bacteria crosscontamination between high and low-risk areas. Red,
Blue, White and Yellow brush buttons are packed with the
machine. Simply plug the buttons into the hole in the
brush as shown. Clear identification, by colour coding,
helps to prevent cross contamination.
3. Controls
The operating controls are located on the handle (1) and
on the side of the machine. Please refer to page 1.
On/Off Control
By pressing the pedal lightly
with your foot, pull back the
handle a little to start the
motor. The brushes and the
drum starts rotating. Pulling
the handle further without
pressing the pedal, lowers
the machine and engages
the rotating brushes onto
the floor. To stop working,
take the handle to the
vertical position.
Transport/Working Mode Control
Slide this knob to TOP
position (Working Mode) to
operate the machine. Slide
this knob to BOTTOM
position to move the
machine and park the
machine.
WARNING- Keeping the knob in the top position (working
mode) and moving the machine will damage the brushes.
6
Brush Contact Control
Brush contact with the floor
is adjustable in 4 steps,
contact is MINIMUM when
the knob is fully down and
MAXIMUM when it is fully
raised. This helps you to
compensate for the wear of
brushes and also to control
the scrubbing effect. If the
machine does not move
when the handle is lowered, slide the transport/working
mode knob up one step.
Cleaning Liquid Discharge Control
By pulling, the liquid
discharge control handle
up, the cleaning solution is
dispensed on the floor. The
solution stops once the
liquid discharge control
handle is released.
Pull cable connect / disconnect control
Insert the free end of pull
cable into the valve body
fitted in the fresh water
tank. Press and twist
clockwise to secure the
cable end. Similarly, press
and twist anti clockwise to
disconnect the cable end.
Motor Overload Protector
In the event of motor
getting overloaded due to
improper power supply or
unexpected obstruction to
the brush/drum rotation,
the over load protector
trips and protects the
motor from damage. If this
happens, identify the
cause, correct it and, reset
the protector button after minimum of 30 seconds from
tripping by pressing the over load protector manually and
continue working.
IMPORTANT - Should the machine fail to operate, contact
the supplier from whom you purchased the machine.
4. Operation
4.1 Checks before use
• Ensure that the brushes
are fitted properly
• Fill fresh water tank with
cleaning solution
• Insert the plug into mains socket
4.2 Using the machine
WARNING - Never start the machine without a brush or
pad fitted.
Recommended washing sequence
1. Start the machine by pressing the pedal and pulling the
handle back (Fig-ii).
2. Move forward, while sparingly pulling the liquid
discharge control handle (Fig-iii). This handle should
not be kept pulled all the time. The duration and
frequency of pulling and releasing has to be adjusted
to match with the type of floor, extent of dirt. etc. For
tiled or stone floors, apply very little water. The spray
pattern of the Multiwash can be adjusted by the user.
Adjust the spray to prevent solution being dispensed
onto areas that already have been cleaned. The spray
pattern is adjusted by using the serrations in the spray
nozzle and holder. Each serration allows a 4 degree
change (Fig-i v).
3. Stop the liquid discharge approximately 30 cm before
the end of forward motion, continue to move forward
up to the wall without pulling the pull handle.
4. Pull the machine backwards in the same track, but
without discharging any liquid. When you reach the
starting point, change the track and repeat steps 2
through
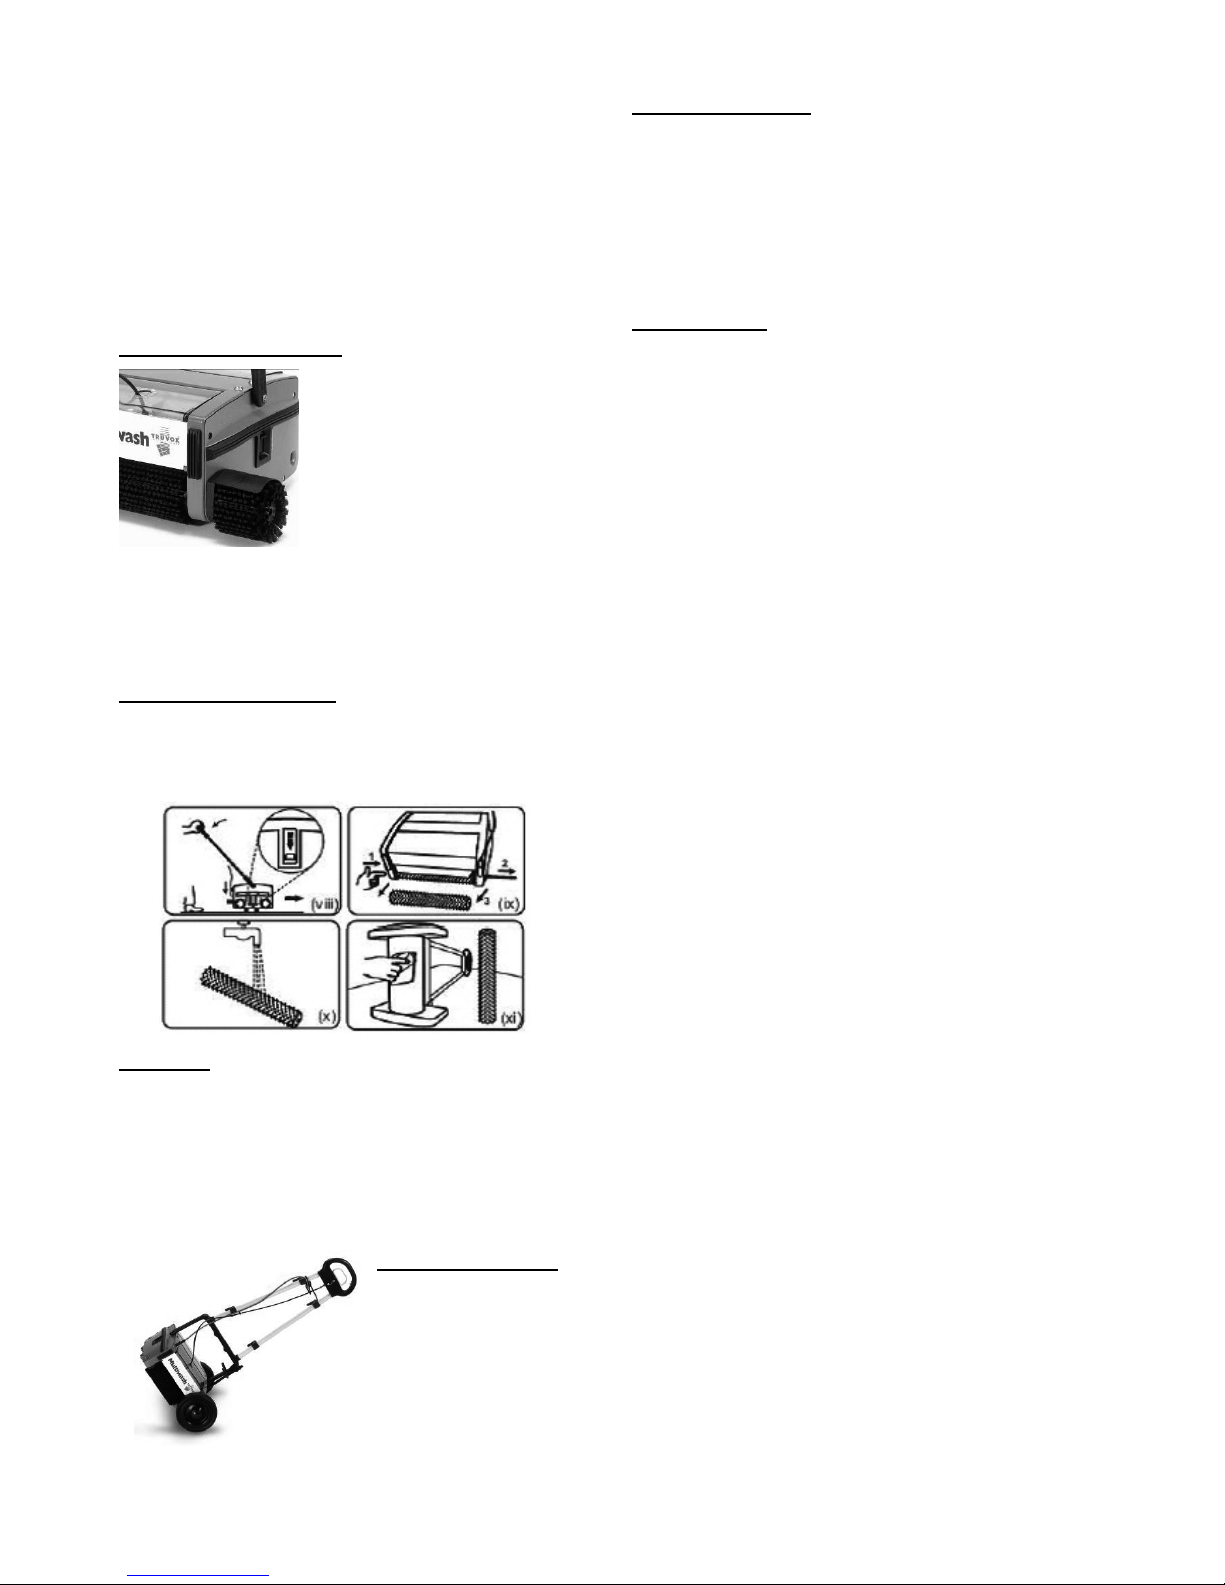
7
5. When you are changing the track allow some overlap
with the cleaned area. In case of large halls take a Uturn and move forward. If quick drying is required,
move on the same track, without discharging the liquid
(Fig-v)
6. Clean the blades and push the tank into its place.
WARNING- Pre-sweep the floor to remove debris before
using the Multiwash. WARNING- Avoid touching the sharp
edge of dirty water tank, it may cause injury to hands.
4.3 Fitting the side brush
To clean up to walls, the side
brush can be used. Switch off and
unplug the machine before fitting
the side brush.
WARNING - Do not use side
brush in a room with no wall
skirting, otherwise, the wall may
get dirty.
1. Remove the front brush and brush shaft.
2. Fix the shield assembly on the side plate.
3. Insert the side brush through the shield and main
brush.
4.4 Using the side brush
1. Tilt the machine at an angle move forward. This way,
the dirty water thrown by the side brush will be
collected by the rear brush.
2. Use side brush only for washing the edges.
5. Storage
• Always switch off, empty, wipe down and dry the
machine after use.
• The tank should be emptied and flushed out with clean
water.
• Wrap the supply cord around the cable winder ensuring
that the plug is not trailing on the floor.
• Store the machine in a dry indoor area only.
5.1 Transport trolley
The simply fitted trolley
provides for ease of
movement when
transporting the machine.
WARNING - Empty all
liquid from the machine
before using the
transporter.
5.2 Using the trolley
1. With the machine handle in the upright position place
the trolley centrally alongside the machine.
2. By holding the machine firmly, strap the Velcro with the
machine to fix the transporter.
3. Ensure that the Velcro strap is securely wrapped
around the bottom handle.
4. Now the trolley is ready to use. The machine can then
be manoeuvred easily whilst holding the top handle.
6. Maintenance
WARNING - Before undertaking maintenance operations
or adjustments switch off machine and unplug from the
electricity supply. IMPORTANT – All other servicing and
repairs should only be performed by a Truvox engineer or
Authorised Service Agent. IMPORTANT – Should the
machine fail to operate please refer to the fault diagnosis
section in the back of this instruction manual. If the
problem / remedy is not listed please contact Truvox
Customer Service Department for rapid attention.
The machine requires minimum maintenance apart from
the following checks by the operator prior to use:
• DO NOT use aggressive detergents, acid, lye etc.
during cleaning and washing and take particular care
with electrical parts.
• Supply cord - Regularly inspect sheath, plug and cord
anchorage for damage or loose connection. Only
replace the supply cord with the type specified in these
instructions.
• Brushes - For maximum life, wash the brushes
regularly. Ensure machine is in Transport mode when
not in use. Store additional brushes in a vertical position
to avoid bending of bristles. Check for permanent
bending of bristles in a particular direction. This may
occur if the machine is operated for several days without
removing the brushes, which is not recommended. If
this occurs, reverse the brush so that the bent bristles
are automatically straightened.
• Wiper Blade - After years of use the wiper blade may
wear. If this occurs the water collection performance will
decrease. It should be replaced by an authorised
service agent.
• Solution tank filter (Standard) - The filter prevents
clogging of the drip holes in the tank. Periodically clean
the filter to ensure uniform discharge of liquid. In case of
non-uniform discharge from the drip holes, back flush
the tank in running
water. Clean the drip holes using
wire or a blunt pin.
• Solution feed filter (Pump) - The filter prevents clogging
of the spray nozzle and should be periodically cleaned.
Use pressurised air/water for cleaning.
• Nozzle maintenance (Pump) - If the spray of the nozzle
becomes blocked, slide the nozzle cover off and remove
nozzle wash in clean water and clean using a pin and
refit.

8
7. After sales service
Truvox machines are high quality machines that have
been tested for safety by authorised technicians. It is
always apparent that after longer working periods,
electrical and mechanical components will show signs of
wear and tear or ageing. To maintain operational safety
and reliability the following service interval has been
defined: Every year or after 250 hours. Under extreme or
specialised conditions and/or insufficient maintenance,
shorter maintenance intervals are necessary. Use only
original Truvox spare parts. Use of other spare parts will
invalidate all warranty and liability claims. Should you
require after sales service please contact the supplier from
whom you purchased the machine, who will arrange
service. Repairs and servicing of Truvox products should
only be performed by trained staff. Improper repairs can
cause considerable danger to the user.
8. Guarantee
Your product is guaranteed for one year from the date of
original purchase, or hire purchase, against defects in
materials or workmanship during manufacture. Within the
guarantee period we undertake at our discretion, to repair
or replace free of charge to the purchaser, any part found
to be defective, subject to the following conditions:
C
ONDITIONS
1. Claims made under the terms of the guarantee must be
supported by the original invoice/bill of sale issued at
the time of sale, or the machine Serial No.
2. For claims under this guarantee contact the supplier
from whom you purchased the product who will
arrange the appropriate action. Do not initially return
the product as this could result in transit damage.
3. Neither Truvox nor its distributor shall be liable for
any incidental or consequential loss.
4. This guarantee is governed by the laws of England.
5. This guarantee does not cover any of the following:
• Periodic maintenance, and repair or
replacement of parts due to normal wear and
tear.
• Damage caused by accident, misuse or neglect,
or the fitting of other than genuine Truvox parts.
• Defects in other than genuine Truvox parts, or
repairs, modifications or adjustments performed
by other than a Truvox service engineer or
authorised service agent.
• Costs and risks of transport relating directly or
indirectly to the guarantee of this product.
• Consumable items such as, brushes, drive
discs, filters and vacuum skirts.
• This guarantee does not affect your statutory
rights, or your rights against the supplier arising
from their sales or purchase contract. Truvox
International Limited policy is one of continual
product development and we reserve the right to
alter specifications without prior notice.
9. Accessories
Item MW240 MW340 MW340/Pump MW440/Pump Usage
Standard brush –
black (2 required)
90-0127-0000 90-0130-0000 90-0130-0000 90-0387-0000
All natural stone floors,
ceramic, mosaic,
wood, profiled rubber,
vinyl, PVC (First time
cleaning); smooth
concrete
Soft brush – grey
(2 required)
90-0133-0000 90-0131-0000 90-0131-0000 90-0388-0000
All natural stone floors,
ceramic, mosaic,
wood, profiled rubber,
vinyl, PVC
(Maintenance
cleaning); short pile
carpet, marble granite
Side brush –
black (1 required)
90-0134-0000 90-0132-0000 90-0132-0000 90-0385-0000
For up-to-the-edge
cleaning
Hard brush –
blue (2 required)
- 90-0089-0000 90-0089-0000 -
To suit individual floor
conditions, smooth
concrete
Escalator brush –
blue (2 required)
- 90-0090-0000 90-0090-0000 90-0469-0000 For use on escalators
4 litre tank
- - 90-0307-0000 90-0103-0000
Trolley
(for all models)
05-3395-0000 05-3395-0000 05-3395-0000 05-3395-0000 For easier transport

9
10. Fault diagnosis
The following simple checks may be performed by the operator:
Trouble Reason Remedy
Machine fails to start
– no power
• Transport working knob is in bottom
position
• Motor overload protector has tripped
• Micro switches are faulty open circuit
•
Check mains cable
• Check plug top fuse
• When handle is lowered transport wheels
move allowing brushes to touch the floor, if
transport wheels don’t move when handle is
lowered remove wheels and shafts and
clean.
Machine fails to pick
up water from the
floor
• Worn brushes
• Damaged lip on recovery tank
• Broken lugs on recovery tank
• Drum not revolving
• Bridge fitted wrong way on machine or
springs broken
•
Replace brush, lip, lugs or springs
• Fit bridge the correct way
Machine fails to
spray solution onto
the floor
(MW340/Pump &
MW440/Pump only)
• Blocked jet
• Blocked inline filter
• Faulty pump
• Blocked filter or faulty valve in solution
tank
• Faulty pump micro switches
• Damaged or broken pull cable
•
Clean jet or inline filter
Machine only sprays
when handle in
upright position
• Loose lower handle bolts
•
Tighten lower handle bolts
Drum is turning, but
brushes are not
• If one or both brushes are not turning,
stripped gears in gear box
Machine fails to let
solution onto the
floor (MW240 &
MW340 only)
• Damaged or broken pull cable
• Adjustment on pull cable
• Dirty filter in clean water tank
• Blocked holes in outlet channel
•
Empty clean water tank and fill up with clean
water
• Clean holes
Drum not turning
• Plastic gear inside rim of drum
sheared
• Drum sprocket bearing seized
• Build up of dirty hair etc. around bridge
springs
• Plastic gears in gear box stripped
• Drum rubber sleeve loose on drum
•
Clean drum and bearings and remove dirt
and build up
Motor makes a
humming noise but
does not turn
• Motor capacitor faulty
• Motor seized up
• Faulty motor windings
•
Contact service agent
* If the fuse blows several times, the machine should be checked by an authorised Service Agent.
10
MULTIWASH
Diese Bedienungsanleitung enthält wichtige
Informationen zu diesem Gerät sowie
Sicherheitsanweisungen für den Benutzer.
ACHTUNG
Erdungssymbol
Elektro- und Elektronik-Altgeräte
(WEEE)
Entsorgen Sie dieses Gerät nicht im
Hausmüll. Eine unsachgemäße
Entsorgung kann die Umwelt und
die Gesundheit schädigen. Wenden
Sie sich für Informationen über die
Abgabe- und Sammelsysteme in
Ihrer Region an die lokale
Entsorgungsstelle.
TECHNISCHE ANGABEN
Modell
Multi
wash
240
Multi
wash
340
Multi
wash
340
(Pumpe)
Multi
wash
440
(Pumpe)
Produktnummer
MW
240
MW
340
MW340/
PUMPE
MW440/
PUMPE
Spannung AC
(~)/ Frequenz
V/
Hz
230/
50
230/
50
230/
50
230/
50
Motorleistung (+
Pumpe)
W 400 600
600 +
26
1000 +
26
Arbeitsleistung m²/h 650 930 - 1150
Füllmenge
Laugentank
l 1.2 1.7 4 4
Bürstenbreite cm 24 34 34 44
Bürstendrehzahl
U/
min
650 650 650 650
Bürstendruck
g/cm
²
250 250 250 250
Geräuschpegel
dB
(A)
68 69 69 71
Abmessungen
(H x B x L)
cm
37,8 x
34 x
111,8
37,8 x
44 x
111,8
37,8 x
44 x
111,8
37,8 x
54 x
111,8
Gewicht kg 20 23 25 28
Kabellänge m 12 12 12 12
Gewährleistung 1 Jahr
• Die Geräuschentwicklung wurde im Abstand von 1 Meter von der
Maschine und 1,6 Metern über dem Boden beim Reinigen von
Hartboden gemessen. Die Messungen wurden mit einem
Handmessgerät durchgeführt.
• Die Griffvibration übersteigt 2,5 m/s² im Betrieb auf einer ebenen,
harten Fläche nicht.
• Die obenstehenden Abmessungen sind Richtwerte. Da sich unser
Unternehmen der ununterbrochenen Weiterentwicklung seiner
Produkte verschrieben hat, können die Daten ohne Ankündigung
geändert werden.
Wenn Sie Probleme oder Fragen haben, wenden Sie
sich an den Fachhändler, bei dem Sie die Maschine
erworben haben, oder an Truvox International.
Truvox International Limited
Third Avenue, Millbrook, Southampton, Hampshire,
SO15 0LE, Großbritannien; Tel.: +44 (0) 23 8070 6600,
Fax: +44 (0) 23 8070 5001; E-Mail: sales@truvox.com;
Web: www.truvox.com
EU-KONFORMITÄTSERKLÄRUNG
Gerätetyp: Bodenreinigungsmaschine
Typ: Multiwash
Modell: MW240…,
MW340…,
MW340/Pumpe…,
MW440/Pumpe…
Dieses Gerät entspricht den folgenden EU-Richtlinien:
2006/42/EG
2004/108/EG
Angewendete
harmonisierte
Normen
Machinenrichtlinie
EMV-Richtlinie
EN60335-1, EN60335-2-72,
EN55014-1, EN55014-2,
EN610003-2, EN610003-3,
EN62233
Truvox International
Malcolm Eneas
Third Avenue, Millbrook
Operations Manager
SO15 0LE, Southampton
Hampshire, England
Southampton, 01-11-2008
ACHTUNG – LESEN SIE DIESE ANLEITUNG VOR DER VERWENDUNG DES GERÄTES SORGFÄLTIG DURCH
UND BEWAHREN SIE SIE FÜR REFERENZZWECKE AUF
11
Beachten Sie die Geräteabbildungen auf Seite 1
1
2
3
4
5
6
Oberer Griff
Steuergriff für
Flüssigkeitsabgabe
Laugentank
(optional)
Abdeckung
Hauptbürste
Bürstenwelle
7
8
9
10
11
12
13
Transport/Arbeitsknopf
Sammelbehälter
Filter
Deckelkappe
Düse
Trommel
Pedal
1. Produktinformationen
Die Multiwash-Bodenreinigungsmaschinen sind für den
Einsatz auf glatten, ebenen Böden in Innenräumen
bestimmt. Sie können auf den meisten Bodenbelägen wie
kurzflorigem Teppich, Holz, PVC, Gummi und Stein
verwendet werden. Sie sollten nicht auf rauen, unebenen
Flächen verwendet werden. Das Gerät ist für die
gewerbliche Nutzung, zum Beispiel in Hotels, Schulen,
Krankenhäusern, Fabriken, Ladengeschäften, Büros,
Vermietungsunternehmen und andere Zwecke außer der
normalen Haushaltsreinigung vorgesehen.
Diese Bedienungsanleitung enthält wichtige Informationen
zu den Geräten sowie Sicherheitsanweisungen für den
Benutzer. Diese Bedienungsanleitung gilt für folgende
Modelle:
Multiwash - MW240…, MW340…, MW340/Pumpe…,
MW440/Pumpe…
Das Gerät muss im Einklang mit den Anweisungen des
Herstellers bedient, instand gehalten und gewartet
werden. Wenden Sie sich im Zweifelsfall an Ihren
Fachhändler.
1.1 Wichtiger Sicherheitshinweis
Bei der Verwendung dieses Geräts sollten die
grundlegenden Sicherheitsvorkehrungen
eingehalten werden, unter anderem die
folgenden:
• Das Gerät darf nur für den vom Hersteller vorgesehenen
Verwendungszweck, wie in dieser Anleitung
beschrieben, verwendet werden.
• Beachten Sie, dass die Sicherheitshinweise in den
Ergänzungen zur Bedienungsanleitung keinen Vorrang
vor den Normen in dem Land, in dem das Gerät benutzt
wird, haben.
• ACHTUNG - Verwenden Sie nur Zubehör- und
Ersatzteile, die mit der Maschine geliefert werden oder
vom Hersteller zugelassen sind. Durch die Verwendung
anderer Ersatz- oder Zubehörteile kann die Sicherheit
der Maschine beeinträchtigt werden.
• HINWEIS - Diese Maschine ist nur für die Verwendung
in trockenen Innenräumen vorgesehen und darf nicht im
Freien bei feuchtem Wetter verwendet oder gelagert
werden.
• Alle Teile müssen vor der Benutzung des Gerätes wie in
der Anleitung angegeben positioniert werden.
• Das Gerät muss vor seinem Anschluss an die
Stromversorgung entsprechend dieser Anleitung
ausgepackt und montiert werden.
• Verwenden Sie das Gerät NICHT in Räumen mit
gefährlichem Staub.
• Verwenden Sie das Gerät NICHT in explosionsfähigen
Atmosphären.
• Starten oder verwenden Sie das Gerät NICHT in der
Nähe entzündlicher Flüssigkeiten, Stäube oder
Dämpfe.
• Verwenden Sie das Gerät NICHT, um damit
brennende oder glimmende Materialien wie Zigaretten,
Streichhölzer, Asche oder andere entzündliche
Gegenstände aufzunehmen.
• Verwenden Sie das Gerät am oberen Ende von
Treppen mit Vorsicht, um Unfälle durch
Gleichgewichtsverlust zu vermeiden.
• Nutzen Sie das Gerät nur auf festen, ebenen
Oberflächen. Verwenden Sie das Gerät NICHT auf
schrägen Flächen und bei einem Gefälle von mehr als
2 %.
• Benutzen Sie das Gerät NICHT auf rauen, unebenen
Flächen wie industriellen Betonböden.
• Verwenden Sie das Gerät NICHT auf groben
Betonoberflächen.
• Verwenden Sie das Gerät NICHT in Außenbereichen
wie z.Bsp. Innenhöfen oder Terrassen oder auf rauen
Oberflächen.
• Verwenden Sie das Gerät NICHT auf nassen Flächen.
• ACHTUNG – Befüllen Sie die Maschinen nicht mit
Wasser, das wärmer ist als 50 °C.
• Verwenden Sie NIEMALS Diesel/Benzin oder ätzende
Reinigungsmittel auf den Böden.
• Wischen und saugen Sie NIEMALS ätzende,
entflamm-bare und/oder explosive Flüssigkeiten, auch
nicht in Verdünnung.
• Stecken Sie KEINE Gegenstände in die Öffnungen
des Geräts. Verwenden Sie das Gerät NICHT, wenn
Öffnungen versperrt sind. Entfernen Sie Staub, Unrat
und alles, was zu einer Beeinträchtigung des
Luftstroms führen könnte.
• Decken Sie das Gerät während der Benutzung N
I
CHT
ab.
• Ziehen Sie den Stecker der Maschine IMMER nach
der Verwendung aus der Steckdose; lassen Sie das
Gerät nie an die Stromversorgung angeschlossen.
• Lassen Sie das Gerät NICHT unbeaufsichtigt laufen.
• Die Maschine sollte immer mit einem ordnungsgemäß
geerdeten Stromanschluss mit der richtigen Spannung
und Frequenz verbunden werden.
• Wenn es gereinigt oder gewartet wird oder wenn Teile
oder Zubehör ausgetauscht werden, sollte das Gerät
immer durch Abziehen des Steckers aus der
Steckdose von der Stromversorgung getrennt werden.
• Benutzen Sie das Gerät NICHT, wenn es beschädigt,
draußen stehen gelassen oder in Wasser eingetaucht
wurde.
• Betätigen Sie die Schalter und berühren Sie den
Netzstecker NICHT mit nassen Händen, da Sie dabei
einen elektrischen Schlag bekommen können.
• ACHTUNG - Halten Sie das Stromkabel von sich
bewegenden Teilen (und/oder rotierenden Bürsten)
 Loading...