

Page 1
USER IDE
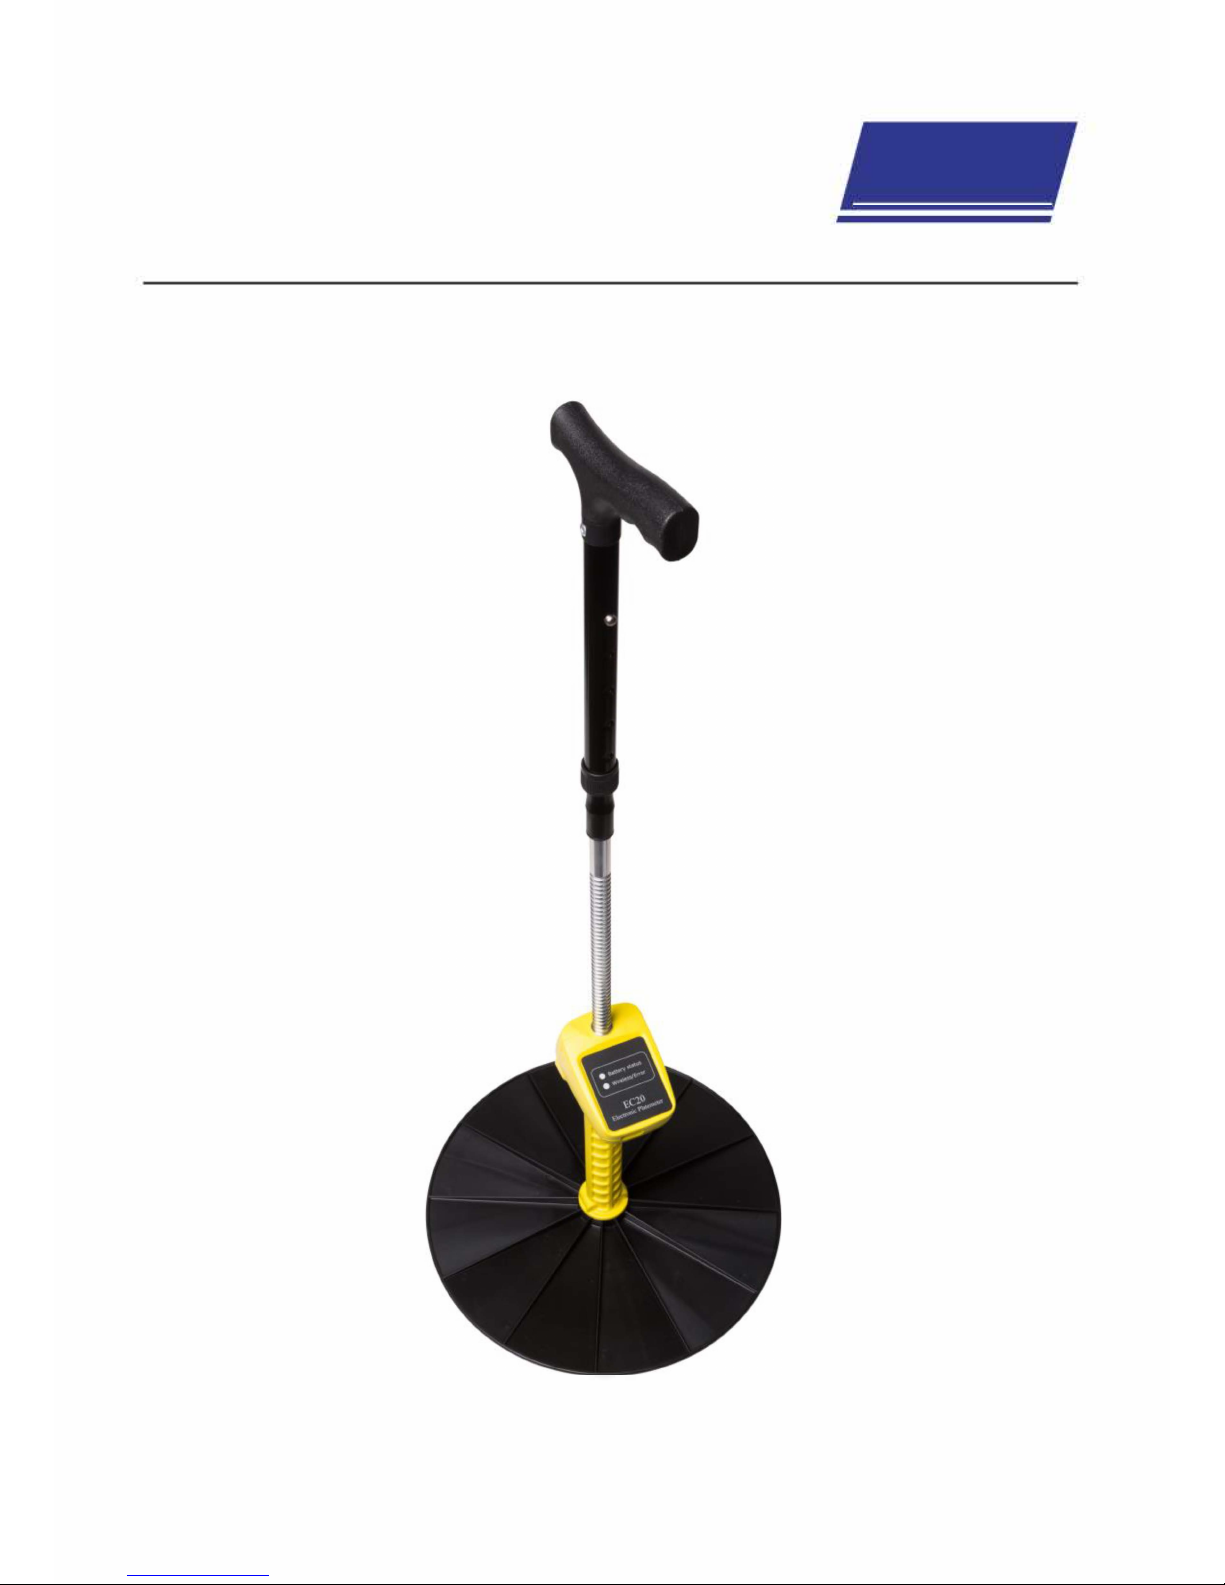
EC-20 Plate Meter
Page 2

Tru-Test recommends the use of Jenquip Pasture Management Software. This software is
required in order to download data from the plate meter. It takes the information from your farm
walk and produces ready-to-use reports. Jenquip Pasture Management Software is supplied with
your plate meter on a USB stick. For all support, phone 0800 AGDATA (0800 243282).
Computer requirements: Windows XP or later.
To use the EC-20 plate meter, you will also need:
An Android phone with the following features:
Android software version 4.3 or newer
Jenquip Pasture App installed (available from Google Play Store)
Bluetooth
® to connect the phone to the plate meter
A cellular or Wi-Fi connection, if you want to send files from the app
If you are using FarmIQ’s auto paddock recognition feature, you will need to activate
Location Services on your phone.
The
Bluetooth
® word mark and logos are registered trademarks owned by
Bluetooth
SIG, Inc. Any use by
Tru-Test Limited is under licence.
© 2018 Tru-Test Limited.
All product names and brand names in this document are trademarks or registered trademarks of their
respective holders.
No part of this publication may be photocopied, reproduced, stored in a retrieval system, or transmitted in
any form or by any means, electronic, mechanical, photocopying, recording or otherwise without the prior
written permission of Tru-Test Limited. Product specifications may change without prior notice.
For more information on other quality Tru-Test Group brands and products, visit
www.tru-testgroup.com
Tru-Test Limited
25 Carbine Road
Mt Wellington
Auckland 1060
New Zealand
Postal address:
P O Box 51078
Pakuranga
Manukau 2140
New Zealand
All trademarks with an * are neither owned by nor licensed to Tru-Test Limited and belong to their
respective owners.
Tru-Test Limited, 2018. All rights reserved.
832994 Issue 1 01/2018
Page 3

Introduction ................................................................................................. 1
Assembly instructions................................................................................... 2
Operating the plate meter ............................................................................ 4
Battery ........................................................................................................ 5
Testing to see whether Zero Calibration is required ....................................... 5
Zero calibration ........................................................................................... 6
Fault finding ................................................................................................ 7
Warranty and servicing ................................................................................ 8
Page 4

Page 5
1
Congratulations on the purchase of your Tru-Test EC-20 Plate Meter (plate meter).
This plate meter is a high precision engineered device for measuring the average
height of pasture relative to density of the pasture.
This is directly relative to the quantity of dry matter present (kilograms of dry
matter – kg DM/ha).
Your plate meter will become an invaluable tool in your farming operation for dayto-day feeding decisions and long term feed budgeting.
Read and understand all the instructions before using the plate meter. A copy of
this user guide can be downloaded from www.livestock.tru-test.com
Your plate meter is designed only for measuring pastures. Use it for no other
purpose (e.g. it is not a walking stick). We have manufactured the plate meter
using quality materials and manufacturing techniques, however, if faults do occur,
have them corrected before you use the plate meter.
Be careful around electric fences. Parts of the plate meter will
conduct electricity!
Store the plate correctly. Be careful that the wind does not blow the plate away - it
could be dangerous. It is not to be thrown.
Water blasting or submerging the unit will void the warranty.
Page 6
2
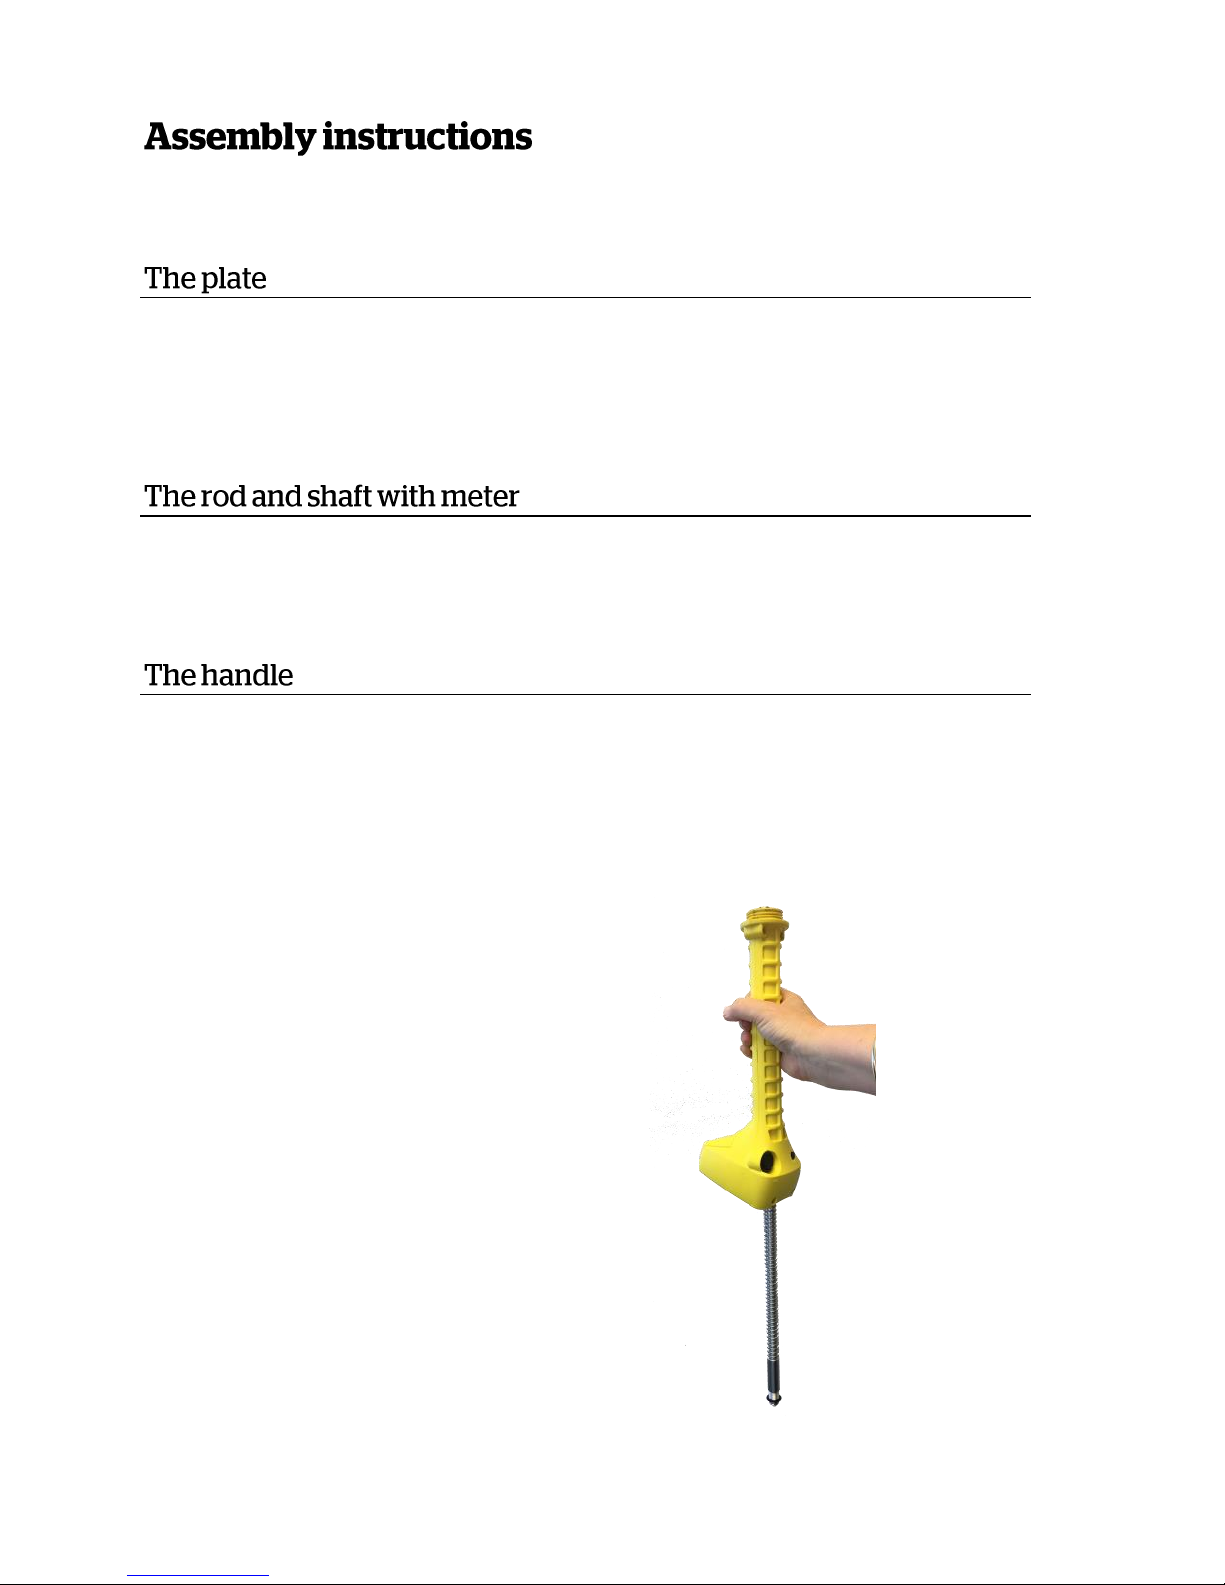
The plate meter is supplied in three parts:
The heavy duty plastic plate sits on top of the pasture to establish average height
and density. The area of the circle and weight of the plate have been carefully
calibrated.
The grooved rod allows pasture to be measured in 0.5 cm intervals (clicks). The
yellow shaft includes the electronic meter.
The black handle can be adjusted to suit the height of the user.
To assemble the plate meter:
1 With one hand, hold the yellow
shaft vertically with the counter
towards the ground. The grooved
rod will slide down through the
shaft.
Page 7
3
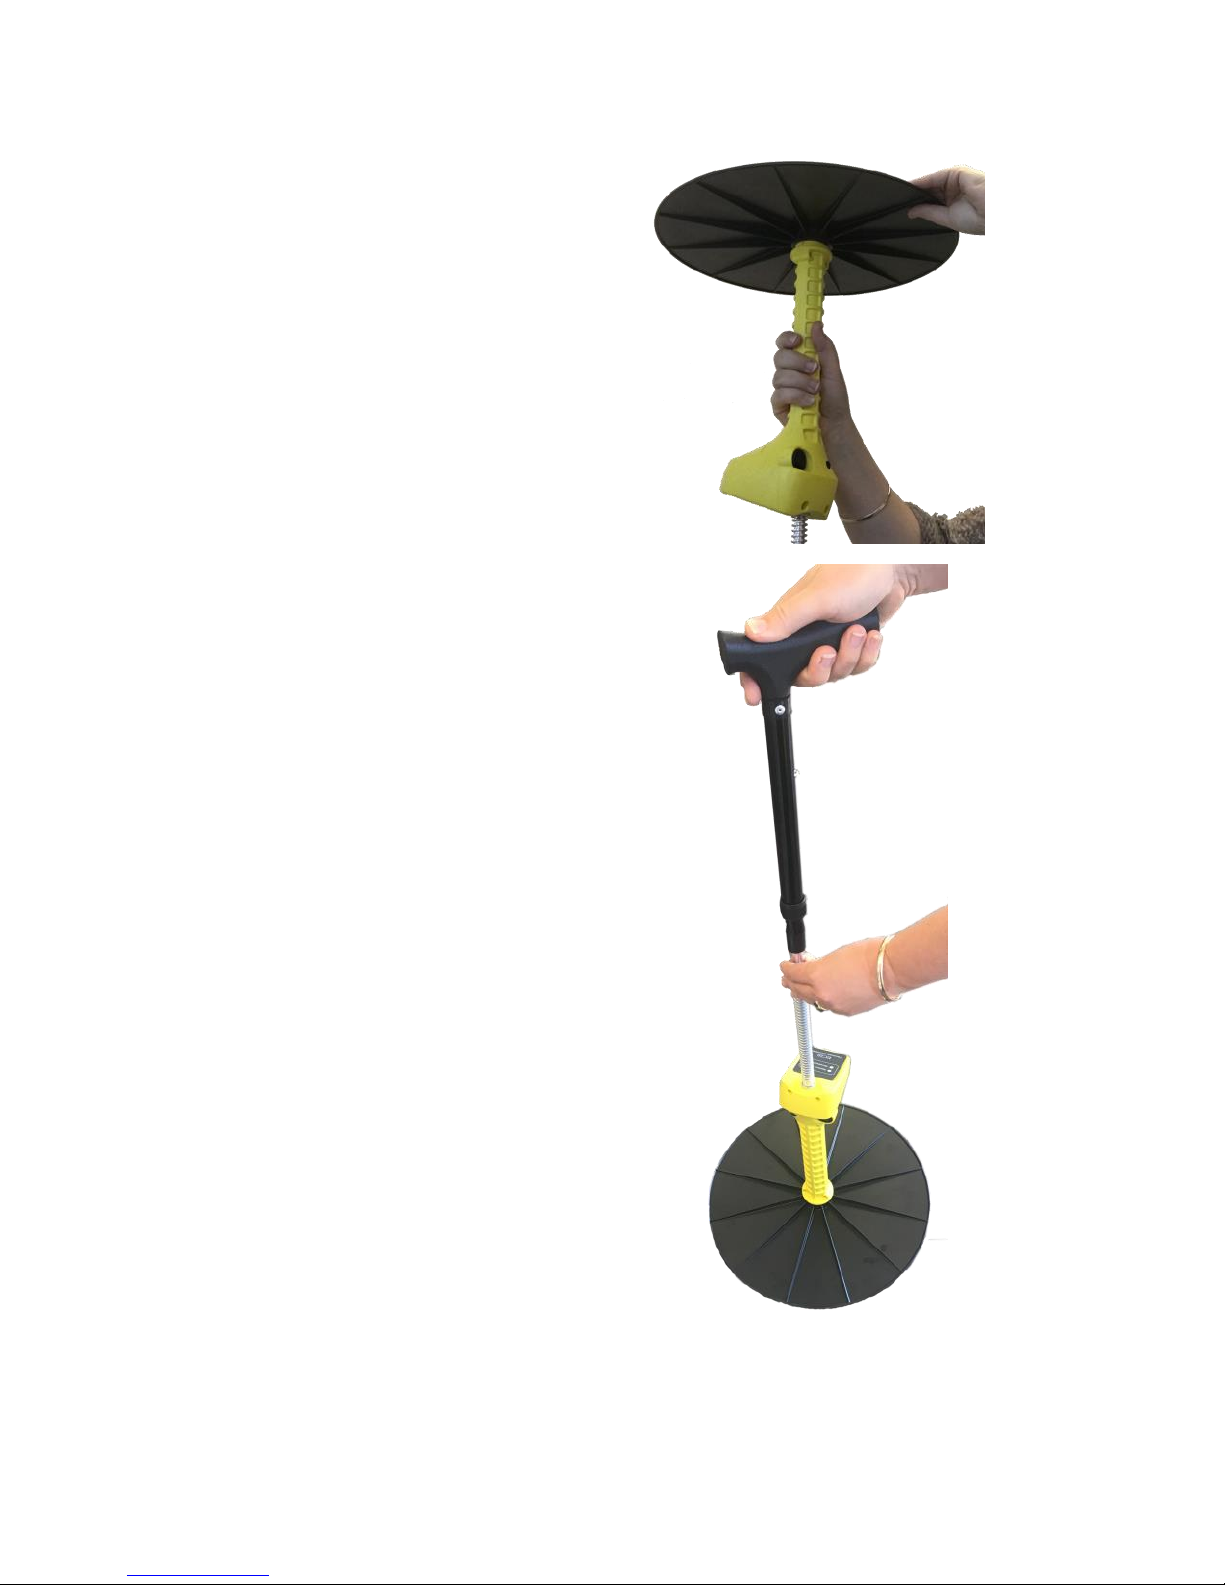
2 With your other hand, screw on
the plate, making sure that the
smooth side of the plate is
uppermost (ribbed side closest to
the meter).
3 Turn the plate meter the correct
way up (plate down) and place it
on the ground. The grooved rod
will protrude out of the shaft. With
one hand hold the grooved rod
and with the other hand, screw on
the black plastic handle. Be careful
not to displace the small rubber Oring on the top of the rod.
4 Use the buttons on the handle to adjust the handle so that it is a
comfortable height.
Page 8
4
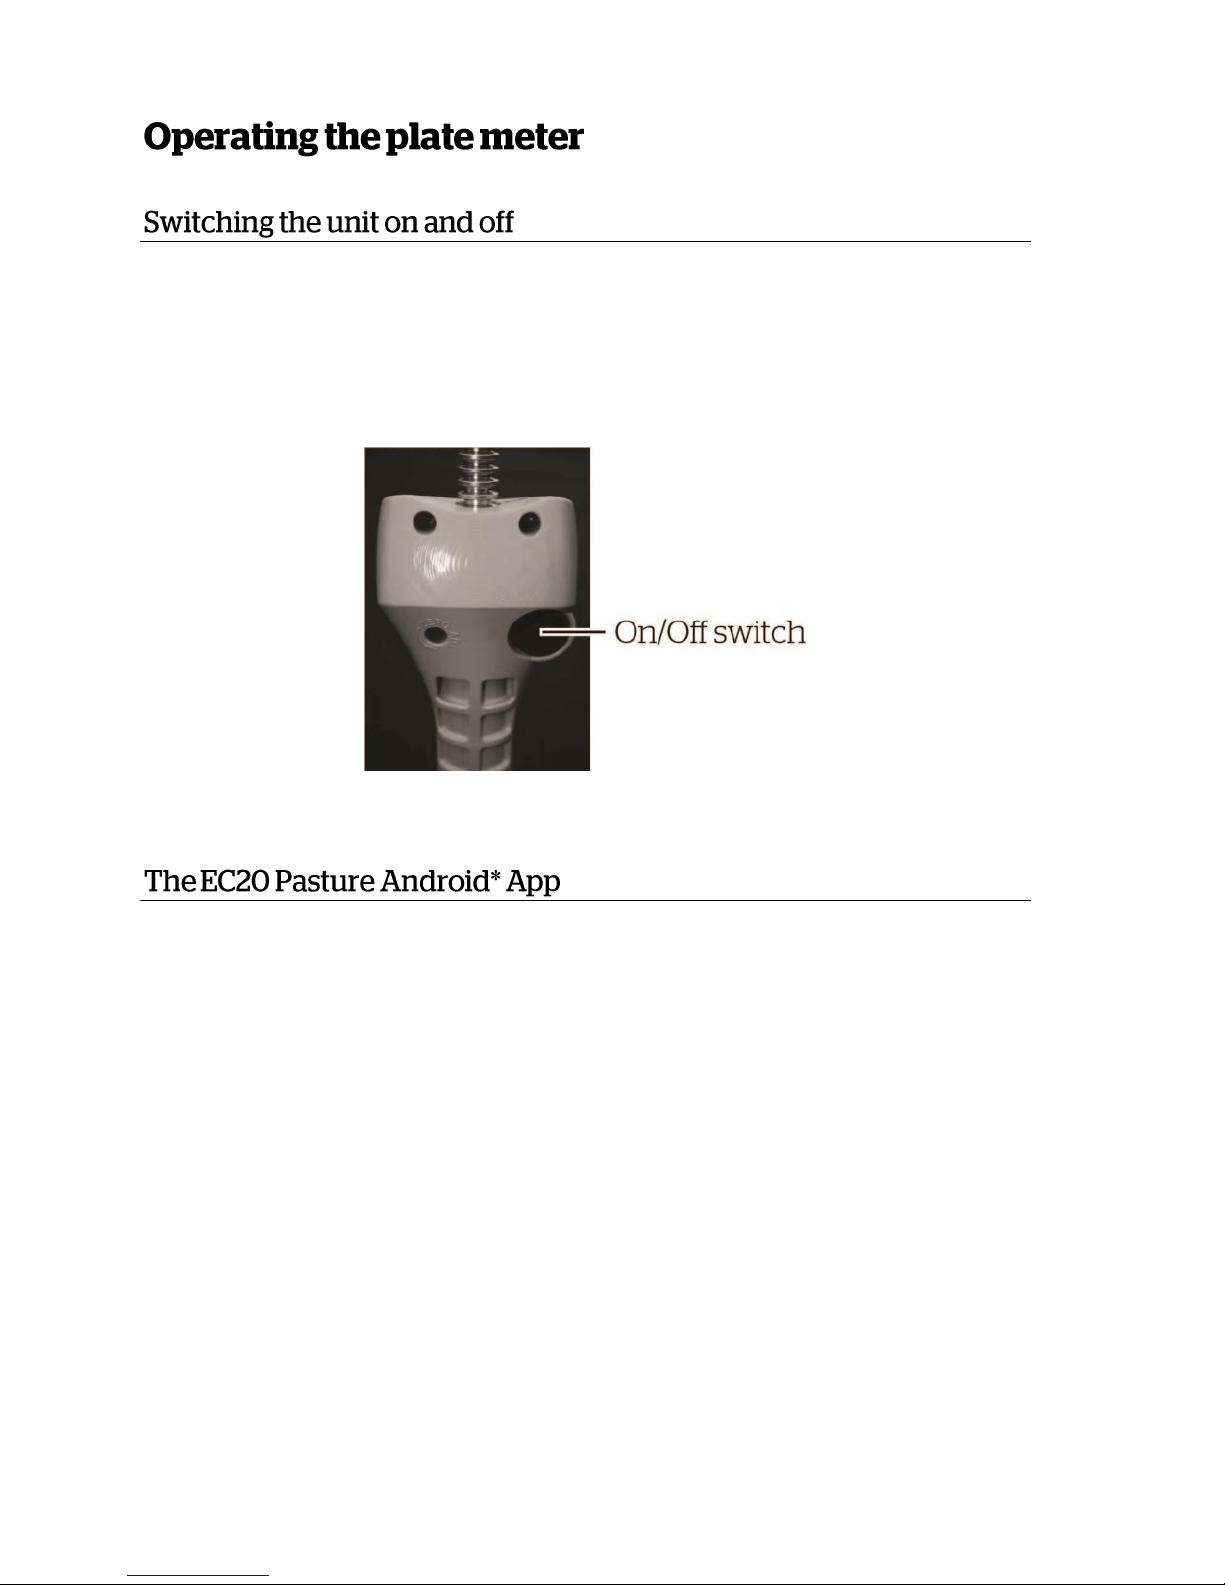
The plate meter is switched on and off using the black switch at the back of the
unit. Off is in the ‘down’ position. When the plate meter is off, there are no
numbers displayed on the LCD screen. The plate meter will turn off automatically
after 15 minutes if it is left on, and is not in use.
The pasture app enables the EC20 plate meter to communicate with your Android
phone or tablet. You can store paddock walk data, and export reports for viewing
or further manipulation in other pasture management systems.
Refer to the EC20 Pasture Android App Handbook that shipped with your
EC20 Plate Meter.
Page 9

5
The product consumes about 10 to 20 mA when on, depending on the battery
voltage and whether it is beeping. This could be used to estimate run times on
rechargeable NiMh battery packs.
The “Battery Status” LED shows green for the first half of the battery life. As the
battery becomes weaker, the LED will gradually change to orange, and then to red
when it is at 6 V. From 6 V to 5 V, the LED will slowly flash red as there is only
about one hour of life left. A good quality alkaline battery could last around 28
hours or even longer. Below 5 V, the product will play a tune and turn off.
Make sure that the Potentiometer (Pot) Zero Calibration is correct. Perform a
sample reading. The product should beep as you lift the plate meter off
the pasture, registering the reading. The
Bluetooth®
link does not need to be
active to do this test. If the Phone App is connected, the “Wireless/Error” LED
should be blue and will flicker briefly as data is being sent to the Phone App.
If there is no beep and you continue to perform three sample readings in a row,
the product will likely play a warning alarm sound, and the Wireless/Error” LED
will blink four times red: “Ze-ro-Er-ror”. This means that the potentiometer has
not returned to “Zero” between each reading. No data is sent to the phone in this
condition. (Although the Phone App is notified of the error condition, so could be
enhanced to instruct the user to perform a zero-calibration procedure on the plate
meter). Every 20 seconds, the warning alarm will be heard until the product is
turned off, or a screwdriver is used to zero out the potentiometer.
Page 10
6
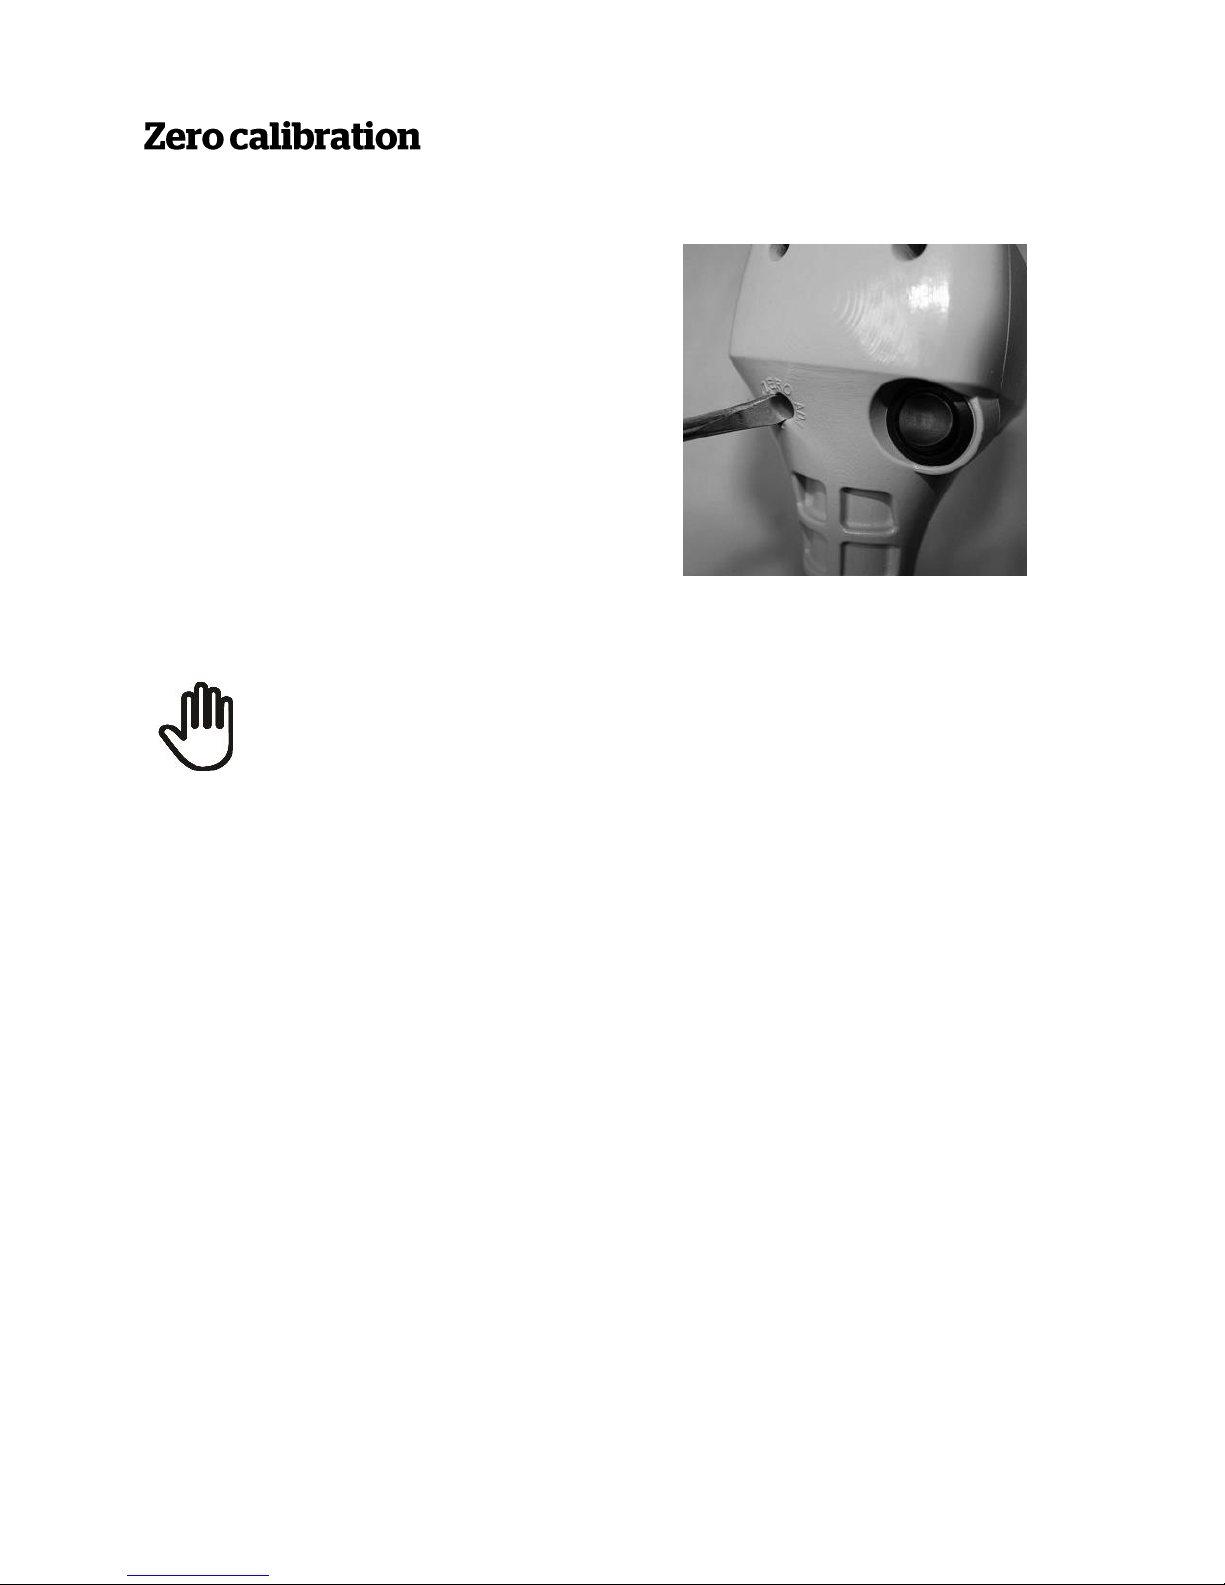
To zero out the potentiometer:
1 Locate the zero adjustment screw (beside
the On/Off switch).
2 Remove the protective rubber bung by
levering it out gently using a flat-bladed
screwdriver.
3 Insert the flat-bladed screwdriver into the
slot. Turn anti-clockwise gently until the
potentiometer stops turning.
4 Replace the rubber bung.
Do not force or over-tighten the potentiometer. This may damage the
plate meter and void the warranty.
Page 11
7
Most problems are due to the plate meter being out of calibration (see
following points as to why). If in doubt it is worth Zero Calibrating just
to make sure it is correct.
This means that the plate meter does not know where the bottom is and therefore
does not record the reading.
Check
Resolution
The cog has wound off.
Replace - Request a spare cog from
your service agent.
Potentiometer is damaged. The
Potentiometer is the shaft part that
drives the cog.
Note:
Under no
circumstances should you apply CRC or
a light oil to the potentiometer. It is a
dry bearing and any lubricant will
render the potentiometer useless.
Send the plate meter to your service
agent for repair.
Check that the metal shaft is coming
right back into the base of the tube.
Ensure that there is no grass or soil
build-up preventing it from doing so.
Also check the washer at the bottom of
the shaft is not catching on the bottom
of the plate.
Clean the plate meter.
Metal shaft is bent.
Straighten or request a replacement
part from your service agent.
Grass or soil build-up inside case.
Clean the plate meter.
Flutes on steel shaft have become filled
with grass or soil.
Clean the plate meter.
Page 12

8
For warranty and servicing information, see
www.livestock.tru-test.com/product-warranty
For all support, phone
0800 AGDATA (0800 243282)
 Loading...