

Page 1
SECURITY PLUS-LINE
ALSET-2000
ALSET2000 WIRELESS SECURITY SYSTEM
QUICK INSTALL GUIDE
MULTI LANGUAGE
Item 71116 Version 1.0
Visit www.trust.com
for the latest instructions
Page 2
1
2 3
On
O
u v w x
Learn button
2 sec
LED indicator
Page 3
4 5
6 7
DELSET
LED indicator
Backplate
DELSET
SET
2 sec
DEL SET
DEL SET
DEL SET
SET
2 sec
Page 4
8 9
10 11
Arm
O
On
O
ON button
4 sec
OFF button
Short press
ON button
Page 5

12
14
OTHER
Tamper switch
13a
13b
Page 6

16
Arm
O
ON button
4 sec
On
O
1.5 sec
15
Tamper switch
Page 7

18
17
On
O
1.5 sec
O
On
OFF button
4 sec
85 sec.
19
20
On
O
Page 8

1
ALSET-2000 WIRELESS SECURITY SYSTEM
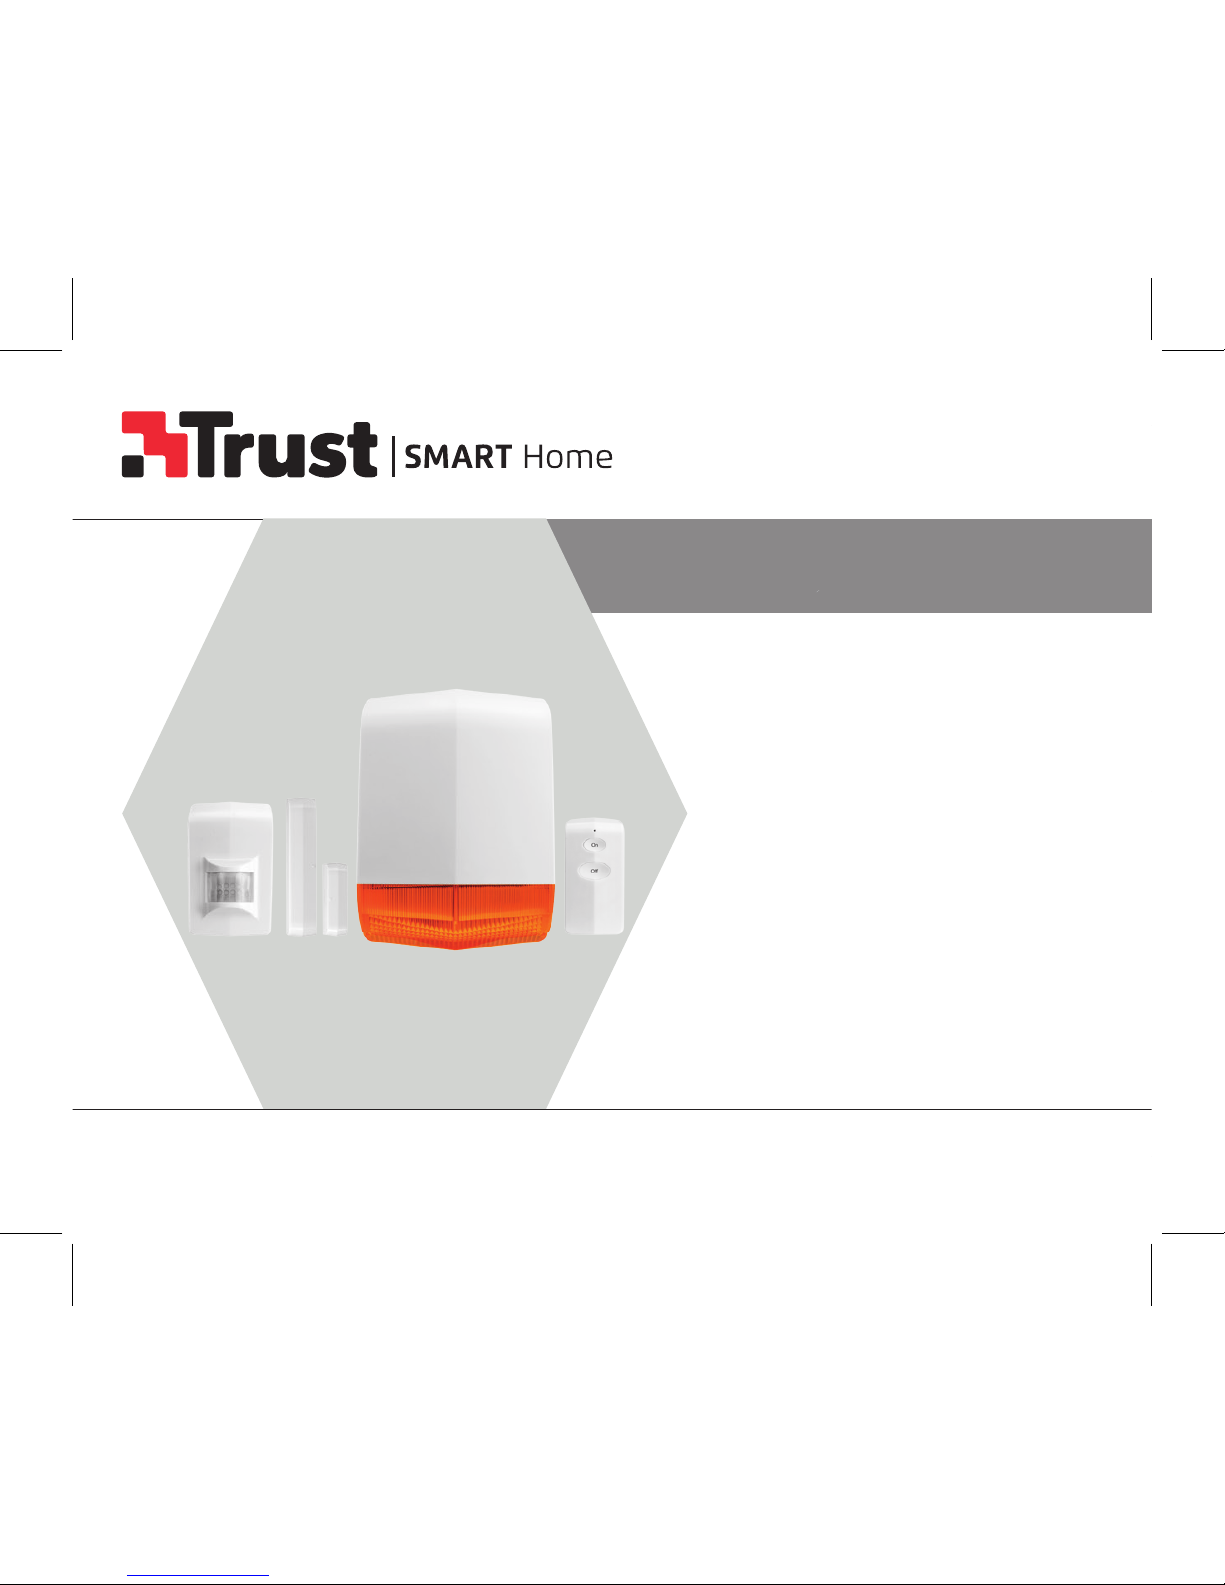
1. Package content
The following products are included:
u ALKCT-2000 Remote control
v ALSIR-2000 Siren
w ALMST-2000 Magnetic contact sensor
x ALMDT-2000 Infrared motion sensor
NOTE: This is a quick installation guide, visit www.trust.com/71116 for more in depth info of the
individual products like:
- Specifications
- Mounting
- Reset/unpair
- Tamper switch
- LED indications
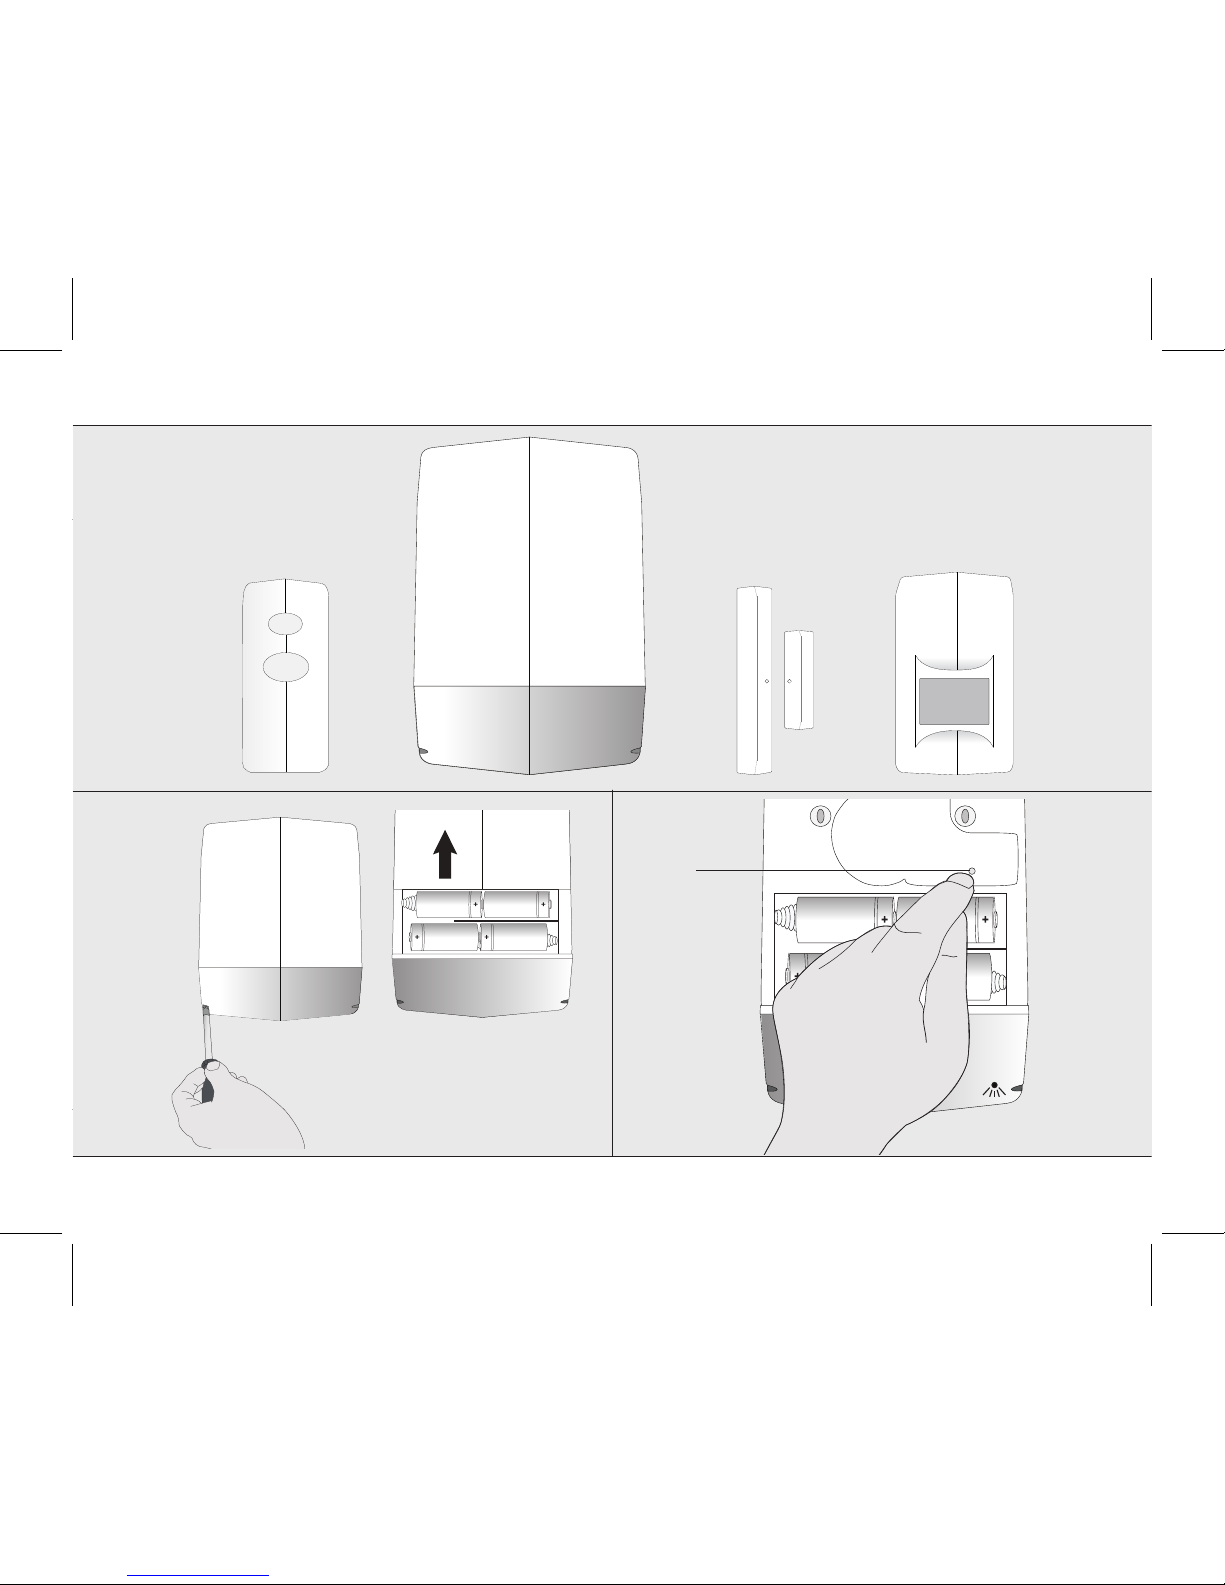
2. Open the ALSIR and place batteries
Open the siren by unscrewing the two screws beneath the light cap. When the screws are removed
the cap of the siren can be slid open. When the cap of the siren is slid open place 4x Alkaline D type
1.5V battery in the siren (not included). Observe the correct polarity of the batteries.
3. Put the ALSIR in learn mode
Slide open the cap and press and hold the siren learn button for about 2 second to enter learn mode.
The LED of the siren will be blinking (in the light cap). The learn mode lasts 15 seconds.
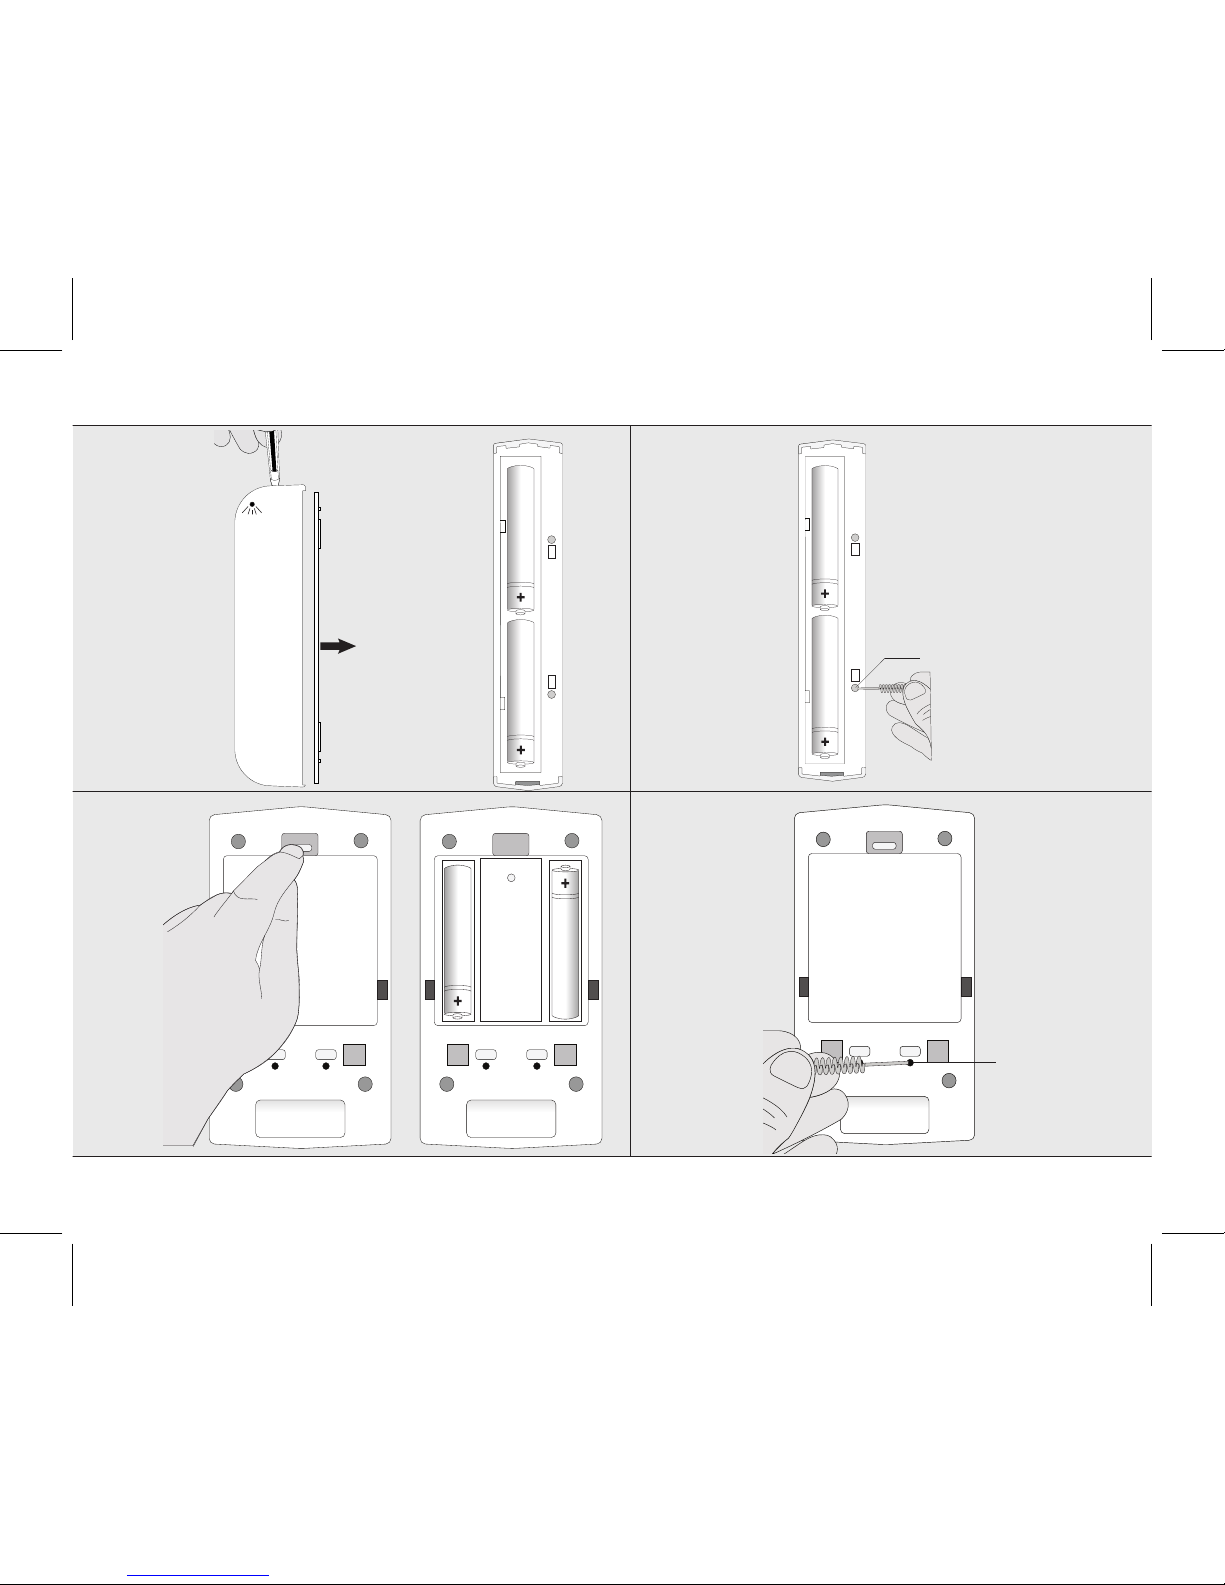
4. Open the ALMST and place batteries
Push with a sharp object on top of the magnetic sensor and pull o the backplate. Insert two 1,5V AAA
Alkaline batteries in the slot (not included). Observe the correct polarity of the batteries (place plus and
minus on the correct side)
EN
Page 9

ALSET-2000 WIRELESS SECURITY SYSTEM
2
5. Pair the ALMST to the ALSIR
Put the ALSIR in learn mode (see step 3). After putting the ALSIR in learn mode send a pair-signal by
pressing the SET button with a sharp object next to the battery slot of the magnetic sensor. The LED
indicator of the ALMST will flash 5x to confirm that the pairing has been done successfully.
6. Open the ALMDT and place batteries
Open the battery slot on the back side of the motion sensor by pushing the pull-tab down and
removing the battery cover. Insert two AA 1,5V Alkaline batteries as shown above (not included).
Observe the correct polarity of the batteries place plus and minus on the correct side. Close the
battery slot.
7. Pair the ALMDT to the ALSIR
Put the ALSIR in learn mode (see step 3). After putting the ALSIR in learn mode send a pair-signal by
pressing the SET button with a sharp object on the back of the sensor. The LED indicator of the ALMDT
will flash 5x to confirm that the pairing has been done successfully.
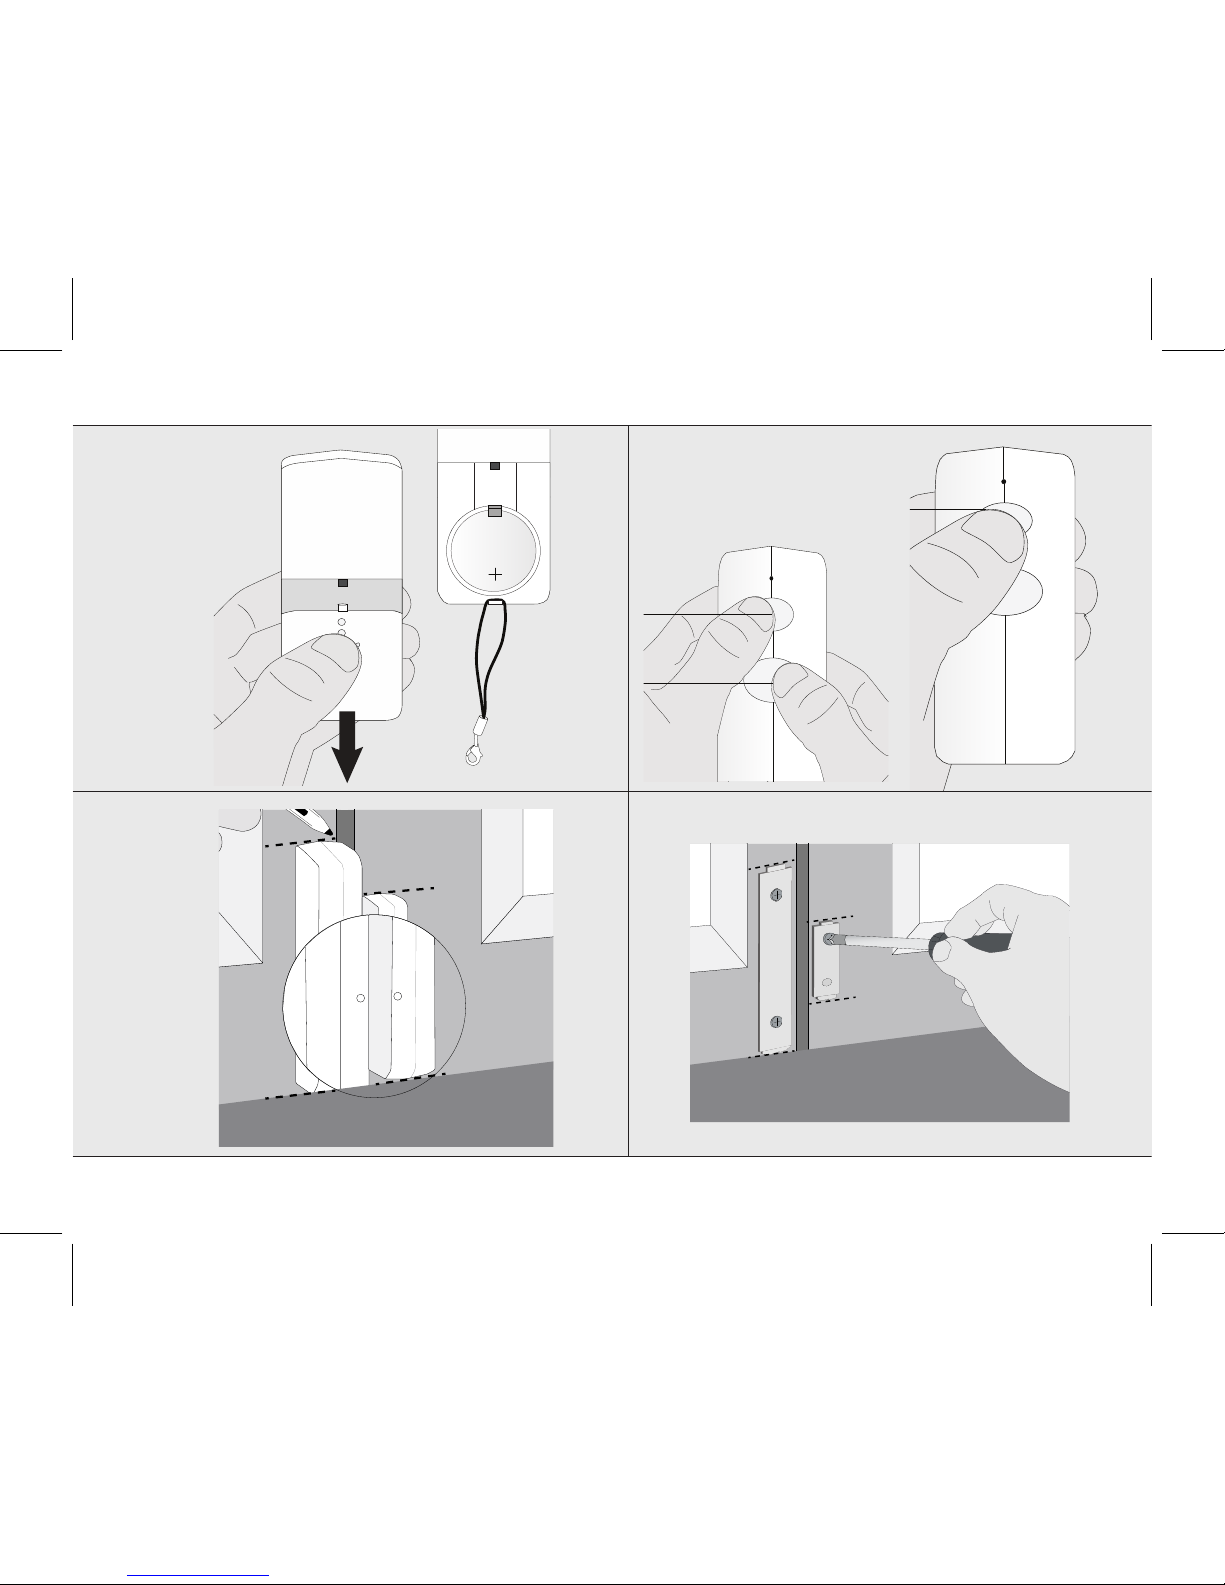
8. Open the ALKCT and place battery
Open the battery slot at the back of the ALKCT by sliding it down. Place the included 3V CR2477 battery
and close the battery slot. For more information on replacing and purchasing new batteries visit trust.
com/71115
9. Pair the ALKCT to the ALSIR
1. Put the ALSIR in learn mode (see step 3). Put the ALKCT in pair-mode by first pressing the ON and
OFF button simultaneously for 4 sec (untill the LED of the ALKCT starts blinking).
2. Give a short press on the ON button to pair with the Siren. The LED indicator of the ALKCT will be
flashing 5x to confirm that the pairing has been done successfully.
EN
Page 10

3
ALSET-2000 WIRELESS SECURITY SYSTEM
10. Mount ALMST
Place the magnetic sensor on the window or door and make sure that both points on the two parts
are in line with each other. Mark the top and bottom of both parts. After marking the positions remove
the sensor.
11. Fasten the ALMST
Screw or tape both backplates of the magnetic sensor on the window or door according to the made
markings. When securing the backplates make sure both parts are mounted with as little space
between as possible (max. 5mm). Place both parts of the magnetic sensor back on the mounted
backplates.
Note: More detailed mounting instructions of the magnetic sensor are available at trust.com/71113
12. Mount ALMDT
Mount the backplate of the motion sensor on a flat surface and secure it with screws. (Screws are
included).
13a. Fasten the ALMDT
Place the ALMDT on the backplate untill you hear a click. Make sure that the backplate is fitted in the
location of the tamper switch.
Note: More detailed mounting instructions of the motion sensor are available at trust.com/71114
13b. Secure the ALMDT
When the ALMDT is placed on the backplate pull it down untill you hear a click to secure it and lock the
tamper switch.
Note: After arming the Siren it is possible to move in front of the sensor for 1 min. It takes ~1.5 minute
before the sensor will be completely active.
14. Mount ALSIR
To fasten the siren slide the cap o (see step 2) remove the batteries and screw the casing with
screws on a flat surface according to the screwholes. (Screws are included). Keep attention that the
tamper switch is pressed to the surface after mounting the siren.
EN
Page 11

ALSET-2000 WIRELESS SECURITY SYSTEM
4
15. ALSIR placement
When placing the siren on a wall keep attention that the tamper switch isn’t placed on a groove or
crack in the wall. Make sure that the tamper switch is placed on a location of the wall where it is firmly
pressed.
Note: More detailed mounting instructions of the siren are available at trust.com/71112
16. Arm/Turn on the siren
To arm the siren press the ON button for 4 seconds on the ALKCT.
If the siren is armed successfully the LED of the ALKCT will light up for 1.5 sec.
17. Walk-out time
When the Siren is armed there is a 85 sec walk-out time. Within these 85 sec the system checks all
the sensors if they are responding and it is possible to leave the building without triggering the alarm.
When there already is a window or door open at the beginning of this walk- out time the alarm will
go o for 20 sec reminding that one of the doors or windows isn’t closed. After the window or door
sensor is closed the alarm will stop and continue in armed mode.
18. Disarm/Turn o the siren
To disarm the Siren press the OFF button for 4 seconds on the ALKCT.
If the Siren is disarmed successfully the LED of the ALKCT will light up for 1.5 sec.
19. Mounting the ALKCT holder
Mount the holder of the ALKCT on a flat surface and secure it with screws. (Mounting screws not
included)
20. Place ALKCT in holder
When the holder has been mounted and secured with screws place the ALKCT in the holder. To place
the ALKCT slide it in from top to bottom.
EN
Page 12

SECURITY PLUS-LINE
ALSET-2000
ALSET-2000 WIRELESS SECURITY SYSTEM
Item 71116 Version 1.0
Visit www.trust.com
for the latest instructions
IMPORTANT INFORMATION
MULTI LANGUAGE
Page 13

ALSET-2000 WIRELESS SECURITY SYSTEM
1
EN
Legal information
CE: Trust declares this device complies with the Directives as listed in Section 2 of this document.
WEEE: Dispose of the device at a recycling centre. More information: www.trust.com
Warranty information: www.trust.com/warranty
WIRELESS RADIO SIGNAL
• The 868 MHz signal passes through walls, windows and doors.
• Range up to 120 m (under optimal conditions).
• The strength depends on local conditions, such as the presence of metals. The metal particles in for example, double
glazing (HR glass), can provide a reduction in the range of wireless signals.
• There may be restrictions on the use of these devices outside the EU. Check, if applicable, whether this device meets
local regulations.
Read the manual carefully. Failure to follow these instructions can be dangerous.
Incorrect installation will void any warranty on these products.
SMARTPHONE/TABLET FUNCTIONS
By combining these products with the OCTOPUS Control station, you can also set your alarm on / o via your tablet and /
or smartphone and receive push notifications when you are not at home.
For more information visit trust.com/71110
COMPATIBILITY
The security set works with the ALSIR-2000, ALMST-2000,
ALMDT-2000 and ALKCT-2000.
FUNCTIONALITY
Wireless security set for alarming the user and their
neighbours when a sensor is triggered.
Page 14

ALSET-2000 WIRELESS SECURITY SYSTEM
2
EN
BATTERY
Remove the battery from the devices if these are not used
for a long time. Extreme temperatures reduce the capacity
and lifetime of the battery.
Batteries should not be chopped into pieces or burned.
Dispose of batteries according to local regulations. Deliver
them for the possibility to reuse. Do not throw batteries
away with the normal household waste.
LIFE SUPPORT
Never use Trust SmartHome products for life support
systems or other applications where failures can have life-
threatening consequences.
INTERFERENCE
Interference can aect the operation of all
broadcast transmitter and receivers negatively. The distance
between 2 receivers or transmitters should be at least
50 cm.
REPAIRS
Do not try to repair these products yourself.
The devices contain no serviceable parts for the user.
WATER-RESISTANT
Within this set only the siren is water-resistant (IP44) and
can be placed indoor and outdoors.
The other products can only be placed indoors.
CLEANING
Clean these products with a dry cloth.
Do not use harsh chemicals, cleaning solvents or strong
detergents.
HANDLING
Do not drop the devices, bump the devices against
something or shake them. Rough handling can damage
internal circuit boards and fine mechanics.
ENVIRONMENT
The products should not be exposed to extreme heat or
cold. This can damage the circuit boards and batteries or
shorten its life.
DISCLAIMER
These products are a basic deterrent against intruders.
However, it remains the responsibility of the end-user to
adequately protect their home against break-ins. Therefor
Trust cannot be held responsible or liable for any damages
resulting from break-ins, trespassing, unauthorized access
or vandalism.
Page 15

ALSET-2000 WIRELESS SECURITY SYSTEM
50
Declaration of conformity
Trust International B.V. declares that the
TrusT smarThome
-product:
model: ALSET-2000
item number: 71116
intended use: Indoor/Outdoor
is in compliance with the essential requirements and other relevant provisions of the following directives:
EMC Directive (2014/30/EU), Low Voltage Directive (2014/35/EU), ROHS Directive (2011/65/EC), R&T TE
Directive (1999/5/EC). The product is compatible with the following norms/standards:
Manufacturer/Authorised representative,
H. Donker, Procurement Director
Dordrecht, April 28 2016
Trust International B.V.
LAAN VAN BARCELONA 600
3317DD DORDRECHT
NETHERLANDS
EN 300-220-1 V2.4.1 (2012)
EN 300-220-2 V2.4.2 (2012)
EN 301489-1 V1.9.2 (2011)
EN 301489-3 V1.6.1 (2013)
EN 60950-1: 2006+A11: 2009+A1 2010+A12:
2011+A2 2013
EN 55014-1 : 2006+A1 : 2009+A2: 2011
EN 55014-2: 1997+A1: 2001 +A2: 2008
EN 50581: 2012
 Loading...