

Page 1

TRUST 910Z POWERC@M OPTICAL ZOOM
1
UK
Instructions when using for the first time Chapter
1. Preparing the camera (4)
2. Using the camera (5)
3. Advanced camera settings (6)
4. Connecting to a computer (7)
5. Application software (PC only!) (8)
1 Introduction
This instruction manual is for users of the TRUST 910Z LCD POWERC@M ZOOM.
The highest photograph resolution is 2496 x 2016 pixels (5.0 Mpixel). The camera
has an 15 MB internal flash memory, a webcam function, an automatic exposure, a
lens with a optical zoom, digital zoom and a flash function. The camera’s memory
can be increased up to a maximum of 512 Mbytes using an optional Secure Digital
Card (SD) or Multimedia Card (MMC). In addition, the camera can record short video
clips with sound. When using a MAC, be sure to read chapter 7.2. The included
application software only works on a PC in Windows.
Please consult one of the Trust Customer Care Centres if you have any problems.
You can find more information at the back of this instruction manual.
2 Safety
2.1 General information
Carefully read the following instructions before use.
- The TRUST 910Z POWERC@M OPTICAL ZOOM does not require any
special maintenance. Use a slightly damp, soft cloth to clean the camera.
- Do not use aggressive substances, such as white spirit, to clean the device.
These may harm the material.
- Do not submerge the device in liquid. This may be dangerous and will
damage the device. Do not use this device near water.
- Make sure nothing is placed on the cable. Do not use this device in an area
where the cable can become worn or damaged as a result of people walking
over it.
- Do not disassemble the camera. Touching the product’s internal parts could
result in injury. In the event of a malfunction, only a qualified technician
should repair the product. Should the product break open as a result of a fall
or other accident, take the product to an authorised service centre for
inspection.
- Avoid contact with liquid crystal. Should the LCD display break, care should
be taken to avoid injury due to broken glass and to prevent the liquid crystal
from touching the skin or entering the eyes or mouth.
- Do not look at the sun through the viewfinder. Viewing the sun or other strong
light source through the viewfinder could cause permanent visual impairment.
- Do not use in the presence of flammable gas. Using electronic equipment
near flammable gas could result in explosion or fire.
- Observe caution when operating the flash. Do not use the flash close to
anyone’s eyes. This can cause temporary damage to eyesight. Particular
care should be observed when photographing infants – keep the flash at a
distance of at least 1 meter from infants’ eyes.
Page 2

TRUST 910Z POWERC@M OPTICAL ZOOM
2
2.2 Batteries
Important: To get the best performance from your camera, we recommend
using rechargeable NiMH-batteries (not supplied!).
- Observe proper precautions when handling batteries. Uses only size AA
alkaline batteries. Batteries may leak or explode if handled improperly.
- The alkaline batteries supplied with the camera are not rechargeable. Do not
try to recharge them, because this may cause them to explode.
- Remove batteries (and memory card) from the camera if you are going to
store the camera for extended periods of time. Ensure the camera is turned
off before inserting or removing batteries.
- Do not insert batteries backwards or upside down.
- Do not disassemble batteries.
- Do not expose batteries to flame or excessive heat.
- Do not immerse batteries in or expose to water.
- Never throw the batteries onto an open fire. The batteries may explode.
- Keep the batteries out of the reach of small children.
- Discontinue use immediately if you notice any changes in the battery such as
discoloration, deformation or leakage.
- When the alkaline batteries are empty, ask your local authority where you
can dispose of them.
Note: Alkaline or NiMH batteries type AA are suitable for use with this
device.
Note: Do not use old and new batteries at the same time, because the
old batteries may deplete the new ones.
Note: The batteries should be removed if the camera is not going to be
used for some time. This w ill save the battery capacity.
Note: To get the most from your camera, we recommend using
rechargeable NiMH-batteries (not supplied!).
3 Description of the camera
3.1 Front of the camera
Use table 1 in combination with figure 1.
Item Description Function
1
Shutter Button Press this button to take pictures, or to
select menu options.
2
Built-in Flash For taking photographs when there is
insufficient light. The flash has a maximum
effective range of 3 metres.
3
Self-Timer LED When the Self-Timer option is being used,
this LED will blink for te n seconds before the
camera takes a picture.
4
Light Sensor The digital camera automatically detects
ambient light levels and determines whether
or not the flash is needed. Light
measurements are made with this sensor.
Page 3

TRUST 910Z POWERC@M OPTICAL ZOOM
3
UK
Item Description Function
Do not block the sensor while taking
pictures.
5
Viewfinder The viewfinder helps you to frame a picture.
The actual picture is taken with the lens and
not with the viewfinder.
6
Lens The lens focuses the light onto the digital
image capturing circuitry. For the best
picture quality, ensure it remains free of
dust, fingerprints, and scratches.
7
Microphone Records audio when the camera is capturing
video-clips.
Table 1: Functions of the front of the camera
3.2 Rear of the camera
Use table 2 in combination with figure 2.
Item Description Function
1
Status LED When the camera is busy (and not available
to take a picture), the LED will flash. W hen
the camera is ready, the LED will be solid
green.
2
Viewfinder See chapter 3.1 (item 5)
3
Power Button
Press this button to turn on the camera.
Press it again to turn it off.
4
WB/Delete
Press this button to cycle through the White
Balance pre-sets: Auto, Daylight, Shade,
Tungsten and Fluorescent when taking
pictures. See also chapter 6.2.
5
Strobe / Copy
Copies pictures during playback from
internal camera memory to the exte rnal
SD/MMC memory card if availa ble.
6
Zoom Out Key
Zooming out of the object while in Snapshot,
Pre-set, Video or Playback-mode. This
button could not be used during recording
video-clips.
7
Zoom In Key
Zooming into the object while in Snapshot,
Pre-set, Video or Playback-mode. This
button could not be used during recording
video-clips.
8
Shutter Button Press this button to create a digital photo.
While navigating through the
camera’s options menus, use the Shutter
Button to go back to the previous selection.
9
Power Connect an external AC power-adapter here
(not provided by this camera!) for external
power source.
10
Video Out Jack Connect the video out cable to the camera
and your television to use the camera as a
digital video player. Video out cable is
provided with this camera. See also chapter
5.6
Page 4

TRUST 910Z POWERC@M OPTICAL ZOOM
4
Item Description Function
11
USB Port
The USB (Universal Serial Bus) port is used
to connect the camera to a PC with the
provided USB cable. See also chapter 7.
12
Hand Strap Loop Attach the hand strap to this loop for ease of
carrying.
13
Mode Dial Rotate to select the camera mode: Video,
Pre-set, Snapshot, Playback, Set-up or PC
Camera.
14
Down Button
Move down through menus.
15
Up Button
Move up through menus.
16
Display Button
Press Display button to set the various
display options.
In Snapshot, Pre-set and Video mode:
switch on/off the LCD screen
In Playback mode:
switch on/off indicators on LCD screen
In Set-up mode:
Select item
17
LCD Display Use the LCD display to preview photos.
When in the Set-up menu, use the LCD
display to configure the camera.
Table 2: Functions of the rear of the ca mera
3.3 Bottom of the camera
Use table 3 in combination with figure 3.
Item Description Function
1
Tripod Connector Attaches the camera to a tripod. This is an
optional accessory that can be used to
hold the camera still.
2
Battery / Memory Cover Opens to allow access to the battery
holder as well as the memory card slot.
3
Memory Card Slot Accepts Secure Digital and Multi Media
cards up to 512 MB.
4
Battery Holder For two Alkaline or NiMH batteries type
AA.
Table 3: Bottom of the camera
Page 5
TRUST 910Z POWERC@M OPTICAL ZOOM
5
UK
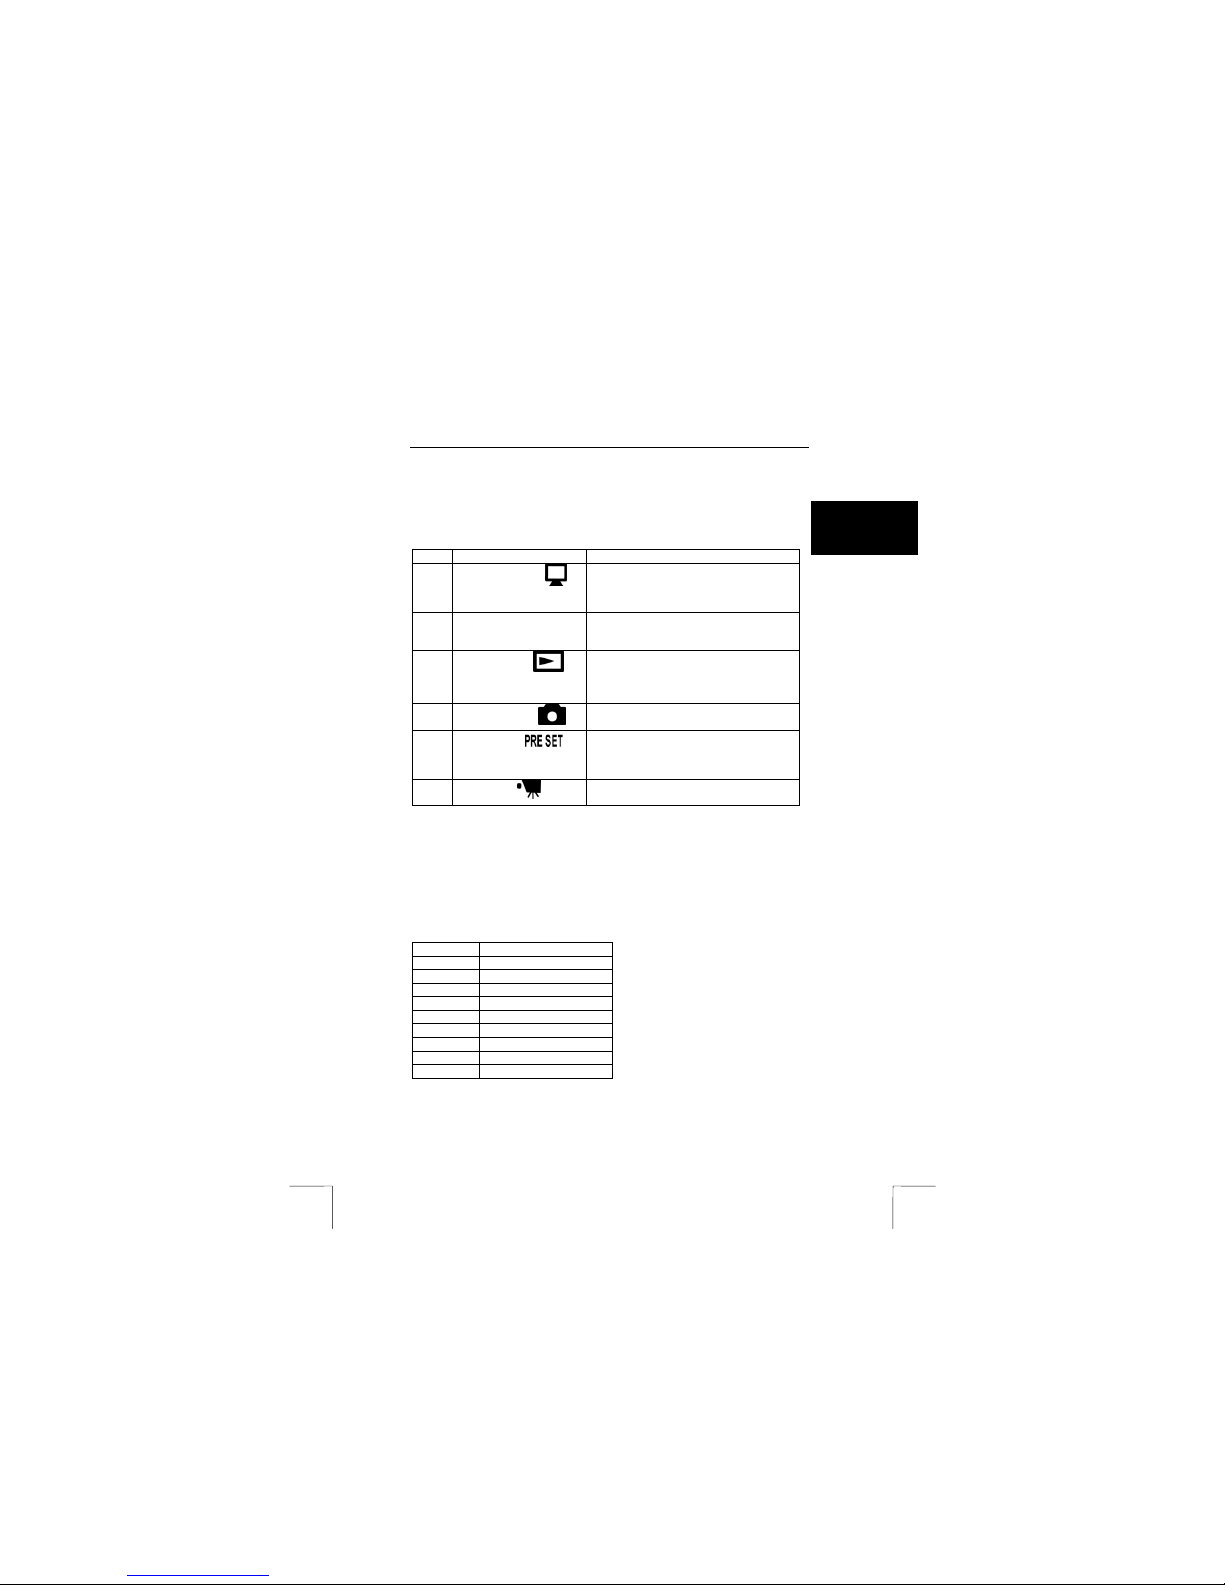
3.4 Mode Dial Button
This digital camera has six separate modes of operation. You can select which mode
you want by rotating the Mode Dial to the correct position. This chapter describes
each of these modes and the different button functions. See figure 4 for the picture.
Item Description Function
1
PC Camera Mode
Makes connection to the PC so that the
camera could be used as video camera or
web cam. USB Cable should be connected
first between camera and PC!
2
Set-up Mode Enters the configuration menu of the
camera.
3
Playback Mode
The Playback mode is used to view the
photos or video clips stored in the digital
camera’s on-board memory or on the
SD/MMC memory card.
4
Snapshot Mode
Snapshot mode is used for taking pictures.
5
Pre-set Mode
Pre-set Mode has five pre-set settings
optimised for taking specific types of
pictures: Landscape, Portrait, Night Scene,
Self-Timer and Macro.
7
Video Mode
Video mode allows you to record / preview
videoclips.
Table 4: Mode Dial Button
3.5 LCD Display
When the camera is in any other mode then Set-up mode, current camera settings
such as zoom, icons on the LCD display indicate quality, etc. This chapter describes
these icons and their meanings (see figure 6).
Use table 5 in combination with figure 6:
Item Function
1
Flash Mode
2
Pre-set Mode
3
White Balance Mode
4
Pictures Remaining
5
Quality
6
Date/Time
7
Exposure Compensation
8
Battery Status
9
Zoom Ratio
Table 5: LCD screen
Page 6

TRUST 910Z POWERC@M OPTICAL ZOOM
6
4 Preparing the camera
4.1 Install the Memory Card
A memory card is not supplied with the camera. You could purchase these cards
separately to increase the number of photographs that the camera can save. The
memory cards which are supported for this camera are SD (Secure Digital) or MMC
(multimedia). Instructions for installing memory card (see also figure 7):
1. Turn off the camera.
2. Open the battery holder by pressing on the cover and sliding in the direction
of the arrow toward the outside edge of the camera.
3. Insert the memory card with the notched corner facing the cover of the
battery holder.
4. Close the battery cover.
4.2 Install / replace the batteries
See also figure 8.
1. Turn off the camera.
2. Open the battery holder on the bottom of the camera by pressing on the
cover and sliding in the direction of the arrow toward the outside edge of the
camera.
3. Insert batteries into the chamber making sure that the positive
and
negative
ends are properly oriented, as indicated on the compartment’s
interior wall.
4. Close the battery cover.
The battery condition is shown on the LCD screen (bottom left-hand corner) as
follows:
The batteries are full.
The battery capacity is low. Only a few more photographs can be
taken.
Table 6: Battery conditions
4.3 Placing the camera on the tripod
Screw the tripod to the fixing point (1, figure 3) on the bottom of the camera. Make
sure the tripod is fitted as shown in figure 14, with the middle foot facing the side of
the camera with the USB/TV connection. Move the feet of the tripod as far apart as
possible, so that the camera is stable.
Page 7

TRUST 910Z POWERC@M OPTICAL ZOOM
7
UK
Caution: If the tripod is not fitted as described above, the camera could
easily fall over.
Note: You can also fit the camera to a more professional tripod. These
are available from your local photography shop.
5 Using the camera
This chapter will explain the following :
- How to set up the camera for the first time.
- The most used settings of this camera.
- How to take pictures in SNAPSHOT and PRE SET mode.
- How to record your video clips.
- How to review your pictures / video clips.
- How to connect the camera to a TV.
- How to turn-of f the camera.
Note: Make sure you have installed 2 Alkaline or 2 NiMH batteries type
AA.
Note: If you want to store your photos on a SD/MMC Card, make sure it
is also installed before you turn on the camera. If you want to store
images directly to the camera's internal memory, either remove the
memory card, or select Internal from the Storage Media menu.
Note: Using the LCD display consumes more battery power. To prolong
the life of your batteries it is recommended to keep the LCD display
shut off when not needed.
5.1 Setting the camera for the first time
To use the camera for the first time it’s recommended to set the language and date
& time first before taking any pictures or recording any movies.
To go to the set-up menu of the camera do the following steps:
1. Rotate the Mode Dial to Set-up mode (2, figure 4).
2. Turn the camera on.
3. The Set-up menu will be displayed on the LCD (se e figure 5).
Choose a language
The digital camera can display text and messages in English, French, Spanish,
German, Italian, Chinese and Japanese.
Page 8
TRUST 910Z POWERC@M OPTICAL ZOOM
8
To select a different language:
4. Use the Down button to select Language then press the Display button
to enter this menu.
5. Use the Up and Down buttons / to select the language you want
to use.
6. Press the Display button
to set the language. The Set-up Menu
returns.
7. Press Shutter button any time to go back to the previous options.
Set the date and time
When you transfer a photo to a computer and/or print it using DPOF, the date will
beshow when it was taken.
To set the date display style:
1. Use the Down button to select Date/Time and then press the Display
button
.
2. Select the Style option by using the Down button. Press the Display button
to enter that menu.
3. Choose either Month/Day or Day/Month as the display style for the date.
4. When the settings are correct, press the Display button
to save the
changes and return to main menu.
5. Select again Date/Time and press the Display button
.
6. Select the Clock option.
7. Use the Up and Down buttons
/ to set the time / date values.
8. Use the Strobe / Copy button
(5, figure 2) to move through the time
and date fields.
9. When finished press the Display button
to save the changes and return
to main menu.
Note: If you make a mistake and need to go back, use the White
Balance/Delete button
or Shutter button.
Page 9

TRUST 910Z POWERC@M OPTICAL ZOOM
9
UK
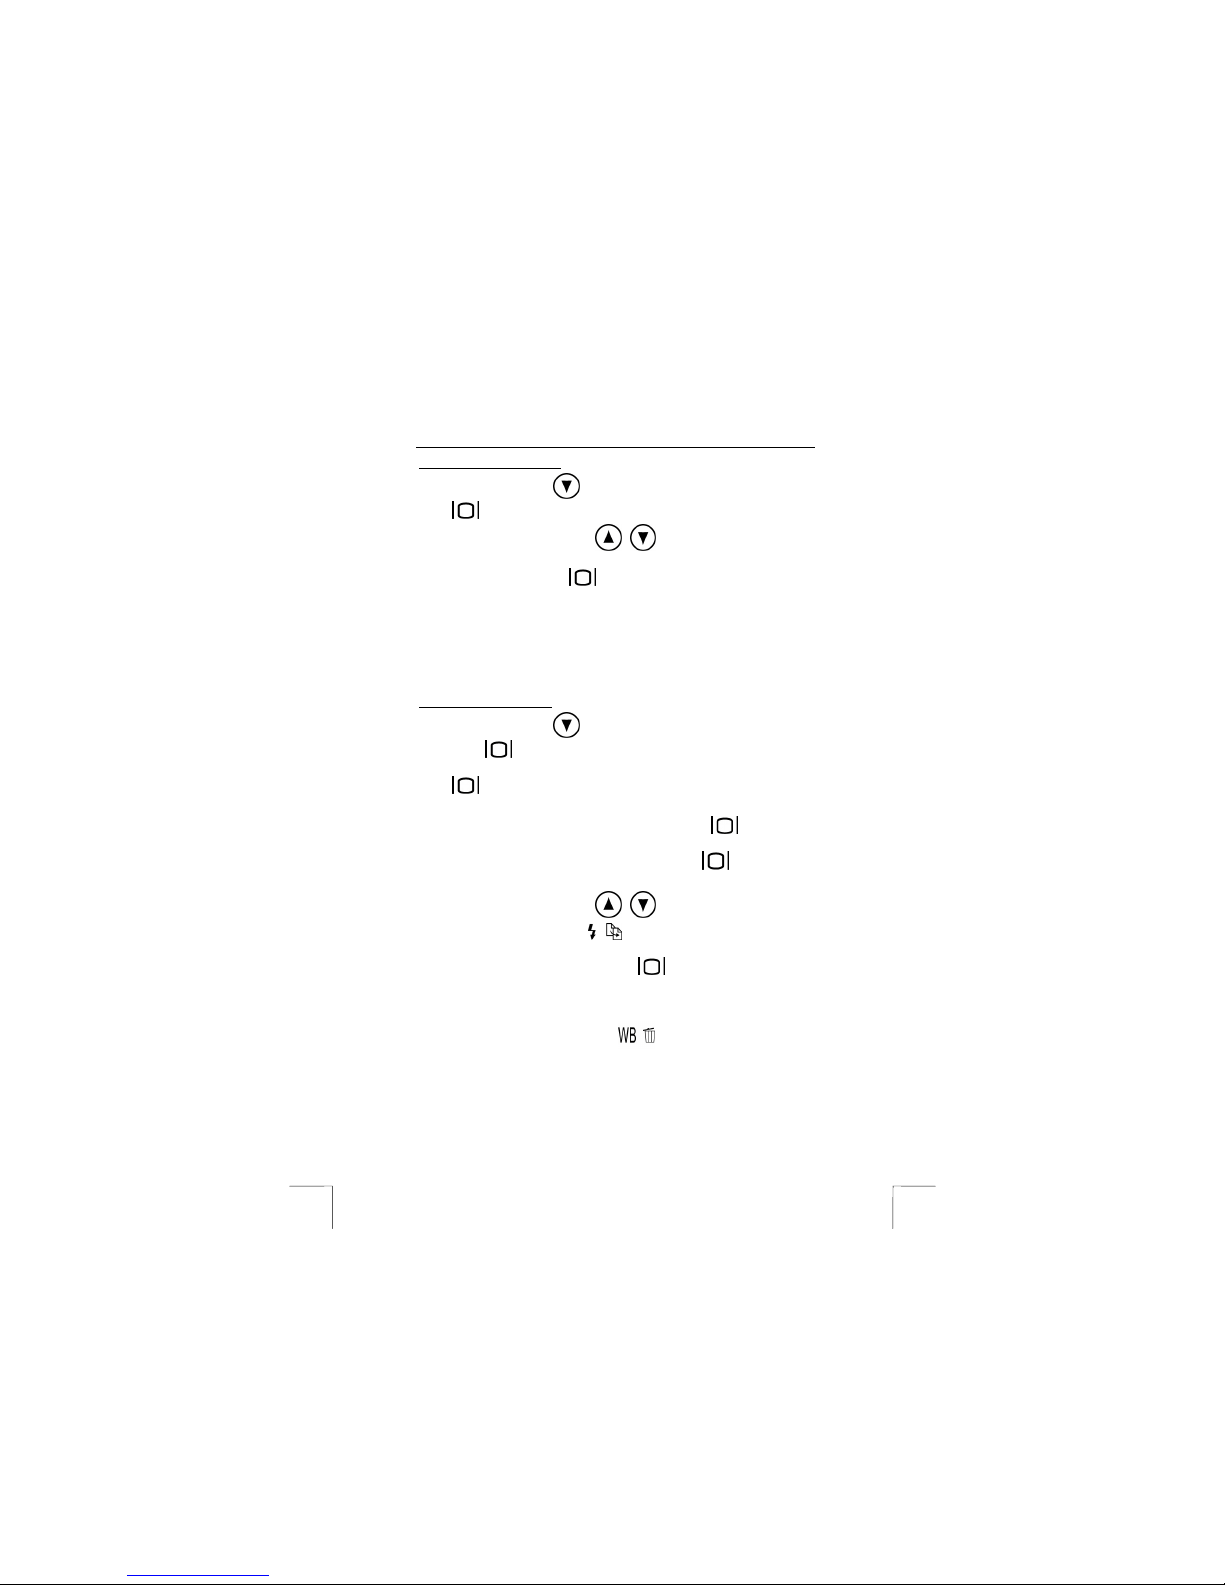
5.2 Most used settings
5.2.1 LCD screen
The LCD screen can be turned off to save the battery-life. You can also turn off the
menu items to have a better view of the image. The functions of the LCD button in
the PLAYBACK mode (3, figure 4) are different to the functions in the SNAPSHOT
(4, figure 4) or PRE SET mode (5, figure 4). The LCD button is 16 in figure 2.
PLAYBACK mode:
Press once to turn off the symbols.
Press twice to return to the beginning. The symbols are turned back on.
SNAPSHOT or PRE SET mode:
Press once to activate histogram.
Press twice to turn off battery-, remaining pictures/quality-indicators.
Press again to turn off LCD screen. This will save the batteries. Use the optical
viewfinder to direct the camera.
When the LCD screen is off press again to return back to the beginning. The
sysmbols are turned back on.
5.2.2 Flash
The flash settings are automatic flash, flash, red-eye reduction and never flash. To
set the flash:
1. Turn Mode Dial to SNAPSHOT or PRE SET mode.
2. Press button 5 (figure 2) to change flash-settings.
3. See table 7.1 for the description of the flash settings.
Symbol Na me Description
< empty >
Auto Flas h
The camera senses whether the flash is
needed by detecting the amount of ambient
light.
Flash On
Flash is turned off, regardless of the amount of
light available.
Red-Eye
Reduction
Use the Red-Eye Reduction function to reduce
the occurrence of "red-eye" (eyes appear red
in the pictures due to flash reflection off the
eyes’ retinas.) This function causes the camera
to flash quickly before the picture is taken to
reduce red-eye.
Flash Off
Flash is turned off, regardless of the amount of
light available.
Table 7.1: Description of the flash-symbols
Note: The flash does not function when recording video clips.
Page 10

TRUST 910Z POWERC@M OPTICAL ZOOM
10
5.2.3 Zoom
Optical Zoom
This camera has an optical zoom which allows you to zoom on a subject in the
highest resolution. Use Zoom In button
(7, figure 2) to enlarge the subject or
Zoom Out
button (6, figure 2) to widen the area of the subject. When using
optical zoom the zoom-indicator at the left of the LCD screen (9, figure 6) will be in
the white area.
Digital Zoom
This function allows you to zoom up to 4 x on a subject in 15 steps when taking a
photograph. The zoom ratio will appear on the middle top of the LCD screen (figure
6) and the zoom-indicator (9, figure 6) will be in the red are a.
In the PLAYBACK mode, you could zoom in on parts of a photograph or display a
number of photographs on the screen at once.
Note: The use of the digital zoom function when taking photographs will
slightly reduce the quality.
Note: The digital zoom does not function when recording video clips.
5.3 Taking pictures
There are two modes for taking pictures: SNAPSHOT and PRESET. Snapshot mode
is for basic picture taking, while the Pre-set mode allows you to take pictures in one
of five pre-set schemes: Macro, Self-Timer, Landscape, Portrait and Night-Scene.
5.3.1 Taking pictures in SNAPSHOT mode
Note: To save the batt eries, the camera will tu rn off automatically w hen it
has not been used for 3 minutes
See figure 2.
1. Turn the camera on using the ON/OFF button (3).
2. Place the MODE DIAL (13) in the SNAPSHOT mode (4, figure 4).
3. You can turn on/off the LCD screen by pressing the LCD button (16) or you
can use the viewfinder (2). If the LCD screen is used, all the settings will also
be visible. See chapter 3.5 for their meaning.
4. Look through the viewfinder or look at the LCD screen to get a good image of
the subject.
5. You can use the Zoom In
or Zoom Out buttons to narrow or
widen the lens’ field of view. Use the LCD display to preview the effects of
the zoom function.
6. Press the SHUTTER button (8) half way and keep it in this position. The
camera will adjust itself to the surrounding light conditions and then beep (if
the beep-settings on the camera is switched on).
7. Fully press the SHUTTER button. The photograph will now be taken. The
image on the LCD screen will disappear for a short period and the LED (1)
will flash.
Page 11

TRUST 910Z POWERC@M OPTICAL ZOOM
11
UK
8. The next photograph can be taken when the LED no longer flashes. The
photograph has been saved in the camera’s memory.
Note: Keep the glass of the lens clean. Use a lens tissue to clean the lens. If
necessary, use special cleaning liquid for camera lenses. Do not use
a different cleaning product.
Tip: The quality of the photograph depends on the surrounding light. More
light will result in a b etter picture.
Tip: The number of photographs that can be taken depends on the
number of details of the object to be photographed. The photograph
indicator on the LCD screen is an approximation.
Tip: The image viewed through the viewfinder may be slightly different to
what is recorded through the lens. You can use the LCD for greater
accuracy.
5.3.2 SNAPSHOT mode’s button functions
Up Button
Increases the camera exposure compensation, which allows in
more light.
Down Button
Decreases the camera exposure compensation, which
gradually blocks light.
Display Button
Browse through the following LCD display settings: Press once
to activate histogram. Press twice to turn off battery-,
remaining pictures/quality-indicators. Press again to turn off
LCD screen.
Strobe / Copy
Determines how the strobe light (flash) is used. Pressing the
Strobe key cycles through the following settings: Auto (A), On,
Red-Eye Reduction and Off.
WB / Delete
Adjusts the White Balance settings. Pressing the WB key
cycles through the following settings: Auto, Day Light, Shade,
Light Bulb (incandescent light), and Fluorescent Light.
Zoom Out
Widens the area which is framed by the camera’s lens.
Zoom In
Enlarge the subject which is framed by the camera’s lens.
Table 7.2: Snapshot mode’s button functions
5.3.3 Taking pictures in PRE SET mo de
Pre-set Mode has five pre-set settings optimised for taking specific types of pictures:
Macro, Self-Timer, Landscape, Portrait and Night-Scene.
1. Turn the camera on using the ON/OFF button (3).
2. Place the MODE DIAL (13) in the PRE SET mode (5, figure 4).
Page 12

TRUST 910Z POWERC@M OPTICAL ZOOM
12
3. Select the type of picture you want to take using the Up and Down /
buttons. The pre-set symbol will appear on the LCD display. See table
8 for the description of the pre-set symbol.
4. Press the Shutter button to take a picture.
Landscape
This pre-set is optimised for taking landscape pictures, with the
lens focus universally distributed to encompass everything
within the entire frame.
Portrait
This pre-set is optimised for taking portraits pictures of other
people, focusing more on the centre of the frame than the
peripheral parts.
Night Scene
This pre-set is optimised for taking photos at night. You should
hold the camera pe rfectly still when taking night shot or place it
upon a stable surface or tripod to minimise blurring resulting
from the longer exposure.
Self-Timer
This pre-set lets you to take a photo after a ten second delay.
This gives you the ability to t ake hands-free photos, perhaps
self-portraits or group photos, for example.
Macro
This pre-set optimises the camera for taking extreme close up
shots of objects or people within a foot or less of the camera.
When not using this pre-set, the camera lens cannot focus as
well as normal due to the extremely short distance between it
and the subject matter.
Table 8: Symbols in PRE SET mode
5.3.4 Taking pictures using Self-timer
For taking pictures using the self-timer do the following steps:
1. Position the camera on a stable surface (such as an optical tripod) and frame
the shot.
2. Rotate the camera’s Mode Dial to PRE-SET mode.
3. Use the Up and Down buttons to select the Self-Timer Pre-set.
4. Press the Shutter Button. The 10-second countdown begins immediately. As
soon as the delay ends, the camera takes the picture.
With the exception of the Shutter button, all of the camera’s other buttons behave
the same as they do in the other Pre-set modes.
5.4 Recording video clips
The camera can be used to record small video clips.
1. Turn the MODE switch to the VIDEO mode (6, figure 4).
2. Turn the camera on using the ON/OFF button (3). The LCD screen will be
turned on. A preview will be displayed.
3. Focus the subject you wish to record.
Page 13

TRUST 910Z POWERC@M OPTICAL ZOOM
13
UK
4. Press the SHUTTER button (figure 1, 1) briefly to start recording video. When
the LCD screen is switched on, there is an indicator to see the remaining
recording time.
5. Press the SHUTTER button again to stop recording. When the memory is
full, the recording stops automatically. When there are no pictures present,
you can record approximately 53 seconds of video in the internal memory of
the camera. When using an optional SD/MMC card of 32 MB or larger, you
could record longer (depending on the size of the memory card).
Like Snapshot mode, you may also zoom in and out when recording videos. The
available zoom ratios in VIDEO Mode are: x1.1, x1.2, x1.3, x1.4, x1.5, x1.6, x1.7,
x1.8, x1.9 and x2.0.
Pressing the Up and Down buttons
/ before recording to increase and
decrease the lens’ exposure value, which variously brightens and darkens the video
as light is regulated.
5.5 Reviewing pictures / video clips
One benefit of digital cameras is that you could immediately check whether or not
you like the picture you just took.
To view the pictures that you have stored in internal memory or on the SD/MMC
Memory Card, rotate the Mode Dial to Playback Mode
and turn the camera
on.
5.5.1 Full-screen Review
The default Playback method is to show each individual picture one at a time at fullscreen size.
See table 9.1 for the button functions in full-screen review:
Up Button
Move to the previous photo.
Down Button
Move to the next photo.
Display Button
Turn on/off status-indicators on LCD screen.
Strobe / Copy
Copies the selected image from on-board memory to the
memory card or vice v ersa.
WB / Delete
Deletes selected photo.
Zoom Out
Widens the field framed by the camera’s lens from x8.0 to
x1.5.
Page 14

TRUST 910Z POWERC@M OPTICAL ZOOM
14
Zoom In
Narrows the field framed by the camera’s lens from x1.5 to
x8.0.
Table 9.1: Functions full-screen review
5.5.2 Thumbnail Review
If you press the Zoom Out button when the zoom ratio is at x1 (default), the
camera switches over to Thumbnail Review
.
See table 9.2 for the button functions in thumbnail review:
Up Button
Move thumbnail-selector to up.
Down Button
Move thumbnail-selector to down.
Strobe / Copy
Move thumbnail-selector to right.
WB / Delete
Move thumbnail-selector to left.
Display Button
Turn on/off thumbnail-selector
Table 9.2: Functions thumbnail-review
Press the Shutter button or the Zoom buttons
/ to go to full-screen
review. See chapter 5.5.1.
5.6 Connecting the camera to a TV
The camera can be connected to a TV to view your pictures and / or video-clips. The
LCD screen will be turned off. A standard RCA video cable is supplied with the
camera.
Setting the Video Out option:
1. See chapter 5.1 how to set the camera in the SET UP mode.
2. Select ‘Video Out’ from the set-up menu.
3. Use the UP button until the selected item has been set correctly: PAL for
Europe.
4. Press the SHUTTER button to record your selection.
Page 15

TRUST 910Z POWERC@M OPTICAL ZOOM
15
UK
Connect camera to a TV:
1. Connect one end of the AV cable to the camera into the video output located
above the USB connector.
2. Connect the other end of the AV cable to your TV. Your TV must have an
input for video signals (yellow RCA plug). The yellow plug is for the image
signal. You will need an adapter if your TV only has a SCART plug. This can
be purchased from most TV and radio shops.
3. Set your TV to display the video input.
4. Turn the camera on. The camera image will now be visible on your TV. You
could use the Mode dial button to change settings. (see chapter 3.4)
Note: Make sure to set this to PAL for use in Europe. Setting to the
wrong standard makes the screen fuzzy and everything will be
displayed in black and white.
Note: The camera’s AV output is not suitable for connecting to the
aerial connection on your TV. Your TV must have a video input.
Note: If you do not see an image and hear a loud humming sound
through the speakers, then you may have connected the image
plugs to the wrong connection. Check the connections and try
again.
5.7 Turn off the camera
When you are finished taking pictures, press the power button (3, figure 2) to turn it
off. This conserves battery power.
6 Advanced camera settings
6.1 Set-up menu
See chapter 5.1 how to set the camera in the SET UP mode. See table 10 for all
options.
DELETE ALL
To delete all images from your storage device (either the
camera's interna l memory or from the SD/MMC Card), select
Delete All from the Set-up menu.
FORMAT
This option completely erases and reformats the storage
device.
QUALITY
Adjust the image quality and resolution by selecting Quality.
The higher the quality, the clearer your picture will be, but at
the same time the image file size will be larger, and therefore
you will be able to sto re fewer pictures in me mory. Generally,
0.7 M (1024 x 736) is high enough quality for most purposes.
BUZZER
When this feature is turned on, the camera makes a beep
when you push its buttons or rotate its Mode dial.
To activate the beeps, select the Buzzer option from the menu.
On the subsequent screen, select Yes to confirm and then
Page 16

TRUST 910Z POWERC@M OPTICAL ZOOM
16
press the Display button .
DPOF
The Digital Printer Order Format (DPOF) lets you print photos
directly to a printer that supports this protocol. See chapter 6.3
for more info rmation.
DATE/TIME
The digital camera marks each picture with a time stamp
displaying the hour, minute and day the photo was taken. This
is useful for organising and keeping track of your photo
collection.
For more about setting the time and date see chapter 5.1
MEMORY
TYPE
You can choose whether you want to store photos in the onboard memory or in the SD/MMC Card.
To set the default storage media:
1. Rotate the Mode Dial to Set-up.
2. Turn on the camera.
3. Use the Down button
to select Memory Type and
then press the Display button
.
4. Use the Up and Down / buttons to select
either Internal, for the camera’s on-board memory, or
External, to use an installed SD/MMC Card.
5. Press the Display button
to confirm your selection
and return to the main Set-up screen.
LANGUAGE
The digital camera can display menu items in the following
languages: English, French, Spanish, German, Italian, Chinese
and Japanese.
For more on setting the default language, see chapter 5.1
VIDEO OUT
When connecting your camera to a television, you have the
option to choose a video standard format compatible with that
of your TV.
Select the Video Out option from the Set-up menu, and then
choose either NTSC or PAL, according to your hardware and
region. Press the Display button
to confirm your choice.
ISO
You can adjust the camera’s sensitivity to light by changing the
ISO setting. Three presets are available:
ISO 100: For shooting in bright sunlight
ISO 200: For all-round situations
OPENING
You can choose to display a splash screen when the camera is
turned on. To turn the splash screen on or off, scroll down to
the Opening option, press the Display button
, select Yes
or No, and press
to confirm.
Table 10: Description set-up menu
Page 17

TRUST 910Z POWERC@M OPTICAL ZOOM
17
UK
6.2 White balance
Not all light has the same colour. The light in a living room, for example, is more
yellow than daylight. The human eye automatically adjusts to this. The camera has
also been designed to do this. You can adjust the white balance when this does not
work (your photographs appear coloured). The white balance is set to AUTO when
the camera is turned on. This is usually the best setting. The white balance can be
set as followed:
1. Check whether the camera is in the SNAPSHOT mode (option 4, figure 4)
and the LCD screen has been turned on using the LCD button (16, figure 2).
2. Press the WB/DELETE button (4, figure 2) a number of times. The white
balance symbol will be disp layed at the top of the LCD screen.
3. Select one of the options from table 11 depending on the surroundings in
which the photographs will be taken.
< empty > Aut o WB
The camera automatically determines the
White Balance setting.
Daylight
Use this setting when taking pictures in bright
daylight, to reduce the effect of "whitewashed"
pictures.
Shade
Use this setting when taking pictures in shade,
or any time your pictures come out too dark.
Tungsten
Use this setting for taking pictures under
tungsten or incandescent light.
Fluorescent
Use this setting for taking pictures under
fluorescent light.
Table 11: Explanation of the white balance settings
Tip: The wrong setting will also lead to coloured photographs. The LCD
screen will only show an approximation of the result. You can correct
coloured photographs using Photo Express, which is supplied with the
camera.
Note: You can only use these settings in the PLAYBACK and SNAPSHOT
mode. When in the PLAYBACK mode, the WB button is the delete
function!
Page 18

TRUST 910Z POWERC@M OPTICAL ZOOM
18
6.3 Using DPOF
Note: To use DPOF option you’ll need an external memory card (SD/MMC)
and a DPOF-compatible printer which supports your memory card.
To print your pictures directly to a DPOF printer, first install an external SD/MMC
memory card in the camera. See chapter 4.1 for how to install a memory card.
1) Rotate the Mode-dial to Set-up mode (2, fig. 4). The Set-up menu will appear
(fig. 5).
2) Select ‘memory-type’ option.
3) Set the memory-type to ‘external’ (see also chapter 6.1).
4) When back in main-menu, select the DPOF option.
5) Choose specific images with the Select Images option or Select All Images
to print all pictures of the storage device.
When ‘Select Images’ is selected:
- Use the Up and Down / buttons to browse through your pictures.
- Press Shutter button or WB / Delete button
to go back any time.
- Use Strobe / Copy button
to set the DPOF settings of the
selected picture. The number of copies could be set now.
- Press Up and Down
/ buttons to increase or decrease the
number of copies you want to print.
- Press Strobe / Copy button
again, to set the date-mark when
printing the picture.
- Use Up and Down
/ buttons to select ‘YES’ or ‘NO’.
- Press Strobe / Copy button
again to go back to select another
picture.
- Press Display button
to save the DPOF settings on the SD/MMC
memory card.
- The memory card is ready for being inserted in a DPOF printer.
Note: When DPOF settings are found on the memory card, the following
message will appear on the camera: ‘Making Print Settings RESET
EDIT’. Choose EDIT to continue the previous DPOF selection(s).
Choose RESET to start a new DPOF selection.
Page 19

TRUST 910Z POWERC@M OPTICAL ZOOM
19
UK
7 Connecting to a computer
This chapter explains how to connect your digital camera to a computer for either
downloading pictures to a PC or Mac or for using as a PC Camera.
Note: There’re no drivers needed to be installed on Mac OS 9.x / OS X.
Please continue to chapter 7.2.
7.1 Connecting to a PC
Tip: Install the drivers first before connecting your camera to the PC!
7.1.1 Uninstalling old drivers and devices
The most common cause of faults during installation is the presence of a driver for a
similar, old device. The best solution is to first remove all drivers related to old
devices before installing the new driver. Make sure you only delete programs for old,
unused (similar) devices.
1. Enter the Windows ‘Safe Mode’. (Press F8 when starting Windows before the
Windows start screen is displayed and select ‘Safe Mode’.)
2. Click on ‘Start – Settings – Control Panel’ and double-click on the
‘Add/Remove Programs’ icon.
3. Find all the programs for similar, old devices and remove these by clicking on
the ‘Add/Remove’ button. When in the ‘Safe Mode’, it is possible for some
programs to appear twice. In that case, remove all the programs which
appear twice.
4. Restart the computer.
7.1.2 Driver Installation
1. Insert the installation software CD into your CD-ROM drive. Don’t connect the
camera to the PC.
2. The installation program should start automatically. If not, double click the My
Computer icon on your desktop, open the CD-ROM drive, and then run the
'setup.exe' found on the installation CD-ROM.
3. Select ‘Install drivers’ in the set-up-menu (see fig. 9).
4. Follow the on-screen instructions.
5. The drivers will be installe d now.
6. Restart your computer after installing.
7.1.3 PC Camera / MSD Driver Installation
1. Install the drivers first as described in chapter 7.1.2.
2. Set the Mode Dial to PC CAMERA mode.
3. Connect the small connector of the USB cable to the camera (see figure 13).
Page 20

TRUST 910Z POWERC@M OPTICAL ZOOM
20
4. Connect the large head of the USB cable to an empty USB slot on your
computer. To locate USB slots on your computer, look for the USB icon
.
5. Turn on your camera.
6. The Windows Add Hardware Wizard will automatically detect th e camera and
lead you through the installation procedures for the corresponding mode.
7. Reboot your PC and switch the Mode Dial of your camera to PLAYBACK
mode.
8. After rebooting Add Hardware Wizard will automatically detect the MSD an d
leads you through the installation procedures.
7.1.4 Making connection to a PC
The camera can be used in two different modes when connected to your computer:
1. Mass Storage Device (MSD)
MSD mode allows you to use the camera just like a standard storage device
where you can copy, delete and move files to and from the camera just as a
normal disk drive. To activate switch the Mode Dial of your camera to
PLAYBACK mode (3, figure 4).
2. PC Camera
PC Camera mode allows you to use the camera as a standard PC video
camera like the kind used for video teleconferencing, security, videophones,
and so on. To activate switch the Mode Dial of your camera to CAMERA
mode (1, figure 4).
Both MSD and PC Camera mode may only be used once you have connected the
camera to your PC with the supplied USB cable.
7.1.5 Moving Photos to a PC
When connected to your computer in MSD mode, the digital camera behaves exactly
like any another disk drive attached to your computer. This makes copying the
images to your hard drive as easy as copying files from a floppy disk, zip drive or
CD-ROM.
To copy photos to your computer:
1. Connect the digital camera to the computer with the USB cable.
2. Switch the Mode Dial of your camera in PLAYBACK mode.
3. Turn on the camera.
4. Open Windows Explorer. The contents of your computer will be displayed,
including all your disk drives, and, if the camera is connected properly, an
extra disk drive representing the camera's memory called “Removable Disk.”
5. Select the digital camera drive. The camera’s photos are listed. Select the
photos and drag and drop them onto your computer’s hard disk.
Page 21

TRUST 910Z POWERC@M OPTICAL ZOOM
21
UK
7.1.6 Using as a PC Camera
To use the camera as a PC Camera, you switch the Mode dial of your camera to PC
Camera mode
and then connect it to the computer via the USB port.
When connected, the camera may be used in conjunction with any commercially
available video capture software to create your own home videos. Then you can edit
and distribute your video files across the Internet or save them on CD-ROM for later
viewing on your PC or with a VCD/DVD player.
7.2 Connecting to a Mac
Note: There is limited support for MAC OS built-in at this date. You will be
able to get pictures and video clips from the camera, but the webcam
function is not supported in MAC-OS. Visit www.trust.com/13674 to
see if there is any updated driver available.
7.2.1 General info
1. Check if your MAC complies with the following system requirements: MAC
OS 9.0 or later, one free USB port.
2. You might need additional software to edit your pictures as the software
included with the camera is designed for a PC with Windows.
3. The recorded video clips are in a format designed for a PC and might not
play correctly on Mac’s without additional software for playing media files.
7.2.2 Getting your pictures
1. Make sure your computer is turned on.
2. Turn the MODE switch to the PLAYBACK position.
3. Connect the camera to your MAC. An extra folder will be added to your
desktop. Your pictures are stored in this folder.
4. Open this folder to access your pictures and video clips.
5. In MAC OS X, the image capture will be activated automatically to easily
import your pictures into the ‘Pictures’ folder on yo ur system.
Tip: Mac OS w ill automatically display th e camera’s internal memory w hen
there is no SD / MMC card present. When there is a memory card
present in your camera, its contents will be displa yed instead until you
remove it.
7.2.3 Formatting
You could both format the camera’s internal memory and the external memory card
with your MAC. Use only the DOS-format. However, it’s recommended using the
camera’s format function to format the memo ry.
Do not format the camera’s memory when you using Mac OS 10.2 (Jaguar) or
higher, because this OS can only format HFS and UNIX formats, which are not
compatible with your camera.
Page 22

TRUST 910Z POWERC@M OPTICAL ZOOM
22
8 Application software (PC only)
A number of different applications are supplied with the camera. These applications
do not have to be installed to use the camera. However, it is recommended to install
these programs in order to use all the extra options available with the camera.
8.1 Installing the application software
Note: Make sure all other applications are closed during the installation.
8.1.1 Photo Express
Photo Express 4.0 is an application that can be used to load and edit the
photographs on your PC which you have taken using TRUST 910Z POWERC@M
OPTICAL ZOOM. This program requires 500 MB free hard disk space. Follow the
instructions below to install Photo Express 4.0. This installation can take longer than
10 minutes.
1. Start the Trust Software Installer (see figure 9).
2. Select ‘Ulead Photo Express 4.0 SE’.
3. Select the language you wish to use.
4. Follow the on-screen instructions.
8.1.2 Photo Explorer
Ulead Photo Explorer 7 is a program which you can use to organise your
photographs. Simple processes can be carried out, such as rotating, printing and
viewing the photographs. Photo Explorer is useful if you wish to download
photographs and save them on your computer. Follow the instructions below to
install Photo Explorer 7.0.
1. Start the Trust Software Installer (see figure 9).
2. Select ‘Ulead Photo Explorer 7.0 SE’.
3. Select the language you wish to use.
4. Follow the on-screen instructions.
8.1.3 COOL 360
COOL 360 is an image editing program that can be used to change the photographs
you have taken using the TRUST 910Z POWERC@M OPTICAL ZOOM into
panoramic photographs. Follow the instructions below to install COOL 360.
1. Start the Trust Software Installer (see figure 9).
2. Select ‘Ulead Cool 360’.
3. Follow the on-screen instructions.
8.1.4 DVD Picture Show
This program should only be installed if your computer has a CD-writer or a DVDwriter. DVD Picture Show allows you to transform your photographs into a slideshow
which can easily be played using a DVD player. In order to enjoy maximum use of
this application, you require a CD-RW or DVD-writer and a DVD player. Not all DVD
players are able to read DVD’s or CD-R disks which you have made yourself. If in
doubt, see the instruction manual provided with your DVD player.
1. Start the Trust Software Installer (see figure 9).
2. Select ‘Ulead DVD Picture Show Basic SE’.
3. Select the language you wish to use.
4. Follow the on-screen instructions.
Page 23

TRUST 910Z POWERC@M OPTICAL ZOOM
23
UK
8.2 Using the application software
8.2.1 Ulead Photo Express
You can use this application to solve problems with the pictures, such as the red-eye
effect, coloured photographs, photographs which are too bright or too dark, remove
undesirable objects from the background, etc. You can also use this application to
design calendars and cards.
Follow the instructions given below:
1. Copy your photographs to your hard disk as described in chapter 7.1.5.
2. Click on ‘Start – Programs – Ulead Photo Express 4.0 SE – Ulead Photo
Express 4.0 SE’. Figure 1 0 will appear. You will be in the ‘Browse’ mode.
3. Find the folder containing your photographs in the left-hand side of the
window.
4. Click on this folder to view the contents. Your photographs will be visible in
the main window as thumbnails.
5. Select a photograph that you wish to edit and double-click on it. After a
couple of seconds, the photograph will become visible in the main window.
You can now edit the photograph.
6. Click on ‘Edit’ at the top of the window and select an option. The most
common options are included here.
7. Click on ‘Save’ after editing the photograph to save the finished result.
See this program’s instruction manual and Help function for more information.
Note: The photographs are saved in JPEG format to save space. JPEG
reduces the size of the file by removing small details from the
photograph. If you wish to edit the photographs during different
sessions, use a different file format to JPEG (for example, TIFF) to
prevent the loss of quality as a result of constant loading and saving
in the JPEG format.
Note: Since editing cannot be undone, it is recommended to make a copy of
the photographs and to only edit the copies. You can then always
return to the original photographs. It is strongly recommended to
make a back up on a CD-ROM using a CD-writer for protection
against computer faults.
8.2.2 Ulead Photo Explorer
You can use Ulead Photo Explorer 7.0 to easily download photographs and video
clips onto your computer. A short description of how to use Photo Explorer is given
below. For a detailed description of Photo Explorer, see the program's Help function.
Follow the instructions below to use the TRUST 910Z POWERC@M OPTICAL
ZOOM in Photo Explorer.
1. Turn the Mode Dial on the camera to the PLAYBACK mode.
2. Connect the camera to the computer using the USB cable.
3. Start Ulead Photo Explorer.
4. The main window will appear. The 'Set-up Internet Connection' window may
also appear. Click on the 'Skip for now' button to close this window if it
appears. The Trust camera will be visible as a ‘Removable disk’ in the list on
the left-hand side of the window.
5. Double-click on this. The ‘DCIM’ folder will be visible.
6. Double-click on this. The pictures/video-clips folder will be visible.
Page 24

TRUST 910Z POWERC@M OPTICAL ZOOM
24
7. Double-click on this. Your photographs and video clips will slowly become
visible. The window will now look like figure 11.
8. Click on one of the thumbnails in the main window to edit, print, etc. the
photograph. Note: you will edit the original photograph and changes cannot
be undone. Video clips can only be played, not edited or printed.
9. See the program’s Help function for more information.
Note: The program has the option to publish the photographs on the
Internet (if you have a connection to the Internet). This is useful if you
wish to show your photographs to friends. Remember that anybody
will then be able to see your photographs and the company that
administers the site has the right to use your photographs in
advertisements. This is also often the case with other photograph
sharing websites and is partly the reason that they are free. Read the
conditions for use.
8.2.3 DVD Picture Show
You can use DVD Picture Show to easily transform your photographs into a
slideshow. This slideshow can then be viewed on your television. You need a CDwriter or a DVD-writer in order t o make the CD-ROM’s. You will also need a DVD
player.
1. Start the program (Start - Programs - DVD Picture Show Basic SE - DVD
Picture Show Basic SE).
2. A window will appear once in which you must input the country you are
located in or the video system. Select the bottom option and then select
‘PAL’.
3. Click on 'OK'.
4. In the following window, select ‘Next’. A choice menu for the slideshow will
now be displayed. This window will be empty the first time you use the
program.
5. Click on ‘New Slide Show’ to create your first presentation. A new window will
appear in which you can select the photographs and background that you
wish to use for the presentation (see figure 12).
6. Follow the on-screen instructions and, if necessary, use the Help function
(F1). Pay attention to the size of the file: the maximum size for a CD-ROM is
approximately 700 MB.
7. Once you have finished, you can save the slideshow on a CD-ROM or DVD
using the program Disc Image Recorder (Start - DVD Picture Show Basic SEDisc Image Recorder).
Note: This application only works with photographs, not video clips.
8.2.4 COOL 360
Use this program if you wish to join several photographs together to make a
panoramic photograph. For instructions on how to use COOL 360, please refer to
the instruction manual included on the CD-ROM.
Note: It’s recommended to make all pictures first and copy them to your
harddisk by using MSD. In Cool 360 select the pictures on your
harddisk to make a panoramic photograph.
Page 25

TRUST 910Z POWERC@M OPTICAL ZOOM
25
UK
8.3 Using the camera as a webcam
8.3.1 General
The TRUST 910Z POWERC@M OPTICAL ZOOM can also be used as a webcam,
for example, on your Internet page.
A number of informative sites about webcam are given below:
http://www.camarades.com
http://www.teveo.com
At these sites, you can download software that you can use to send live video
images over the Internet.
Please refer to the sites concerned for information on how to install and use the
software.
Caution: The camera could be used as webcam for a limited time depending
on the batteries being used.
8.3.2 Netmeeting
NetMeeting is not provided with the camera. When using Windows 2000 / XP it’s
already included in Windows.
When you’re using Windows 98 / ME you could download the latest version of
NetMeeting by going to www.microsoft.com and searching under the Keywords
‘download netmeeting’.
1. Make sure you have an Internet account installed and your speakers and
microphone are connected before starting NetMeeting.
2. Start NetMeeting (Start -> Programs -> Accessories -> Internet Tools ->
NetMeeting).
3. Two windows will be opened, namely NetMeeting and your Dial-up
connection.
4. Fill in your user name and password and click on 'Connect' to connect to the
Internet. A ‘Dial Up Connection’ window will appear if you use an external
gateway, a cable modem or ADSL.
5. Once a connection has been made with the Internet, only the NetMeeting
window will remain visible. The ‘Dial-up Connection’ window will disappear.
6. A number of settings should be made only once.
Go to ‘Tools -> O
ptions…’ and click on the ‘Video’ tab.
7. To prevent a mirror image of your camera, do not select
‘Show mirror image in preview video window’. Image settings, such as the
image size and quality, can also be changed in this window. Click on 'OK' to
save the new settings and return to the start window of NetMeeting. The
once-only settings have now been completed.
8. Click on 'View' in the NetMeeting window and select the 'My Video (New
Window)' option. An extra window ('My Video') will now be opened.
9. Click on the ‘Play’ button (
) to turn on your current video image. This
image will also be seen by the person you make a NetMeeting connection
with.
10. You are now ready to make a NetMeeting connection. Click on NetMeeting’s
telephone book icon. A new window will appear.
11. In the address bar, type an ‘ils server name’ (for example, ils.worldonline.nl)
and click on ‘Enter’.
Page 26

TRUST 910Z POWERC@M OPTICAL ZOOM
26
12. Double-click on a person in the list. A NetMeeting connection will be made.
The person may not wish to make a connection with you, because this person may
be communicating with somebody else. If this is the case, select somebody else
from the list. You can find other ‘ils servers’ on the Internet. An example is
http://www.netme etinghq.com. For more information or solutions to problems, click
on ‘Help’ in NetMeeting’s start window. This contains a description of all the
functions available with NetMeeting.
Caution: When using NetMeeting, you may contact people who have different
opinions than you have. Do not allow children to use NetMeeting
unsupervised.
Microsoft has started closin g down its ILS servers. This will mean that you will only
be able to use NetMeeting via MSN Messenger (an instant message program) which
is included with most versions of Windows. You must register with Microsoft (to
obtain a passport) b efore this program will work. S ee the MSN Messenger Help
function for instructions on how to register. Other organisations have active ILS
servers which can also be used.
When your version of Windows does not include MSN messenger, go to
www.microsoft.com/msn to download it for free.
Page 27

TRUST 910Z POWERC@M OPTICAL ZOOM
27
UK
9 Trust Photo Site
Trust offers you the possibility to publish your photographs on the Internet at
www.trustphotosite.com. There are a number of conditions for the use of this site.
The conditions can be found at www.trustphotosite.com.
9.1 Register
9.1.1 For non-registered users
Go to the Trust website (www.trust.com) to register yourself and your camera.. After
registering, you will rece ive a conformation e-mail.
Sign in using the confirmation code which is sent to you.
Next, follow the instructions for registered users.
9.1.2 For registered users
Go to the Trust Customer Care section of the website (www.trust.com/customercare)
and register using your e-mail address and password (password for the Trust
website).
1. Enter the item number of your digital camera and click on ‘Search’ to
go to the support page for your camera.
2. Click on ‘Create account’ in the Trustphotosite.com banner on the
right-hand side to create an account.
3. Click on the ‘Create trustphotosite.com account’ button. It may take a
while before the next window appears.
4. Click on ‘Continue’. In the window that appears, you can download
software for uploading your photographs to the Trust Photo Site. You
can download the latest version of the software here. (The Trust
Photo Upload software is also included on the CD-ROM provided with
the camera.)
9.2 Installing the Trust Photo Upload software
Note: The latest version of the Trust Photo Upload software can
always be downloaded from the Trust website.
1. Start the Trust Software Installer (see chapter 7.2.1).
Select ‘Open SOFTWARE menu’.
Select ‘Install Trust Photo Upload’.
Follow the on-screen instructions to complete the installation.
9.3 Using the Trust Photo Upload software
1. Start Trust Photo Upload from the Windows Start menu (Start –
Programs – Trust – Trust Photo Upload).
2. Use the ‘Explorer’ to select the photographs you wish to upload. You
can use the buttons on the right-hand side of the Explorer to select
photographs, unselect photographs, view photographs, etc.
3. Click on ‘Upload’.
4. Enter your e-mail address and password for your Trust registration
(not the password for your e-mail account).
Page 28

TRUST 910Z POWERC@M OPTICAL ZOOM
28
5. Click on ‘Next’. You login in formation will be checke d. This can take
some time.
6. Select the photo album where you wish to upload the photographs to
or create a new album.
7. Click on ‘Next’. The photographs will now be uploaded. The progress
will be displayed on you r monitor. This can take a long time if you use
an analogue modem.
8. Click on ‘Close’ to close th e window.
Go to the website www.trustphotosite.com and register.
You can now view your photographs, arrange them, etc. See the Help function on
the website for more information.
10 Specifications
Hardware resolution 2048 x 1472 (3.0 Mpixel))
Max. camera resolution 2496 x 2016 (5.0 Mpixel)
Internal memory 15 MB
External memory Max. 256 MB (SD/MMC)
Optical zoom 3x
Digital zoom 4x
LCD display 1,5" (3,8 cm) Color TFT LCD
White balance Auto WB / Daylight / Shade / Tungsten /
Fluorescent
View angle 53°
Lens f=6.2~18.6mm 1:2.9~6.9
DPOF compatible Yes, version 1.1
Self-timer 10 sec.
Interface USB 1.1
Built-in-microphone Yes
Built-in speakers Yes
11 Troubleshooting
Method
1. Read the solutions given below.
2. Check for up-to-date FAQ’s, drivers and instruction
manuals on the Internet www.trust.com/13674
Problem Possible cause Solution
The camera is turned off. Press the power button to turn
the camera ON.
The batteries are
discharged.
Replace the batteries with fresh
ones. Refer to Inserting
Batteries.
The camera has no
power.
The batteries are inserted
incorrectly.
Check the battery orientation.
Refer to Inserting the Batteries.
Page 29

TRUST 910Z POWERC@M OPTICAL ZOOM
29
UK
Ensure the green Camera
Ready LED indicator is on
and not flashing.
If the light is flashing, wait until it
emits a steady light before taking
a picture. The camera may be
waiting for the flash to charge.
The camera won’t
take a picture.
Is the camera connected to
a computer?
The camera’s buttons are not
functional when connected to a
PC. Disconnect the camera to
take more pictures.
Is the flash on? Ensure the flash is set to auto or
always on. Refer to Setting the
Flash.
The flash doesn’t
work.
There’s too much light. When there’s too much light the
flash will not work in auto-mode.
The camera or subject was
moving when the shot was
taken.
Hold the camera steady or put it
on a tripod to take pictures.
The images are
blurry.
There was not enough light
while taking picture.
Use the flash option.
The computer does
not recognize the
camera
The camera was
connected to a personal
computer by USB before
installing software .
Connect the camera to the
computer with the USB cable.
Select [My computer] > [Control
panel] > [System] > [Device
manager]. From [other devices]
delete [Composite USB device]
or [unknown device]. Disconnect
the camera from the computer,
install the software, and then
reconnect the camera.
Images lose
formatting data
during image
capture in "PC
Camera" mode.
If your hard disk's DMA
setting is turned off images
may lose formatting data
during image capture.
(Windows 98 and Windows
ME only.)
Please check to make sure your
hard drive's DMA setting is
enabled, as follows:
From the Windows Start menu,
select Settings, then Control
Panel.
In the Control Panel double-click
System, then click the Device
Manager tab.
Select your hard drive from the
list, then click Properties.
Click the Settings tab.
Make sure the box marked DMA
is checked. If not, check the box
to ensure that you r hard drive will
protect image attributes during
capture.
Page 30

TRUST 910Z POWERC@M OPTICAL ZOOM
30
If you still have problems a fter trying these solu tions, please contact one of the Trust
Customer Care Centres. You can find more information at the back of this instruction
manual. Please have the following information available:
• The item number. This is 13674.
• A good description of what does not work.
• A good description of when the problem occurs.
Page 31

TRUST 910Z POWERC@M OPTICAL ZOOM
31
UK
12 Warranty conditions
- Our products have a two-year manufacturer's warranty which is effective from
the date of purchase.
- If there is a fault, return the product to your dealer and include an explanation
of the fault, the proof of purchase and all the accessories.
- During the warranty p eriod, you will receive a similar model, if one is
available. If no similar product is available, your product will be repaired.
- Please contact our help desk for missing components, such as the instruction
manual, software or other components.
- The warranty becomes invalid if the product has been opened, if there is
mechanical damage, if the product has been misused, if alterations have
been made to the product, if the product has been repaired by a third party,
in the case of negligence or if the product has been used for a purpose other
than that originally intended.
- Excluded from the warranty:
• Damage caused by accidents or disasters, such as fire, flood,
earthquakes, war, vandalism or theft.
• Inco mpatibility with other hardware/sof tware which is not stated in the
minimum system requirements.
• Accessories, such as batteries, fuses (if applicable).
- Under no circumstances will the manufacturer be held responsible for any
incidental or consequential damage, including the loss of income or other
commercial losses resulting from the use of this product.
 Loading...