

Page 1

Trust Flat Scan USB 19200
1
GB
TRUST FLAT SCAN USB
19200
Quick installation manual
Version 1.0
Page 2
Trust Flat Scan USB 19200
2
1. Introduction
This manual is intended for users of the Trust Flat Scan USB 19200. Prior knowledge is not
necessary to install this product.
This instruction manual describes how to install the software and how to solve problems that may
be encountered during the installation.
A detailed manual for this product is contained on the CD-ROM. See chapter 4 for instructions on
how to read this manual.
2. Safety
Please read the following instructions carefully before using the device:
1. Do not use the device in a damp environment, such as a bathroom, damp basement,
swimming pool, etc.
2. Never stick objects into the slots on the outside of the device, because you may touch
live components. This may cause a fire or give you an electric shock.
3. Do not try to repair this device yourself. When you open or remove the casing, you may
accidentally touch live components. There are also other risks.
4. If any of the following circumstances occur, remove the plug from the power socket and
have the device repaired by qualified personnel:
a) The cable or plug is damaged or worn.
b) Fluid has entered the device.
c) The device has been dropped and/or the housing is damaged.
5. Position the device so that the cables cannot be damaged.
3. Quick installation
3.1 Installing the driver in Windows 98 / 2000
1. Insert the CD-ROM into your CD-RO M drive.
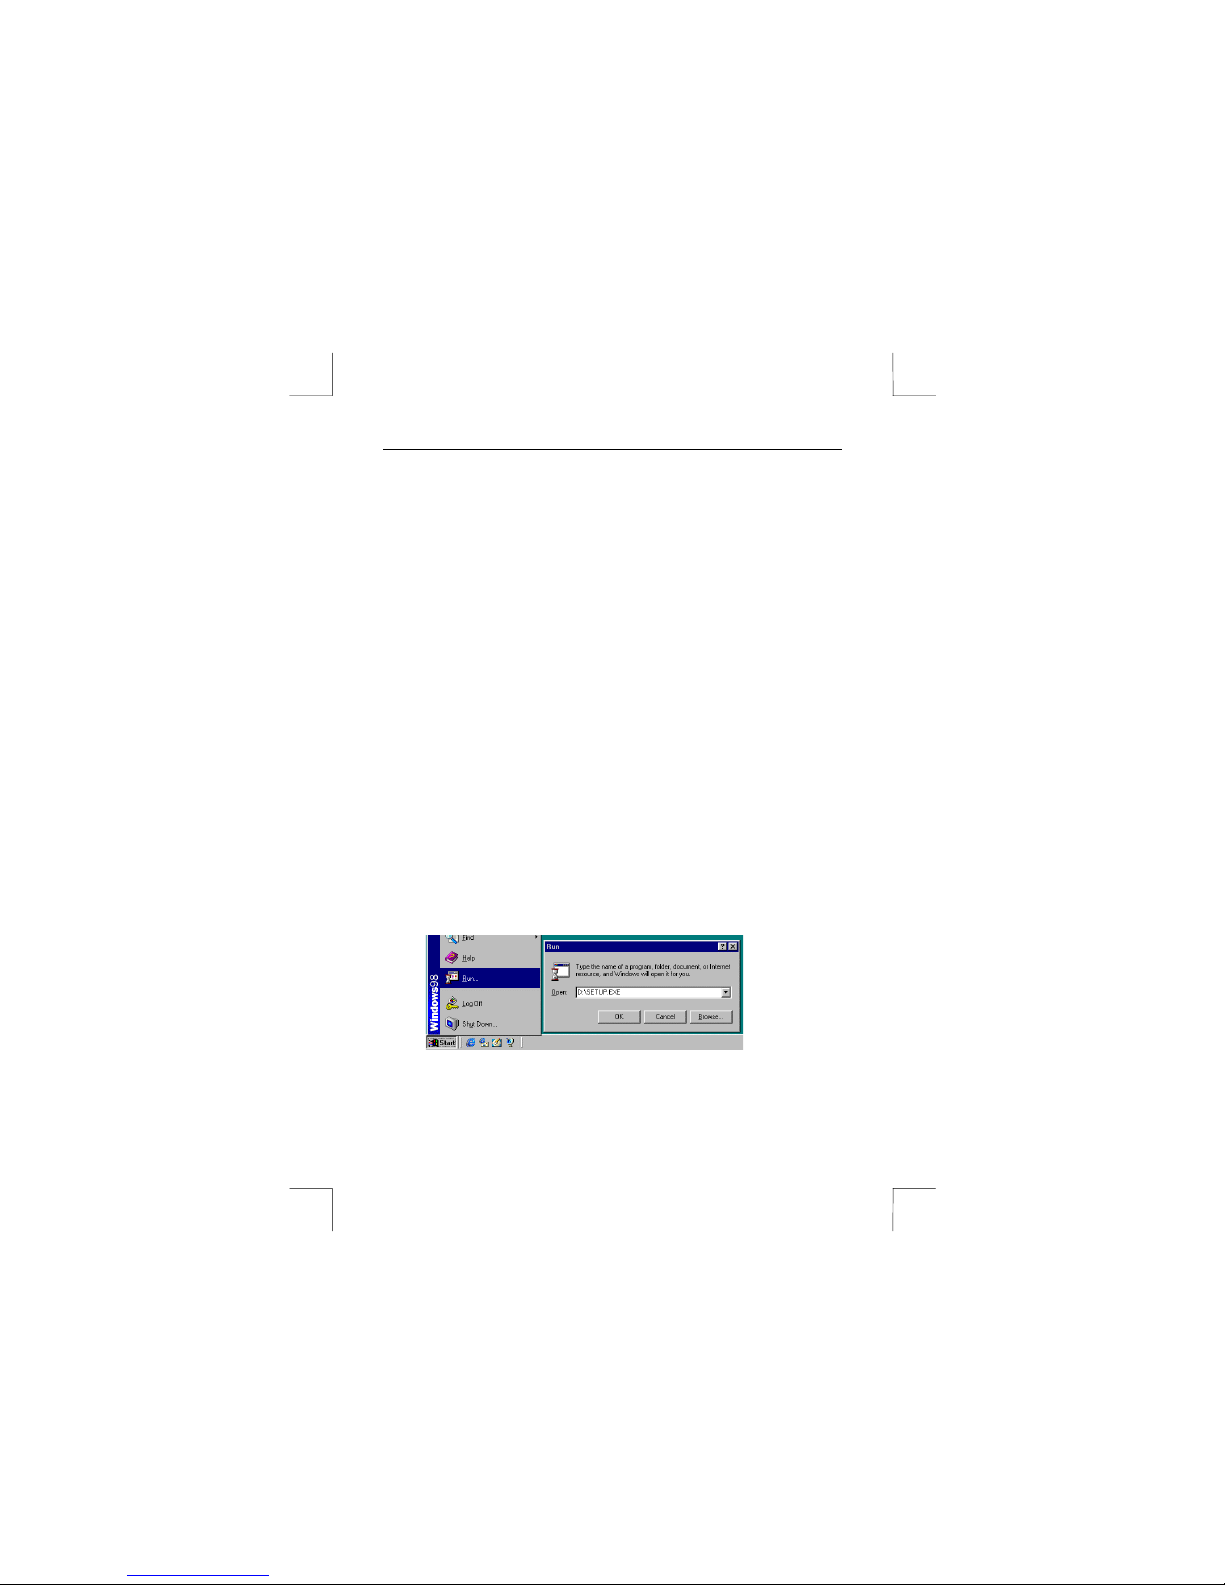
2. Select 'Run' from the Start menu.
3. Type [D:\SETUP.EXE] and click on ‘OK’ (see figure 1) to start the Trust Software Installer.
Figure 1: Starting set-up
Page 3

Trust Flat Scan USB 19200
3
GB
4. Select the language you wish to use. Figure 2 will appear.
Figure 2: Trust Software Installer
5. Select ‘Install Trust Flat Scan USB 19200’.
6. Follow the on-screen instructions.
7. Restart your computer after installing the software.
3.2 Connecting the scanner to the USB port
The scanner can be connected to your computer's USB port after the TWAIN driver has been
installed (see chapter 3.1). To do this, follow the instructions given below:
1. Start Windows.
2. Connect the square USB plug on the USB cable provided into the rear of the scanner.
3. Connect the other end of the USB cable into a free USB port on your computer.
4. The new hardware will be detected b y Windows and the driver for the scanner will be
automatically installed.
Note: For installation in Windows 2000, a message will be displayed stating that the
driver's digital signature has not been found. Due to the fast development of
computer technology, it is not always possible to have the newest drivers signed in
time. Click on 'Yes' to accept and continue with the installation (see figure 3).
Page 4

Trust Flat Scan USB 19200
4
Figure 3: Digital signature in Windows 2000
The Trust Flat Scan USB 19200 is now ready for use.
A more detailed description of the installation and use of this product can be found in the
instruction manual included on the CD-ROM. See chapter 4 for more information. If necessary,
also refer to your computer's instruction manual.
4. Acrobat Reader
4.1 Reading the electronic manual
1. Start the Trust Software Installer.
2. Select 'Read manual'.
3. Select the language you wish to use to read the manual.
4. The manual will be displayed on the monitor.
4.2 Printing the manual
1. Click on 'Print' in the 'File' menu (see figure 4).
Figure 4: Opening the file
Page 5

Trust Flat Scan USB 19200
5
GB
2. Change any settings you wish to alter.
3. Click on 'OK' to print the document.
5. Troubleshooting
Problem Possible cause Solution
The computer
does not detect
the scanner.
The scanner may not be
connected to the computer
correctly.
Check whether the scanner is
correctly connected to the USB
port. See chapter 3.2.
The USB cable has not been
connected correctly.
Connect the USB cable
correctly. See chapter 3.2.
The error
message 'Cannot
operate!' is
displayed.
The driver for the scanner has
not been installed correctly.
Reinstall the TW AIN driver.
The scan
command is not
carried out.
The scanner has not been
connected to the computer
correctly.
Check whether the scanner is
connected correctly. See chapter
3.2.
Monitor is set too dark. Adjust the brightness of the
monitor.
Scan is too dark.
The number of colours for your
monitor adapter is set too low.
Adjust your monitor adapter to a
minimum of 65,535 colours (16
bit).
Resolution is set too low. Set your resolution to 600 dpi.
The number of colours for your
monitor adapter is set too low.
Adjust your monitor adapter to a
minimum of 65,535 colours (16
bit).
Low scan quality.
The glass plate is dirty. Dirt on
the glass plate shows up in the
scanned image.
Thoroughly clean the scanner
glass plate.
Also see the 'Troubleshooting' chapter on the electronic manual (chapter 4 – Acrobat Reader).
Check the FAQ's on the Internet (www.trust.com).
If you still have any prob lems after trying these solutions, please con tact your dealer or call the
Trust Helpdesk.
 Loading...