

Trust FAMILYCAM 300 User Manual

TRUST FAMILYC@M 300
UK
TRUST FAMILYC@M 300
User Manual
Version 2.0

TRUST FAMILYC@M 300
01 UK 12441 FAMILYC@M 300 CD HANDLEIDING (A4).DOC
Thank you
Thank you very much for purchasing this product from the Trust range. We wish you hours of fun
with it. Please read this manual carefully before using the product.
Registration
Register your purchase now at the Trust Internet site, www.trust.com, so that you are able to
receive optimal guarantee and service support. You will be automatically informed of
developments to your product and of other Trust products. You will also have the chance to win
some spectacular prizes.
Copyright statement
No part of this instruction manual may be reproduced or transmitted, in any form or by any means,
electronic or mechanical, including photocopying, recording, or information storage and retrieval
systems, for any purpose other than the purchaser's own personal use, without prior written
permission from the manufacturer.
Disclaimer statement
The manufacturer specifically disclaims all warranties, either express or implied, including, but not
limited to, implied warranties for the marketability and suitability for a particular purpose, with
respect to the software, the accompanying product manual(s) and written material, and all other
accompanying hardware. The manufacturer reserves the right to revise or make improvements to
its product at any time and without obligation to notify any person of such revisions or
improvements.
In no event shall the manufacturer be liable for any consequential or incidental damages, including
any loss of business profits or any other commercial damages, arising out of the use of its
products.
All company or product names are trademarks or registered trademarks of their respective
owners.

TRUST FAMILYC@M 300
1
UK
Table of Contents
1. Introduction ..................................................................................................................................... 3
1.1 Conventions used in this manual .......................................................................................... 3
1.2 Contents of the package ......................................................................................................... 3
1.3 Minimum system requirements .............................................................................................. 3
2. Safety ............................................................................................................................................... 4
2.1 General...................................................................................................................................... 4
2.2 Batteries.................................................................................................................................... 4
3. Functions of the ‘Trust FAMILYC@M 300’ ................................................................................... 5
3.1 Camera functions..................................................................................................................... 5
3.2 LCD display functions ............................................................................................................. 5
4. Installation ....................................................................................................................................... 6
4.1 Inserting batteries.................................................................................................................... 6
4.2 Placing memory card............................................................................................................... 6
4.3 ‘TRUST FAMILYC@M 300’ driver installation ....................................................................... 7
5. Software Installation....................................................................................................................... 9
5.1 Installing Ulead Photo Express 3.0 SE .................................................................................. 9
5.2 Ulead Photo Explorer 6.0 installation .................................................................................. 11
5.3 Installing COOL 360............................................................................................................... 13
5.4 Installing VideoLive Mail 4.0 ................................................................................................. 15
5.5 Installing Microsoft Internet Explorer 5.0 (NetMeeting) ..................................................... 16
5.6 Installing Ulead VideoStudio 3.0 SE..................................................................................... 17
6. Using the camera .......................................................................................................................... 22
6.1 Connecting cables ................................................................................................................. 22
6.2 Taking photos ........................................................................................................................ 22
6.3 Menu options.......................................................................................................................... 22
6.3.1 Programming photo quality ........................................................................................... 22
6.3.2 Using the automatic shutter release ............................................................................. 22
6.3.3 Deleting photos ............................................................................................................... 23
6.3.4 Video function ................................................................................................................. 23
6.3.5 Viewing photos in the computer ................................................................................... 23
6.3.6 Viewing video takes in the computer............................................................................ 23
6.3.7 WebCam & Internet ......................................................................................................... 23
7. Using the Software ....................................................................................................................... 24
7.1 FamilyC@m 300 Manager...................................................................................................... 24
7.1.1 Photos .............................................................................................................................. 24
7.1.2 1.3 Mpix Photo resolution settings ............................................................................... 25

TRUST FAMILYC@M 300
2
7.1.3 Video ................................................................................................................................ 26
7.2 Using Ulead PhotoExpress 3.0 SE ....................................................................................... 27
7.2.1 Loading photos ............................................................................................................... 27
7.3 Using Ulead Photo Explorer ................................................................................................. 30
7.4 Using VideoLive Mail ............................................................................................................. 31
7.4.1 One-off setting................................................................................................................. 31
7.4.2 Working with VideoLive Mail Plus................................................................................. 35
7.4.3 Function key description................................................................................................ 36
7.4.4 Creating a VideoMail.......................................................................................................37
7.5 Using Ulead COOL 360.......................................................................................................... 38
8. Troubleshooting ........................................................................................................................... 39
9. Specifications................................................................................................................................ 41
10. Trust Customer Care Centres...................................................................................................... 41

TRUST FAMILYC@M 300
3
UK
1. Introduction
This instruction manual is intended for users of the Trust FamilyC@m 300. Some computer knowledge is
necessary to install and use this product. If you have any questions, please consult one of the Trust
Customer Care Centres. You can find more information about these Customer Care Centres on the last page
of this electronic manual, as well as at the back of the quick installation manual.
1.1 Conventions used in this manual
The following conventions have been used in this manual to indicate instructions:
<key> Here you should press a key. The name of the key is given between brackets.
‘System’ This is a specific term used in a program. These are the terms used by, for example,
Microsoft Windows 98.
[DIR] Key in the text shown in square brackets [….].
{term} The text between the parentheses {….} is the English term, e.g. {File} used in the figure
referred to.
Additional information will be shown as follows:
NOTE: If you connect the ‘Trust FamilyC@m 300’ to a USB HUB, then the USB HUB should have its own
power supply.
The examples assume that the letter “D” has been assigned to your CD-ROM drive. If your system uses a
different drive letter for your CD-ROM drive, for example “E”, you should replace “D” by “E”.
1.2 Contents of the package
Please check the contents of the package before reading the instruction manual. It should contain the
following:
• Trust FamilyC@m 300
• 8 MB SmartMedia card
• Camera stand
• USB cable
• 2 type AAA alkaline batteries
• CD-ROM with driver and applications
• CD-ROM with Ulead VIDEO STUDIO SE
• Wrist band
If anything is missing or if something is damaged, please contact one of the Trust Care Centres. You can find
more information at the back of this instruction manual.
1.3 Minimum system requirements
• Intel Pentium 200 MMX CPU or higher
• USB port
• Windows 98 / ME / 2000
• 32 MB RAM (64 MB recommended)
• 60 MB free Hard disk space
• 4X CD-ROM player
Recommended system configuration for full operation of the programs:

TRUST FAMILYC@M 300
4
• ISDN-adapter or modem
• Sound card with speakers and microphone
• Internet subscription
2. Safety
2.1 General
1. Do not use the device in a damp environment.
2. Do not try to repair the device yourself.
3. Under the following circumstances have the device repaired by qualified personnel:
a) The cable or plug is damaged or worn.
b) Liquid has entered the device.
c) The device has fallen and/or the casing has been damaged.
4. Position the device so that the cables cannot be damaged.
2.2 Batteries
1. The batteries are not rechargeable. Do not try to recharge these batteries. There would be danger of
explosion.
2. Do not throw the batteries into an open fire. The batteries may explode.
3. Never drill into the batteries.
4. Keep the batteries out of the reach of small children.
When the batteries are empty, ask your local government where you can recycle them.
NOTE: If the battery voltage is low or empty, all pictures you intend to save must first be loaded into the
computer and saved before you replace the batteries. When the batteries are being replaced, all
photos disappear from the memory of the camera.
NOTE: Do not mix old and new batteries because the old batteries may drain the new ones.
NOTE: If the camera is not used for an extended period, you must remove the batteries from the camera
to save the battery capacity.
TRUST FAMILYC@M 300
5
UK
3. Functions of the ‘Trust FAMILYC@M 300’
3.1 Camera functions
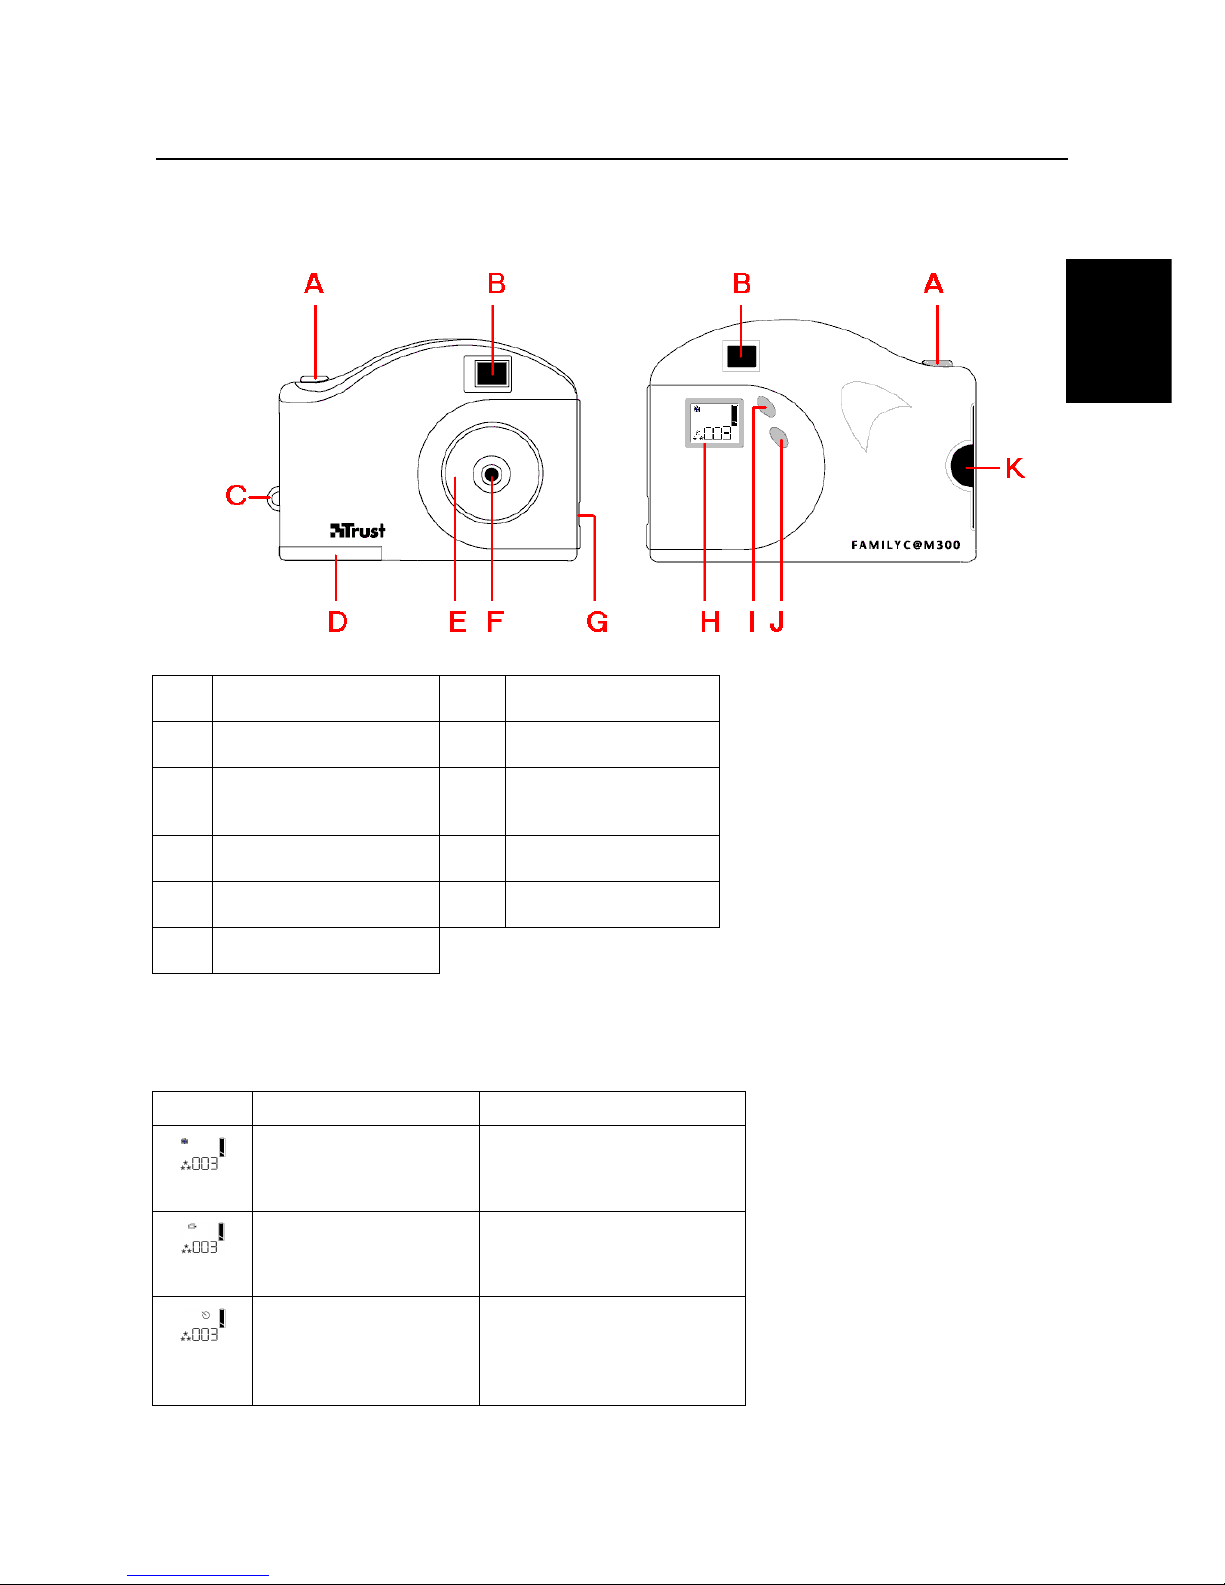
Figure 1: Functions of the ‘Trust FAMILYC@M 300’
A Shutter release G USB connection
B Viewer H LCD display
C Connecting point for
wristband
I Menu button
D Battery cover J ON button
E Focus ring K Slot for memory card
FLens
Table 1: Functions of the FAMILYC@M 300
3.2 LCD display functions
DISPLAY description Function
Camera mode In this mode photos can be
made.
Video mode In this mode videos can be
shot.
Automatic shutter release With this option you can
activate the automatic shutter
release.
TRUST FAMILYC@M 300
6
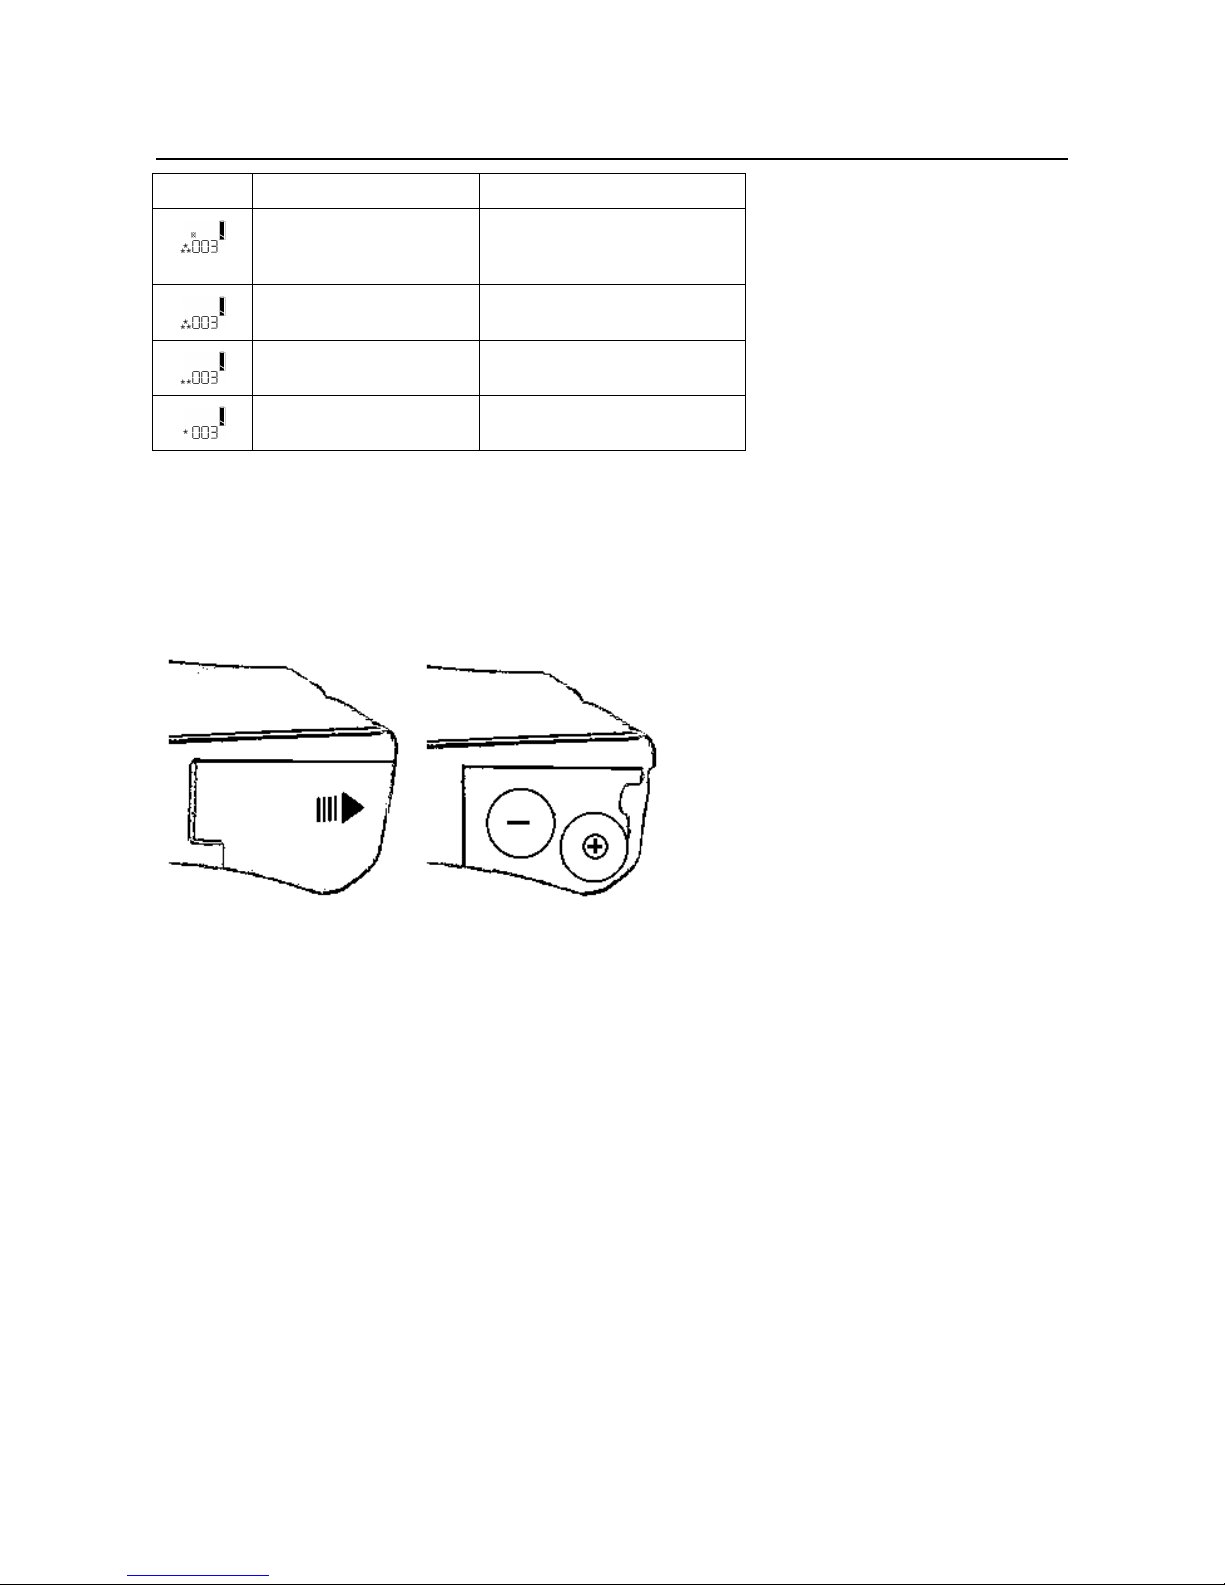
DISPLAY description Function
Erase This option will erase all
photos from the camera’s
memory.
High resolution High (VGA) resolution for
making photos in 640x480.
Low resolution Low (QVGA) resolution for
making photos in 320x240.
Lowest resolution Lowest (QVGA) resolution for
making photos in 320x240.
Table 2: LCD display functions
4. Installation
4.1 Inserting batteries
Insert the batteries in your camera as follows:
Figure 2: Inserting batteries
1. Slide the battery cover on the bottom of the camera to the right as indicated in Figure 2.
2. Insert the batteries in the compartment as indicated. You can also read on the inside of the battery
compartment how the batteries must be inserted.
3. Next, close the battery cover.
Note: Inserting the batteries incorrectly causes damage.
Note: Replace the battery only with an equivalent type (2x AAA type) batteries or rechargeable NiMH.
Note: If the camera is not used for an extended period, you must remove the batteries from the camera
to save the battery capacity.
4.2 Placing memory card
The Trust FamilyC@m 300 is provided with an 8 MB SmartMedia memory card.
Note: Avoid all contact with the contacts of the memory card.
Place the memory card in your camera as follows.
TRUST FAMILYC@M 300
7
UK
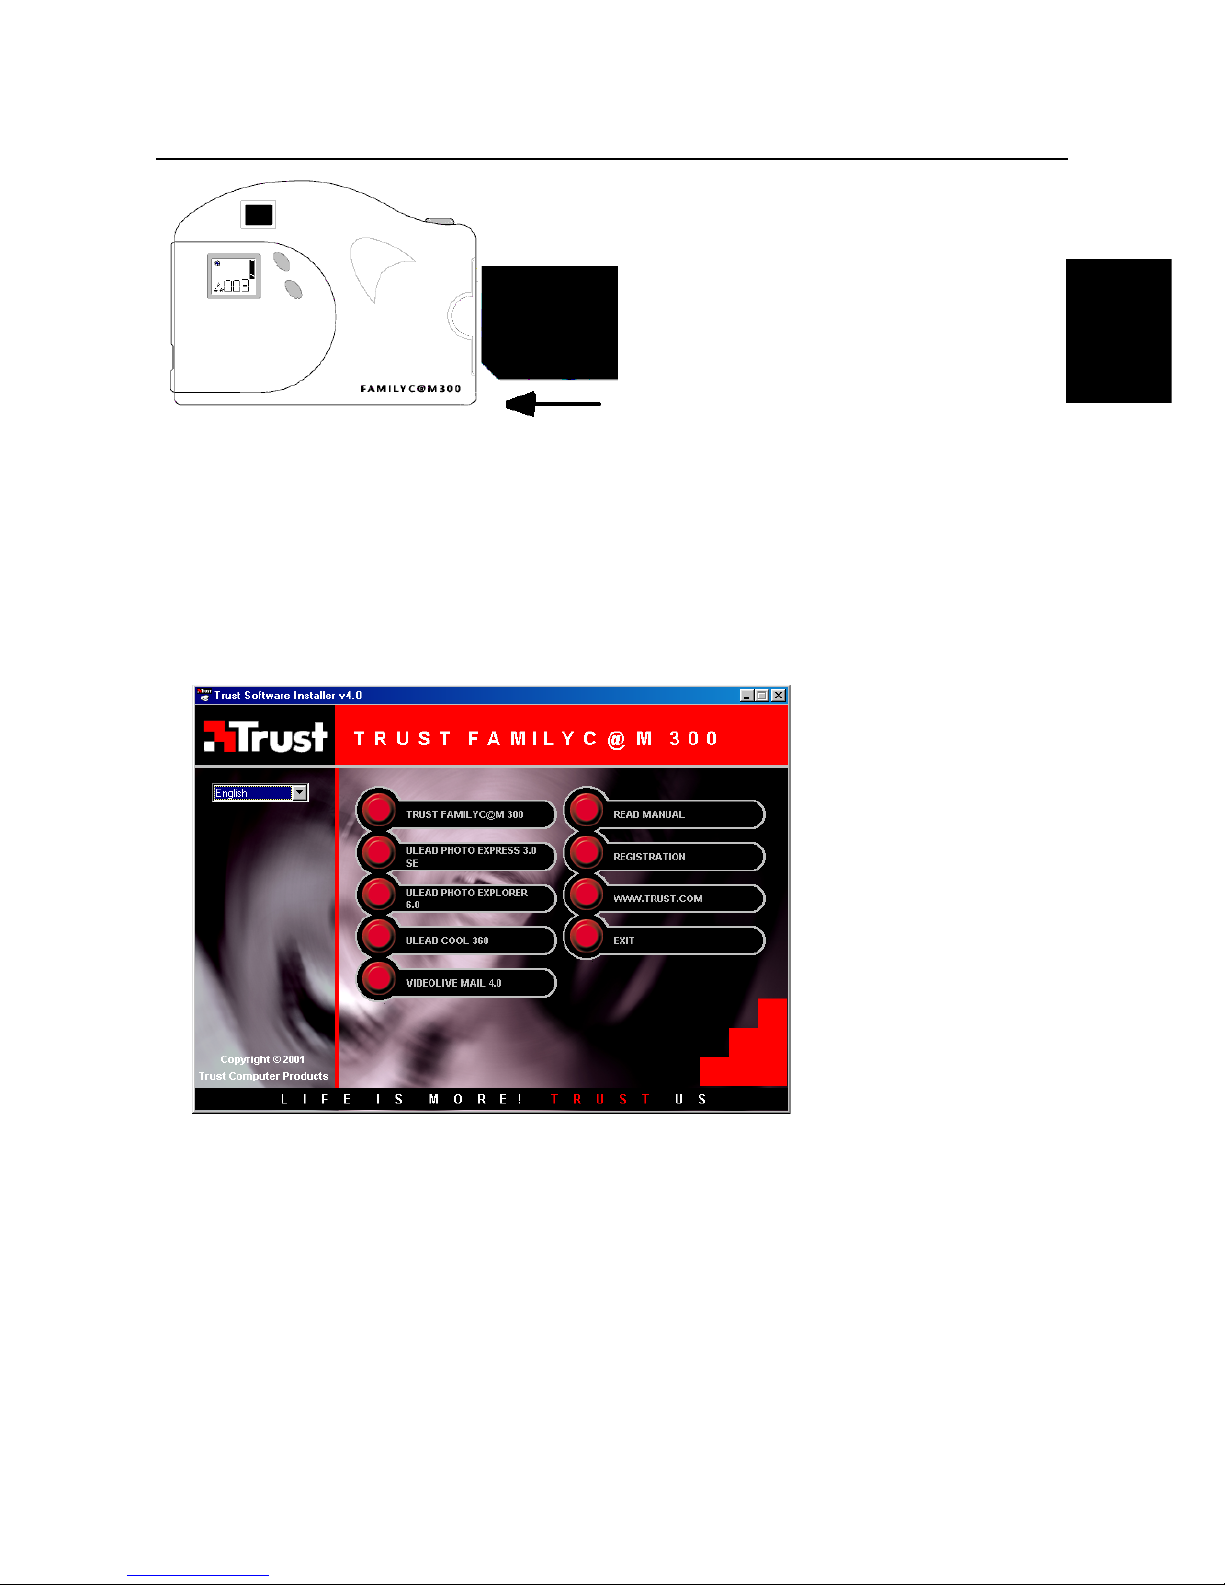
Figure 3: Placing the SmartMedia memory card
1.
Turn off the camera.
2.
Slide the memory card into the slot, contacts facing backwards.
3.
Turn the camera on.
4.3 ‘TRUST FAMILYC@M 300’ driver installation
1. Insert the CD in the PC and the installation program will start up automatically. If this does not occur, start
up ‘Setup.exe’ on the CD-ROM. Figure 3 will appear.
Figure 3: driver installation
2. Click on ‘TRUST FamilyC@m 300’ to start up installation. Figure 4 will appear.

TRUST FAMILYC@M 300
8
Figure 4: driver installation
3. Click on ‘Next’ to start installation. After installation, Figure 5 will appear.
Figure 5: driver installation
4. Click on ‘OK’ to complete installation and restart the computer.
5. Connect the USB connection G (see Figure 1) of the camera to a free USB port of your computer.
Windows 98 detects the new hardware and automatically installs the Trust FamilyC@m 300 driver.
You have completed installation of the driver. Proceed to chapter 5 for installation of the software enclosed.
TRUST FAMILYC@M 300
9
UK
5. Software Installation
5.1 Installing Ulead Photo Express 3.0 SE
Ulead Photo Express 3.0 SE is an image editor that you can use to load and edit the images on your
computer that you have taken using your FamilyC@m 300. Follow the instructions below to install Ulead
Photo Express 3.0 SE.
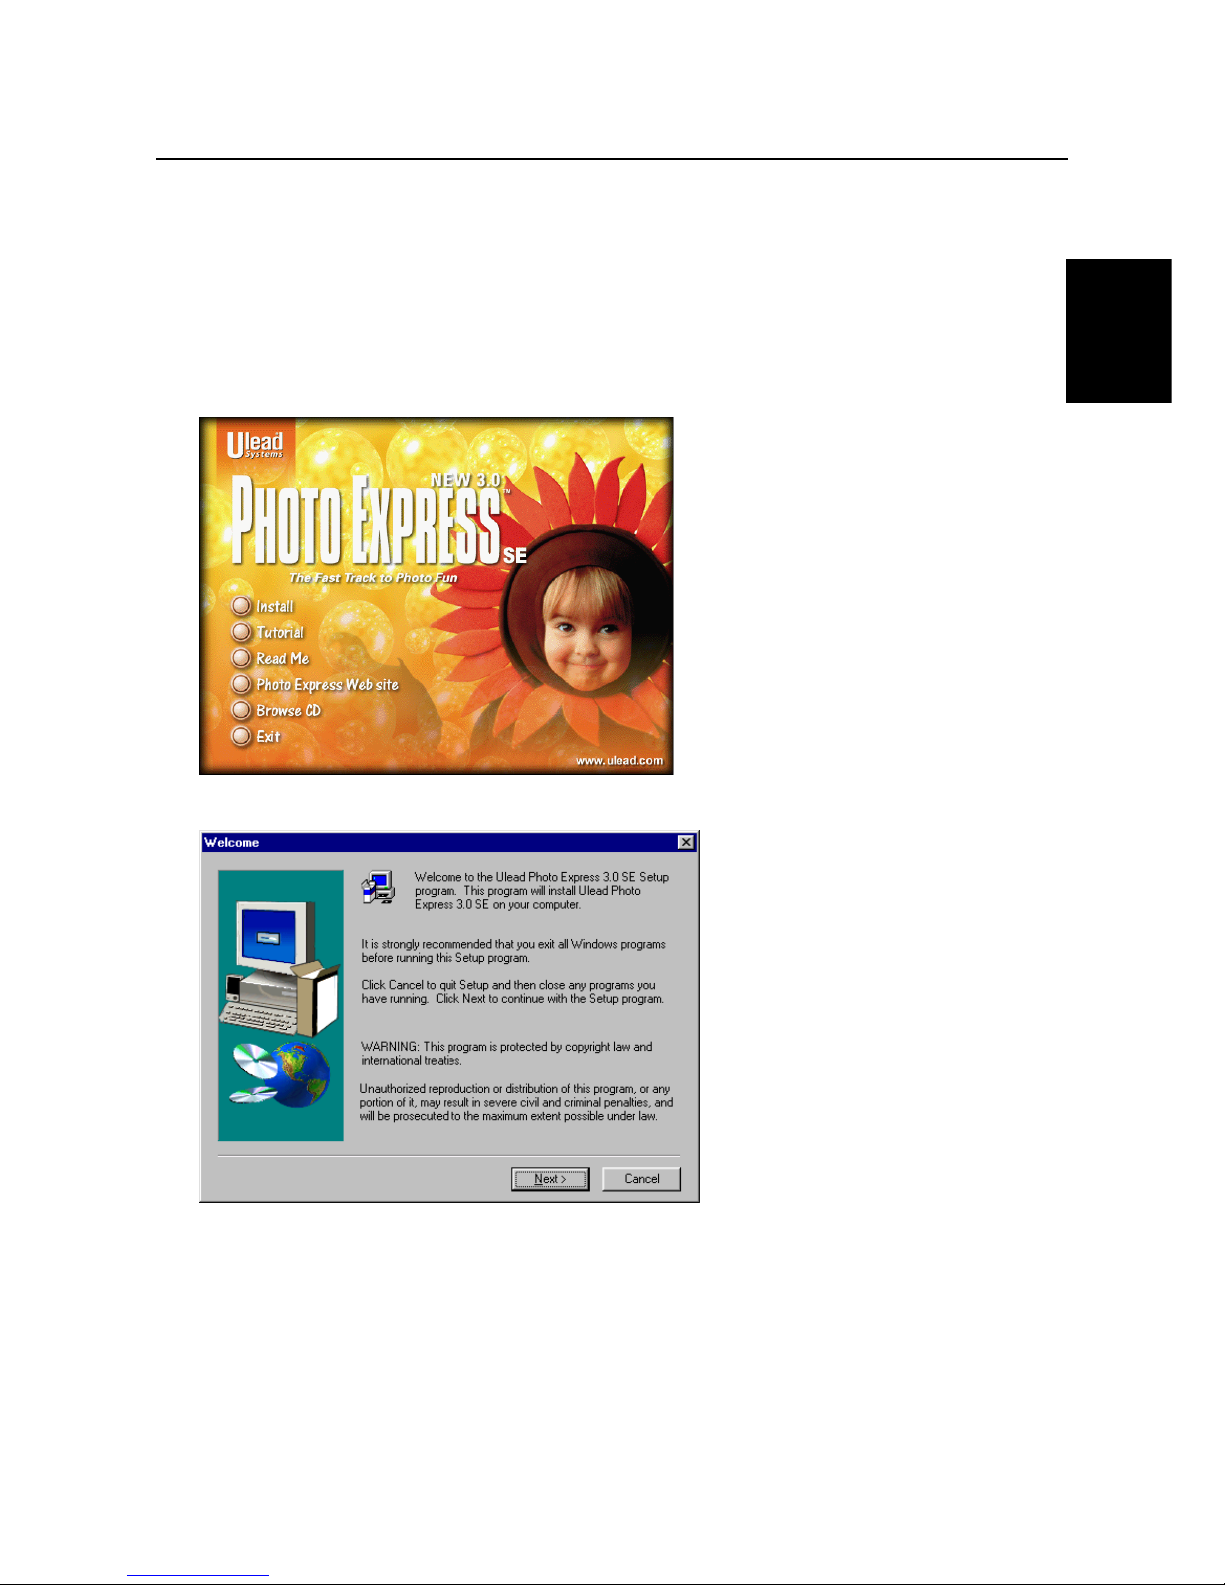
1. In the installation screen, click on 'Install Ulead Photo Express 3.0 SE'. See figure 2. Figure 6 will
appear.
Figure 6: Installing Ulead Photo Express 3.0 SE
2. Click on ‘Install’. Figure 7 will appear.
Figure 7: Installing Ulead Photo Express 3.0 SE
TRUST FAMILYC@M 300
10
3. Click on 'Next'. Figure 8 will appear.
Figure 8: Installing Ulead Photo Express 3.0 SE
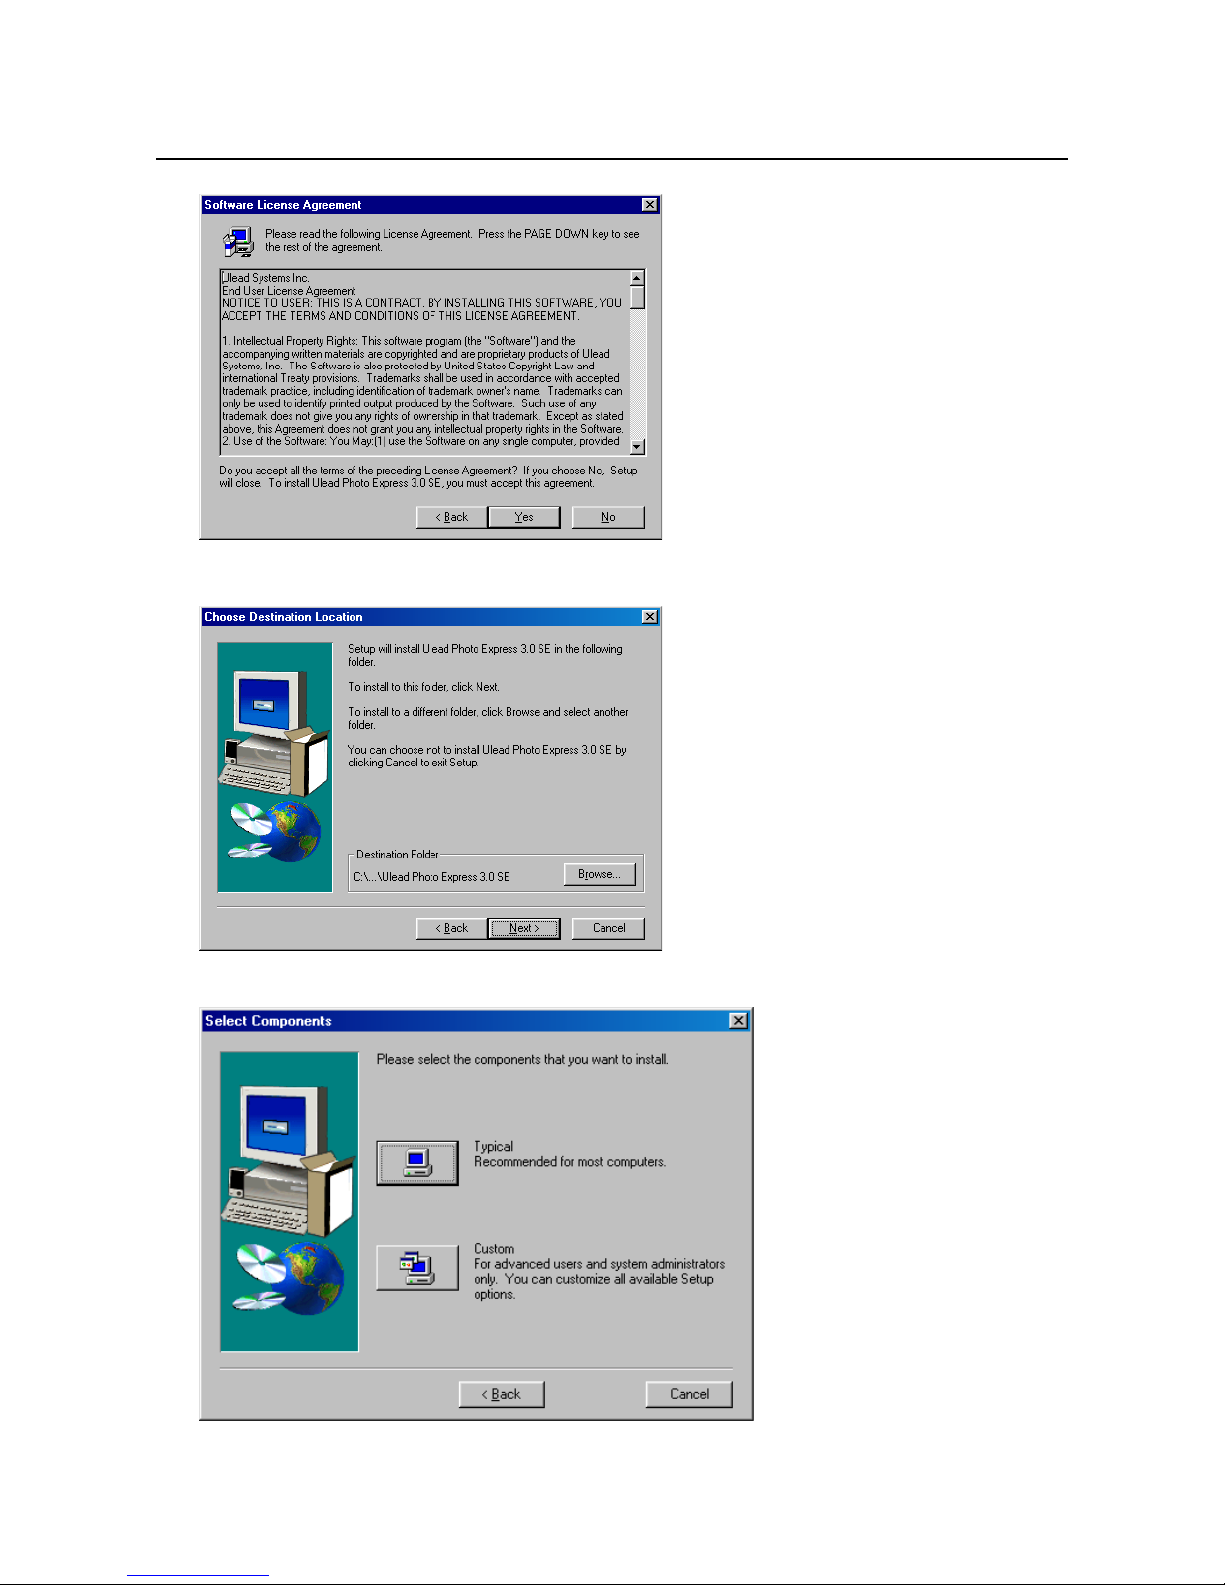
4. Click on 'Yes' to accept the license agreement and continue with the installation. Figure 9 will appear.
Figure 9: Installing Ulead Photo Express 3.0 SE
5. Click on 'Next'. Figure 10 will appear.
Figure 10: Installing Ulead Photo Express 3.0 SE
TRUST FAMILYC@M 300
11
UK
6. Click on ‘Typical’. Follow the directions on the screen. After installation, Figure 11 will appear.
Figure 11: Installing Ulead Photo Express 3.0 SE
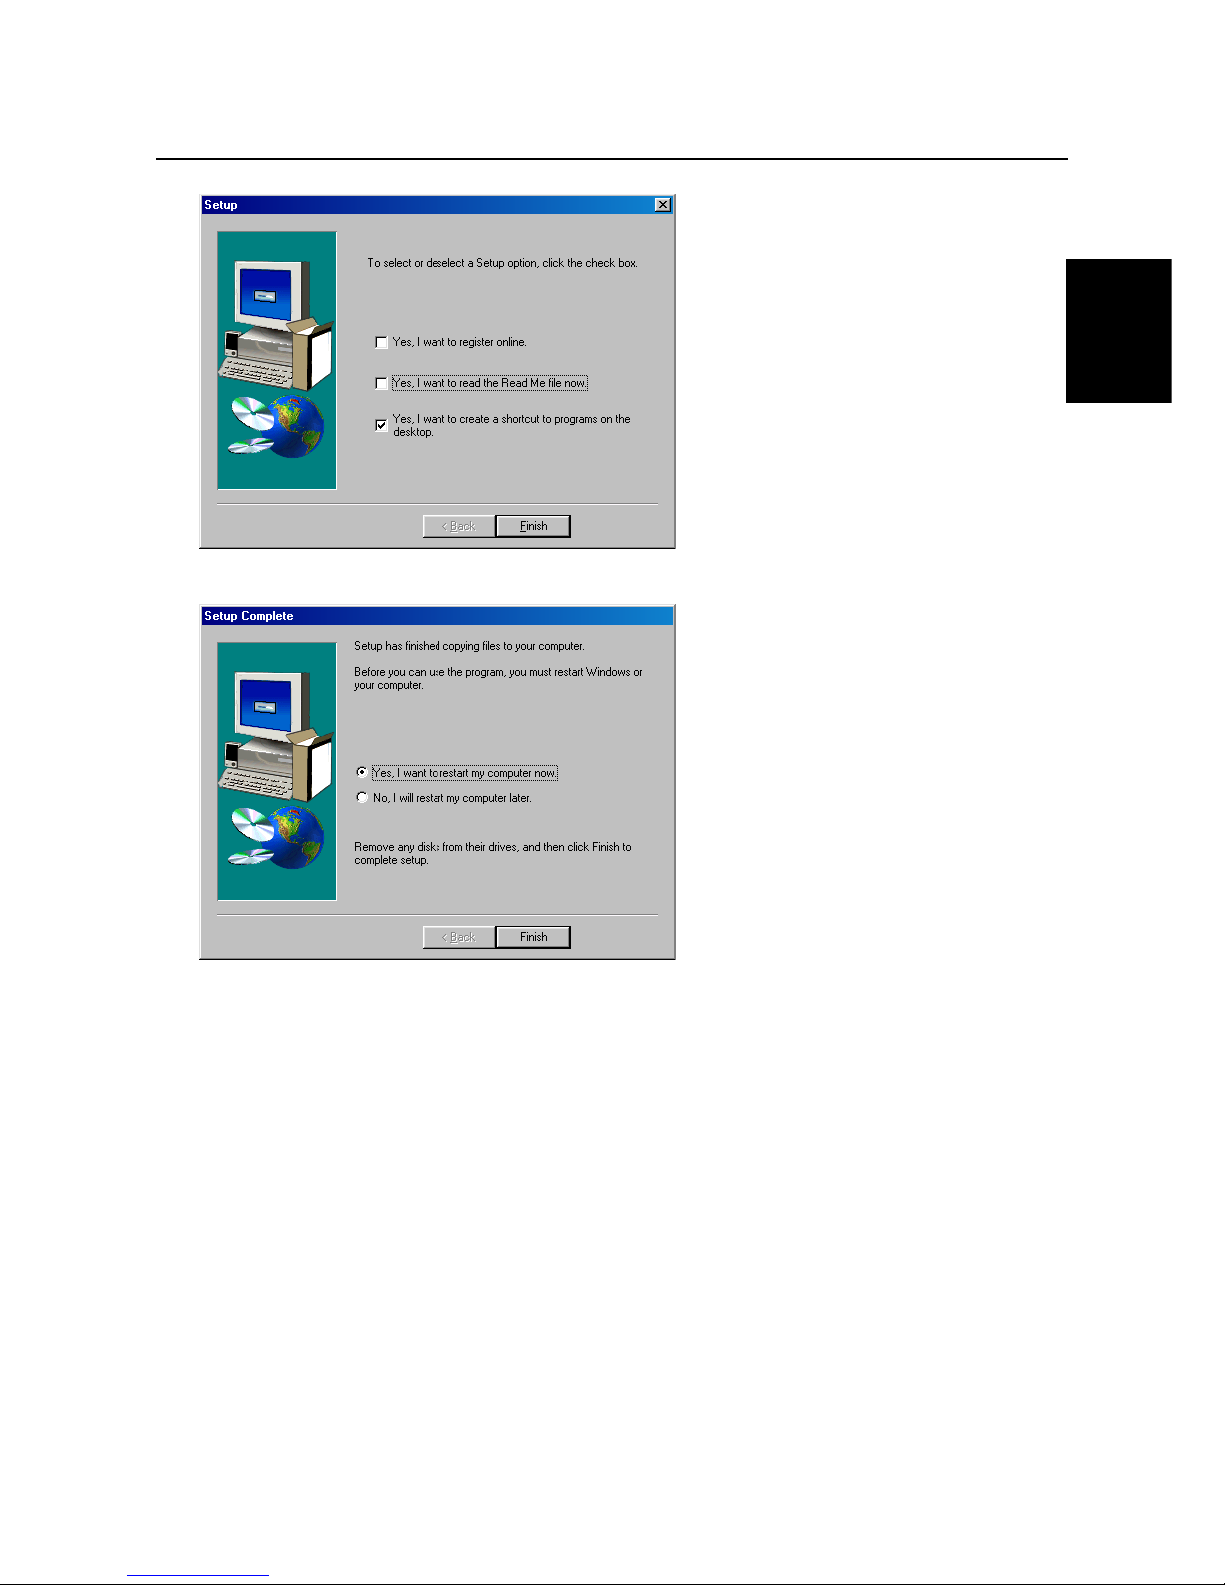
7. Disable the option for 'online' registration and click on 'Finish'. Figure 12 will appear.
Figure 12: Installing Ulead Photo Express 3.0 SE
8. Click on 'Finish' to restart your computer.
You have now completed the installation of Ulead Photo Express 3.0 SE. See chapter 5.2 for installation of
Ulead Photo Explorer 6.0.
5.2 Ulead Photo Explorer 6.0 installation
Ulead Photo Explorer 6 is an image-processing program that enables you to load and process photos you
took with your FamilyC@m 300 on the PC. For installation of Ulead Photo Explorer 6 follow the instructions
below.
1. Go to the installation screen and click on ‘Install Ulead Photo Express 3.0 SE. See Figure 2. Figure 13
will appear.
 Loading...