

True Value RockSolid POS Installation Instructions Manual

RockSolid POS
EQUIPMENT INSTALLATION INSTRUCTIONS
In preparation for your initial Installation Call, you will
need to follow these instructions in a specific order.
¾ Make sure you received all the equipment by checking it against the packing list.
¾ If anything is missing please contact your Retail Systems sales representative immediately.
¾ If you have any questions regarding these instructions please contact your Help Desk at
1-800-882.1137 and they will direct your call to the appropriate person.
This document was updated on December 8, 2005.

True Value Company
PREPARATION
These instructions will walk you through setting up your primary POS PC/Server, and a second PC
which will be used as an office workstation.
NOTE: Do not unpack anything before reading the installation procedure. The
installation procedure needs to be performed in a specific order.
After you have read the installation procedure, you should unpack and remove everything from the
box.
However, you will need to assemble the RockSolid components in the following order:
1. Battery Backup (UPS)
2. Cash Drawer
3. POS Server PC
4. Monitors
5. Barcode Scanner
6. Signature Capture Pad
7. Receipt Printer
8. Credit card swipe (Optional)
9. Display Pole (Optional)
10. Workstation PC
11. Dymo Label Printer
12. REV Backup Drive
- 2 - RockSolid Equipment Installation Instructions_beta

True Value Company
TABLE OF CONTENTS
BATTERY BACKUP ............................................................................................................... 4
Connect the Battery......................................................................................................... 4
Charge the Battery........................................................................................................... 5
Connecting Equipment to the Back-UPS ........................................................................ 5
Battery Back-Up Outlets...........................................................................................5
Surge Only Outlets.................................................................................................... 5
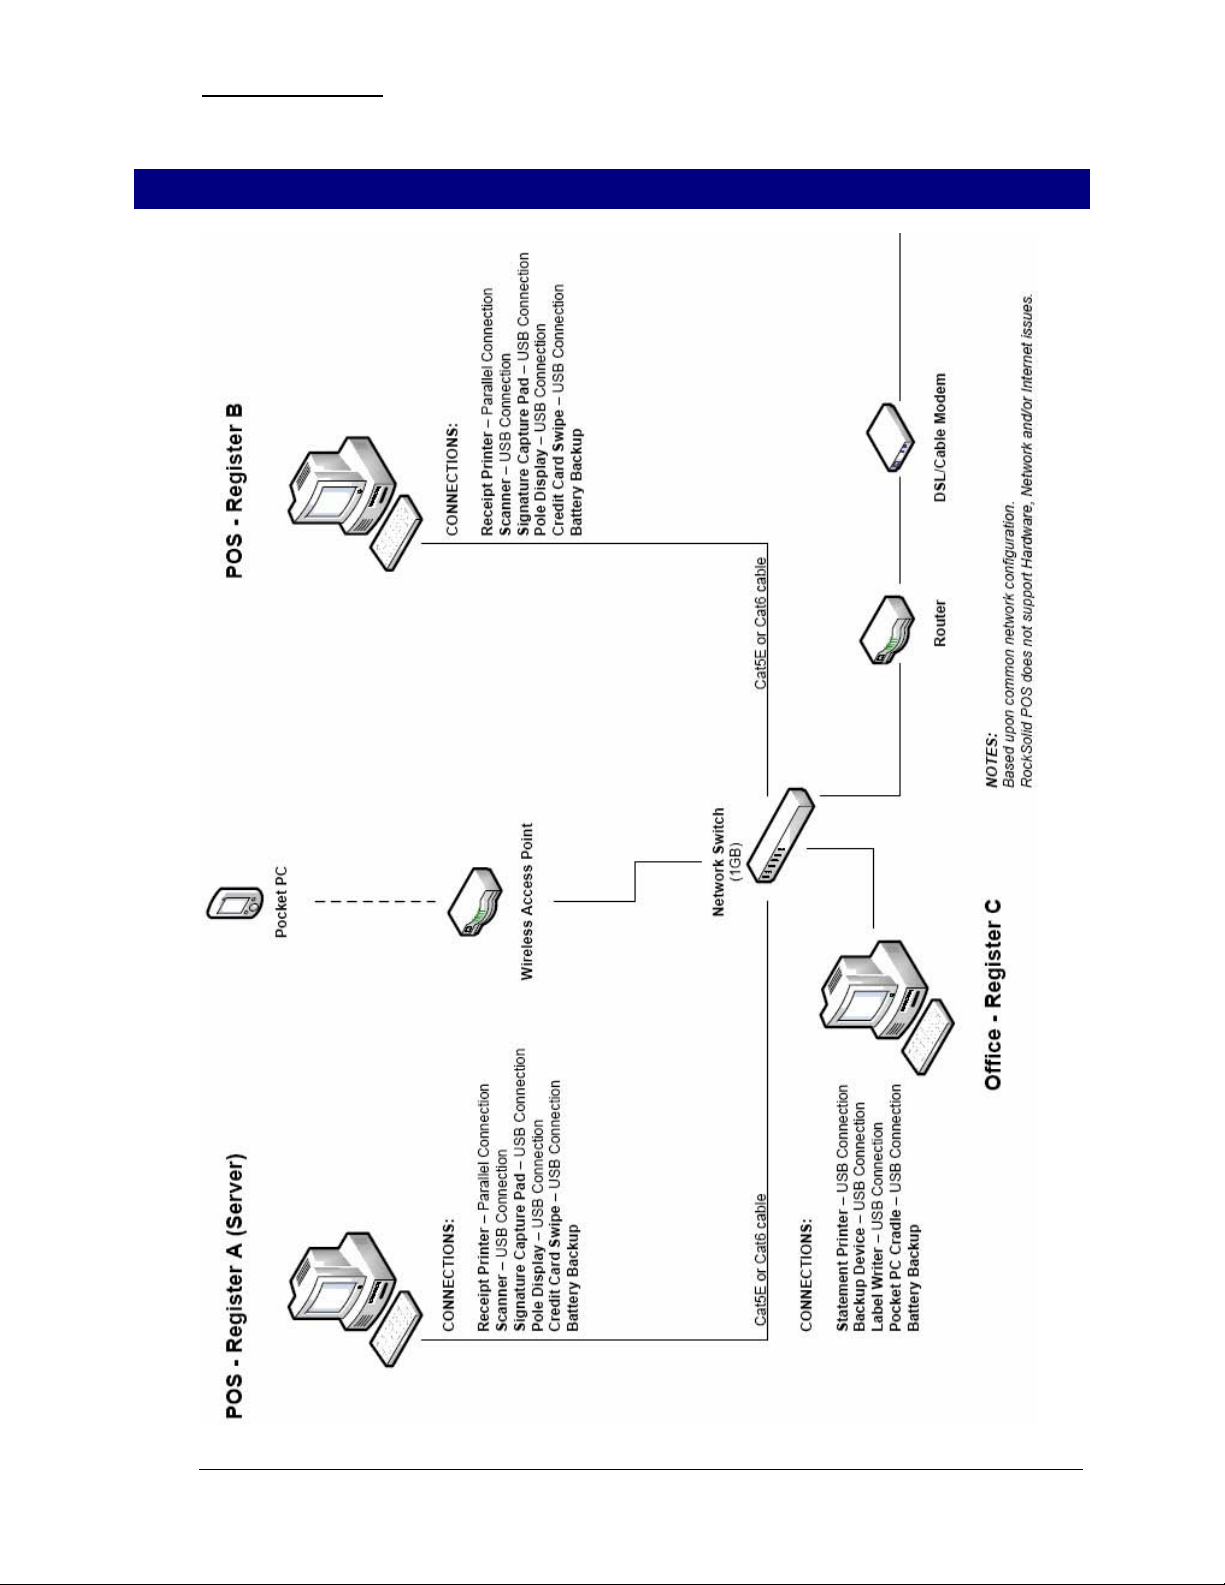
NETWORK SET UP................................................................................................................. 6
Ethernet Wiring Diagram (CAT 5e Cable)...................................................................... 8
POS / SERVER SET UP........................................................................................................... 9
Cash Drawer.................................................................................................................... 9
Primary POS/PC Server .................................................................................................. 9
Monitor..........................................................................................................................10
Receipt Printer............................................................................................................... 11
Barcode Scanner............................................................................................................ 12
Signature Capture Pad................................................................................................... 13
Credit Card Swipe ......................................................................................................... 14
Display Pole .................................................................................................................. 15
BACK OFFICE WORKSTATION INSTALLATION...........................................................16
Back Office Workstation............................................................................................... 16
Monitor..........................................................................................................................17
Dymo Label Printer....................................................................................................... 18
REV Backup Drive........................................................................................................ 18
RockSolid Equipment Installation Instructions_beta - 3 -

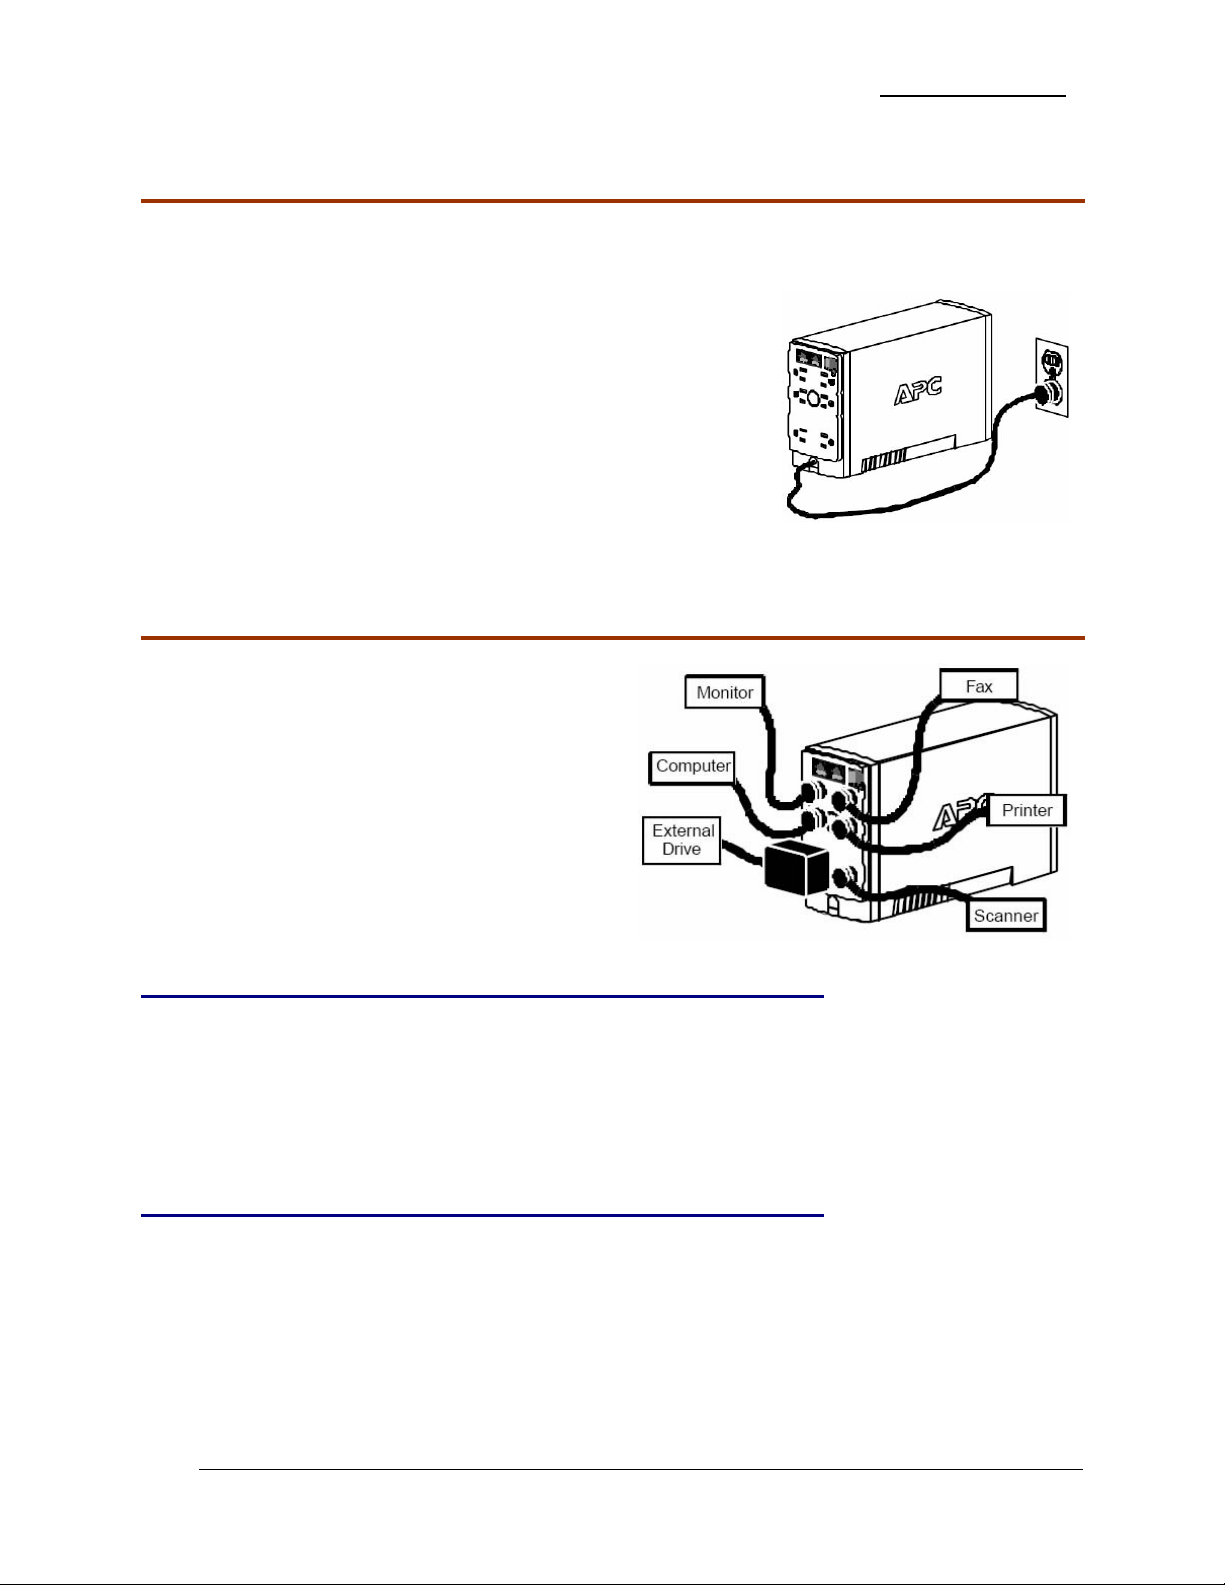
BATTERY BACKUP True Value Company
BATTERY BACKUP
In compliance with Department of Transportation (DOT)
regulations, the Back-UPS is shipped with the internal red
battery wire disconnected.
The Back-UPS will not operate until the internal red wire is
connected to the battery.
Connect the Battery
1. Note the yellow warning sticker on the side of the battery backup.
2. Open the battery compartment, as shown.
3. Pull the battery about half way out, as shown.
4. Connect the red battery wire to the positive battery terminal.
5. Small sparks may occur during battery connection. This is normal.
6. Push the battery into the battery compartment and re-install the
cover, as shown.
- 4 - RockSolid Equipment Installation Instructions_beta
True Value Company BATTERY BACKUP
Charge the Battery
During normal operation, the Back-UPS charges the internal battery any time it is connected to a
wall outlet.
1. Once connected, allow the Back-UPS to charge for a full
eight hours.
2. While the Back-UPS receives its initial charge, you may
continue with the Network Setup part of the installation.
Connecting Equipment to the Back-UPS
The rear panel of the Back-UPS consists of:
¾ Battery Back-Up Outlets
¾ Surge Only Outlets
Battery Back-Up Outlets
Battery Back-Up outlets are typically used for a computer, monitor, and external disk or CD-ROM
drive. Battery Back-Up outlets provide battery back-up, surge protection, and Electro-magnetic
Interference (EMI) filtering. During a power outage, battery power is automatically provided to
these outlets. Power is not supplied to these outlets when the Back-UPS is switched OFF.
Surge Only Outlets
Surge Only outlets are typically used for a printer, fax machine, or scanner. Surge Only outlets are
always ON when utility power is available and are not controlled by the On/Off switch. These
outlets DO NOT provide power during a power outage.
RockSolid Equipment Installation Instructions_beta - 5 -
NETWORK SET UP True Value Company
NETWORK SET UP
- 6 - RockSolid Equipment Installation Instructions_beta
 Loading...